
Enchanting Miniature Christmas Row Houses: A DIY Guide to Whimsical Holiday Decor
As the holiday season draws near, the magical spirit of Christmas beckons us to infuse our homes with warmth, joy, and a touch of handmade charm. If you’re like many craft enthusiasts, you understand that creating cherished holiday decorations requires a head start. Today, we’re diving into a delightfully enchanting project that promises to transform your festive display: crafting your very own miniature Christmas row houses, complete with captivating lights and intricate details. These charming little dwellings are more than just decorations; they are tiny canvases awaiting your personal touch, ready to evoke nostalgia and wonder in equal measure.
The inspiration for this whimsical project struck me during a recent visit to Hobby Lobby, where a particular display sparked an idea that refused to leave my mind. It was a simple item, yet it held the potential for something truly special, something that could be transformed into a vibrant, festive scene. My imagination immediately conjured images of Charleston, South Carolina’s iconic Rainbow Row, a street renowned for its pastel-hued historic homes. I envisioned creating a similar aesthetic, but with a distinct Christmas twist, bringing that architectural charm into a miniature, illuminated holiday village.
Crafting your own Christmas village offers an unparalleled opportunity to personalize your holiday decor. Unlike mass-produced items, each handmade piece carries a story, a moment of creation, and a unique charm that resonates with the spirit of the season. Whether you’re looking to create a stunning centerpiece for your dining table, a cozy display for your mantel, or a captivating accent for a windowsill, these miniature row houses are versatile enough to fit seamlessly into any festive setting. They’re also a fantastic family activity, allowing everyone to contribute their creativity and make lasting holiday memories.
A big thank you to our wonderful sponsors at Hobby Lobby, whose incredible selection of craft supplies makes imaginative projects like this one not just possible, but truly enjoyable. Their dedication to supporting the crafting community helps bring so many creative visions to life.
Crafting Your Dream Christmas Village: A Step-by-Step Guide
Ready to embark on this magical crafting journey? Here’s a detailed guide to creating your own miniature Christmas village, designed to be both enjoyable and rewarding. If you prefer a visual walkthrough, remember to scroll to the bottom of this post for a comprehensive video tutorial!
Essential Materials You’ll Need:
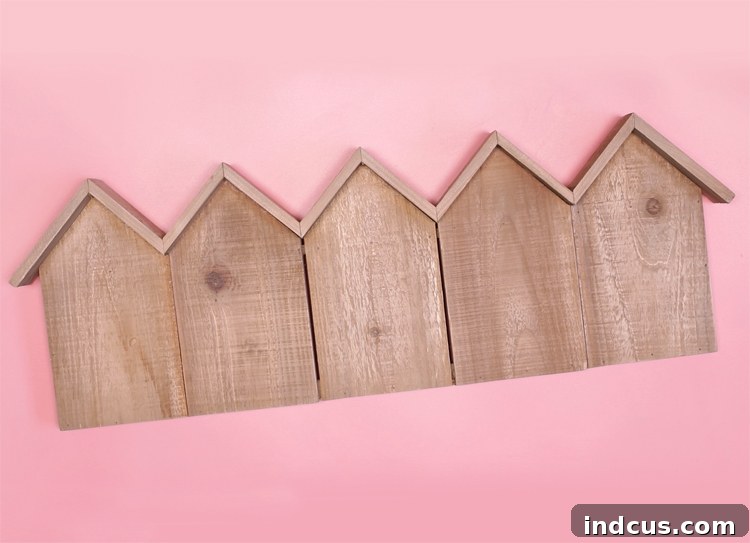
- Rustic Birdhouse Wood Panel: This serves as the foundational structure for your row houses, providing a sturdy and charming base.
- Craft Paint: A variety of colors to bring your houses to life. Think about vintage pastels, traditional reds and greens, or even a contemporary monochromatic scheme.
- Cardstock and Vellum, Assorted Colors: Crucial for cutting out intricate windows and doors, with vellum providing that delicate, translucent “glass” effect.
- Fine Tip Glue Pen: Absolutely essential for precision work, especially when assembling tiny details like window panes and door frames.
- Assorted Miniatures: This is where your houses truly gain personality! Consider items like Wreaths, Trees, a charming Picket Fence, tiny lampposts, benches, or even miniature sleds.
- Battery Operated Fairy Lights: The key to making your houses glow and come alive, adding that magical nighttime charm.
- Mod Podge: A versatile crafting essential for sealing paint, adhering snow, and adding protective layers.
- Glitter Snow: To create realistic, sparkling snow drifts on your rooftops, windowsills, and ground.
Step 1: Laying the Foundation – Painting Your Houses with Personality
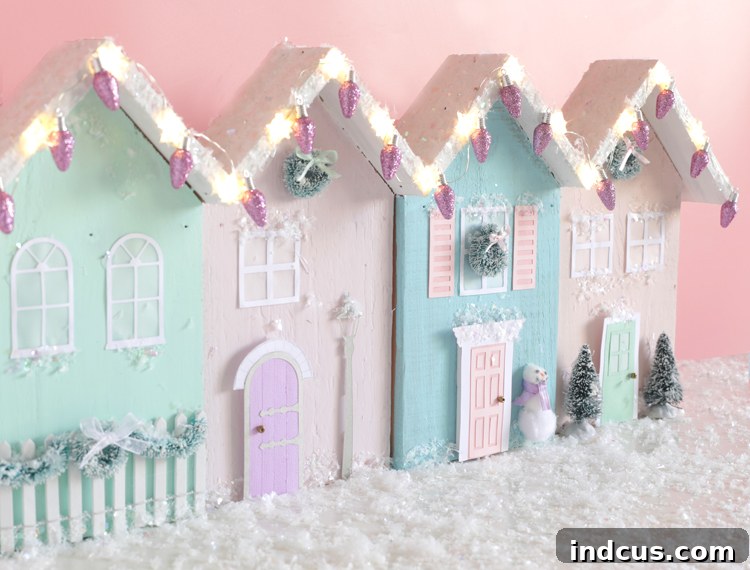
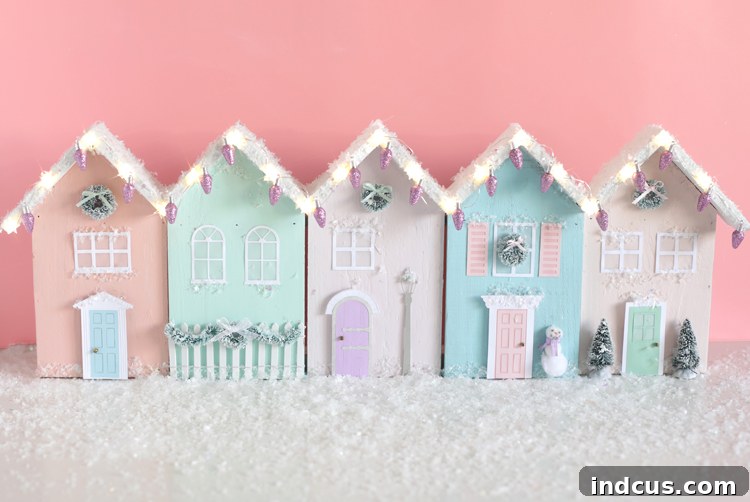
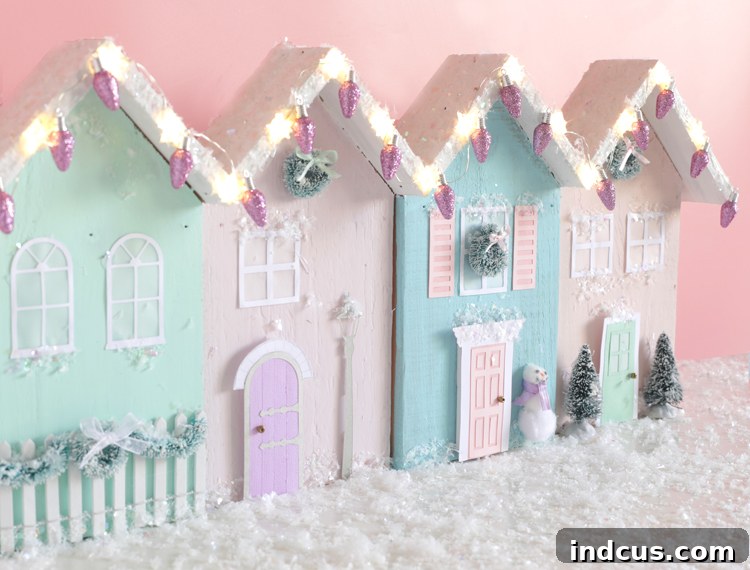
The first step in bringing your miniature village to life is painting the wooden birdhouse panels. This is where you set the tone for your entire display. While traditional red and green are always festive choices, don’t be afraid to experiment with other color palettes. For this project, I opted for a playful array of vintage pastel colors – soft blues, gentle pinks, and subtle mints – to give the houses a unique, storybook feel. When applying your paint, consider using two coats for a rich, opaque finish. Ensure each coat dries completely before applying the next. For the roofs, a crisp white paint creates the perfect snowy illusion, making your houses look as though they’ve just been dusted by a fresh winter snowfall. You can even add a touch of texture to the roofs before the snow application by lightly dabbing the paint for a less uniform, more natural look.
Step 2: Crafting Architectural Details – Windows and Doors
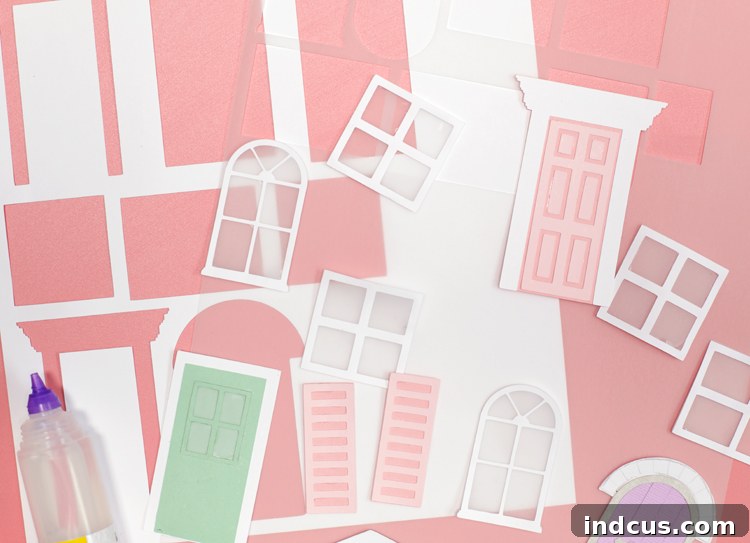
Next, we move on to the intricate details that give your houses character: the windows and doors. I found my trusty Silhouette Cameo machine invaluable for this step, using pre-made designs downloaded from the Silhouette Design Store (you can find similar patterns here, here, here and here). These machines offer incredible precision for tiny cuts. However, if you don’t own a craft cutting machine, don’t worry! You can absolutely cut these by hand with a sharp craft knife and a steady hand; it will simply require a bit more patience and time. To mimic the look of real glass, I lined all the window cutouts with pieces of vellum. This translucent material diffuses light beautifully and adds a delicate touch. A fine-tip glue pen is an absolute lifesaver for attaching these small, delicate pieces, ensuring clean lines and strong bonds without messy excess glue. For added dimension and a more realistic pop, I glued a small piece of craft foam to the back of each door before attaching it to the house, making them stand slightly proud of the surface.
Step 3: Embellishing with Miniature Magic – Adding Festive Details
This is arguably the most delightful part of the project: adding all the charming miniature details that truly bring your Christmas village to life. Think of your houses as blank canvases waiting for festive adornments. I started with miniature wreaths for the doors and tiny evergreen trees placed around the houses, instantly creating a holiday feel. A whimsical snowman crafted from pom-poms found its place, alongside a classic picket fence that defines the front yards. To create a cohesive garland for the fence, I ingeniously cut up two of the mini wreaths, repurposing them into a festive trim. For door knobs, tiny golden beads added a touch of elegance and realism. Don’t be shy about piling on the details – this is where your creativity truly shines! Consider adding tiny lampposts, miniature benches, little gift boxes, or even tiny pets peeking out from windows. The more intricate the details, the more fun and engaging your finished project will be.
Step 4: A Winter Wonderland – Creating Snowy Landscapes
No Christmas village is complete without a blanket of sparkling snow. Mod Podge is your best friend for this step. Apply a thin layer of Mod Podge anywhere you envision snow piling up – along the bottoms of the houses, on windowsills, and most importantly, across the rooftops. Immediately after applying the glue, generously sprinkle your glitter snow onto the wet Mod Podge. The key is to work in small sections. Mod Podge can dry relatively quickly, so by tackling one roof or one windowsill at a time, you ensure that the glue remains tacky enough for the snow to adhere properly. Don’t be afraid to create varying snow depths, allowing it to look natural and windswept. For an even more realistic effect, consider adding a few tiny “icicles” made from a thin bead of Mod Podge or clear glue, allowed to dry and then lightly dusted with glitter.
Step 5: The Magical Glow – Illuminating Your Village
The final touch, and arguably the most magical, is adding the lights that will bring your miniature Christmas row houses to life. I used hot glue to secure small LED star-shaped fairy lights along the rooftops, creating a continuous, enchanting glow. These tiny lights are perfect for adding a subtle shimmer and truly transforming the houses into a captivating display, especially in dim lighting. For an extra festive and playful touch, I also glued some fake mini Christmas bulbs on top of the LED lights. When positioning your battery pack for the fairy lights, hot glue it securely to the back of the entire wooden panel. This ensures it’s hidden from view but remains easily accessible for battery changes and turning the lights on and off. Once everything is secured, flip the switch and watch your charming Christmas village come alive with a warm, inviting glow.
Then turn those lights on and watch the whole project glow with an undeniable festive charm.
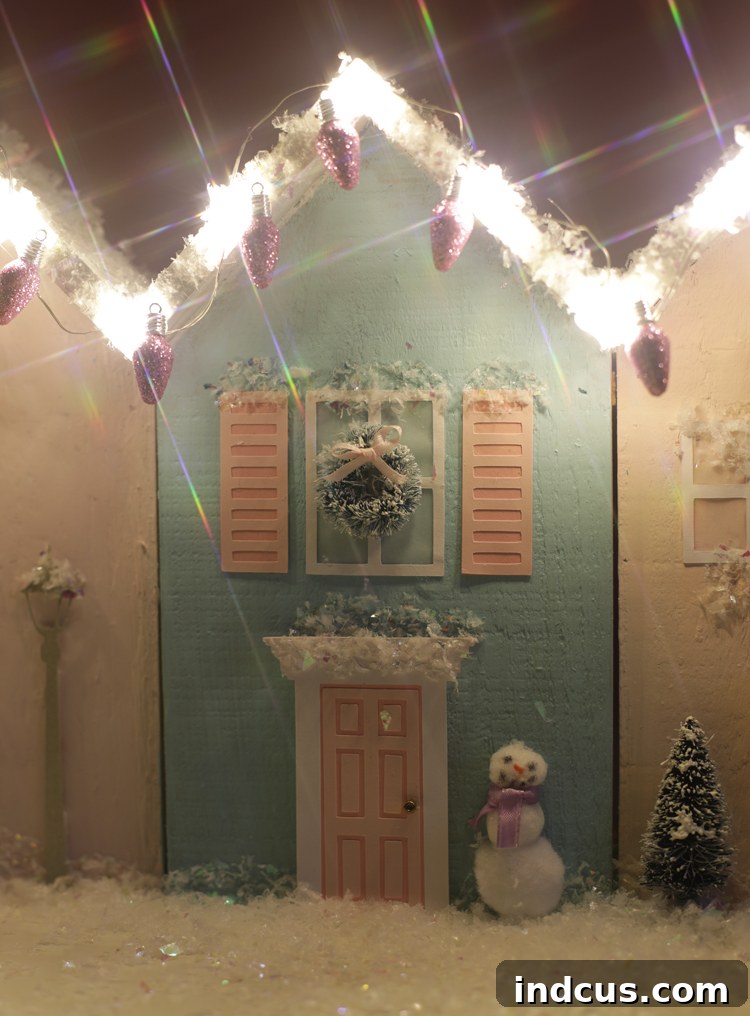
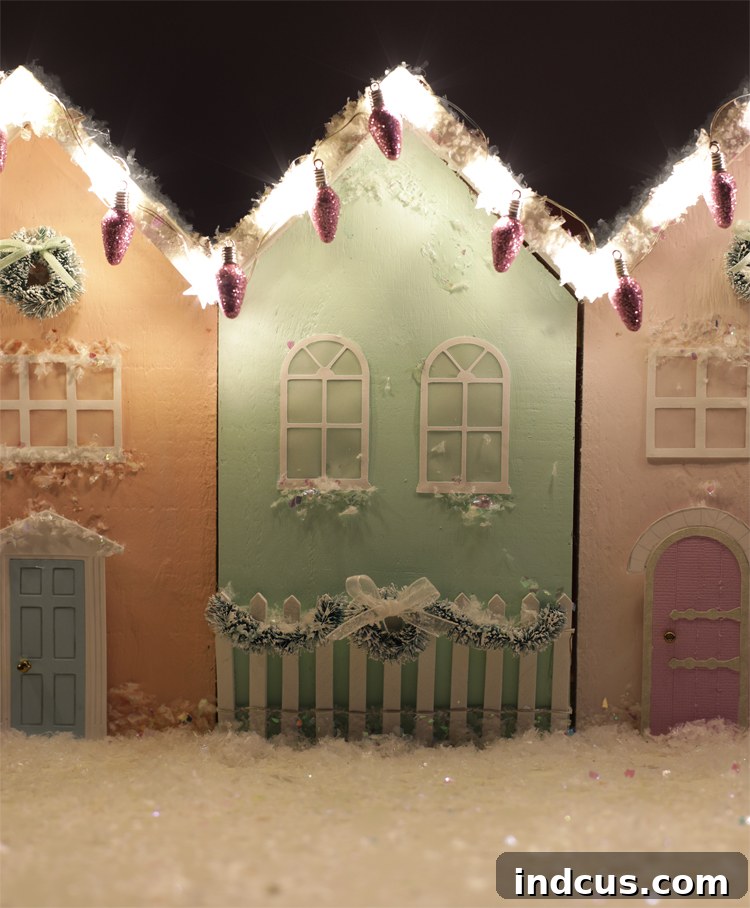
Ahhhh!!!! The transformation is truly incredible! These houses are almost too cute to handle, radiating a cozy and whimsical spirit that is perfect for the holiday season.
Miniature Christmas Row Houses Video Tutorial
For those who learn best by watching, we’ve prepared a detailed video tutorial to guide you through each step of creating these charming miniature Christmas row houses. Simply click the link below to watch the process unfold and get even more tips and tricks!
Watch the Wooden Christmas Row Houses with Lights Video Tutorial Here!
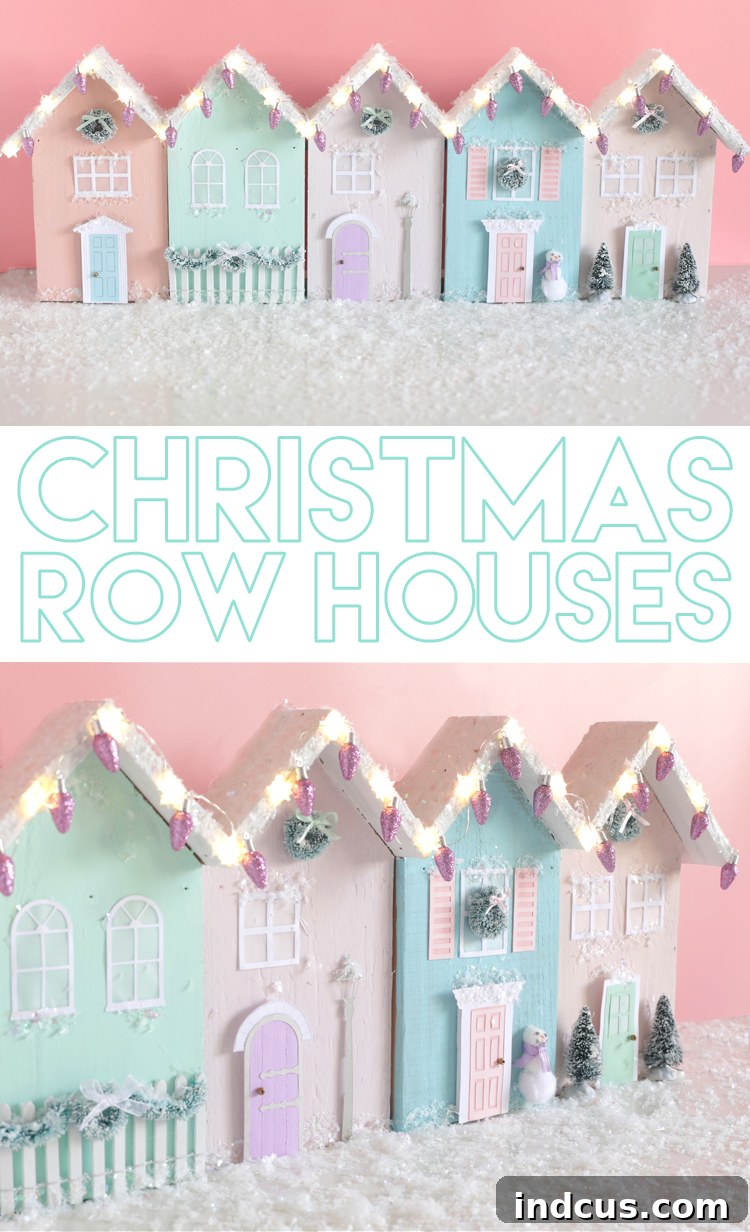
Love this project and want to save it for later? Pin it to your favorite holiday craft board so you don’t forget it! Sharing is caring!
Before you head out to Hobby Lobby to gather your supplies, remember to check their website or app for a coupon! It’s always a smart idea to save a little extra cash, especially during the bustling holiday season.
Creating these miniature Christmas row houses is more than just a craft; it’s an opportunity to infuse your home with personalized charm and create lasting memories. The process is enjoyable, the results are stunning, and the whimsical glow they cast will undoubtedly become a cherished part of your holiday traditions for years to come. Happy crafting!
This post is proudly sponsored by Hobby Lobby, a fantastic resource for all your crafting needs. All opinions expressed herein are my own.







