Unlock Rustic Charm: Craft a Beautiful Farmhouse Sign with Rubber Stamps on Wood
Are you searching for a unique way to infuse your home with that coveted farmhouse aesthetic? Look no further than the delightful world of rubber stamps and a simple piece of wood. In this comprehensive guide, we’ll explore an innovative and surprisingly easy method to create stunning, personalized farmhouse-style signs that will become cherished pieces of your home decor.
Having recently reconnected with my passion for rubber stamping, thanks to an inspiring partnership with Stampin’ Up!, I’ve been on a creative quest. While traditional uses like scrapbooking and card-making are wonderful, I wanted to push the boundaries and discover fresh, exciting applications for these versatile craft tools. This curiosity led me to an exciting question: “Can you stamp directly onto wood?”
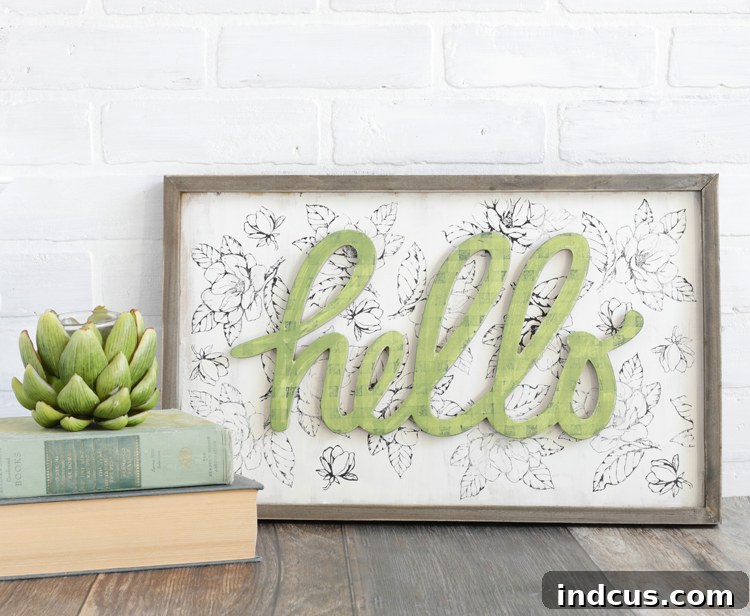
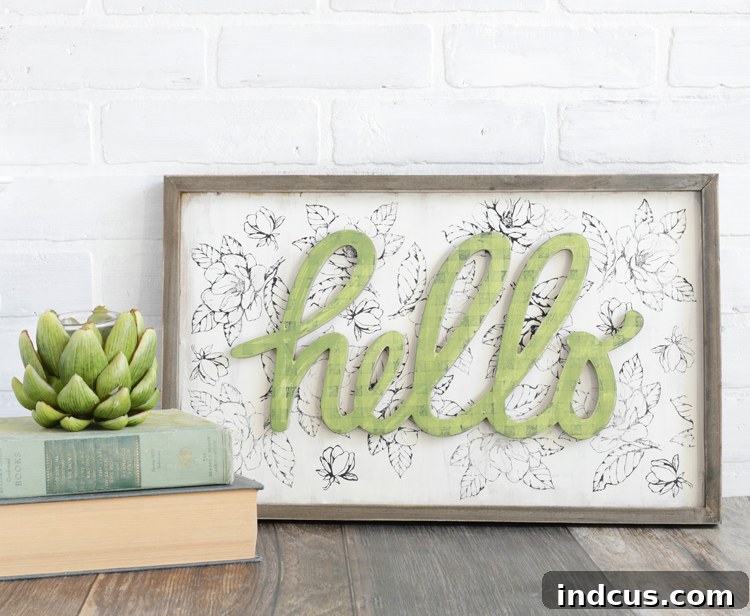
The answer, to my absolute delight, is a resounding YES! Not only is it possible, but the results are truly remarkable. Stamping on wood opens up a whole new realm of DIY possibilities, allowing for intricate designs and patterns that look effortlessly professional. I recently embarked on this journey myself, crafting a charming wooden farmhouse sign, and I couldn’t be happier with the authentic, rustic appeal it now brings to my space. The process was not only satisfying but also surprisingly straightforward, making it an ideal project for crafters of all skill levels.
If you’re ready to transform a plain wooden surface into a custom piece of farmhouse art, you’ve come to the right place. I’ll guide you through each step of this rewarding project, offering tips and insights along the way to ensure your success. For those who prefer a visual learning experience, a quick video tutorial is also available at the bottom of this post, showcasing the entire crafting process from start to finish. Get ready to add a touch of handmade charm to your home with a beautiful, stamped wooden sign!
Why Stamping on Wood is a Game-Changer for DIY Decor
Before we dive into the how-to, let’s talk about the incredible advantages of using rubber stamps for wooden signs. Many DIY enthusiasts struggle with achieving crisp, professional designs on wood. Options like stenciling can be messy, freehand painting requires a steady hand and artistic talent, and cutting intricate vinyl or paper designs for decoupage can be time-consuming and frustrating, especially on curved surfaces or detailed lettering.
Stamping eliminates these common hurdles. It offers unparalleled precision, allowing you to replicate detailed patterns and text flawlessly. The result is a clean, consistent image that looks like it was professionally printed. Furthermore, stamping provides a tactile, slightly raised texture that often enhances the rustic feel of farmhouse decor. It’s a fast, efficient, and incredibly satisfying method for personalizing wooden items, making it perfect for creating custom wall art, personalized gifts, or seasonal decorations. This technique empowers you to bring intricate designs to life on wood with remarkable ease, offering a versatile alternative that’s both enjoyable and effective.
Essential Supplies for Your Stamped Farmhouse Sign Project
Gathering your materials is the first exciting step in any DIY adventure. For this farmhouse sign project, you’ll need a few key items. Choosing quality supplies, especially your stamps and ink, will make a significant difference in the final appearance and longevity of your creation.
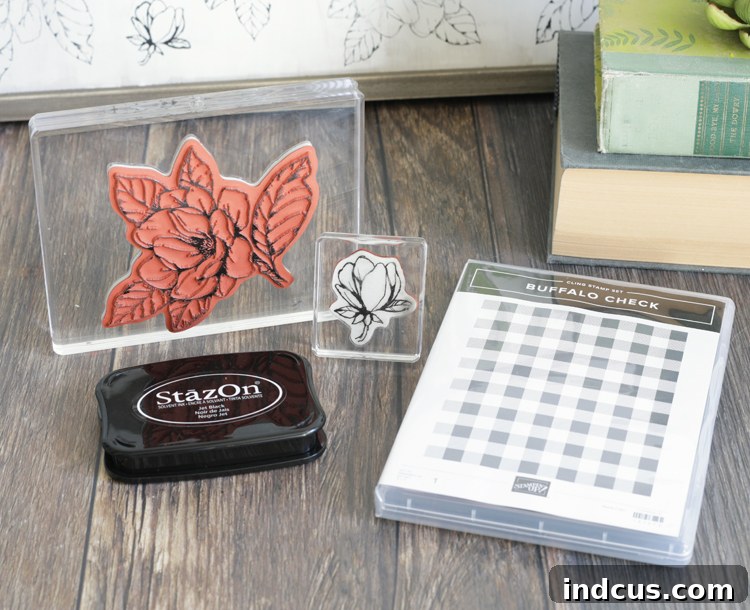
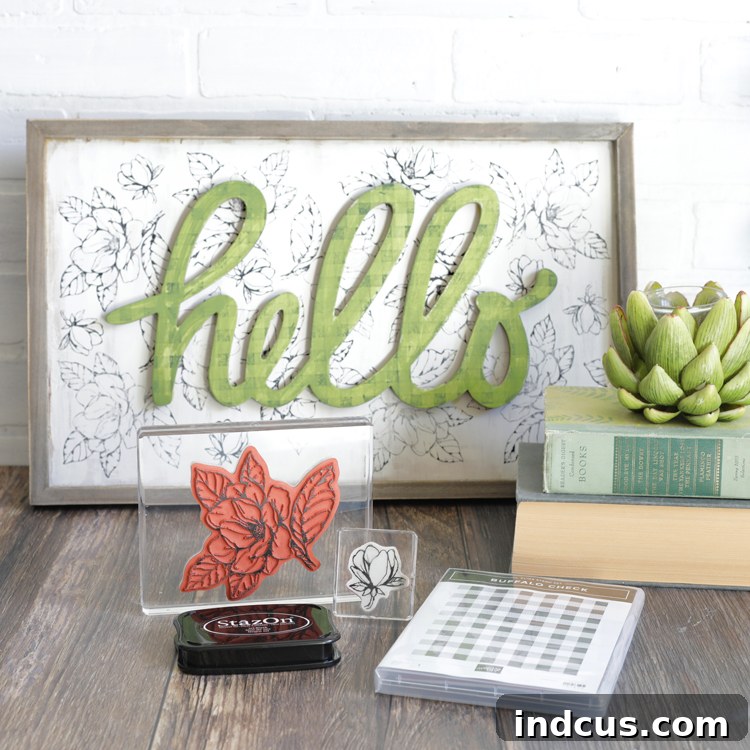
- Good Morning Magnolia Cling Stamp Set: This set features beautiful floral designs that are perfect for adding an elegant, natural touch to your farmhouse sign. The cling nature of these stamps ensures excellent ink transfer and crisp impressions.
- Buffalo Check Stamp: A staple in farmhouse aesthetics, the buffalo check pattern adds a classic, cozy feel. This large stamp makes it easy to create a seamless, repeated pattern on your decorative word or even directly on the sign itself.
- Jet Black Stāzon Ink Pad: This is a crucial component for stamping on non-porous surfaces like wood. Stāzon ink is known for its quick-drying, permanent properties, ensuring your stamped images won’t smudge or fade. It adheres beautifully to wood, producing sharp, vibrant results.
- Blank Wood Sign: The canvas for your masterpiece! You can find these at most craft stores in various shapes and sizes. Choose one that fits your desired farmhouse aesthetic and available wall space.
- Chipboard or Wood Decorative Word: Select a word that resonates with the farmhouse theme, such as “Home,” “Family,” “Gather,” or “Welcome.” This will be the focal point of your sign.
- Chalk Paint (Optional): If you want to add a distressed, weathered, or colored effect to your decorative word, chalk paint is an excellent choice. It adheres well to wood and creates a beautiful matte finish.
- Paint Brush: Essential for applying chalk paint evenly.
- Craft Glue: A strong adhesive suitable for wood, to securely attach your decorative word to the sign.
Step-by-Step Guide to Crafting Your Stamped Farmhouse Sign
Now, let’s get down to the exciting part: bringing your farmhouse sign to life! Follow these detailed instructions for a smooth and enjoyable crafting experience.
Step 1: Laying the Foundation – Stamping the Main Design on Wood
Begin by carefully peeling your large magnolia flower stamp from its backing and adhering it firmly to a clear acrylic stamping block. This block acts as your handle, providing stability and allowing for precise placement. Next, gently but thoroughly ink your stamp by pressing it onto the Jet Black Stāzon Ink Pad. Ensure that the entire surface of the stamp, particularly all the intricate details of the magnolia, is evenly coated with ink. You want a rich, consistent layer for a perfect impression. Now, position your inked stamp over your blank wood sign. Take a moment to visualize the final placement and ensure it’s centered or aligned as desired. Once you’re confident in its position, apply steady, even pressure across the entire stamping block. Hold it down firmly for several seconds, allowing the permanent Stāzon ink ample time to transfer completely and absorb into the porous wood grain. When you lift the block straight up, you’ll reveal a beautifully crisp and detailed magnolia impression, setting the elegant tone for your farmhouse sign.
Step 2: Adding Depth and Detail with Smaller Stamps
With your main magnolia design in place, it’s time to add complementary elements using the smaller magnolia flower stamp. This step allows you to fill in gaps, create a clustered effect, or extend the floral motif along the edges of your sign. Attach the smaller stamp to a clear acrylic block. You may find it beneficial to adjust the position of this smaller stamp on your block, allowing you to reach tight corners or stamp very close to the edge of your wooden sign without the block itself getting in the way. Ink the smaller stamp thoroughly, just as you did with the larger one, ensuring a rich coating of Jet Black Stāzon ink. Carefully position and stamp the smaller flowers around your main design, layering them slightly or arranging them to create a natural, flowing pattern. Don’t be afraid to experiment with different angles and overlaps to achieve a full and organic look. Remember to apply firm, even pressure for each impression to guarantee excellent ink transfer onto the wood.
Step 3: Personalizing Your Sign with the Buffalo Check Word
Now for the focal point of your sign – the decorative word with its charming buffalo check pattern. Take your Buffalo Check Stamp and adhere it securely to a clear stamping block. Generously ink the stamp with your Jet Black Stāzon Ink Pad, making sure all the squares of the pattern are fully covered. Next, carefully stamp this pattern directly onto the front surface of your chipboard or wooden decorative word. The key to a seamless, continuous buffalo check pattern is precise alignment. If your word requires multiple impressions, ensure you line up the squares from one stamp with the squares from the previous impression to create a flawless, unbroken pattern. This attention to detail will give your word a professionally finished appearance. The beauty of stamping here is how effortlessly it covers even the most intricate or curvy letters, a task that would be significantly more challenging with paper cutting or stenciling. Once stamped, allow the ink to dry completely before proceeding.
At this stage, your wooden sign will be taking on its distinctive farmhouse character, ready for the next layer of personalization:
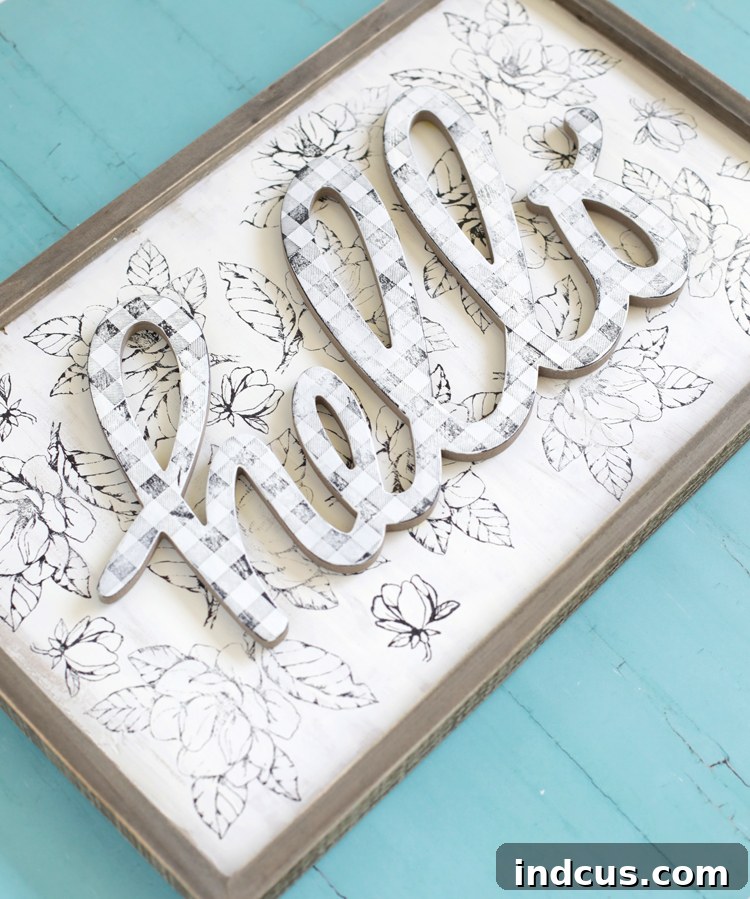
Step 4 (Optional): Adding a Distressed Pop of Color with Chalk Paint
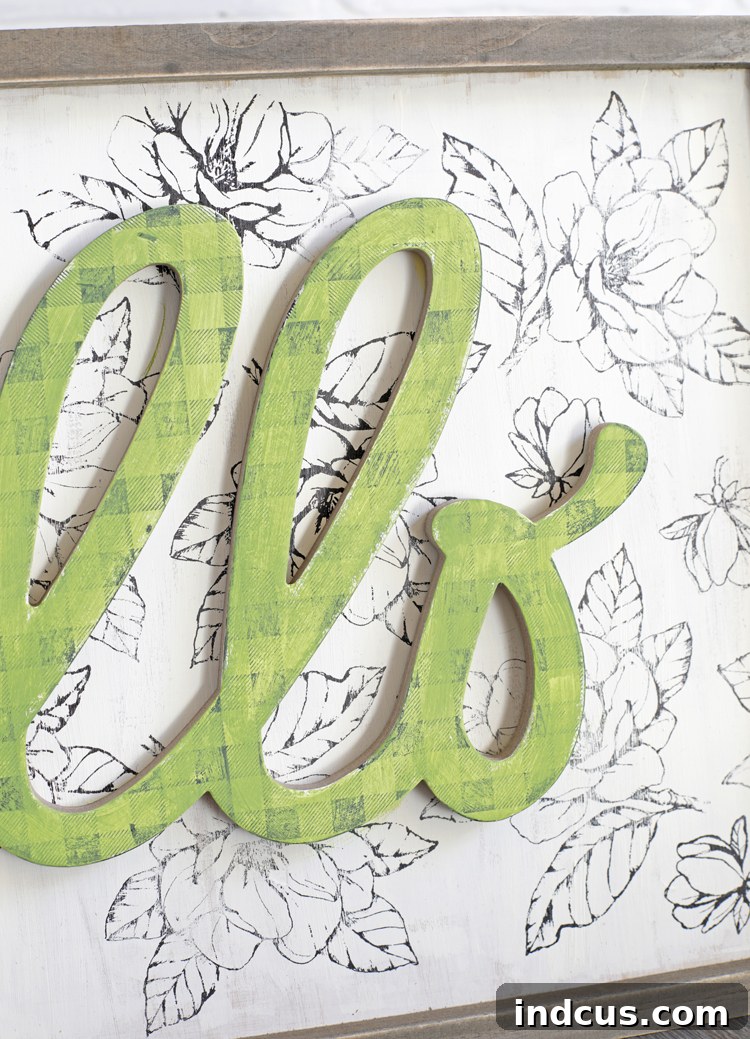
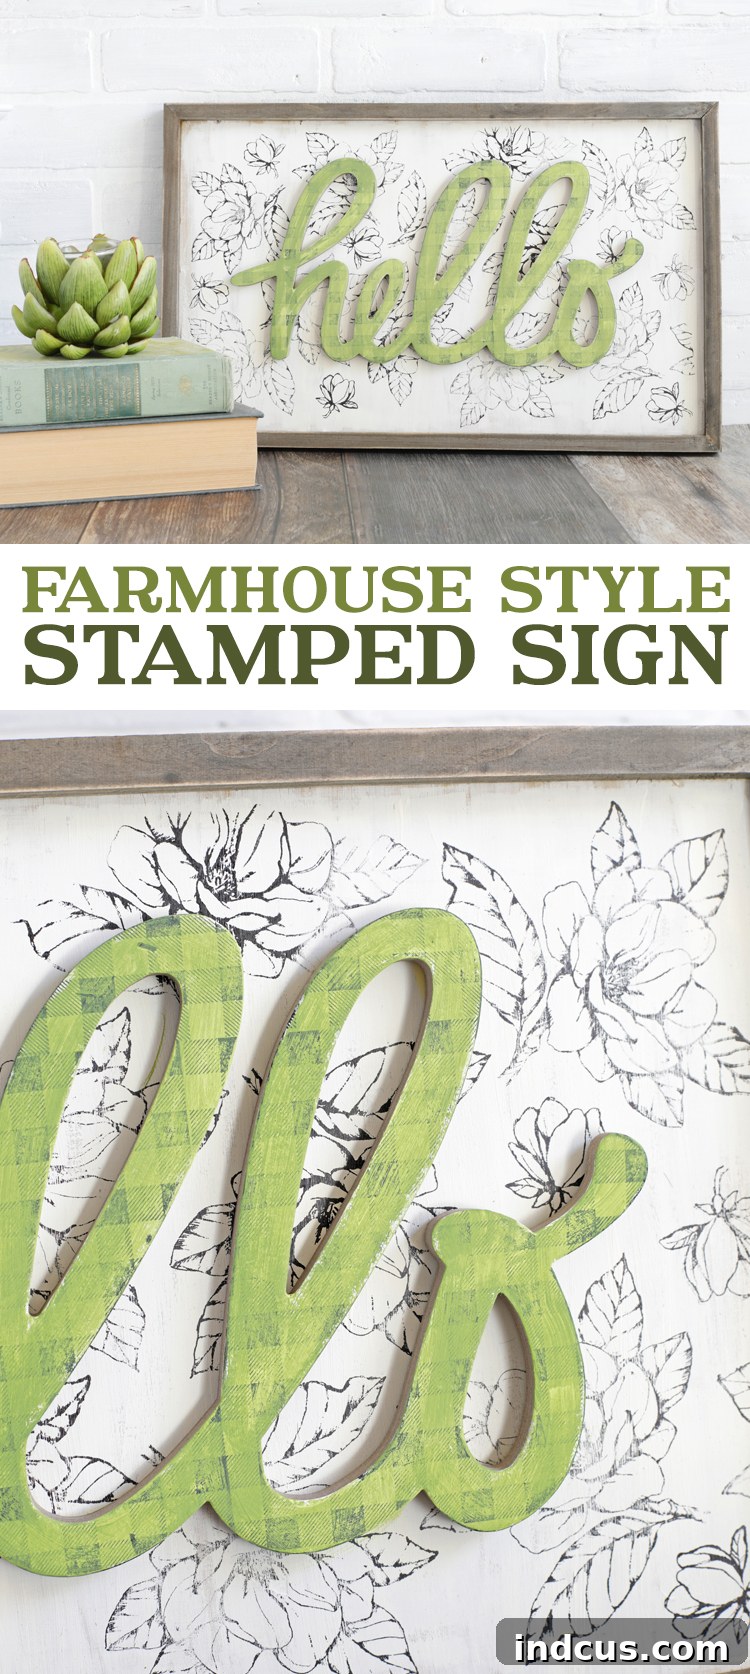
This step is where you can truly infuse your personality and add a unique, vintage touch to your sign. As someone who loves a splash of color, I couldn’t resist! Using a clean paintbrush, apply a very light and thin coat of green chalk paint over the buffalo check stamped word. Chalk paint is ideal for this because it dries quickly and adheres beautifully, often enhancing a distressed look. The goal here isn’t full coverage but rather a subtle wash that allows the black buffalo check pattern to peek through, creating a lovely worn and weathered texture. This layering effect adds depth and character, giving your sign an aged, authentic farmhouse feel.
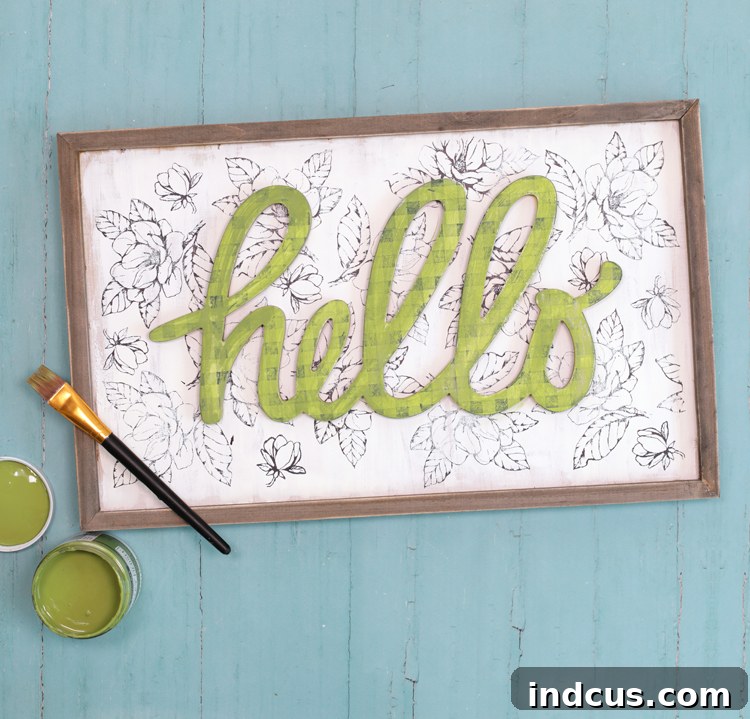
If, however, you prefer a crisper, more vibrant buffalo check pattern with a colored background, you can achieve this by altering the order of operations. First, paint your decorative word with your chosen chalk paint color, allowing it to dry thoroughly. Then, load your buffalo check stamp completely with ink and stamp it directly onto the painted word. This technique will yield a totally different, more defined and bold look for your buffalo check pattern against a solid color base. Both methods create beautiful results; it simply depends on the aesthetic you’re aiming for!
Step 5: Assembling Your Masterpiece
Once all your stamped elements and optional paint layers are completely dry, it’s time to bring your sign together. Apply a generous amount of strong craft glue to the back of your decorative word. Carefully position the word onto your main wood sign, ensuring it is straight and centered (or off-center, if that’s your preferred design). Press down firmly and hold for a few moments to allow the glue to begin bonding. If necessary, you can use clamps or place a heavy object on top of the word while the glue fully cures, ensuring a secure and lasting attachment. Once the glue has dried, your beautiful, custom-stamped farmhouse sign is ready to be displayed!
The Unbeatable Ease and Appeal of Stamping on Signs
Reflecting on this project, I can unequivocally say I’m a huge fan of stamping on wooden signs. The convenience and quality of the results are truly unparalleled. One of the greatest benefits is completely sidestepping the tedious task of cutting paper or vinyl, especially for intricate designs or words with curves. Have you ever tried to meticulously cut around the edges of a curvy word for a decoupage project? It’s incredibly challenging and often leads to frustrating imperfections!
With rubber stamps, that frustration is completely eliminated. The stamp effortlessly transfers the design, making the process quick, clean, and remarkably easy. This method allows you to achieve a polished, professional finish without the need for specialized cutting machines or advanced crafting skills. The tactile feel of the ink on the wood also adds a beautiful depth and authenticity that is hard to replicate with other techniques. It’s a fantastic way to personalize your home decor, create unique gifts, or simply enjoy a rewarding crafting session. I’m a big fan, and I’m confident you will be too!
Stamped Wood Sign Video Tutorial
For those who prefer a visual demonstration or want to see each step in action, I’ve prepared a concise video tutorial. This video walks you through the entire process, offering a dynamic perspective on the stamping techniques and tips discussed above. It’s an excellent resource to clarify any steps and watch the transformation unfold in real-time.
Feeling inspired to try this charming project yourself? Don’t forget to save it for later! Pin this guide so you can easily come back to these instructions whenever you’re ready to create your own beautiful farmhouse-style sign.
This post is proudly sponsored by Stampin’ Up!, a brand renowned for its high-quality crafting products that inspire creativity. All opinions expressed herein are my own and genuinely reflect my experience with their excellent stamps and inks, which were instrumental in achieving the beautiful results showcased in this project. Should you wish to delve deeper into the extensive range of Stampin’ Up! products or learn more about their incredible crafting community, I encourage you to connect with a local demonstrator. Finding one near you is incredibly easy; simply visit www.stampinup.com and click on the “Find a Demonstrator” button. They are a fantastic resource for product information, creative ideas, and support for your crafting journey.