
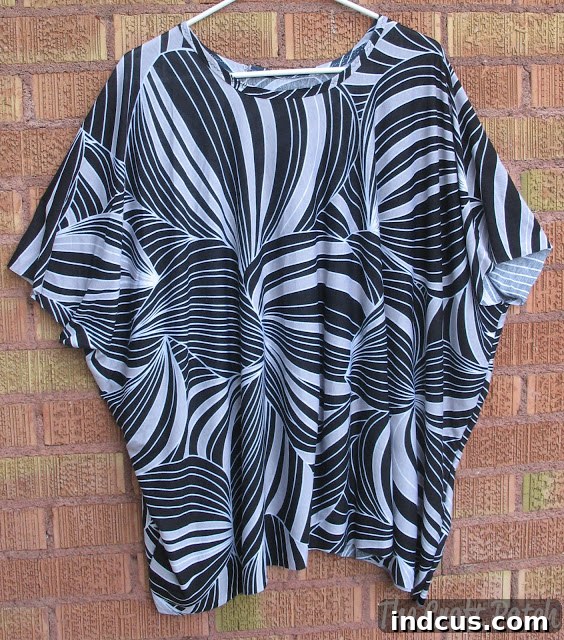
DIY Full-Coverage Nursing Cover: A Simple Knit Fabric Poncho Tutorial for Discretion and Style
Why You Need a 360-Degree Nursing Cover
Navigating motherhood, especially with a new baby and older children, often brings unique challenges, particularly when it comes to breastfeeding in various settings. Ensuring discreet and comfortable nursing experiences becomes a priority, whether you’re at home with inquisitive siblings or enjoying a busy summer schedule packed with outings and activities. Traditional nursing covers, typically a simple square of fabric with a neck strap, offer a basic level of modesty, but they often fall short in providing comprehensive coverage. The constant worry about accidental slips, drafts, or peek-a-boos from curious onlookers can detract from the precious bonding time with your little one.
This is precisely why the concept of a full-coverage nursing cover, resembling a stylish poncho or a versatile circle shirt, has become incredibly appealing to many breastfeeding mothers. Imagine the freedom of a cover that gracefully drapes around you, offering complete 360-degree privacy from every angle. No more concerns about fidgety babies kicking off the cover, sudden gusts of wind, or awkward glances. This innovative design allows you to nurse your baby with utmost confidence and peace of mind, transforming public feedings into a calm and intimate moment. If you’ve ever admired the simplicity and elegance of a circular garment, similar to the adaptable circle shirt tutorial we’ve previously shared, you’ll appreciate the effortless style and practicality this nursing cover brings.
Choosing the Perfect Fabric for Your DIY Nursing Cover
The foundation of any successful sewing project lies in selecting the right materials, and for a nursing cover, this choice is paramount for both comfort and functionality. For this particular project, I opted for a single yard of incredibly soft and lightweight knit fabric. My lucky find came from the bargain section of a local store, proving that you can often discover hidden gems at surprisingly affordable prices. Keep an eye out for sales and remnant bins; you never know when you’ll stumble upon the perfect material for your next creation! The key characteristics to look for in your chosen fabric are breathability, softness, and a good drape. A fabric that breathes well will prevent overheating for both you and your baby, which is especially crucial during warmer months or prolonged feeding sessions. Look for materials like cotton jersey, bamboo knit, modal, or a lightweight rayon blend. These fabrics are not only gentle against delicate baby skin but also tend to be naturally wrinkle-resistant, keeping your cover looking neat and presentable even after being folded in a diaper bag.
Knit fabrics are ideal for this poncho-style nursing cover because they offer natural stretch and do not fray, which simplifies the sewing process significantly. This means you can often leave edges raw or opt for a minimal hem, saving time and effort. When shopping, gently stretch the fabric to ensure it has enough give for comfortable movement, but not so much that it becomes flimsy. A good drape is also important; you want the fabric to flow gracefully around you, creating a flattering silhouette rather than a stiff, boxy look. Investing a little time in selecting the perfect knit fabric will undoubtedly enhance your overall nursing experience with your custom-made cover.
While a picture is often worth a thousand words, sometimes creativity strikes even when technical difficulties arise! My camera unfortunately decided to take an unplanned break, so to ensure you could still follow along with this fantastic project, I’ve meticulously hand-drawn the instructions. These illustrations are designed to be clear and easy to understand, guiding you through each step of creating your very own 360-degree nursing cover.
Essential Materials and Tools for Your DIY Nursing Cover
Gathering your supplies beforehand ensures a smooth and enjoyable sewing experience. Here’s a comprehensive list of what you’ll need to create your custom nursing cover:
- 1 Yard of Knit Fabric: As discussed, choose a soft, lightweight, and breathable knit fabric that drapes well and, importantly, doesn’t fray. Cotton jersey, interlock knit, bamboo, or modal are excellent choices for their comfort and ease of use.
- Matching Thread: Select a high-quality polyester thread that closely matches the color of your fabric. This ensures your seams are inconspicuous and durable. For knit fabrics, a polyester all-purpose thread works perfectly, or you can opt for a serger thread if you plan to use a serger for finishing.
- Fabric Scissors: A sharp pair of fabric scissors is indispensable for clean, precise cuts, especially when working with stretchy knit materials. Dedicate a pair specifically for fabric to keep them keen.
- Rotary Cutter, Quilting Mat, and Ruler: While fabric scissors will work, a rotary cutter paired with a self-healing quilting mat and a long ruler will make cutting knit fabric incredibly easy and accurate. The rotary cutter glides through multiple layers of fabric effortlessly, preventing distortion and ensuring straight lines, which is particularly beneficial for squaring up your fabric and cutting the neck opening.
- Sewing Machine: Any standard sewing machine capable of a straight stitch and a zigzag stitch (or a stretch stitch, if available) will be suitable.
- Pins or Fabric Clips: Essential for holding your fabric layers together securely while sewing, preventing the knit from shifting.
- Iron and Ironing Board: For pressing seams and creating crisp folds, which helps achieve a professional finish.
Step-by-Step Guide to Crafting Your Poncho Nursing Cover
Follow these detailed instructions to create a beautiful and functional nursing cover that will offer you comfort and discretion wherever you go. Take your time with each step, and don’t be afraid to adjust as needed!
Step 1: Prepare Your Fabric – Fold and Square Up
Begin by laying your yard of knit fabric flat on your work surface. Fold the fabric in half lengthwise, ensuring the selvage edges (the finished edges of the fabric) are aligned. Smooth out any wrinkles. Next, carefully square up all the raw edges using your rotary cutter, mat, and ruler, or a sharp pair of fabric scissors. This crucial step ensures your cover will hang evenly and professionally. Once squared, measure and cut a 2-inch wide strip from one of the long ends of your folded fabric. This strip will be essential for finishing the neckline later, so set it aside carefully. This initial preparation sets the stage for accurate cutting and a well-proportioned final product.
Step 2: Fold into Fourths for Precision Cutting
With your fabric still folded in half from Step 1, fold it in half again widthwise. You should now have your fabric folded into quarters, creating a smaller, more manageable square or rectangle. Ensure all the raw edges are aligned neatly, and the corner representing the true center of your fabric (if unfolded) is easily identifiable. This corner will be where you cut your neck opening, guaranteeing a perfectly centered and symmetrical neckline.
Step 3: Create the Neck Hole – The Heart of Your Cover
Locate the corner of your quadruple-folded fabric that represents the absolute center when the fabric is fully opened. From this corner, you will cut the neck opening. Using a fabric marker or chalk, measure approximately 3.5 inches from the corner along each of the folded edges, marking a gentle curve between these two points. This measurement provides a good starting point for a comfortably sized neck hole. The ideal neck opening needs to be large enough to allow you to easily peek in on your baby during feeding, ensuring a good latch and comfortable positioning, but simultaneously small enough to remain securely on your shoulders without gapping or slipping down. Before cutting, you might want to try holding the folded fabric up to your neck to visualize the size. You can always make the hole larger, but you can’t make it smaller, so start conservatively. Carefully cut along your marked curve. When you unfold the fabric, you’ll reveal a perfectly circular or slightly oval neck opening.
Step 4: Stitch the Side Seams and Define Armholes
Now it’s time to bring your cover to life! Unfold your fabric so it is only folded in half lengthwise (right sides together). ‘Right sides together’ means the ‘pretty’ side of your fabric is facing inward, and the ‘wrong’ or less attractive side is facing outward. Pin or clip the long raw edges together. You will sew up these side seams, but it’s important to leave openings at the top for your arms. I found that sewing up about three-quarters of the way from the bottom raw edge worked well, leaving the top quarter (roughly 8-10 inches, depending on your arm size and desired drape) open for armholes. A good strategy is to stitch up partially, then try on the cover (inside out) to adjust the armhole size for your comfort and preferred fit. Mark where you want your armholes to end. Use a stretch stitch, a narrow zigzag stitch, or a serger to sew these seams, as this will allow the knit fabric to stretch without popping threads. For the raw bottom and side edges, because knit fabric generally does not fray, you have the option to leave them unfinished for a minimalist look, which is a fantastic time-saver. Alternatively, for a more polished finish, you could fold the edges under once or twice and topstitch, or use a serger for a quick and neat narrow hem. The beauty of working with knits is this flexibility!
Step 5: Master the Neckline Finish with Binding
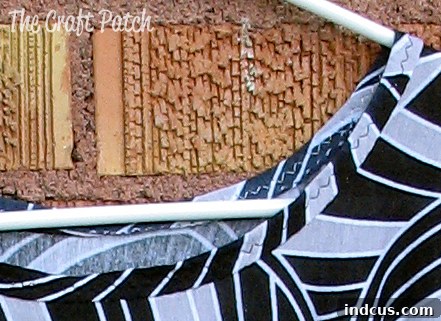
This final sewing step gives your nursing cover a professional and durable finish. Retrieve the 2-inch wide strip of knit fabric you cut in Step 1. This strip will act as a binding for your neckline. With right sides together, align one long edge of this strip with the raw edge of your neck hole, starting at the back center of the neckline. Pin or clip the strip all the way around the entire circular opening, gently stretching the strip slightly as you go to ensure it lies flat against the curve. Sew the strip to the neckline using a stretch stitch or a narrow zigzag. Once attached, fold the strip of fabric around to the back of the neck hole, encasing the raw edge within the fold, effectively creating a clean bind. Pin it down securely. Then, from the right side of the cover, topstitch around the neckline, catching the folded binding on the underside. This creates a neat, finished edge that is comfortable against your skin and reinforces the neckline, preventing it from stretching out over time. And just like that, your beautifully finished 360-degree nursing cover is complete!
Congratulations! Your stunning, custom-made 360-degree nursing cover is now complete. You’ll be delighted by how effortlessly this cover blends practicality with personal style. It has the chic appearance of a fashionable top, yet it offers an abundance of discreet space for your baby, ensuring you both remain comfortable and unexposed during feeding times. The thoughtful design means you can move freely, without worrying about accidental reveals, providing unparalleled confidence whether you’re at home or out and about. It’s truly a game-changer for confident public breastfeeding.
As you embark on your journey with this new, improved nursing solution, you might find yourself needing a practice model if your little one hasn’t quite arrived yet! In my case, my trusty companion, Heart the Pink Bear, graciously stepped in to demonstrate the perfect fit and ample room this cover provides. This project is not just about sewing; it’s about empowering mothers with practical, beautiful tools that enhance their breastfeeding experience.
Real-World Experience and Unwavering Love for Full Coverage
Initially, I was eager to put this innovative nursing cover to the test, anticipating its benefits in real-world scenarios. With only a few weeks left until my baby’s arrival, the excitement was palpable. Now, after using this cover consistently for over two months, I can unequivocally say that it has exceeded all my expectations. My initial hopes were not only met but surpassed, making this DIY nursing cover an absolute staple in my new mom toolkit. I genuinely adore it!
The 360-degree coverage has proven invaluable, particularly during family gatherings, outings to busy parks, doctor’s appointments, or any situation where nursing in public felt daunting before. The peace of mind that comes from knowing I am completely covered from all angles has transformed my public breastfeeding experience. There’s no more fussing with flapping fabric, no awkward adjustments, just pure, uninterrupted bonding time with my baby. The lightweight, breathable knit fabric keeps both of us comfortable, even on warmer days, and its non-fraying nature means it holds up beautifully to repeated washes and constant use.
This poncho-style nursing cover has become my go-to choice, offering a level of confidence and convenience that traditional covers simply couldn’t match. I find myself reaching for it time and time again, appreciating its ease of wear and its ability to blend seamlessly into my outfit. If given the chance, I would absolutely make another one – perhaps in a different color or pattern! The joy of creating something so practical and personal, combined with its outstanding performance, makes this project incredibly rewarding. I wholeheartedly recommend this DIY 360-degree nursing cover to any parent seeking a comfortable, discreet, and stylish breastfeeding solution. Give it a try; you might just fall in love with the freedom and confidence it brings!







