
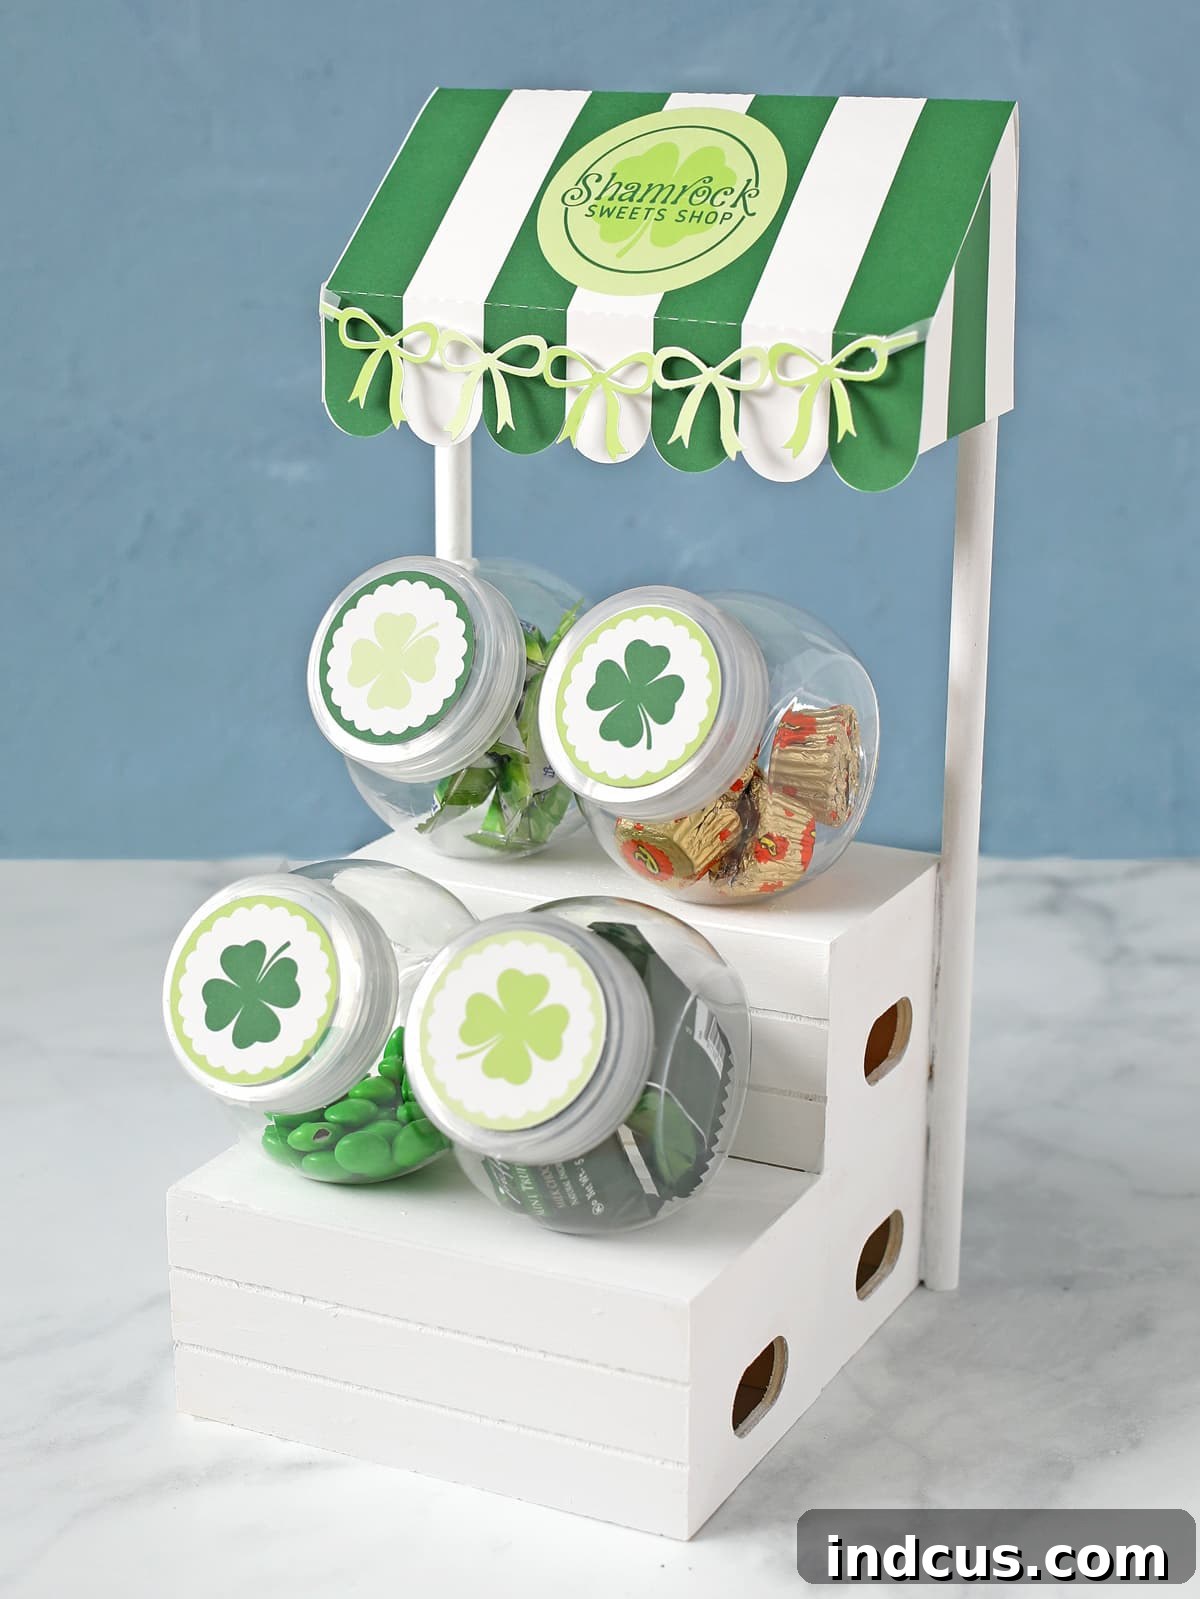
Create an Adorable St. Patrick’s Day Candy Shop Display with Dollar Tree Finds
Get ready to sprinkle some magic and good luck into your St. Patrick’s Day celebrations with a charming, handmade candy display! Following the overwhelmingly positive response to our beloved Cupid’s Candy Shoppe for Valentine’s Day, we’re thrilled to present its festive counterpart: the enchanting Shamrock Sweets Shop! This delightful DIY project allows you to craft a charming and versatile candy display using simple, budget-friendly items you can find at your local Dollar Tree.
Our children absolutely adored the Valentine’s Day version, and the excitement for a St. Patrick’s Day rendition was palpable. This project isn’t just about crafting; it’s about creating lasting memories and a beautiful piece of seasonal decor that brings joy to your home. Imagine the fun of swapping out the awning for every holiday throughout the year – Easter, Halloween, Christmas, and more! The possibilities for customization are endless, making this a truly rewarding and fun endeavor that keeps on giving.
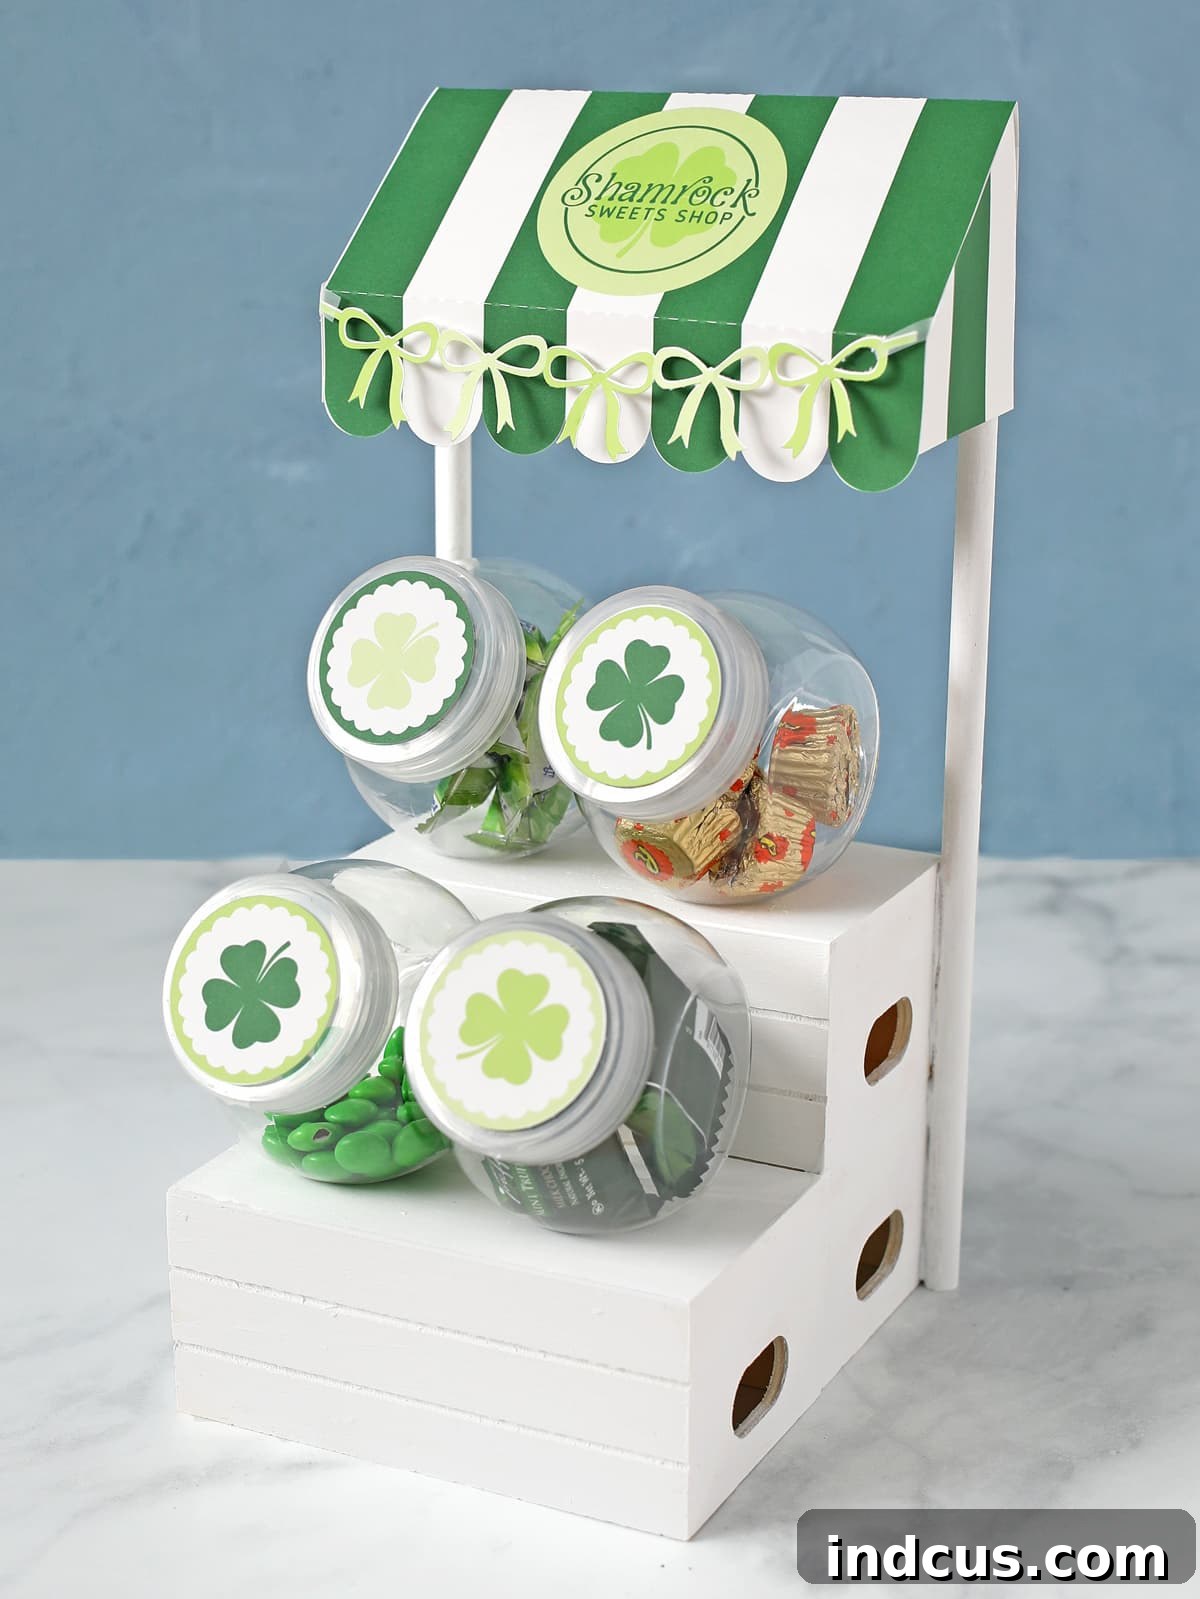
Why a DIY St. Patrick’s Day Candy Shop is a Must-Have
St. Patrick’s Day is a vibrant celebration filled with themes of luck, abundant green hues, and joyful gatherings. What better way to capture this festive spirit than with a dedicated display for all your celebratory treats and candies? This DIY candy shop serves as a fantastic centerpiece for any St. Patrick’s Day party, a charming addition to your kitchen counter, or a delightful way to present small, thoughtful gifts. It adds a whimsical touch that invites everyone to indulge in the holiday’s sweetness and charm.
Beyond its aesthetic appeal, this craft project embodies the spirit of smart, creative decorating. By leveraging the incredible value offered at Dollar Tree, you can achieve a high-end, custom look without breaking the bank. It’s an excellent project for crafters of all skill levels, offering a straightforward process with absolutely stunning results that will impress your guests. Plus, the ability to easily swap out the awning means this isn’t just a one-holiday wonder; it’s a versatile foundation for year-round seasonal decorating! Embrace the joy of crafting something truly unique and personal for your home this St. Patrick’s Day.
Your Essential Shopping List: Dollar Tree Finds for Your Shamrock Sweets Shop
One of the most appealing aspects of this project is its remarkable affordability and accessibility. All the core materials can be found at Dollar Tree, making it an incredibly budget-friendly craft. While we’ve provided direct links to the items online for your reference, we highly recommend heading to your local Dollar Tree store. Most items are sold in bulk online, making in-store purchases far more practical and cost-effective for a single craft project. Here’s a detailed list of exactly what you’ll need to create your very own charming Shamrock Sweets Shop:
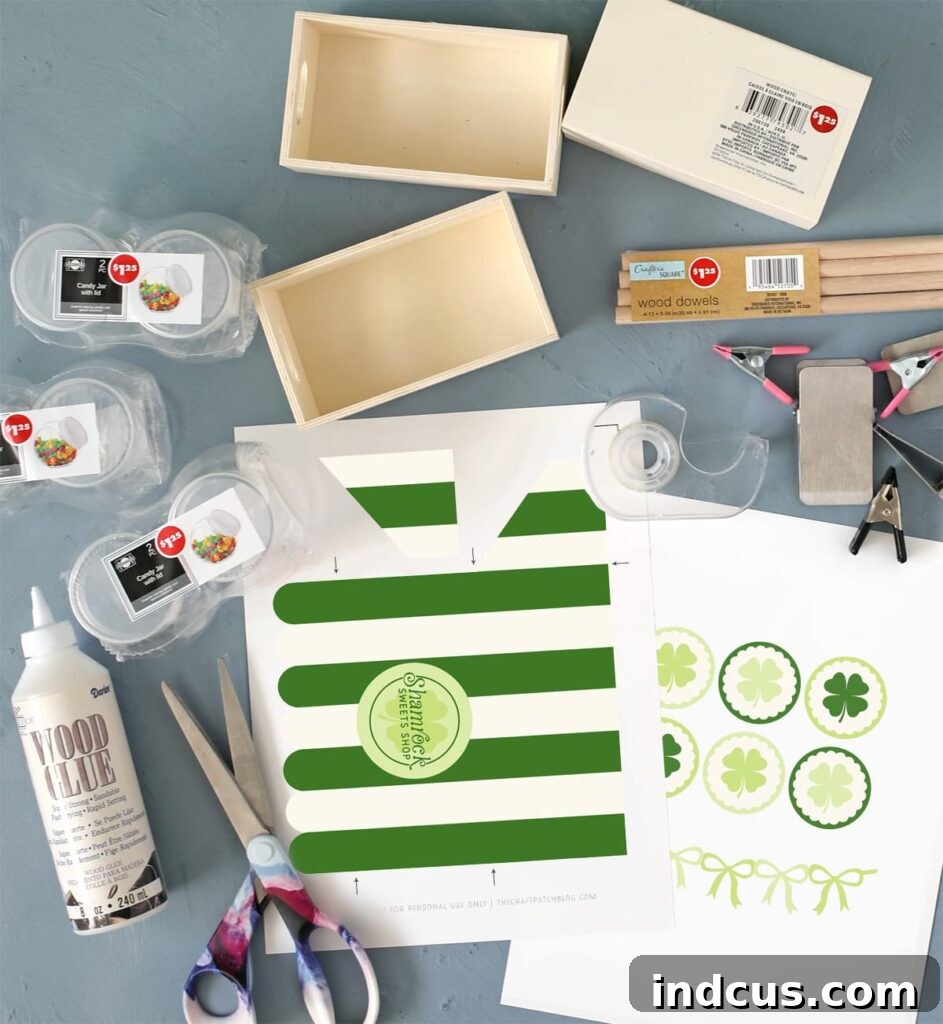
Materials Needed for Your DIY Candy Display
- Printable St. Patrick’s Day Awning: This is the magical touch that instantly transforms your stand! You can easily download this custom-designed printable at the very bottom of this post.
- 3 Wooden Crates: Look for the “Crafter’s Square Wood Crate with Handles” at Dollar Tree. These sturdy crates form the essential base of your candy shop. (Example Product Link)
- Wooden Dowels: A pack of “Crafter’s Square Wood Dowels” (typically a 4-count pack) will provide the necessary supports for your charming awning. (Example Product Link)
- Small Candy Jars with Lids (4 total): The “Mini Candy Jars with Lids” often come in convenient 2-packs, so you’ll need two packs for a total of four jars. These are absolutely perfect for showcasing your festive St. Patrick’s Day treats. (Example Product Link)
- White Cardstock: Essential for printing your awning and any additional decorative elements, ensuring they are sturdy.
- Wood Glue: For a strong, lasting bond between your wooden crates, providing stability.
- Clamps: “Crafter’s Square Metal Craft Clamps” are ideal for holding your crates securely in place while the wood glue dries. (Example Product Link)
- Hot Glue Gun + Glue Sticks: Your secret weapon for quick, secure adhesion, especially for attaching the dowels.
- Clear Tape: For easily attaching and, more importantly, swapping out your seasonal awnings without damage.
- White Craft Paint + Paint Brush: To give your candy shop a clean, versatile base color that beautifully suits any holiday theme.
Optional Materials to Enhance Your Display:
- Fine-Grit Sandpaper: Use this to smooth out any rough edges on your wooden crates for an even more polished and professional finish.
- Green or Gold Acrylic Paint: For subtle accents or to add more direct St. Patrick’s Day color to the structure itself, if desired.
- Decorative Ribbon or Twine: To adorn your display, create bows, or tie around the candy jars for an extra touch of charm.
- Small St. Patrick’s Day Themed Embellishments: Think mini shamrocks, tiny leprechaun hats, or shiny gold coins to scatter around the base for added festive flair.
Step-by-Step Guide: Crafting Your St. Patrick’s Day Shamrock Sweets Shop
Let’s get crafting! Follow these detailed instructions meticulously to assemble your adorable and festive candy display. Remember, a little patience with drying times will ensure a sturdy, durable, and beautiful finished product that you’ll cherish for seasons to come.
Step 1: Constructing the Sturdy Base Structure
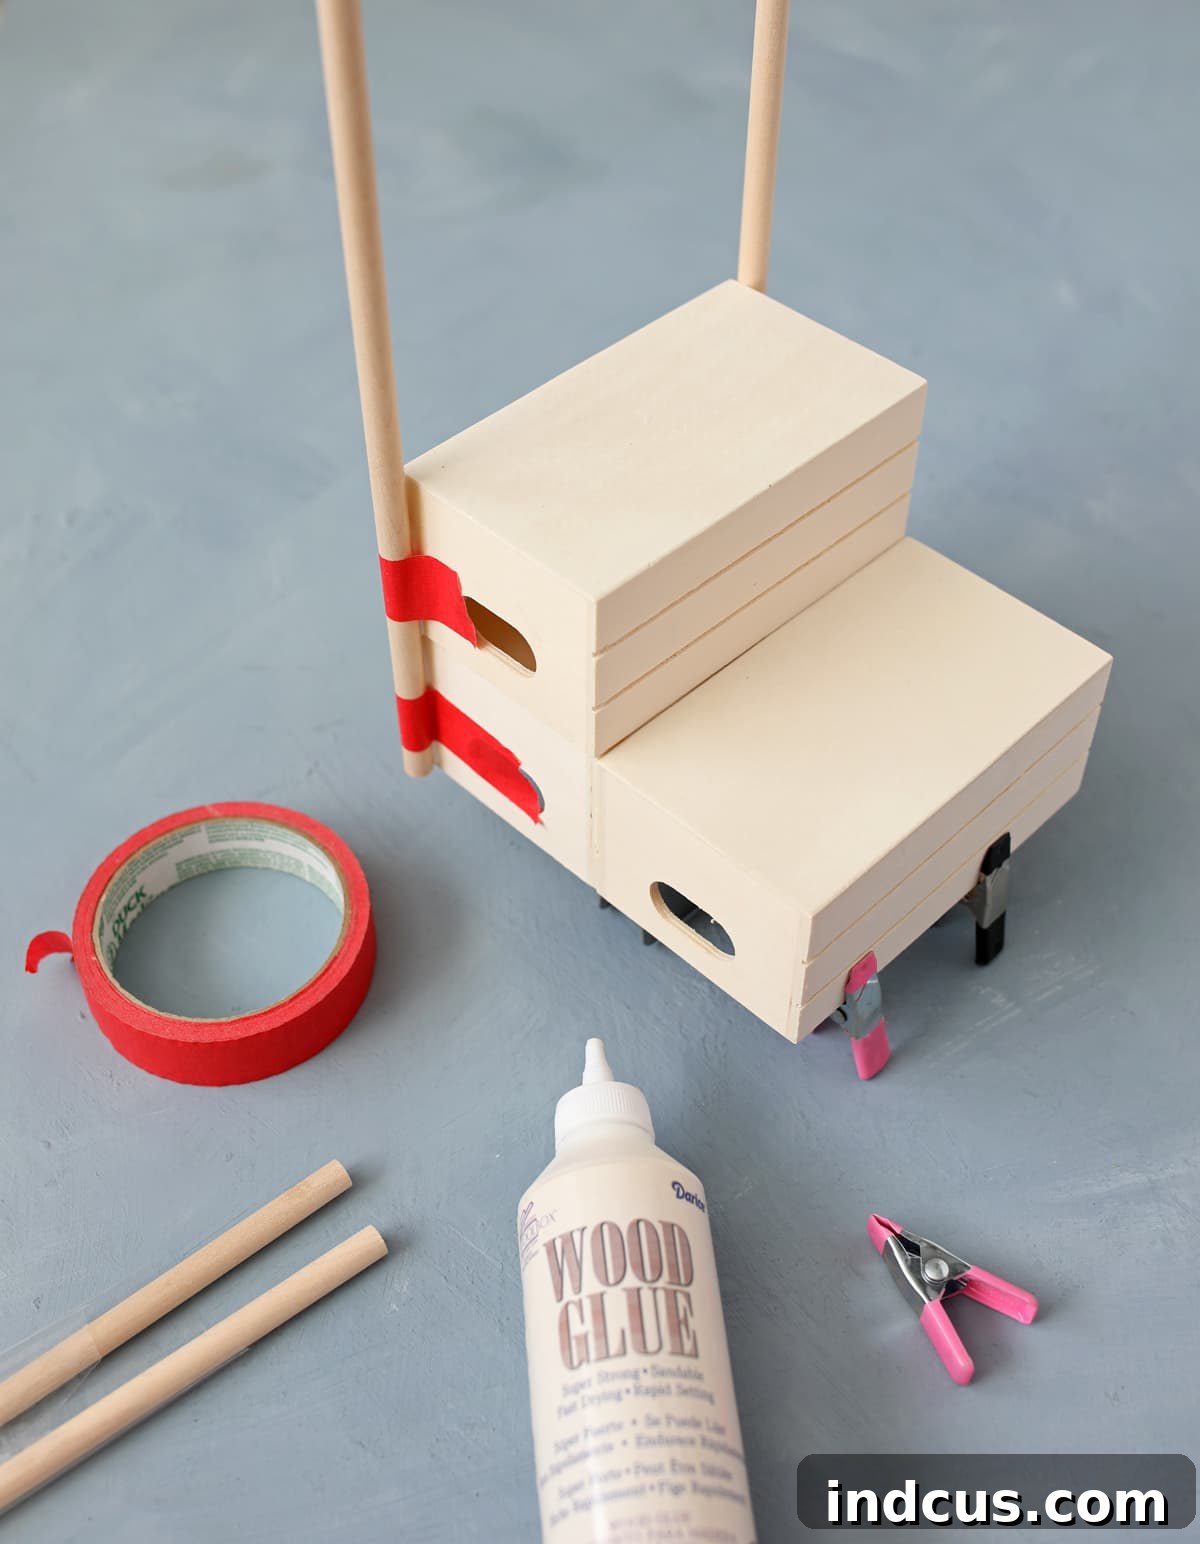
Begin by carefully removing any store stickers from all three of your Dollar Tree wooden crates. Sometimes, a little rubbing alcohol or a specialized goo remover can help with stubborn labels, ensuring a clean surface. Once completely clean and dry, arrange two crates side-by-side on the bottom, forming the spacious lower level of your shop. Then, center the third crate and stack it precisely on top. It’s absolutely crucial that the crates are placed upside down, ensuring their solid bottom sides face upwards. This configuration creates stable, flat shelves that are perfect for displaying your candy jars and treats.
Apply a generous, even layer of strong wood glue to all the surfaces where the crates will meet. Press them firmly together, aligning them as perfectly as possible. Immediately after gluing, secure the crates with clamps. These clamps are essential for maintaining constant pressure and ensuring a strong, immovable bond as the glue cures. For optimal stability and durability, allow the wood glue a minimum of one hour to dry, though leaving it overnight is always recommended if your timeline permits. A well-glued base is the absolute foundation of a long-lasting and robust candy shop!
Step 2: Attaching the Awning Support Dowels
Once your crate structure is completely dry and perfectly stable, it’s time to add the vital awning supports. Take two wooden dowels and position one on each side of the back of the top-stacked crate. While traditional wood glue might seem intuitive for wood-to-wood adhesion, for this particular step, a hot glue gun is your absolute best friend. I’ve found that hot glue provides vastly superior adhesion here because it quickly melts and molds around the cylindrical shape of the dowels, effectively filling in any minor gaps or uneven spots on the crate surface. This ensures an immediate, tight, and secure fit, preventing any wobbling. Apply a generous bead of hot glue along the dowel’s contact points with the crate and hold it firmly in place for a few moments until cooled and set. Repeat this precise process for the second dowel, ensuring both are parallel and securely fixed.
Step 3: Preparing Your Shop with a Fresh Coat of Paint
With your structure fully assembled and all glue thoroughly dried, it’s time to paint! You have a choice between using spray paint for its speed and smooth finish, or regular craft paint for more precision and control. Given that outdoor spray painting might not always be feasible due to weather conditions or space, a crisp white craft paint is often the most practical and versatile option. Painting your entire wooden structure white provides a clean, neutral canvas. This is a strategic choice, as it will allow you to easily swap out awnings for various holidays without any clashing colors, ensuring your display looks fresh and appropriate for any season. Apply thin, even coats of paint, allowing each layer to dry completely before adding the next. This meticulous approach prevents unsightly drips and ensures a smooth, professional-looking finish. The bright white base will also help the vibrant greens and golds of your St. Patrick’s Day decor really pop and stand out!
Step 4: Crafting the Festive St. Patrick’s Day Awning
This is where your Shamrock Sweets Shop truly comes to life and gains its unique festive character! You’ll need to print out the special St. Patrick’s Day awning design. We’ve thoughtfully provided two distinct file variations to cater to different crafting preferences and available tools:
- SVG File: This format is absolutely ideal for those with electronic cutting machines such as a Silhouette or Cricut. This file type allows for precise, effortless cutting, ensuring a professional finish with minimal effort.
- PDF Version: Perfect for crafters who prefer to cut by hand using sharp scissors or a craft knife. This option makes the project accessible to everyone, regardless of high-tech tools.
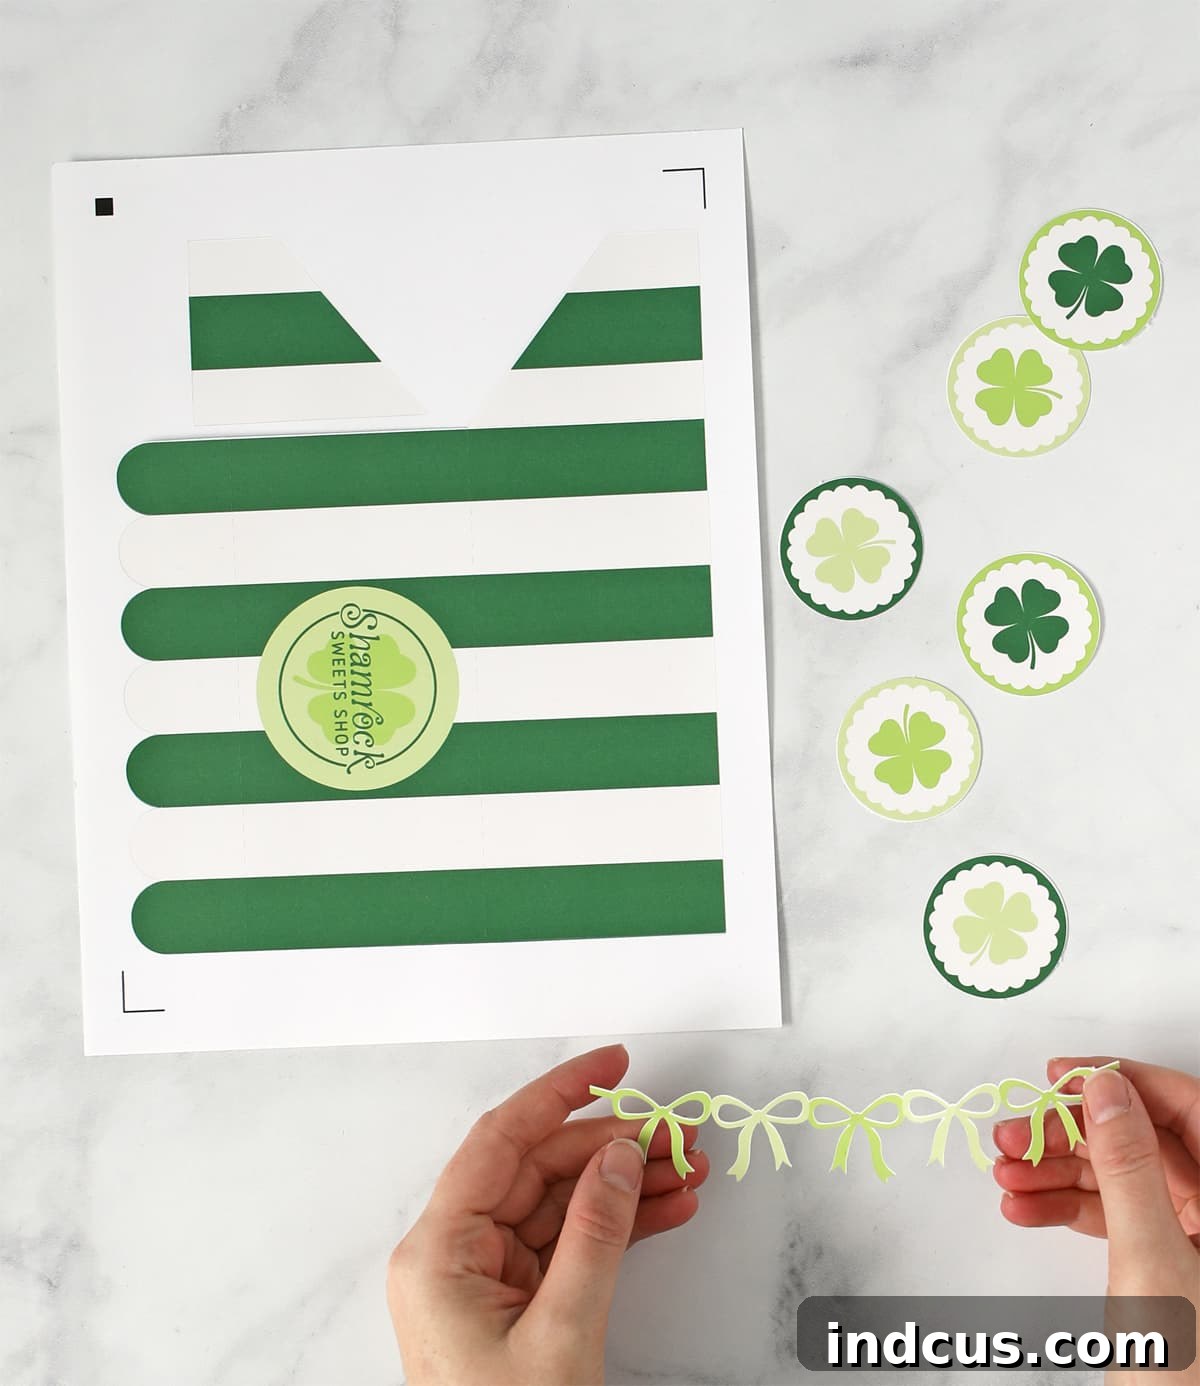
Both printable files include the main large awning shape and a smaller separate piece that forms one side of the awning. This clever design ensures that the entire awning can fit conveniently and without waste on standard letter-sized paper (8.5 x 11 inches). For an extra touch of authentic St. Patrick’s Day charm, the Shamrock Shop design also includes a delightful bow garland printable. While this cuts beautifully and precisely with a Silhouette machine, manual cutting might require a bit of patience and a very sharp pair of scissors to achieve the intricate details.
To expedite the creation of this tutorial and share it with you sooner, some images illustrating the general assembly methods have been thoughtfully reused from our Cupid’s Candy Shoppe project. Rest assured, the fundamental techniques and steps remain identical, guaranteeing the same fantastic and charming results for your St. Patrick’s Day version.
Detailed Instructions for Electronic Cutting Machine Users (Silhouette/Cricut)
If you are lucky enough to own an electronic cutting machine like a Silhouette or Cricut, utilizing the provided SVG file will make this step incredibly fast, precise, and enjoyable. You can achieve a professional “print and cut” finish with minimal effort. If you’re new to using your Silhouette machine for print and cut features, or simply need a quick refresher, please refer to this comprehensive Print and Cut tutorial. This guide covers all the essential steps and troubleshooting tips for successful machine cutting.
A Few Crucial Notes for a Flawless Cut:
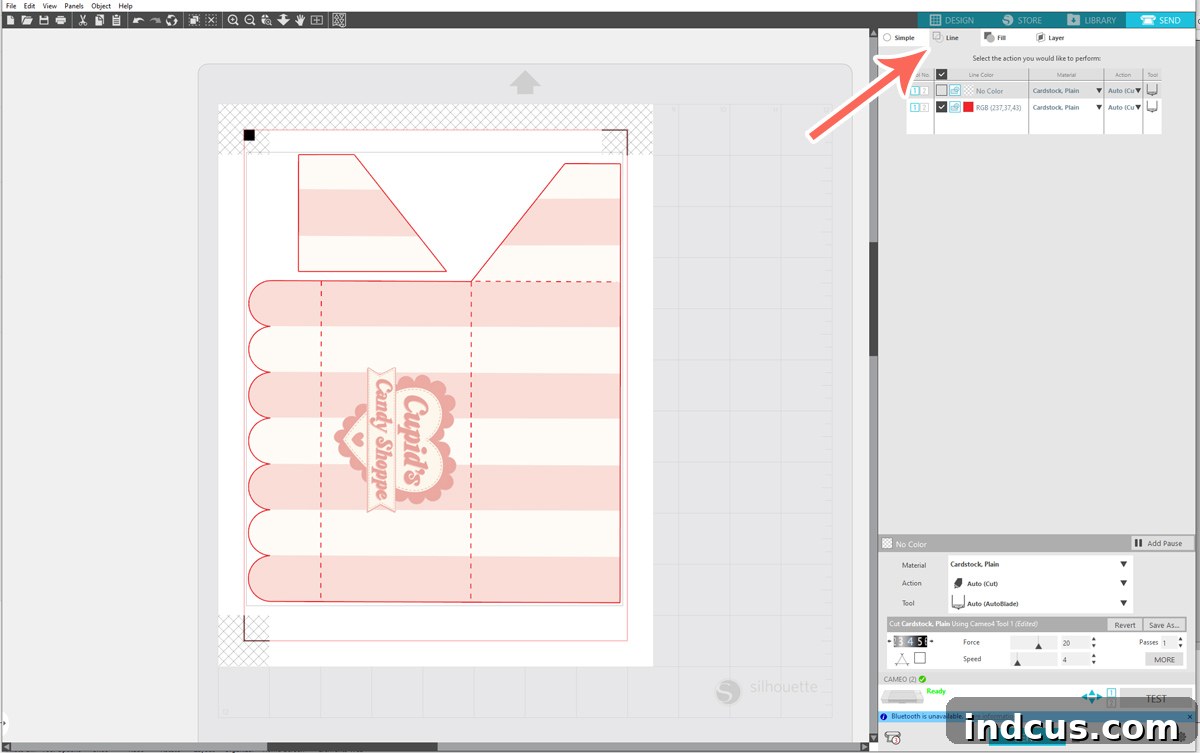
– Registration Marks are Key: Before sending your design to print, always remember to activate and turn on your machine’s registration marks within the software. These marks are absolutely vital; they act as a precise map, telling your electronic cutter the exact location and orientation of the printed design on your paper. Without them, your cut lines will not align correctly with the printed graphic, resulting in misaligned cuts.
– Checking the SEND Tab Settings: When you navigate to the ‘SEND’ tab in your software to prepare the design for cutting, you might initially see numerous cut lines displayed all over the page. This is usually not the desired outcome! To ensure only the perimeter of your awning and garland is cut, select the ‘LINE’ sub-tab within the ‘SEND’ panel. This specific setting instructs your machine to cut exclusively along the defined lines of your design, cleverly ignoring any internal printing or unwanted cut paths. The preview on your screen should clearly show only the outlines of the shapes intended to be cut, as precisely demonstrated in the image below, indicating it’s perfectly ready to be sent to your machine for cutting.
Instructions for Hand Cutting Your Awning (No Cutting Machine Needed!)
Don’t have an electronic cutting machine? No problem at all! You can absolutely still create this charming candy shop with fantastic results. Simply download the PDF version of the awning design and print it onto sturdy white cardstock. Using cardstock is essential here as it provides the necessary rigidity and durability for the awning to hold its shape beautifully and resist creasing.
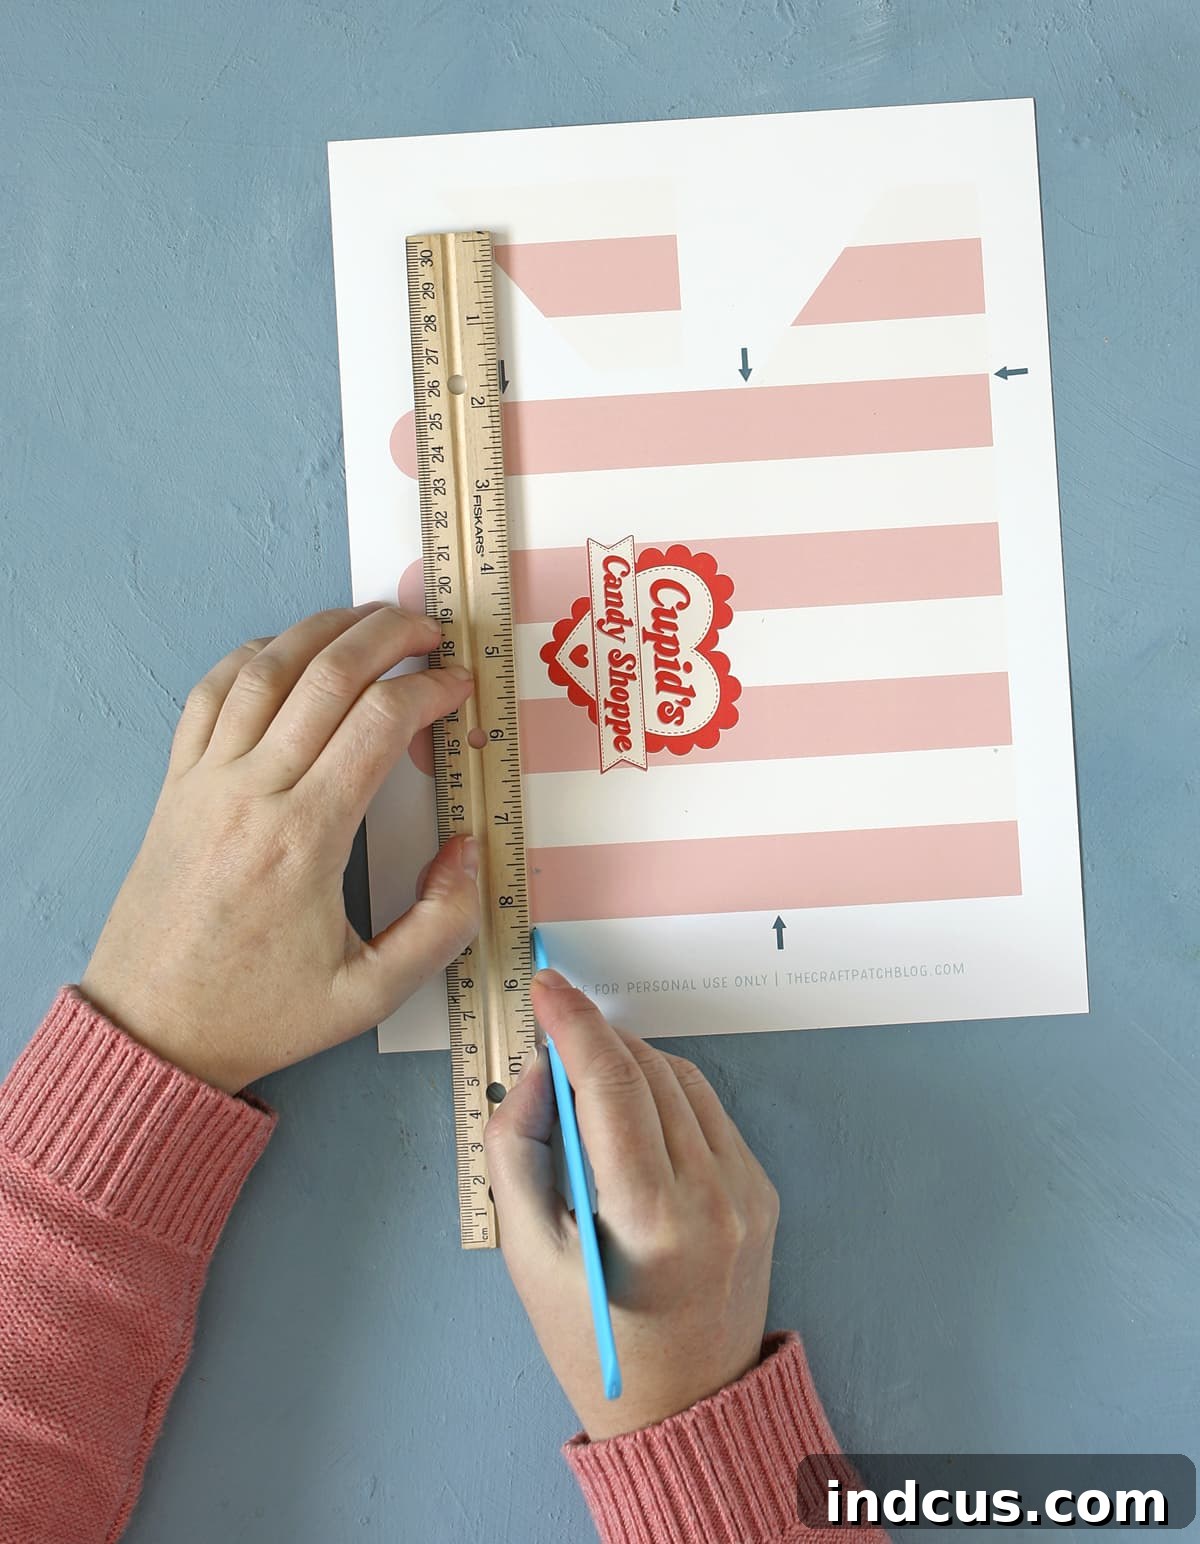
Before you start cutting, carefully locate the subtle gray arrows printed on the design. These arrows are your precise guides for creating perfect fold lines. Using a scoring tool (if you have one), or a suitable alternative like the back of a dull butter knife, a dried-out ballpoint pen, or a stylus, and a straight-edge ruler, carefully score along these indicated lines. Scoring creates a clean, defined crease that allows for a crisp, professional fold, which is key to achieving a polished look without any visible lines on your finished project. Once all lines are accurately scored, proceed to carefully cut out both the main awning shape and the smaller side piece using sharp scissors or a precision craft knife. Take your time for the best results!
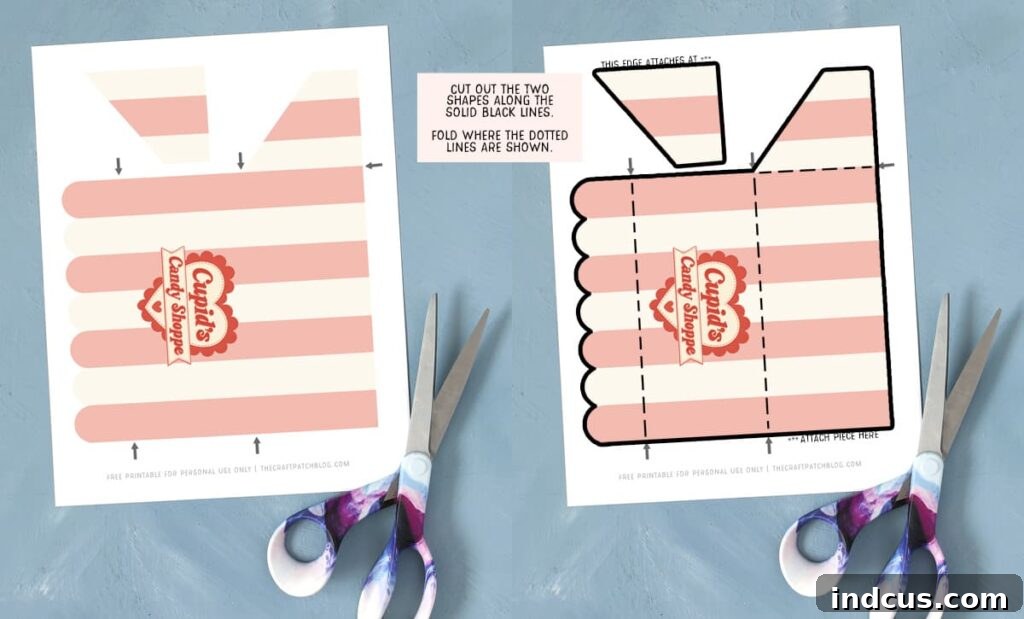
After carefully cutting out both main shapes (refer to the outlined sections in the photo below for clarity on precisely where you should cut), you’ll clearly see the extra side piece and understand exactly how it integrates with the main awning. Precision in cutting will directly lead to a more polished, neat, and professional-looking final awning assembly.
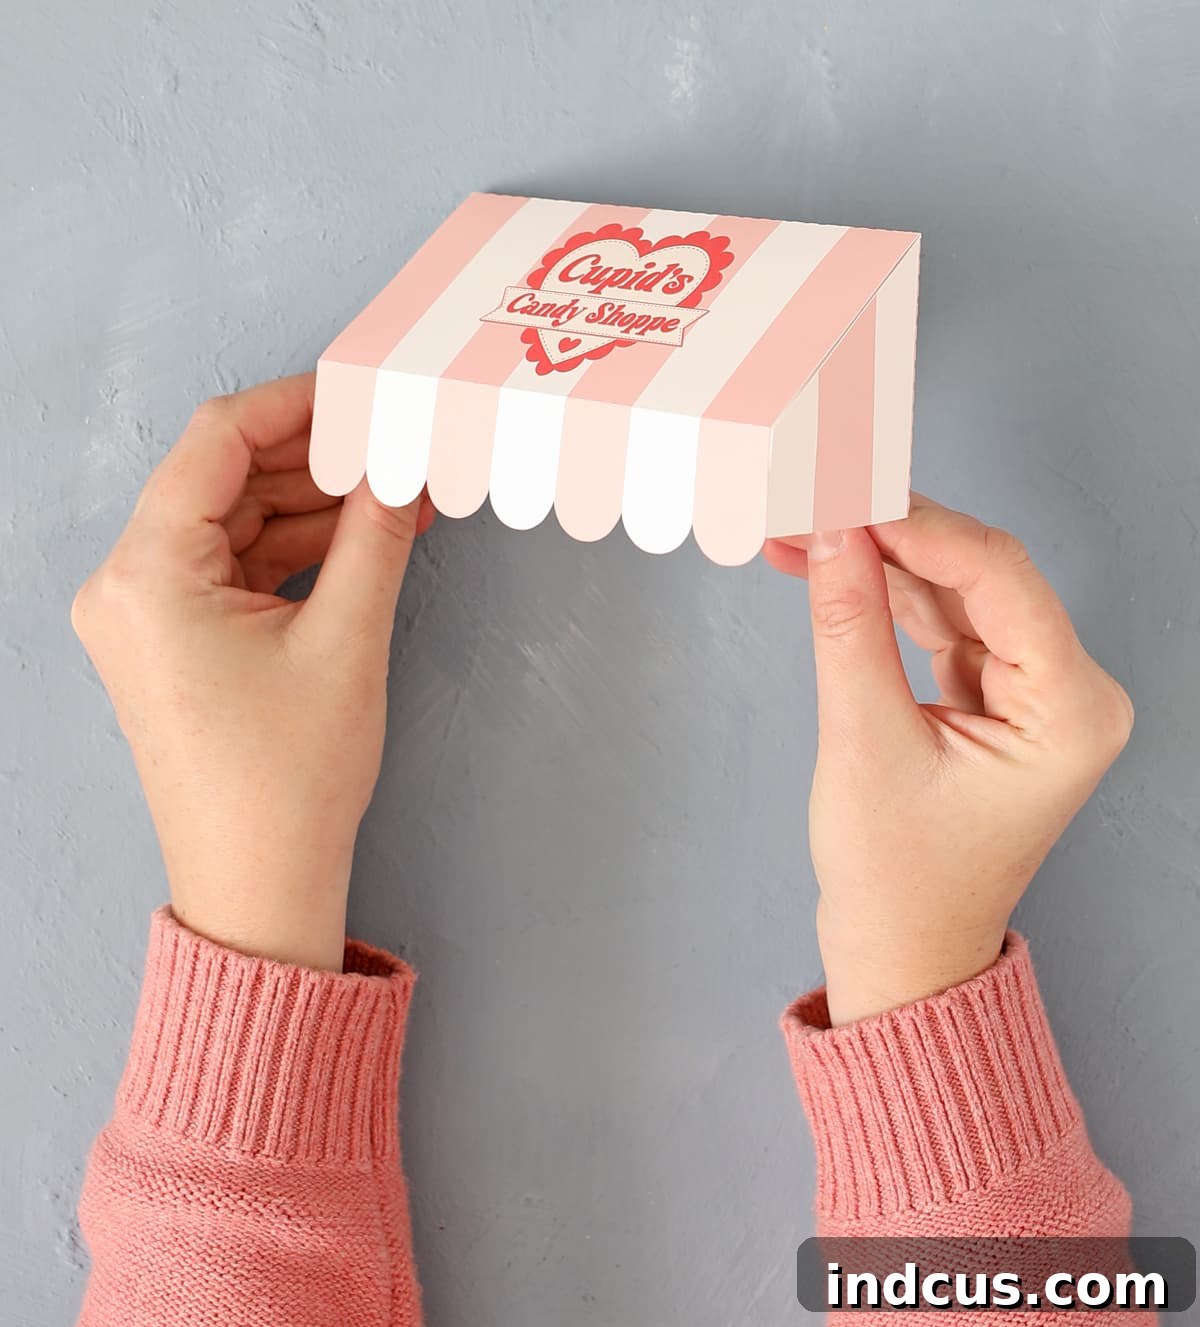
Once both the main awning and side pieces are expertly cut out, regardless of your chosen cutting method, it’s time for the final assembly of the awning itself. Fold all the scored lines away from you, creating crisp, defined creases that give the awning its classic shape. Then, using small pieces of clear tape, carefully attach the smaller side pieces to the main center awning piece. Ensure the tape is applied neatly from the inside to hide it as much as possible. For a complete visual demonstration and extra guidance, consult the video tutorial linked at the bottom of this post – it clearly illustrates the folding and taping process, making it easy to follow along. When finished, your paper awning should precisely resemble the charming structure shown in the image below, perfectly shaped and ready to adorn your new candy shop!
Step 5: Attaching Your Shamrock Sweets Awning to the Display
Now, carefully position your beautifully crafted cardstock awning onto the wooden dowels that you previously attached to the crate structure. Take a moment to adjust its placement to ensure it’s centered and visually appealing. Use small, discreet pieces of clear tape to secure it firmly in place against the dowels. The ingenious beauty of using clear tape here is its flexibility and non-permanence. It holds the awning firmly enough to display proudly, but also allows you to easily peel it off without damage when you’re ready to swap in a new, seasonally themed awning for another holiday down the road. This ingenious design makes your candy shop truly versatile and endlessly customizable for every celebration!
Step 6: Adding Festive Shamrock Details and Filling with Treats
To perfectly complete the St. Patrick’s Day theme, we’ve included matching shamrock printables in the same convenient download folder as your awning. Print these out, carefully cut them into individual shamrock shapes, and then attach them to the lids of your small candy jars. These small, thoughtful details add an extra layer of charm, cohesion, and festive spirit to your entire display. Consider using a small dab of hot glue or a piece of clear tape to securely attach them to the jar lids, ensuring they stay put.
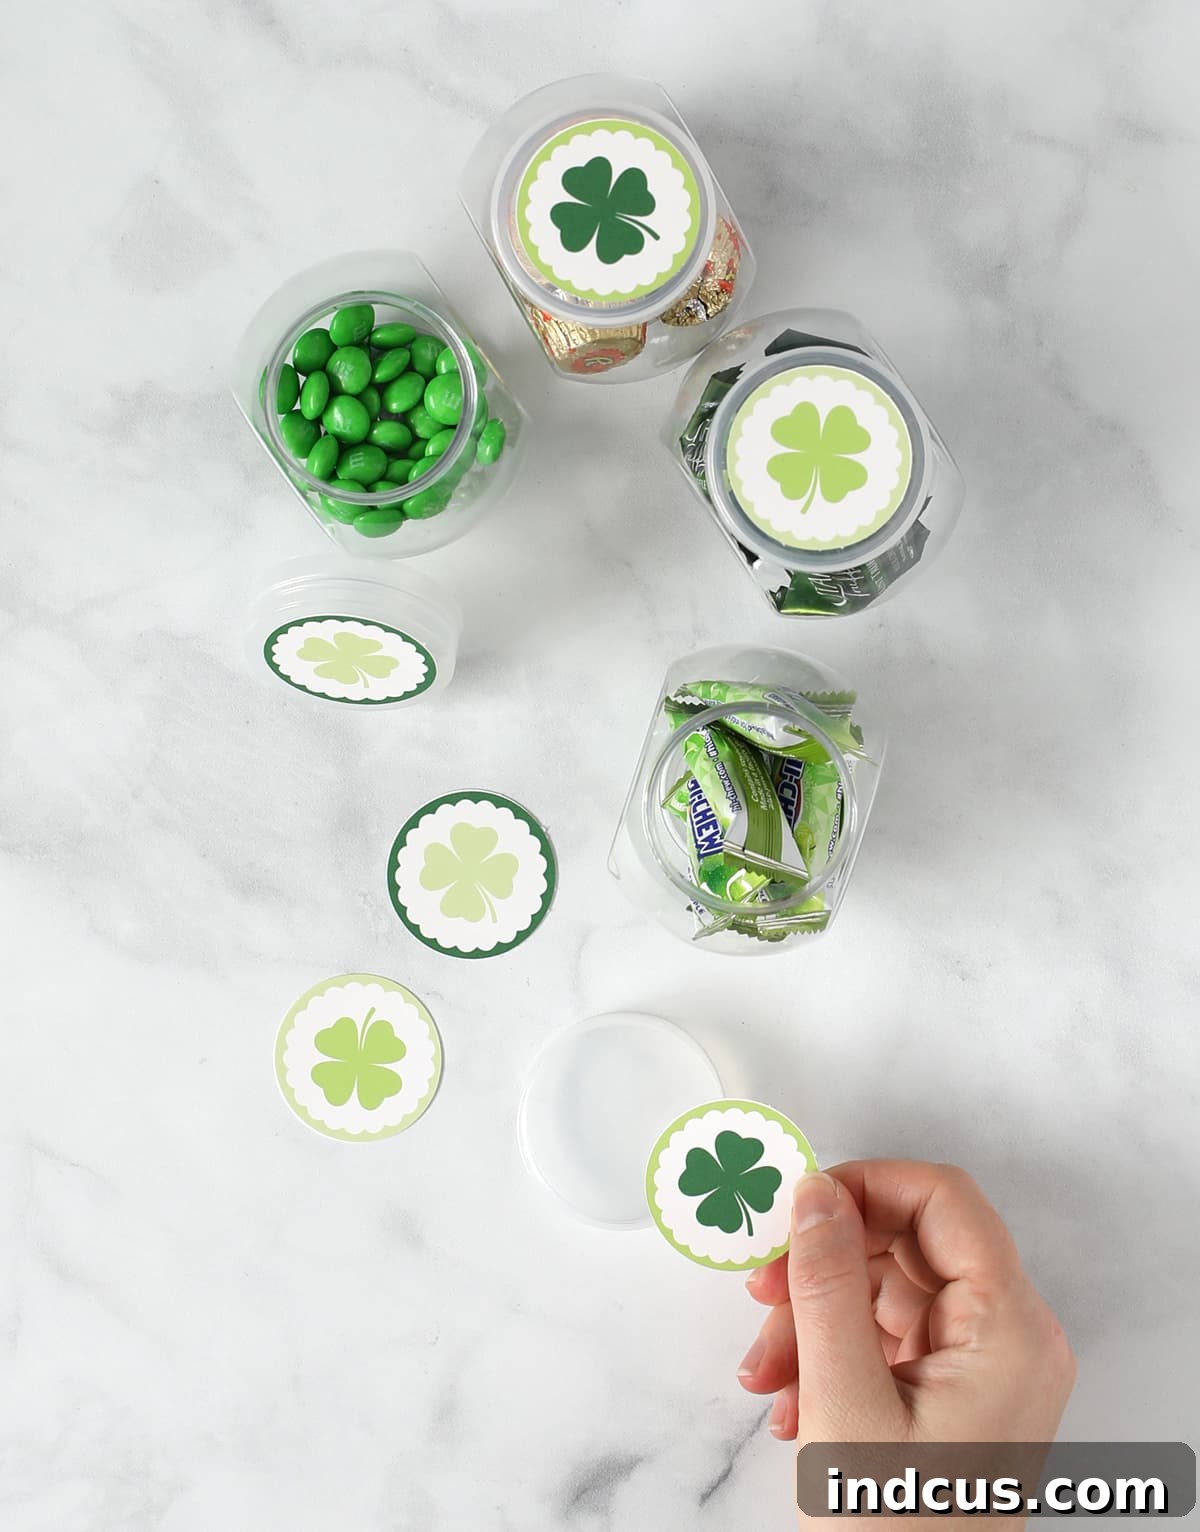
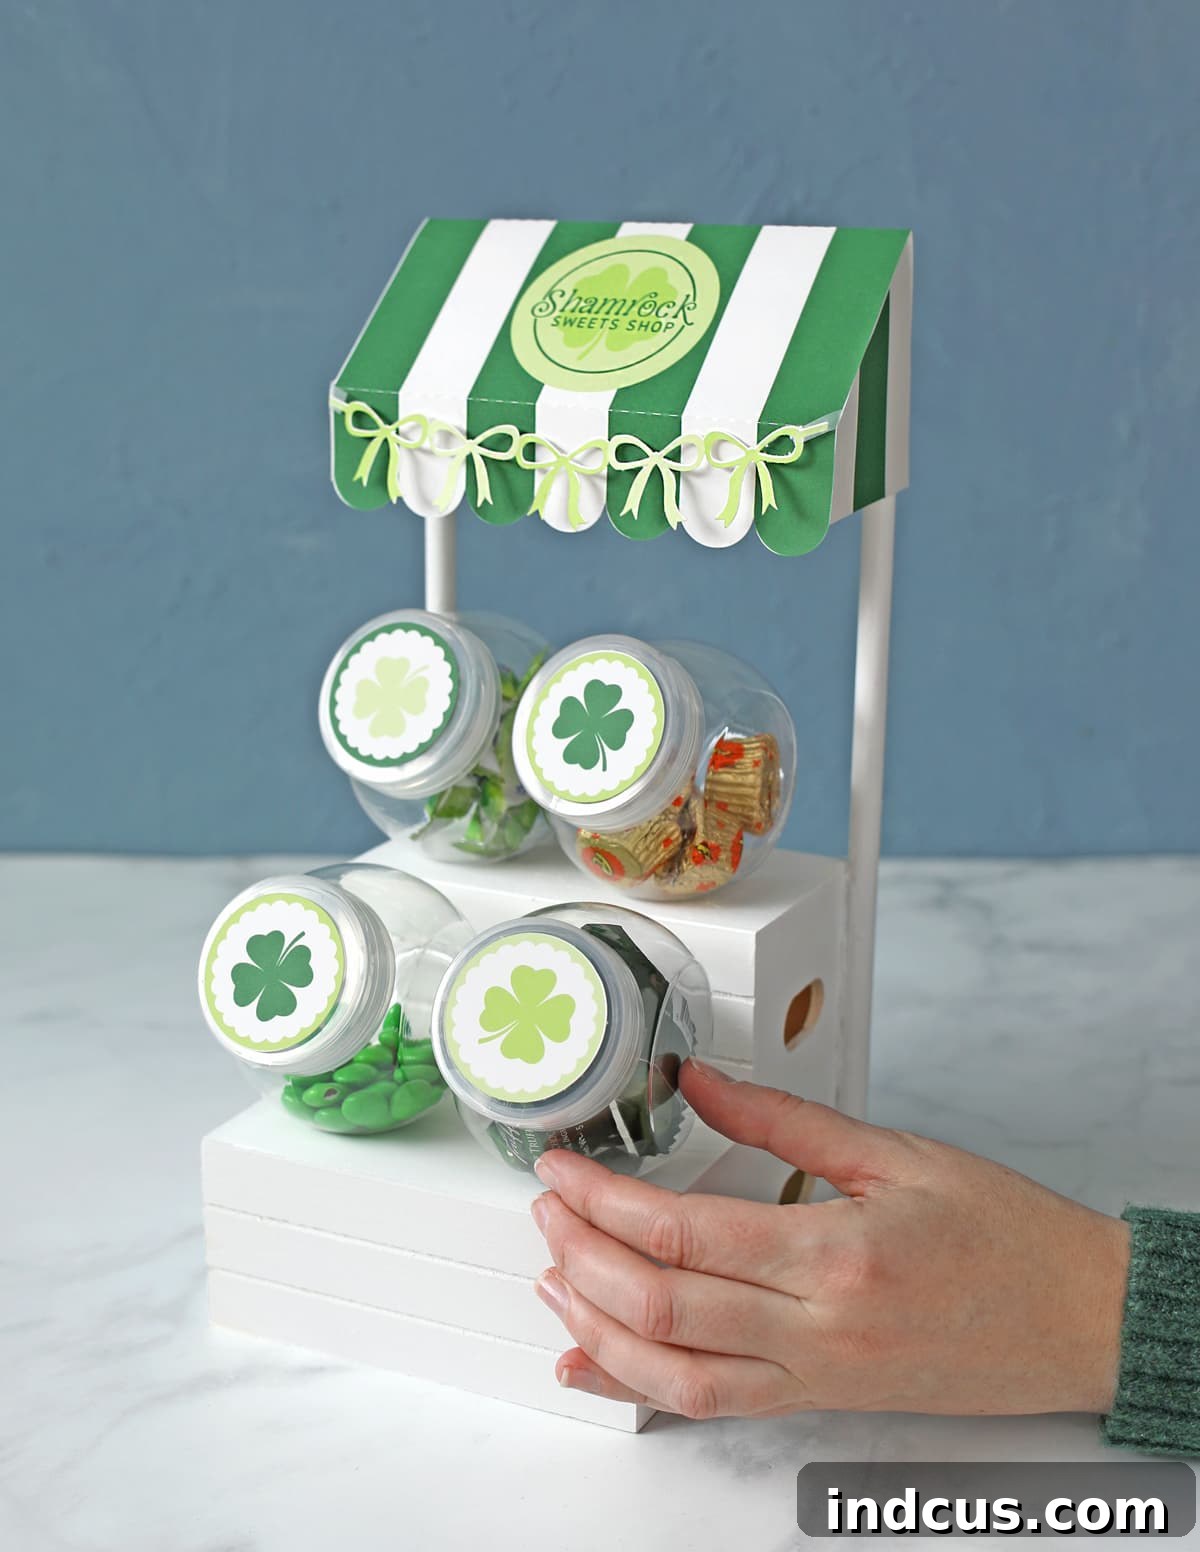
Finally, it’s time for the most delicious and rewarding part! Fill each of your beautifully decorated candy jars with your favorite St. Patrick’s Day themed treats. Think vibrant green jelly beans, shimmering gold chocolate coins, colorful rainbow candies, or even homemade shamrock-shaped cookies. Arrange the filled jars thoughtfully on the different tiers of your newly constructed wooden candy stand. Step back and admire your handiwork – your delightful Shamrock Sweets Shop is now complete, overflowing with charm and ready to bring a touch of Irish cheer and sweetness to your home! It’s sure to be a focal point and a conversation starter for your St. Patrick’s Day festivities.
Tips for Personalization and Seamless Seasonal Swaps
The true magic and enduring appeal of this Dollar Tree candy shop display lies in its incredible adaptability. Once the basic, neutral white structure is built, you possess a versatile canvas for decorating for every season and celebration throughout the entire year. This modular design ensures your craft remains relevant and exciting. Here are some inspiring ideas to spark your creativity and encourage continuous use:
- Easter Wonderland: Easily swap out the shamrock awning for a pastel “Easter Egg Hunt,” “Bunny’s Treats,” or “Spring Sweets” themed printable. Fill the jars with vibrant jelly beans, delicious chocolate eggs, and fluffy marshmallow chicks for a truly enchanting display.
- Summer & Patriotic Fun: For Fourth of July celebrations or general summer fun, design an “American Sweets” or a classic “Lemonade Stand” awning. Use an array of red, white, and blue candies, or opt for bright, refreshing fruit-flavored treats to capture the essence of summer.
- Autumn & Halloween Haunts: Transform your shop into a “Spooky Sweet Shoppe” or a quaint “Pumpkin Patch Candies” stand. Use orange and black themed printables, and fill the jars with classic candy corn, wiggly gummy worms, and mini chocolate bars for a frightfully delightful display.
- Christmas & Winter Wonderland: Create a “Santa’s Sweet Treats,” “Gingerbread Lane,” or “Winter Wonderland Candies” awning. Stock the jars with traditional candy canes, rich peppermint bark, and an assortment of festive chocolates to spread holiday cheer.
- Birthdays & Special Occasions: Customize an awning with a specific name, age, or party theme, making it a truly unique and memorable display for any birthday party, baby shower, or special event.
Remember to store your seasonal awnings flat and protected in a folder or box to ensure they remain in perfect, pristine condition for next year’s festivities. This DIY project is not just a one-time craft; it’s an intelligent investment in year-round festive fun and beautiful, customizable home decor!
Maintaining Your Dollar Tree Candy Shop Display
To ensure your charming candy shop remains a delightful and lasting part of your seasonal decor for many years to come, a little care and attention go a long way. Since the primary structure is made of wood and paper, it’s crucial to avoid exposure to excessive moisture or humidity, which can warp the wood or damage the paper awning. For routine cleaning, simply wipe down the wooden crate base with a dry or very slightly damp cloth to remove any dust or spills. The glass candy jars can be easily hand-washed with mild soap and warm water after emptying their contents. When storing your display between holidays or seasons, carefully disassemble the awning (which is made easy by the tape attachment) and store it flat to prevent creases or damage. The sturdy wooden base can be kept in a dry, safe place where it won’t be crushed or exposed to extreme temperatures. With proper care, your Dollar Tree candy shop will be ready to bring joy and sweetness to your home, season after season.
Shamrock Sweets Shop Video Tutorial
For a complete visual guide and additional tips that bring every step to life, watch our detailed step-by-step video tutorial:
We truly hope you thoroughly enjoy crafting this delightful St. Patrick’s Day candy shop! It’s an inexpensive, incredibly fun, and rewarding project that adds a personalized, festive touch to your home decor. Whether it’s brimming with vibrant green goodies, shimmering gold chocolates, or a rainbow of delicious treats, your Shamrock Sweets Shop is sure to be a charming conversation starter and a source of sweet cheer for everyone who sees it. Happy crafting and a very Happy St. Patrick’s Day!
Explore More Creative Candy Shop Printables for Every Season!
Loved creating your St. Patrick’s Day display? The fun doesn’t stop here! Discover our full collection of customizable candy shop printables designed for every holiday and special occasion. Transform your versatile Dollar Tree base into a new festive theme all year long with our easy-to-use designs!
-
Cupid’s Candy Shoppe Valentine’s Day Craft
-
DIY Easter Candy Shop
-
Farmer’s Market Fruit Stand Candy Shop Craft
-
Halloween Candy Shop Craft
-
Shamrock Sweets Shop St. Patrick’s Day Craft
-
Patriotic Candy Shop Craft







