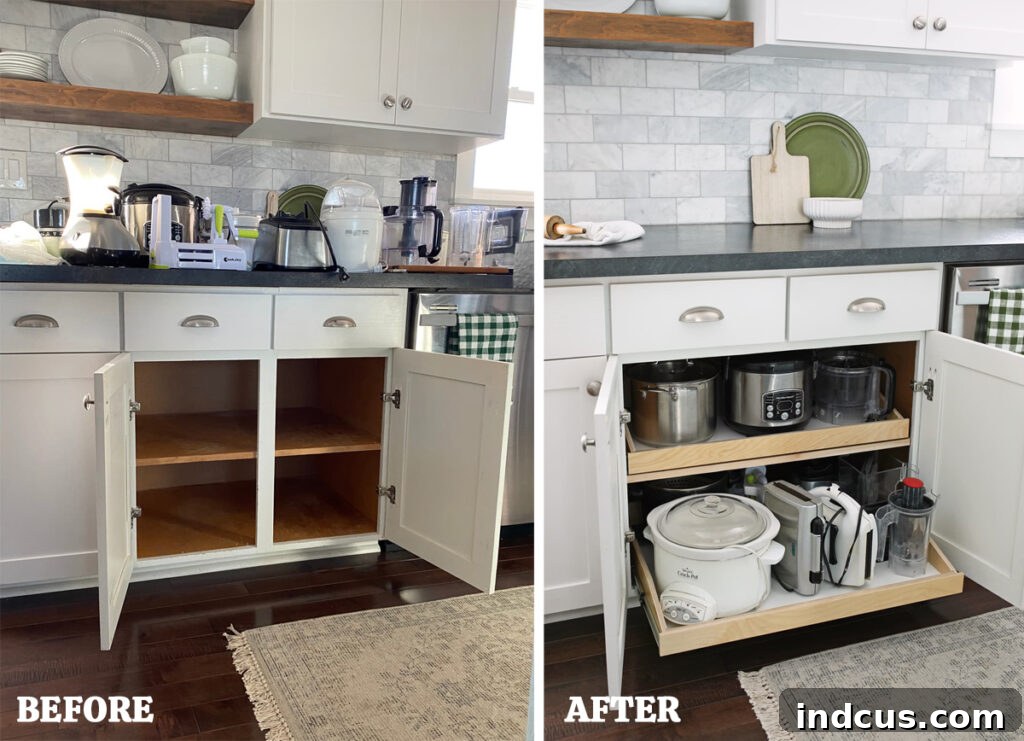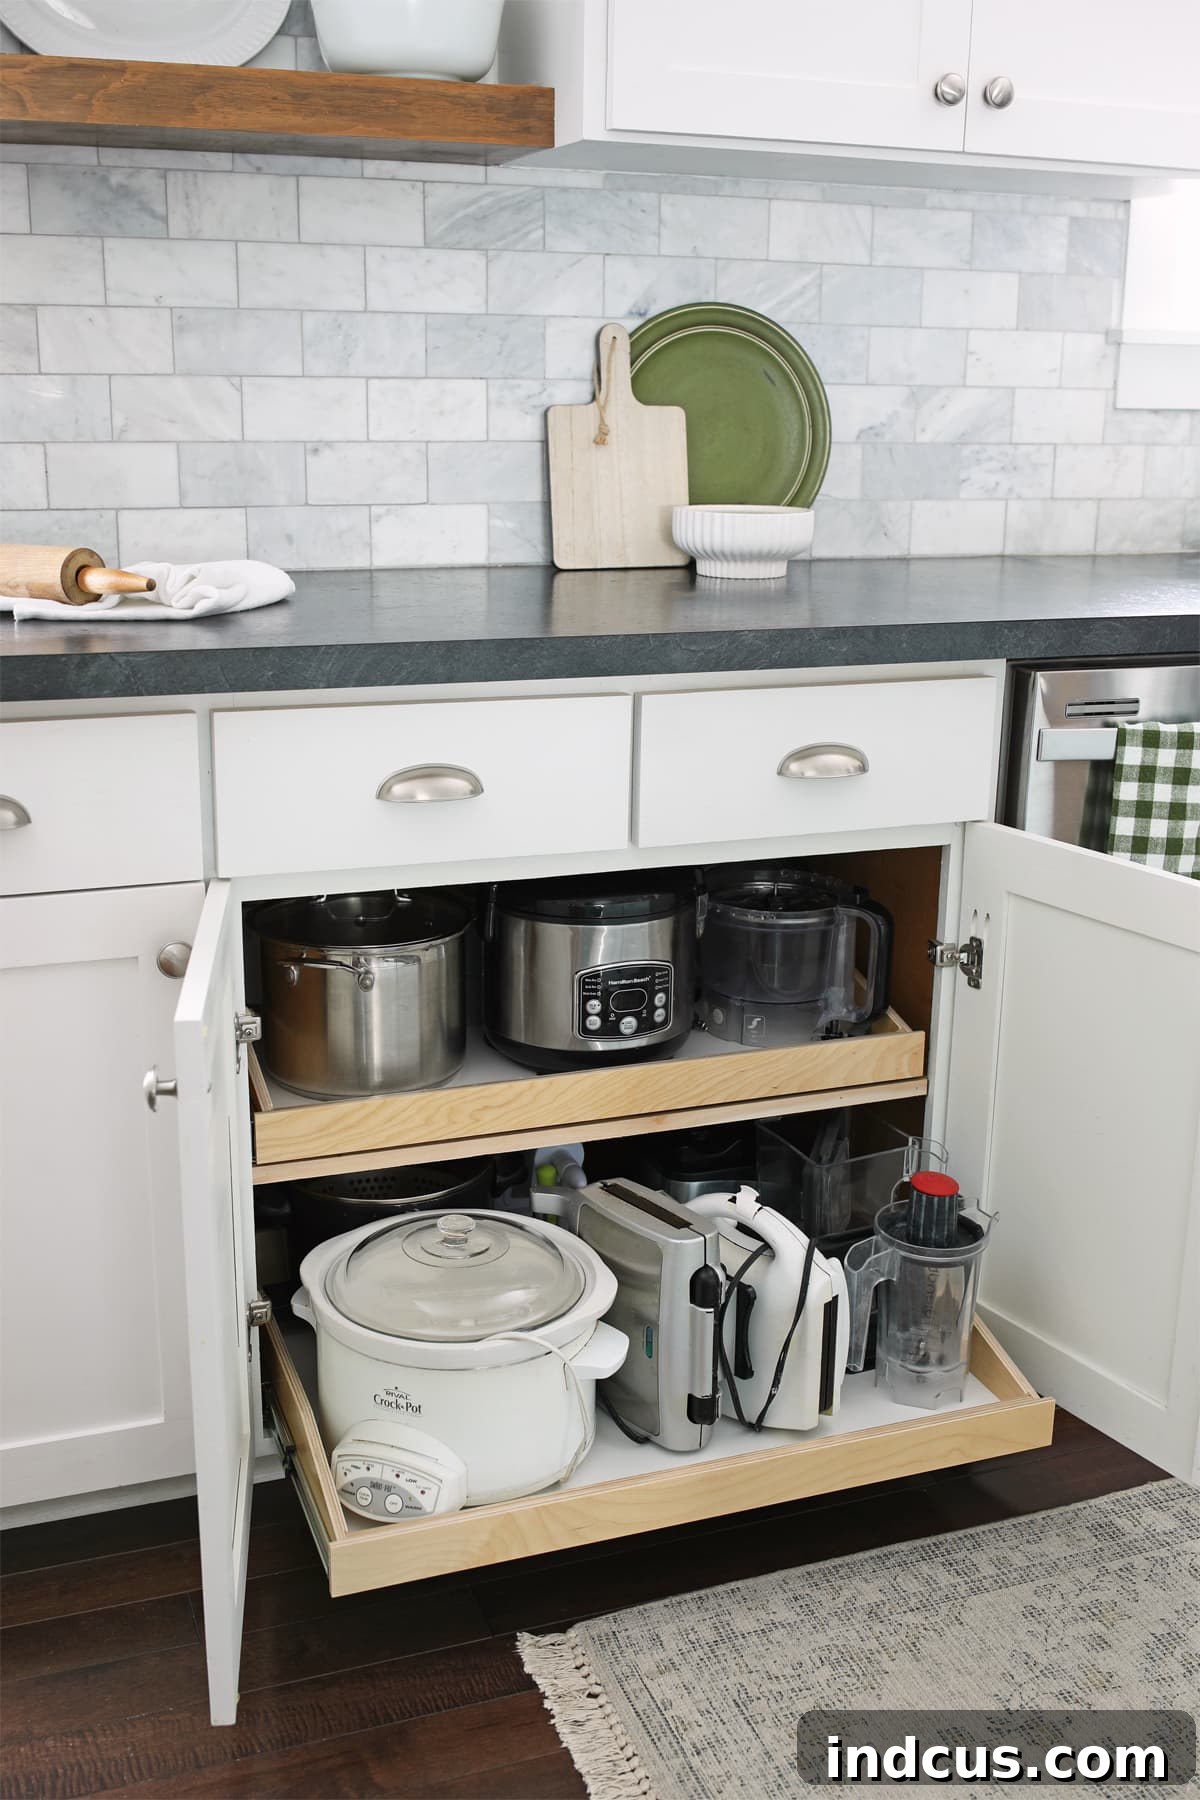
Transform Your Kitchen: The Ultimate Guide to DIY Pull-Out Shelves for Seamless Cabinet Organization
This post includes affiliate links as part of the Lowes Creator Program. I receive commission for purchases made from this post. Your support helps keep this content free!
Every home chef dreams of a perfectly organized kitchen, where every utensil, pot, and appliance has its place and is easily accessible. Yet, many of us contend with frustrating, deep kitchen cabinets that swallow items whole, making daily tasks a chore. Let me introduce you to what used to be the most challenging cupboard in my entire kitchen:
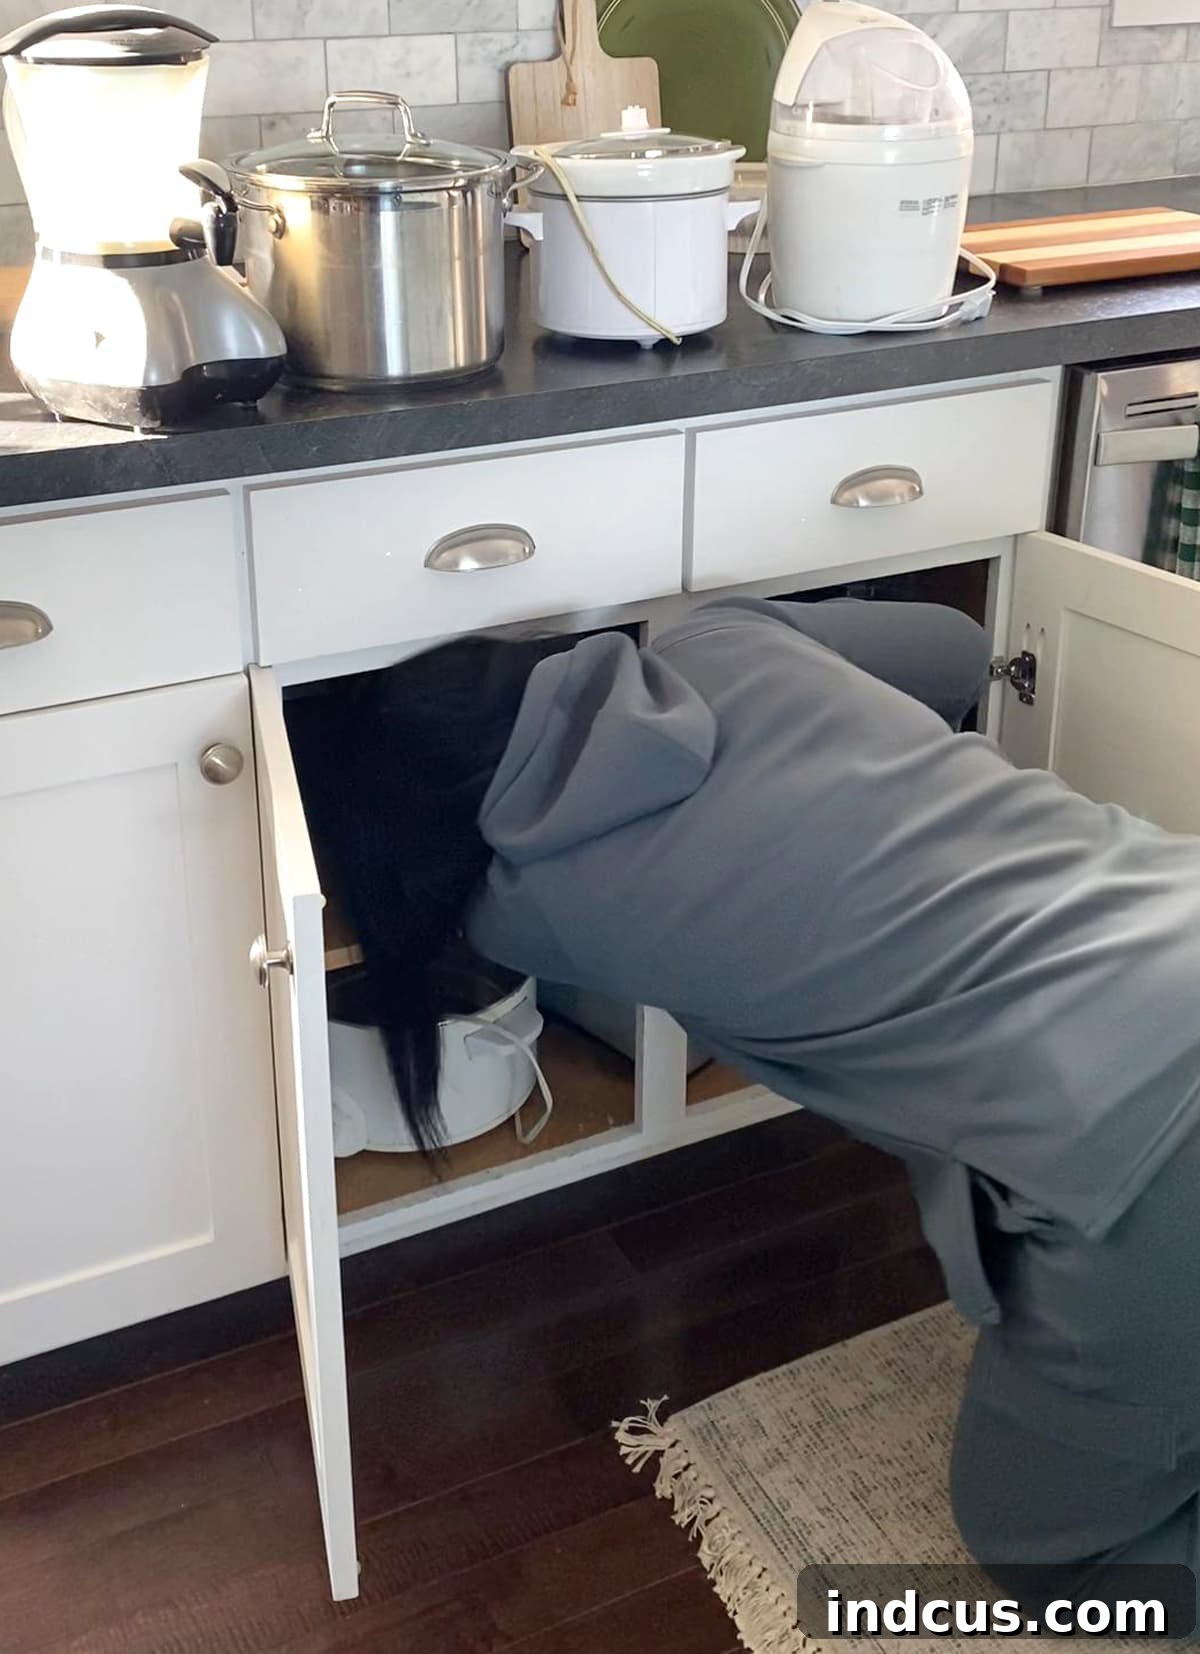
This particular cabinet was dedicated to housing all my small appliances – a notorious pain point in many kitchens. I constantly found myself shuffling items around, straining to reach the ones tucked away at the back. It wasn’t uncommon to pull out three different gadgets just to get to the one I actually needed. This cupboard was far from functional, and frankly, I had put off dealing with its chaos for far too long, like many busy homeowners do.
The thought of completely custom-built solutions often comes to mind, and while my husband is incredibly handy and could certainly craft something from scratch, time is a precious commodity we simply don’t have. I didn’t want to add unnecessary stress by asking him to squeeze in a large woodworking project. My goal was to find an effective, yet straightforward solution that wouldn’t consume our limited free time. So, I turned to the internet, determined to find a product that could transform this problem area.
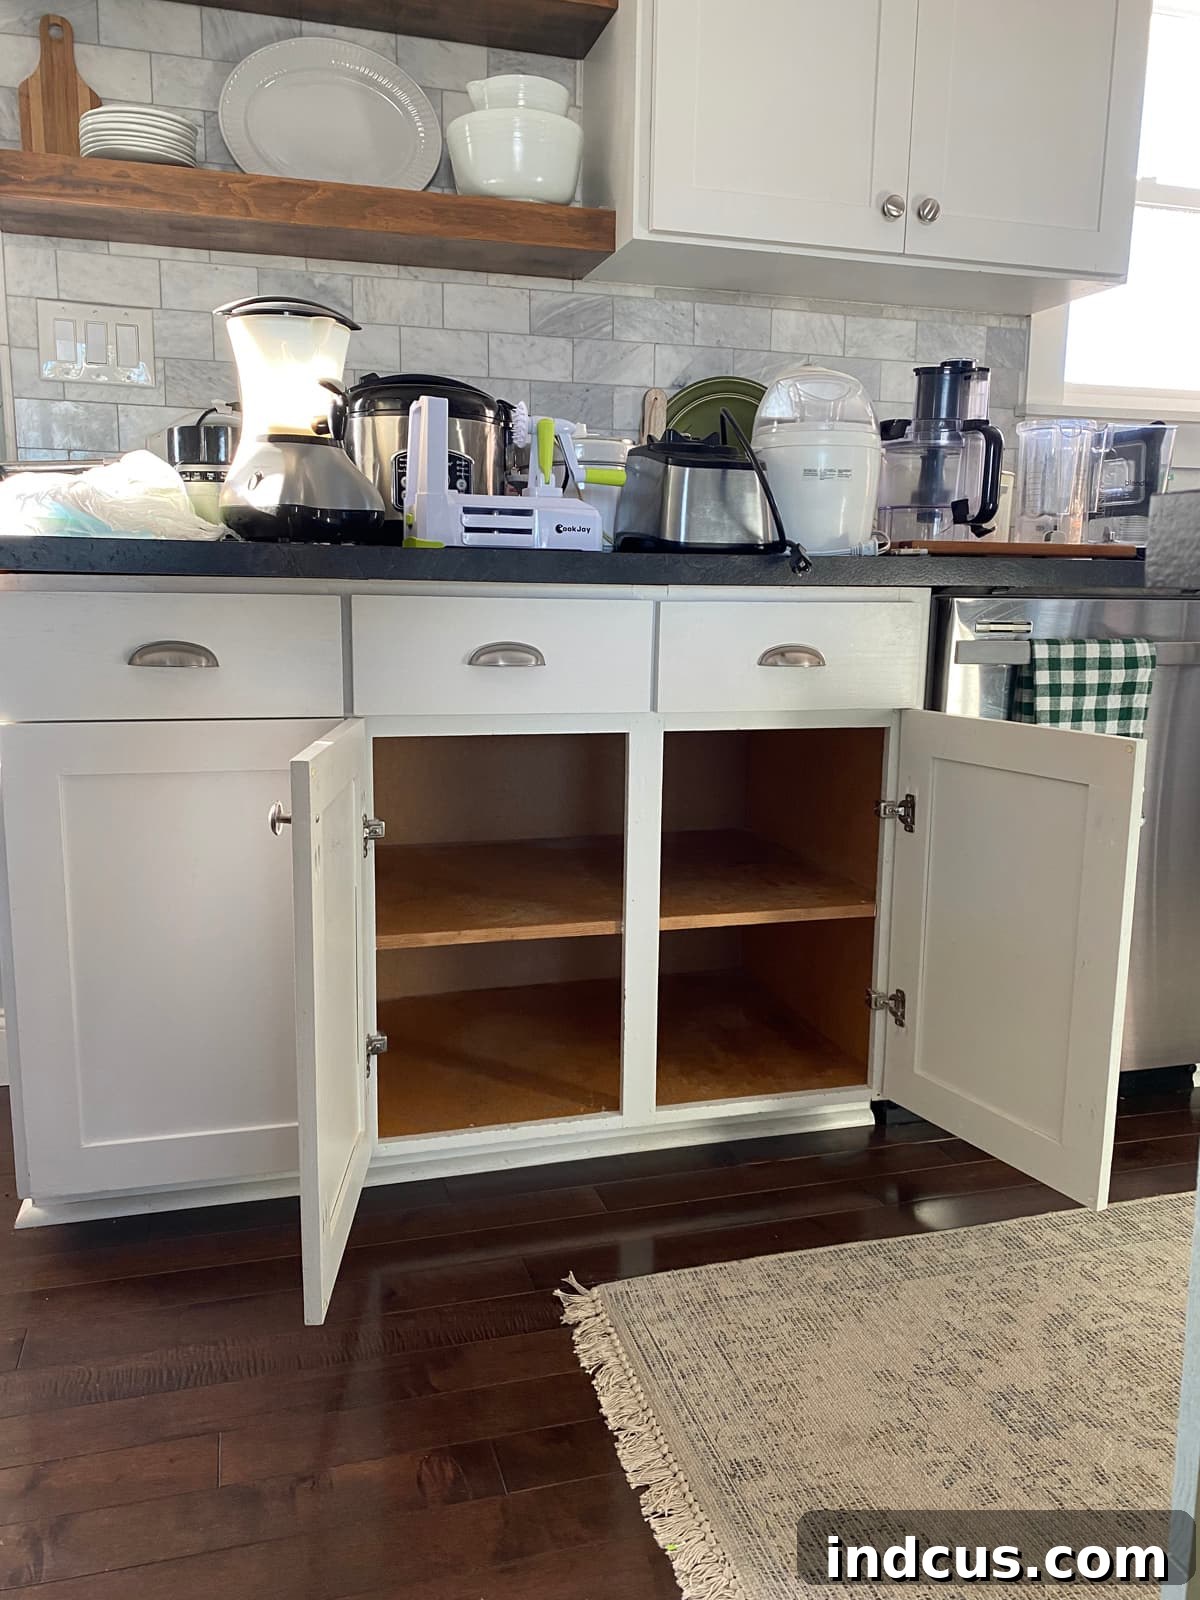
And that’s when I stumbled upon an absolute game-changer: the Slide-A-Shelf sliding shelf kit. This product is pure genius, meticulously designed to address every common frustration associated with deep cabinets. The brilliance of this kit lies in its custom sizing; you can enter your exact cabinet measurements and receive a shelf that fits your space perfectly. Beyond customization, its installation process is incredibly user-friendly, featuring a template that simplifies alignment and requires just four screws for the main attachment.
Now, while the actual shelf installation itself is indeed just four screws, converting a double cupboard (like mine) into a single, expansive pull-out drawer involves a few additional, yet equally manageable, steps. I’m eager to walk you through our entire process, demonstrating just how straightforward this home improvement project truly is. My hope is that by the end of this tutorial, you’ll feel fully confident and inspired to tackle this transformation in your own kitchen.
Step 1: Precision Ordering Your Custom Sliding Shelves
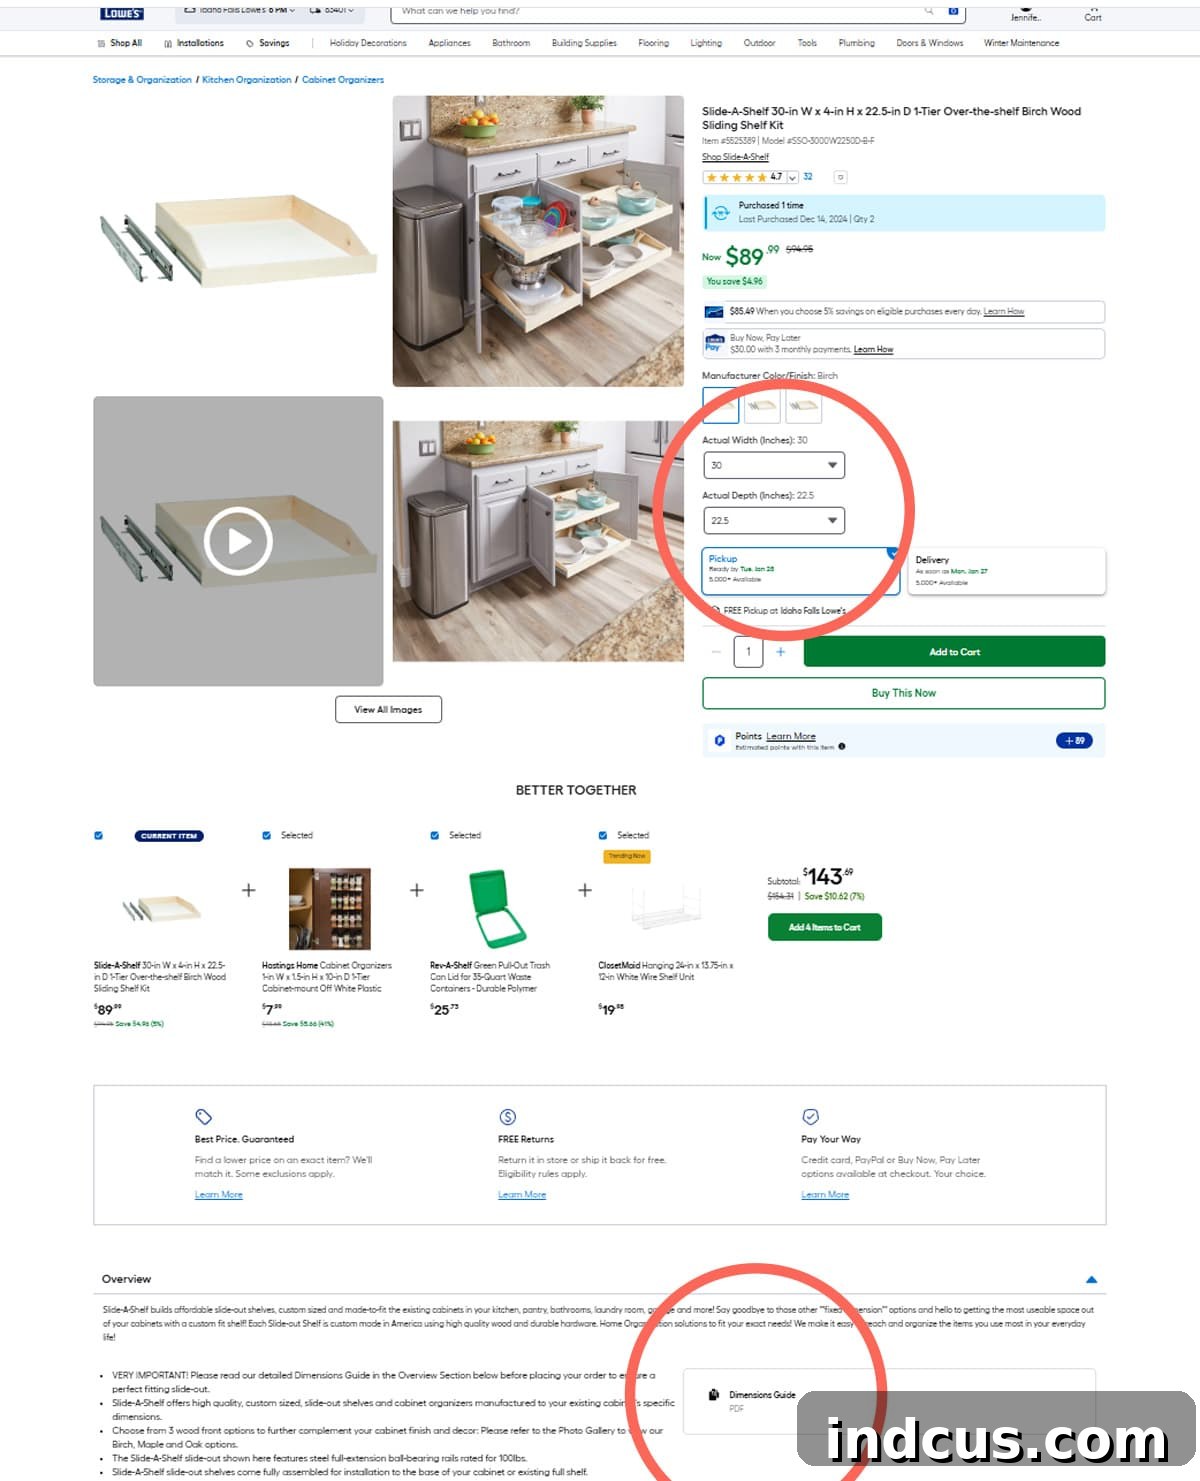
The foundation of a successful installation begins with ordering the right product. The specific solution I used, and highly recommend, is the Slide-A-Shelf Sliding Shelf Kit. Their website provides an exceptionally clear and comprehensive PDF dimensions guide, making the ordering process surprisingly simple.
CLICK HERE TO ORDER YOUR CUSTOM SLIDE-A-SHELF KIT
When you navigate to their ordering page, pay close attention to the measuring instructions. They’ve thoughtfully designed their guide to walk you through every critical dimension. I’ve circled the key areas in the image below to highlight where you’ll find the measuring directions and the size selection options. Accurate measurements are crucial for a perfect fit, ensuring your new pull-out shelves maximize every inch of your cabinet space and operate smoothly for years to come.
Step 2: Removing the Center Stile for Seamless Access
If you’re converting a double-door cabinet into a single, wide pull-out drawer, you’ll likely encounter a vertical piece of wood in the middle, known as a center stile. This piece acts as a divider and provides a closing surface for cabinet doors. If your specific cupboard doesn’t have a center stile blocking your desired pull-out shelf placement, you can happily skip this step!
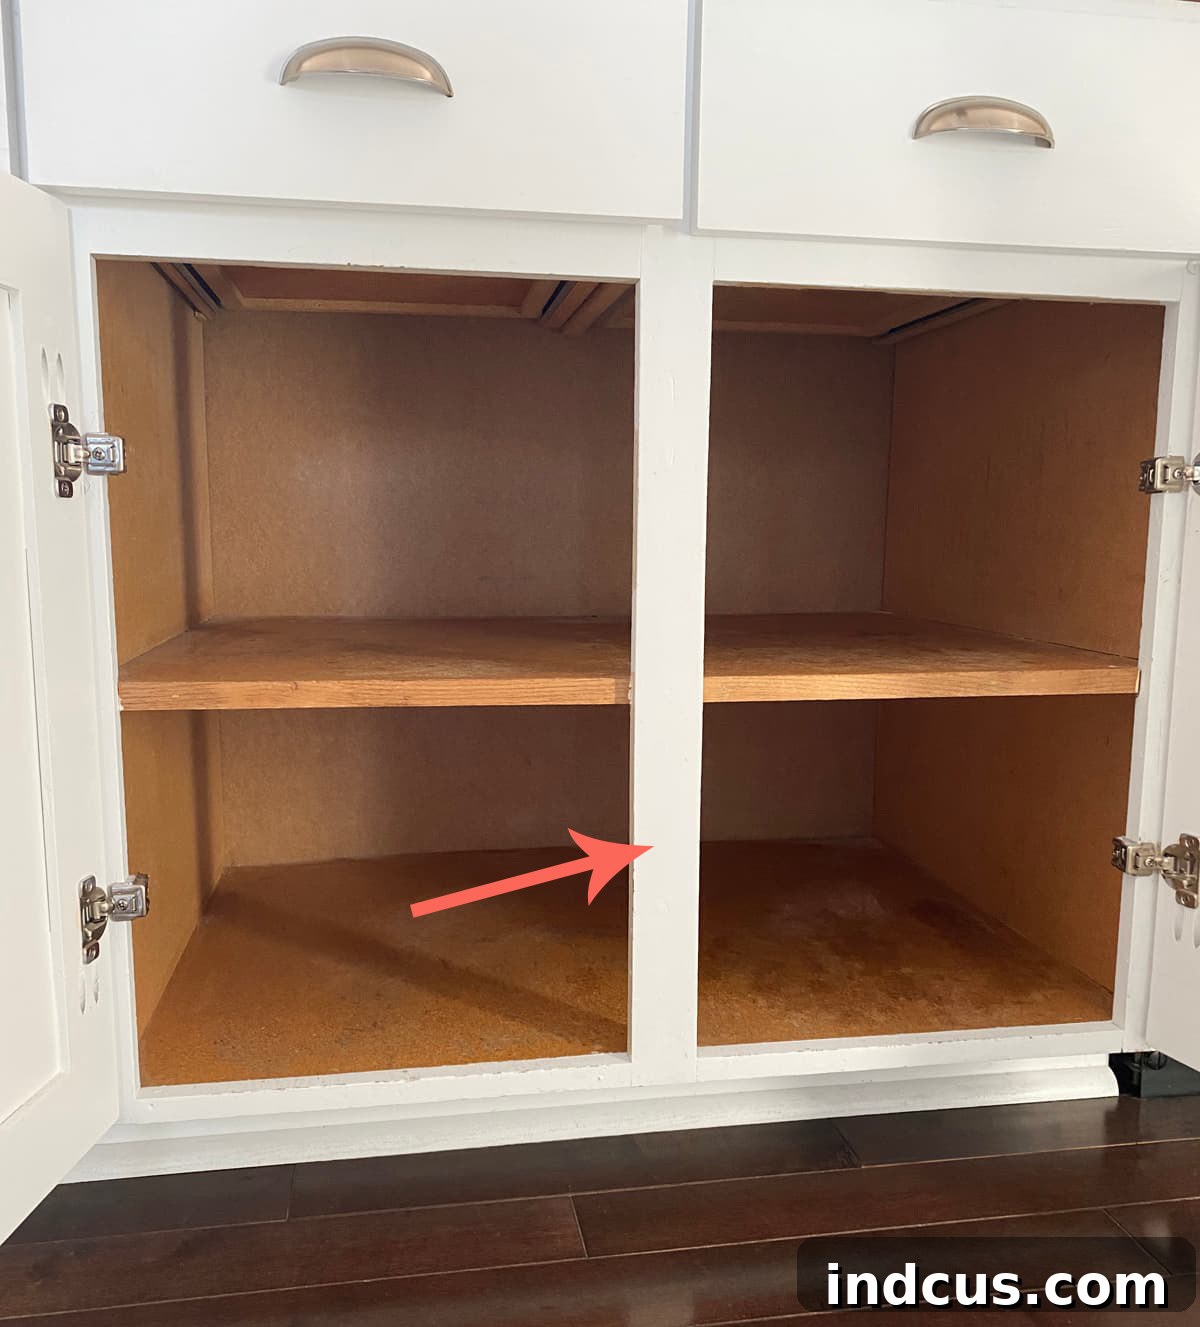
To maximize the storage potential and achieve the full width of our cabinet for our new, expansive pull-out drawers, this center stile definitely needed to be removed. My husband skillfully used a jig saw to cut the stile precisely, ensuring it was flush with both the top and bottom of the cabinet frame. This step is easier than it might seem, but it does require careful measurement and a steady hand for a clean cut.
A frequent question we’ve received is whether this center stile is structural. It’s important to clarify: this piece is typically not structural. It’s part of the cabinet’s face frame, primarily serving as an aesthetic element and a stop for the cabinet doors. The actual cabinet box is robustly designed to bear the weight of your countertops and contents. Removing the stile will not compromise the integrity of your cabinet. Its main function is purely cosmetic and functional for door closure.
Upon removing the center stile, you might notice a gap or unevenness where it was once attached to the cabinet’s horizontal shelf. In our case, the front edge of the existing shelf was also quite dinged up from years of heavy appliances sliding in and out. This presented a perfect opportunity for an upgrade. We opted to replace the entire damaged front edge of the shelf with a new piece of scrap wood, cut to size. This not only filled the gap left by the stile but also provided a fresh, clean surface for the new drawers.
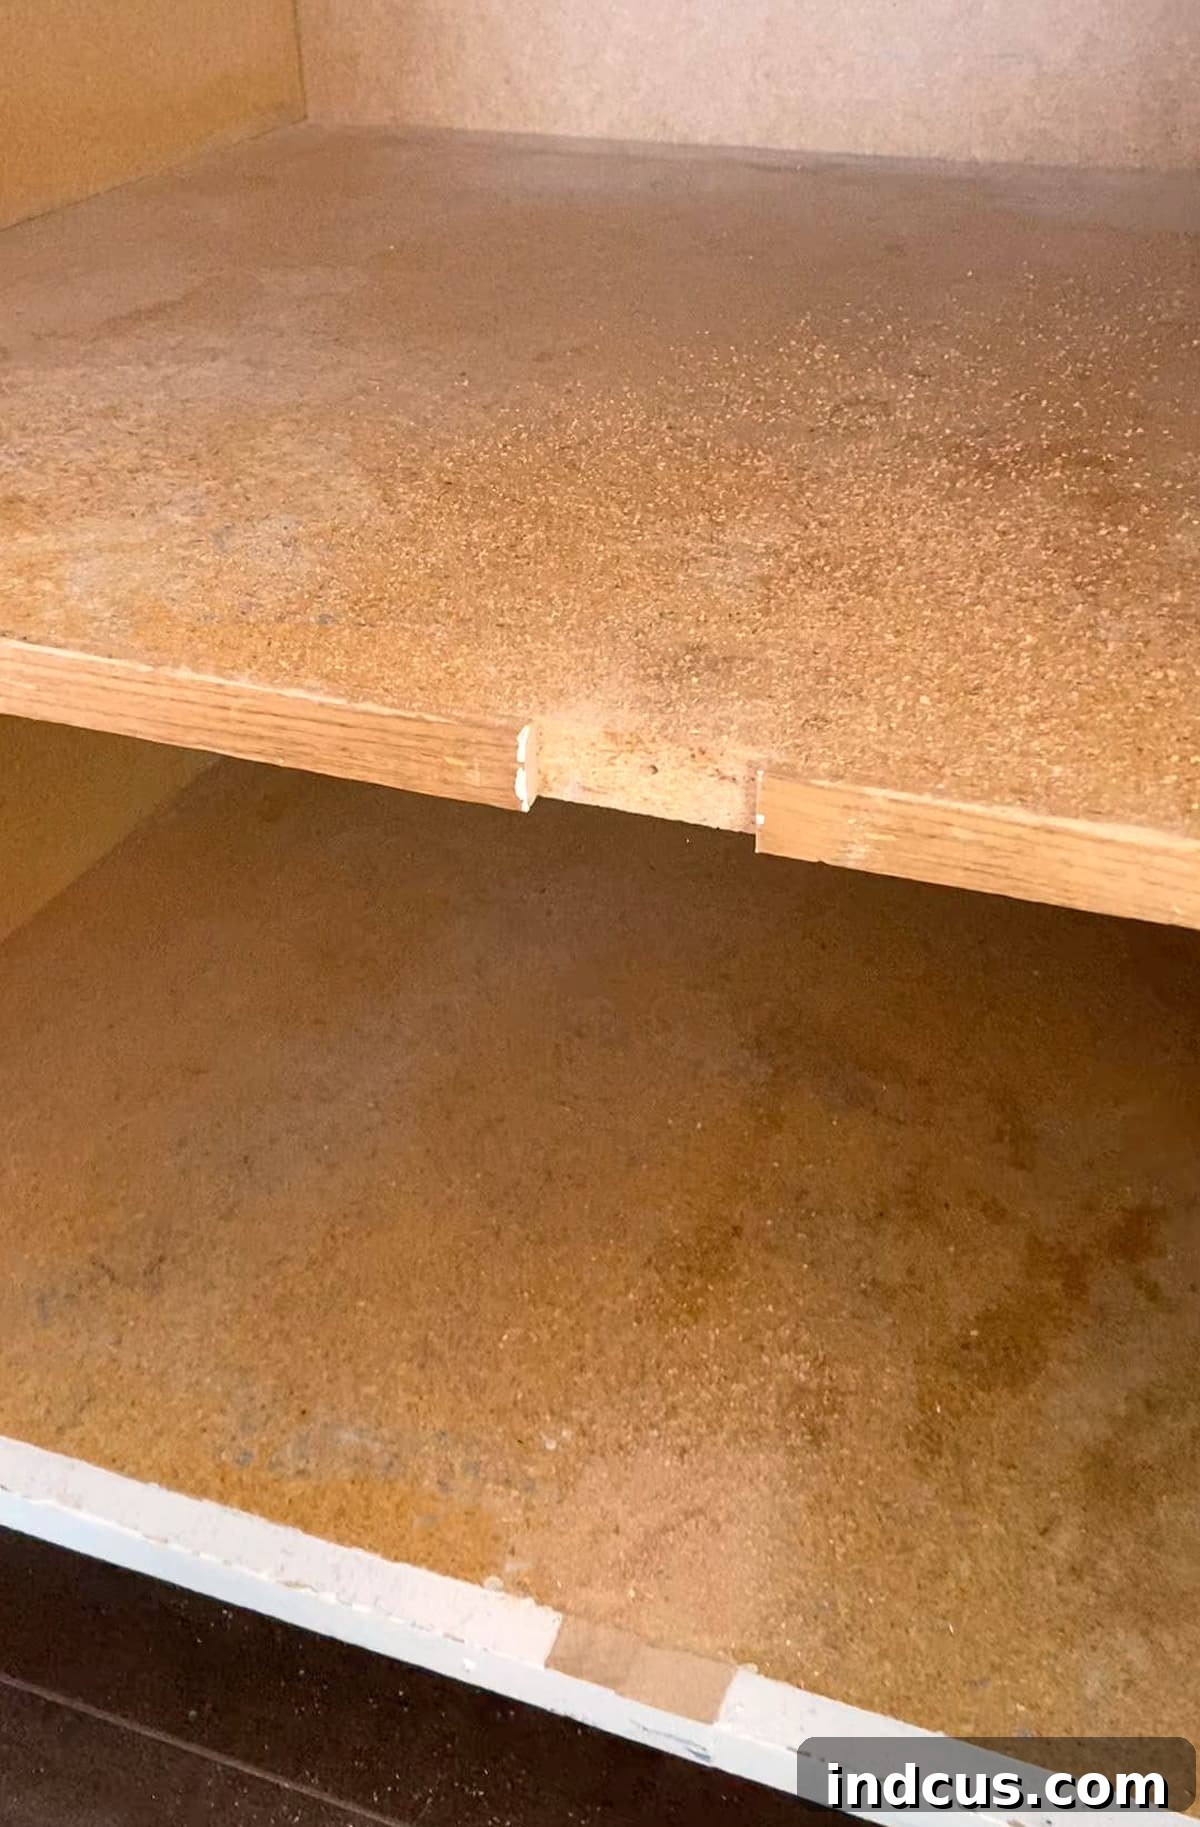
After installing the new edge piece, I sanded down the top and bottom edges until they were perfectly smooth, creating a seamless transition. A quick touch-up with matching paint, and the cabinet opening looked as if the center stile had never existed. This meticulous finishing touch ensures a professional and integrated look for your newly optimized cabinet.
Step 3: Effortless Installation of Your New Sliding Drawers
Here’s where the Slide-A-Shelf truly shines – this is by far the easiest step of the entire transformation! The shelves arrive with incredibly clear and detailed instructions, but the essence of the process is brilliantly simple. Each kit comes with specialized templates; all you need to do is position the template within your cabinet, ensuring it’s level and aligned, and then drive four screws into place to secure the mounting hardware. It’s genuinely that straightforward, minimizing the typical complexities associated with installing drawer slides.
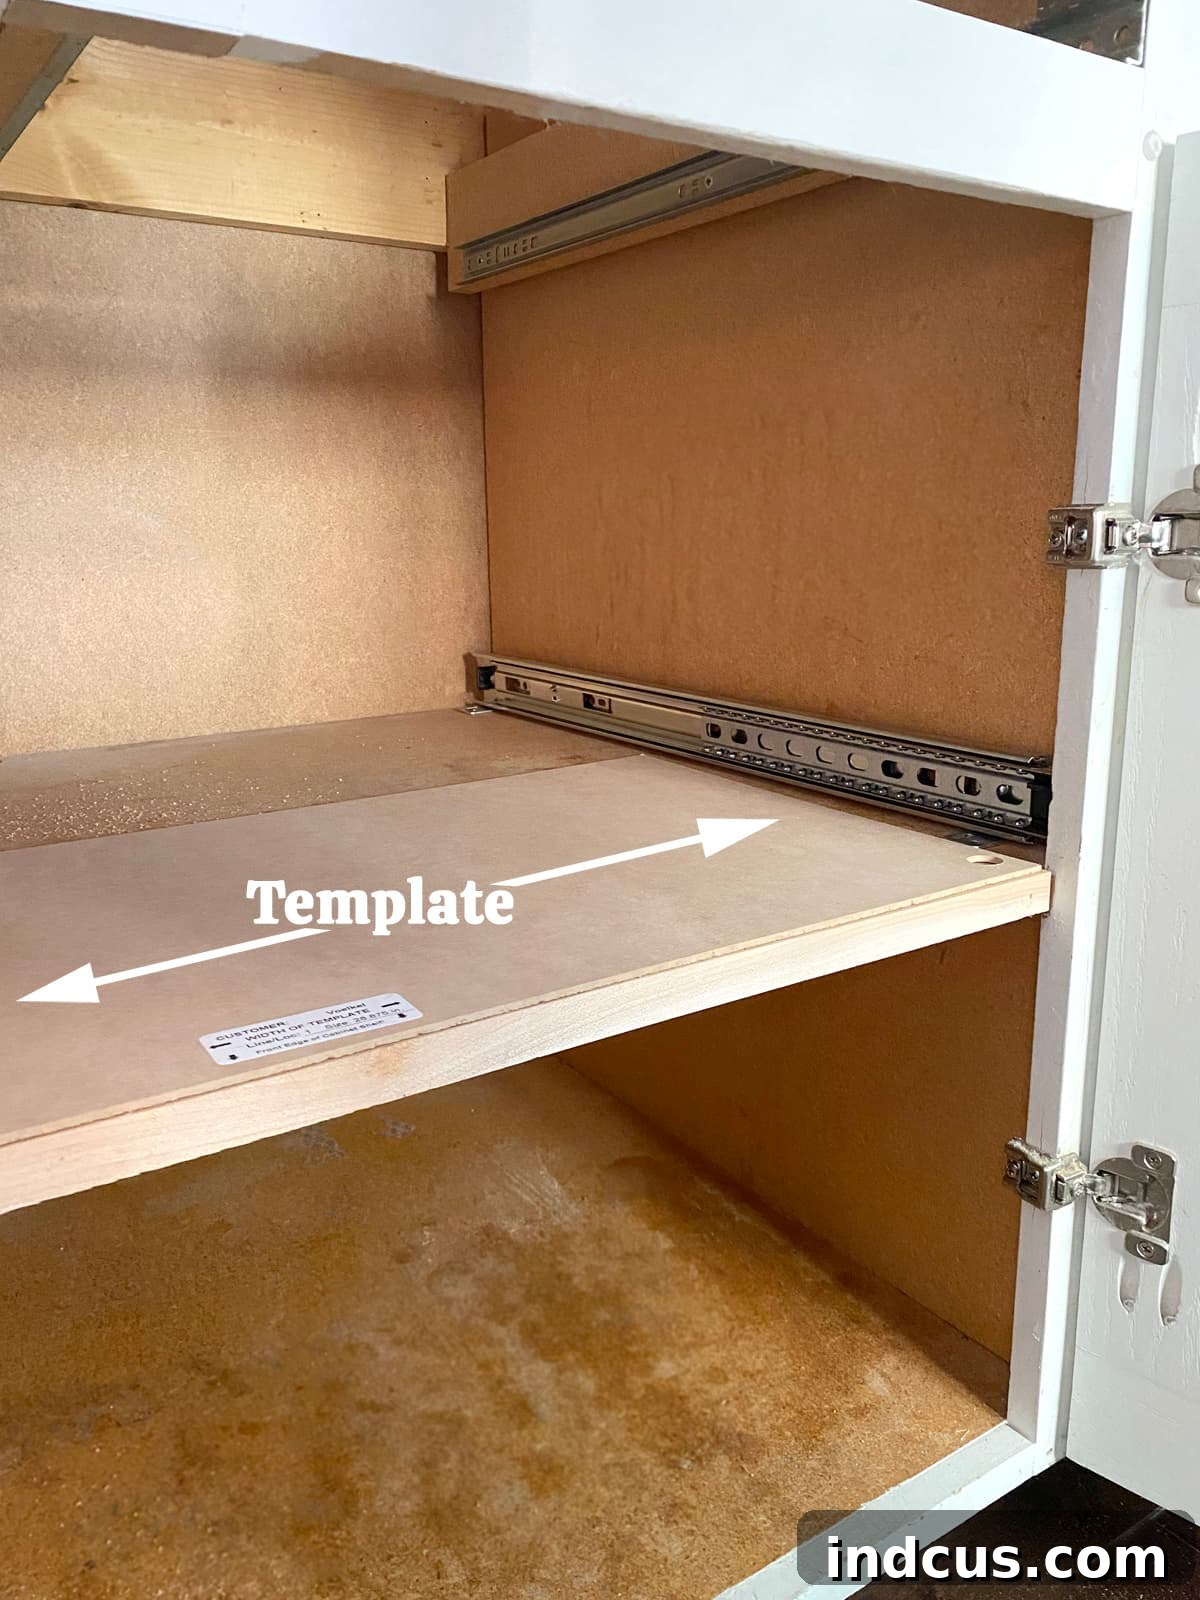
The beauty of the template system is that it perfectly aligns the sliding drawer hardware, eliminating any guesswork. Once the four screws for each side were securely fastened, we simply clipped the pre-assembled drawer hardware onto the cabinet-mounted hardware, and our new pull-out drawers were complete! The immediate gratification of seeing everything fit back into the cupboard with such neatness and order was truly astounding.
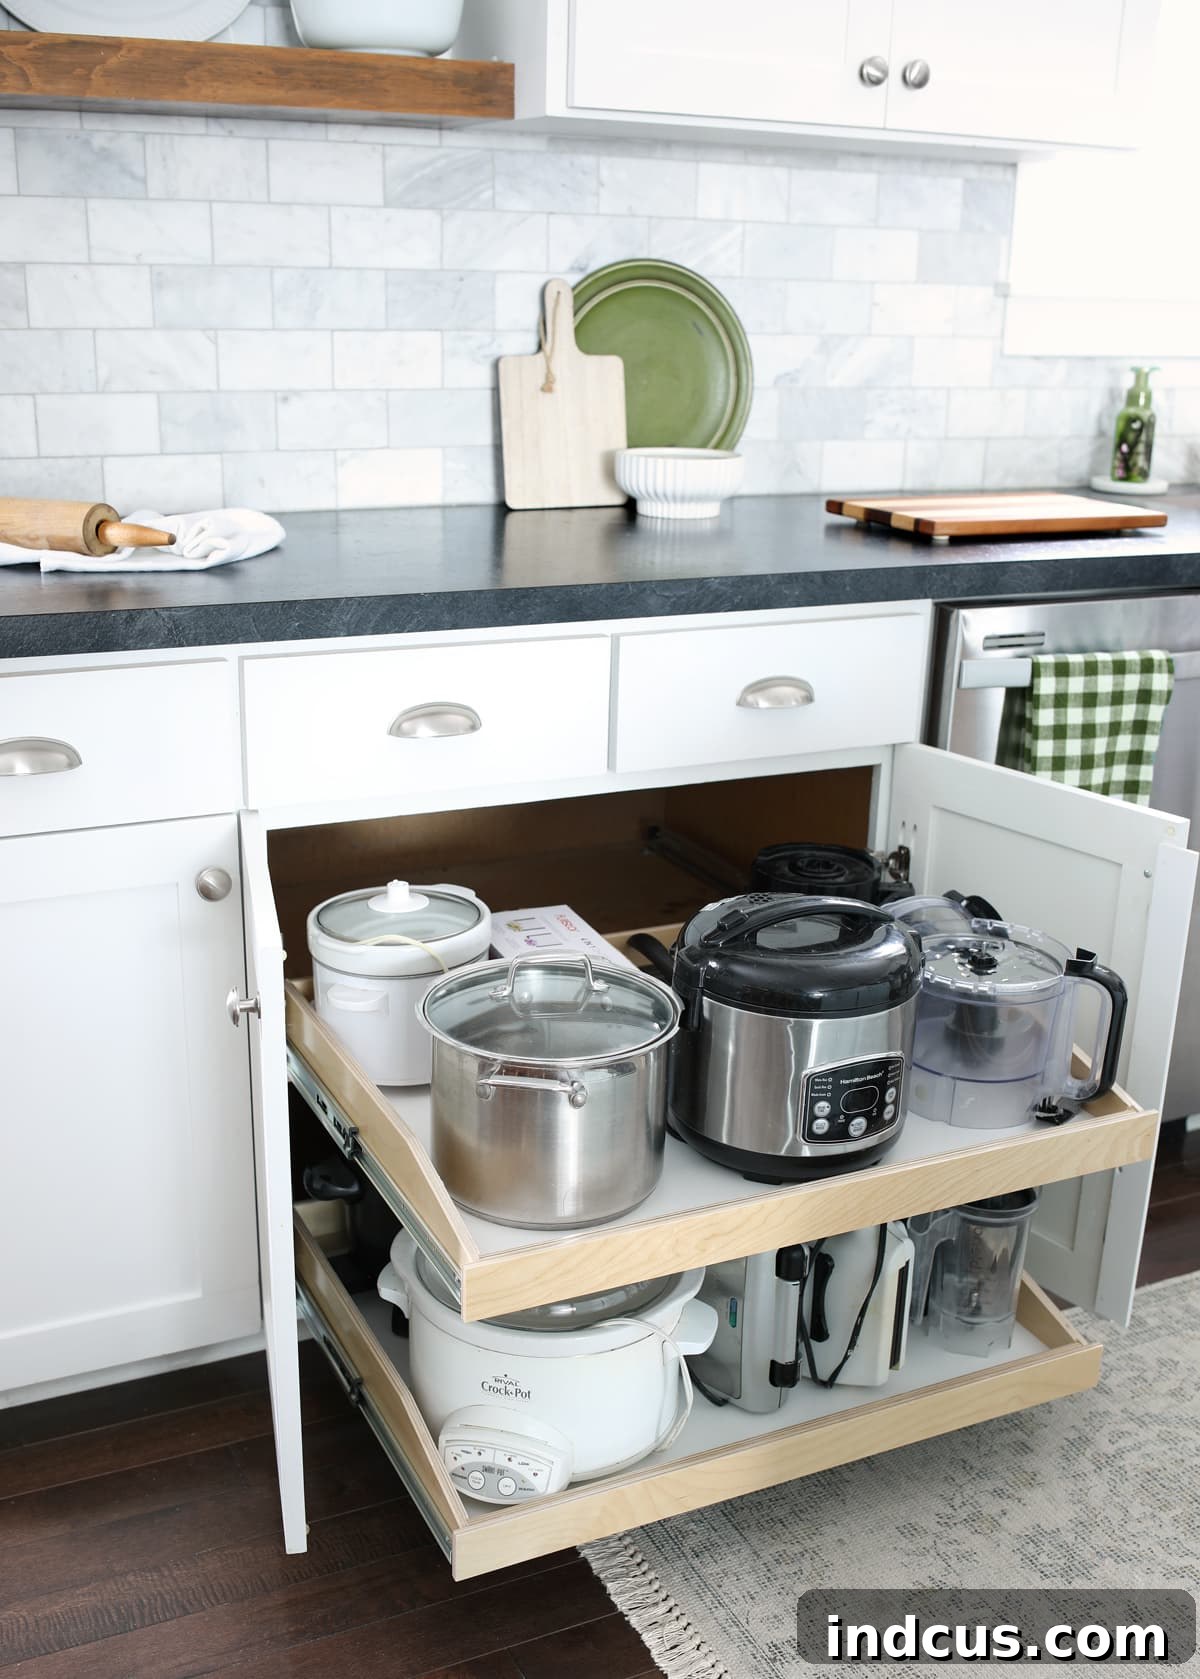
One of my initial concerns was the weight capacity, especially with a cabinet full of small appliances. However, I am thoroughly impressed by how much these shelves can hold. Even when fully loaded, they glide out smoothly and feel incredibly sturdy, a testament to the quality construction and robust drawer slides. This durable design ensures your organized kitchen remains functional for years to come.
Now, you might be wondering, “What about the large gap between the cabinet doors after cutting out that center stile?” Fear not! We devised a remarkably simple yet effective solution to ensure a seamless and polished finish.
Step 4: Crafting a Seamless Finish with a Gap Filler
As anticipated, after removing the center stile, closing the cupboard doors revealed a noticeable gap, which, while functionally sound, wasn’t aesthetically pleasing:
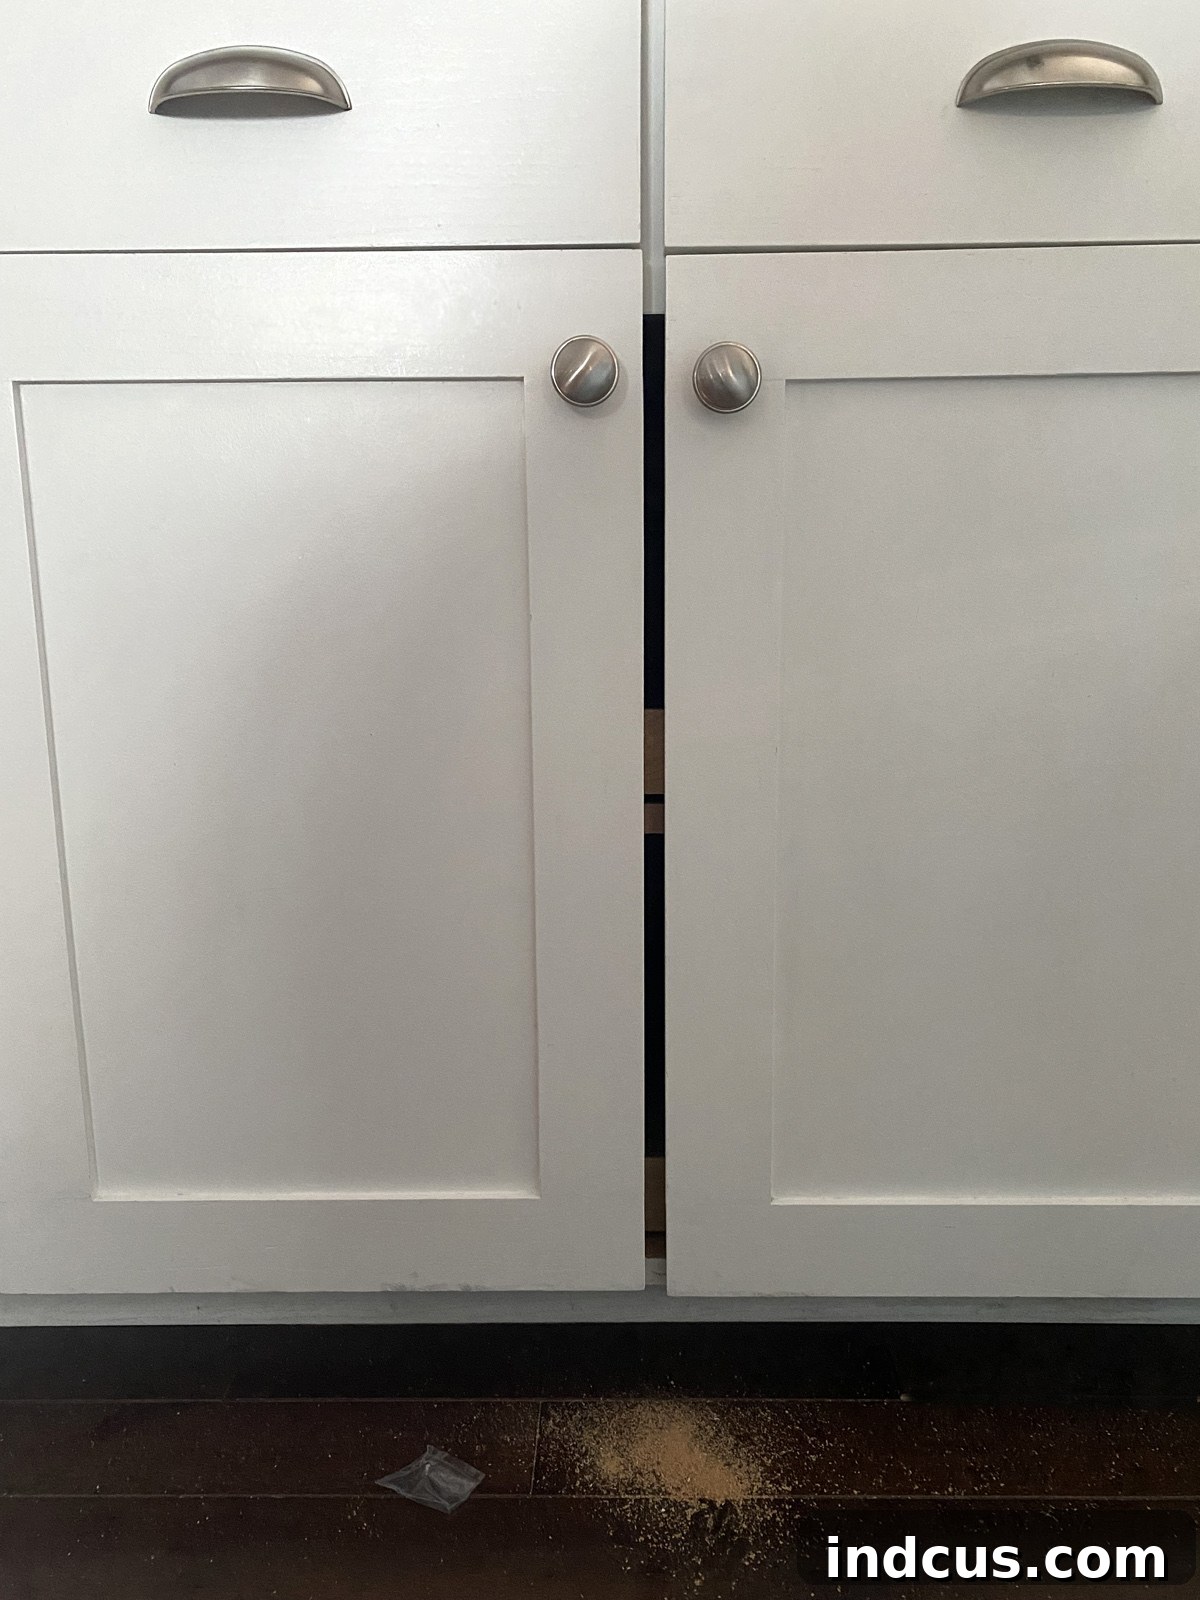
A giant gap indeed! But there’s a straightforward and elegant solution. We cut a thin piece of wood to the exact size of the gap and discreetly screwed it onto the back of one of the cabinet doors. The trick is to position it so that when that particular door closes, the filler piece sits flush with the cabinet face frame, effectively bridging and concealing the gap.
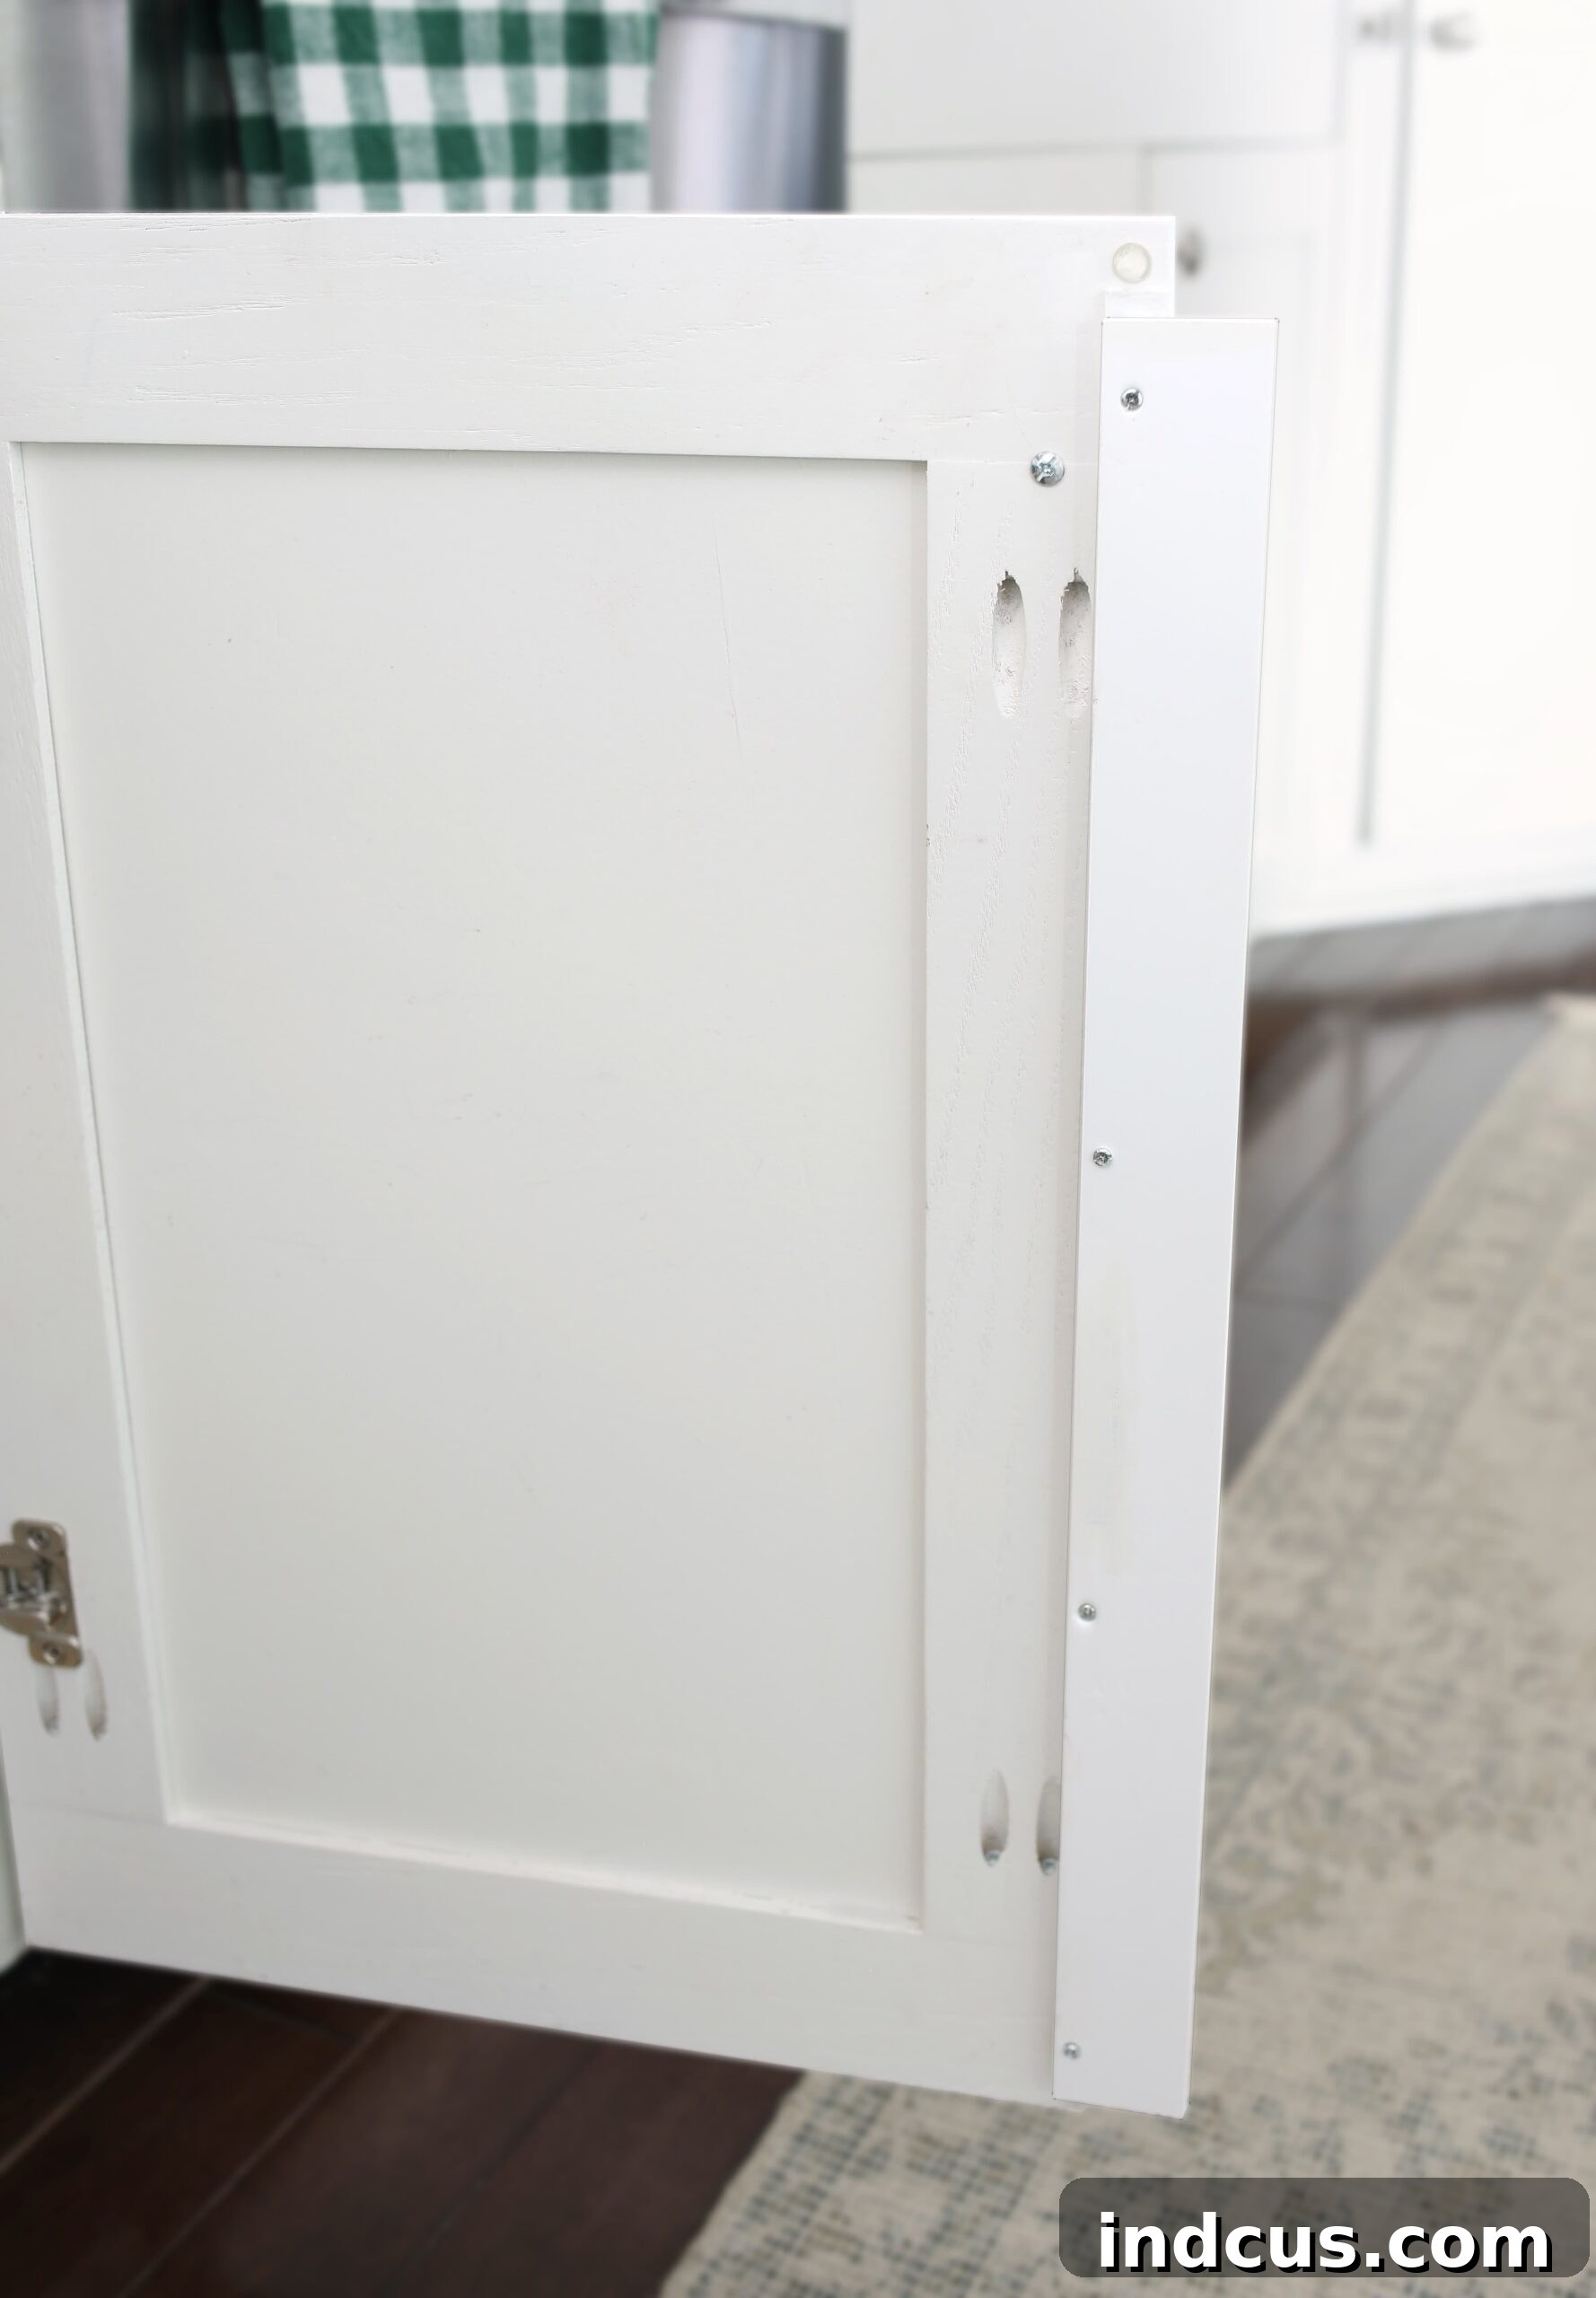
This solution works perfectly. Once the door is closed, the filler piece is completely invisible from the outside, creating the illusion of a continuous cabinet front. You would never guess it’s there!
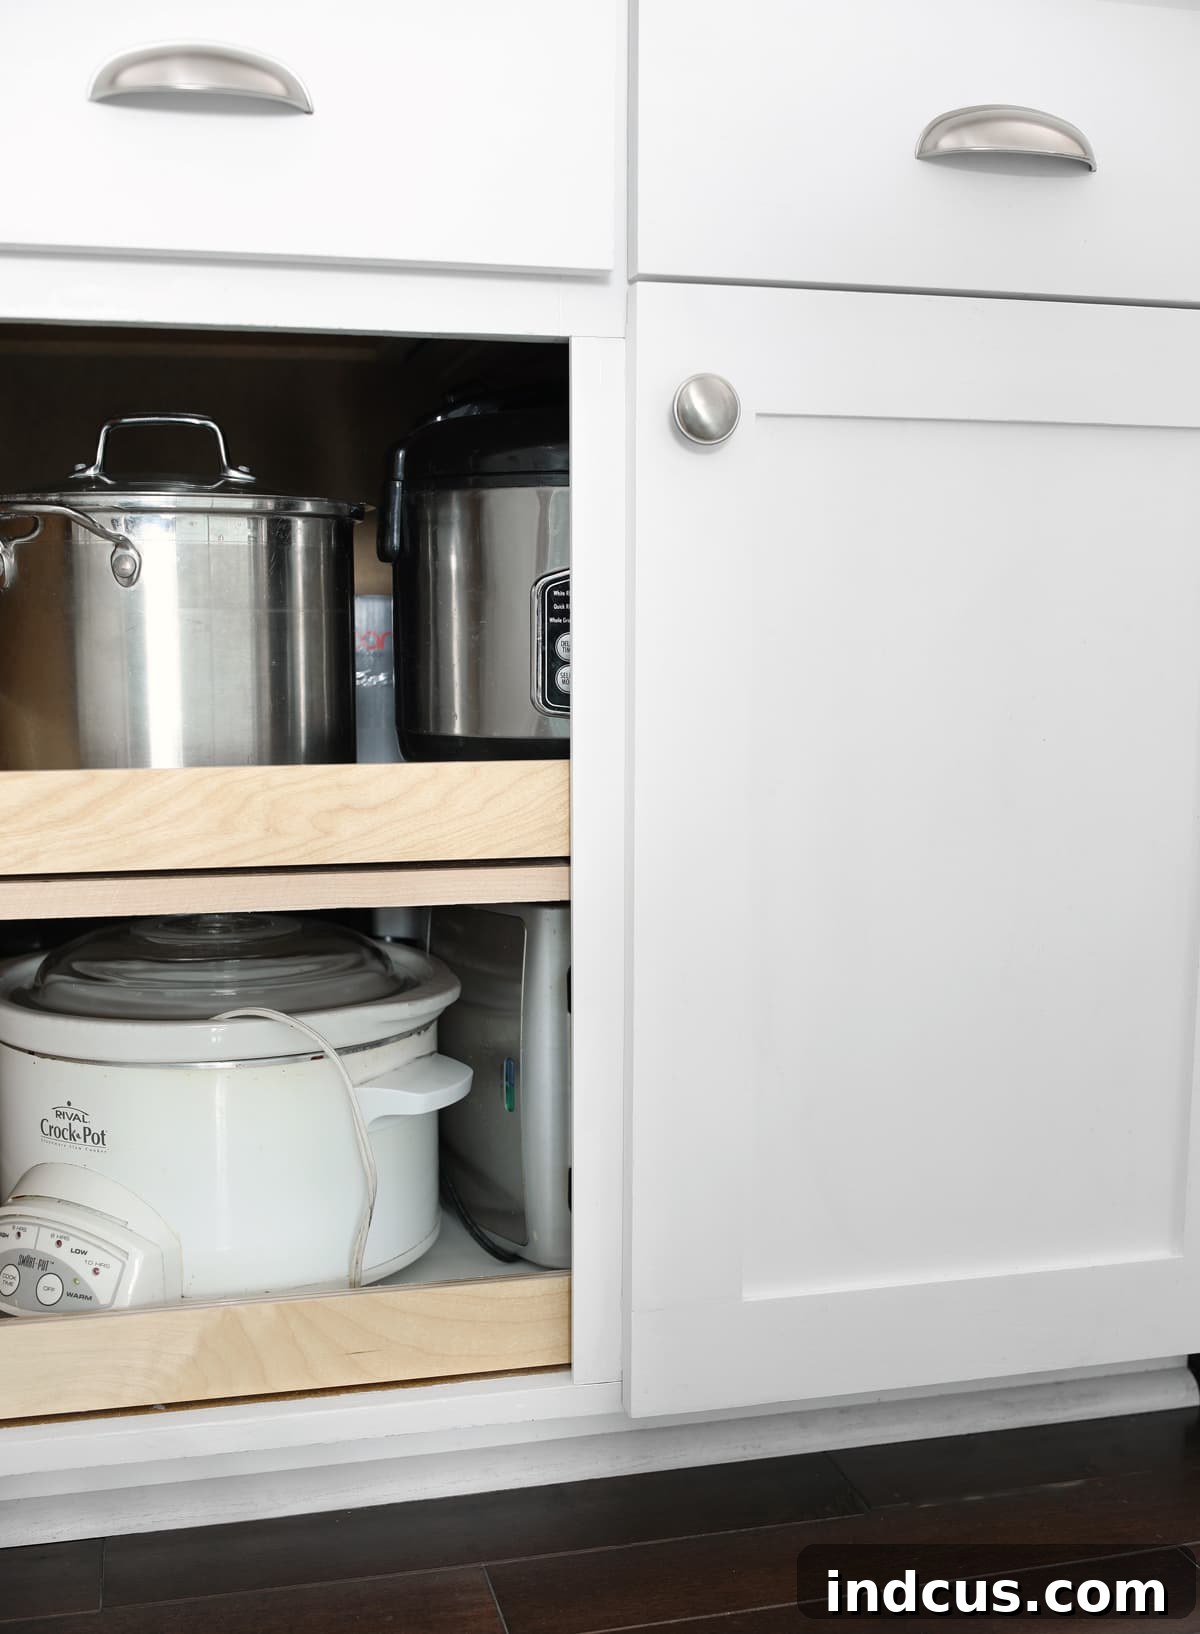
We’ve received some excellent suggestions from readers as well. One brilliant idea was to simply reuse the piece of wood you removed from the center stile itself, screwing it to the back of the cabinet door. This could work wonderfully, provided you achieved very clean and precise cuts during its removal. Another reader wisely commented on the placement of the backing piece, suggesting it might be more convenient on the left cabinet door since most people are right-handed and typically open the right door first. I can certainly appreciate that ergonomic insight! While I might not get around to switching ours (mostly due to my own “too lazy” tendencies, LOL!), it’s definitely a consideration for anyone embarking on this project.
See It in Action: Pull-Out Drawers Video Showcase
Words and pictures only tell part of the story. To truly appreciate the effortless functionality of these DIY pull-out drawers, take a moment to watch them in action:
The Unbelievable Transformation: Benefits and Considerations for Your Kitchen Upgrade
I honestly cannot overstate how dramatically better this cupboard functions now. The transformation is nothing short of glorious! I can see absolutely everything at a glance, and more importantly, I can *reach* every single item without any effort or shuffling. It’s no exaggeration to say that I hear angels singing every time I open those cabinet doors! This simple upgrade has made my everyday kitchen life infinitely more enjoyable and efficient, turning a source of daily frustration into a point of pride.
One valid concern I had going into this project was the potential loss of storage space. Living in a smaller home, I’m acutely aware of the need to utilize every nook and cranny. Adding the pull-out shelves inevitably meant losing a few inches along each side and an inch or two in overall height due to the drawer mechanisms. To accommodate this, I did take the opportunity to declutter and got rid of two random, rarely-used appliances. However, I was able to comfortably fit everything else back in, proving that the space loss was quite minimal and undeniably worth it for the immense increase in functionality and organization.
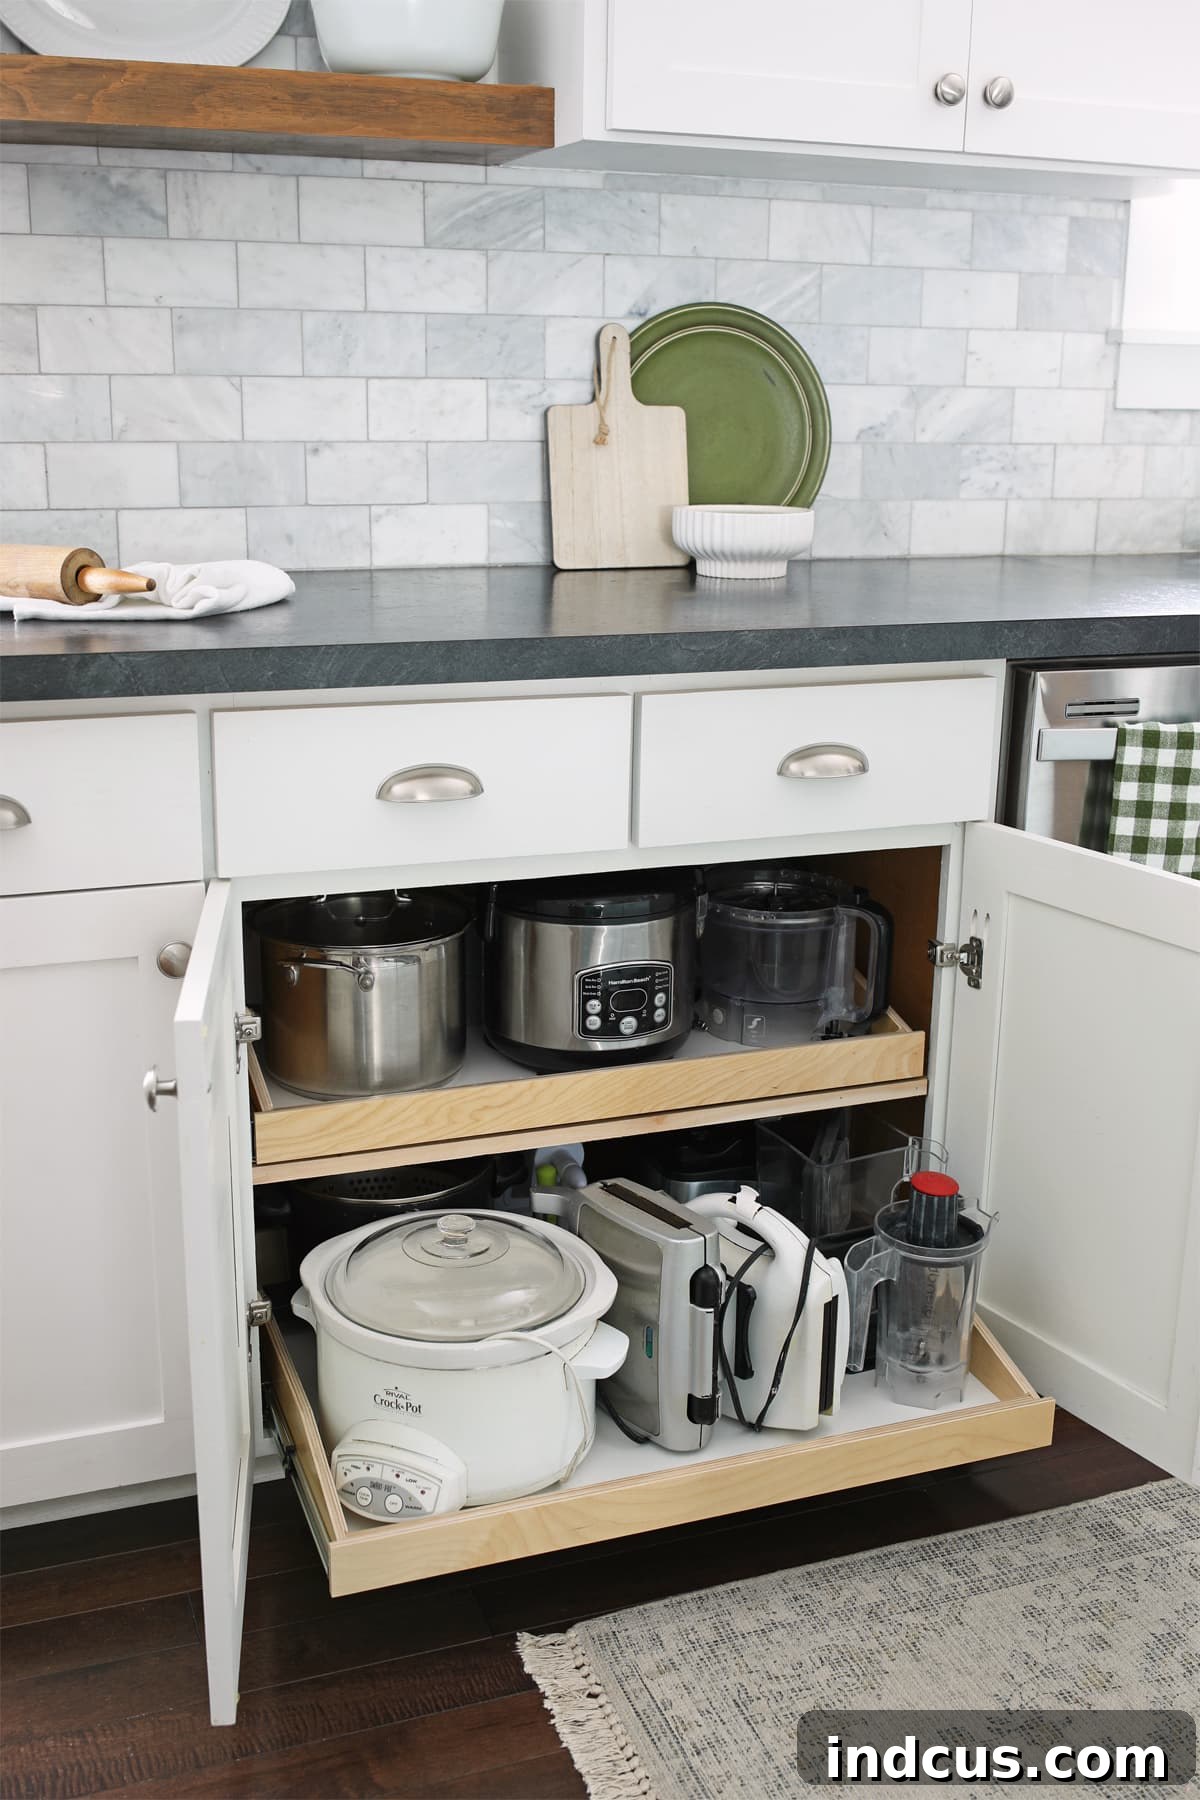
It’s important to consider these slight height and width reductions when planning your project, especially if you have particularly tall items. For instance, my rice maker just barely fits on the new, slightly higher shelves, but it fits perfectly, ready for use. This adaptability makes pull-out drawers an ideal solution not just for small appliances, but also for organizing pantry items, pots, pans, cleaning supplies, or even linens.
This entire project was a truly glorious upgrade, and I’m incredibly grateful that, for once, a home improvement task was actually easier and quicker than I anticipated. From start to finish, we completed the entire installation in just one afternoon. The reasonable price of the Slide-A-Shelf product felt like an investment in sanity, delivering a quick, headache-free solution to a long-standing kitchen problem. I’ve become a huge fan of the Slide-A-Shelf brand and would wholeheartedly recommend these custom pull-out shelves to anyone looking to enhance their kitchen’s functionality and organization. I would absolutely purchase them again in a heartbeat!
Before and After: Visualizing Your Kitchen Upgrade