
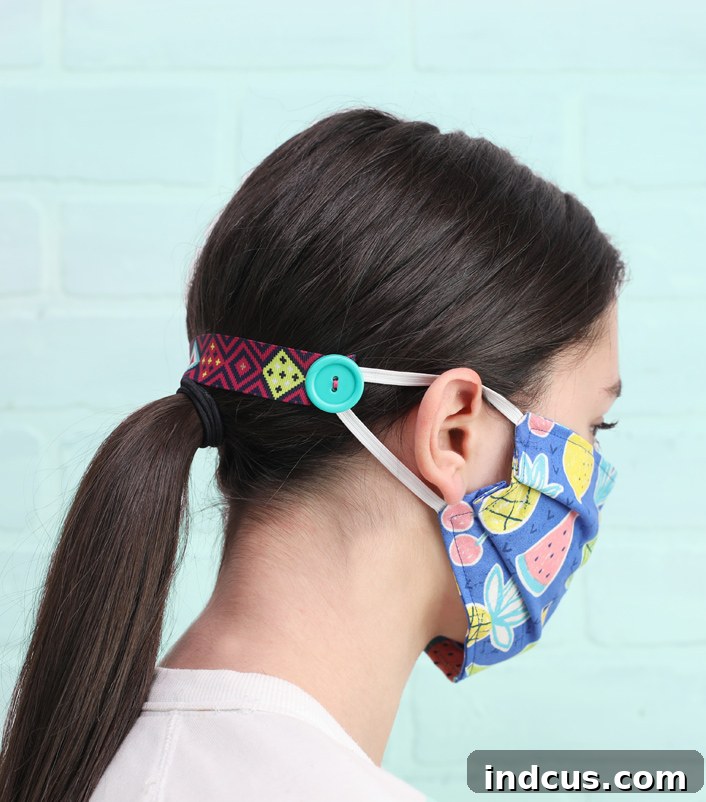
DIY Ear Savers: The Ultimate Guide to Mask Comfort and Chafing Relief
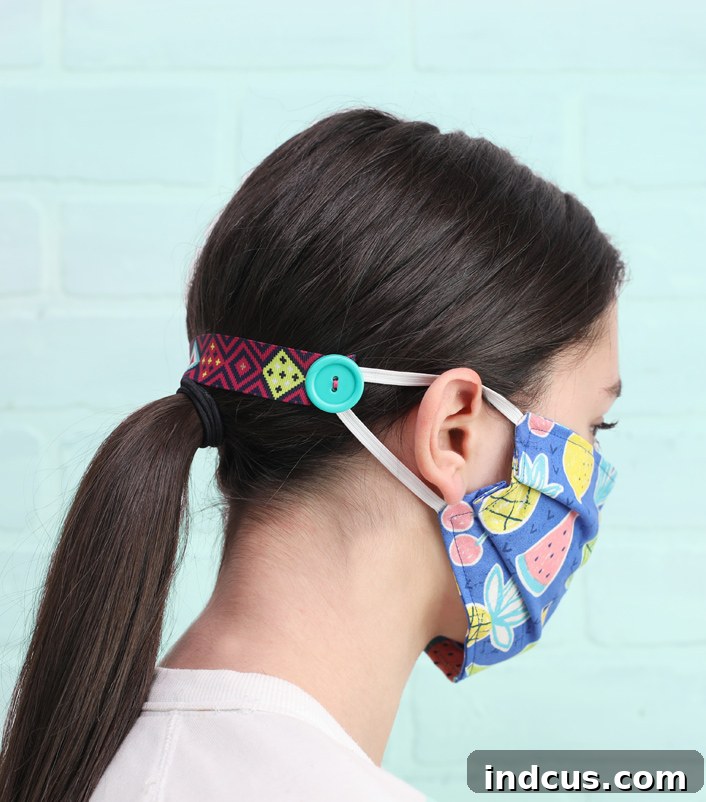
In recent times, face masks have become an essential part of our daily lives, a vital tool for public health and safety. While indispensable, the prolonged wear of masks, especially those with elastic ear loops, often leads to an unexpected but persistent problem: discomfort and chafing behind the ears. This common issue, ranging from mild irritation to painful skin breakdown, affects countless individuals, from daily commuters to dedicated healthcare professionals.
If you’ve been joining the growing community of crafters creating fabric face masks, you’ll find that making these simple ear savers is the perfect companion project. A mask might feel fine for an hour or so, but when it’s worn for an entire workday, during long commutes, or throughout a demanding shift, the constant pressure and friction from elastic straps can become genuinely unbearable. This is where ear savers come into play, offering a much-needed reprieve and significantly enhancing mask-wearing comfort.
The inspiration for this tutorial comes directly from the front lines. My sister, a dedicated hospital nurse, shared her experience with one of the biggest discomforts she and her colleagues faced: persistent chafing and soreness around their ears due to the elastic straps of the mandated face masks. Thankfully, some thoughtful individuals donated ear savers to her hospital, providing immense relief. Her gratitude was so profound that she strongly encouraged me to share a tutorial, empowering more people to create these incredibly helpful devices.
These DIY ear savers are invaluable, whether you’re crafting them for your own comfort, for your family, or with the noble intention of donating them to hospitals, clinics, or essential workers in your community. They are a small gesture with a huge impact on daily comfort and well-being.
Understanding that many of us might not be able to (or shouldn’t) make frequent trips to physical stores for supplies, I focused on designing a method that uses materials most crafters and sewists likely already have on hand. This ensures accessibility and allows you to start this beneficial project immediately, without needing specialized items.
With this straightforward design, each ear saver can be completed in approximately 5 minutes. This incredible efficiency means you can produce a substantial batch for everyone in your household or a generous donation in just about an hour. Imagine the collective relief! Plus, if you’re looking for a creative way to personalize your masks, don’t forget to check out my tutorial on Sharpie Tie Dye masks. They are not only adorable but also a mess-free way to add a unique touch to your protective gear.
Why Ear Savers Are a Game-Changer for Mask Comfort
Ear savers, also known as mask extenders or strap holders, are simple yet ingenious accessories designed to alleviate the pressure and irritation caused by mask elastic. Instead of the elastic loops pulling directly on your ears, an ear saver holds the elastic straps together at the back of your head, distributing the tension more evenly. This small change makes a world of difference for prolonged mask wear.
Key Benefits of Using Ear Savers:
- Eliminates Ear Chafing and Irritation: The primary benefit is preventing the painful rubbing and redness that often develops behind the ears.
- Reduces Pressure Points: By redistributing the mask’s tension, ear savers reduce concentrated pressure on the delicate skin and cartilage of the ears.
- Enhances Overall Comfort: Wearing a mask for hours becomes significantly more tolerable, allowing you to focus on your tasks rather than discomfort.
- Improves Mask Fit (for some): For individuals with smaller heads or masks with overly long ear loops, ear savers can help create a snugger, more secure fit, reducing gaps and improving efficacy.
- Supports Extended Wear: Essential for healthcare workers, teachers, retail staff, and anyone who needs to wear a mask for long durations.
- Reusable and Washable: Like fabric masks, these ear savers can be cleaned and reused, making them a sustainable solution.
- Customization and Personalization: An opportunity to add a personal touch with different ribbons, buttons, or embellishments.
- A Thoughtful Gesture: Donating homemade ear savers is a practical and heartfelt way to support frontline heroes and community members.
Materials Needed for Your DIY Ear Savers
Gathering your materials is the first step towards creating these essential comfort accessories. The beauty of this project lies in its simplicity and the use of readily available items.
- Sturdy Ribbon (1 inch or 1.5 inches wide): The width is crucial here. A wider ribbon provides a broader surface area, which helps distribute pressure more effectively and prevents the ear saver itself from digging into the back of your head. Choose a sturdy material like grosgrain or satin for durability and resistance to stretching.
- Large Buttons: These buttons will serve as the anchors for your mask’s elastic straps. Opt for buttons that are at least 3/4 inch to 1 inch in diameter. Larger buttons are easier to hook the elastic onto and provide a more secure hold, preventing the mask from slipping off. Four-hole buttons are generally sturdier for sewing.
- Needle and Thread: A strong, all-purpose thread is ideal. Consider using a double strand for extra durability, especially since these ear savers will undergo repeated use and washing. A sturdy sewing needle will make passing through the ribbon easier.
- Scissors: Sharp fabric scissors will ensure clean cuts on your ribbon, minimizing fraying from the start.
- Ruler or Measuring Tape: Precision in cutting the ribbon length is important for a good fit.
- Lighter or Candle: This tool is essential for heat-sealing the ribbon ends, a critical step to prevent fraying and ensure the longevity of your ear savers. Exercise caution and safety when using an open flame.
- Clear Nail Polish, Fray Stop, or Fabric Glue (optional): While optional, applying a small dab of one of these products to your thread knots after sewing can significantly reinforce them, preventing them from unraveling over time and through washes. This simple step adds a professional touch and enhances durability.
Step-by-Step Guide to Making Your Ear Savers
Follow these simple steps, and you’ll have a batch of ear savers ready in no time!
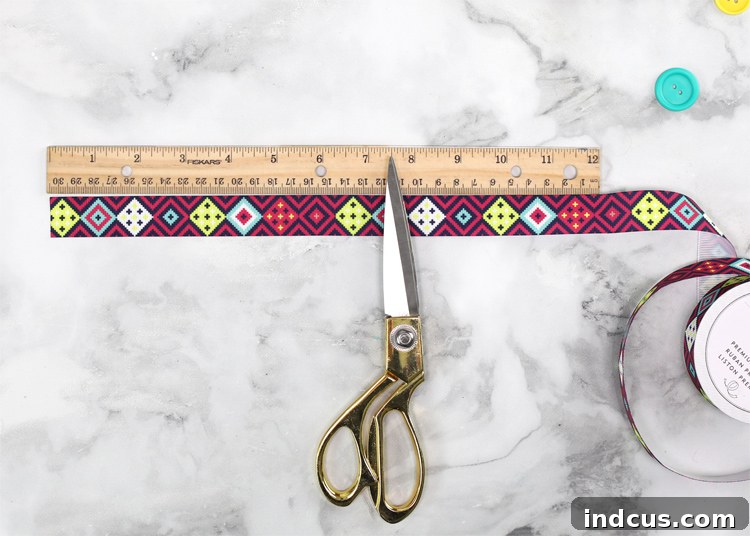
Step 1: Cut the ribbon to length.
Carefully measure and cut your ribbon. I recommend making several different sizes to accommodate a range of head sizes, as comfort can be very individual. A good starting range is approximately 8 inches to 10 inches. For children, you might aim for 7-8 inches, while adults might prefer 9-10 inches. The goal is for the ear saver to sit comfortably at the back of the head without being too tight or too loose. If you’re making them for donation, a variety of lengths is always appreciated.
Step 2: Seal the ends of the ribbon.
This is a crucial step for durability. Using a lighter or candle, carefully and quickly pass each end of the ribbon through the flame. The heat will melt the synthetic fibers of the ribbon, preventing it from fraying. This step is particularly important because ear savers will need frequent washing to maintain hygiene, and unsealed ends will quickly unravel. Hold the ribbon end close to the flame but not directly in it, moving it swiftly to melt without burning or discoloring the ribbon. Always exercise extreme caution when working with fire.
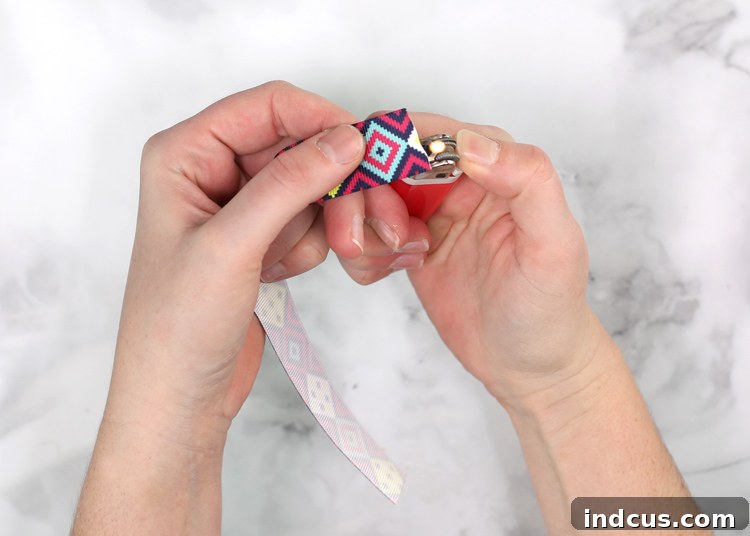
Step 3: Sew buttons onto each end of the ribbon.
Thread your needle (consider using a double strand for extra strength) and securely sew one large button onto each sealed end of the ribbon. Position the button about 1/4 inch to 1/2 inch from the very end of the ribbon. Ensure the buttons are sewn on firmly with multiple stitches, as they will bear the tension of the mask’s elastic. Make sure the button is aligned straight with the ribbon for a neat finish. Create a strong knot on the back of the ribbon once you’re done sewing each button.
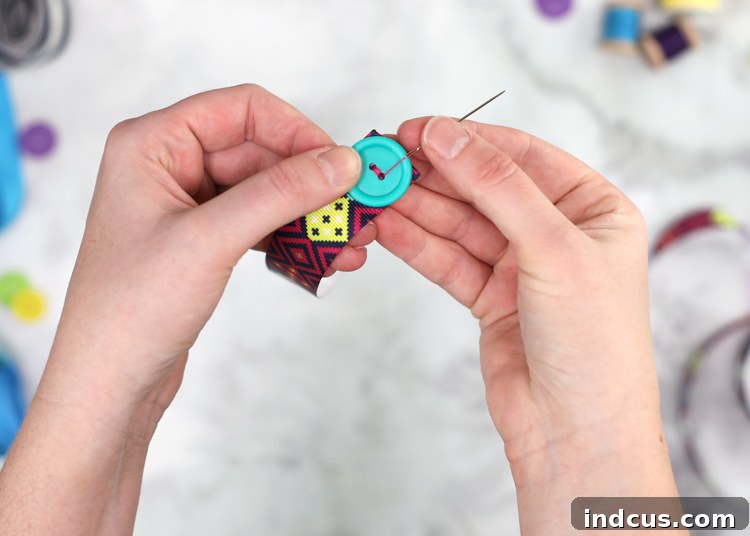
Step 4: Reinforce the knots (optional but recommended).
To further secure your stitches and prevent the thread knots from coming undone, add a tiny dab of clear nail polish, Fray Stop, or fabric glue directly onto the knot on the back of each button. This step takes mere seconds but significantly enhances the durability and longevity of your ear savers, especially after repeated washing cycles. Allow it to dry completely before use.
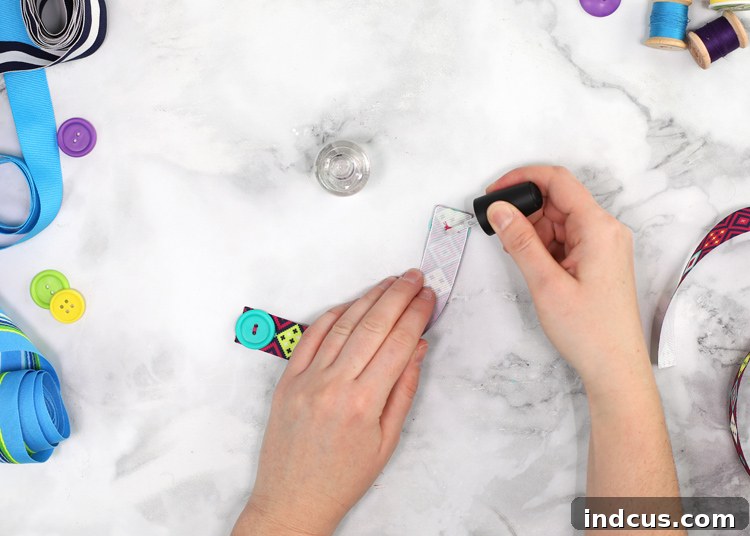
And that’s it! You’ve just created a simple, yet incredibly effective ear saver. So straightforward, yet so impactful!
How to Wear Your Ear Saver for Maximum Comfort
Using your newly crafted ear saver is incredibly simple and intuitive. Here’s how to integrate it into your mask-wearing routine:
- First, put on your face mask as you normally would, ensuring it covers your nose and mouth properly, with the elastic loops temporarily resting on your ears.
- Next, take your ear saver and position the ribbon horizontally across the back of your head.
- Gently slip each elastic loop from your mask off your ears and hook it over the corresponding button on the ear saver.
- Adjust the ear saver’s position until the mask feels secure and comfortable, with no pressure on your ears.
My sister, who often wears her hair in a low bun during her shifts, finds it most comfortable to place the ribbon just above her bun. This clever positioning helps to anchor the ear saver, preventing it from slipping down and ensuring it stays in place throughout her busy day. Experiment with different placements—above or below a ponytail, or simply resting against the back of your head—to discover what works best for your hairstyle and personal comfort.
Customization and Advanced Tips for Your Ear Savers
While the basic design is fantastic, there are several ways to customize and enhance your ear savers to perfectly suit individual needs and preferences:
- Adjustable Sizing with Multiple Buttons: To make an ear saver adaptable for various head sizes without needing to change the ribbon length, consider sewing a second (or even a third) button onto each side of the ribbon. Space these buttons about an inch apart. This allows the wearer to choose which button provides the most comfortable and secure fit, making them versatile for donation or for family members with different head circumferences.
- Enhanced Stability with Velcro Dots: If you find your ear saver tends to slip a lot, especially with certain hairstyles or during active movements, adding the “scratchy” (hook) side of self-adhesive Velcro dots to the underside of the ribbon can provide extra grip. Place a few dots strategically along the ribbon’s length. This helps the ear saver stay securely in place against your hair.
- Headband Style Ear Savers: For those who prefer a different aesthetic or an even more stable fit, a headband-style ear saver is an excellent alternative. Simply purchase a stretchy headband (a plain one from a dollar store works perfectly) and sew a large button onto each end. This style is particularly good for people with shorter hair or those who prefer a wider band for comfort.
- Using Different Materials:
- Elastic: Instead of ribbon, you can use a sturdy piece of elastic for the main band. This offers inherent adjustability and comfort. You’d still sew buttons on the ends.
- Fabric Scraps: Upcycle fabric scraps by cutting them into strips, folding them to create a strong, narrow band, and sewing the edges. This is a great way to use up leftover materials from mask making.
- Paracord or Cordage: For a more rugged or minimalist design, a length of paracord with toggle buttons or knots can also function as an ear saver.
- Personalized Touches: Don’t hesitate to add decorative elements! Use colorful buttons, patterned ribbons, or even embroidery to make each ear saver unique and personal. These small details can bring a little joy to an otherwise mundane accessory.
Care and Maintenance for Your Homemade Ear Savers
To ensure your ear savers remain hygienic and last for as long as possible, proper care is essential, especially given their repeated contact with masks and skin.
- Washing: After each use, it’s recommended to wash your ear savers, just as you would your fabric masks. They can typically be hand-washed with mild soap and warm water, or machine-washed on a delicate cycle with similar colors. Placing them in a mesh laundry bag can help protect them from getting tangled or damaged in the washing machine.
- Drying: Air drying is best for preserving the integrity of the ribbon and buttons. Lay them flat or hang them to dry completely. Avoid high heat from a dryer, as it can potentially damage the ribbon or melt the heat-sealed ends.
- Inspection: Regularly inspect your ear savers for any signs of wear and tear, such as loose buttons, fraying ribbon (if not properly sealed), or weakened stitches. Repair any issues promptly to extend their lifespan.
A visual guide can often enhance the learning experience for many crafters. While we don’t include an embedded video player here, many online resources offer video tutorials for creating ear savers, which can be a great complement to these written instructions.
Please take a moment to pin the image below to your favorite crafting or DIY boards. By sharing this easy tutorial, you help others discover this simple solution and join in our collective efforts to support the incredible healthcare workers and essential personnel who are tirelessly working on the front lines of this global pandemic. Every bit of comfort helps them continue their vital work.
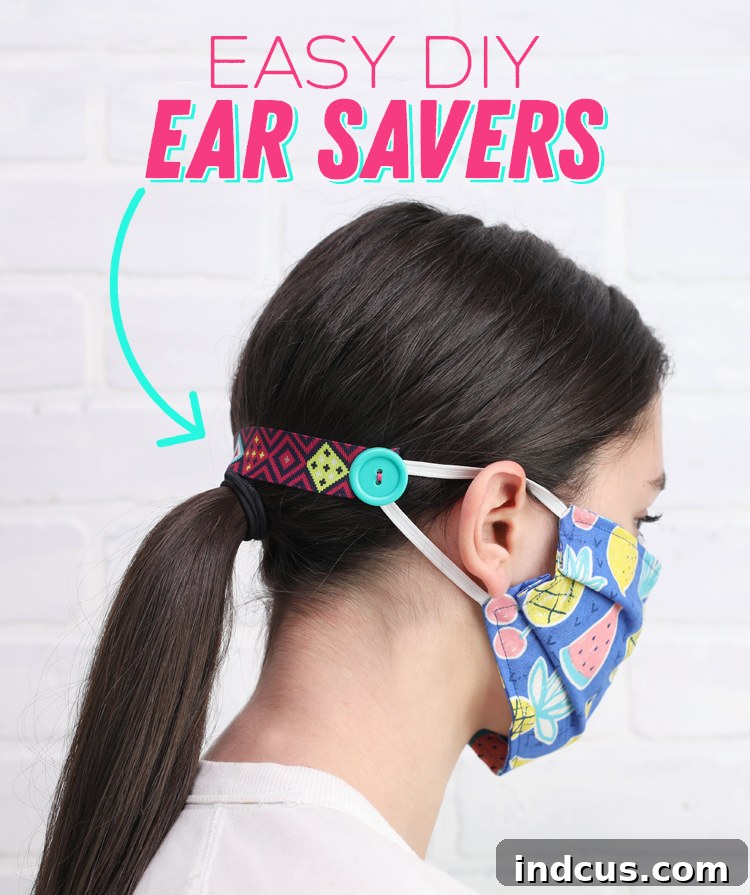
And for those eager to delve deeper into mask creation, be sure to visit my post about DIY Fabric Face Masks. It’s a treasure trove of good information, offering comprehensive instructions and tips to help you craft effective and stylish masks. Pairing your handmade masks with these ear savers creates the ultimate comfortable and protective solution.
Happy crafting, and thank you for making a difference, one comfortable ear at a time!







