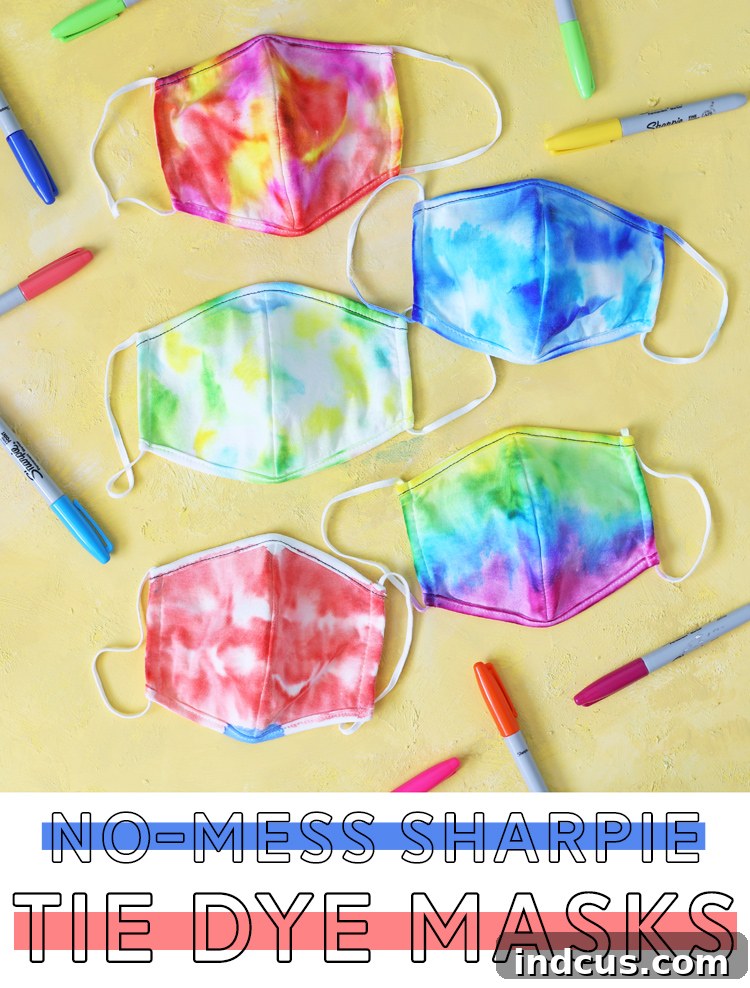
Transform Ordinary Face Masks into Unique Art with This Easy Sharpie Tie-Dye Craft
Are you searching for a vibrant, personalized way to elevate your everyday essentials? This detailed guide unveils the effortless magic of Sharpie tie-dye, offering a wonderfully clean and creative alternative to traditional fabric dyeing. Forget about the extensive prep, the inevitable mess, and the lengthy clean-up associated with conventional tie-dye methods. With Sharpie tie-dye, you can achieve stunning, one-of-a-kind designs on your fabric face masks quickly and easily, making it an ideal craft for enthusiasts of all ages and skill levels. Whether you desire a subtle splash of color or a bold, artistic statement, this technique provides boundless opportunities for self-expression and customization.
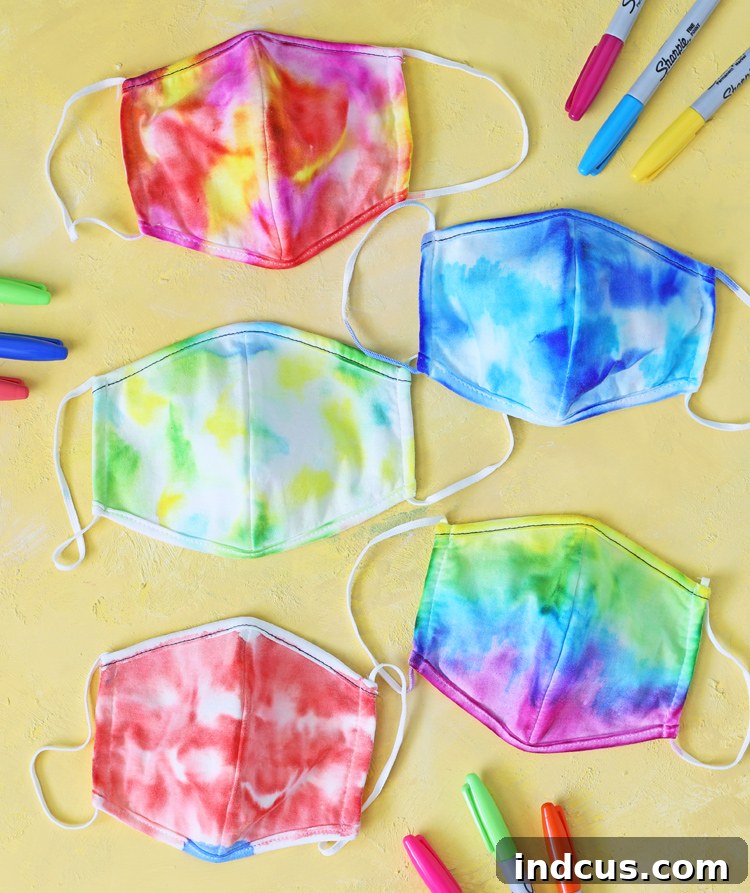
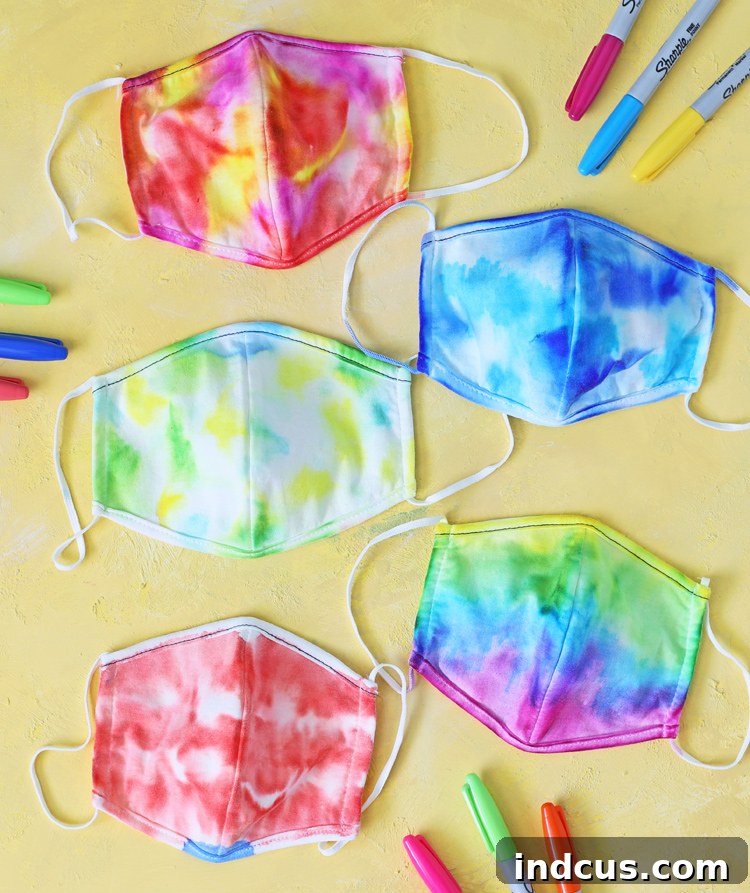
As a devoted admirer of tie-dye, I’ve always been drawn to its spontaneous beauty and the joy it brings. However, the practicalities of traditional tie-dyeing—involving multiple liquid dye baths, intricate rubber band tying, prolonged soaking times, and copious rinsing—often deter me due to the significant mess and cleanup involved. This is precisely why Sharpie tie-dye has become a beloved method in my crafting repertoire for infusing color and personality into various fabric items. It’s incredibly neat, surprisingly swift, and consistently yields stunning, lasting results. You might recall the sheer fun I had when I ventured into creating Sharpie tie-dye sneakers; this mask project promises the same addictive enjoyment and creative satisfaction!
Why Choose Sharpie Tie-Dye for Your Face Masks? The Ultimate No-Mess Craft
Beyond the undeniable allure of a mess-free crafting experience, Sharpie tie-dye offers a multitude of compelling advantages, particularly when working with smaller fabric items such as face masks. It simplifies the creative process without compromising on visual impact or durability.
- Effortless & Exceptionally Clean: Bid farewell to stained hands, protective tarps, and the need for multiple buckets of messy liquid dyes. Sharpie markers keep the ink contained, and the rubbing alcohol is easily controlled with a dropper, minimizing spills and splashes.
- Rapid Drying & Setting: The alcohol evaporates quickly, and a brief tumble in a dryer is all that’s required to heat-set the ink, ensuring your design becomes permanent and washable in record time. This means less waiting and more wearing!
- Remarkably Forgiving & Adaptable: Did your design not quite turn out as planned? No problem! As long as the fabric is dry, you can easily layer more Sharpie colors and reapply alcohol to deepen, modify, or completely transform your design. It’s a truly flexible technique that encourages experimentation.
- Unleash Unlimited Creativity: From intricate geometric patterns to flowing abstract blends, the precision and control offered by Sharpie markers allow for a vast spectrum of artistic expressions. Experiment freely with different colors, application styles, and dot placements to craft truly unique and personal pieces.
- Budget-Friendly: Chances are, you already have many of the necessary supplies at home. A simple pack of Sharpies, some isopropyl rubbing alcohol, and a plain white cotton mask are essentially all you need to embark on this exciting project.
- Fun for Every Age Group: This engaging craft is straightforward enough for children to participate in (with appropriate adult supervision for the alcohol application), yet captivating enough to provide hours of enjoyment for adults. It serves as a wonderful activity for family bonding or small crafting gatherings.
Essential Supplies for Your Sharpie Tie-Dye Mask Project
Before diving into the creative process, ensure you have all your materials ready. The beauty of this craft lies in its simplicity and the accessibility of its required items:
- White Cotton Fabric Masks: For the most vibrant colors and optimal ink spread, choose masks made from 100% cotton. Smooth, tightly woven cotton fabric will yield the best results. It’s advisable to use clean, pre-washed masks to remove any sizing or fabric softener that could impede ink absorption.
- Sharpie Markers (Assorted Permanent Colors): While any permanent marker can work, Sharpies with thicker tips (such as chisel tips or magnum markers) are often easier and more efficient for covering larger areas, ensuring a good concentration of ink. A wide array of colors will allow for more dynamic and visually appealing designs. Don’t forget fine or ultra-fine tips for intricate details and outlines.
- Isopropyl Rubbing Alcohol (70% or 91%): This is the key solvent that enables the Sharpie ink to bleed and blend. Higher concentrations (like 91%) generally facilitate a faster and more dramatic spread of color, though 70% alcohol is also perfectly effective.
- Medicine Dropper or Pipette: An indispensable tool for precise and controlled application of the rubbing alcohol. This prevents oversaturation and helps guide the color flow exactly where you intend it to go, creating delicate patterns.
- Protective Surface: Prepare your workspace by laying down a barrier such as a sheet of plastic, wax paper, aluminum foil, or several layers of newspaper. This will protect your table from any potential ink bleed-through, especially while the alcohol is wet.
- Small Cup: A small, disposable cup or dish is perfect for holding a small amount of rubbing alcohol, allowing for easy and clean access with your medicine dropper.
Step-by-Step Guide: Crafting Your Stunning Sharpie Tie-Dye Mask
Step 1: Unleash Your Inner Artist – Coloring Your Mask
Lay your clean, dry white cotton mask flat on your protected work surface, ensuring it’s smooth and free of wrinkles. Now, the creative phase begins! Arm yourself with your chosen Sharpie markers and let your artistic instincts guide you. There are no strict rules here, so feel free to experiment with a myriad of patterns, shapes, and color combinations. The goal is to apply a significant amount of ink to the fabric, as this ink will later “bloom” into beautiful designs.
- Design Inspiration & Techniques:
- Abstract Swirls & Curves: Draw free-form squiggles, spirals, or overlapping circles for an organic, watercolor-like effect.
- Geometric Patterns: Create structured designs using parallel lines, grids, checkerboards, or various geometric shapes like triangles and squares.
- Polka Dots Galore: Simple yet incredibly effective, polka dots of varying sizes can create playful and vibrant results when the alcohol spreads them.
- Ombre & Gradient Effects: Color areas with gradually transitioning shades of a single color, or strategically place different colors next to each other to encourage a seamless blend.
- Concentric Rings: Start with a small circle in the center and draw increasingly larger rings around it; the alcohol will cause them to expand outwards.
- Random Doodles & Blocks: Sometimes the most unexpectedly beautiful outcomes arise from simply coloring blocks of color or spontaneous doodles.
- Expert Coloring Tips:
- Tip Size Matters: Thicker-tipped Sharpies are ideal for quickly saturating larger areas with color, providing ample ink for a robust bleeding effect. Utilize fine or ultra-fine tips for adding intricate details, outlines, or subtle textures.
- Achieve Optimal Ink Saturation: Don’t be timid with your ink application. A higher concentration of Sharpie ink on the fabric will result in more vibrant colors and a more expansive, dramatic bleed when the alcohol is introduced. However, apply with steady pressure to avoid damaging the fabric fibers.
- Strategic Color Placement: Consider how adjacent colors will interact and blend. Complementary or analogous colors placed side-by-side often create visually harmonious and interesting new shades where they meet. For instance, blue and yellow will merge into green, while red and blue can create stunning purples.
- Embrace White Space: You don’t necessarily need to color every inch of the mask. Leaving some uncolored white areas can create striking contrasts and allow the tie-dyed colors to pop even more prominently.
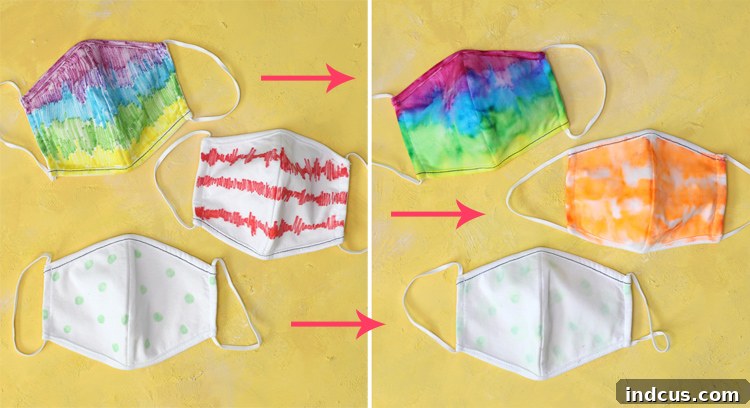
Allow your creativity to flow freely; the inherent beauty of Sharpie tie-dye lies in its organic and often delightfully unpredictable nature. The accompanying image showcases a variety of initial coloring patterns and how they elegantly transformed after the alcohol application:
Step 2: The Magic Unfolds – Applying Rubbing Alcohol
With your mask beautifully colored, it’s now time for the most captivating phase of the project: activating the tie-dye effect! Pour a modest amount of isopropyl rubbing alcohol into your small cup. Using your medicine dropper, carefully draw up some alcohol, ensuring you have controlled amounts ready for application.
- Controlled & Precise Application: Gently begin by applying small, deliberate drops of alcohol directly onto the Sharpie-colored areas of your mask. You will immediately observe the ink beginning to spread and bleed outwards, forming intricate, watercolor-like patterns. This process is truly mesmerizing to watch as the colors dance and merge on the fabric.
- Experiment with Droplet Size & Placement:
- Small, Concentrated Drops: For tighter, more defined bleeding patterns, apply tiny drops close together. This can create a speckled or finely marbled effect.
- Larger, Diffused Drops: To achieve a broader, more expansive spread of color and softer transitions, use slightly larger drops or apply them further apart.
- Targeted Flow: You can guide the movement of color by strategically placing your drops. For example, dropping alcohol into the center of a colored circle will encourage the ink to radiate evenly outwards. Applying alcohol to the border between two colors will encourage them to blend beautifully.
- Avoid Oversaturation: While it’s essential for the ink to bleed, be mindful not to completely drench the fabric in alcohol. Excessive alcohol can overly dilute the colors, leading to less vibrant results and less defined patterns. A little alcohol often goes a long way. If the fabric becomes too wet, you can gently blot around the edges of the design with a paper towel to absorb excess liquid and prevent unwanted spreading.
- Ensure Surface Protection: It’s crucial to remember that while the alcohol is wet, the ink remains mobile and can bleed through the mask onto your underlying workspace. Maintain your protective plastic or wax paper layer beneath the mask throughout this entire step to prevent any staining.
Take your time during this step; it’s a wonderfully artistic process. You are essentially harnessing the power of chemistry to transform static lines into dynamic, fluid art. Continue applying alcohol until you are completely satisfied with the extent of the spread and the harmonious blending of your chosen colors.
Step 3: Drying & Heat Setting for Lasting Permanence
Once your desired tie-dye effect has been achieved, the final and most crucial step is to ensure the design is properly set and permanent. This vital stage guarantees the longevity and washability of your beautiful creation. It involves two distinct phases: thorough drying and essential heat setting.
- Thorough Drying: The first and most critical action is to allow the alcohol to dry completely. This cannot be emphasized enough, as while the alcohol is still present, the Sharpie ink remains active and highly susceptible to smudging or bleeding onto any surface it contacts. To prevent this, carefully transfer your wet mask to a non-absorbent surface, such as a clean plastic sheet, wax paper, or a ceramic plate, ensuring it’s isolated from other fabrics or materials. Depending on the amount of alcohol used, environmental humidity, and airflow, this drying process could range from 30 minutes to several hours. You’ll know it’s fully dry when there is no visible dampness and the characteristic alcohol scent has entirely dissipated. Patience is key at this stage!
- Heat Setting for Permanent Results: Once your mask is completely dry to the touch and smell-free, it’s time to heat set the ink. This step is absolutely essential for making your Sharpie tie-dye design permanent, ensuring that the colors will not fade, run, or transfer during future washes.
- Using a Clothes Dryer (Recommended Method): The most straightforward and effective method is to place your dry masks into a clothes dryer. Set the dryer to a high heat setting and tumble the masks for approximately 15-20 minutes. The intense heat generated will effectively fuse the Sharpie ink pigments to the cotton fibers, permanently locking in your beautiful design.
- Ironing (Alternative Method): If you prefer not to use a dryer or require an alternative, an iron can also be used for heat setting. Place a clean, thin piece of fabric (like a cotton pillowcase, parchment paper, or an old t-shirt) over your dry mask to protect your iron’s soleplate. Iron the mask on a high, dry heat setting (appropriate for cotton) for about 3-5 minutes, continuously moving the iron across the surface to ensure even heat distribution and prevent scorching.
- No Lingering Odor: A common concern with Sharpie markers is their strong initial odor. Rest assured, once the isopropyl alcohol has fully evaporated and the ink has been properly heat-set, there will be no residual Sharpie or alcohol smell on your finished mask. It will be fresh, odorless, and perfectly ready for use!
The inherent beauty of Sharpie tie-dye truly lies in its forgiving nature. As previously highlighted, if your initial attempt doesn’t quite meet your expectations—perhaps that green polka dot mask didn’t quite bloom into the vision you had—there’s no need for disappointment! Once the mask is thoroughly dry (after the alcohol has evaporated), you have the complete freedom to add additional layers of Sharpie marker, redefine certain areas, or introduce new colors to enhance the design. Then, simply reapply more rubbing alcohol to encourage the new ink to blend, allow it to dry once more, and heat-set again. This iterative process empowers you to refine and perfect your design until you achieve a look you absolutely adore.
Expert Tips for Success and Creative Variations
To ensure your Sharpie tie-dye project is as enjoyable and successful as possible, consider these additional insights and ideas for expanding your creativity:
- Work in Sections for Control: If your mask features multiple panels or intricate folds, consider working on one section at a time. Allowing each area to dry slightly before moving on can help prevent unwanted color bleeding into adjacent sections.
- Pre-Test Colors: If you’re experimenting with new Sharpie colors or combinations, it’s always a good idea to perform a small test patch on a scrap piece of similar cotton fabric. This will give you a preview of how the colors will bleed and blend before applying them to your main project.
- Further Personalization: Once your mask is completely dry and heat-set, you can add even more intricate details. Use a fine-tip permanent marker for outlining designs, adding small drawings, or incorporating personalized messages.
- Explore Other Fabric Items: Don’t confine this brilliant technique solely to masks! Sharpie tie-dye works wonderfully on a wide array of other cotton-based items. Consider transforming plain t-shirts, canvas shoes, tote bags, bandanas, socks, or even drab pillowcases into vibrant, personalized accessories.
- A Fantastic Kids’ Craft: This project is a phenomenal activity for children. Allow them to freely choose colors and design patterns, supervising closely when handling the rubbing alcohol. It fosters creativity and provides a tangible, wearable result they can be proud of.
Caring for Your Beautiful Sharpie Tie-Dyed Mask
After investing your time and creativity, you’ll want to ensure your vibrant tie-dyed mask retains its beauty for as long as possible. Once properly heat-set, your Sharpie tie-dye design is permanent and remarkably durable. To preserve the vibrancy and integrity of your colors:
- Washing Instructions: Always machine wash your mask in cold water. It’s best to wash it with similar colors, especially for the first few washes, just in case there’s any minuscule residual bleeding. Avoid using harsh detergents or bleach, as these can strip the color.
- Drying Recommendations: For optimal longevity and color retention, tumble dry your mask on a low heat setting. Alternatively, air drying is an excellent option that further extends the life of the fabric and the vibrancy of the design.
- Ironing Guidelines: If your mask becomes wrinkled and requires ironing, set your iron to a low temperature suitable for cotton. For extra protection, it’s advisable to place a thin pressing cloth or a clean piece of parchment paper over the tie-dyed design before ironing.
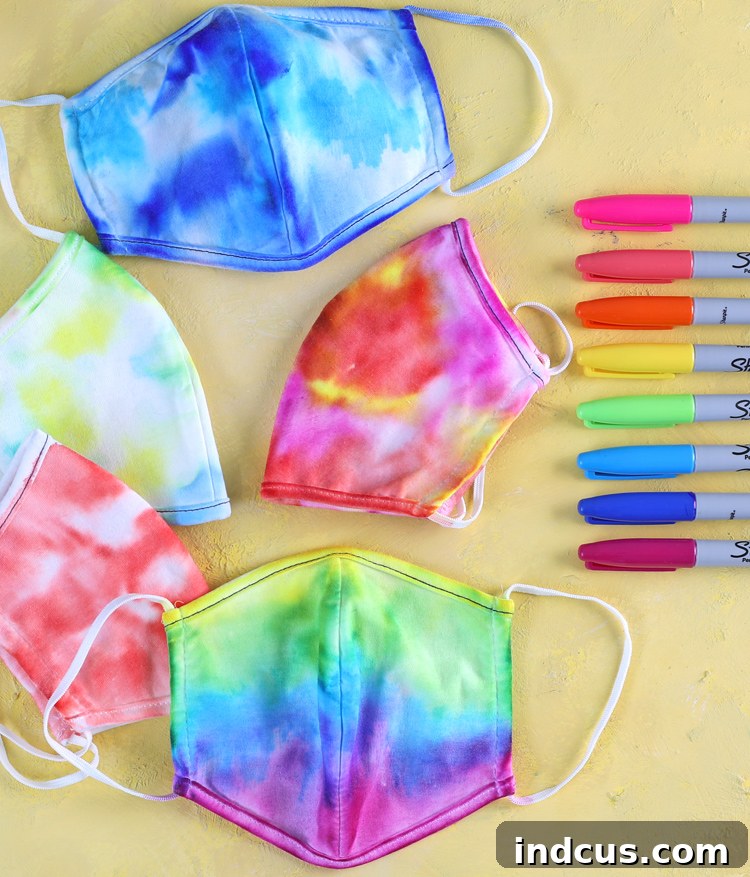
And there you have it! A collection of super cool, custom-made, and uniquely individual tie-dye face masks, brought to life through an incredibly easy, no-mess crafting method. This project is not only deeply satisfying but also provides a fantastic avenue to express your personal style and creativity in a practical and eye-catching way. Prepare to showcase your vibrant, handmade accessories with pride!
Found this simple yet spectacular DIY project inspiring? Don’t let these brilliant ideas disappear!
Pin this fantastic Sharpie Tie-Dye Mask tutorial so you can easily revisit it and inspire your friends and fellow crafters to create their own vibrant, no-mess accessories!