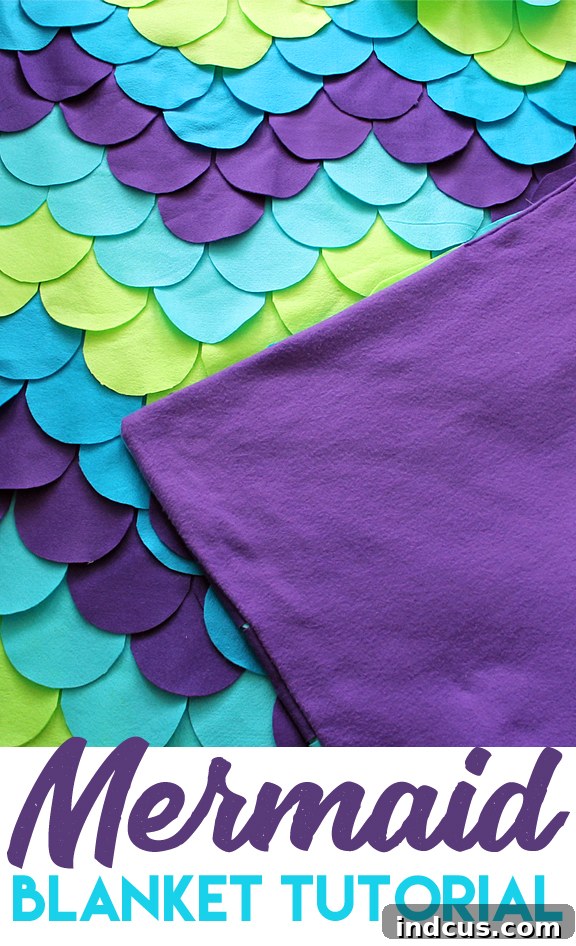
Discover How to Sew a Stunning Mermaid Blanket: A Complete Step-by-Step Guide
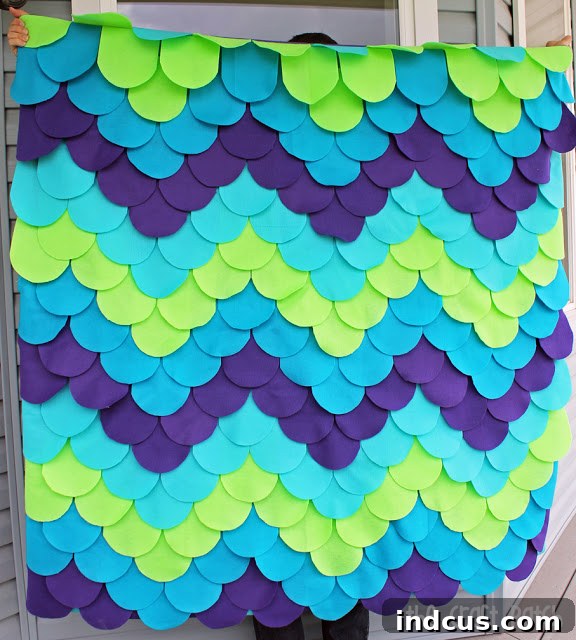
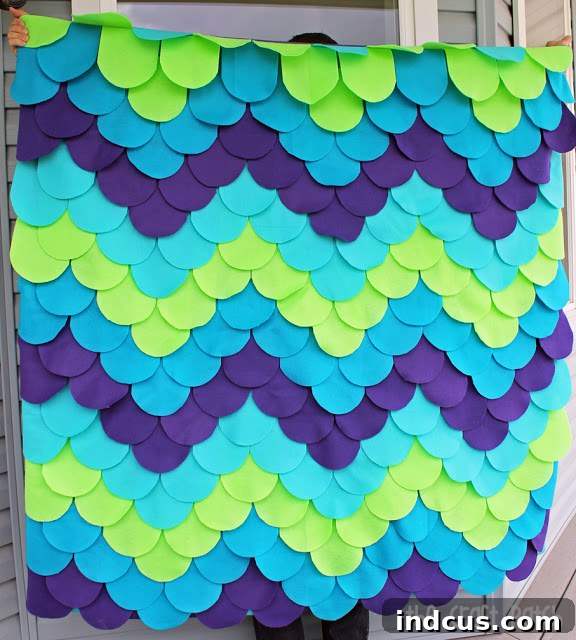
Are you searching for a unique and heartwarming gift idea, or perhaps a way to add a touch of whimsy and comfort to your own space? Look no further! Today, we’re thrilled to share an exciting and rewarding DIY project that’s perfect for anyone who loves creativity and cozy comforts: a vibrant, textured mermaid blanket. This eye-catching creation isn’t just a blanket; it’s a statement piece, a conversation starter, and a snuggle essential, designed to bring warmth and a splash of personality to any room, especially a college dorm or a cozy reading nook.
I recently embarked on this project to create something truly special for my younger sister’s high school graduation. I wanted a gift that reflected her vibrant personality, something fun and one-of-a-kind that she could cherish and take with her to college. The result? A brightly colored, funky mermaid blanket that certainly stands out from the crowd. Crafted with over 200 individual felt pieces, layered meticulously like shingles, this blanket boasts incredible texture and warmth. It’s backed with a soft cotton fabric and lined with plush purple fleece, making it exceptionally cozy and substantial. Imagine the joy of wrapping yourself in such a unique, handmade masterpiece!
This tutorial will guide you through every step of crafting your very own mermaid-inspired throw. Whether you’re an experienced seamstress or a confident beginner eager to tackle a rewarding challenge, you’ll find the instructions clear, concise, and easy to follow. Get ready to dive into the magical world of felt and fabric, and create a mermaid blanket that’s as unique as you are!
Essential Materials for Your Mermaid Blanket Project
Before we begin transforming ordinary fabric into an extraordinary mermaid blanket, gather all your supplies. Having everything ready ensures a smooth and enjoyable crafting experience.
- Felt Fabric: You’ll need four different colors of 72-inch wide felt, with approximately 2/3 yard of each color. Feel free to use more colors if you desire a richer, more varied look, adjusting the yardage accordingly. High-quality felt is recommended for durability and a luxurious feel. Consider a blend that resists pilling for long-lasting beauty.
- Backing Fabric: A sturdy yet soft fabric for the base of your blanket is essential. I found an inexpensive 5-dollar cotton sheet from a general store to be perfect. Its wide width and affordability make it an excellent choice. Look for a fabric that is easy to sew and can withstand the weight of the felt scales.
- Fleece Fabric: For the ultimate cozy experience, you’ll need a piece of fleece approximately 60×70 inches. This will serve as the soft, warm lining for the back of your blanket. Choose a fleece that complements your felt colors or adds another layer of playful contrast, like the rich purple I selected.
- Rotary Cutter and Mat: Precision is key in this project, and a good quality rotary cutter along with a large self-healing cutting mat will make cutting numerous felt pieces much faster and more accurate than scissors alone. Ensure your blade is sharp for clean cuts.
- Sewing Machine, Thread, and Scissors: A reliable sewing machine is a must. You’ll also need high-quality polyester thread that matches or complements your felt colors, and a pair of sharp fabric scissors for any detailed cutting or trimming.
Step-by-Step Instructions to Sew Your Enchanting Mermaid Blanket
Now that you have all your materials, let’s begin the exciting process of bringing your mermaid blanket to life. Follow these detailed steps carefully for the best results.
Step 1: Prepare Your Felt by Cutting Strips
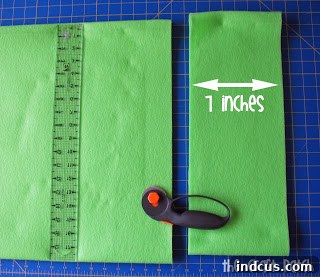
Lay out your felt fabric smoothly on your cutting mat. Using your rotary cutter and a long ruler, carefully cut strips of felt that are 7 inches wide. The width of these strips forms the base of your individual “scales.” Accuracy here will ensure your scales are uniform and your finished blanket looks neat and professional. You can layer multiple pieces of felt (typically 2-3 depending on felt thickness) to speed up this initial cutting process, but ensure they are perfectly aligned to maintain precision.
Step 2: Transform Strips into Rectangular Scale Bases
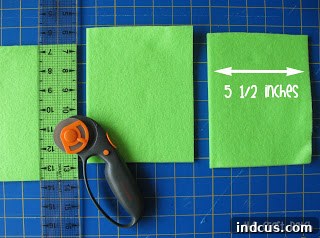
Next, take your 7-inch wide felt strips and cut them into individual rectangles measuring 5.5 inches in length. This means each rectangle will be 5.5 inches by 7 inches. Again, your rotary cutter and mat will be invaluable for making quick, clean cuts. Continue this process until you have a substantial stack of these felt rectangles. These will form the foundation of your mermaid scales.
Step 3: Shape Your Mermaid Scales
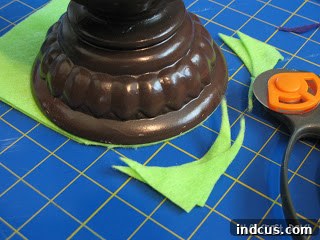
Now comes the fun part: giving your felt rectangles their distinct scale shape! Find a hard, round object – a small plate, a bowl, or even a large glass will work perfectly. Place this object on one of the 7-inch sides of your felt rectangle (the shorter side of the rectangle when held horizontally), aligning its curve to create a rounded edge. Use a fabric marker or chalk to trace this curve. Once traced, carefully cut along the line to create a beautifully curved “shingle” or “scale” shape. To expedite this step, you can cut through two (or even three if your felt is thin and sharp) layers of felt at a time, ensuring they are perfectly stacked to maintain uniformity. You should now have a growing pile of charming mermaid scales!
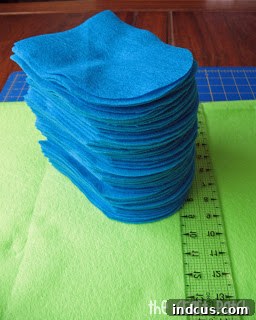
Seeing your stack of carefully cut and shaped felt scales is incredibly satisfying. This bulk preparation makes the sewing process much more efficient and enjoyable.
Step 4: Prepare Your Backing Fabric with Guide Lines
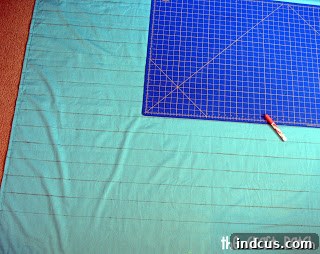
Lay your chosen backing fabric (like the cotton sheet) flat and smooth. Using a fabric marker, chalk, or even a pencil if it won’t show through, draw horizontal lines across the entire length of your fabric. These lines will serve as your guides for precisely attaching the felt scales. Mine were spaced 2 3/4 inches apart. A large cutting mat can double as a straight edge for this step, but a long ruler or yardstick will also work perfectly. Ensure your lines are parallel and extend all the way across the fabric to maintain a consistent pattern.
Step 5: Design and Arrange Your Felt Scales
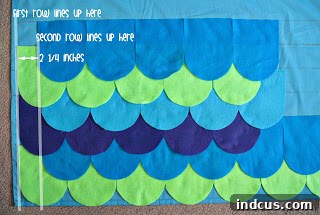
This is where your creativity truly shines! Before you start sewing, experiment with arranging your felt scales directly onto your backing fabric to visualize your design. I chose a dynamic chevron pattern, which adds a beautiful sense of movement and depth. However, you can opt for any design you wish: a random mix of colors, an ombré effect, color blocks, or even a specific pictorial design. The first row of scales should begin approximately 1/2 inch from one edge of your backing fabric. To create the offset for a chevron pattern, start the second row 2 3/4 inches (or roughly half the scale width) from where you started the first row’s edge. Take your time with this step, shifting pieces around until you’re delighted with the visual flow and color arrangement. This planning stage is crucial as it dictates the final aesthetic of your blanket.
Step 6: Organize Your Rows for Seamless Sewing
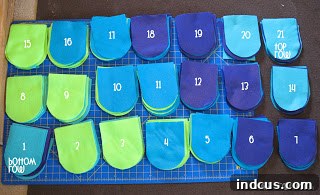
Once you’ve finalized your design layout, carefully stack up all your felt scale rows in the exact order they will be sewn. This organization is key to maintaining your desired pattern and preventing confusion or mistakes during the sewing process. If your design is complex, you might even consider labeling your stacks or taking a photo as a reference. This meticulous preparation will save you time and frustration when you’re at the sewing machine.
Step 7: Begin Sewing Your Felt Scales onto the Backing
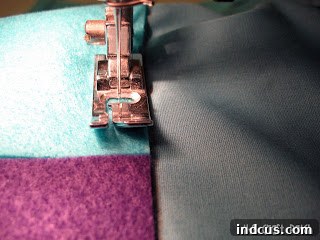
With your scales organized, it’s time to start sewing! Position your first felt scale on the backing fabric, aligning its straight top edge with the first guide line you drew in Step 4. Using your sewing machine, sew a straight stitch across the top edge of the felt piece, attaching it securely to the backing. Don’t lift your presser foot after finishing one piece; instead, grab the next piece from your organized stack, align it, and continue sewing. This “chain piecing” method is incredibly efficient and helps maintain momentum. Continue this process until you reach the end of the row. Then, move to the next guide line and repeat the process with the next row of scales, overlapping the previous row slightly to create the shingled effect. Ensure your stitches are straight and consistent for a professional finish. A longer stitch length (around 3-3.5mm) often works well with felt.
As an alternative to the chevron, here’s a glimpse of a more random pattern I explored. Don’t be afraid to experiment with your own unique arrangements!
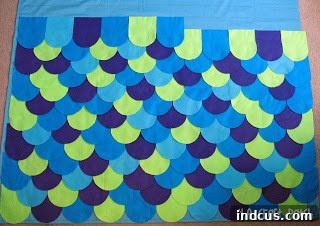
Step 8: Attach the Fleece Backing for Ultimate Coziness
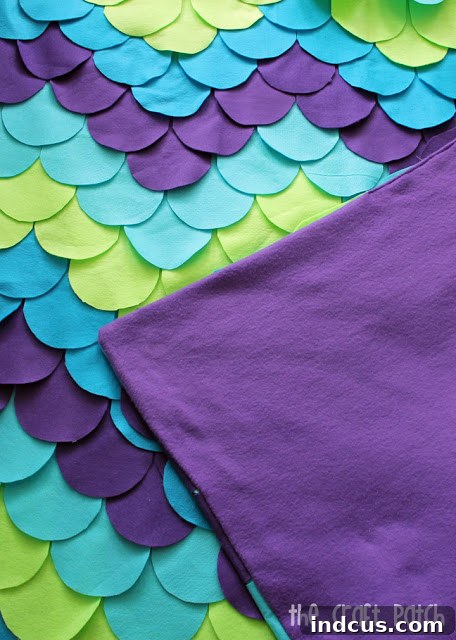
Once all your felt scales are sewn onto the backing fabric, it’s time to add the plush fleece lining. Lay your felt-covered fabric right side up. Then, place your fleece fabric on top, right side down, ensuring the “right sides” of both fabrics are facing each other. This is similar to how you would sew a pillow. Carefully pin the two layers together all around the edges. This step was particularly challenging for me because cotton and fleece have different stretch properties and can be notoriously difficult to work with together. I had to use an extensive amount of pins – easily over 100 – to prevent the fleece from stretching or shifting while sewing it to the more stable cotton backing. While I generally dislike pinning, it was absolutely critical for achieving a smooth, even seam for this project.
Sew around the edges, leaving a generous opening (about 8-10 inches) along one side. This opening is crucial for turning your blanket right-side-out. Remember to backstitch at the beginning and end of your seam to secure the stitches. For easier sewing, consider using a walking foot on your sewing machine, which helps feed multiple layers of fabric evenly. Also, before sewing, trim the excess backing fabric, leaving a 1/2 inch border of the blue backing fabric around the entire blanket. This deliberate border is important because it prevents any of the felt scales from accidentally getting caught in the final outer seams when you attach the fleece, ensuring a clean and professional edge. Once sewn, carefully clip the corners (without cutting the stitches) to help them turn out neatly. Turn the blanket right-side-out through the opening, gently pushing out the corners. Finally, hand-stitch the opening closed using a ladder stitch or top-stitch around the entire perimeter of the blanket for a clean, finished look and added durability. Your beautiful, cozy mermaid blanket is almost complete!
Admire Your Finished Mermaid Masterpiece!
Congratulations! You’ve successfully created a truly extraordinary mermaid blanket. Take a moment to step back and admire your handiwork. The vibrant colors, the rich texture of the layered felt scales, and the soft embrace of the fleece lining combine to create a blanket that is not just functional, but also a magnificent work of art.
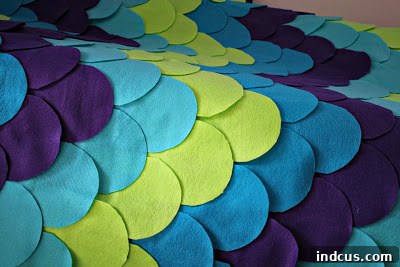
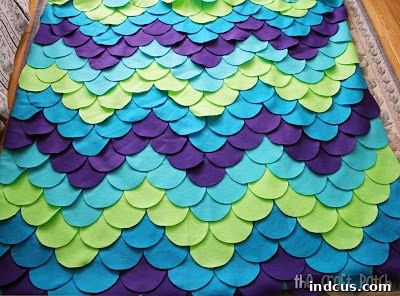
Isn’t it absolutely stunning? The mermaid-ish charm and funky design make it perfect for brightening up a college apartment, adding a playful touch to a bedroom, or simply providing a cozy, stylish throw for movie nights. This blanket isn’t just a gift; it’s a labor of love, a testament to your creativity, and a unique item that will be cherished for years to come.
To keep your mermaid blanket looking its best, consider gentle care. Spot clean any small marks, or if a full wash is needed, use a delicate cycle with cold water and lay flat to dry to preserve the integrity of the felt and the overall shape. Avoid high heat, which can damage felt. Every stitch, every scale, tells a story of dedicated craftsmanship and personal flair. Enjoy the comfort and beauty of your handmade mermaid blanket, or delight someone special with this truly unforgettable gift!