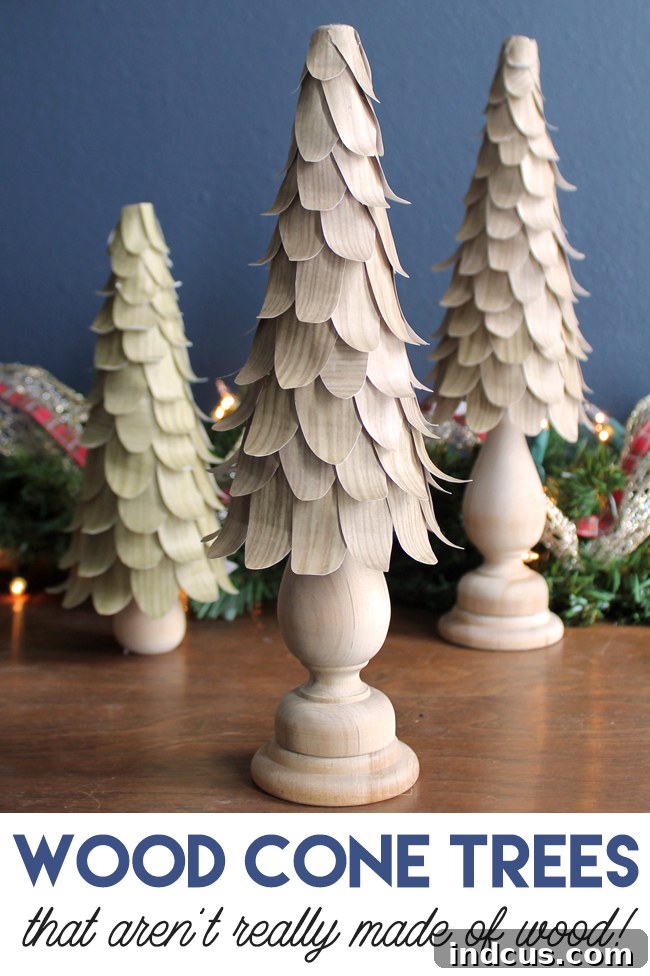
Transform Your Holiday Decor: Easy DIY Wood-Look Christmas Cone Trees
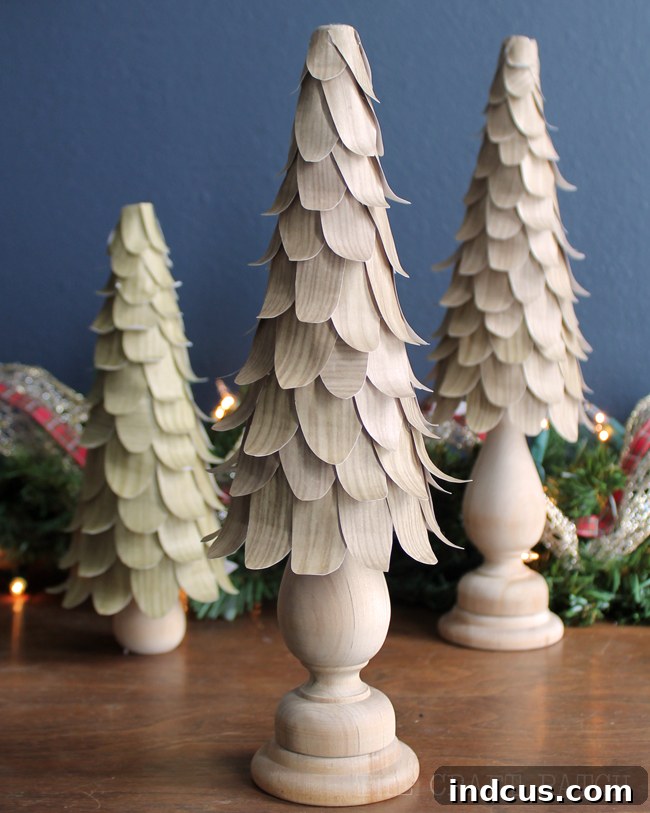
Are you searching for a unique way to infuse natural charm and rustic elegance into your holiday decorations this season? Look no further! This delightful DIY project guides you through creating stunning faux wood cone trees that promise to elevate your festive display. What started as a simple thrift store find – a few unassuming cone forms – has blossomed into an enchanting Christmas craft. While there are countless ways to adorn these versatile cones, we chose to embrace the timeless appeal of wood, crafting trees that appear intricately carved yet are incredibly simple and budget-friendly to make. The results are truly captivating, offering a warm, organic touch that complements any decor style, from modern farmhouse to classic lodge. Prepare to be amazed by how easily you can achieve this sophisticated look!
Why Choose DIY Wood-Look Cone Trees for Your Holiday Decor?
In a world saturated with mass-produced decorations, crafting your own holiday accents brings a refreshing sense of individuality and warmth to your home. DIY projects like these wood-look cone trees offer numerous advantages, making them an ideal choice for the conscientious decorator. Firstly, they allow for unparalleled personalization; you can tailor the size, texture, and embellishments to perfectly match your existing decor or create an entirely new theme. Secondly, they are incredibly cost-effective. Utilizing readily available and often inexpensive materials like scrapbook paper and thrifted cone forms can save you a significant amount compared to purchasing high-end designer pieces. More importantly, there’s an immense sense of satisfaction that comes from creating something beautiful with your own hands. These faux wood trees embody a rustic aesthetic that is both timeless and versatile. Their natural appeal blends seamlessly with various interior design schemes, adding a cozy, inviting ambiance that truly captures the spirit of the season. They are perfect for creating charming mantel displays, captivating table centerpieces, or adding a touch of festive cheer to shelves and entryways. Ditch the ordinary and embrace the extraordinary with handmade charm!
Gather Your Materials: What You’ll Need for This Enchanting Craft
Embarking on any craft project begins with assembling the right tools and materials. For these exquisite wood-look cone trees, you’ll find that the list is delightfully short and accessible. Most items can be found at your local craft store, an online retailer, or even around your home. Investing in quality supplies will ensure a smoother crafting process and a more durable, professional-looking finished product. Here’s a detailed breakdown of what you’ll need to transform simple cones into rustic masterpieces:
Essential Supplies:
- Cone Form(s): These are the foundation of your trees. You can find them in various sizes at craft stores, or like us, discover them at a thrift store for a budget-friendly option. Styrofoam, paper mache, or plastic cones all work wonderfully. Consider a variety of sizes to create a dynamic display.
- Wooden Candlestick(s): These serve as sturdy bases, elevating your trees and adding a touch of classic elegance. Thrift stores are excellent places to find unique candlesticks. Look for ones with a flat top for easy attachment. If you can’t find wooden ones, painted metal or ceramic candlesticks can also work, or even small wood blocks.
- Scrapbook Paper with a Wooden Pattern: This is where the magic happens! We sourced ours from Michaels, but most craft stores offer a wide selection of wood-patterned scrapbook paper. Look for designs that mimic natural wood grain, bark textures, or even painted wood effects to achieve your desired aesthetic. One 12×12 inch sheet typically covers one small to medium cone tree, so stock up if you’re making a “forest.”
- Sharp Scissors: Precision is key for cutting the many “petals.” A good pair of sharp craft scissors will make the cutting process much quicker and cleaner, reducing hand fatigue.
- Hot Glue Gun and Plenty of Glue Sticks: Hot glue is the adhesive of choice for this project due to its quick drying time and strong hold. Ensure your glue gun is in good working order and have a generous supply of glue sticks on hand, as you’ll be using quite a few for securely attaching all the paper pieces.
Optional Enhancements:
- Pencil, Dowel, or Pen: Essential for curling the edges of your paper petals, adding dimension and a lifelike texture.
- Cutting Machine (e.g., Cricut, Silhouette): If you’re planning to make a large quantity of trees or very large trees, a cutting machine can significantly save time and ensure uniform petal shapes. However, hand-cutting is perfectly feasible and adds a charming, organic touch.
- Craft Mat or Protected Work Surface: To keep your crafting area clean and free from glue drips.
- Small Embellishments: Consider subtle additions like glitter, tiny beads, or thin twine to further personalize your finished trees.
Step-by-Step Guide: Crafting Your Rustic Wood Cone Trees
With your materials gathered, it’s time to bring your vision to life! This project is wonderfully straightforward, making it enjoyable for crafters of all skill levels. Follow these detailed steps to create your beautiful faux wood cone trees:
Step 1: Prepare Your Wooden Petals – The Foundation of Your Tree
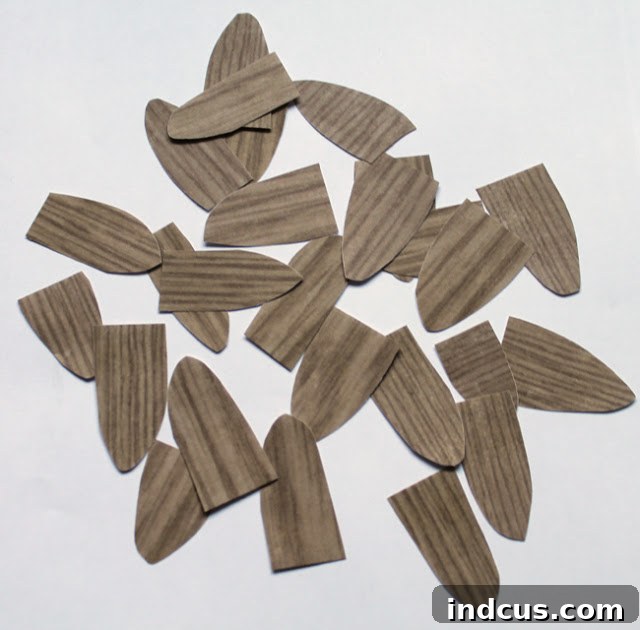
The first and most time-consuming step is cutting out your individual “petals” or “leaves” from the wood-patterned scrapbook paper. The key here is consistency in shape, but variety in size. We recommend cutting out a significant number of leaf shapes – think of it as preparing the foliage for your tree. For a single average-sized cone tree, an entire 12×12 inch sheet of paper might be needed. Start by cutting larger leaves for the bottom rows of your cone, gradually making them smaller as you work your way up towards the apex. This natural progression in size will give your finished tree a more realistic and organic silhouette. Don’t worry about perfect symmetry; slight variations will enhance the handcrafted charm. If you’re tackling multiple trees or a very large one, consider using a cutting machine (like a Cricut or Silhouette) to expedite this process and ensure uniform shapes. However, for the three small trees we created, hand-cutting was a relaxing and manageable task, allowing for an authentic, human touch in each piece.
Step 2: Add Dimension – Curled Edges for a Natural Look
Flat paper leaves can make a tree look two-dimensional. To infuse life and realistic texture into your faux wood trees, you’ll need to curl the edges of each paper petal. This simple technique adds significant depth and mimics the subtle curves found in natural wood elements or even real leaves. To do this, take each individual paper leaf and gently roll its edges around a pencil, a thin dowel, a knitting needle, or even a pen. Apply light pressure as you roll, allowing the paper to curve without creasing or tearing. You can curl just the tips, or roll a larger section of the leaf, depending on the desired effect. Some leaves can be curled inwards, others outwards, creating a dynamic and varied texture across your tree. This step is crucial for achieving that intricately carved, three-dimensional appearance that makes these trees look so wonderfully authentic.
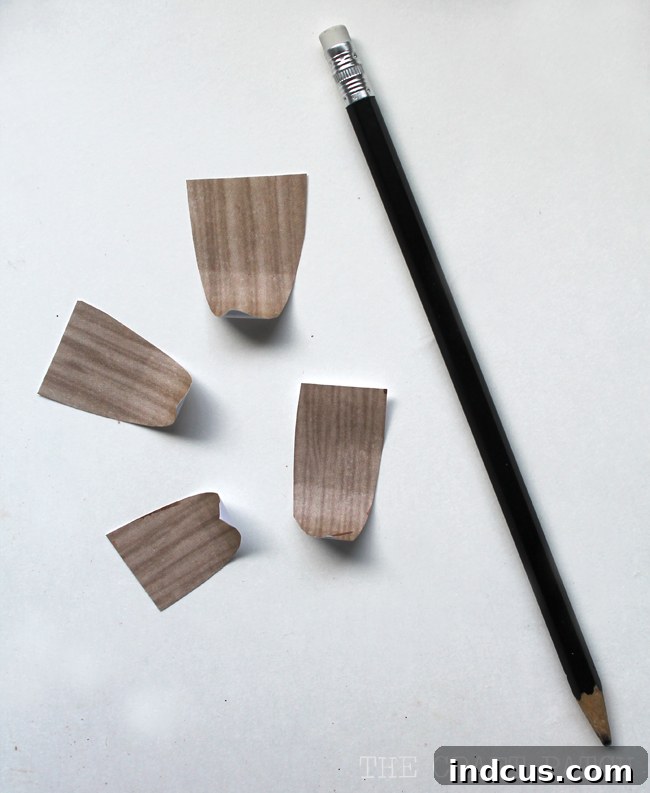
Step 3: Build Your Tree – Attaching the Petals Layer by Layer
Now for the most satisfying part: assembling your tree! Grab your hot glue gun and begin at the very bottom edge of your cone form. Apply a small bead of hot glue along the straight (un-curled) edge of one of your larger paper leaves. Quickly press it firmly onto the base of the cone. Continue this process, working your way around the entire circumference of the cone, slightly overlapping each leaf to ensure complete coverage. The overlapping is key; it creates a dense, layered look, reminiscent of tree bark or closely packed petals. As you move upwards, begin using the slightly smaller leaves you prepared earlier. Aim for even spacing and consistent layering to maintain a uniform texture. Continue this spiral ascent, overlapping the leaves from the previous row slightly to conceal the base of the new layer. Take your time, ensuring each leaf is securely attached and that the hot glue has cooled before moving on. The goal is to completely cover the cone form, creating a seamless, wood-like surface that flows beautifully from base to tip.
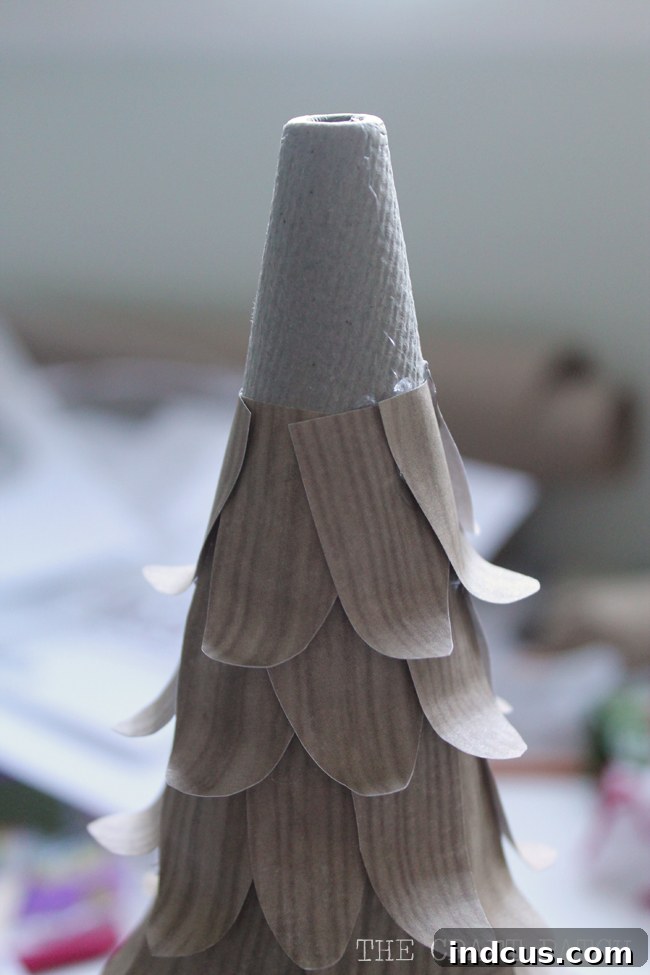
Step 4: Secure the Base – Elevating Your Cone Tree with a Candlestick
With your cone completely covered in beautiful faux wood petals, the final structural step is to attach it to its base. This not only provides stability but also elevates your tree, giving it a more substantial and elegant presence. Take your chosen wooden candlestick and apply a generous bead of hot glue around its top edge, ensuring sufficient adhesive for a strong bond. Carefully center the bottom opening of your paper-covered cone over the glued candlestick. Gently press the cone down onto the candlestick, holding it firmly in place until the hot glue cools and sets completely. It’s important to keep the tree straight and centered during this crucial bonding period to ensure it stands tall and evenly. Once the glue has hardened, your beautiful wood-look cone tree is complete and ready for display! This sturdy base makes the tree easy to move and integrate into any holiday vignette.
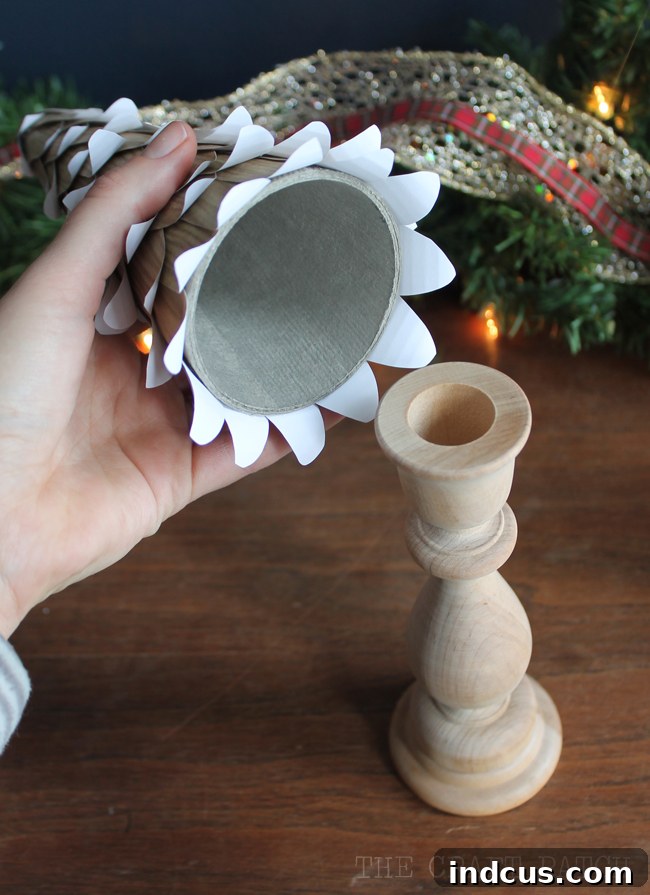
The Grand Reveal: Admiring Your Handcrafted Masterpiece
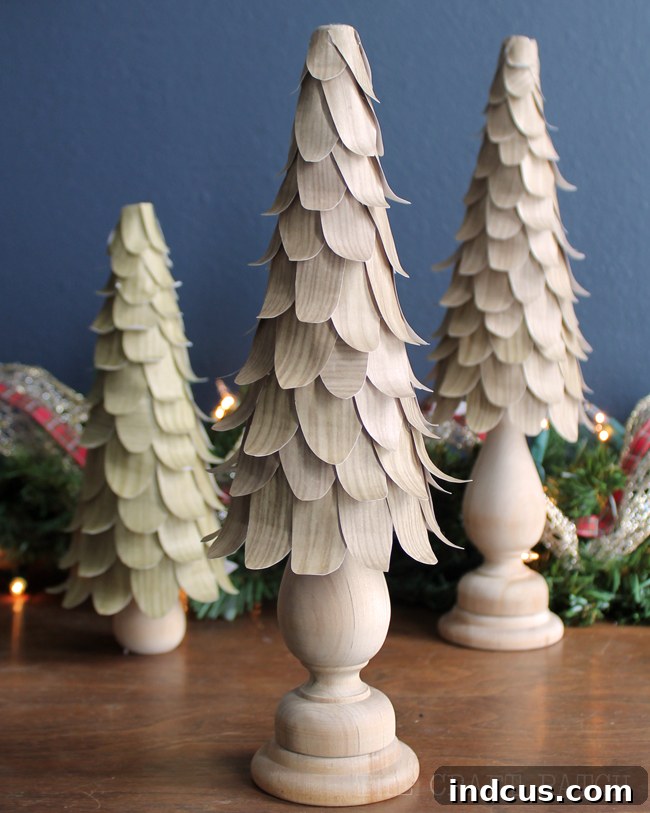
And there you have it! In just a few simple steps, you’ve created a truly magnificent piece of holiday decor. The transformation is astounding – from plain cone forms to elegant, rustic wood-look trees that seem to have sprung directly from a magical forest. We absolutely adore the final effect; these trees possess a sophisticated charm that belies their humble origins. The careful layering and curling of the paper leaves create an illusion of depth and texture so convincing, you’d swear they were intricately carved from genuine wood. It’s a joy to watch people get up close, only to discover that what they perceived as solid timber is, in fact, cleverly manipulated paper. This delightful surprise adds another layer of appreciation for your crafting ingenuity. These trees aren’t just decorations; they’re conversation starters, embodying the spirit of handmade creativity and the warmth of the holiday season.
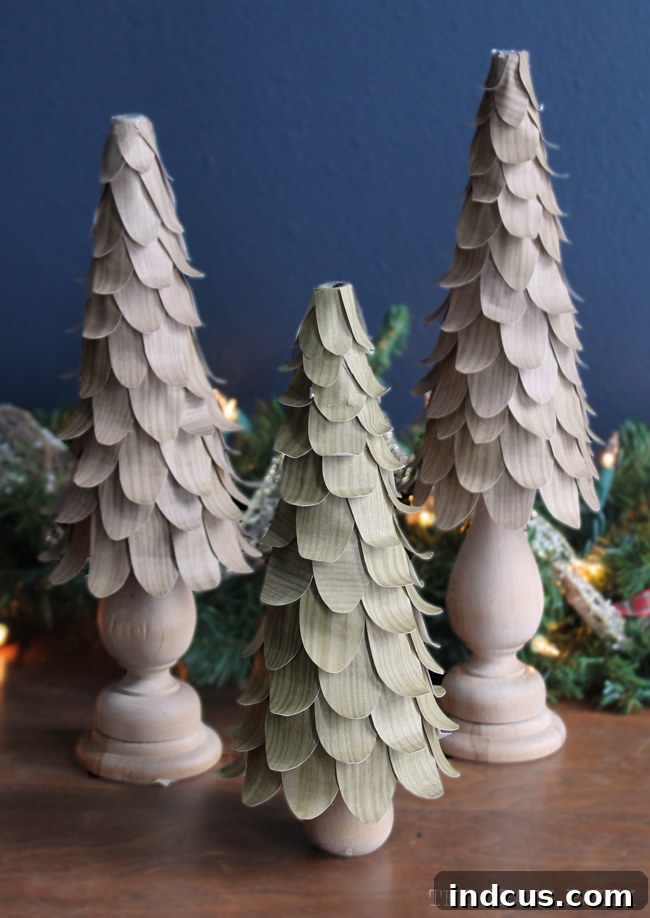
Personalize Your Forest: Creative Customization Ideas
While the natural wood look is undeniably beautiful, one of the greatest joys of DIY is the freedom to customize. These wood-look cone trees serve as a perfect canvas for your creative imagination. Here are a few ideas to inspire you to make your trees uniquely yours:
- Varying Paper Textures and Colors: Don’t limit yourself to just one wood pattern. Experiment with different shades of wood (light birch, dark walnut), distressed wood patterns, or even combine wood patterns with subtle metallic or glitter paper for a glamorous rustic feel. You could also paint plain paper in various shades of brown and grey, then distress it for a weathered wood effect.
- Adding Glitter or Faux Snow: For a touch of winter wonderland magic, lightly dust the tips of your paper petals with fine glitter or faux snow while the glue is still tacky. This will create a frosty, enchanting effect that shimmers under holiday lights.
- Ribbons, Beads, and Small Ornaments: Once your trees are complete, consider draping delicate ribbons (burlap, lace, or satin) around them, or gluing tiny beads, faux berries, or miniature pinecones onto the “branches.” Small, lightweight ornaments can also be nestled between the layers for an added festive touch.
- Creating a “Winter Wonderland” Set: Instead of making just one tree, create a collection of varying heights and sizes. Group them together on a mantelpiece, a side table, or as a magnificent centerpiece on your dining table. Add LED fairy lights, a dusting of faux snow, and a few miniature deer or woodland creatures to complete a stunning winter scene.
- Thematic Variations: Adapt the paper choice to fit a specific theme. For a farmhouse look, use whitewashed wood patterns. For a modern minimalist vibe, use very subtle, light wood grain papers and keep embellishments to a minimum.
Caring for Your Handcrafted Treasures
To ensure your beautiful faux wood cone trees remain a cherished part of your holiday decor for years to come, a little care goes a long way. Since they are primarily made of paper and hot glue, they are best suited for indoor display. Avoid placing them in areas with high humidity or direct sunlight, which can cause fading or damage to the paper. When the holiday season ends, gently dust them off with a soft brush or cloth. Store them carefully in a sturdy box, preferably wrapped in tissue paper or bubble wrap to protect the delicate curled edges from getting crushed. Storing them upright will help maintain their shape. With proper care, these delightful handmade trees will bring joy and rustic charm to your home for many Christmases to come.
Don’t miss out on this fantastic DIY project! Pin it now to save for later and share your own stunning creations!