
Welcome back to another thrilling update on our journey through the Jeffrey Court Renovation Challenge! As we dive deeper into this six-week whirlwind, our bathroom transformation is rapidly approaching its grand reveal. For those just joining us, I’m tackling a complete bathroom remodel from the ground up, and it’s been an incredible, albeit intense, ride. If you’ve missed any of the crucial planning stages or the early demolition chaos, you can catch up on all the progress and design decisions by exploring our previous posts:
- Week 1 Update: Laying the Foundation for Our Vision
- Week 2 Update: Navigating Unexpected Challenges and Milestones
- Week 3 Update: The Structure Takes Shape
PREVIEW THE FINAL BATHROOM TRANSFORMATION HERE!
Your support means the world to me in this competition, and I’d be incredibly grateful if you could take a moment to vote for my bathroom! It’s genuinely straightforward: simply click the link provided below, scroll down until you spot my project picture, and then click ‘vote.’ It only takes about ten seconds of your time, but it makes a monumental difference. Remember, you can cast one vote per day, per device, until the challenge concludes. Every click brings us closer to success!
CLICK HERE TO CAST YOUR VOTE AND SUPPORT OUR PROJECT!
Bringing the Vision to Life: From Chaos to Charm
This week marked a monumental shift in our bathroom renovation journey. After weeks of demolition dust, structural work, and the less glamorous aspects of remodeling, we finally transitioned into what I affectionately call “the pretty stuff.” It’s incredibly rewarding to see the aesthetic elements come together, transforming our space from a construction zone into a room with character and charm. The sense of accomplishment that comes with each finished surface and installed fixture is truly energizing, especially when working against such a demanding deadline.
Mastering the Marble: Sealing and Grouting the Floor
One of the most anticipated steps was undoubtedly the completion of our marble floor. On Wednesday and Thursday, I meticulously focused on sealing and grouting, two critical processes that not only protect the beautiful natural stone but also define its final appearance. For this intricate task, I relied on TileLab Surface Guard Sealer and FusionPro Grout. I’m genuinely delighted with the performance of both products. The TileLab sealer provided excellent protection, enhancing the marble’s natural beauty without altering its finish, which is crucial for such a luxurious material. The FusionPro Grout was a dream to work with, offering a smooth application and a durable finish that beautifully complements the veining of the marble. My only minor regret? Opting for the larger-sized containers. Despite the expansive area of our bathroom, I barely scratched the surface of what was provided, meaning I’ll have a substantial amount leftover even after I tackle the shower tiling. A valuable lesson in project planning and material estimation for future endeavors!
Introducing Our New Vanity: The Heart of the Bathroom
With the marble floor safely sealed and grouted, and now secure enough to walk on, we eagerly ushered in the brand-new vanity from its temporary home in the garage. This was a moment I had been eagerly anticipating, almost as much as the flooring. Unpacking it from its shipping box and finally seeing it nestled in its designated spot within the bathroom was incredibly exciting. It’s more than just a functional piece; it’s a design statement that anchors the entire room.
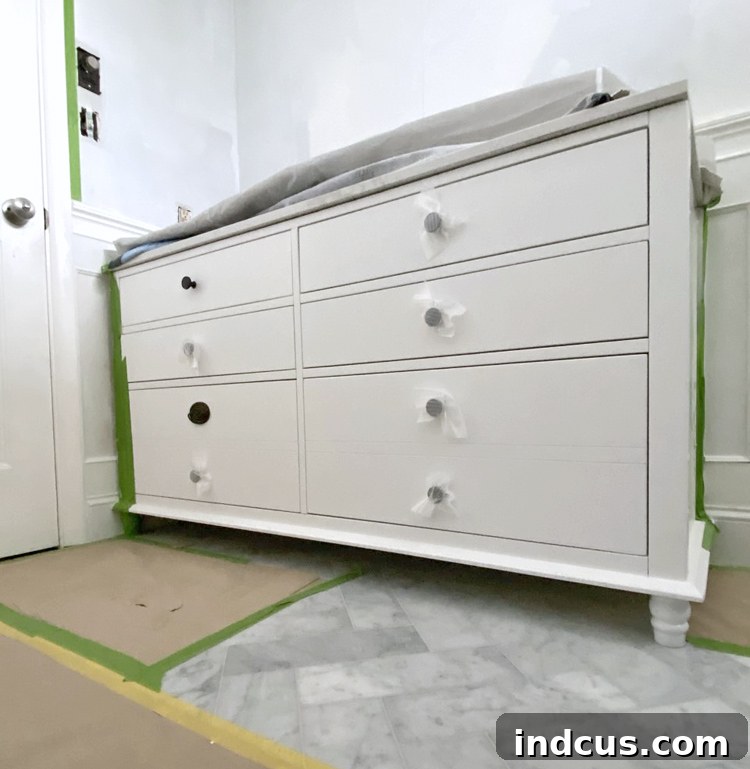
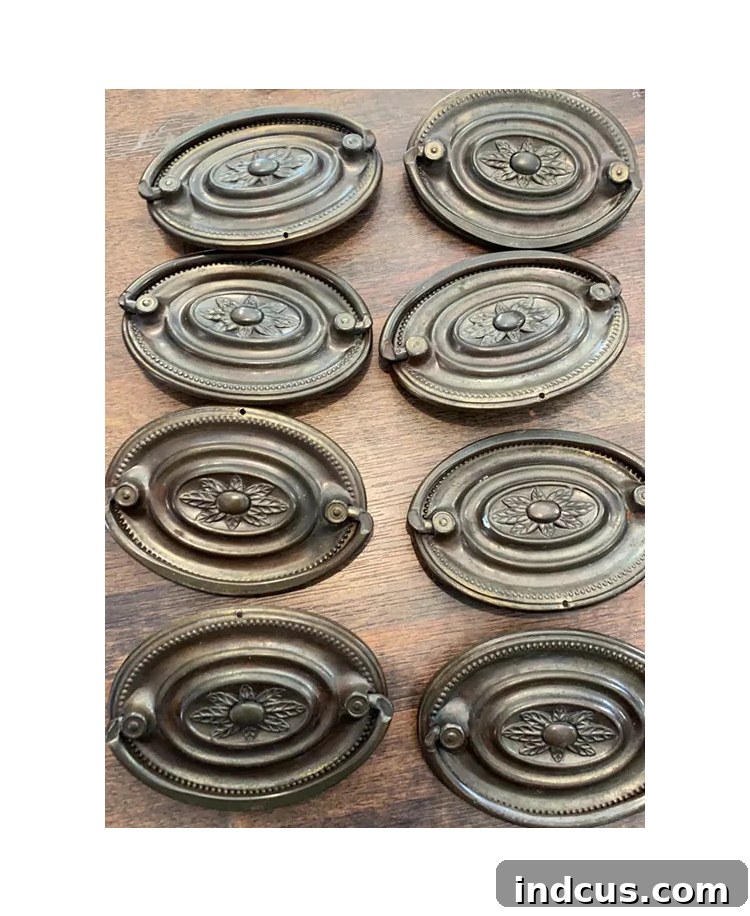
My decision to select this particular vanity was driven by a very specific aesthetic goal: I wanted it to emulate the elegant appearance of an antique dresser. For weeks, I scoured antique shops, online marketplaces, and salvage yards in search of the perfect vintage piece that could be repurposed. However, the constraints of the competition deadline, coupled with the need for precise dimensions to fit our space, made finding an ideal antique dresser a fruitless endeavor. Ultimately, I “settled” (and I use that term loosely, as I’m thrilled with it!) for a newly manufactured vanity specifically designed to mimic that classic dresser style. To further enhance this vintage appeal, I’m installing exquisite antique Hepplewhite style cabinet pulls, which are renowned for their timeless design and intricate detailing. These small, thoughtful additions are key to achieving the bespoke, heirloom look I envisioned for this space.
Elevating the Walls: The Art of Wainscoting
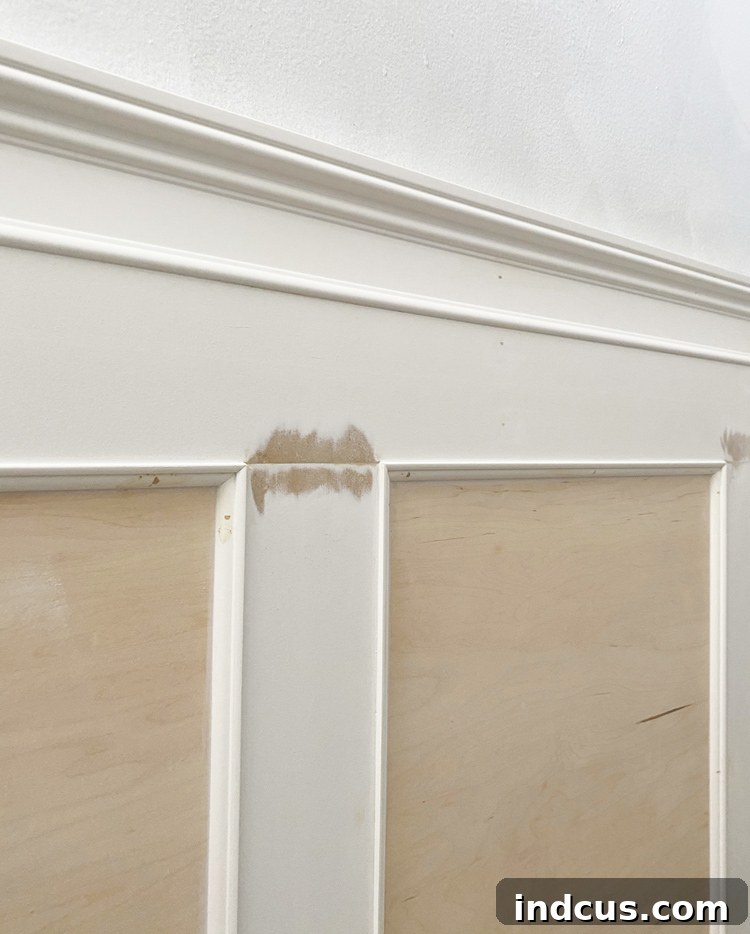
The third major triumph of the week, and arguably the most transformative, was the installation of the wainscoting wall treatment. This wasn’t merely a decorative addition; it was a challenging yet rewarding undertaking that demanded precision and patience. We were steadfast in our desire for a super traditional aesthetic, a look that exudes classic elegance and architectural depth. After much deliberation, we settled on the sophisticated design of inlaid boxes, aiming for that luxurious, substantial feel that only thick molding can provide. The images you see now showcase the wainscoting after the painstaking process of installation, followed by meticulous nail hole filling and caulking. These finishing touches are crucial for achieving a seamless, polished appearance that truly elevates the room.
Deconstructing the Wainscoting: A Layered Approach to Design
Understanding the anatomy of our chosen wainscoting style reveals the thoughtful layering and specific materials required to achieve this traditional look. It’s a testament to how multiple components can come together to create a unified, high-end finish. This intricate wall treatment is comprised of several distinct pieces, each playing a vital role in its overall aesthetic and structural integrity:
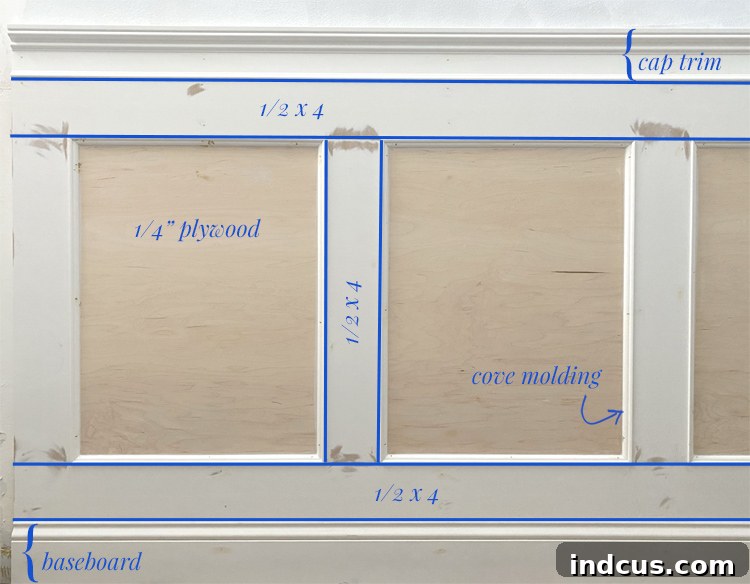
At the very top, crowning the entire structure, is the cap trim. This essential piece serves as the finished top edge, providing a clean transition and a touch of architectural detail. Crafted from PVC, it offers the added benefit of moisture resistance, a practical consideration for a bathroom environment where humidity levels can fluctuate. This durability ensures the wainscoting will stand the test of time.
Beneath the cap trim lie the horizontal rails and vertical stiles, which define the classic box-panel layout. These critical components are made from 1/2×4 inch MDF (Medium-Density Fiberboard). We specifically chose MDF for its stability, smooth finish, and affordability, making it an excellent material for painted trimwork. These pieces initially came with a rounded edge on one side, a common feature for many stock moldings. However, to achieve the sharp, traditional look we desired for our inlaid boxes, we carefully ran them through a table saw to square up all the edges. The 1/2-inch thickness was particularly important, as it provided the perfect depth to seamlessly integrate with the other wainscoting elements, creating a cohesive and custom appearance. This size proved challenging to find in stock, making it a valuable discovery for our project.
Each individual rectangular center within the wainscoting framework was then meticulously filled with 1/4 inch plywood. This step is often overlooked by DIYers, but it’s absolutely critical for achieving a truly smooth, high-end finish. While it might seem like an extra layer of work, the difference it makes is undeniable. If your existing walls are perfectly smooth, you might consider skipping this step. However, I have a strong aversion to seeing the subtle texture of drywall through wainscoting, as I believe it can significantly cheapen the overall look. The plywood infill ensures a flawless, paint-ready surface that contributes to the luxurious feel of custom millwork.
To further enhance the traditional elegance of each box, a decorative cove piece was meticulously mitered into each corner. This small, yet impactful, trim element is what truly distinguishes our wainscoting from a more rustic “farmhouse” style, pushing it firmly into the realm of classic, refined design. It adds a layer of intricate detail and visual interest that elevates the entire wall treatment.
Finally, at the very bottom, we have the baseboard. This is the same 5-inch baseboard that extends throughout the rest of our home, ensuring a consistent design aesthetic. However, integrating it with the new wainscoting presented a unique challenge. To ensure the baseboard lined up perfectly at the correct depth with the other trim pieces, we had to carefully rip down 1/2-inch strips of plywood. These strips were then nailed behind the baseboard, effectively “furring out” the wall to achieve a seamless alignment. As you can imagine, this detailed layering and precise fitting made the entire wainscoting installation far more complex than a simple accent wall. It’s a testament to the fact that achieving a truly custom and traditional look often requires these meticulous, multi-step processes.
The Vanity-Molding Conundrum: A DIYer’s True Test
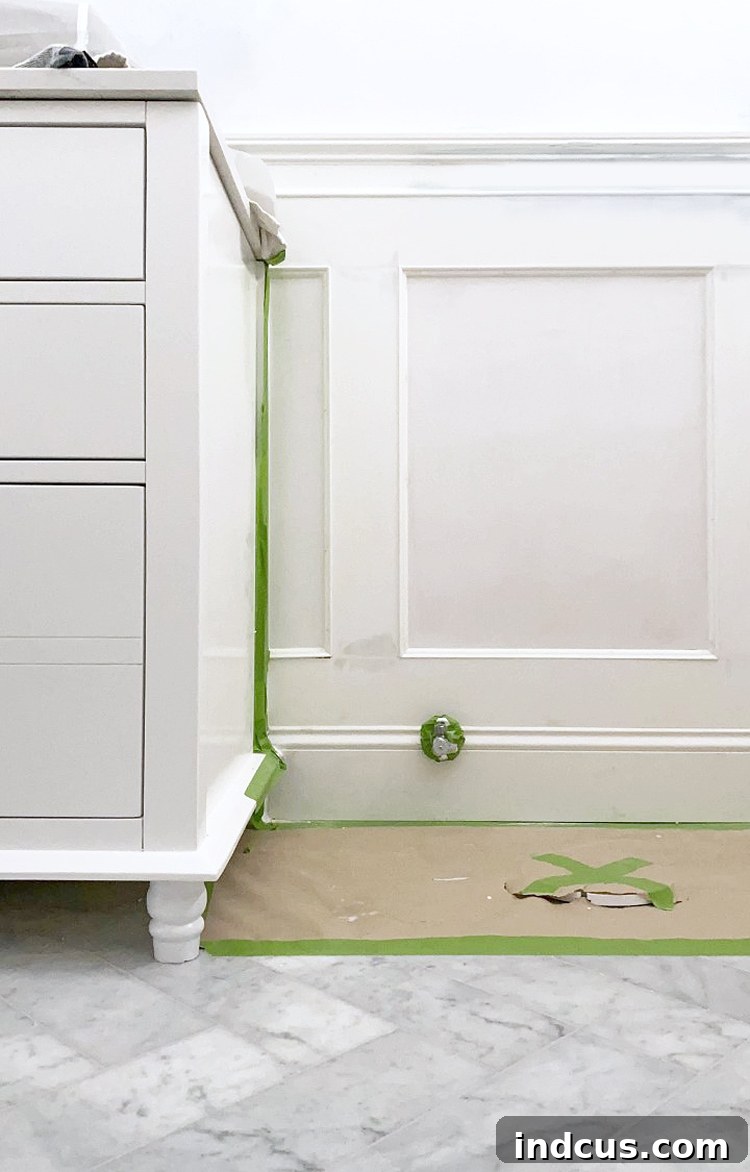
While the overall wainscoting installation was intricate, the most daunting challenge, and frankly, the one that nearly broke us, was seamlessly fitting the trim around the newly installed vanity. This wasn’t just a matter of straight cuts; it involved navigating a complex interplay of angles, depths, and the unique contours where the vanity met the wall. It required an estimated eight grueling hours of dedicated problem-solving, countless trial-and-error attempts, and cutting all sorts of “crazy shapes” to ensure the vanity and the molding played nicely together. Just take a moment to study the image below and visualize the incredibly intricate and non-standard cuts required where the back edge of the vanity bumps up against the molding. Indeed, figuring out these precise fits was exceptionally difficult and tested our patience and woodworking skills to their limits.
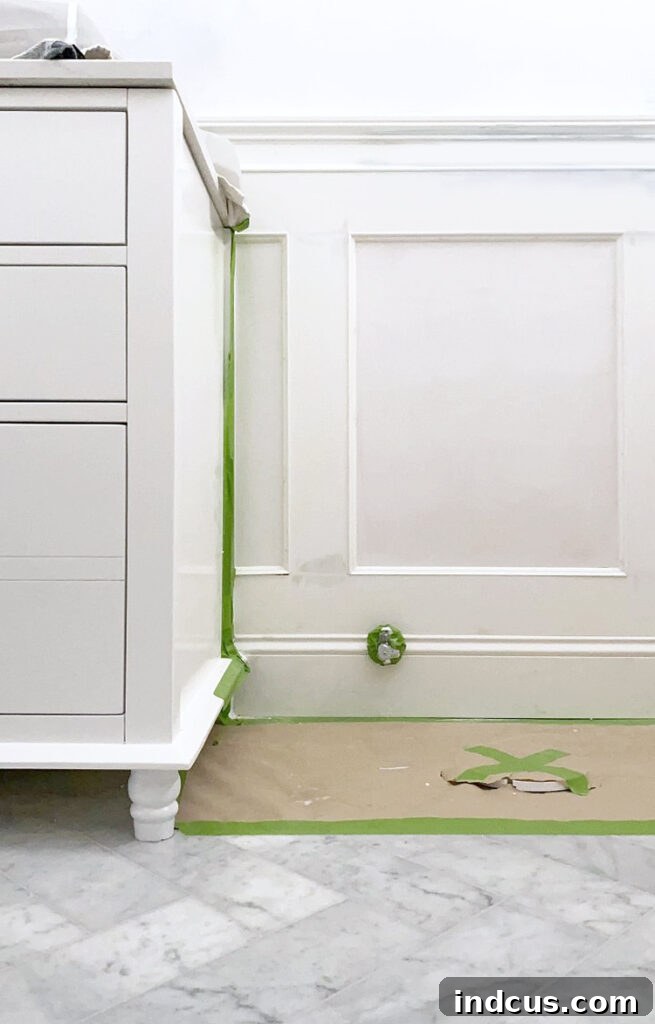
But through all the frustration and painstaking adjustments, one motto consistently reigns supreme in the world of DIY, a mantra that every seasoned renovator lives by. Repeat after me, because it’s a truth that saves countless projects:
Caulk and paint make things what they ain’t.
This timeless adage is a DIYer’s best friend, a reminder that minor imperfections in cuts, gaps, or seams can often be magically rectified with the strategic application of caulk and a fresh coat of paint. It provides a comforting light at the end of the tunnel when grappling with seemingly insurmountable fitting challenges, assuring us that a polished finish is always within reach.
The Grand Reveal: A Splash of Unexpected Color
As I type these words, the primer on our wainscoting is diligently drying, setting the stage for one of the most exciting transformations yet: the paint! And here’s a little secret for you, a delightful surprise that deviates from the conventional white trim: the wainscoting is not staying white! *Ahhh!* The decision to depart from classic white has been an agonizing one, a journey through countless shades and undertones that has consumed my thoughts. I swear I’ve Googled every conceivable color ever invented, meticulously comparing swatches and poring over inspiration images. The sheer volume of paint samples I’ve acquired could probably, if mixed together, paint an entire room! This exhaustive process underscores the critical importance of selecting the perfect hue, especially for such a prominent architectural feature in a bathroom.
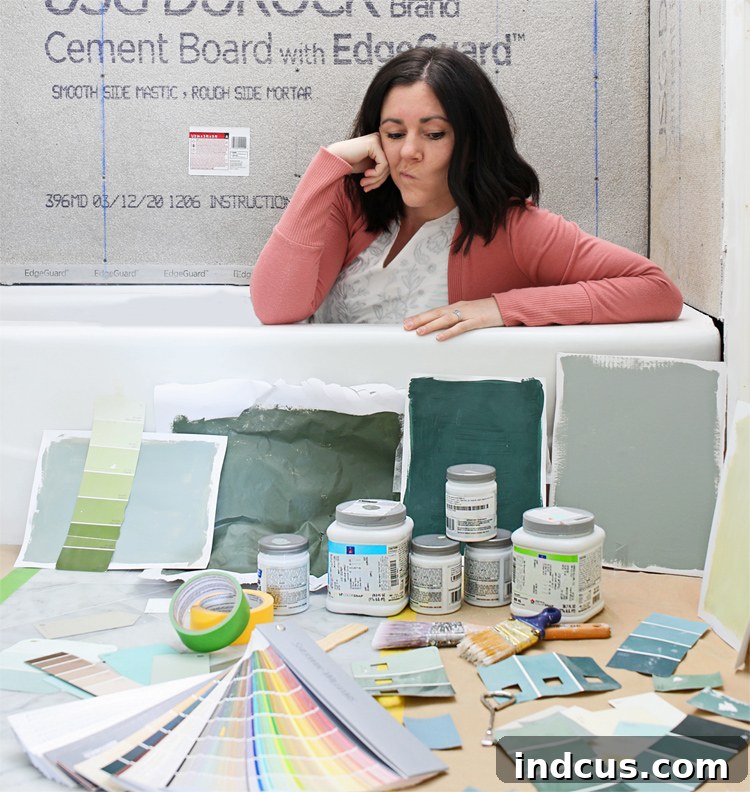
During my extensive quest for “the one” paint color, I stumbled upon an truly invaluable resource for discerning and comparing shades: Encycolorpedia. This website is an absolute game-changer for anyone navigating the overwhelming world of paint choices. You can effortlessly search any paint color name, and it instantly provides its corresponding hex color code. This feature alone is incredibly powerful, allowing you to digitally compare colors with unparalleled precision. Understanding how different shades interact and complement each other, especially when contemplating bold design choices for wainscoting or a bathroom space, is made significantly easier with this tool.
To give you a glimpse into my detailed process, here’s a small example of how I leveraged Encycolorpedia to refine my color selection:
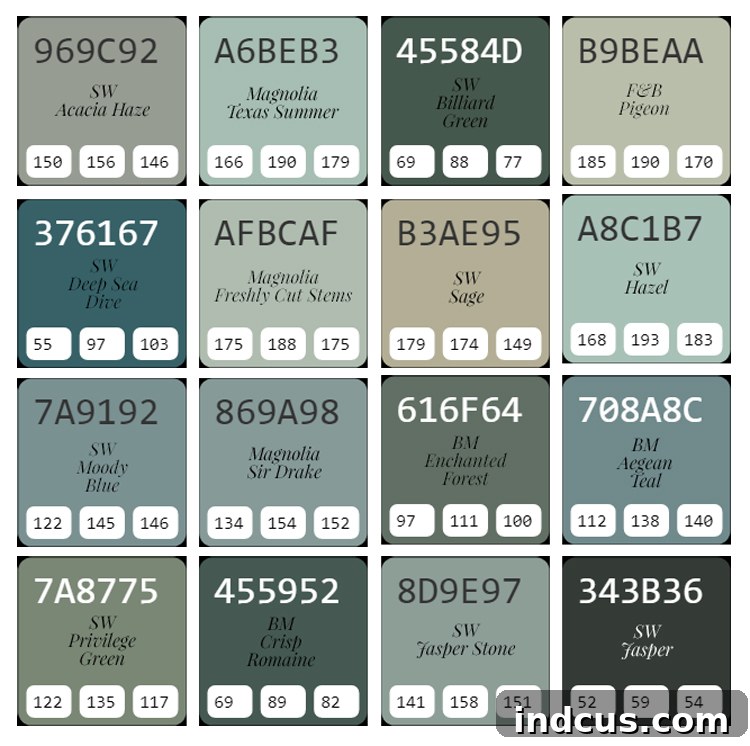
Every time I encountered an image on Instagram or Pinterest featuring a paint color that sparked my interest and seemed to hold the potential to be “the one,” I would immediately look it up on Encycolorpedia. Then, I’d pull the resulting thumbnail into Photoshop, placing it side-by-side with other contenders. The visual impact of seeing colors juxtaposed like this is immensely helpful; it truly clarifies undertones, saturation, and overall feel in a way that individual swatches often cannot. Beyond hex codes, the site also provides the Light Reflecting Value (LRV) for each color. The LRV indicates how much light a color reflects, essentially telling you how light or dark a color will appear in a space. This metric is incredibly useful for a bathroom, where lighting conditions and the perception of spaciousness are paramount. A higher LRV can make a small bathroom feel larger and brighter, while a lower LRV can create a sense of intimacy and drama. Factoring in LRV was crucial for ensuring our chosen color would contribute to the desired ambiance without making the room feel too dim or overwhelming.
After what felt like an eternity of staring at paint samples, making countless trips back to the store for “just one more color,” I finally made my definitive choice. The chosen shade is one of the hues sampled above, promising to deliver a sophisticated and perhaps unexpected twist to our traditional wainscoting. Care to venture a guess which one it is? You’ll have to return next week for our next update to see if your intuition proves correct! The anticipation is building, and I can’t wait to share this bold design decision with you all.
The Home Stretch: Navigating Final Hurdles
Despite the tremendous progress we’ve made this week, the renovation challenge continues to test our mettle. We are currently in a critical holding pattern, eagerly awaiting the arrival of our plumbing fixtures. Once these essential components are delivered, we can finally install the valves and pipes behind the walls, allowing us to close them up and, crucially, get the shower tiled. The thought of this final tiling push sends slight heart palpitations through me – it’s a significant undertaking that requires both precision and speed to meet our tight deadline. Please, cross your fingers for us that our shipment arrives ASAP! External dependencies like this can truly make or break a renovation timeline, adding an extra layer of stress to an already intense challenge.
To keep everything on track and provide a clear overview of the journey, here’s an updated look at our comprehensive to-do list. The satisfaction of crossing off completed items is unmatched, even as new challenges emerge:
RENOVATION CHALLENGE TO-DO LIST:
Remove old tile around tub and showerRemove old tile floorClear out debrisRemove old vanityAdd outlet behind vanityMove light box downRepair drywallRemove toiletClean floor and prepLay down cement boardTape and cement seamsTile floorSeal floorGrout floor- New plumbing valves in shower (Waiting for parts!)
- Install cement board in shower surround
- Tape + Mud shower seams
- Redgard waterproofing application
- Tile shower surround
- Seal shower surround
- Grout shower surround
Install vanityWainscoting wall moldingSand, caulk,prime and paint molding- Wallpaper above wainscoting
- Install new toilet
- Install light fixtures, mirrors, towel bars, decor, etc.
It’s undeniably crunch time! The finish line is in sight, but the final push is always the most demanding. Are you feeling the pressure from your side of the screen? I certainly am! Every minute counts, and every completed task brings us closer to the big reveal. Stay tuned for next week’s update, where we hope to share even more exciting progress!







