
Craft the Cutest No-Carve Witch Pumpkin: An Easy Halloween DIY Guide
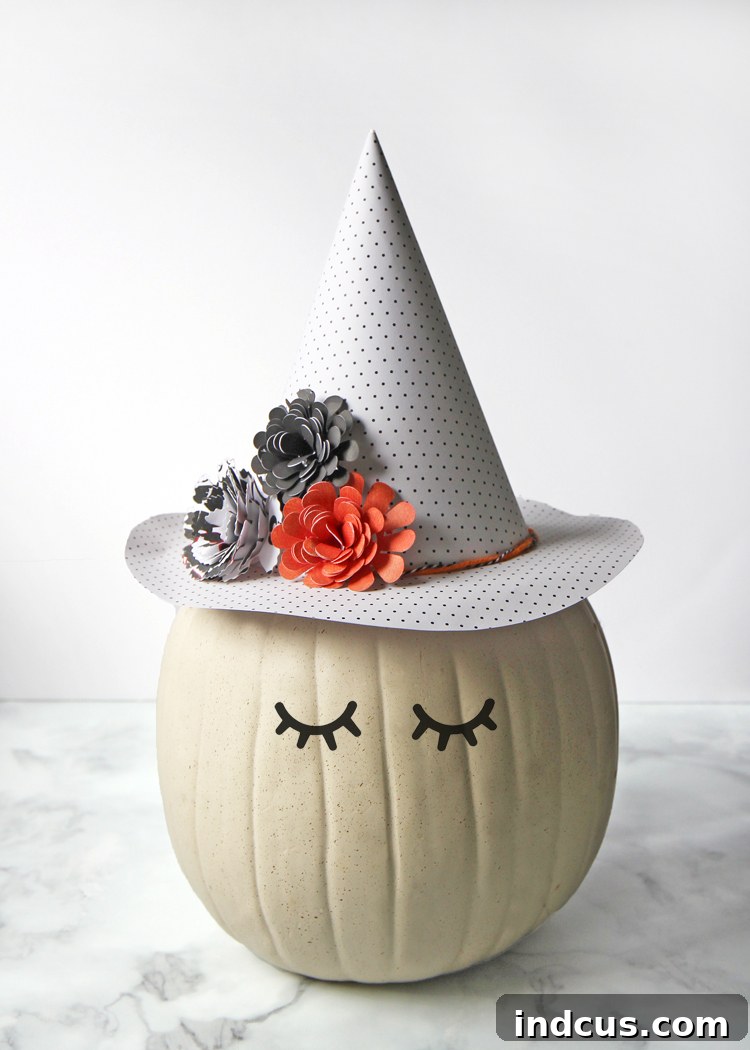
Are you searching for an enchanting, mess-free, and utterly adorable Halloween decoration idea that will charm everyone on your block? Look no further! This comprehensive guide will walk you through creating a delightful no-carve witch pumpkin, featuring a whimsical paper hat adorned with rolled flowers and expressive vinyl eyes. Forget the gooey mess and sharp tools associated with traditional pumpkin carving; this project is all about creativity, simplicity, and bringing a touch of adorable magic to your autumn decor.
Halloween doesn’t always have to be spooky or creepy. Sometimes, the sweetest decorations are the most memorable. Our charming witch pumpkin embodies just that – a perfect blend of festive fun and whimsical elegance. It’s an ideal project for crafters of all skill levels, especially those looking for a child-friendly activity or a unique centerpiece that stands out from the traditional carved jack-o’-lanterns. Prepare to transform an ordinary pumpkin into an extraordinary character with just a few clever paper crafting techniques and the help of your trusty Silhouette machine.
Why Choose a No-Carve Pumpkin for Your Halloween Decor?
No-carve pumpkins have surged in popularity, and for good reason! They offer a multitude of benefits over their carved counterparts:
- Longevity: Carved pumpkins quickly rot, often lasting only a few days. No-carve designs, on the other hand, can last for weeks, or even months, allowing you to enjoy your festive creations throughout the entire Halloween season.
- Safety: Eliminating sharp knives makes this a much safer activity, especially when crafting with children. It opens up a world of creative possibilities for younger hands without the associated risks.
- Less Mess: Say goodbye to sticky pumpkin guts and seeds! No-carve projects are significantly cleaner, making cleanup a breeze.
- Versatility: You can use real pumpkins or artificial craft pumpkins, which can be reused year after year, making your decorations more sustainable and economical.
- Creative Freedom: The possibilities are endless! From paint and glitter to fabric and paper, no-carve pumpkins invite a wide array of artistic expressions, allowing for truly unique and personalized decorations.
Our witch pumpkin project perfectly encapsulates these advantages, offering a stress-free and enjoyable crafting experience that yields spectacular results.
Unleashing Your Inner Witch: Project Overview
This project focuses on crafting a miniature, yet impactful, witch’s hat from decorative scrapbook paper, complete with delicate rolled paper flowers. These elements, combined with simple adhesive vinyl eyes, give your pumpkin a charming personality. The core of this craft relies on the precision and ease of a Silhouette cutting machine, making intricate cuts simple and repeatable. Let’s gather our materials and dive into the enchanting process.
Gathering Your Enchanted Supplies
To embark on this delightful crafting journey, you’ll need a few essential tools and materials. Having everything ready before you start will ensure a smooth and enjoyable crafting experience.
Materials Checklist:
- Silhouette Cameo + Cutting Mat: This electronic cutting machine is the heart of this project, enabling precise cuts for the hat components and intricate flower spirals. Any model of Silhouette Cameo will work beautifully.
- Patterned Scrapbook Paper:
- Two 12×12 inch pieces for the witch’s hat. Choose patterns and colors that complement your desired aesthetic. Think classic Halloween motifs, playful polka dots, charming stripes, or elegant floral designs. A mix of coordinating patterns can add depth and visual interest.
- Scraps of coordinating or contrasting scrapbook paper for the rolled flowers. This is a fantastic way to use up smaller pieces from your stash.
- Black Adhesive Craft Vinyl: This will be used for creating the adorable eyelashes that give your witch pumpkin its personality. Adhesive vinyl is easy to work with and sticks securely to the pumpkin’s surface.
- Hot Glue Gun and Glue Sticks: Essential for assembling the hat and attaching the flowers and hat to the pumpkin. Ensure your glue gun is heated and ready for use.
- Scissors or Craft Knife: Useful for minor adjustments or trimming.
- Pumpkin: A real pumpkin (miniature or standard size) or a faux craft pumpkin. Choose one with a smooth surface for best adherence of the vinyl eyes and hat.
Essential Silhouette Design Store Cut Files:
These specific digital files are crucial for replicating the project exactly as shown. You’ll need to purchase and download them from the Silhouette Design Store:
1. 3D Witch Hat: This file contains all the necessary pieces to construct the three-dimensional witch hat, including the cone and the brim with assembly tabs.
2. Cute Eyelashes: These are the perfect vinyl cutouts to give your witch pumpkin a friendly, adorable expression.
3. 3D Rolled Spiral Flower (Design 1): One of the spiral patterns for crafting lovely paper flowers.
4. 3D Rolled Spiral Flower (Design 2): Another distinct spiral pattern, allowing you to create a variety of flower shapes and textures for your hat.
Crafting the Magic: Your Step-by-Step Guide to a Cute Witch Pumpkin
Step 1: Preparing Your Design Files and Silhouette Machine
Once you’ve downloaded your cut files, open them in your Silhouette Studio software. Arrange the witch hat components and flower spirals onto your virtual mat. For the hat, you’ll want to size it appropriately for your pumpkin. The flowers can be resized to create varying dimensions for a more dynamic arrangement. For reference, the largest flower shown in the example was sized to about 6 inches across when flat, and the smallest was approximately 4 inches across. Adjust your machine’s cut settings (blade depth, force, speed) according to the type and weight of your scrapbook paper and vinyl. It’s always a good idea to perform a test cut on a scrap piece of your material to ensure optimal settings.
Step 2: Precision Cutting with Your Silhouette Cameo
Now it’s time for your Silhouette Cameo to work its magic! Carefully place your chosen patterned scrapbook paper onto the cutting mat, ensuring it’s smooth and securely adhered. Load the mat into your machine and send the hat components and flower spirals to be cut. Repeat this process for the black adhesive vinyl, cutting out the cute eyelashes. Once cutting is complete, carefully remove the paper and vinyl cutouts from the mat. For the vinyl eyelashes, you’ll find them very easy to peel directly off the backing, no transfer tape needed for such small designs.
Step 3: Assembling the Bewitching Hat
With your hat components cut, it’s time to bring them together. The 3D Witch Hat design typically includes a cone piece and a brim piece, complete with tabs. Gently fold the tabs on the pointy part of the hat (the cone) inwards. Apply a small amount of hot glue to each tab, one at a time, and carefully secure them to the underside of the hat brim. Work slowly and precisely to ensure a neat, sturdy assembly. Hold each tab in place for a few seconds until the glue sets. This process creates the classic witch hat shape, ready for embellishment.
Step 4: Bringing Flowers to Life: The Rolled Paper Technique
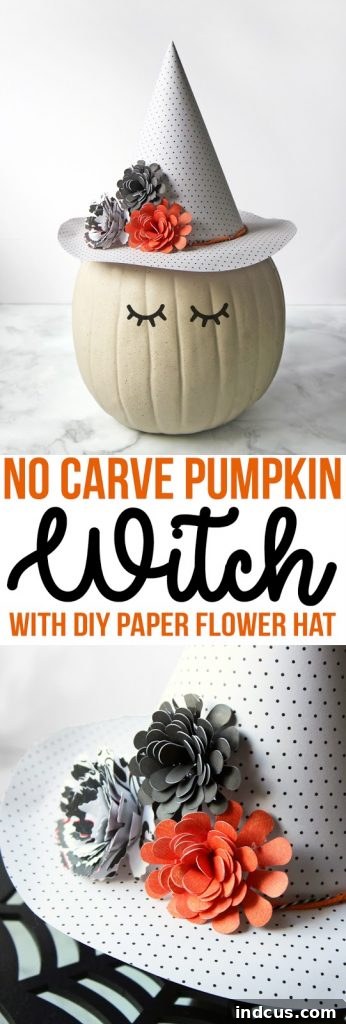
The rolled paper flowers add a beautiful, whimsical touch to your witch hat. This step is incredibly satisfying! Take one of your spiral flower cutouts. Starting from the tail end of the spiral (the outer edge), begin to tightly roll the paper towards the center. Maintain an even, firm roll, keeping the bottom edges aligned as much as possible. Continue rolling until you reach the small circular base in the middle of the spiral. Once rolled, allow the flower to gently relax and unfurl slightly to create a fuller, natural bloom. Apply a generous dot of hot glue to the center circular base, then carefully press the rolled spiral of petals onto the glue, holding it firmly until it’s secure. Repeat this for all your desired flowers, experimenting with different sizes and paper patterns to create a varied and interesting floral cluster.
Step 5: Adorning the Hat with Floral Elegance
Now for the fun part – attaching your beautiful paper flowers to the witch hat! Arrange the rolled flowers on the brim of the hat, experimenting with different placements until you achieve a look you love. You can create a dense cluster, spread them out, or layer smaller flowers over larger ones for dimension. Once satisfied with the arrangement, use hot glue to securely attach each flower to the hat. Press firmly and hold until the glue sets. This floral embellishment is what truly makes this witch hat stand out and adds to its charming appeal.
Step 6: Adding Personal Touches (Optional but Recommended)
To further personalize your witch’s hat and pumpkin, consider adding extra embellishments around the brim of the hat. A delicate ribbon tied in a bow, a string of tiny pom-poms, a sprinkle of glitter, or even small charms can elevate the design. These optional additions can enhance the overall theme and add an extra layer of sparkle or texture, making your witch pumpkin truly unique. Just use a small amount of hot glue to attach any additional trims.
Step 7: Giving Your Pumpkin Personality: Eyes and Hat Placement
With the hat complete, it’s time to bring your pumpkin to life! Carefully peel off the black adhesive vinyl eyelashes from their backing. Their small size makes them very forgiving, so you typically won’t need transfer tape. Position them directly onto the pumpkin’s surface where you’d like the eyes to be, pressing firmly to ensure good adhesion. Adjust them to create the desired expression – perhaps a playful wink or a sweet, inquisitive gaze. Finally, apply a generous amount of hot glue to the underside of the finished witch’s hat brim and carefully place it onto the top of your pumpkin. Hold it in place for a moment until the glue sets firmly. And just like that, your adorable witch pumpkin is complete and ready to enchant!
Tips for a Spellbinding Display
- Pumpkin Variety: This project works wonderfully with various pumpkin sizes. A large pumpkin could be your main witch, while smaller ones could be her adorable companions, each with a unique hat and flower arrangement.
- Color Palettes: Don’t limit yourself to traditional Halloween colors. Experiment with pastel papers for a whimsical fairy witch, or bold, vibrant hues for a modern twist. The possibilities are endless!
- Groupings: Create a charming Halloween tableau by grouping several decorated pumpkins together. Add battery-operated candles around them for a magical glow without the fire hazard.
- Lighting: Place your finished witch pumpkin in a well-lit area to showcase its intricate details, or use subtle accent lighting to create a warm, inviting ambiance.
- Family Fun: This is a fantastic craft for families! Younger children can help choose paper patterns and colors, while older kids can assist with rolling flowers (with adult supervision for the hot glue).
- Care and Storage: If using a real pumpkin, display it indoors or in a sheltered outdoor area to protect it from the elements. If using a faux pumpkin, gently clean it with a dry cloth and store it carefully to reuse next year.
Unleash Your Halloween Creativity!
This no-carve witch pumpkin project is a testament to how simple materials and a touch of creativity can transform an ordinary object into a charming holiday masterpiece. It’s a delightful way to celebrate Halloween without the mess, fuss, or scary elements, making it perfect for homes with young children or anyone who prefers a more whimsical approach to the holiday. The result is a unique, handmade decoration that is sure to bring smiles and compliments.
So, gather your supplies, fire up your Silhouette, and get ready to craft the cutest Halloween decoration on the block. We can’t wait to see your magical creations!







