
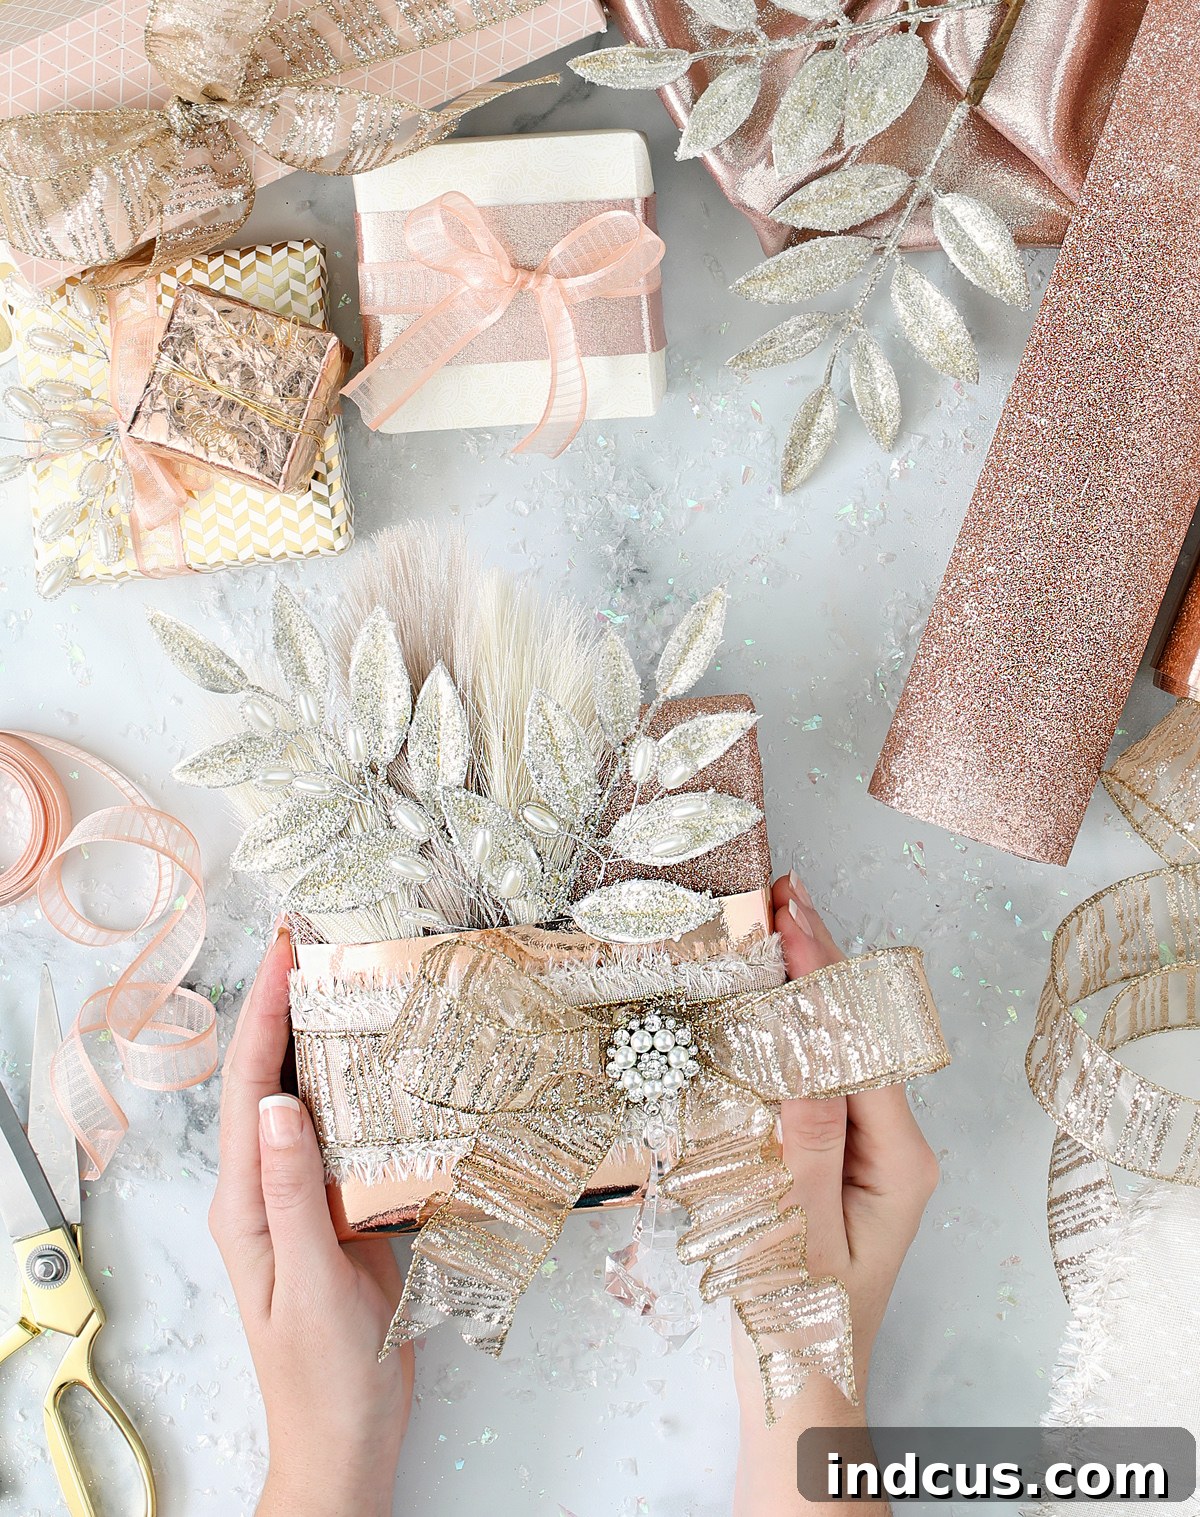
Elevate Your Gift Giving: Mastering the Art of Pocket Gift Wrapping
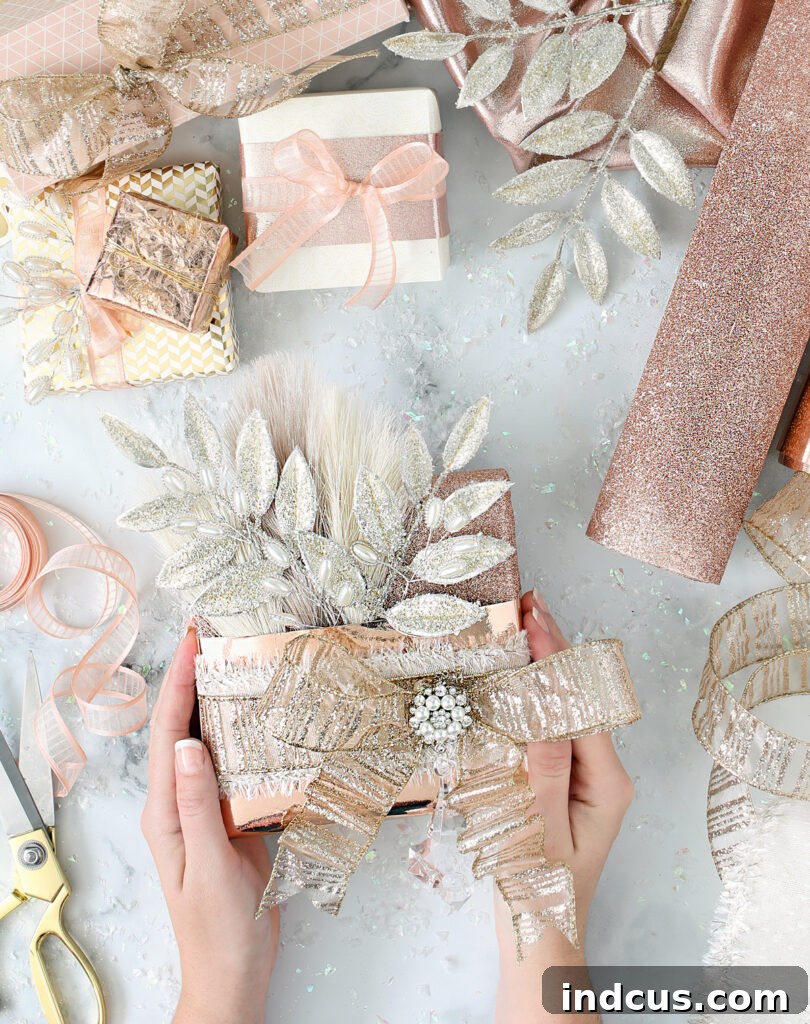
There’s an undeniable joy in giving a thoughtfully chosen gift, but the presentation itself can transform a simple present into an unforgettable experience. For many, gift wrapping is an art form—an opportunity to add a personal touch, express creativity, and build anticipation even before the ribbon is untied. While the holiday season often brings out our most elaborate wrapping endeavors, the truth is that a beautifully wrapped gift is appreciated year-round, for any occasion.
Today, we’re diving into a wonderfully simple yet incredibly versatile gift wrapping idea that adds a delightful surprise: a decorative pocket. This unique gift wrapping technique allows you to incorporate extra embellishments, a personalized gift tag, or even a small, flat additional item directly into the wrap. It’s a method that offers endless possibilities for customization, letting you go as elaborate or as understated as you desire, making every gift feel truly special.
The Charm and Versatility of Pocket Gift Wrap
What makes the pocket gift wrapping method so appealing? Beyond its immediate visual appeal, it offers practical benefits that elevate your gift presentation. Imagine a perfectly wrapped package that not only looks stunning but also serves as a canvas for additional creative elements. This pocket isn’t just for show; it’s a functional space to tuck in delicate floral picks, a handwritten note, a tiny ornament, or a custom-designed gift tag that might otherwise get lost or taped awkwardly onto the surface. It provides a structured way to integrate these smaller details seamlessly, creating a cohesive and elegant look.
This DIY gift wrapping technique is also incredibly adaptable. Whether you’re aiming for a lavish, over-the-top glamour or a cozy, traditional charm, the core method remains the same, allowing your choice of wrapping papers, ribbons, and pocket fillers to dictate the final aesthetic. It’s an easy gift wrap tutorial that empowers you to unleash your inner artist, ensuring your presents stand out with a touch of handmade elegance.
Gathering Your Creative Arsenal: Materials for Your Unique Gift Wrap
Before you begin, selecting your materials is crucial to achieving the desired look. The beauty of this pocket gift wrapping idea lies in its flexibility, so take your time choosing elements that harmonize and reflect the recipient’s style or the occasion.
- Two Coordinating Wrapping Papers: This is the foundation of your pocket wrap. Choose a base paper that will cover the entire gift and a secondary paper for the pocket itself. These papers should complement each other in color, pattern, or texture. For instance, a solid color base might pair beautifully with a patterned pocket paper, or two different patterns with a shared color palette could create a dynamic effect. Consider contrasting textures as well—a matte base with a metallic pocket, or a smooth paper with a tactile, embossed design.
- Ribbon: Ribbon adds a luxurious touch and helps define the pocket. You can opt for a single elegant ribbon or layer multiple ribbons of different widths and textures for added visual interest. Satin, grosgrain, velvet, burlap, or even twine can all work depending on your desired style.
- Embellishments (Optional but Recommended!): This is where the magic happens! Think beyond simple gift tags. Small floral picks (real or artificial), dried botanicals, miniature ornaments, brooches, sparkling gems, small bells, cinnamon sticks, sprigs of evergreen, or even a tiny, personalized charm can transform your wrap. The pocket is designed to showcase these treasures.
- Basic Wrapping Supplies: You’ll also need scissors, double-sided tape (highly recommended for a clean finish), and regular tape. A good quality tape dispenser can also speed up the process.
Step-by-Step Guide: Crafting Your Signature Pocket Gift Wrap
Step 1: Laying the Foundation with Your Base Paper
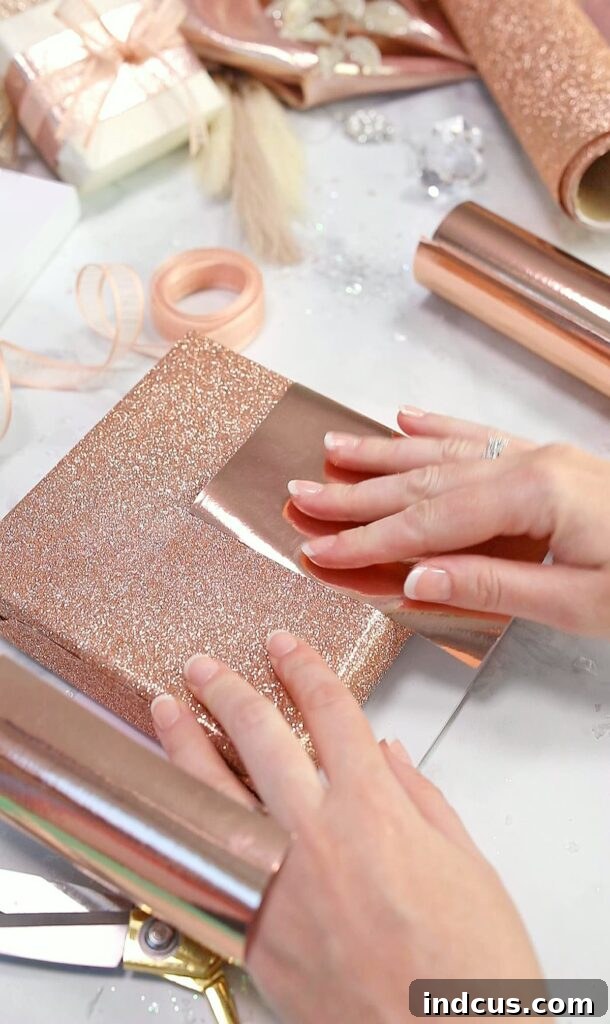
Begin by wrapping your gift as you normally would with your chosen base wrapping paper. Aim for crisp edges and neat seams, as this forms the backdrop for your pocket. Measure your paper carefully to avoid excessive bulk, ensuring enough overlap for a secure closure without being too wasteful. Use double-sided tape for a clean, invisible seam along the main overlap and at the ends for a truly professional finish. This attention to detail in the initial wrapping stage sets the tone for the entire presentation, providing a polished canvas for the creative elements that follow.
Step 2: Creating the Distinctive Pocket Feature
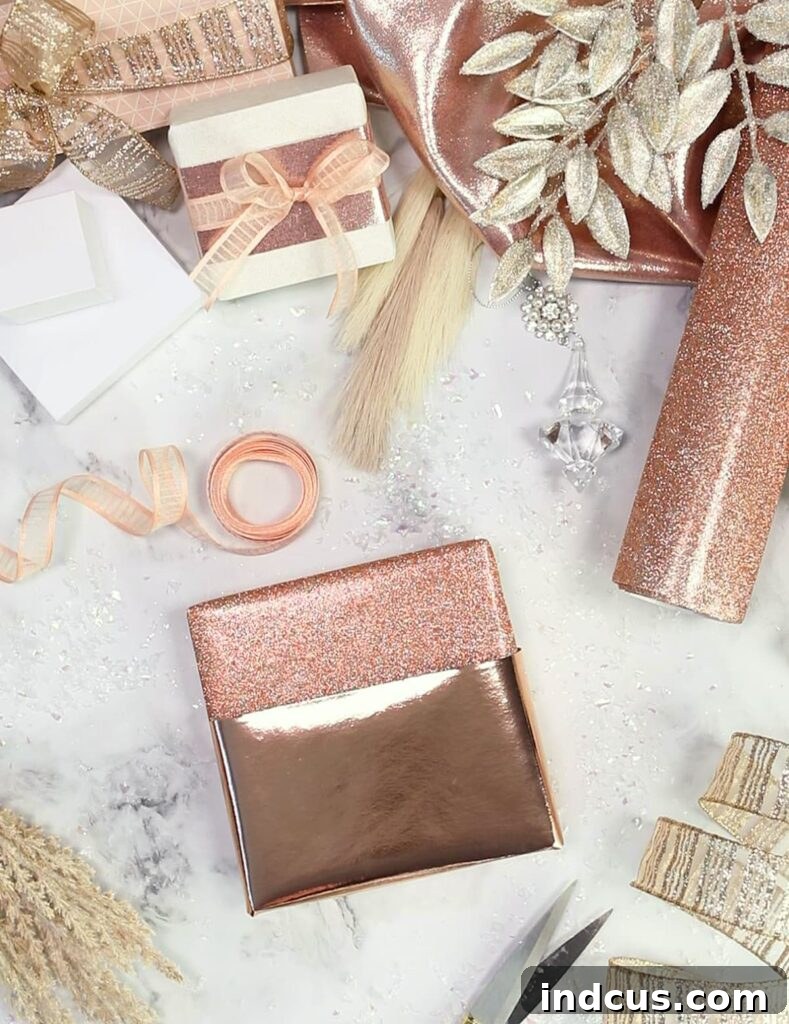
Now, it’s time to add the secondary layer that will form your elegant pocket. Take your coordinating wrapping paper and cut a strip that is wide enough to cover the desired portion of your gift, typically extending one-half to one-third of the way up from the bottom. The length should be sufficient to wrap around the entire gift with a slight overlap. For the top edge of this secondary paper, you have a few options to ensure a polished look. You can utilize the perfectly straight “factory edge” if available, which offers a clean, crisp line. Alternatively, if your cut edge isn’t perfectly straight, or if you prefer a more finished aesthetic, fold the top edge under by about half an inch and crease it sharply before securing it. For an extra touch of flair and decorative elegance, consider using scallop-edge scissors or pinking shears along this top edge to create a charming, unique border that hints at the creativity within.
Carefully position this secondary paper strip on your wrapped gift, ensuring it’s centered and aligned at the bottom. Only tape the sides and the bottom edge of this secondary paper to the base paper, leaving the top edge completely open. This creates the “pocket” where you’ll later tuck your delightful embellishments. Ensure the tape is applied neatly along the edges so it’s invisible or barely noticeable, maintaining the seamless appearance of your unique gift wrapping.
Step 3: Embellishing Your Pocket – More Than Just a Tag
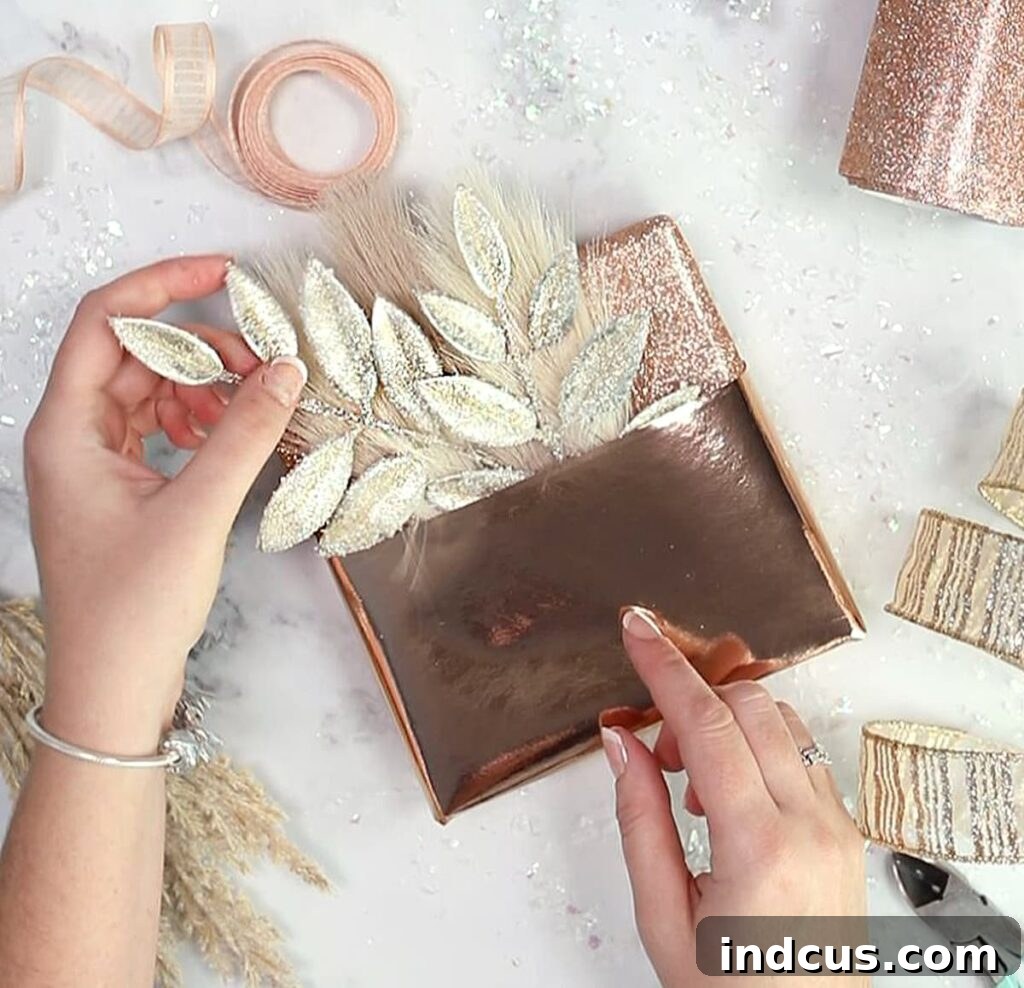
This is arguably the most exciting step, where your creative vision truly comes to life! The open pocket is the perfect canvas for personalization and surprise. Start by tucking in a few floral picks – whether they are delicate artificial blooms, dried lavender sprigs, or a small sprig of fresh greenery like eucalyptus or pine, these add organic beauty. You can either leave them loosely placed so they can be easily removed and enjoyed, or secure them gently with a small dab of hot glue or double-sided tape if you want them firmly in place. This pocket is also the ideal spot for your gift tag or card; simply slide it in along with your chosen embellishments. But don’t stop there!
Consider other thoughtful additions to your pocket: a small, flattened photo, a personalized bookmark, a mini candy bar, a collection of tea sachets, or even a tiny handwritten poem. For a festive touch, small jingle bells or miniature ornaments can be nestled within. For a rustic feel, a small pinecone or a bundle of cinnamon sticks tied with twine would be charming. The key is to choose items that are relatively flat or lightweight so they don’t distort the shape of the pocket. This innovative pocket transforms a simple wrapped gift into a mini treasure chest, inviting the recipient to discover its delightful contents.
Step 4: The Art of Ribbon and Bows
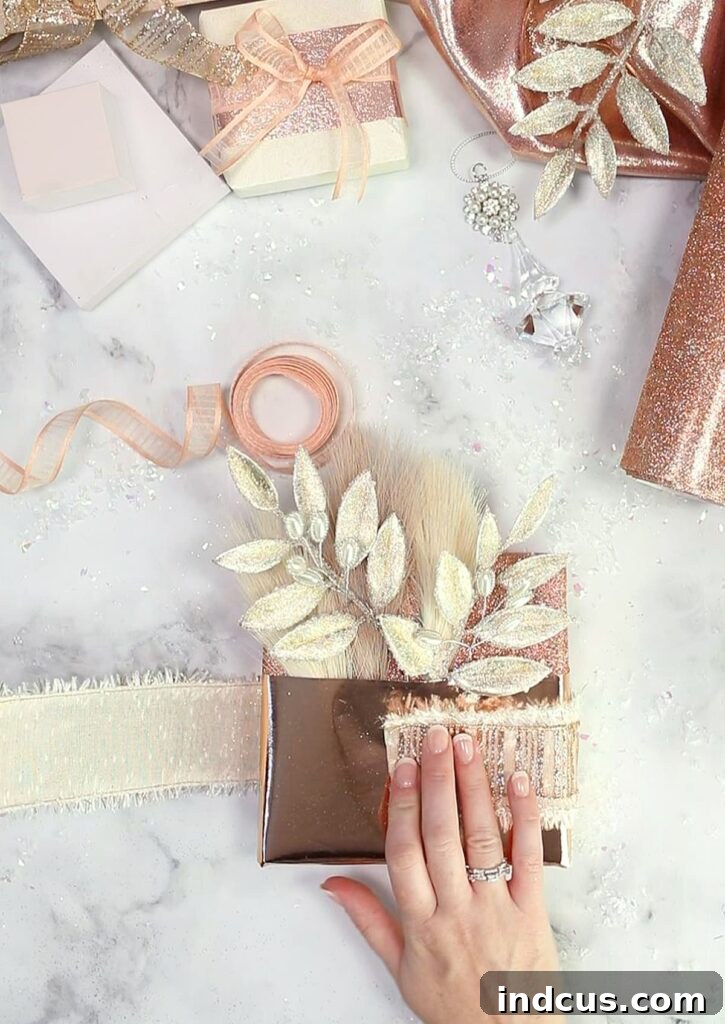
Ribbon serves as both a decorative accent and a practical element, helping to visually define the bottom pocket portion of your gift. Wrap your chosen ribbon (or ribbons) snugly around the lower part of the gift, ideally just below or directly over the bottom edge of your pocket. For a truly luxurious and elaborate gift wrapping effect, layer two different ribbons together. For example, a wider, textured ribbon as the base, topped with a narrower, contrasting satin or velvet ribbon, creates depth and visual interest. Secure the ribbons on the underside of the gift with double-sided tape for a clean look.
Next, it’s time to add a beautiful bow. You can tie a traditional bow directly around the gift, or for a more polished and symmetrical appearance, create a separate bow and attach it. A simple, elegant single-loop bow or a more intricate layered bow can both work wonders. For this specific glamorous example, a one-layer bow was meticulously tied and then carefully glued on top of the layered ribbons. Consider the scale of your bow relative to the gift; a larger gift can handle a more substantial bow, while a smaller package might benefit from something more delicate. Practice tying a few different bow styles to find one that suits your aesthetic and skill level, ensuring that it enhances rather than overwhelms your exquisite pocket gift wrap.
Step 5: Adding That Extra Sparkle and Personal Touch
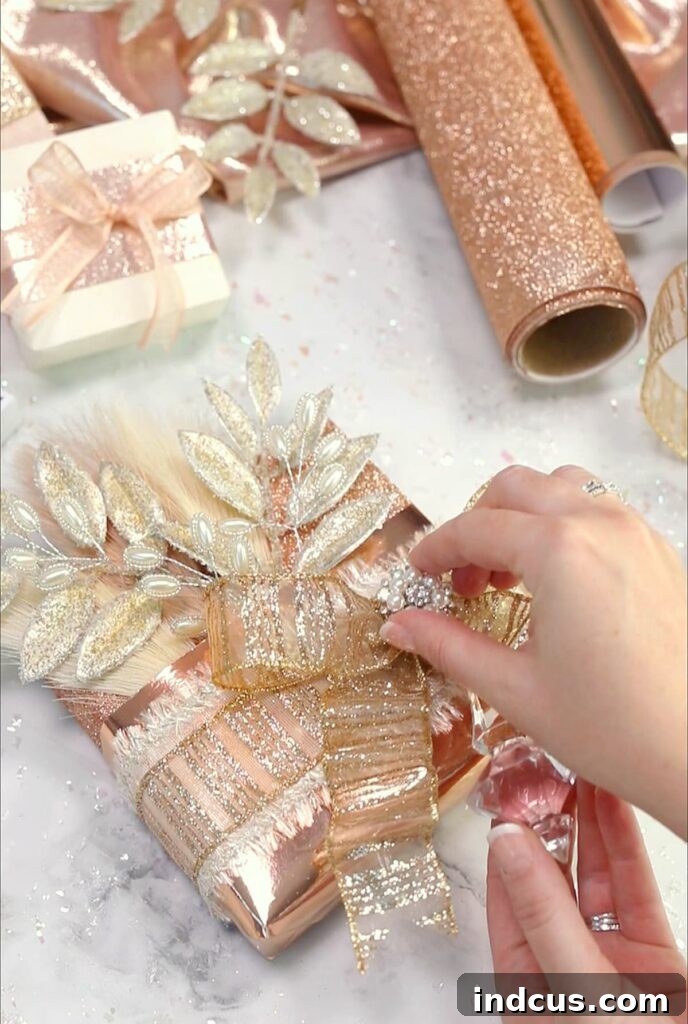
To truly elevate your gift and infuse it with a touch of breathtaking sparkle and individuality, consider adding a central embellishment to your bow. This final detail is often the focal point that catches the eye and makes the gift truly memorable. For a festive holiday gift, a miniature Christmas ornament—perhaps a delicate glass bauble, a tiny metallic star, or a whimsical character—can be securely attached to the center of your bow using a small dab of hot glue or a thin piece of floral wire. For other occasions, a dazzling brooch, a faceted gem, or even a personalized initial charm can provide that luxurious extra bit of shine. Think about the theme and the recipient’s taste; a vintage button might suit a rustic style, while a glittering rhinestone buckle could enhance a glamorous design. This final flourish transforms your gift into a mini work of art, reflecting the care and thought you’ve poured into its presentation, making it almost too beautiful to open!
Unleashing Your Creativity: Two Distinct Styles of Pocket Gift Wrap
The beauty of this easy gift wrap idea lies in its incredible adaptability. We’ve just walked through the creation of a stunning, glamorous gift, featuring rich textures, layered ribbons, and a dazzling central ornament. Isn’t it just breathtaking? This particular design showcases how far you can take the concept, transforming a simple present into a luxurious statement piece that speaks volumes about the thoughtfulness behind the gift.
However, this technique isn’t limited to a single aesthetic. To demonstrate its versatility, let’s look at another example using the exact same method, but with a completely different mood. Here’s a package wrapped in a more traditional, cozy Christmas style.
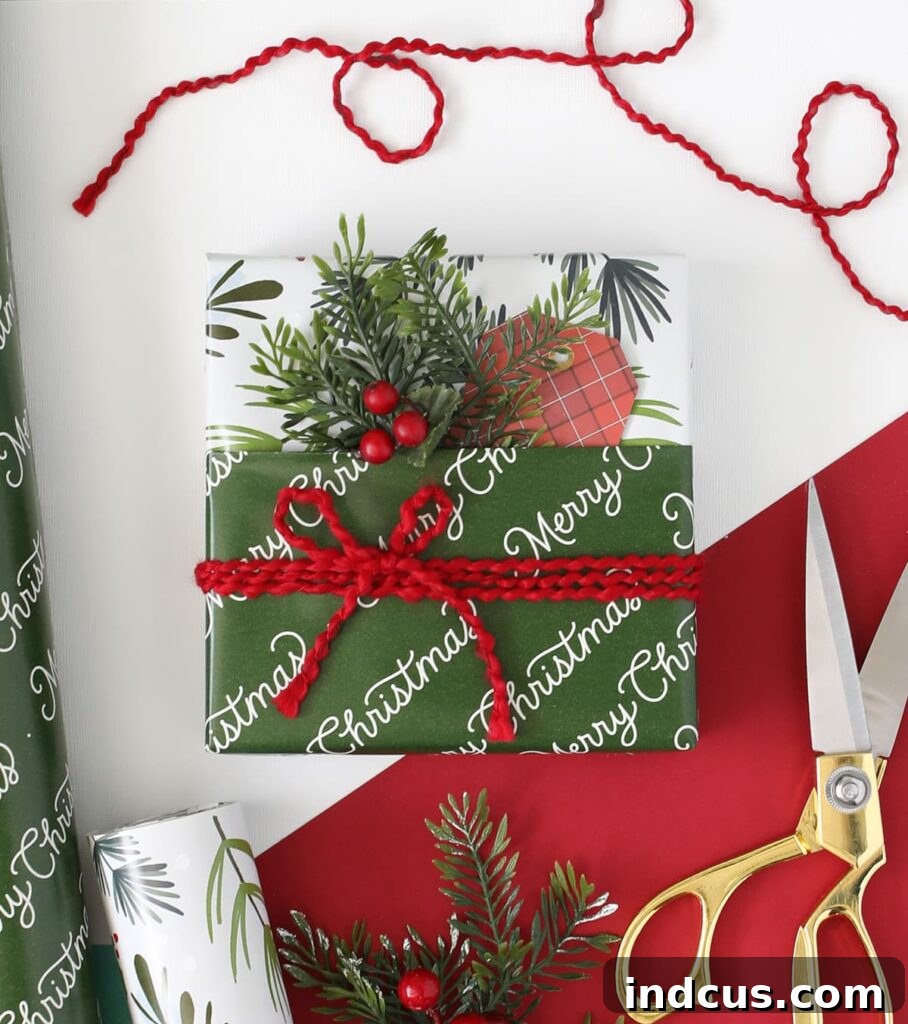
Even with simpler papers and fewer elaborate embellishments, the pocket still adds that wonderful dimension and opportunity for personalization. The charm is undeniable, proving that whether you’re aiming for rustic elegance, minimalist chic, or playful fun, this pocket design seamlessly integrates. Just as exciting as finding a dress with pockets, discovering a gift wrapped with a hidden pocket brings an extra layer of delight and anticipation! Consider different themes: for a child’s birthday, fill the pocket with small stickers or a balloon; for an anniversary, tuck in a small love note or a dried rose petal; for a hostess gift, include a recipe card or a packet of gourmet seeds. The possibilities are truly endless.
Beyond the Basics: Advanced Tips for Stunning Gift Presentation
To truly master the art of unique gift wrapping and ensure your pocket gifts are always flawless, here are a few additional tips:
- Crisp Folds are Key: For a professional finish, always use a bone folder or the edge of a ruler to create sharp, defined creases. This makes all the difference in achieving neat lines, especially when layering papers.
- Double-Sided Tape is Your Best Friend: For invisible seams and a clean aesthetic, invest in good quality double-sided tape. Use it for securing paper overlaps, attaching ribbons, and even delicate embellishments within the pocket.
- Measure Twice, Cut Once: Especially when cutting your secondary pocket paper, take precise measurements. This ensures the pocket is perfectly proportioned to your gift and wraps around smoothly without excess.
- Consider Eco-Friendly Options: If sustainability is a priority, choose recyclable wrapping papers, reuse ribbons, or select natural embellishments like dried flowers, pinecones, or fabric scraps. The pocket method works beautifully with these materials too!
- Personalize Beyond the Pocket: While the pocket offers fantastic opportunities, remember that the entire gift wrap is an expression. Choose patterns and colors that resonate with the recipient or the occasion. A handwritten message on the inside of the base paper before wrapping can be another sweet surprise.
Watch the Video Tutorial
Sometimes, seeing is believing! If any of these steps aren’t quite clear, or if you simply want to watch the magic unfold in real-time, click the link below to view a quick video tutorial. It demonstrates the entire process, making it even easier to follow along and perfect your unique pocket gift wrapping technique.
Watch the Pocket Gift Wrapping Video Tutorial Here
There you have it! A wonderfully simple, versatile, and elegant technique to add to your gift wrapping arsenal. This pocket gift wrap method is more than just a way to cover a present; it’s an opportunity to infuse your gifts with an extra layer of thought, creativity, and love. So, gather your papers, ribbons, and imagination, run with this idea, and make it uniquely your own. Your recipients are sure to be enchanted by the thoughtful presentation. Happy crafting and happy gifting!







