
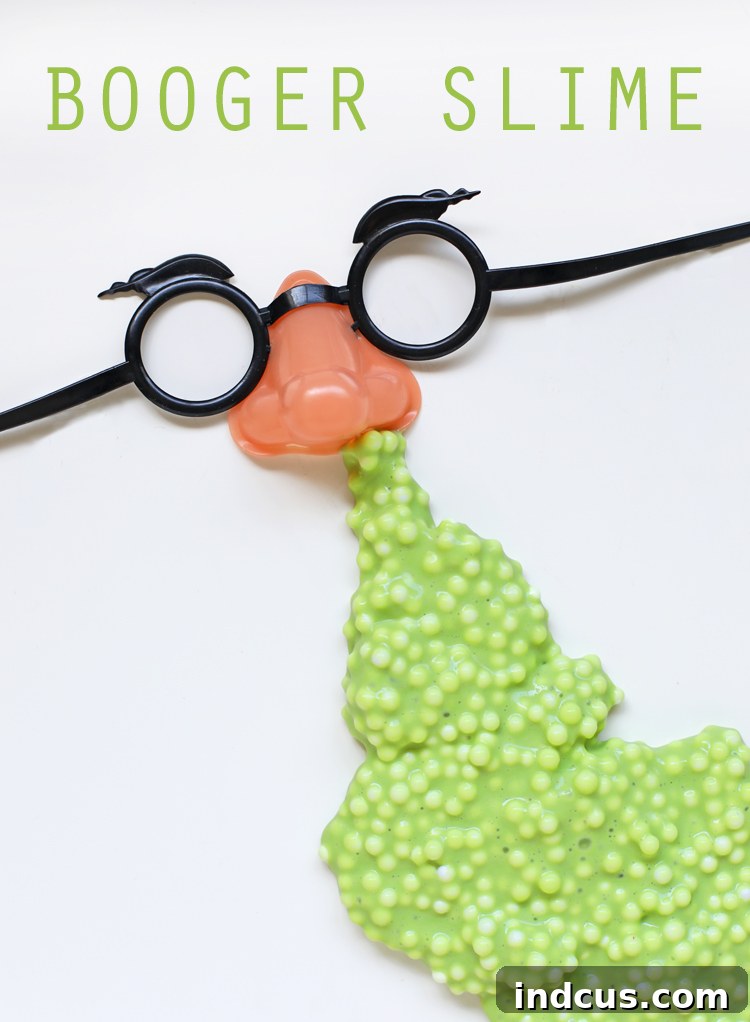
How to Make Grossly Fun Booger Slime: An Easy DIY Guide for Kids
In the vibrant world of kid-friendly crafts, slime holds a special place, captivating young minds with its unique texture, endless stretch, and satisfying squishiness. From glitter-infused concoctions to vibrant, rainbow-colored creations, the possibilities are limitless. But what about when your kids want to venture into the wonderfully weird and delightfully disgusting? That’s where “booger slime” comes in! This hilariously gross slime recipe is not only incredibly easy to make but also promises hours of silly, sensory fun that will have your children giggling and perhaps even grossing out their friends (in the best possible way, of course!).
If your children have already mastered the art of making basic slime recipes, they’re perfectly poised to tackle more imaginative and unique variations. Our booger slime takes a playful twist on traditional recipes, blending simple ingredients to create a stretchy, bumpy, and unmistakably booger-like substance that’s guaranteed to be a hit. Get ready to dive into a creative crafting session that embraces the bizarre and celebrates the joy of homemade slime. We’re going there, and it’s going to be wonderfully weird. Let’s gather our supplies and start crafting this unforgettable, gooey creation!
Why Kids Love Gross Slime: The Appeal of the Unconventional
You might wonder why children are so fascinated by things that are a little bit “gross.” The answer lies in their natural curiosity, their love for breaking conventions, and the sheer delight of exploring textures and concepts that are often off-limits. Booger slime taps into this playful rebellion, offering a safe and creative outlet for kids to experiment with something delightfully unrefined. It’s not just about the slime itself; it’s about the story, the reaction it elicits, and the shared laughter with friends and family. This particular recipe encourages imaginative play, where kids can invent elaborate scenarios involving their slimy creations, turning a simple craft into an engaging adventure. Beyond the novelty, making slime is a fantastic sensory experience, providing tactile stimulation that can be both calming and engaging for children of all ages. It also introduces basic scientific concepts in a fun, hands-on way, turning kitchen chemistry into an exciting experiment.
Gathering Your Essential Ingredients: What You’ll Need for Booger Slime
Creating your very own batch of booger slime requires just a few readily available ingredients. The beauty of this recipe lies in its simplicity, making it a perfect project for a rainy afternoon or a spontaneous crafting session. Before you begin, ensure you have all components at hand to make the process smooth and enjoyable. Each ingredient plays a crucial role in achieving that perfect booger-like consistency and appearance.
Materials Needed for DIY Booger Slime
- White School Glue: This is the foundation of most classic slime recipes. White PVA glue provides the sticky base that reacts with the activator to form the stretchy polymer we know as slime. Opt for a reputable brand to ensure consistent results. A standard 4 oz bottle is perfect for one batch.
- Liquid Starch: Our chosen activator for this slime recipe. Liquid starch is an excellent alternative to borax, often preferred by parents for its ease of use and perceived safety. It reacts with the polymers in the glue to create the slime’s characteristic texture and stretch. Make sure it’s liquid laundry starch, not spray starch.
- Slime Ballz (or small foam balls): These are the secret ingredient for achieving the “bumpy” texture that truly sells the booger illusion. Available on Amazon and often found in craft stores or the toy aisle at Walmart, these small foam balls add an extra layer of gross realism and tactile interest to your slime. If you can’t find Slime Ballz, small polystyrene foam beads or even tiny pieces of shredded foam could be a creative substitute, though they might not integrate as smoothly.
- Food Coloring: The key to transforming plain white glue into that iconic booger hue. We’ll be using a specific combination of green, yellow, and red to achieve a genuinely authentic and disgustingly delightful color. Liquid food coloring works best for blending evenly.
Step-by-Step Guide to Crafting Your Booger Slime
Now that you have all your materials, let’s get down to the fun part: making the slime! Follow these simple steps carefully, and you’ll soon have a wonderfully gross batch of booger slime ready for play. Remember, slime making is a bit of an art and a science, so don’t be afraid to adjust slightly as you go.
Step 1: Prepare Your Glue Base
Begin by pouring one standard 4 oz. bottle of white school glue into a mixing bowl. A plastic or glass bowl works best. Ensure you scrape out as much glue as possible to maximize your slime batch. This glue will form the primary base of your booger slime, providing the essential stickiness and elasticity.
Step 2: Mix Your Booger-ific Color
This is where the magic happens and your slime truly starts to take on its revoltingly charming appearance. Add three drops of green food coloring, two drops of yellow food coloring, and one tiny drop of red food coloring to the glue in your bowl. Using a spoon or craft stick, stir the mixture thoroughly. Keep mixing until the colors are fully incorporated and you achieve a truly convincing, sickly green-yellowish “booger” shade. Don’t be shy – really get in there and blend those colors until it looks perfectly gross. Hee hee hee, the more realistic, the better!
Step 3: Activate Your Slime
Slowly begin adding the liquid starch to your colored glue mixture. It’s crucial to add it gradually, about 1 teaspoon at a time. After each addition, stir vigorously. You’ll notice the mixture starting to thicken and pull away from the sides of the bowl, forming a coherent blob. Continue adding liquid starch teaspoon by teaspoon, stirring well after each addition, until the slime begins to form a cohesive ball that’s mostly pulling away from the bowl and your stirring utensil. The exact amount of liquid starch can vary slightly depending on the brand of glue and starch, so trust your judgment and the texture you observe.
Step 4: Incorporate the Slime Ballz and Knead
Once your slime has started to form but is still a bit sticky, it’s time to add the “booger” texture. Pour in your Slime Ballz (or chosen foam balls) directly into the developing slime. Now, it’s time to get your hands dirty! Transfer the slime to a clean, flat surface (a cutting board or a designated crafting mat works well) and begin to knead it with your hands. This kneading process is vital. It helps to evenly distribute the foam balls throughout the slime and further activates the starch, reducing stickiness. Continue kneading until the Slime Ballz are well mixed in, and the slime is no longer overly sticky to the touch. It should feel pliable, stretchy, and satisfyingly bumpy.
Troubleshooting Common Slime Problems: Making Your Slime Perfect
Even with the simplest recipes, sometimes slime can be a bit finicky. Don’t worry, these common issues are easy to fix with a few simple adjustments. Here’s how to ensure your booger slime is just right.
How Do I Make Slime Less Sticky?
If you’ve kneaded your booger slime thoroughly for several minutes and it still feels excessively sticky, it means it needs a bit more activator. The solution is simple: add more liquid starch, but be very cautious! Add just a few drops at a time, then work it into the slime by kneading. Repeat this process, adding a few more drops and kneading, until the stickiness diminishes to a manageable level. The goal is for the slime to be pliable and stretchy, not aggressively clinging to your hands. Remember, patience is key here; adding too much liquid starch too quickly can lead to the next common problem!
How Do I Fix Over-Activated or Hard Slime?
On the flip side, if you’ve added too much liquid starch, your slime might become too stiff, hard, and lose its desirable stretchiness. It will feel brittle and tear easily instead of flowing. To revive over-activated slime, you can try adding a tiny amount of plain white school glue (a quarter teaspoon at a time) and kneading it in. Alternatively, for a quick fix, add a squirt of hand lotion or a few drops of baby oil. Knead the lotion or oil into the slime for several minutes. This will help break down some of the polymer bonds and restore some of its elasticity and softness. Be persistent; it might take a few minutes of kneading to see results.
How Do I Make Slime Stretchy Again?
Slime, like many things, can lose its optimal texture over time, especially if exposed to air. If you pull out your booger slime a few days after making it and find it’s no longer as soft and stretchy as it once was, don’t despair! A quick revival method is to add a small squirt of hand lotion (any basic, unscented lotion will do). Work the lotion into the slime by kneading it thoroughly with your hands. The emollients in the lotion will help to rehydrate the slime and restore its elasticity, allowing you to enjoy playing with your wonderfully gross creation for even longer. Store-bought slime activators or even a few drops of glycerin can also work wonders in restoring stretchiness.
Maximizing Your Slime Fun: Storage, Safety, and Creative Play
Once you’ve perfected your booger slime, you’ll want to ensure it lasts as long as possible and that play remains safe and creative.
Proper Storage for Slime Longevity
To keep your booger slime fresh, soft, and stretchy indefinitely, proper storage is crucial. Always store your slime in an airtight container immediately after play. A simple plastic container with a tight-fitting lid or a resealable plastic bag works perfectly. This prevents air exposure, which can dry out the slime and make it hard and brittle. Stored correctly, your homemade booger slime can last for weeks, if not months, providing continuous enjoyment.
Safety Tips for Slime Making and Play
While this recipe uses liquid starch and is generally considered safer than borax powder, it’s always important to prioritize safety, especially when crafting with children. Ensure adult supervision for younger children, particularly during the mixing and kneading stages. Always instruct children not to ingest the slime or any of its ingredients. After playing with slime, it’s a good practice to wash hands thoroughly with soap and water. If any skin irritation occurs, discontinue use. Keep all ingredients out of reach of very young children and pets.
Encouraging Creative Play with Booger Slime
Beyond the initial giggles, booger slime can spark immense creativity. Encourage your children to invent scenarios for their slime: Is it monster snot? Alien goo? A wizard’s failed potion? The bumpy texture from the Slime Ballz makes it particularly fun for imaginative play, adding another layer of sensory exploration. They can stretch it, squish it, poke it, and even try to mold it (though slime is best for abstract shaping rather than precise forms). This kind of open-ended play is vital for developing problem-solving skills, fine motor control, and storytelling abilities.
The End Result: Giggles, Grossness, and Great Memories
This easy booger slime recipe is more than just a craft; it’s an experience. It’s about embracing the silly, the slightly gross, and the wonderfully tactile world of homemade creations. Do you know anyone who would absolutely get a kick out of this booger slime? Perhaps a group of cub scouts, a classroom of eager learners, or just a child who appreciates a good, clean (but looks-gross!) mess. The boys in my son’s cub scout group certainly thought it was a hoot, and yours will too!
So, gather your supplies, call the kids, and prepare for some delightfully disgusting fun. This booger slime is sure to be a memorable project that provides entertainment long after the crafting is done. Happy sliming!







