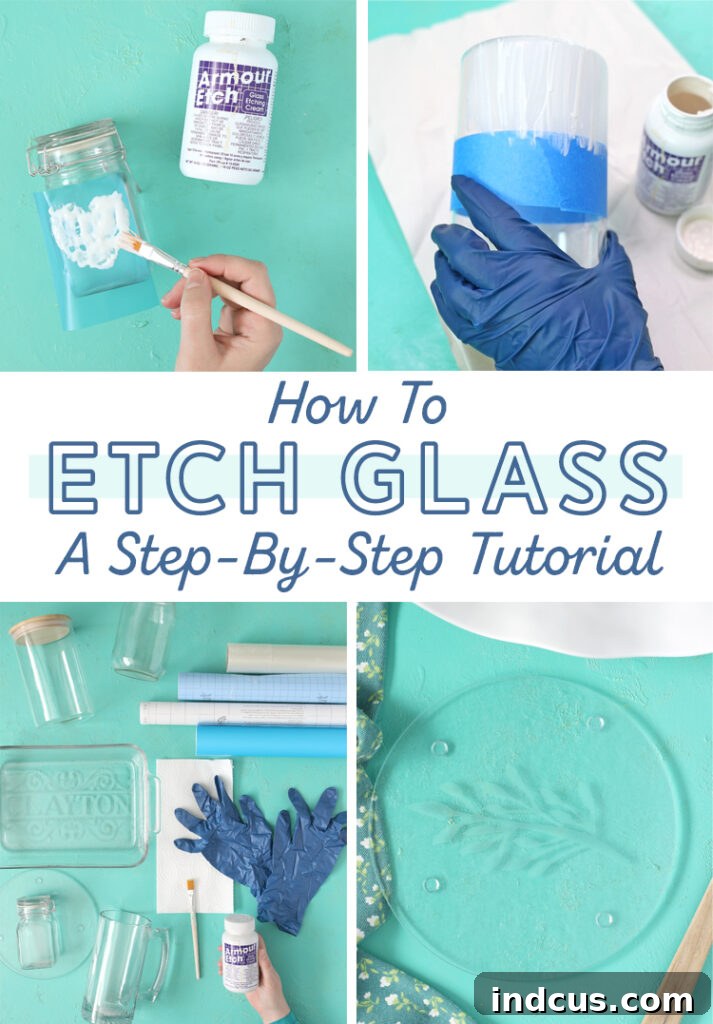
Unlock the Art of Glass Etching: Your Ultimate DIY Guide to Frosted Elegance
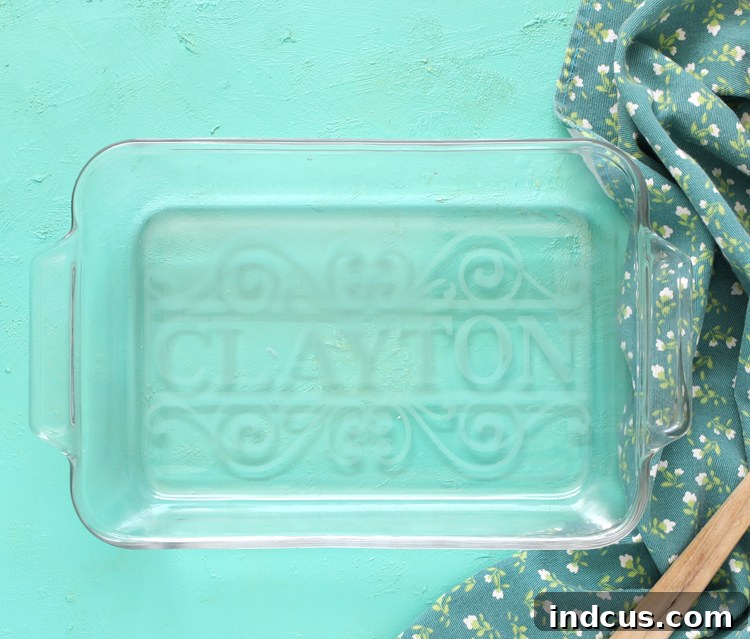
Transform ordinary glass into extraordinary works of art with the timeless technique of glass etching. This surprisingly easy craft project yields stunning, sophisticated results that look professionally made. Imagine gifting a personalized wine glass for a wedding, a custom casserole dish for a birthday, or a unique thank-you present that truly stands out. Glass etching offers endless creative possibilities and adds a touch of bespoke elegance to any item.
If you’ve ever wanted to try glass etching but felt nervous about starting, this comprehensive guide is for you. We’ll walk you through every step, demystifying the process and equipping you with all the knowledge needed to etch glass easily and successfully right in your own home. Whether you’re a complete beginner or looking for new tips, you’re about to discover a fun, rewarding craft that you’ll love – and yes, you absolutely can do it!
What Exactly is Glass Etching?
Glass etching is a creative technique used to permanently apply designs onto glass surfaces, giving them a beautiful frosted appearance. This effect is achieved through the application of a special glass etching cream. The chemicals within this cream react with the glass, creating microscopic scratches on its surface. These tiny abrasions scatter light, resulting in the characteristic opaque, frosted look that contrasts elegantly with the smooth, transparent areas of the unetched glass. Unlike temporary decals or paint, etching permanently alters the glass, providing a subtle yet incredibly elegant finish that is both durable and long-lasting.
Why Choose Glass Etching Over Vinyl Decals?
While vinyl decals offer a quick way to add designs to glass, glass etching provides superior benefits, especially for items intended for frequent use. The most significant advantage of glass etching is its permanence. Once etched, the design becomes an integral part of the glass itself; it won’t peel, fade, or scratch off over time. This makes etched glass items completely dishwasher safe and suitable for everyday use, unlike many vinyl applications that can degrade with repeated washing or exposure to heat.
For drinking glasses, baking dishes, or any glass item that will endure regular handling and cleaning, etching is the ideal choice. It ensures your personalized creations last forever, maintaining their pristine appearance and thoughtful design through countless uses. This makes etched items not just beautiful, but also incredibly practical and enduring gifts or additions to your home decor.
This post may contain affiliate links. I may earn a small commission at no extra cost to you if you make a purchase through these links.
How to Easily Etch Glass: A Step-by-Step Tutorial
Materials Needed for Glass Etching
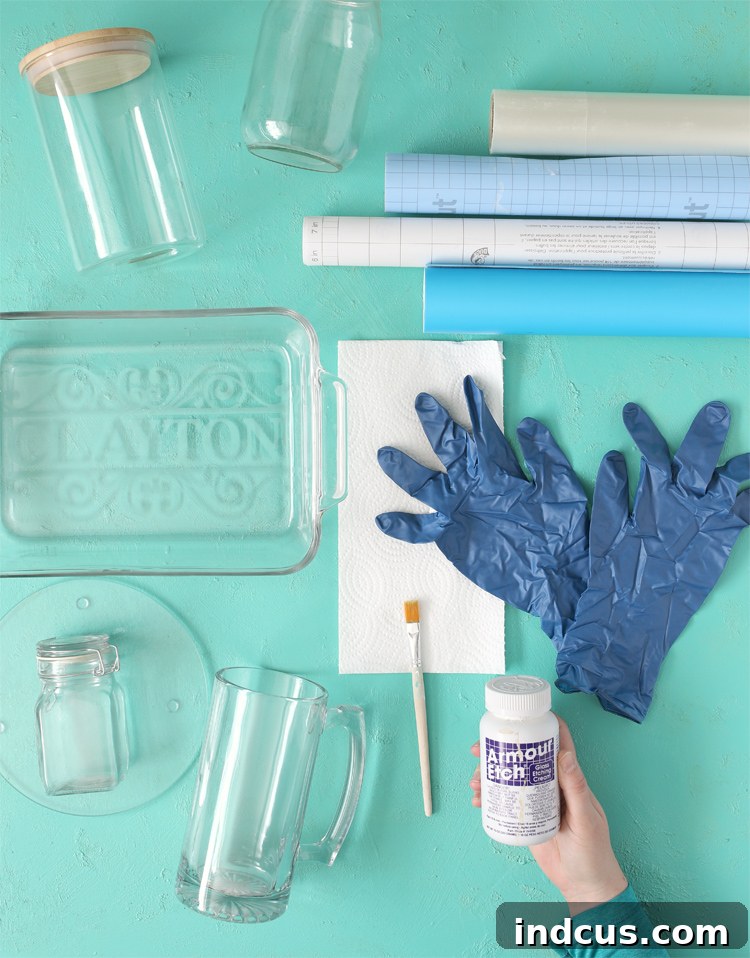
Before you begin your glass etching journey, gather the following essential tools and materials. Having everything ready will make the process smooth and enjoyable:
- Armour Etch Glass Etching Cream: This is the star of the show. A small bottle goes a long way.
- Craft Paint Brush: Opt for a regular craft brush over foam brushes, which can create bubbles. Consider using an older brush, as the etching cream might affect its bristles over time.
- Plastic Gloves: Essential for protecting your hands from the etching cream.
- Clean Water: For rinsing the glass and for immediate cleanup of any spills.
- Stencil: (See the detailed stencil section below for options) An adhesive-backed stencil is crucial for crisp designs.
- Paper Towels or Baby Wipes: For quick cleanup and wiping away excess cream.
- Garbage Bag or Newspaper: To cover your work surface and protect it from spills.
- Damp Cloth: Keep one handy for immediate spot cleaning.
Safety First: Important Precautions
Working with etching cream, which contains mild acids, requires a few safety measures to ensure a safe and pleasant crafting experience. Always wear plastic or rubber gloves to protect your hands from direct contact with the cream. Work in a well-ventilated area, preferably near an open window or with a fan, to minimize inhaling any fumes. If you are particularly sensitive, consider wearing safety glasses to protect your eyes. In case of accidental skin contact, rinse thoroughly with water immediately. Always read and follow the specific safety instructions provided by the etching cream manufacturer.
Instructions for Etching Glass
Follow these steps carefully to achieve beautifully etched glass:
Step 1: Prepare Your Glassware and Apply the Stencil
Begin by thoroughly washing your glass item with soap and water. Ensure it is completely clean and dry, free from any fingerprints, dust, grease, or smudges, as these can interfere with the etching process and result in an uneven finish. Once sparkling clean, carefully position your chosen stencil onto the glass. This is a critical step for a professional-looking result. Take your time to press all the edges of the stencil firmly onto the glass surface. Use your fingers or a craft squeegee to smooth out any air bubbles, especially around the design edges. The goal is to create a tight seal, preventing the etching cream from bleeding underneath the stencil and ruining your design.
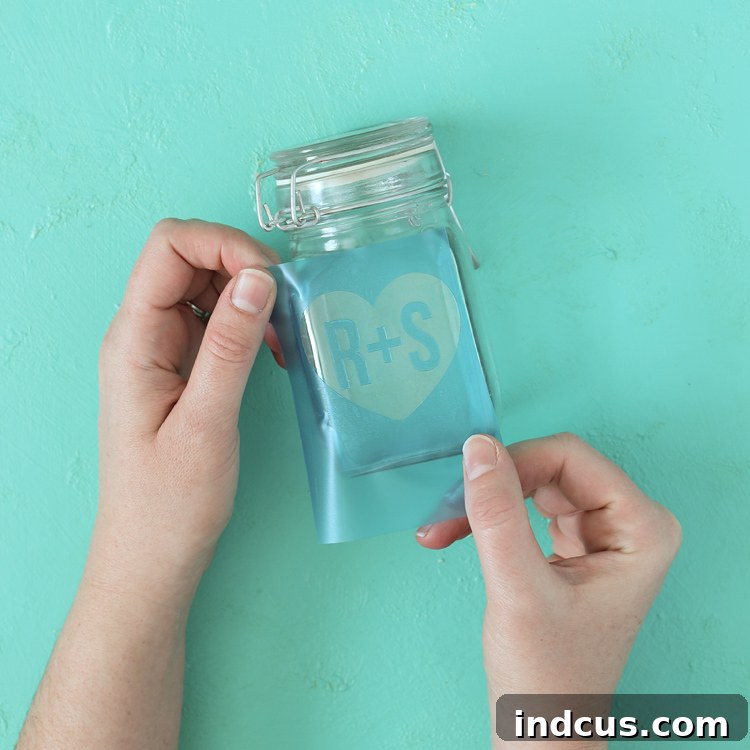
Step 2: Apply the Etching Cream
Before application, ensure you are in your well-ventilated area and wearing your plastic gloves. Gently stir the etching cream thoroughly with a craft stick or the brush handle to ensure consistent texture. Using your designated craft paintbrush, apply a thick, even layer of etching cream over the entire stencil design. Make sure the cream completely covers all areas where you want the frosted effect. Avoid thin spots, as these may lead to patchy etching. While applying, be careful to stay within the stencil boundaries. If any cream accidentally gets onto the glass outside the stencil, immediately wipe it off with a damp cloth or paper towel to prevent unwanted etching.
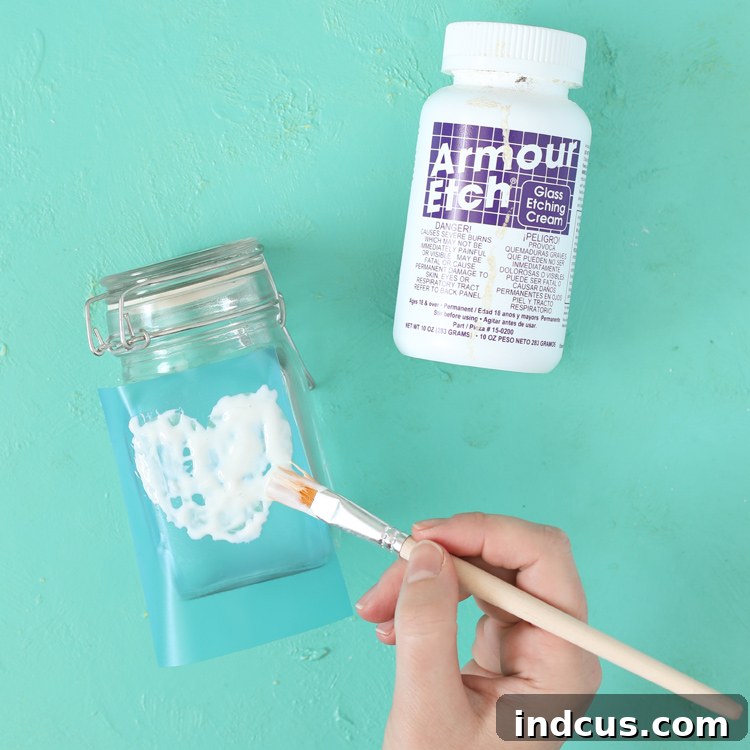
Step 3: Allow the Cream to Work and Rinse
The manufacturer’s instructions for most etching creams often suggest leaving the cream on for just one minute. However, based on extensive personal experience, I’ve found that leaving the cream on for a longer duration, typically around 20 minutes, yields much better and more consistent results, especially for a deeper, more pronounced etch. This can sometimes vary depending on the age of your cream or the type of glass. To determine the perfect timing for your project, you can perform a small test: after about a minute, carefully wipe away a tiny corner of the design to check the etching. If it has reached your desired frosted intensity, proceed to the next step. If not, reapply cream to the tested spot and let it sit longer, checking periodically. Once the desired etch is achieved, carefully wipe away all the excess etching cream using paper towels or a damp cloth. Then, rinse the glass thoroughly under running water until every trace of the etching cream is completely removed from both the etched areas and the stencil. This prevents further etching and cleans the surface.
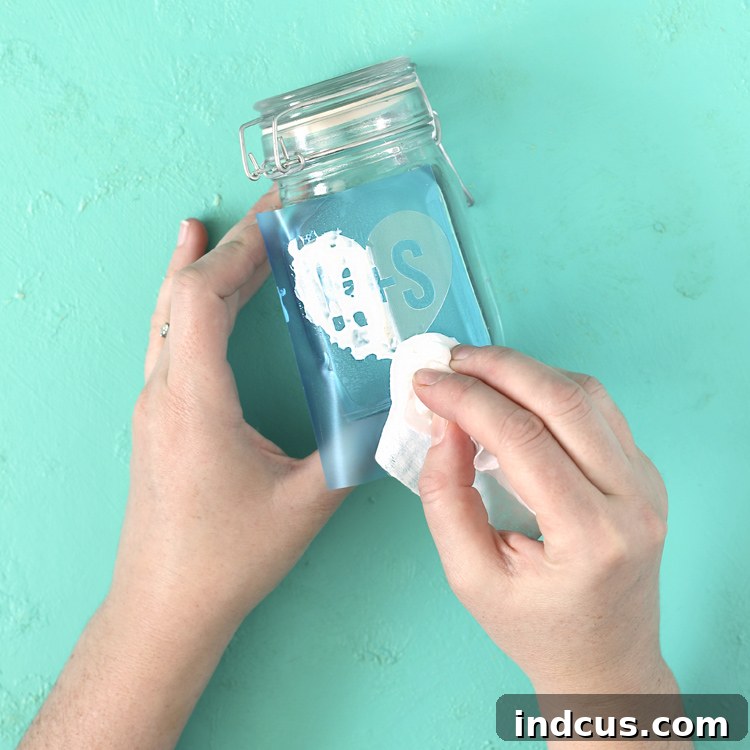
Step 4: Reveal Your Etched Design
Once the glass is completely free of etching cream and thoroughly rinsed, it’s time for the exciting reveal! Carefully peel away the stencil from the glass. You’ll instantly see your beautiful, permanent frosted design emerge. Discard the used stencil and any cleaning materials responsibly. Take a moment to admire your elegant, custom-etched glass masterpiece!
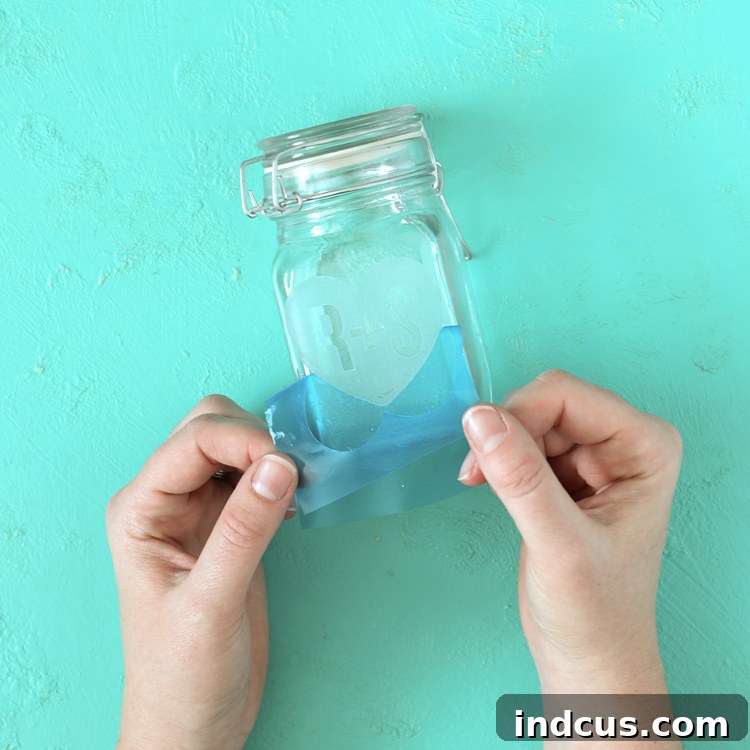
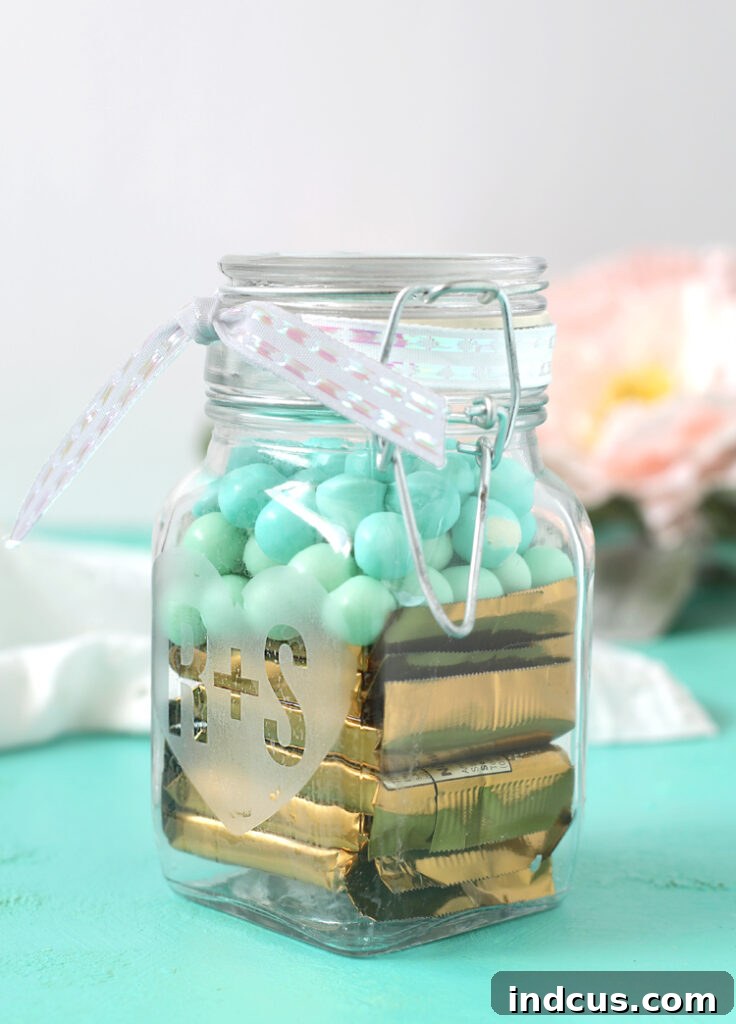
This method was used to create a batch of charming glass candy jars, personalized with the couple’s initials inside a heart for wedding favors. They looked incredibly sweet and made for memorable gifts.
Crafting Your Stencil: Diverse Options for Every Crafter
The quality of your stencil directly impacts the crispness and success of your etched design. Fortunately, there are many excellent options for creating stencils, regardless of whether you own a cutting machine or prefer to work by hand. The key is to use an adhesive-backed material that can create a strong seal against the glass.
Store-Bought Adhesive Stencils: The simplest option for many is to purchase pre-made adhesive stencils. These are readily available at most craft stores like Michaels, Hobby Lobby, and also widely online at Amazon. When buying, specifically look for stencils labeled “adhesive” or “self-stick” to ensure they form a tight bond with the glass. Avoid rigid plastic stencils without adhesive, as etching cream will easily bleed underneath them, resulting in fuzzy or undefined lines.
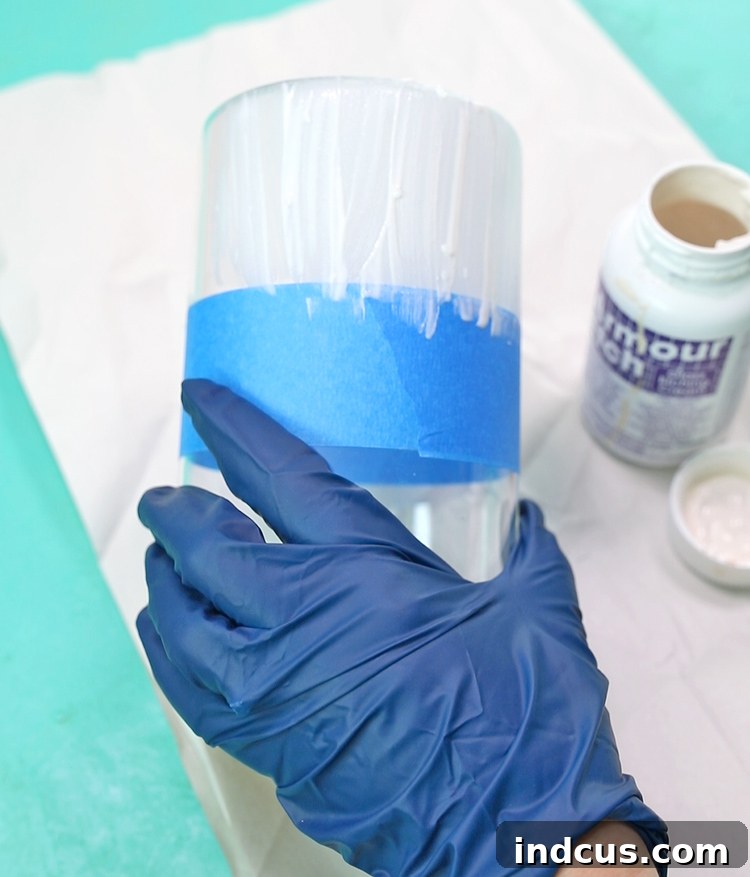
Masking Tape or Painter’s Tape: This is an incredibly budget-friendly and versatile option, particularly for geometric designs such as stripes, chevrons, or color-blocked patterns. Simply apply masking tape or painter’s tape to the areas of the glass you wish to remain clear (i.e., *not* etched). Press the tape down firmly to seal the edges. You can also cut masking tape into custom shapes or straight lines with scissors or a craft knife to create unique patterns. After applying the etching cream and rinsing, peel off the tape to reveal sharp, clean lines between the etched and unetched glass.
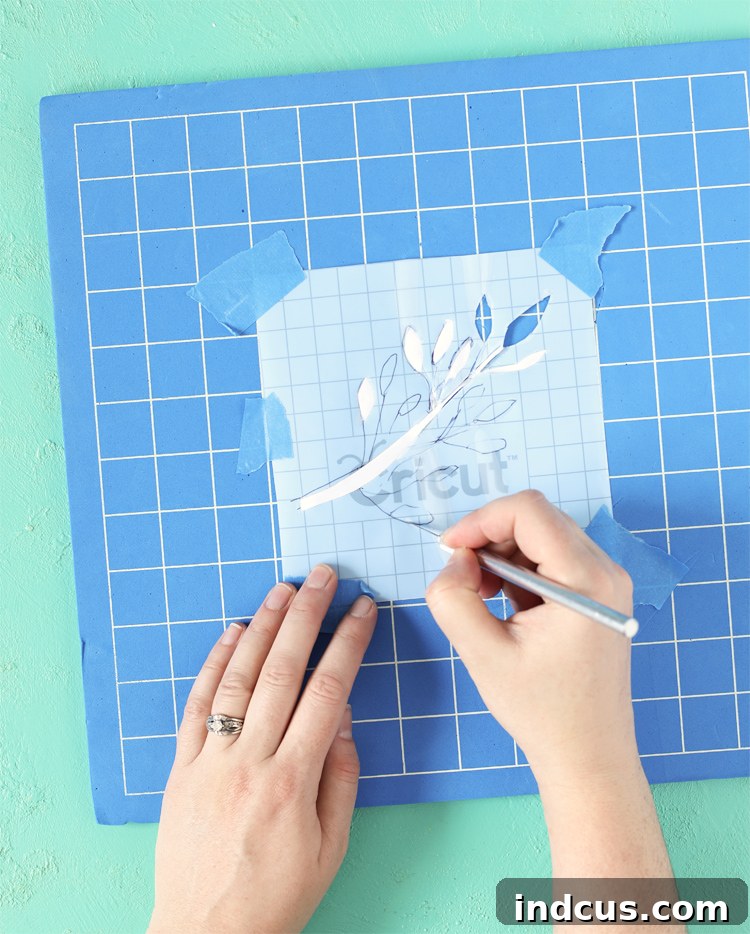
Hand-Cut Stencils from Vinyl: If you don’t have a cutting machine, you can still create intricate designs by hand. Purchase sheets of self-adhesive stencil vinyl or regular adhesive craft vinyl. Use a permanent marker to draw or trace your desired design onto the paper backing of the vinyl. Then, carefully cut out the design using a sharp craft blade or X-Acto knife. Remember that you are cutting out the areas where you want the frosting to appear (the “negative space” of your design). This method allows for immense creativity and precision.
Cutting Machine Stencils (Cricut or Silhouette): For crafters with a Cricut, Silhouette, or similar electronic cutting machine, creating highly detailed and professional-looking stencils is incredibly easy. Design your custom pattern, text, or graphic using your machine’s software. Then, cut the stencil from specialized Cricut Stencil Vinyl or Oramask stencil material. Both work exceptionally well, though many crafters find Oramask to be slightly superior for its ease of use and adhesion. After cutting, “weed” away the parts of the vinyl where you want the glass to be etched (the negative space of your design). For intricate designs, you will likely need transfer tape to move the design from its backing to the glass without losing small pieces or distorting the placement. Apply transfer tape over the front of your weeded stencil, burnish it well, then peel the paper backing off the stencil, ensuring all parts of your design lift with the transfer tape. This method allows for precision and repeatable designs, perfect for matching sets of glassware.
GLASS ETCHING VIDEO TUTORIAL
Watch this video to see the glass etching process in action, including how to use transfer tape for intricate stencil designs.
Frequently Asked Questions About Glass Etching
Where Can I Purchase Etching Cream?
Glass etching cream, like Armour Etch, is widely available. You can easily find it online at Amazon, or in person at major craft stores such as Hobby Lobby, Michaels, and JOANN. A 3-ounce bottle typically provides enough cream for several projects, as a little goes a long way.
How Long Should I Leave Etching Cream on the Glass?
While most manufacturers suggest a brief application time, often as little as one minute, my personal experience consistently shows that a longer duration, typically 20 minutes, yields a more noticeable and durable etch. Factors like the type of glass and the age of the etching cream can affect the outcome. It’s always best to perform a small test in an inconspicuous area or a corner of your design, wiping away a small amount of cream after a minute to check the progress and adjust the timing as needed.
Can I Etch Pyrex Glassware?
Etching Pyrex can be a bit hit or miss. While many modern Pyrex dishes can be successfully etched, some older pieces or specific formulations of Pyrex glass may not react to the etching cream as expected. The best approach is to test a small, hidden area of your Pyrex dish first. The odds are generally in your favor, and many crafters have successfully personalized Pyrex casserole dishes. You won’t know for sure until you try!
Can I Use Contact Paper or Regular Craft Vinyl for Stencils?
Absolutely, yes! Contact paper is a fantastic and inexpensive alternative for creating stencils. As long as you meticulously press down all the edges to ensure a tight seal against the glass, it works wonderfully with etching cream. Similarly, regular adhesive craft vinyl (the kind used for cutting machine projects) can also be used effectively as a stencil material. Both options provide excellent barriers against the cream and allow for crisp designs.
Is Glass Etching Permanent and Dishwasher Safe?
Yes, glass etching creates a permanent frosted design that becomes an integral part of the glass surface. Unlike decals, it cannot be scratched off, peeled, or washed away. This permanence makes etched glassware completely safe for use in the dishwasher, allowing for easy cleaning and long-lasting enjoyment of your personalized items.
What Types of Glass Can Be Etched?
Most smooth, non-porous glass surfaces can be etched. This includes drinking glasses, wine glasses, mugs, mirrors, glass plates, vases, casserole dishes, candy jars, and even glass bottles. However, highly textured or coated glass might not yield consistent results. Always ensure the glass surface is clean and free of any protective coatings that might prevent the cream from reacting with the glass.
How Do I Care for Etched Glass?
Caring for etched glass is simple. Since the design is permanent, you can wash it just like any other piece of glassware – by hand or in the dishwasher. Avoid abrasive scrubbers on the etched surface if possible, though generally, the etch is durable enough to withstand normal cleaning. The frosted design will remain beautiful and intact for years to come.
Inspiring Glass Etching Project Ideas
Now that you’ve mastered the easy process of etching glass at home, let your creativity soar with these fun project ideas. Personalized etched glass makes for thoughtful gifts, unique home decor, and special keepsakes.
Personalized Father’s Day Mug:
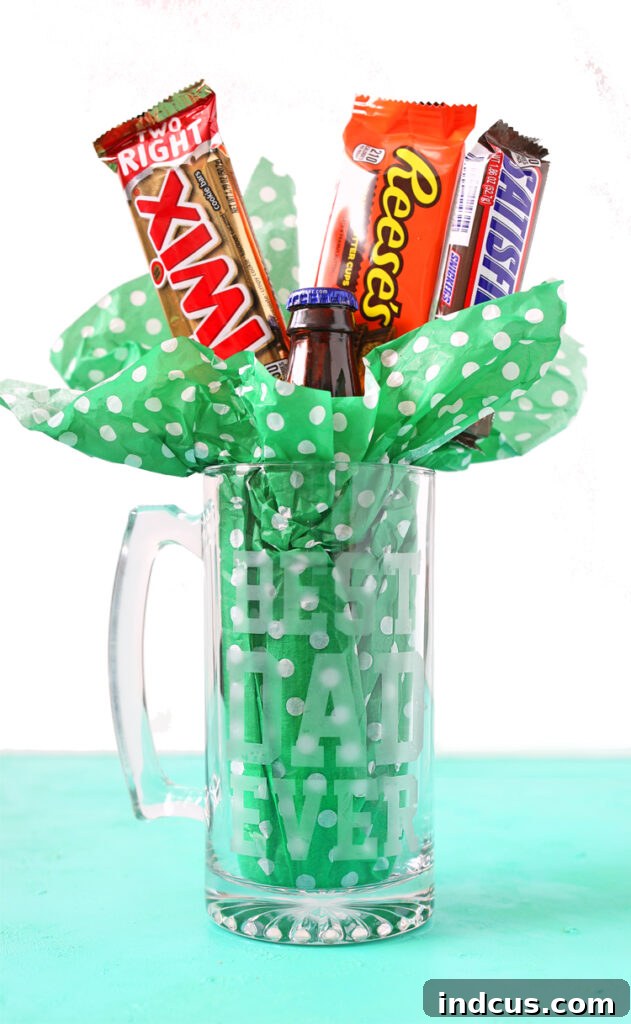
Transform a simple mug from a dollar store into a cherished gift. I etched a large mug with the heartfelt words “Best Dad Ever,” then filled it with his favorite treats, creating a memorable Father’s Day present that he can use daily.
Elegant Glass Trivet:
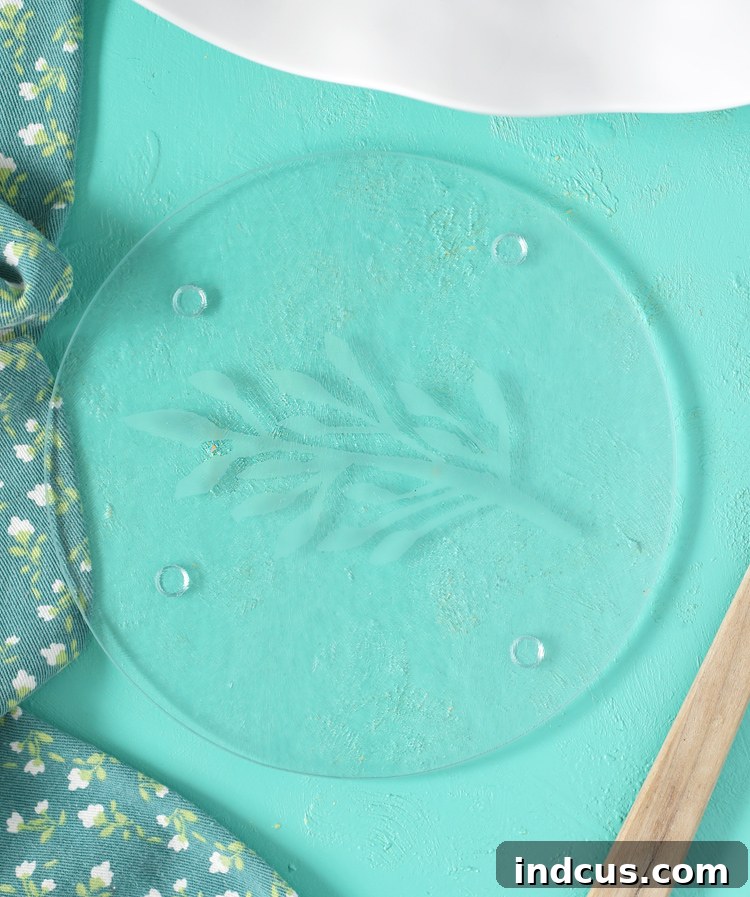
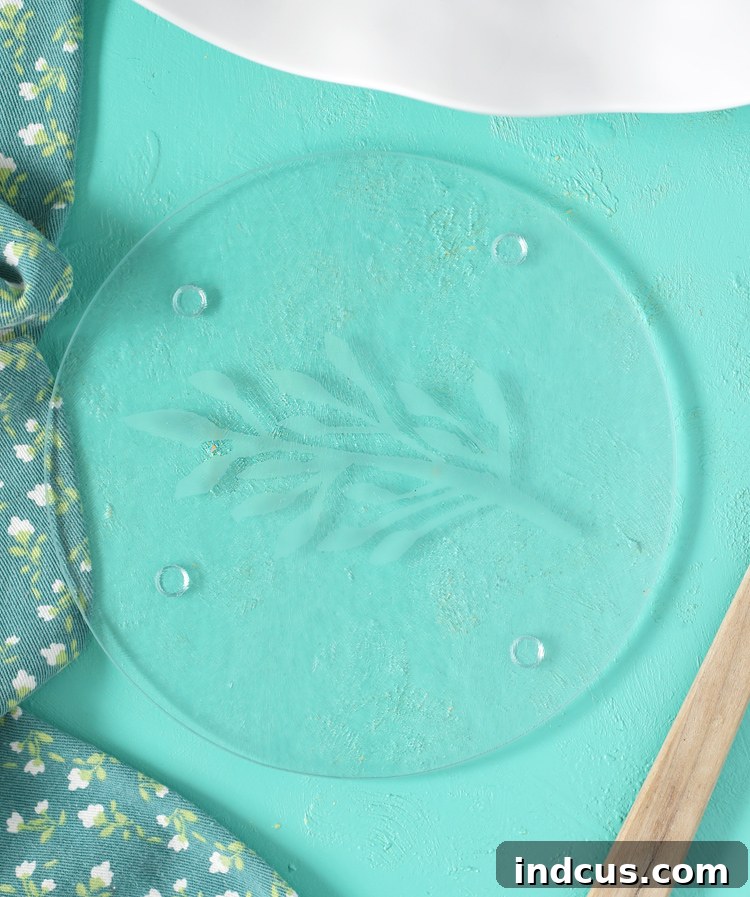
Another fantastic dollar store find – a plain glass trivet – was elevated with a delicate, hand-cut leaf design. The frosted pattern added a touch of natural beauty, turning a functional item into a decorative piece for the kitchen or dining table.
Ready for more inspiration? Here’s a curated collection of glass etching craft ideas from around the web. Click on the links below to explore individual project tutorials and spark your next creation!
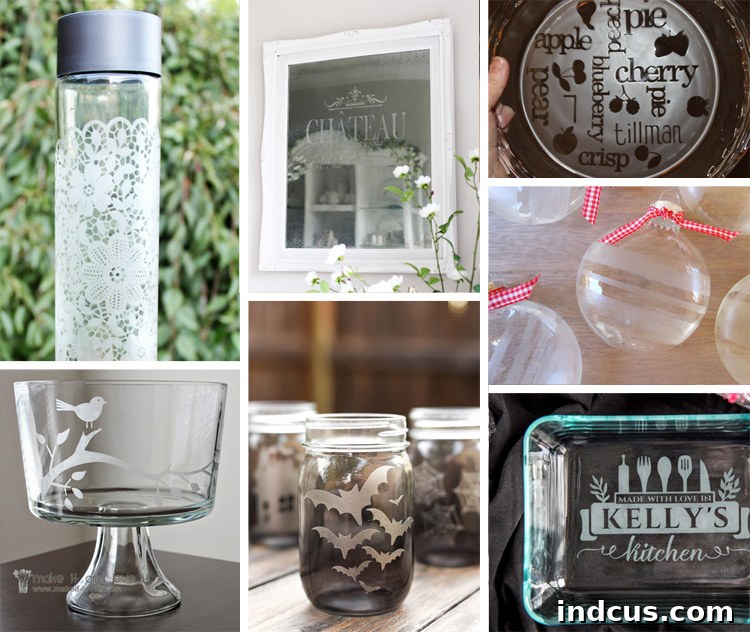
French Mirror |
Trifle Dish |
Christmas Ornament |
Pie Plate |
Halloween Luminaries
Casserole Dish |
Water Bottle |
Cookie Jar |
Wine Glasses
So, what are your thoughts? After reading this detailed tutorial, are you feeling confident and inspired to try etching glass at home? Were you surprised by how accessible and rewarding this craft truly is? I sincerely hope you’re ready to pick up some etching cream and start personalizing your world. If you have any lingering questions or need further clarification, please don’t hesitate to leave a comment below. I’m always happy to help fellow crafters. Happy creating!
Loved this guide? Pin it to save it for your next craft project!