
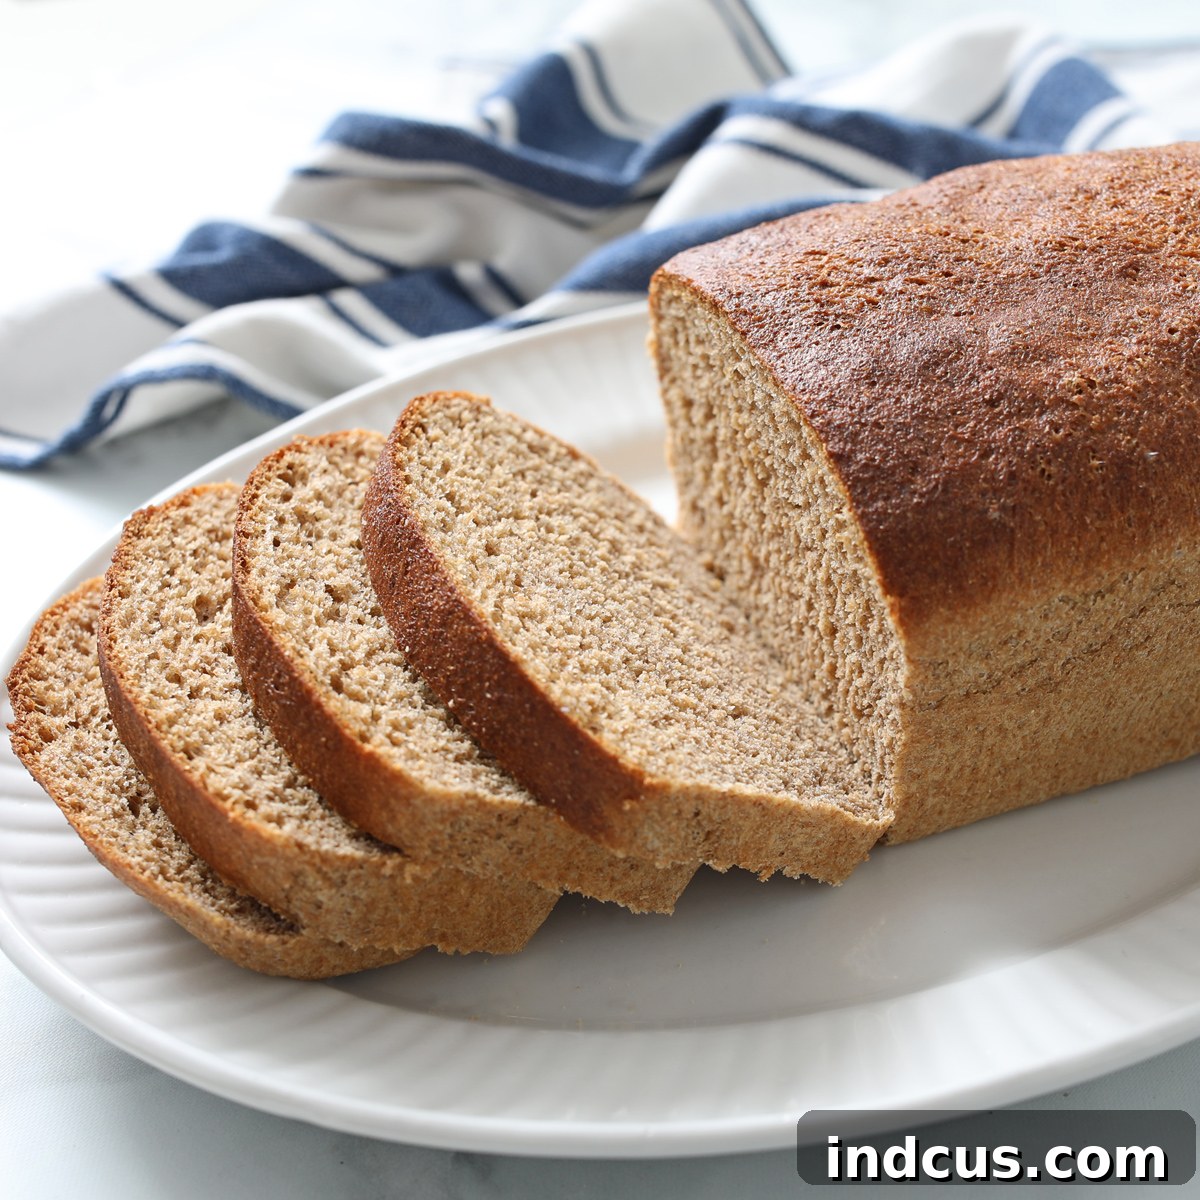
Discover the Secret to Exceptionally Fluffy Whole Wheat Bread: Your New Favorite Recipe!
For too long, whole wheat bread has carried a reputation for being dense, heavy, and often dry. Many home bakers shy away from it, fearing a brick-like loaf rather than the light, airy texture they crave from homemade bread. But what if I told you there’s a game-changing recipe that defies these expectations? This isn’t just another whole wheat bread recipe; it’s *the* recipe that will transform your baking, delivering a loaf that is incredibly flavorful, packed with wholesome whole-grain goodness, and surprisingly soft and fluffy. Prepare to meet your new favorite, go-to bread recipe!
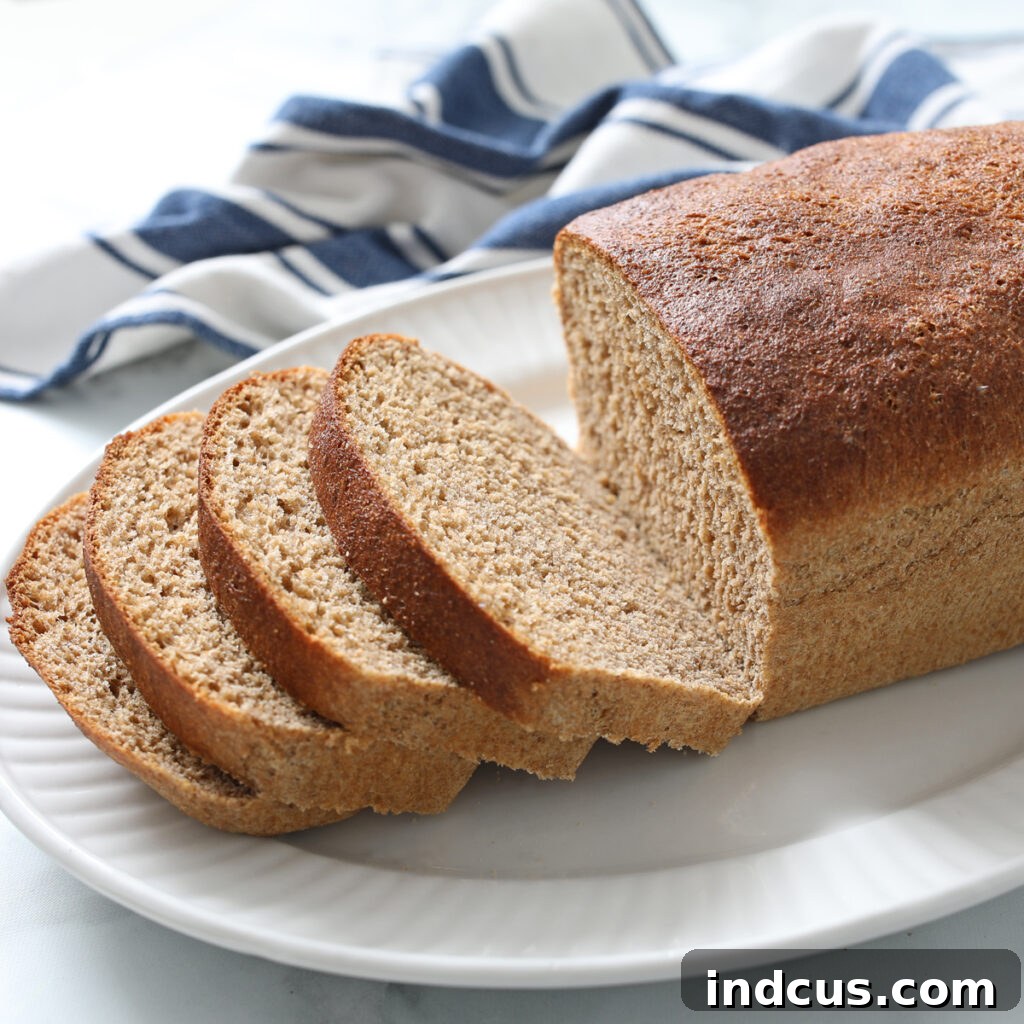
My Journey to the Perfect Whole Wheat Loaf
My own skepticism about whole wheat bread ran deep. For years, every attempt resulted in a loaf that, while undoubtedly healthy, lacked the delightful texture and easy chewiness I associate with truly great bread. I yearned for a whole-grain option that didn’t feel like a sacrifice in taste or texture. Then, about a decade ago, a dear friend brought over a freshly baked loaf. Knowing my usual aversion, I approached it with a healthy dose of doubt. However, with just one bite, all my preconceptions crumbled. This was different. This was *extraordinary*.
The bread was tender, moist, and bursting with a rich, nutty flavor, yet it felt incredibly light. It was everything I had ever wanted in a whole wheat bread and more. I was instantly hooked and, let’s just say, I became quite persistent until she finally shared her secret recipe. It’s truly THAT good, and after years of perfecting it, I’m thrilled to share it with you now. Get ready to bake a loaf that will convert even the most ardent white bread enthusiasts!
This recipe is not only delicious but also remarkably versatile, accommodating various baking methods to suit your preference and kitchen setup. Whether you prefer the hands-on satisfaction of traditional kneading, the efficiency of a stand mixer, or the ultimate convenience of a bread machine, you can achieve outstanding results with this proven formula. We’ll delve into specific tips for each method shortly, ensuring your baking journey is smooth, enjoyable, and successful.
Understanding Whole Wheat Flour: The Foundation of Goodness
Before we dive into our “secret” ingredient, let’s take a moment to appreciate what makes whole wheat flour unique and why it often presents a challenge in baking. Unlike refined white flour, which has had the bran and germ removed, whole wheat flour retains all three essential parts of the wheat kernel: the bran, the germ, and the endosperm. This complete composition is what makes it a powerhouse of nutrition, rich in dietary fiber, essential vitamins, and beneficial minerals.
However, the very elements that make whole wheat flour so nutritious – particularly the bran – can interfere with gluten development. The sharp, coarse particles of the bran can cut through the delicate gluten strands that form during kneading. Gluten is the protein network responsible for giving bread its elasticity and structure, allowing it to trap gases produced by yeast and rise beautifully. When this network is compromised, whole wheat dough tends to be less elastic and results in a denser, heavier loaf. While the nutritional benefits are undeniable, achieving that coveted light and fluffy texture traditionally requires a specialized approach. Our recipe provides just that.
The “Secret” Ingredient: Vital Wheat Gluten
The best solution I’ve discovered to counteract the natural density of whole wheat flour and achieve that desirable light and fluffy texture is the strategic addition of vital wheat gluten to the dough. This incredible ingredient is essentially concentrated natural protein extracted from wheat flour, and it’s a true game-changer for whole grain baking. Think of it as a supercharger for your dough’s structure.
When you add vital wheat gluten, you are significantly enhancing the inherent gluten structure in your whole wheat flour. This additional protein provides the extra strength and elasticity needed to form a robust network capable of trapping the carbon dioxide gases produced by the yeast. This allows the dough to rise significantly higher, creating a more open, less compact crumb, and ultimately a wonderfully light and airy loaf. It truly bridges the gap between the unparalleled nutritional value of whole grains and the luxurious, soft texture typically associated with white bread.
Key Benefits of Adding Vital Wheat Gluten to Whole Wheat Bread Dough:
- Increases the protein level: By boosting the overall protein content, vital wheat gluten directly contributes to the formation of a stronger, more resilient gluten network.
- Helps improve the rise and texture: A robust gluten structure allows the dough to expand more efficiently and hold its shape, resulting in a significantly lighter, airier, and less dense crumb.
- Helps retain moisture: A well-developed gluten network aids in moisture retention within the bread, helping to keep your loaf fresh and soft for a longer period after baking.
- Helps prevent crumbling: Stronger gluten means a more cohesive dough that holds together beautifully, leading to slices that are less prone to drying out or crumbling.
- Controls expansion and contributes to the uniformity of the dough: It provides consistent structural integrity throughout the dough, leading to a more evenly baked loaf with a pleasing, uniform crumb structure.
Finding vital wheat gluten is generally easier than you might think. I often pick mine up from the bulk bins at larger grocery stores like Winco Foods, but it’s typically available in the baking aisle of most well-stocked supermarkets. Look for it near specialty flours, baking mixes, or in the health food section. If you’re having trouble locating it locally, it’s also readily available online through major retailers like Amazon or at health food stores. A small bag goes a long way, making it a cost-effective secret weapon for your regular baking arsenal.
Mastering Your Method: Baking Options for Every Home Baker
One of the many appealing aspects of this whole wheat bread recipe is its remarkable adaptability. Whether you’re a seasoned bread maker who cherishes the traditional craft or someone who prefers the convenience of modern appliances, you can achieve a perfect loaf. Choose the method that best suits your comfort level, available equipment, and time constraints. Each approach offers a unique experience, but all lead to the same delicious outcome.
1. Baking by Hand: The Traditional and Rewarding Approach
If you love the tactile experience and mindful process of traditional baking, making this bread by hand is incredibly rewarding. Begin by combining your wet and dry ingredients in a spacious mixing bowl. Once a shaggy, cohesive dough forms, turn it out onto a lightly floured, clean surface. Knead diligently for approximately 10-15 minutes. The vital wheat gluten in this recipe will make the kneading process more manageable, as the dough will develop its strength and elasticity more quickly than without it. You’ll know your dough is adequately kneaded when it becomes smooth, supple, and passes the “windowpane test” – where you can gently stretch a small piece of dough until it’s thin enough to see light through it without tearing.
2. Using a Stand Mixer (KitchenAid or Bosch): Effortless Efficiency
For those who prefer a less hands-on approach or want to save time and effort, a robust stand mixer equipped with a dough hook attachment is an invaluable tool. This method ensures thorough and consistent kneading without the physical workout. Combine all your ingredients in your stand mixer bowl, ensuring liquids are added first if specified by your mixer’s instructions. Attach the dough hook and begin mixing on a very low speed to initially incorporate the ingredients. Once they come together into a shaggy dough, increase the speed to medium-low. Allow the mixer to knead for about 8-10 minutes. Observe the dough as it kneads; it should begin to clean the sides of the bowl and gather around the hook, becoming smooth, elastic, and pliable. The vital wheat gluten significantly aids the machine in developing a strong, bouncy dough efficiently.
3. Bread Machine: The Ultimate Convenience
The bread machine offers unparalleled convenience, handling almost all the work for you, from initial mixing and kneading to the first rise. Simply add the ingredients to your bread machine pan according to your specific manufacturer’s instructions, which typically means liquids first, followed by dry ingredients, and finally the yeast placed on top. Select the “Whole Wheat” cycle if your machine has one, or the “Basic” cycle if not. The machine will take care of all the hard work. Once the cycle finishes, you can either proceed with shaping the dough for a conventional oven bake and a second rise, or if your machine allows, let it complete the entire baking process for a truly hands-off experience. This recipe is perfectly suited for bread machine use, guaranteeing a beautifully textured loaf every single time.
If you’re new to making homemade bread in general, or simply looking to refine your techniques, I’ve compiled a lot of helpful tips and tricks for making bread here. The fundamental principles and insights shared in that guide apply just as effectively to whole wheat bread as they do to white bread, so feel free to explore those resources for a deeper understanding and to troubleshoot any common baking queries.
The Unsung Hero: A Subtle Touch of Cinnamon
You might notice cinnamon listed among the ingredients for this whole wheat bread and wonder if you’re about to bake a dessert loaf or something akin to cinnamon swirl bread. Rest assured, this is not a sweet bread intended for breakfast pastries! The inclusion of cinnamon in this recipe is subtle yet profoundly transformative. It doesn’t dominate the flavor profile or make the bread taste overtly sweet or spicy. Instead, it plays a nuanced supporting role, working harmoniously to enhance and deepen the natural, earthy, and nutty notes inherent in whole wheat flour.
This hint of cinnamon adds a remarkable warmth and complexity to the overall flavor profile, elevating the bread from simply good to truly exceptional. Many tasters, including myself, often find themselves puzzling over why this whole wheat bread is so undeniably delicious, frequently unable to pinpoint the exact reason. That’s the magic of the cinnamon; it’s a quiet enhancer, creating a more robust, well-rounded, and satisfying flavor experience without ever stealing the show. Trust me on this one: do not skip the cinnamon!
While this whole wheat recipe is a triumph for its hearty flavor and light texture, sometimes you might crave the classic comfort of a perfectly soft white bread loaf. If you are looking for an equally impressive white bread recipe that consistently delivers a dreamily soft crumb, this is, without a doubt, the best homemadewhitebread recipe EVER:
Recipe: 100% Whole Wheat Bread
This whole wheat bread is not only light and flavorful but also packed with all the wholesome goodness of whole grain. Its tender crumb and rich, nuanced taste will quickly make it a cherished household favorite, perfect for sandwiches, toast, or alongside your favorite meal!
Print Recipe
Share on Facebook
Rate This Recipe
Ingredients
- 1 5/8 cup warm water (approximately 105-115°F or 40-46°C, crucial for yeast activation)
- 1/3 cup brown sugar (firmly packed, provides food for yeast and adds flavor)
- 3 teaspoons active dry yeast (ensure it’s fresh and active)
- 4 cups whole wheat flour (plus about 2/3 cup more, reserved for kneading or adjusting dough consistency)
- 2 teaspoons salt (essential for flavor and regulating yeast activity)
- 3/4 teaspoon cinnamon (adds subtle warmth and depth of flavor, don’t skip!)
- 1 teaspoon vital wheat gluten (the key to light and fluffy whole wheat bread)
Instructions
-
Activate Yeast: Measure the warm water, brown sugar, and active dry yeast into the mixing bowl of your stand mixer, bread machine pan, or a large bowl if kneading by hand. Stir gently and allow the mixture to rest for 5-10 minutes. The yeast should become foamy and bubbly, indicating it’s active and ready to work.
-
Combine Dry Ingredients: To the activated yeast mixture, add the initial 4 cups of whole wheat flour, salt, cinnamon, and vital wheat gluten. If using a stand mixer, attach the dough hook. Begin mixing on a low speed (or start kneading by hand) until the ingredients are just combined and a shaggy dough forms.
-
Knead the Dough: Continue mixing or kneading. Gradually add the reserved 2/3 cup of whole wheat flour, a tablespoon at a time, until the dough forms a cohesive ball and begins to pull away cleanly from the sides of the bowl. Knead for a total of 8-10 minutes with a stand mixer, or 10-15 minutes by hand, until the dough is smooth, elastic, and feels pliable. It should pass the windowpane test (stretch a small piece until translucent without tearing).
-
First Rise (Bulk Fermentation): Lightly grease a large, clean bowl. Place the kneaded dough in the bowl, turning it once to coat the entire surface with a thin layer of oil. Cover the dough bowl with a clean kitchen towel or plastic wrap to prevent drying. Let it rise in a warm, draft-free place until it has doubled in size. This typically takes about 1.5 to 2 hours, depending on the warmth of your environment.
-
Shape and Second Rise (Proofing): Once the dough has doubled, gently punch it down to release the air. Turn the dough out onto a lightly floured surface and gently shape it into a smooth, even loaf. Place the shaped dough into a greased 9×5-inch loaf pan. Cover the pan again with a clean towel and let it rise for a second time in a warm place for about 30-45 minutes, or until the dough has risen roughly 1 inch above the rim of the pan. During this time, preheat your oven.
-
Bake: Preheat your oven to 350 degrees Fahrenheit (175 degrees Celsius). Bake the risen loaf for approximately 30-35 minutes, or until the top of the bread is beautifully golden brown and the loaf sounds hollow when tapped gently on the bottom. For an accurate measure of doneness, the internal temperature of the bread should register between 200-210 degrees F (93-99 degrees C) when measured with a food thermometer.
-
Cool: Once baked, immediately remove the bread from the loaf pan and transfer it to a wire rack to cool completely. Allowing the bread to cool fully is crucial as it permits the internal structure to set properly and prevents a gummy texture when sliced. Once cooled, slice and enjoy your perfectly baked, fluffy whole wheat bread!
Share Your Delicious Creations!
Did you make this fantastic whole wheat bread recipe? We’d absolutely love to see your results and hear about your baking experience! Share a photo with us on Instagram and be sure to tag @thecraftpatch. For more inspiring recipes, creative craft ideas, and helpful homemaking tips, don’t forget to follow us on Pinterest!
Email This Recipe
Pin This Recipe
Share on Facebook







