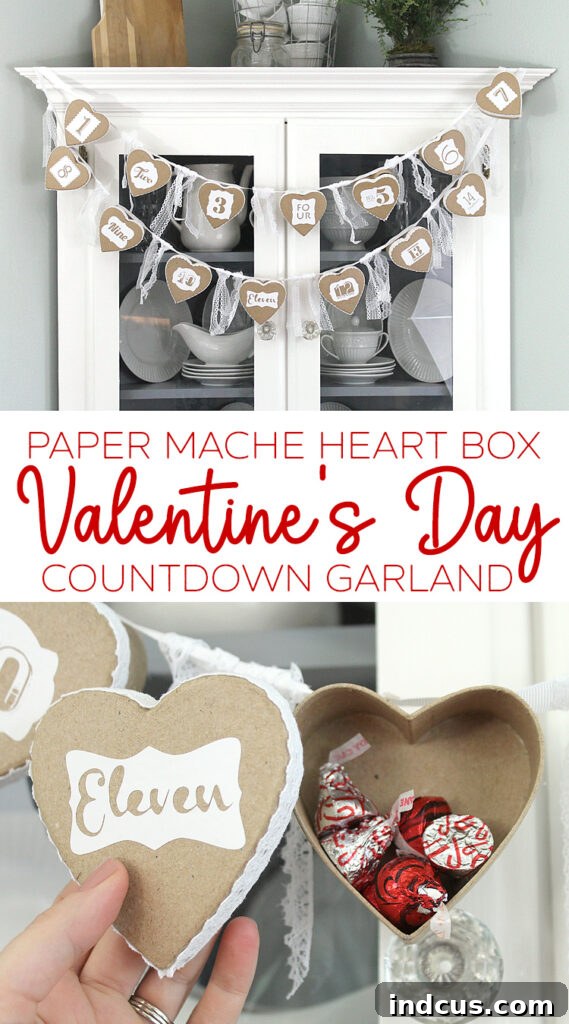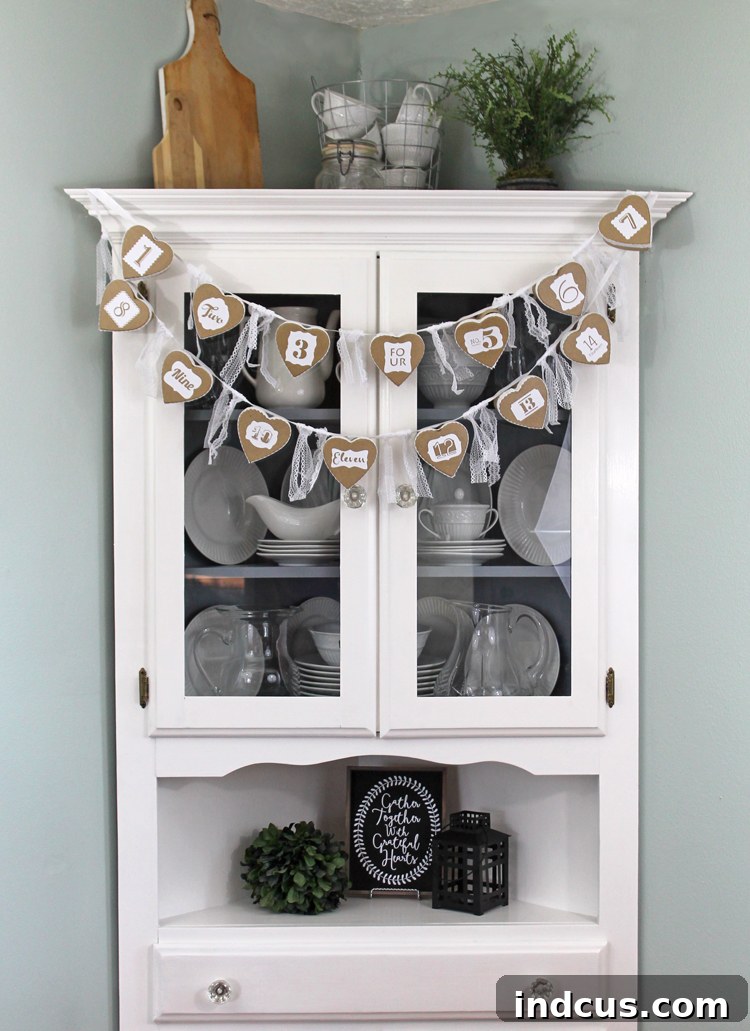
Craft a Heartwarming Valentine’s Day Countdown Garland: The Ultimate DIY Guide
As the air turns crisp and thoughts drift towards expressions of love, Valentine’s Day approaches, bringing with it an opportunity for warmth, affection, and delightful celebrations. While often celebrated with a single day of gifts and dinners, imagine extending that joy and anticipation throughout the entire first half of February! This year, make the lead-up to Valentine’s Day even more special with a charming DIY countdown garland.
Combining the charm of festive decor with the excitement of a daily reveal, this project is perfect for anyone who loves decorating for holidays and enjoys the thrill of a countdown. Valentine’s Day, for all its potential for fun and romance, sometimes doesn’t get the same extended decorative treatment as other holidays. But by creating a countdown calendar, you can elevate the entire experience, making each day leading up to February 14th a little more magical. This adorable garland features fourteen individual paper mache heart boxes, one for each day of February, culminating in the grand celebration of love.
Why You’ll Love This DIY Valentine’s Countdown Garland
- Builds Anticipation: Just like an Advent calendar, a Valentine’s countdown creates excitement, offering a daily surprise that builds towards the main event.
- Personalized Touch: Handmade gifts and decor carry a unique charm. This garland allows for complete customization to match your style or your loved one’s preferences.
- Meaningful Gifting: Instead of a single gift, this craft provides 14 opportunities for small treats, heartfelt notes, or fun activities.
- Charming Decor: Beyond its functional purpose, the garland serves as a beautiful and romantic decoration, adding a warm touch to any room.
- Fun for All Ages: This project is simple enough for adults and older children to create together, fostering family bonding and creative expression.
- Reusable & Eco-Friendly: With proper care, you can use this charming garland year after year, making it a sustainable choice for your holiday decor.
Gather Your Sweet Supplies: Materials Needed for Your Heart Garland
Before diving into the creative process, ensure you have all the necessary materials on hand. Most of these items can be found at your local craft store or online, making this a convenient and accessible DIY project.
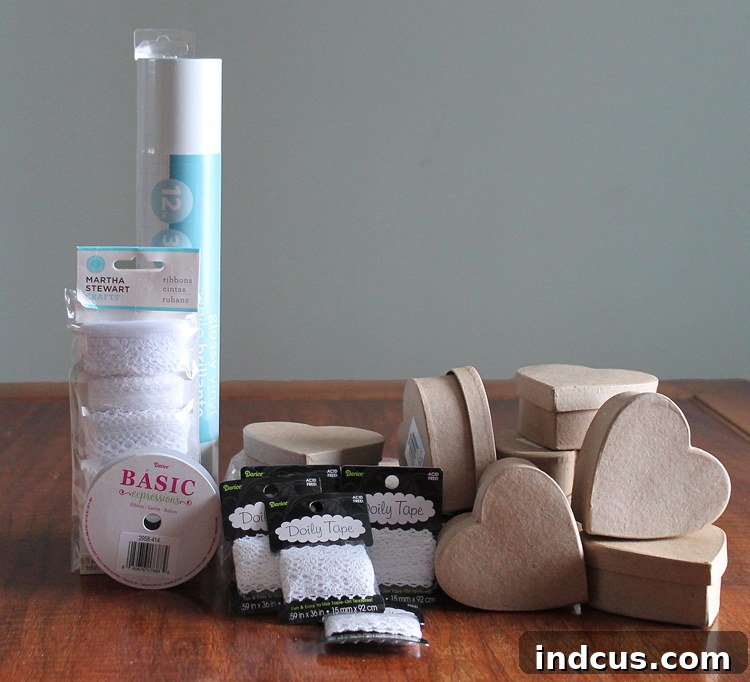
Materials List:
- Paper Mache Heart Boxes: You’ll need 14 small heart-shaped boxes, one for each day from February 1st to 14th. These provide a lovely, rustic base for your garland.
- Lace Tape or Washi Tape: Choose a design that complements your desired aesthetic. Lace tape adds a delicate, romantic touch, while patterned washi tape offers endless creative possibilities.
- White Grosgrain Ribbon: A sturdy, elegant ribbon is essential for stringing your hearts together. White provides a classic, versatile backdrop, but feel free to explore other colors to match your theme.
- White Adhesive Vinyl or Number Stickers: For numbering your boxes. Adhesive vinyl can be cut into precise shapes and fonts, or pre-made number stickers offer a quick and easy alternative.
- Hot Glue Gun + Glue Sticks: Your trusty tool for securing the hearts to the ribbon, ensuring a strong and lasting bond.
- Scissors: For cutting ribbon and tape.
- Craft Knife or Cutting Machine (optional): If you choose to cut your own vinyl numbers, these tools will be invaluable.
Step-by-Step Guide to Crafting Your DIY Valentine’s Garland
Follow these simple instructions to bring your beautiful Valentine’s Day countdown garland to life. Take your time with each step, and don’t be afraid to add your own personal flair!
Step 1: Adorning the Edges of Your Heart Boxes
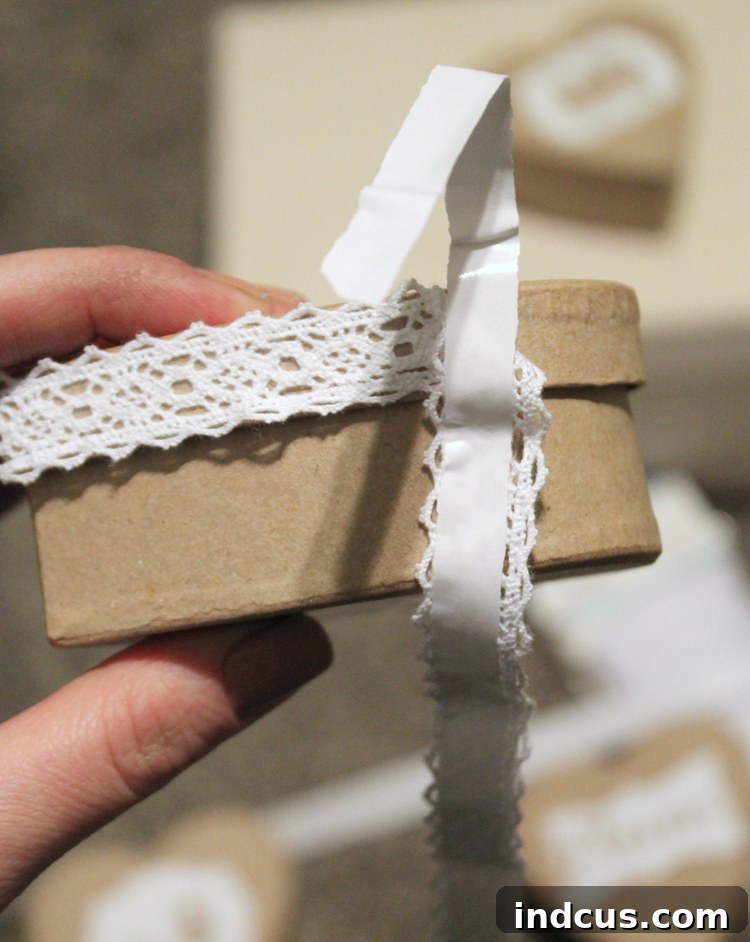
Begin by giving each paper mache heart box a touch of decorative charm. Carefully line the side edges of each box with your chosen lace tape or washi tape. This simple step instantly elevates the look of the plain boxes, adding texture and visual interest. If tape isn’t your preference, consider cutting thin strips of coordinating scrapbook paper and meticulously gluing them around the edges. This offers a different texture and allows for even more personalized patterns and colors. Whatever method you choose, ensure the tape or paper is applied smoothly and evenly for a polished finish.
Step 2: Numbering Your Love: Adding the Countdown Dates
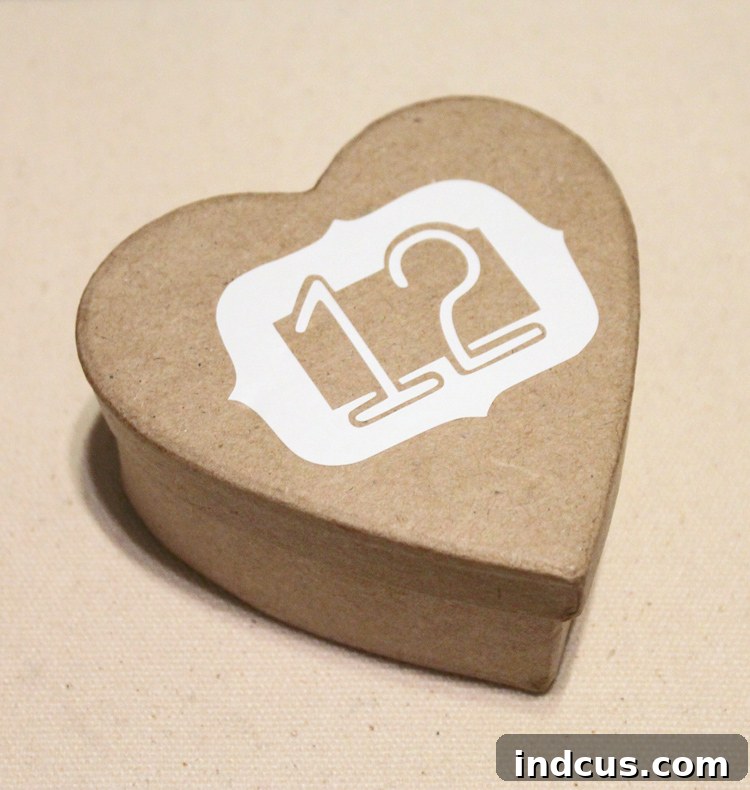
Next, it’s time to add the countdown element to your hearts. Cut numbers from 1 to 14 out of adhesive vinyl, or simply use pre-made number stickers. Each number should correspond to a specific day leading up to Valentine’s Day, starting with ‘1’ for February 1st and ending with ’14’ for Valentine’s Day itself. Affix one number to the front of each heart box. When placing the numbers, aim for a consistent position on each heart for a cohesive look. If using vinyl, ensure the surface is clean and dry for best adhesion. For a touch of creativity, experiment with different fonts or colors for your numbers to match your garland’s overall theme.
Step 3: Arranging Your Hearts on the Ribbon
Find a large, clean work surface to lay out your grosgrain ribbon. Carefully arrange the numbered heart boxes along the ribbon, ensuring they are evenly spaced. The spacing is crucial for a balanced and aesthetically pleasing garland. Consider the length of your ribbon and the space where you plan to hang your garland. For longer garlands or smaller display areas, you might find it more practical to split your hearts between two ribbons, creating a tiered or multi-strand effect. This also allows for greater flexibility in display. Play around with the arrangement until you are satisfied with the visual flow.
Step 4: Securing the Boxes to the Ribbon
With your hearts perfectly positioned, it’s time to secure them permanently to the ribbon. Using a hot glue gun, apply two small dabs of hot glue along the top back edge of each heart box. Immediately and carefully press the ribbon onto the hot glue, holding it in place for a few seconds until the glue sets. This creates a strong bond, ensuring your hearts stay put. Work systematically along your ribbon, attaching each heart one by one. Always exercise caution when using a hot glue gun to avoid burns.
Step 5: Adding Decorative Flourishes and Finishing Touches
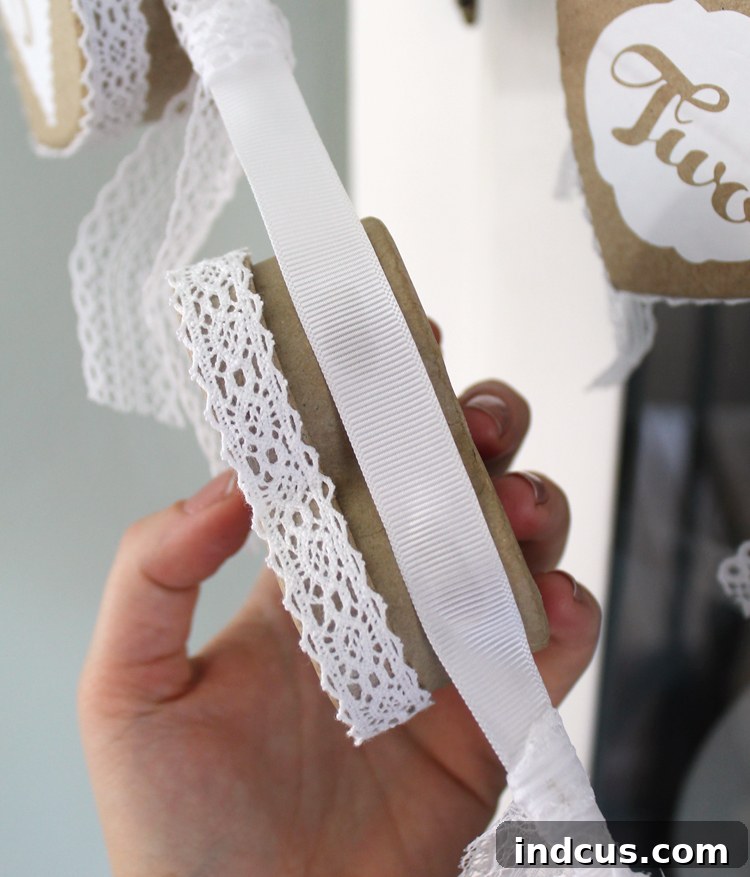
To enhance the romantic appeal of your garland, tie small lengths of leftover lace, or even complementary thin ribbons, to the main ribbon in between each heart box. This step is entirely for fun and adds an extra layer of visual interest and delicate texture to your garland. You can experiment with different knot styles or add small bows. These embellishments help to fill the gaps between the hearts and create a more luxurious, handcrafted feel. Once complete, your garland is ready to be filled with surprises!
Filling Your Hearts: Ideas for Daily Surprises
The true magic of a countdown calendar lies in the daily reveal. Each heart box offers a delightful opportunity to share a small token of love or joy. Here are some ideas for filling your boxes:
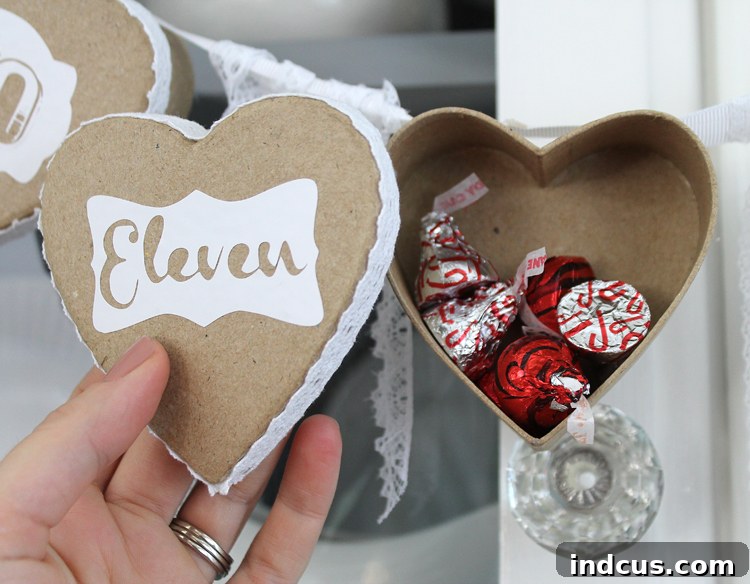
- Sweet Treats: Small chocolates, candies, conversation hearts, or other favorite confections.
- Love Notes: Write personalized messages, quotes, reasons why you love them, or cherished memories.
- Small Gifts: Miniature toys, stickers, temporary tattoos, small pieces of jewelry, or tiny trinkets.
- Activity Ideas: Slips of paper suggesting a family movie night, a walk together, baking cookies, reading a book, or a puzzle.
- Acts of Kindness: Prompts for good deeds like “Help a neighbor,” “Compliment someone,” or “Write a thank-you note.”
- Date Night Ideas: For adults, include suggestions for mini-dates like “Coffee for two,” “Watch a rom-com,” or “Share a dessert.”
- Riddles or Jokes: A daily dose of humor can brighten anyone’s day.
The beauty of this countdown is its versatility. You can tailor the contents to the recipient, whether it’s a spouse, partner, child, or even a friend. Imagine the smiles each day as they open a box, revealing a new surprise and building anticipation for Valentine’s Day!
Personalize Your Countdown: Creative Ideas & Tips
While the instructions provide a solid foundation, there’s ample room to infuse your unique style into this Valentine’s Day countdown garland. Here are some ideas to help you personalize your creation:
- Color Schemes: Don’t limit yourself to traditional reds and pinks. Explore pastel palettes, monochrome elegance, or even bold, unexpected color combinations that reflect your personality.
- Box Decorations: Instead of just tape, consider painting the boxes, adding glitter, stenciling patterns, or decoupaging them with romantic images or fabric swatches.
- Ribbon Alternatives: Experiment with different types of stringing materials like twine for a rustic look, velvet ribbon for luxury, or even fairy lights woven through for a magical glow.
- Embellishments: Beyond lace, attach small charms, mini pompoms, fabric flowers, or personalized tags to the ribbon for extra charm.
- Thematic Designs: Create a theme for your garland, such as “vintage romance,” “modern minimalist,” or “child’s delight,” and choose your materials accordingly.
- Hand-drawn Elements: If you’re artistically inclined, hand-draw small illustrations or details on the boxes for a truly unique touch.
Displaying Your Love: Where to Hang Your Garland
Once your beautiful Valentine’s Day countdown garland is complete and filled, the next step is to proudly display it! Here are a few ideal spots:
- Mantelpiece: A classic choice, allowing the garland to drape elegantly and become a focal point in your living room.
- Doorway or Archway: Drape it across a doorway to greet family and guests with festive charm.
- Wall Decor: Hang it on an empty wall, perhaps above a console table or desk, to add a pop of color and romance.
- Child’s Bedroom: A delightful addition to a child’s room, making the countdown to Valentine’s Day an exciting daily ritual for them.
- Dining Area: Hung above the dining table, it can set a lovely mood for meals throughout February.
Ensure it’s hung securely and at a height where the boxes can be easily accessed for the daily reveal. This garland isn’t just a craft; it’s an interactive piece of decor that brings daily smiles!
Frequently Asked Questions About Your Valentine’s Day Countdown Craft
Here are some common questions you might have while making your DIY Valentine’s garland:
- Q: How long does this project take to complete?
A: Depending on your crafting speed and desired level of detail, it typically takes 2-4 hours to complete the garland itself, not including the time to fill the boxes. - Q: Can children help with this craft?
A: Absolutely! Younger children can help with decorating the boxes (e.g., painting, applying stickers) and filling them, while older children can assist with more precise tasks like cutting and numbering under supervision. - Q: What if I can’t find heart-shaped paper mache boxes?
A: No problem! You can use small square or round paper mache boxes, or even small fabric pouches or envelopes. The key is having 14 individual containers for the countdown. - Q: Are there alternatives to hot glue?
A: Yes, you can use strong craft adhesive or fabric glue. Just be aware that drying times may be longer, and you might need to use clips to hold the boxes in place while the glue sets. - Q: Can I reuse this garland next year?
A: Yes! This garland is designed to be reusable. After Valentine’s Day, simply empty the boxes, carefully detach them if desired for flat storage, and store the garland in a cool, dry place. It will be ready to bring joy again next February!
Share the Love: Your Handmade Valentine’s Tradition
Creating this Valentine’s Day countdown garland is more than just a craft project; it’s an opportunity to infuse your home with love, anticipation, and personalized charm. Each heart box, lovingly decorated and filled, becomes a vessel for spreading joy and making the often-fleeting Valentine’s celebration last throughout the beginning of February. Whether you’re making it for a partner, children, or even as a treat for yourself, this DIY garland is a beautiful reminder of the power of handmade thoughtful gestures.
Loved this idea? Pin it to save it for later and inspire others!