
DIY Gingerbread House Treat Boxes: The Ultimate Guide to Festive Holiday Gifting
The magic of the Christmas season truly comes alive through thoughtful gestures, and for many, one of the most cherished traditions is the exchange of delicious, home-baked neighbor gifts. While the goodies themselves are a treat, the presentation can elevate your offering from delightful to truly unforgettable. Imagine the smiles when your meticulously crafted cookies or candies are nestled inside a charming, miniature gingerbread house! This year, move beyond ordinary gift wrapping and discover how to create stunning, unique, and personalized gingerbread house treat boxes that are sure to wow everyone on your list.
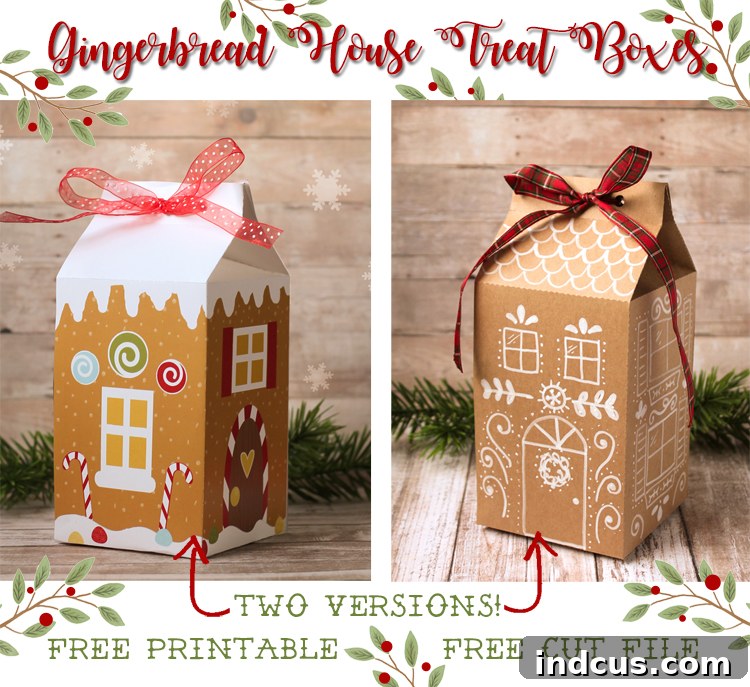
I’m thrilled to share two distinct versions of these adorable Christmas treat boxes, making them accessible for various crafting levels and preferences. Whether you’re a seasoned crafter with a cutting machine or prefer the simplicity of print-and-cut, there’s a perfect option for you. These versatile boxes aren’t just for neighbors; they make a perfect Christmas gift idea for co-workers, appreciative teachers, cherished friends, or even as delightful party favors for your holiday gatherings. Let’s dive into crafting some unforgettable handmade Christmas gifts!
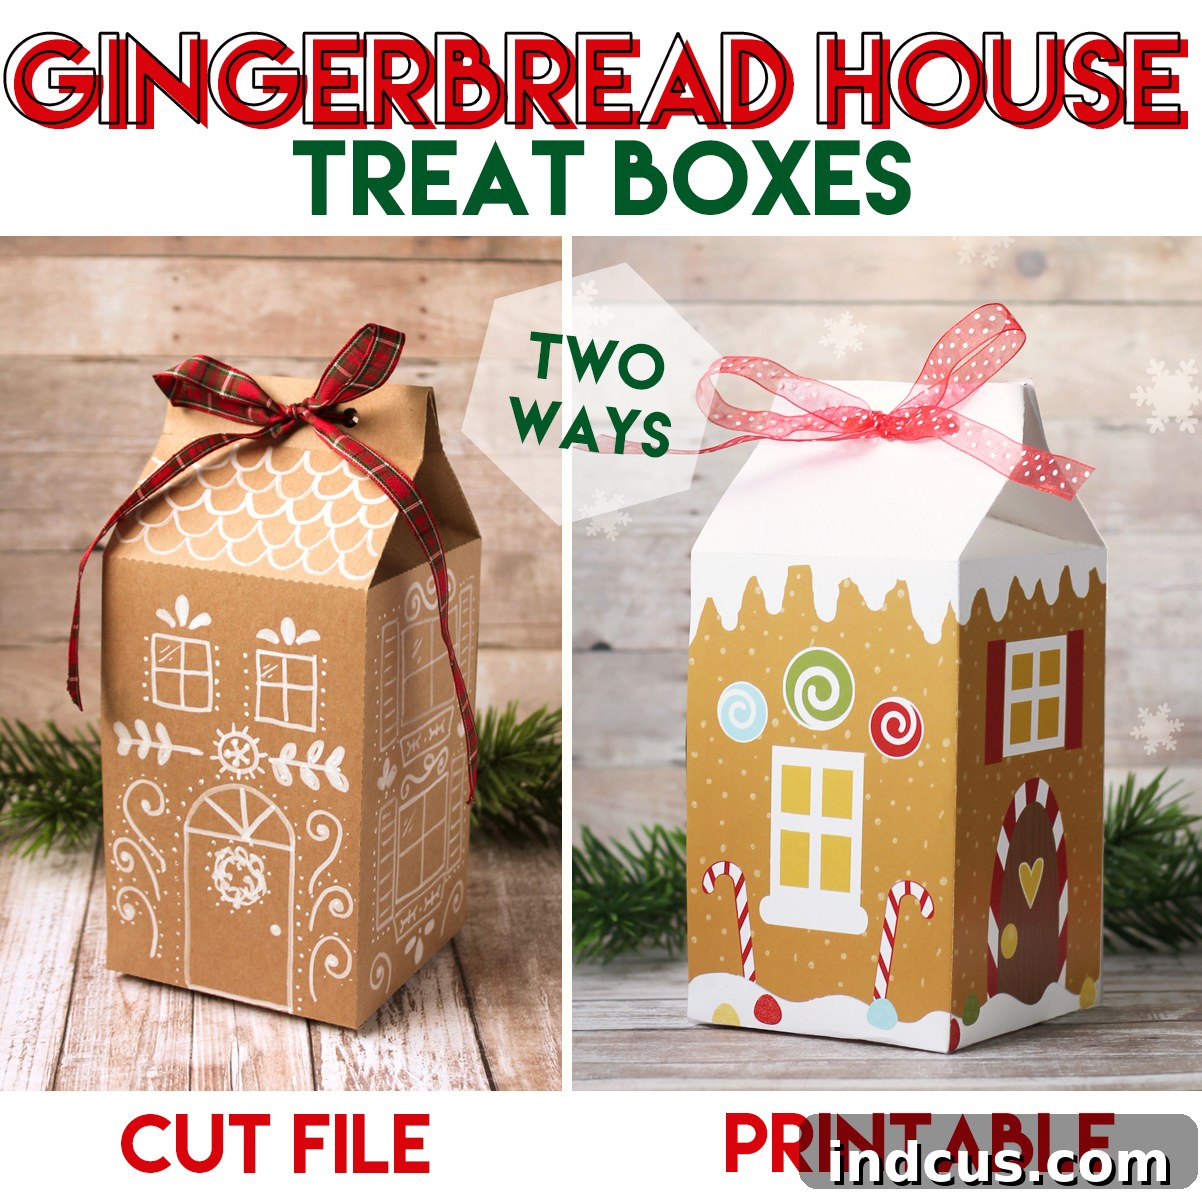
To ensure everyone can participate in this festive craft, I’ve developed two unique approaches to creating these delightful gingerbread house treat boxes. Your choice will depend on the aesthetic you envision and the crafting tools you have at hand. Both versions promise an adorable outcome, perfect for your holiday gift packaging needs.
The first option for these charming DIY Christmas treat boxes is designed to be cut from kraft cardstock, offering a rustic and customizable appeal.

Kraft Paper Gingerbread House Treat Box: Rustic Charm & Customization
Embrace a charming, handcrafted aesthetic with our kraft paper gingerbread house treat box. This version allows for maximum personalization, letting you add your unique artistic flair to each miniature house. The natural texture of kraft cardstock provides a wonderful canvas for white “icing” details, creating a truly authentic gingerbread house template look. This method is ideal for those who love to get creative with their decorations and appreciate the tactile experience of paper crafting.
Materials Needed for Your Handmade Treat Box
Gathering your supplies is the first step to creating these delightful kraft paper treat boxes. Here’s what you’ll need, along with a few tips:
- Kraft Cardstock: You’ll need two 8.5×11″ pieces per box. Opt for a sturdy weight (65-80lb) to ensure your box holds its shape and contents well. The natural brown color provides that perfect rustic gingerbread base.
- White Paint Pen: A fine or medium-tip white paint pen (or a white chalk pen) is essential for drawing “icing” details. Its opaque nature will stand out beautifully against the kraft paper.
- Gingerbread House SVG Cut File: This digital file (available for download at the bottom of this post) is designed for electronic cutting machines like Silhouette or Cricut, ensuring precise cuts and perforated fold lines.
- Hole Punch: A standard single-hole punch for creating openings for your ribbon.
- Glue: A strong liquid glue or hot glue gun is recommended for secure assembly. Consider quick-drying craft glue for efficiency.
- Ribbon: Choose a festive ribbon that complements the gingerbread theme—red, white, green, or even a classic gingham pattern would be lovely to complete your Christmas goodie box.
Step-by-Step Instructions: Crafting Your Kraft Gingerbread Box
Follow these detailed steps to assemble your charming kraft paper gingerbread house treat boxes:
Step 1: Download and Precision Cutting
Begin by downloading the kraft paper cut file from the link below. Load your kraft cardstock into your electronic cutting machine (e.g., Silhouette Cameo or Cricut Maker). Adjust your machine settings for cutting cardstock, ensuring a clean cut. Each box requires two separate pieces of cardstock to be cut. Running a test cut on a small scrap piece is always a good idea to confirm your blade settings.
Step 2: Mastering the Folds for Your Gingerbread House Template
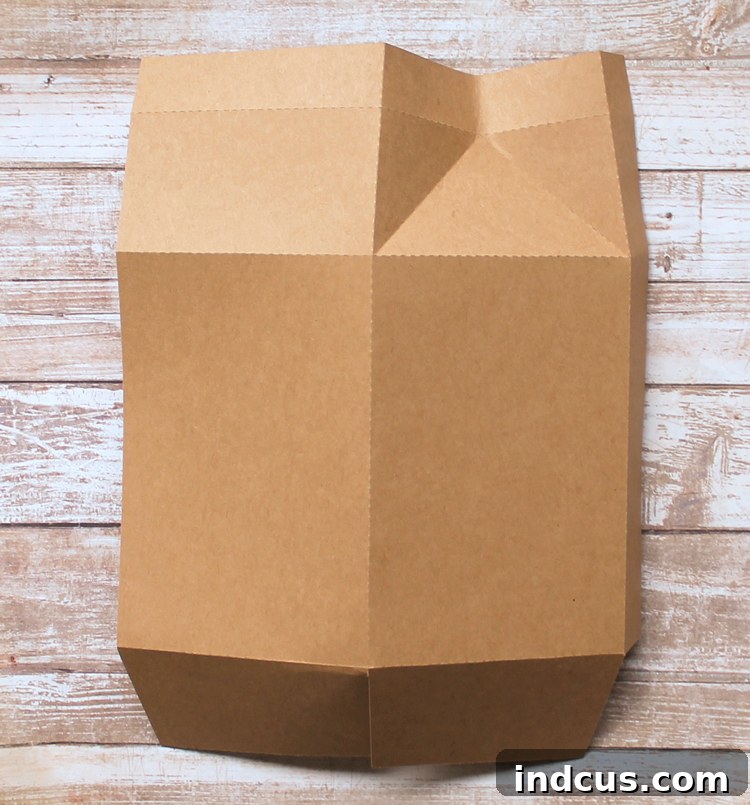
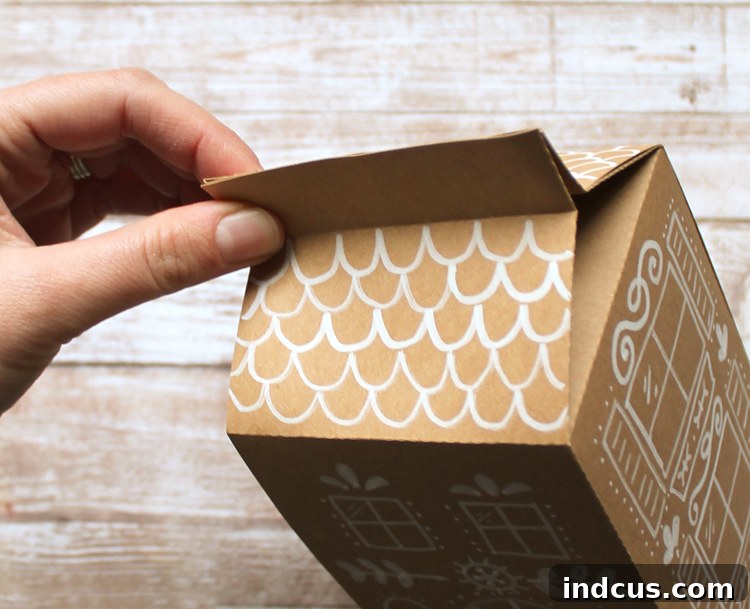
Once cut, you’ll notice perforated lines on your cardstock pieces. These are your folding guides. Carefully fold along every perforated line. For the crispest folds, which are crucial for a professional-looking box, you can use a bone folder or the edge of a ruler to press along the fold lines. Repeat this process for both cut pieces of your box. Precision here will make assembly much smoother and result in a sturdier structure, resembling a perfect “milk carton house.”
Step 3: Unleashing Your Creativity: Decorating Your DIY Christmas Box
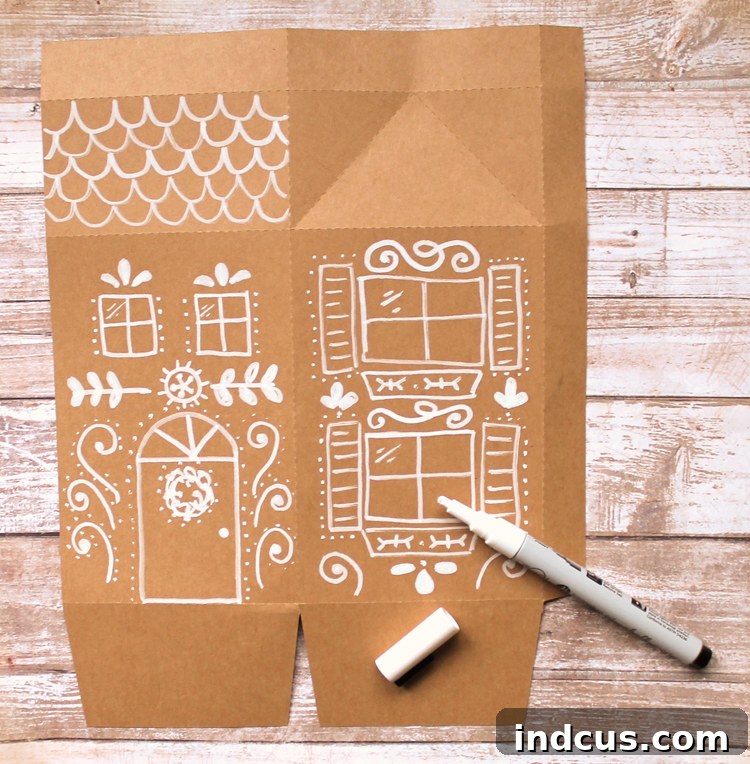
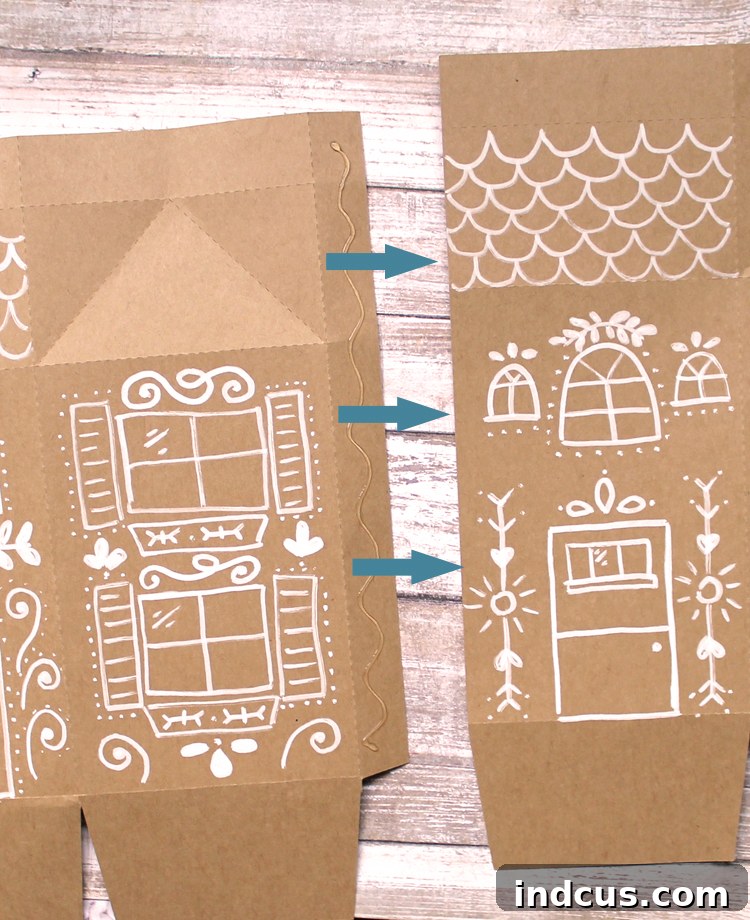
Now for the fun part – decorating! With your white paint pen (or chalk pen), draw windows, doors, scalloped “icing” details along the edges, and any other festive embellishments onto your folded kraft cardstock. Don’t strive for absolute perfection; slight imperfections add to the charming, homemade feel of a real gingerbread house. You can draw simple squares for windows, a rectangular door, or even small dots and swirls to mimic decorative icing. This is where your personal touch truly shines.
Step 4: Assembling the Foundation: Gluing the Sides of Your Holiday Gift Box
Take one of your folded cardstock pieces. Apply a thin but consistent line of glue along the small flap located on the right-hand side. Carefully slide this glued flap underneath the left-hand edge of the second cardstock piece. Press firmly to create a secure bond. Ensure the edges align perfectly to form a seamless side of your box.
Step 5: Completing the Base: Forming a Sturdy Cube
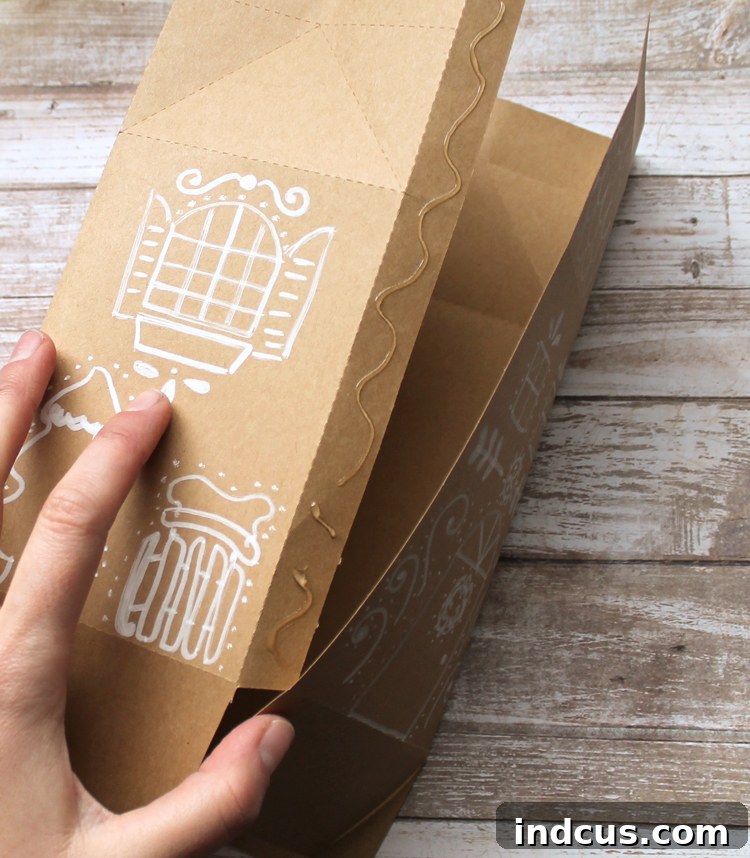
Locate the remaining small flap on the other side of your now partially assembled structure. Apply another line of glue to this flap and tuck it under the opposing edge, pressing firmly to secure. At this point, you should have formed a stable, open-top cube shape, which is the base of your gingerbread house. Allow the glue to set fully before proceeding to ensure durability.
Step 6: Securing the Bottom for Your Treat Packaging
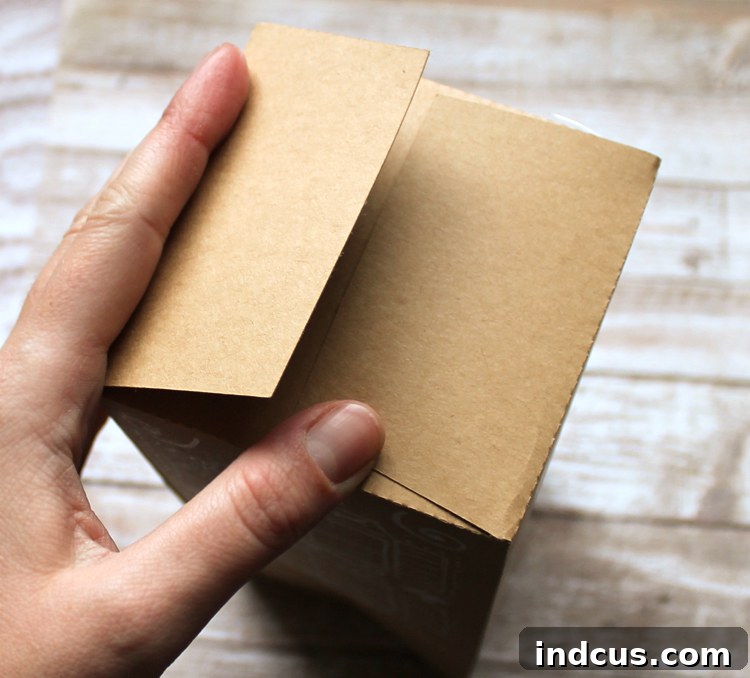
Turn your cube upside down. You will see several flaps at the bottom. Apply glue to each of these flaps, one by one, folding them inwards and pressing them firmly together to create a solid, enclosed base. Overlap them in a way that creates the most secure closure. This ensures your delicious treats won’t fall out!
Step 7: Shaping the Iconic Roof: Creating the Gingerbread House Form
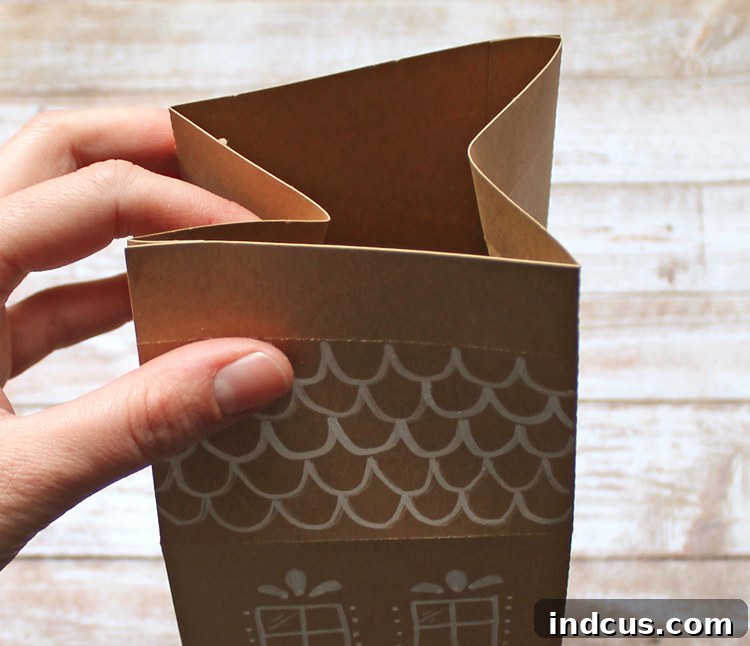
With the bottom now secured, gently pinch the sides of the top opening inwards. As you do this, the triangular sections at the top of the box will naturally come together, forming the classic peaked roof of a gingerbread house. This creates the “milk carton” style closure, adding to the charm of your DIY Christmas craft project.
Step 8: The Finishing Touch: Ribbon Closure for Your Christmas Goodie Box
Once the top sides are pinched together, you’ll have a flat ridge at the very top. Use your hole punch to create two holes along this ridge, spaced evenly apart. Thread your chosen ribbon through these holes and tie a pretty bow. This not only keeps your treat box securely closed but also adds a beautiful decorative element, making your gingerbread house treat box truly complete and ready for gifting!
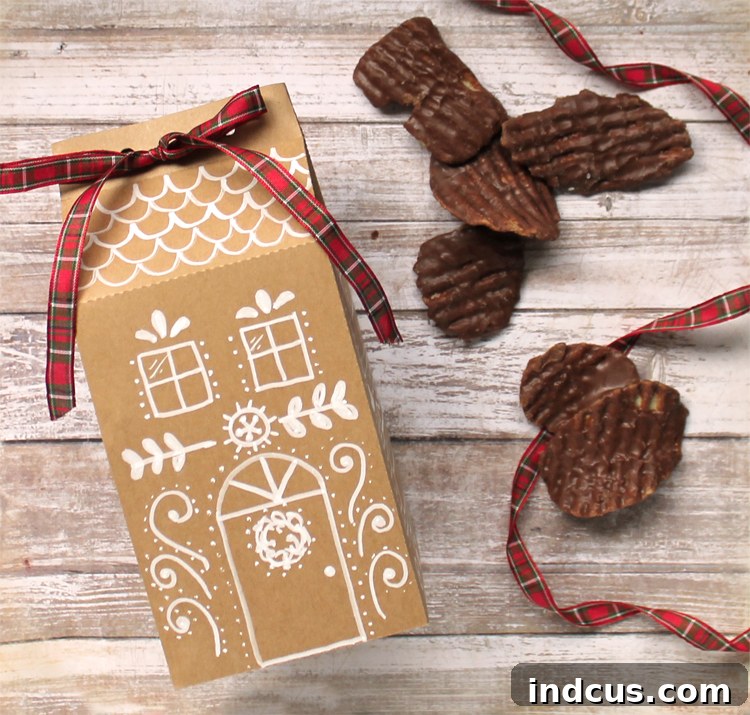
Behold! Isn’t this the most adorable treat box you’ve ever laid eyes on? This kraft paper gingerbread house box is perfect for packaging homemade cookies, candies, hot cocoa mixes, or even small non-edible gifts. Its rustic charm and personalized touch make it an unforgettable part of your holiday gifting tradition. It’s a simple yet impactful way to show you care, transforming a simple treat into a cherished handmade Christmas gift.
Now, if the idea of hand-drawing intricate windows and doors fills you with dread, or if you don’t own an electronic cutting machine, fret not! I have a fantastic second version of these charming treat boxes that offers a quicker, equally delightful solution. This alternative allows you to simply print out the design onto cardstock and then cut it with ordinary scissors, making it an incredibly accessible easy Christmas craft for everyone. Say goodbye to stress and hello to effortless holiday gifting!
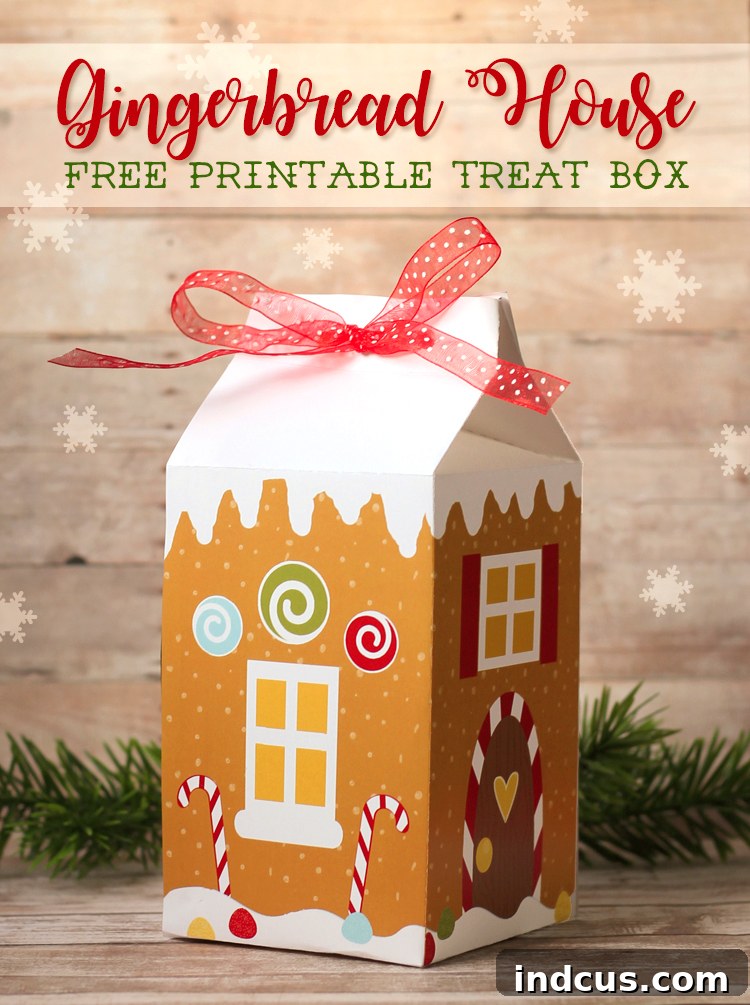
This version truly captures my heart! It’s infused with such a cheerful and whimsical spirit, boasting vibrant pre-designed details that instantly bring a festive touch to your holiday treat packaging. The pre-printed design means less fuss and more fun, perfect for those who want beautiful results with minimal effort. It’s an ideal choice for making a batch of delightful printable gingerbread boxes quickly and efficiently.
Printable Gingerbread House Treat Box: Effortless Elegance
For those seeking a less labor-intensive but equally charming solution, our printable gingerbread house treat box is your answer. This version comes with all the delightful details pre-printed, saving you time and ensuring a consistent, professional look every time. It’s a fantastic option for batch crafting or for those without a craft cutting machine, offering an easy Christmas gifts solution.
Materials Required for Your Print-and-Cut Christmas Box
Here’s what you’ll need to create your cheerful printable gingerbread house boxes:
- White Cardstock: Two pieces per house. A heavier weight (65-80lb) is recommended for durability and a good feel. The white background allows the printed colors to pop brilliantly.
- Scissors: Sharp crafting scissors are essential for clean, precise cuts around the printed design.
- Ruler: A straight edge is crucial for scoring straight lines, ensuring crisp folds for your printable template.
- Bone Folder or Knitting Needle (optional, but highly recommended): These tools aid in scoring, making your folds much cleaner and easier. Alternatives include a dried-out ballpoint pen, a dull butter knife, or even the back edge of a pair of scissors.
- Hot Glue or a School Glue Stick: Both work well for assembly. Hot glue offers a quicker bond, while a glue stick is great for children or less messy crafting.
Step-by-Step Instructions for Your Easy Christmas Treat Box
Creating these printable boxes is wonderfully straightforward:
Step 1: Downloading Your Ready-Made Gingerbread House Design
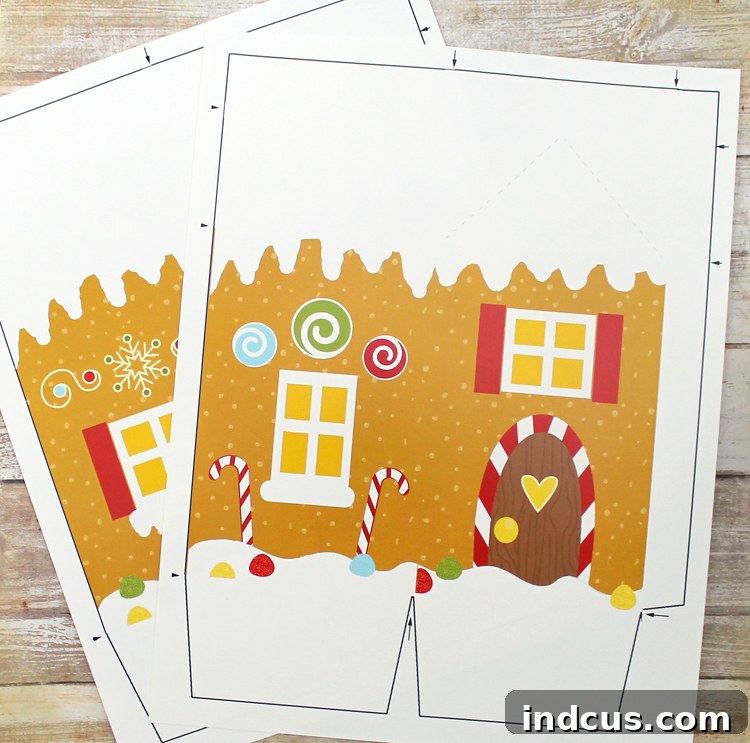
Begin by downloading the two printable house pieces from the link provided at the bottom of this post. Make sure to print them on sturdy white cardstock for the best results. Ensure your printer is set to its highest quality setting for vibrant colors and crisp details. This is the foundation for your delightful printable gingerbread boxes.
Step 2: The Art of Scoring: Ensuring Perfect Folds on Your Printable Template
The assembly process for this printable version is identical to the kraft paper version, with one crucial difference: scoring. You’ll notice tiny arrows positioned around the outside of the cut lines on your printed design. These are your folding guide lines. To achieve perfectly crisp, professional-looking folds (which are especially important on printed cardstock to prevent cracking of the ink), you’ll need to score the paper. Place a ruler along the line connecting an arrow to the one directly across from it. Using a bone folder, a knitting needle, the tip of a dried-out pen, or even the dull side of a butter knife, gently press and run a line along the ruler. This creates a crease that helps the paper fold cleanly. If you need a visual reference for how your folds should look, feel free to scroll back up to the first tutorial photo showcasing the folded kraft paper pieces.
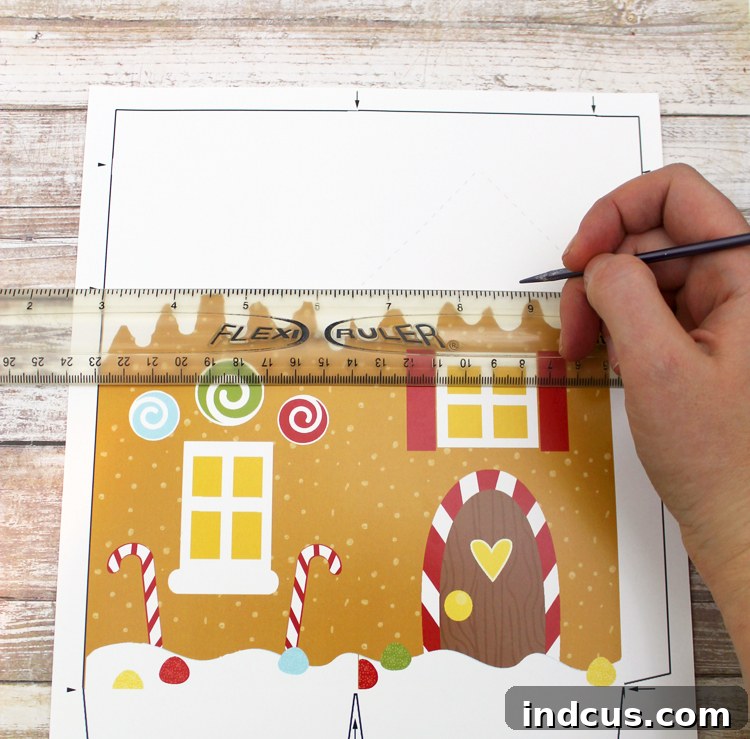
Step 3: Precise Cutting and Seamless Assembly
Once all your score lines are in place, carefully cut just inside the black outline of the design all the way around each piece. Take your time to ensure clean edges. After cutting, simply follow the assembly directions outlined in Steps 4 through 8 of the Kraft Paper Gingerbread House Treat Box tutorial above. The process of gluing the sides, securing the bottom, shaping the roof, and adding a ribbon closure remains the same, ensuring a sturdy and adorable Christmas treat box. This method simplifies the decoration phase, allowing you to focus on precise cutting and assembly for a beautifully finished product.
Pro Tip: Combining the Best of Both Worlds! If you happen to own a craft cutting machine (like a Silhouette or Cricut) but prefer the convenience and pre-designed aesthetic of the printable version, you can combine the best of both worlds! Simply open both the cut file and the free printable designs in your machine’s design software (e.g., Silhouette Design Studio). Align the printable design over the cut file’s outline. This allows your machine to precisely cut out the printed designs, giving you perfectly crisp edges without the need for hand-cutting, while still enjoying the vibrant, ready-to-use artwork of the printable gingerbread house treat box. This hybrid approach offers unparalleled precision and efficiency for your holiday gift packaging.
Visual Learner? Watch Our Gingerbread Treat Box Video Tutorial!
If you’re still picturing how these enchanting boxes come together, or simply prefer a visual guide, you’re in luck! I’ve put together a short, comprehensive video tutorial that walks you through each step of the assembly process. Seeing the folding, gluing, and shaping in action can clarify any uncertainties and boost your confidence in creating these adorable gingerbread house treat boxes. Grab your materials and let’s craft together!
Get Your Free Gingerbread House Treat Box Templates Today!
I poured a lot of love and effort into creating these free files for you, hoping they bring joy to your holiday crafting. Please remember that these templates are for personal use only – share the joy by making beautiful gifts, but not by distributing the files themselves. Thank you for respecting this request! If you encounter any issues accessing the files, it might be due to network restrictions at your school or workplace. Please try downloading them again from an unrestricted computer or network at home. Your delightful DIY Christmas treat boxes are just a click away!
Conclusion: Share Your Handmade Christmas Gift Ideas!
Crafting these gingerbread house treat boxes is more than just a holiday project; it’s an opportunity to infuse your gifts with warmth, creativity, and a touch of personal magic. Whether you choose the rustic charm of the kraft paper version or the effortless elegance of the printable design, each box will carry your thoughtfulness. These unique holiday gift packaging solutions are sure to make your homemade treats and small gifts stand out and be remembered long after the holidays are over.
I encourage you to give this fun Christmas craft project a try! Share your creations with us on social media using #GingerbreadTreatBoxes and inspire others with your delightful handmade Christmas gifts. Happy crafting and happy holidays!







