Transform Your Kitchen: The Ultimate DIY Appliance Makeover with Liquid Stainless Steel Paint
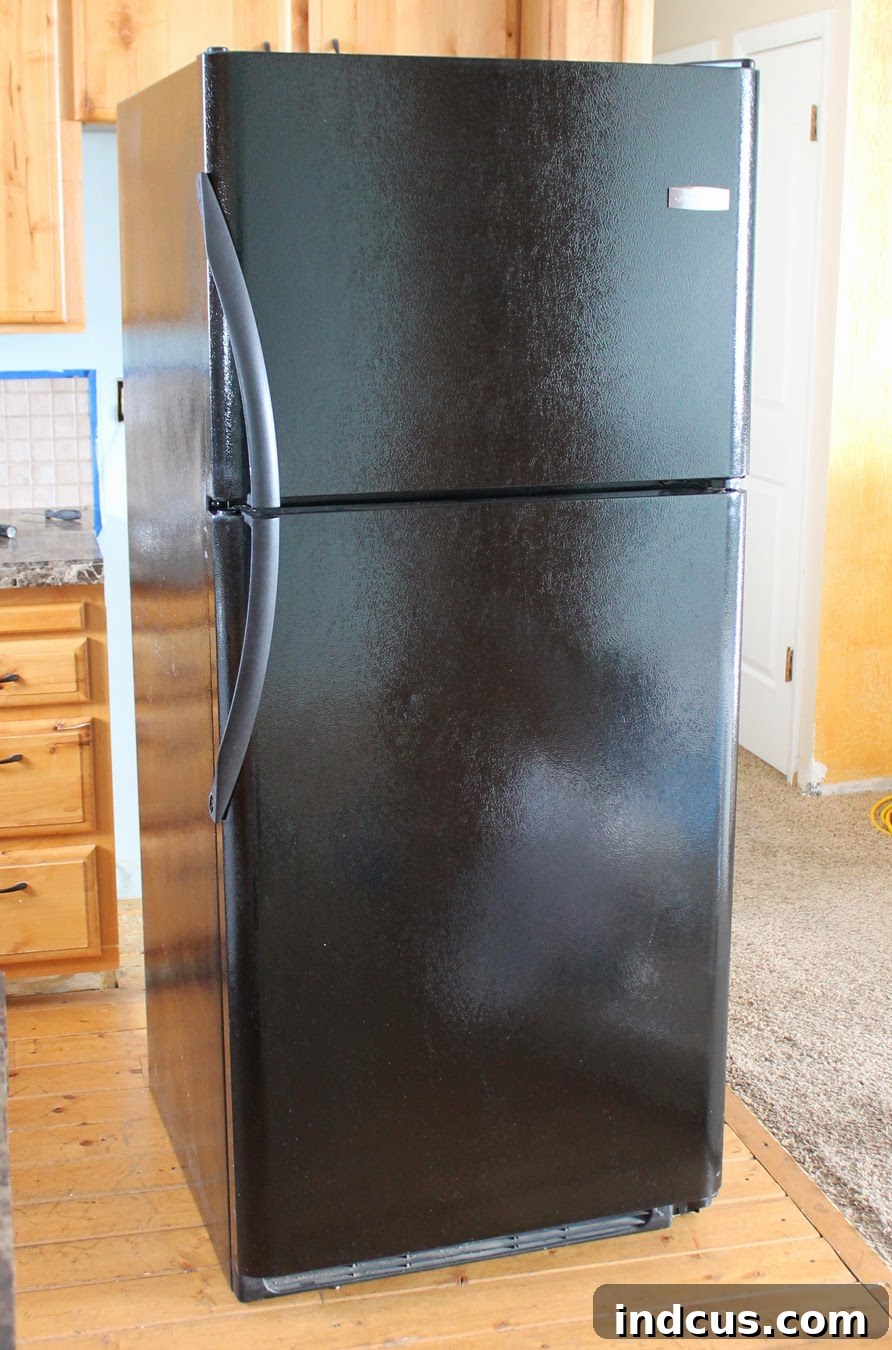
The heart of every home, the kitchen, should be a space that reflects both functionality and personal style. Yet, for many homeowners, the reality is often a collection of kitchen appliances that, while perfectly functional, are a mismatched assortment of colors and finishes. This was precisely the situation in our home: a stark black refrigerator, a contrasting white dishwasher, an oven with an outdated black and white design, and a conspicuously empty space where a built-in microwave should have been. This jumble of appliance finishes created a visual disharmony, preventing our kitchen from achieving the cohesive and modern look we desired.
Beyond the Budget: Why New Stainless Steel Appliances Weren’t an Option
Like many aspiring home improvers, my initial thought was to replace the old appliances with sleek, new stainless steel models to achieve that coveted contemporary kitchen aesthetic. However, a quick foray into appliance shopping brought about immediate sticker shock. High-quality stainless steel refrigerators, even during promotional sales, often carried price tags upwards of $1000. Considering we also needed to purchase a new microwave and ideally update the other existing units, investing in an entirely new suite of appliances was a significant financial undertaking that simply did not align with our budget. The challenge was clear: how could I achieve that sought-after stainless steel look without the hefty price tag of brand-new units? Simply adding a third or fourth distinct finish to our already eclectic appliance collection was certainly not the answer. I needed a creative, cost-effective solution that would bridge the gap between functionality and aesthetics, allowing for a dramatic kitchen upgrade without compromising our financial plans.
The Discovery: Unveiling Liquid Stainless Steel for a Budget-Friendly Renovation
My persistent search for an affordable kitchen appliance makeover eventually led me to an intriguing product: Liquid Stainless Steel. This innovative paint system promised to transform existing appliances, giving them a durable and convincing stainless steel finish. Initially skeptical, I spent considerable time researching the product, including watching their comprehensive YouTube video tutorial multiple times to fully understand the application process and visualize the potential results. The idea of painting my major kitchen appliances was undoubtedly daunting; it felt like a bold and potentially risky DIY venture. Yet, the promise of a dramatic, budget-friendly kitchen transformation was too appealing to simply dismiss.
Inspired and cautiously optimistic, I decided to reach out to the company, expressing my interest in reviewing their product for my blog readers. To my delight, they generously agreed, sending me a complete refrigerator kit and a separate kit designed for dishwashers and ranges. This was the pivotal moment when excitement truly mixed with a healthy dose of apprehension. The thought of applying paint to appliances that were perfectly functional, yet aesthetically lacking, felt like a monumental undertaking. What if I made a mistake? What if I ruined them beyond repair? The fear of an irreversible error was palpable. However, with the product already in transit, there was no turning back. It was time to put aside my anxieties, embrace the challenge, and dive headfirst into this ambitious DIY project. Reflecting on it now, I am profoundly glad I took that leap of faith.
Before the Magic: A Look at Our Mismatched Kitchen Reality
To truly appreciate the scope and success of this DIY transformation, it’s essential to first visualize the “before” state of our kitchen. Each appliance, while serving its intended purpose, contributed to a visually disjointed and somewhat uninspiring environment. Here’s a closer look at the original setup:
The Foundation of Success: Meticulous Preparation for Appliance Painting
The success of any paint project, particularly one involving appliances, rests heavily on meticulous preparation. I diligently followed every instruction provided in the Liquid Stainless Steel kit, understanding that shortcuts at this stage could compromise the final aesthetic and durability. The first and arguably most crucial step was thoroughly scrubbing every surface of the appliances. This isn’t just about superficial cleaning; it’s about diligently removing any traces of grease, grime, food residue, or polish that could prevent the paint from adhering properly. A pristine, smooth, and dry surface is absolutely paramount for achieving a professional-looking and long-lasting finish.
Next, I carefully removed all detachable components. This included unscrewing the appliance nameplates and any other decorative elements or trim that could obstruct the paint application or lead to an uneven finish:
Precise taping was another critical step that demanded patience and attention to detail. I meticulously taped off any areas I did not want painted, such as rubber seals around doors, interior edges, and any permanently affixed trim that wasn’t to be coated. All handles were also removed to be painted separately or reattached later. This precision taping ensures crisp, clean lines and protects delicate or non-paintable parts from accidental paint application, contributing significantly to a polished final look.
Furthermore, all handles and any other small components that could be detached were removed. To prevent any tiny screws, washers, or parts from rolling away and getting lost – a common and frustrating pitfall in any DIY project – I ingeniously used a strip of duct tape to secure them. This simple yet highly effective organizational trick saved a lot of potential stress and searching later on, ensuring every piece was accounted for when it came time for reassembly.
The Application Process: Bringing the Stainless Steel Illusion to Life
With all the extensive preparation finally complete, it was time for the main event: applying the Liquid Stainless Steel paint. The process involved multiple coats of the metallic base paint, followed by several layers of protective top coat designed to enhance the metallic sheen and ensure durability. Each coat required careful, even application and strict adherence to the recommended drying times. This stage truly tested my patience, but I understood it was absolutely essential for a durable and aesthetically pleasing outcome. It’s important to note that the initial coats were indeed streaky and looked far from perfect – a detail the product instructions wisely prepare you for. It is crucial not to panic during this stage, as the true magic of the transformation genuinely unfolds with the subsequent layers and the precise finishing touches.
The Refrigerator’s Dramatic Stainless Steel Reveal
After applying three meticulous coats of the metallic paint and three protective top coats, our once dull black refrigerator underwent a complete and stunning transformation. The dated, dark unit was now gleaming with a sophisticated stainless steel appearance, instantly modernizing our kitchen:
The visual impact was nothing short of astounding! The drab black had been replaced by a sparkling, metallic surface that instantly elevated the entire kitchen’s aesthetic. The side-by-side before and after comparison truly highlights the dramatic change achieved with this innovative DIY appliance paint, proving its effectiveness as a budget-friendly kitchen upgrade:
While photographs, especially those viewed online, often struggle to capture the true depth and vibrant shimmer of the finish, a closer inspection in person reveals the intricate metallic sparkle that gives it such an authentic look. In real life, the effect is even more captivating and convincing:
It’s important to maintain realistic expectations: the painted surface does retain some of the original texture of the appliance, which differs slightly from the perfectly smooth finish of true factory-installed stainless steel. However, given the immense cost difference – the Liquid Stainless Steel refrigerator kit costs a mere $79 compared to over $1000 for a brand-new unit – this minor textural distinction is an incredibly small compromise. The achieved color, the convincing metallic sheen, and the overall impression are so remarkably close that for anyone on a budget, this solution is an absolute game-changer. It delivered precisely the modern, unified look I was aiming for, at a mere fraction of the cost.
The Dishwasher Dilemma: A Work in Progress
My dishwasher project, while underway, remains a work in progress, highlighting some of the enjoyable decision-making complexities that can arise during a DIY kitchen upgrade. I successfully painted the bottom panel, achieving the desired stainless steel look. However, I’ve intentionally paused on the top part, caught in a delightful dilemma: should I commit to an entirely all-stainless finish for the entire unit, or incorporate a black accent to create a stylish two-tone effect? This indecisiveness is a common, creative part of home improvement projects, and I’m still weighing the aesthetic options and how they will best integrate with our evolving kitchen. I’d genuinely love to hear your opinions on which direction would best suit our transformed kitchen!
The Oven’s Unfortunate Turn: A Cautionary Tale in DIY
It’s a common truth in the world of DIY: not every project goes perfectly according to plan. My oven, unfortunately, became a testament to this reality. While attempting to clean the inside of the glass door, I carefully undid the front screws. However, as I tried to reassemble it, an unforeseen accident occurred: with a dramatic “POOF,” the glass shattered into countless pieces. It was a disheartening moment, leading to the untimely and unexpected demise of an otherwise functional oven. Here’s the tragic photographic evidence:
This incident was particularly frustrating because the oven’s lower drawer had turned out exceptionally well with the Liquid Stainless Steel paint. Unlike the fridge, which retained a slight underlying texture, the perfectly smooth surface of the oven drawer allowed the paint to mimic genuine stainless steel with uncanny accuracy. The result was incredibly convincing, truly looking just like the real thing. Photos, I must emphasize, scarcely do justice to how impressive and authentic it appeared in person, highlighting the product’s potential on ideal surfaces.
Naturally, the shattered glass meant we had no choice but to purchase a new stove. However, I remain convinced that if not for my own “dorky” mistake during reassembly, the Liquid Stainless Steel paint would have delivered an equally stunning and durable finish on the entire oven, just as it flawlessly did on the drawer. It stands as a testament to the product’s efficacy and potential, even when human error unexpectedly intervenes.
Why Embrace DIY Appliance Painting? Benefits and Strategic Considerations
Despite the minor setback with the oven, my overall experience with Liquid Stainless Steel has been overwhelmingly positive. This DIY appliance makeover project, while initially nerve-wracking, delivered an immense payoff in terms of both kitchen aesthetics and significant budget savings. It’s a fantastic and highly recommended solution for homeowners seeking to:
- Achieve Cost-Effective Kitchen Upgrades: Dramatically refresh your kitchen’s appearance without the prohibitive cost of purchasing entirely new appliances.
- Promote Environmental Responsibility: Give perfectly functional, albeit outdated, appliances a second life. This approach reduces waste and contributes to more sustainable home improvement practices.
- Enable Customization and Personalization: Break free from limited factory color options and achieve a truly cohesive kitchen design that perfectly reflects your personal taste and style.
- Experience a Sense of Accomplishment: There’s immense satisfaction and pride in transforming a significant part of your home with your own hands, seeing tangible results from your efforts.
- Increase Home Value and Appeal: A modern, unified kitchen aesthetic can significantly boost your home’s overall appeal and potentially its market value.
Expert Tips for a Flawless Liquid Stainless Steel Application
For anyone considering embarking on their own appliance painting journey with Liquid Stainless Steel, I’ve gathered a collection of invaluable tips gleaned directly from my experience. Following these guidelines will significantly increase your chances of achieving a professional-looking, durable, and truly impressive finish:
- Vigilance Against Drips is Paramount: This cannot be overstated. For at least 10-15 minutes after applying each coat, maintain an “eagle eye” vigilance. Carefully inspect every edge, joint, screw hole, and bump for any paint drips or runs. Liquid Stainless Steel dries relatively quickly, and dried drips are incredibly difficult, if not impossible, to rectify without marring the entire finish. Address any drips immediately with a small, clean brush or a lint-free cloth.
- Embrace the First Coat’s Imperfect Appearance: The initial coat will almost certainly appear streaky, thin, and far from perfect. Do not be alarmed or discouraged! This is completely normal and an integral part of the layering process. Resist the urge to overwork the paint or apply it too thickly in an attempt to achieve full coverage with the first coat. Subsequent coats will progressively build coverage and smooth out the appearance. Patience and trust in the process are absolutely key here.
- Master the Squeegee Tool with Precision: The kit includes a specialized squeegee tool, which is absolutely essential for creating the characteristic brushed metallic look of genuine stainless steel. After rolling on the paint, you use this squeegee to make precise, uniform, and parallel streaks. Any crooked or inconsistent lines will be noticeably visible in the dried finish, detracting from the illusion. If you’re unsure, practice your technique on a hidden area or scrap material first. Precision in this step is paramount for achieving an authentic and convincing stainless steel appearance.
- Clean Your Squeegee Frequently: After each pass with the squeegee, ensure you thoroughly wipe off any excess paint from the foam pad. An overloaded squeegee will not create clean, defined streaks and can lead to uneven application and blotchiness. Storing the squeegee in a sealed plastic bag between uses also helps prevent it from drying out, keeping it pliable and effective for subsequent applications.
- Adhere Strictly to Drying Times: The instructions regarding drying times between coats are not merely suggestions; they are absolutely critical for proper adhesion, optimal durability, and a smooth, flawless finish. Rushing the process, as I admittedly did towards the very end of my project, can result in imperfect spots, bubbling, or compromised longevity of the paint. Plan your project to allow ample drying time for each stage, even if it means extending the project over several days.
- Turn Off and Empty Your Refrigerator Completely: While some product videos may suggest you can paint with the fridge on, I strongly advise against this for optimal results. The minor convenience of keeping food chilled is far outweighed by the significant difficulty of working around cold, condensation-prone surfaces and trying to keep doors ajar without them constantly closing. Transfer all perishables to a cooler, turn off and completely empty the fridge. This allows you to leave the doors wide open, making it significantly easier to paint edges, insides, and hard-to-reach areas without interruption. This simple preparatory step will save you considerable frustration and ensure a smoother, more even application.
- Ensure Good Ventilation: As with any painting project, ensure you work in a well-ventilated area. Open windows, use fans, and, if necessary, wear a respirator to dissipate fumes, protecting your health and aiding in faster, more even drying of the paint.
- Consider a Small Test Area: If possible, before tackling the main surfaces, try applying the paint to a small, inconspicuous area (like the back or side of an appliance that won’t be seen once installed) to get a feel for the application technique, the roller, and especially the squeegee method. This practice run can boost your confidence and refine your technique.
Looking Ahead: Our Continued Kitchen Renovation Journey
Our journey towards a fully unified and modern kitchen aesthetic continues! Capitalizing on Home Depot’s excellent Black Friday appliance deals, we’ve now ordered a brand-new stainless steel oven and a matching built-in microwave. These new additions will perfectly complement our freshly painted refrigerator, bringing our vision of a cohesive kitchen to full fruition. I can’t wait to share the final reveal of our complete kitchen once these new appliances are installed, showcasing the full impact of our dedicated DIY efforts combined with strategic new purchases. This project has truly proven that a stunning kitchen transformation doesn’t always require an astronomical budget.
For those interested in seeing how the Liquid Stainless Steel finish holds up over time under daily use, be sure to check out my detailed follow-up post: UPDATE: How The Appliances are Holding Up Three Months Later. This will provide valuable insight into the long-term durability of this innovative paint solution.
If you’re looking for even more inspiration for incredible appliance makeovers and other creative home transformation projects using similar products, explore Liquid Stainless Steel (also known as Giani Granite) on their vibrant social media channels: Facebook and Pinterest. They feature a wealth of inspiring photos, creative ideas, and success stories to fuel your next exciting DIY adventure and help you visualize the possibilities for your own home!