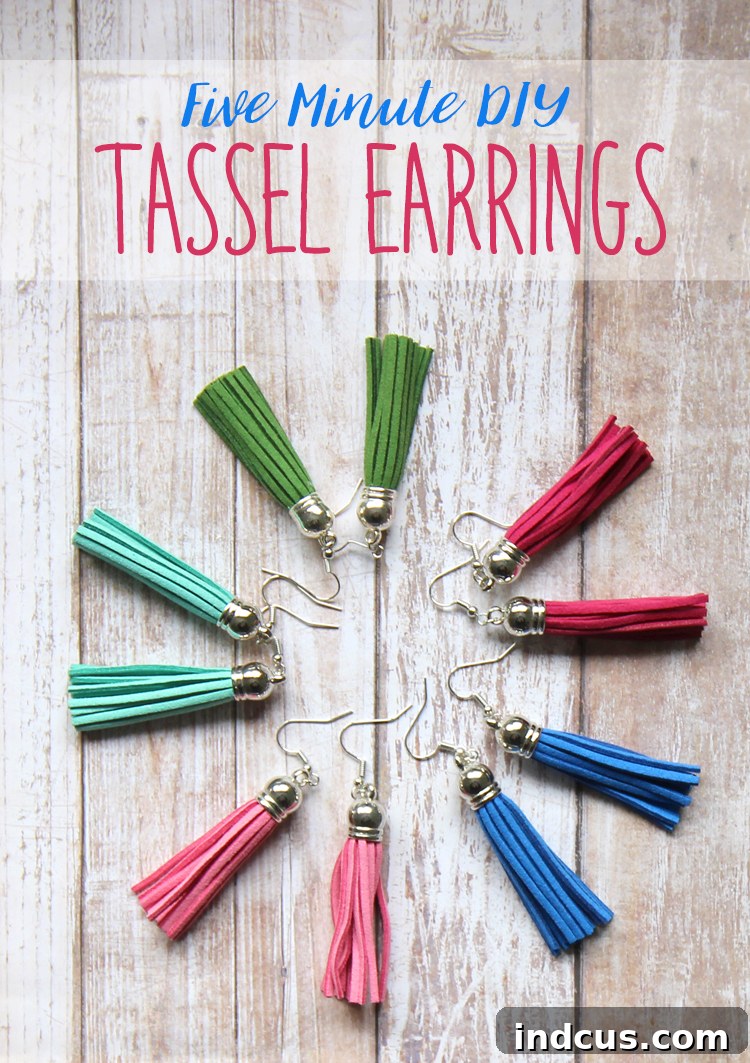
Are you searching for the perfect last-minute gift that feels thoughtful and personal? Or perhaps you’re looking for a fun, creative way to infuse vibrant color into your everyday wardrobe without breaking the bank? Maybe you simply need a delightful excuse to dive into the world of crafting? If any of these resonate with you, then you are absolutely in the right place! Today, I am thrilled to share an incredibly simple yet highly rewarding handmade jewelry tutorial that will guide you through creating these absolutely adorable and wonderfully colorful suede tassel earrings.
The most incredible part about this DIY project? You can craft these charming earrings in less than five minutes, making them an ideal choice for even the busiest schedules! Their simplicity makes them the perfect activity for a casual craft night with friends, a fantastic project for teenagers exploring their creative side, or for anyone who desires stylish, custom jewelry that’s exceptionally easy to make. Imagine the satisfaction of wearing a piece you crafted yourself, perfectly matching your outfit or reflecting your unique personality!
Why You’ll Love Crafting These DIY Tassel Earrings
Beyond their stunning appearance, these suede tassel earrings offer a multitude of benefits. They are incredibly lightweight, ensuring comfort for all-day wear. The suede material gives them a luxurious feel while remaining durable. Plus, with the vast array of colors available, you can truly express yourself and create a pair for every mood, season, or special occasion. Forget expensive boutique accessories; with this tutorial, you become your own jewelry designer, all from the comfort of your home!
Gather Your Tools: Essential Materials for Crafting Your Tassel Earrings
Embarking on any DIY project begins with gathering the right supplies. Fortunately, for these trendy tassel earrings, the list is wonderfully short and sweet, making it an accessible craft for beginners and experienced makers alike. You’ll be amazed at how quickly you can assemble everything needed to bring these beautiful earrings to life.
Materials Needed to Make Your Own DIY Earrings
- Suede Tassels: These are the star of our show! Pre-made suede tassels come in an astonishing variety of colors, sizes, and even different textures. For this project, choose tassels with a small loop at the top, which makes attaching them incredibly simple. Consider vibrant hues for a pop of color, or classic neutrals for everyday elegance.
- 4 mm Jump Rings: These tiny but mighty metal circles act as the connectors for your earrings. A 4mm size is usually perfect for this project, offering a secure connection without being overly bulky. You’ll need two per pair of earrings. Ensure they are sturdy enough to hold the weight of the tassel.
- Fish Hook Earring Backs: Also known as ear wires, these are the components that actually go through your pierced ears. They typically have a small loop at the bottom for attaching other elements. Look for hypoallergenic options if you have sensitive skin. You’ll need one for each earring.
- Chain Nose Pliers: While you might be tempted to use your fingers, a good pair of jewelry pliers, specifically chain nose pliers, will make this process infinitely easier and more professional. They allow for precise control when opening and closing jump rings, preventing damage to the metal and ensuring a secure closure.
Pro Tip for Choosing Materials: When selecting your suede tassels and metal components, consider the overall aesthetic you want to achieve. Do you prefer gold, silver, or rose gold hardware? Matching your jump rings and earring hooks will create a cohesive and professional-looking finished product. Don’t be afraid to mix and match colors of tassels for a truly unique pair!
Step-by-Step Guide: Crafting Your Suede Tassel Earrings
Now for the exciting part – putting it all together! You’ll be amazed at just how straightforward these instructions are. In fact, you’ll likely complete your first earring before you even fully realize it. This truly is a beginner-friendly project, perfect for building confidence in jewelry making.
Simple Instructions for Handmade Earrings
- Open a Jump Ring with Precision: Hold one 4mm jump ring firmly with your chain nose pliers. Instead of pulling the ends directly apart, gently twist one side away from you and the other side towards you. This technique opens the jump ring without distorting its perfect circular shape, ensuring it closes securely later.
- Connect the Earring Hook: Carefully slide the small loop located at the end of your fish hook earring back onto the opened jump ring. Make sure it’s fully threaded onto the jump ring before proceeding to the next step.
- Attach the Suede Tassel: Next, slide the small loop located at the top of your chosen suede tassel onto the *same* opened jump ring. You now have both the earring hook and the tassel loop securely on the jump ring.
- Close the Jump Ring Securely: Using your pliers, gently reverse the twisting motion from step 1 to bring the ends of the jump ring back together. Ensure the ends meet perfectly, leaving no gap. A tightly closed jump ring is crucial for preventing your earring components from falling off during wear. Give it a gentle tug to test the security.
And just like that, you’ve completed one trendy tassel earring! Repeat these steps for the second earring, and you’ll have a matching pair ready to wear in no time. It’s truly that straightforward to create professional-looking handmade jewelry.
Pro Tips for Perfect Tassel Earrings Every Time
- Invest in Good Pliers: Quality jewelry pliers make a significant difference. They offer better grip and control, reducing hand fatigue and improving the precision of your work.
- Check for Security: Always double-check that your jump rings are fully closed. A small gap can lead to your earring components separating over time.
- Work on a Clean Surface: A clean, well-lit workspace will prevent you from losing small components and allow you to see your work clearly.
- Practice Makes Perfect: If you’re new to jewelry making, don’t be discouraged if your first jump ring isn’t perfect. A little practice with opening and closing them will quickly improve your technique.
Elevate Your Design: Customization and Embellishments
While the basic tassel earring is chic and stylish on its own, one of the greatest joys of DIY is the ability to customize! This project offers endless possibilities for personalization, allowing you to truly make these earrings your own.
Optional Enhancement: Add Extra Flair with Beads or Charms!
To give your earrings an even more unique touch, consider adding a beautiful bead or a small charm in between the tassel and the fish hook earring back. This simple addition can significantly change the look and feel of your earrings. Here’s how:
- You’ll need an additional jump ring (or two, depending on your design).
- After sliding the fish hook earring onto your first jump ring (Step 2 above), slide your chosen bead (which should have a hole) onto a *second* jump ring.
- Then, connect this second jump ring (with the bead) to the first jump ring.
- Finally, slide the tassel loop onto the first jump ring.
- Close all jump rings securely. This creates a layered effect, adding visual interest and a touch of sparkle or texture. Experiment with different bead materials like glass, wood, or metal, and various shapes and sizes to find what you love most!
You can even connect multiple tassels of different colors or lengths using additional jump rings for a bohemian, cascading effect. The only limit is your imagination!
Can you see my reflection in the silver tassel tops in that last photo? Peek-a-boo! These little details often bring a smile to my face when I’m crafting.
There are truly so many different colors of suede tassels to choose from that you could realistically make a pair for every single outfit you own! Imagine a rainbow of tassel earrings hanging in your jewelry box, ready to perfectly complement any ensemble. The sheer versatility of these DIY earrings is incredibly appealing.
Aren’t they just the happiest little earrings you’ve ever seen? From the very top curve of the fish hook to the delightful bottom fringe of the tassel, these earrings typically measure around 2.75 inches. This length is, in my opinion, absolutely perfect for dangle earrings. They are long enough to be wonderfully fun and noticeable, adding a playful sway with every movement, yet short enough that they won’t get caught on clothing or hair, nor will they feel too heavy or cumbersome on your ears. They strike that ideal balance between statement and wearability.
The Joy and Rewards of DIY Jewelry Making
This project marks one of my first ventures into the captivating world of handmade jewelry, and I must confess, I’m absolutely “digging” the results! There’s a unique sense of accomplishment and pride that comes with wearing something you’ve created with your own hands. Not only do I get to flaunt my fun new creations, but I also discover a new passion along the way.
For a long time, I held out hope that there would remain at least one aisle at the craft store that wouldn’t tempt me with its endless possibilities. Alas, now that I’ve had a delightful taste of jewelry making, I fear those days of immunity are officially over! The jewelry-making aisle, with its glittering beads, dazzling charms, and various findings, now beckons with an irresistible allure. And frankly, I’m excited to answer its call!
Share Your Creations!
I hope this easy DIY jewelry tutorial inspires you to create your own beautiful suede tassel earrings. Whether you make them for yourself, as gifts for loved ones, or as a fun activity with friends, the process is sure to bring joy. Don’t forget to share your finished projects! I’d love to see the unique color combinations and embellishments you come up with. Happy crafting!