
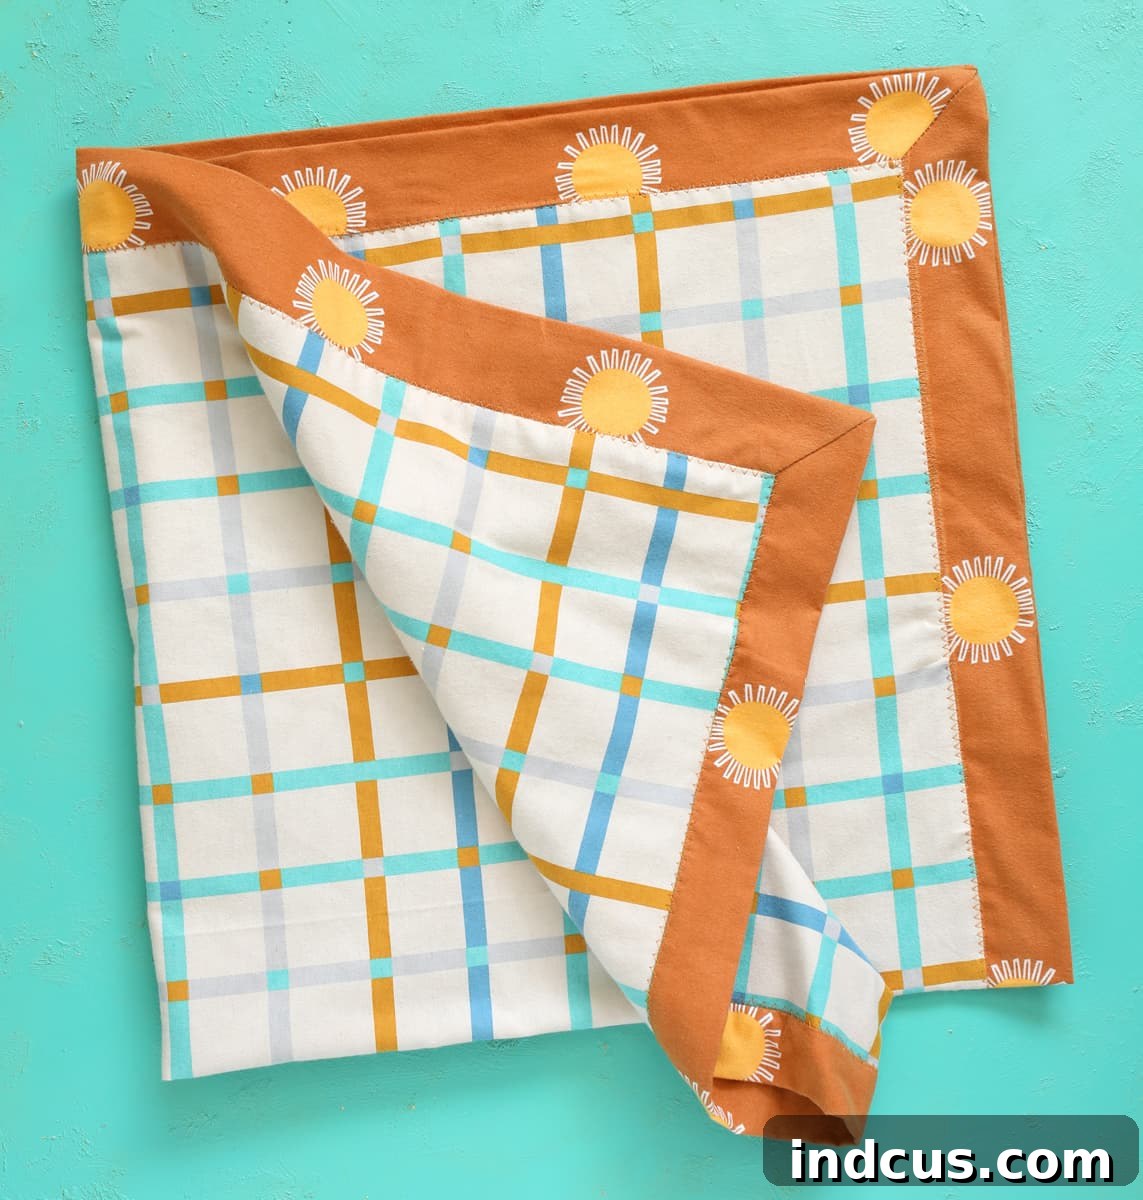
Craft a Cozy Heirloom: Your Guide to Sewing a Flannel Baby Blanket with a Mitered Border
There’s something truly special about a handmade gift, especially for a new baby. And when it comes to combining comfort with classic style, a flannel baby blanket featuring an elegant mitered border is simply unmatched. Today, I’m thrilled to share a comprehensive tutorial that will guide you through creating this beautiful and practical blanket. While you might be familiar with basic two-sided flannel blankets, this version elevates the design with a sophisticated mitered edge, transforming a simple blanket into a cherished heirloom. It looks intricate, but with my step-by-step instructions, you’ll discover it’s a wonderfully achievable project for any sewing enthusiast, even those new to mitered corners. Let’s embark on this rewarding journey together and craft a blanket that will be loved and snuggled for years to come.
Essential Materials for Your Flannel Baby Blanket Project
Gathering your supplies is the first exciting step in any sewing project. For this charming flannel baby blanket with a mitered border, you’ll need a few key items. Choosing quality materials will not only make your sewing experience more enjoyable but also ensure the final blanket is soft, durable, and safe for baby’s delicate skin.
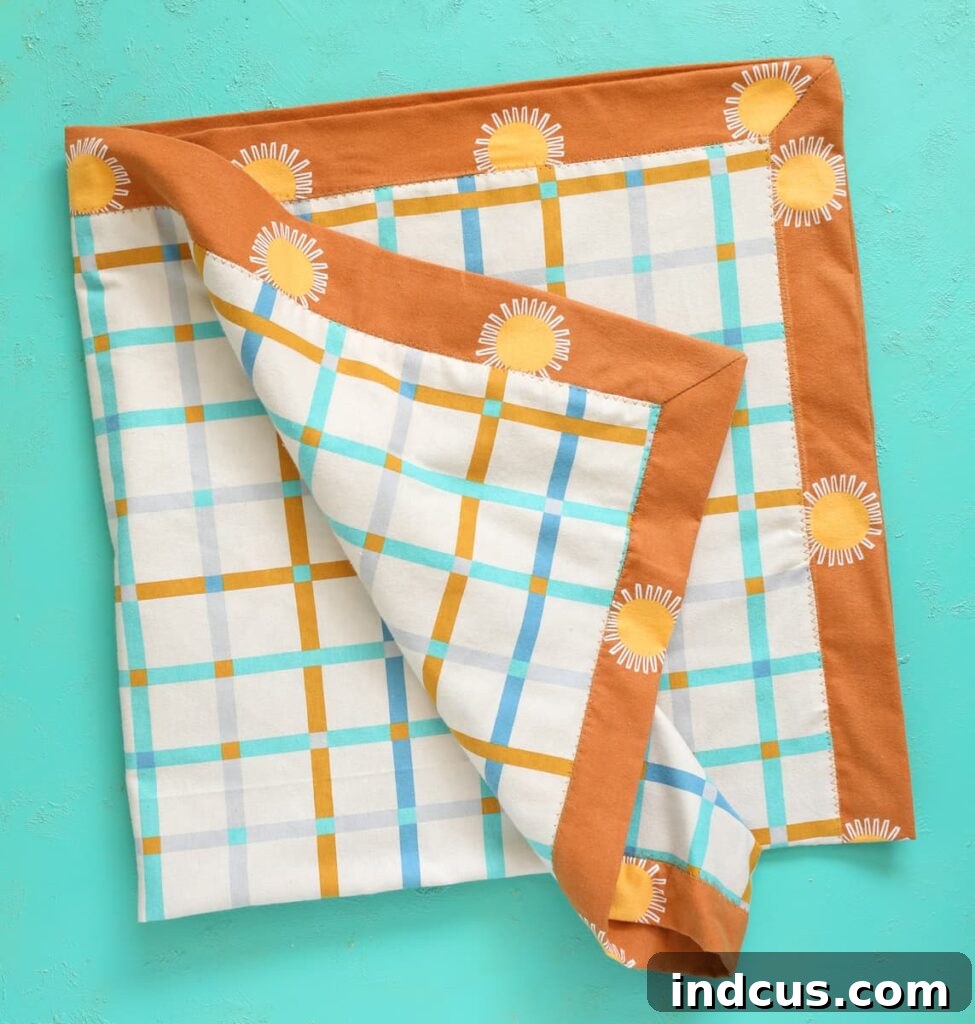
- 1 1/3 yards of Flannel Fabric for Border and Backing: This will be your larger fabric piece, forming the continuous back and the elegant mitered border that frames the front. In our examples, this is the vibrant orange fabric. Opt for a solid color or a subtle pattern that complements your center fabric.
- 1 yard of Flannel Fabric for the Center: This fabric will be the focal point of the blanket’s front. The plaid fabric in our photos serves as a beautiful example. If you choose a striped or plaid design, selecting it for the smaller center section makes pattern alignment significantly easier.
- Sewing Machine: Any standard sewing machine capable of a straight stitch and a zigzag stitch will work perfectly.
- Quilting Ruler, Rotary Cutter, and Quilting Mat OR Fabric Scissors: While a quilting ruler, rotary cutter, and self-healing mat offer unparalleled precision for cutting perfect squares, fabric scissors will also do the job. If using scissors, a large piece of cardstock or a carpenter’s square can help you achieve truly square corners.
- Coordinating Thread: Choose a high-quality all-purpose polyester thread that matches or subtly contrasts with your border fabric for a professional finish.
Choosing Your Flannel: Flannel is an ideal fabric for baby blankets due to its exceptional softness, warmth, and breathability. It’s gentle against sensitive skin and holds up beautifully to frequent washing. When shopping for flannel, you’ll find a vast selection at craft stores like JOANN, which is renowned for its extensive flannel aisles. Hobby Lobby also offers some adorable options, though typically with a smaller selection. The key is to select two fabrics that harmonize well together, creating a visually appealing combination. Consider patterns and colors that are cheerful, calming, or reflective of the nursery’s theme. Always pre-wash your flannel fabrics before cutting to prevent any future shrinkage and to ensure your finished blanket maintains its shape and size after the first wash.
Step-by-Step Instructions for Your Mitered Border Flannel Baby Blanket
Follow these detailed steps to create a stunning and durable flannel baby blanket that will be cherished.
Step 1: Precision Fabric Cutting
The foundation of any beautiful sewing project starts with accurate cutting. For this blanket, you will need two perfectly square pieces of flannel. Cut one 43×43 inch square from your border/backing fabric (the larger piece) and one 36×36 inch square from your center fabric (the smaller piece). If your fabric width doesn’t quite allow for a 43-inch square, adjust both squares proportionally, for instance, to 42×42 inches and 35×35 inches, maintaining a consistent border width. The easiest and most precise way to achieve perfectly square pieces is by using a quilting ruler, a self-healing cutting mat, and a rotary cutter. These tools allow for clean, straight edges and accurate angles. If you don’t have these, don’t worry! You can still make this blanket. Use a large piece of cardstock, a carpenter’s square, or a clear plastic ruler to help you mark and cut very precise 90-degree corners with sharp fabric scissors. Precision here is crucial for flawless mitered corners later on.
Step 2: Marking the Fabric Centers
Accurate marking ensures your blanket’s center fabric is perfectly aligned within its border. On the front side of your largest (43×43 inch) square, mark the exact center of each of its four sides. You can do this with a fabric marker, tailor’s chalk, or by making a small snip (no more than 1/8 inch) into the seam allowance. Next, on the back side of your smallest (36×36 inch) square, mark the center of each of its four sides using the same method. These marks will serve as essential guides for the next step, ensuring your blanket is assembled symmetrically.
Step 3: Aligning and Pinning the Fabric Layers
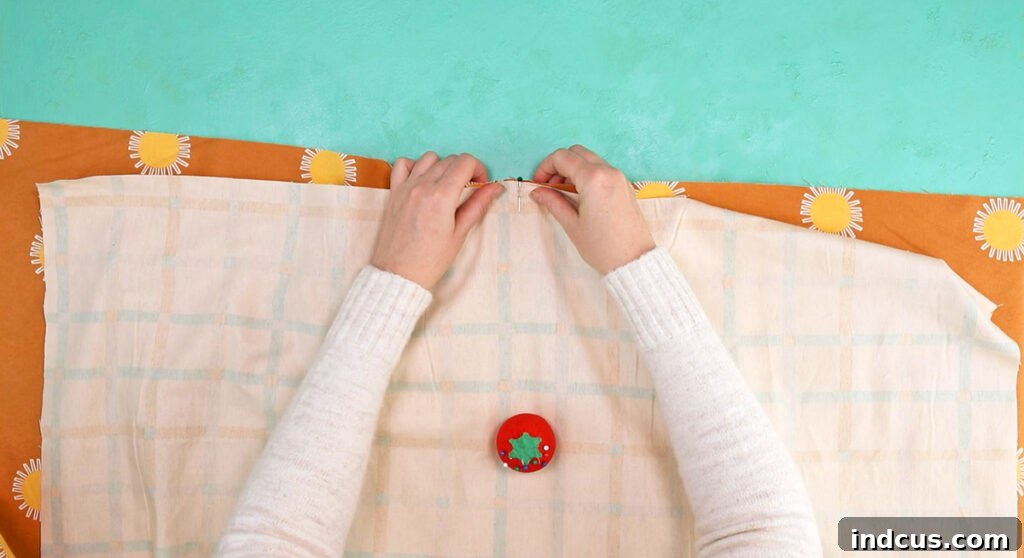
Now, it’s time to bring your two fabric pieces together. Place the two squares right sides together. This means the printed or “good” side of both fabrics should be facing each other. Carefully align the center marks you made on each side of the large square with the corresponding center marks on the small square. Pin these center points together securely. When pinned, you will notice that the large square extends beyond the edges of the small square on all four sides – this excess fabric will become your beautiful mitered border. Ensure the fabrics are flat and smooth, with no wrinkles or puckering between the pins. Continue pinning along each edge, working outwards from the center marks, but only pin where the smaller fabric overlaps the larger fabric. The corners will remain unpinned and “bunchy” at this stage, which is completely normal.
Step 4: Sewing the Edges of the Blanket
With your fabrics securely pinned, it’s time to sew. Using a standard 1/2 inch seam allowance (or your preferred consistent allowance), begin sewing along one of the pinned edges. Start sewing from approximately 1/2 inch before the corner of the smaller fabric piece, and stop sewing about 1/2 inch before the opposite corner of the smaller fabric. This means you are sewing only the section where the smaller fabric overlaps the larger fabric, leaving the “bunchy” corner areas unsewn. Ensure you backstitch at the beginning and end of each sewn section to secure the stitches. Repeat this process for the second and third sides of the blanket. On the fourth side, sew the two ends as you did for the previous sides, but leave a significant unsewn opening (approximately 4-6 inches) in the center of that edge. This opening is crucial for turning your blanket right side out later. It’s vital that this turning hole is located near the center of an edge, not close to a corner, as placing it near a corner can interfere with the formation of neat mitered corners.
Step 5: Creating the Mitered Corners – The Heart of the Project
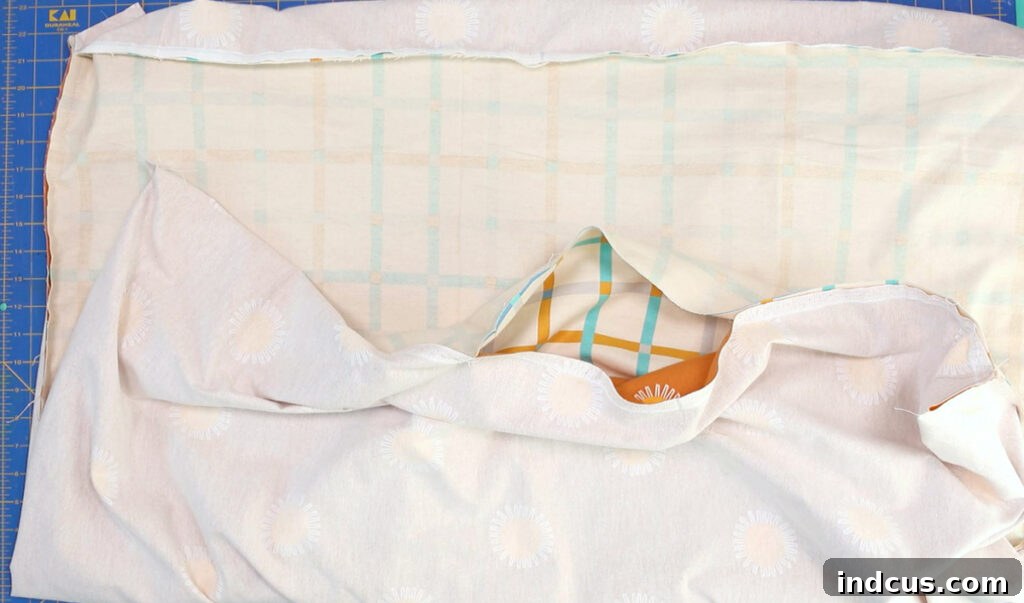
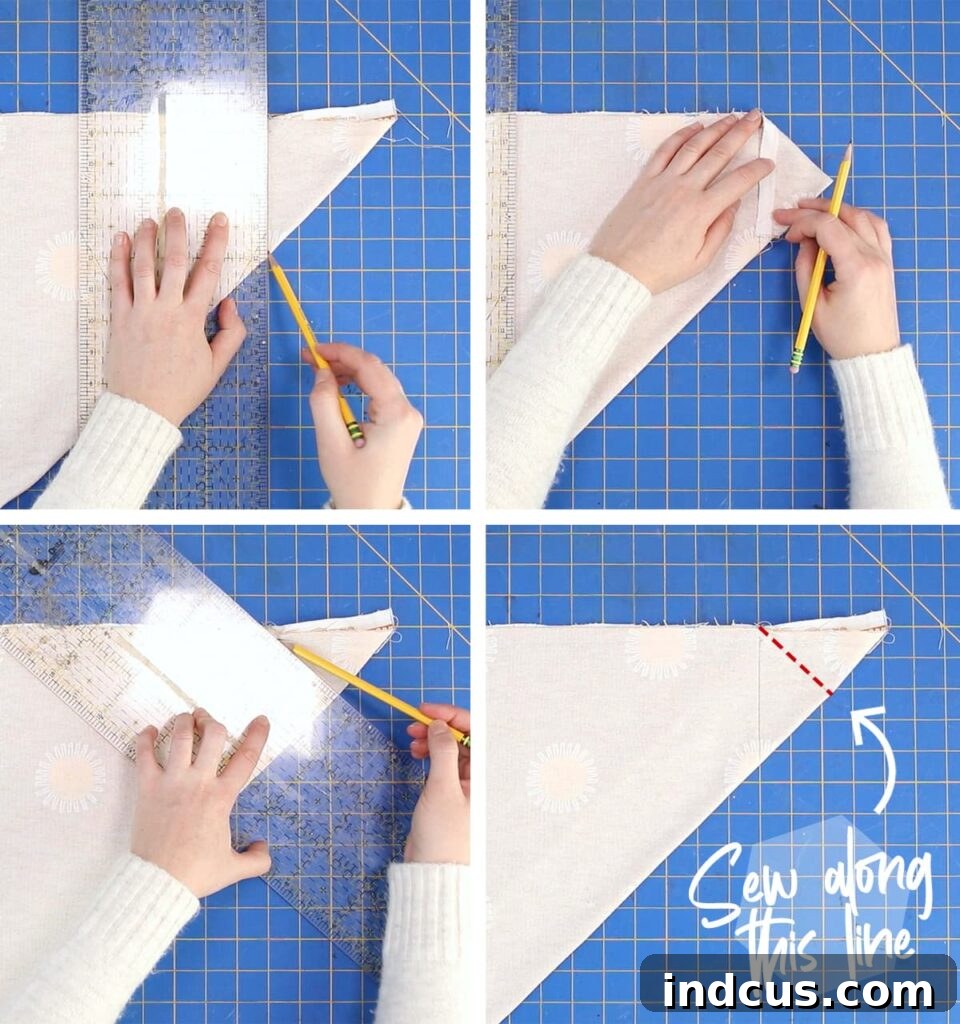
This step is where the magic happens and your simple blanket transforms with elegant mitered corners. Once you understand the technique, it’s surprisingly straightforward. For each corner, fold one of the sewn edges over to meet an adjacent sewn edge. This action will create a triangular shape with the unsewn, bulky blanket corner nestled within the triangle. Lay this folded section flat on your cutting mat or a large, flat surface. Align the flat, sewn edge of your fabric with one of the grid lines on your cutting mat. Now, visualize or draw a 90-degree line from where your stitching stopped at the corner of the smaller fabric. Next, gently fold the corner of the blanket down, pressing firmly to create a visible crease. Draw a line directly along this crease. This line, which forms a 45-degree angle from your stitch ending point, is where you will sew. This 45-degree angle is what creates the seamless mitered look. If your quilting ruler has a 45-degree guide line, you can simply align it with your stitch ending point and draw the line directly. For many, seeing this process visually can be immensely helpful; referring to the accompanying video tutorial will clarify this step perfectly.
Step 6: Stitching the Mitered Corners
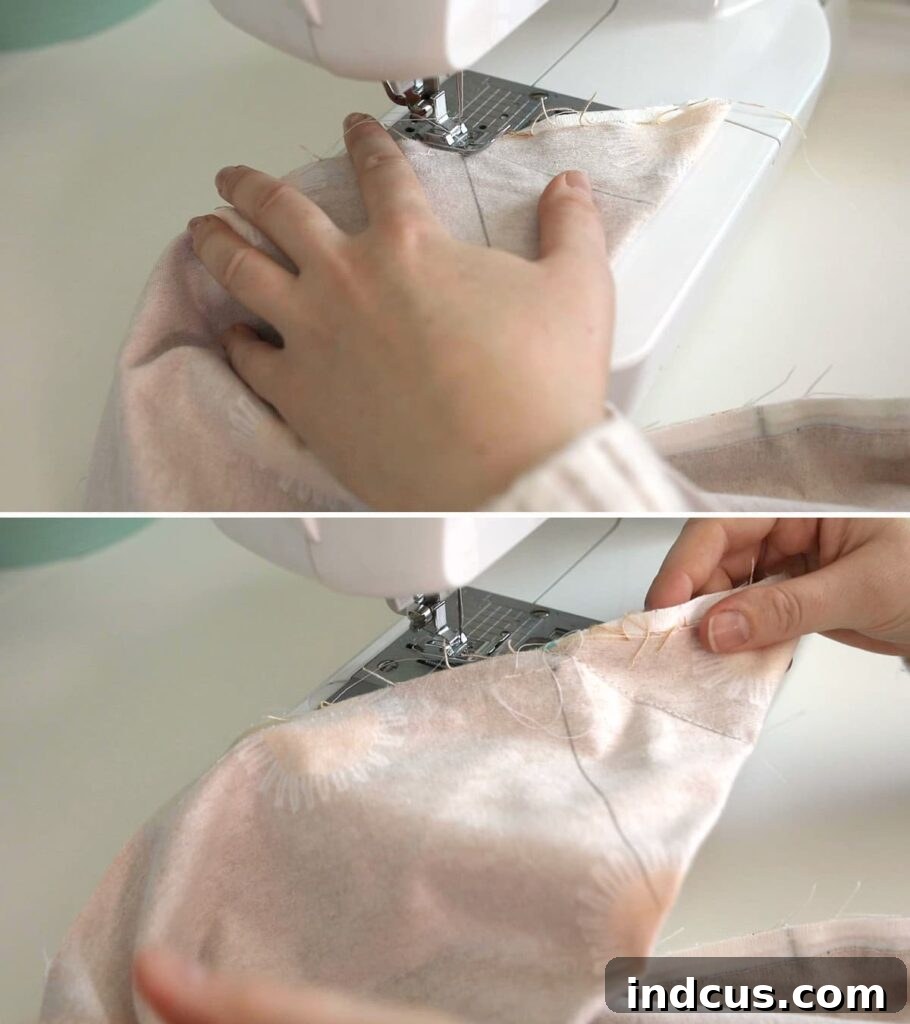
Carefully take your blanket back to the sewing machine. Stitch precisely along the 45-degree lines you marked in the previous step. Ensure you backstitch at both ends of each seam to reinforce the stitching, as these corners will experience some stress when turned. Repeat this marking and stitching process for all four corners of your blanket. Accuracy in this step is paramount for achieving beautifully sharp and professional-looking mitered edges.
Step 7: Clipping the Corner Seam Allowances
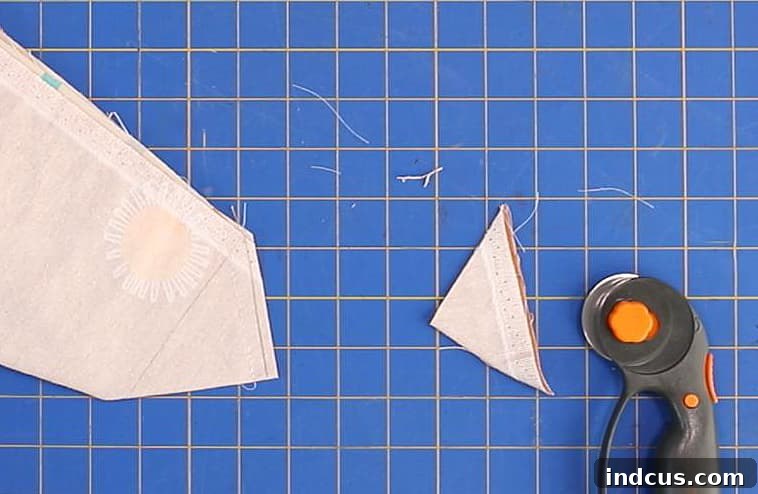
Once all four mitered corner seams are sewn, it’s time to reduce bulk and prepare them for turning. Using your fabric scissors, carefully clip off the excess fabric from each corner, leaving a standard 5/8 inch seam allowance. Be extremely careful not to cut through your newly sewn stitch line. This clipping step is crucial because it helps to reduce bulk in the corners, allowing them to turn out smoothly and sharply, giving your mitered border that crisp, tailored look.
Step 8: Turning the Blanket Right Side Out
Now for a truly satisfying moment! Reach into the turning hole you wisely left on one of the blanket’s edges. Gently pull the entire blanket through this opening, turning it right side out. As you pull, take your time to push out each of the four mitered corners. You can use your fingers, a point turner, or even a blunt tool like a chopstick to carefully push out the corners until they are as crisp and sharp as possible. Be gentle to avoid poking through the fabric. This step reveals the front of your blanket with its beautiful mitered border.
Step 9: The Indispensable Ironing Step
Even if you typically avoid ironing, this is one step you absolutely cannot skip for a professional finish. Ironing your flannel baby blanket at this stage is essential to make it look smooth, flat, and perfectly polished. Pay meticulous attention to the mitered corners, pressing them carefully to ensure they lay flat and sharp. Work your way around the entire blanket, pressing all seams flat and ensuring the fabric is smooth and wrinkle-free. Most importantly, carefully press the edges of the turning hole inwards, so they align perfectly with the rest of the seam. This creates a clean, even edge that will be ready for final topstitching.
Step 10: Topstitching to Finish and Secure
The final sewing step brings your beautiful blanket to completion. Head back to your sewing machine and sew a decorative and functional topstitch around the entire perimeter of the blanket. You can choose a straight stitch or a zigzag stitch, centering it right over the seam where the two fabrics meet (or just inside the border). This topstitching serves a dual purpose: it secures the layers of fabric, preventing them from shifting, and it neatly closes the turning hole you used in Step 8. Make sure to backstitch at the beginning and end of your topstitching for added durability. Once this final seam is complete, your stunning mitered border flannel baby blanket is officially finished!
And that’s it! Your meticulously crafted blanket is now complete, ready to be snuggled and admired.
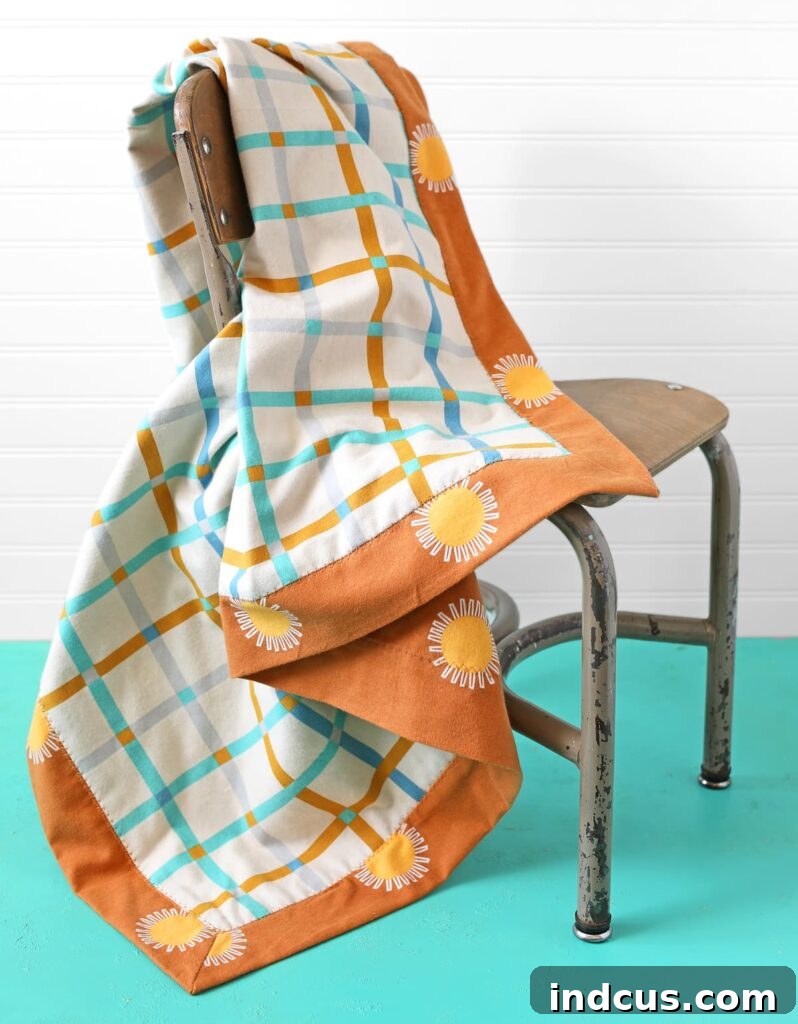
Just look at those perfectly defined mitered corners! The self-bound design adds a touch of elegance and professionalism that truly sets this blanket apart. The thoughtful construction means there are no raw edges, ensuring maximum comfort and durability for repeated use and washing.
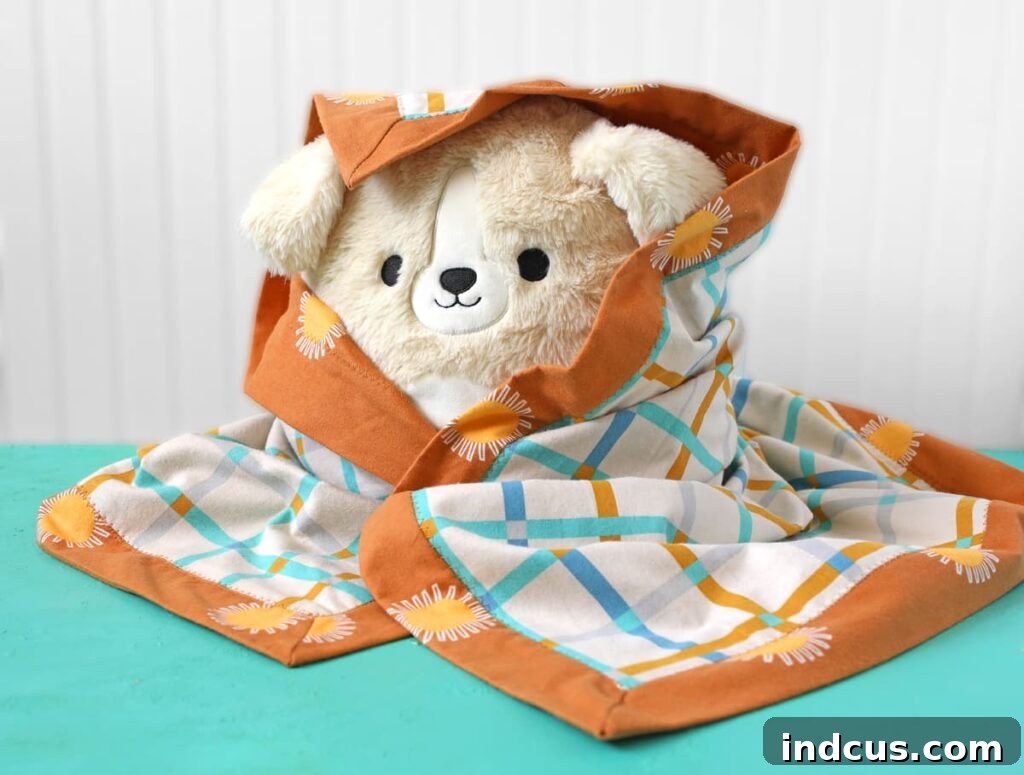
These handmade flannel baby blankets are my absolute go-to for baby showers and new parent gifts. Their versatility is unmatched; they’re the perfect size and weight for tucking into a stroller or car seat, providing a soft surface for tummy time on the floor, or simply wrapping up a little one for a cozy cuddle. The joy of gifting something made with love is truly priceless. And with the incredible array of adorable flannel fabrics available today – from playful prints to sophisticated solids – you can customize each blanket to suit any style or nursery theme. I was particularly impressed by the two full aisles of flannel fabric at JOANN on my last visit!
If any of the steps, especially the mitered corners, still feel a bit daunting after reading, I highly recommend watching a visual demonstration. Sometimes seeing the process in action clicks everything into place more effectively than written instructions alone.
Self-Bound Flannel Baby Blanket Video Tutorial
Hopefully, this video tutorial addresses any lingering questions you might have about the construction of your mitered border flannel baby blanket. Once you master the technique for the corners, you’ll find that this project comes together surprisingly quickly. Many experienced sewers can complete this blanket from start to finish in less than an hour, making it an excellent choice for last-minute gifts or batch sewing.
The total cost for this project is remarkably affordable, especially when compared to store-bought options of similar quality. Fabric prices can vary, but flannel frequently goes on sale for around $6 per yard at major craft retailers like JOANN. If you already have basic sewing supplies like thread, needles, and pins, the total material cost for this beautiful, custom baby blanket could be as low as $14 – an incredible value for a handcrafted item!
Crafting this mitered border flannel baby blanket is more than just a sewing project; it’s an opportunity to create a tangible symbol of love and care. The softness of the flannel, combined with the elegant finish of the mitered border, makes this blanket a truly special gift that new parents will appreciate and babies will adore. So, pick out your favorite flannel fabrics, fire up your sewing machine, and get ready to create something beautiful and heartwarming. Happy sewing!







