
Jeffrey Court Renovation Challenge: Navigating Week 2 of Our DIY Bathroom Remodel
Welcome back to the thrilling journey of the Jeffrey Court Renovation Challenge! This competition pushes DIY enthusiasts like me to completely transform a chosen space in our homes within a tight, six-week timeframe. If you’re just joining us, you can catch up on the initial vision and Week 1 progress right here.
Your support means the world to us! Voting is now officially open, and you can cast your vote once per day for the duration of the competition. Simply scroll down on the voting page until you spot my project photo, then click the “VOTE” button. It’s incredibly quick and makes a huge difference! Thank you, thank you, thank you for being a part of this adventure and for your continuous encouragement!
CLICK HERE TO VOTE AND SUPPORT OUR PROJECT.
With renewed determination and a freshly brewed cup of coffee, let’s dive into what Week 2 brought to our bathroom renovation!
If I had to encapsulate the entire essence of this past week into one pithy phrase, it would undoubtedly be, “Everything takes longer than I expected.” (Cue a collective sigh from every DIYer who has ever tackled a home project.) The initial excitement of demolishing and planning quickly gave way to the painstaking reality of preparation. While I had optimistically hoped to be laying tile by now, the foundational prep work has consumed every single moment – and then some. Join me as we walk through what we managed to accomplish, the unexpected changes we had to implement in our meticulously crafted plan, and why understanding the critical role of prep work is the absolute key to success for any DIY project, even when it feels like the most grueling and least glamorous part of the entire process.
Week 2 Accomplishments: The Foundation of Our Bathroom Transformation
Despite the delays, we made significant headway in preparing our bathroom for its grand transformation. Here’s a quick rundown of the essential tasks we completed:
- Removed all the old tile from both the shower surround and the main floor area.
- Thoroughly cleared out all the debris, ensuring a clean slate for new installations.
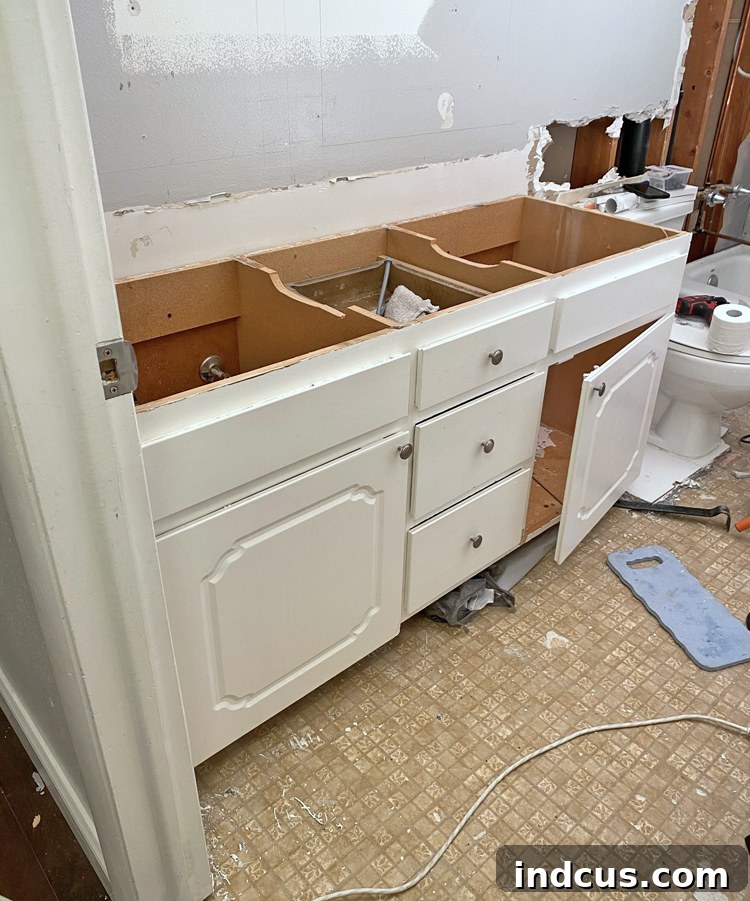
- Carefully detached and removed the old, bulky vanity.
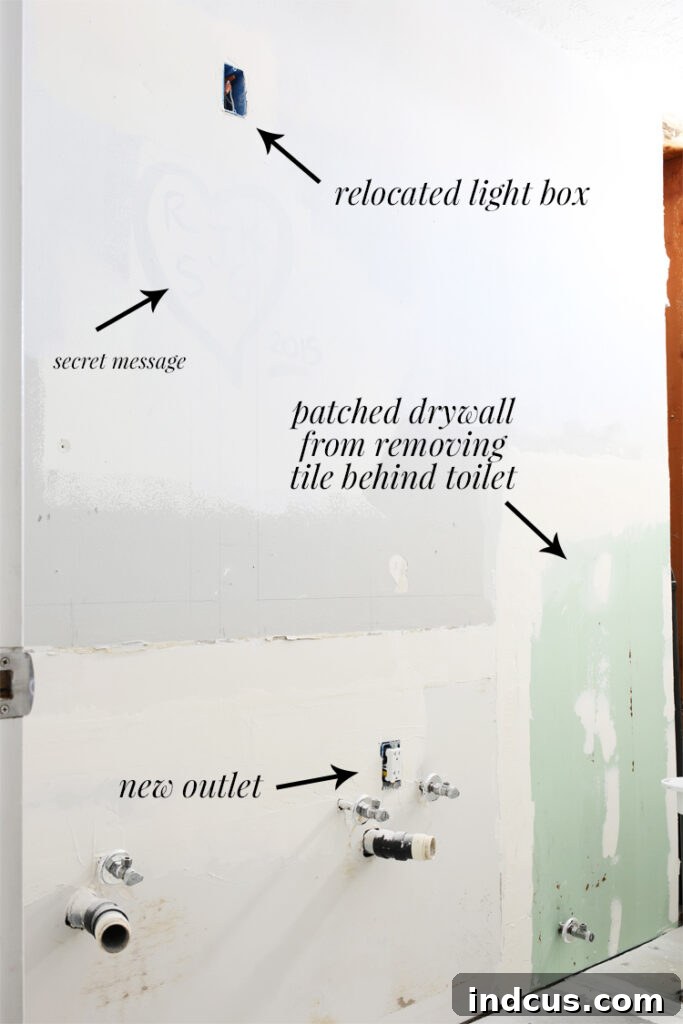
- Installed a brand-new electrical outlet conveniently located behind where the new vanity will sit.
- Precisely relocated the existing light box to ensure it will be perfectly centered above our new vanity setup.
- Meticulously patched any drywall imperfections, followed by taping and mudding to create a smooth, seamless surface.
- Removed the old toilet and replaced its flange to ensure a secure and leak-free installation for the new toilet.
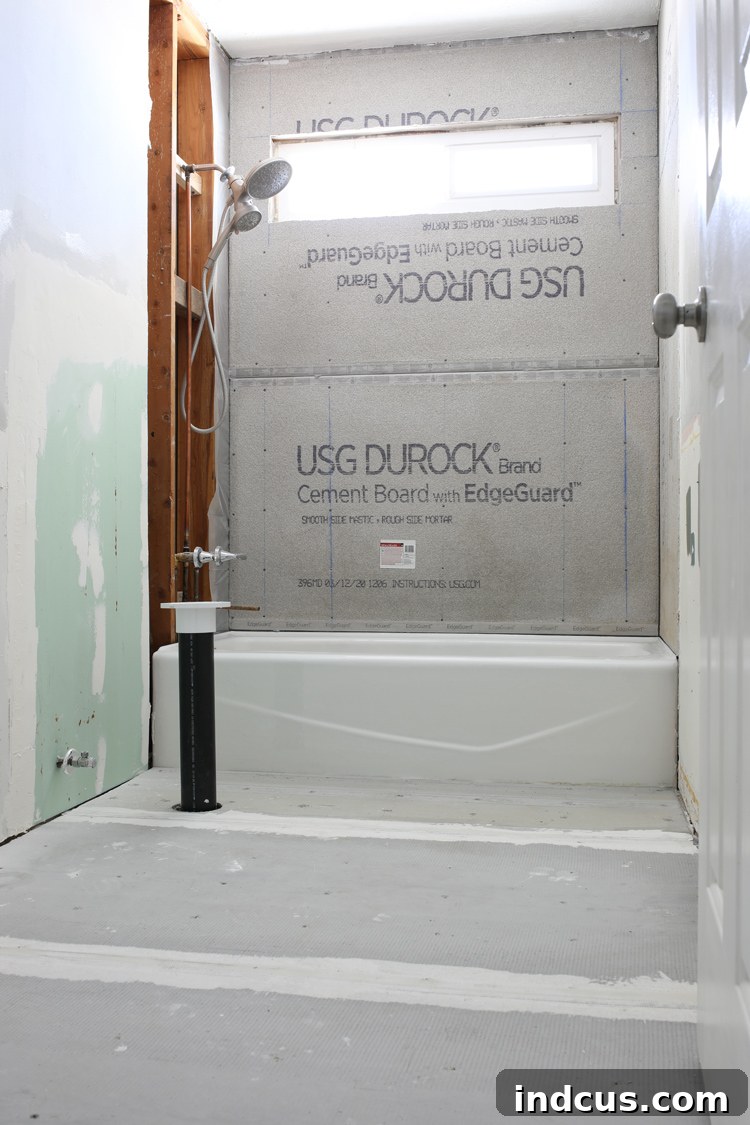
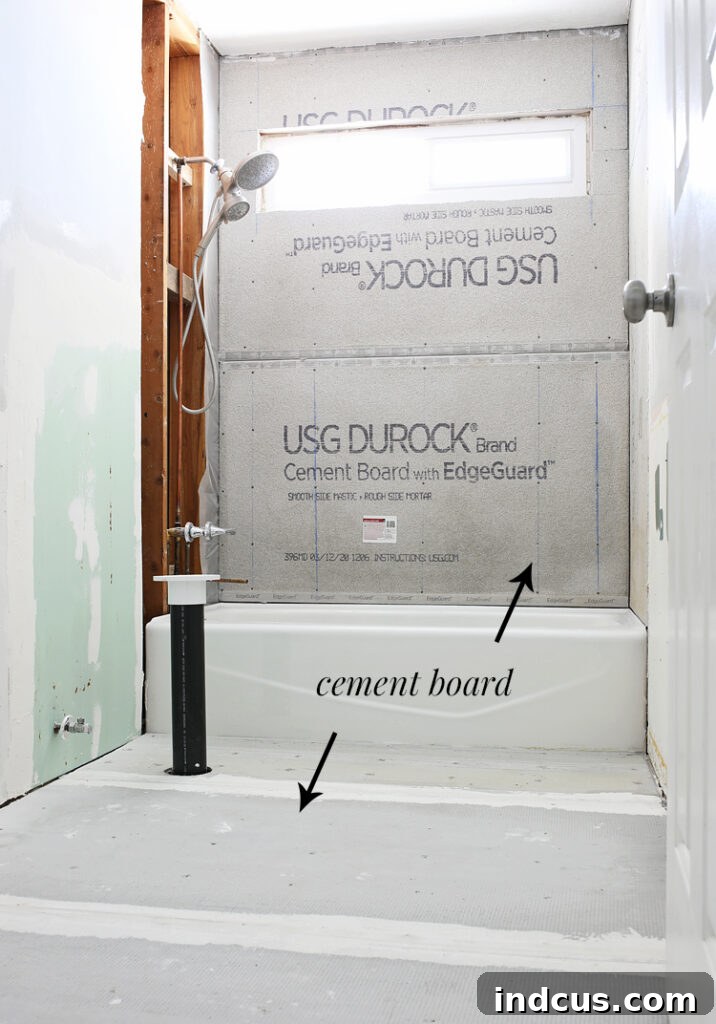
- Prepared the entire floor area for new tile installation, which included laying cement board, taping seams, and mudding for a perfectly level base.
Demolition Day: Unveiling the Past and Planning for the Future
The first major hurdle of Week 2 was tackling the demolition. Removing the existing tile from both the shower surround and the bathroom floor proved to be a surprisingly manageable task. Armed with a sturdy pry bar and a reliable hammer, I found that most of the old tiles came off with relative ease. Don’t misunderstand; it certainly required a fair amount of physical exertion and generated an impressive amount of dust and mess, but I was able to handle the majority of it myself. My husband, who I affectionately refer to as “the big guns,” was only called in for reinforcement on a few particularly stubborn floor tiles that seemed glued to their original spot.
One of the more amusing discoveries during demolition was finding an old linoleum floor hidden beneath the tiles. Its pattern of brown flowers was a delightful, albeit faded, blast from the past – decidedly very 80s chic, if you appreciate that sort of thing!
The old vanity, however, was an entirely different beast. Constructed from heavy MDF, it weighed a ton and was incredibly securely anchored in place. This was definitely a two-person job. We meticulously scored around every caulk line we could find, carefully removed the countertop, and then continued the scoring, wiggling, and prying process until the old gal finally surrendered and came loose. As a testament to our ongoing renovation chaos, the old vanity currently resides on our back deck. The plan is to responsibly give it away to someone who can repurpose or reuse it, extending its life cycle beyond our bathroom.
Electrical and Wall Prep: Adapting to Renovation Realities
Our initial design concept included installing two elegant vanity lights, one positioned above each mirror, perfectly centered over the two sinks of our new vanity. This vision, however, was quickly—and somewhat brutally—nixed. Upon opening up the walls, we discovered that the existing stud configuration simply wouldn’t allow for the ideal placement of new electrical boxes without a complete structural overhaul of the entire wall framework. Tearing out and restructuring an entire wall was a bridge too far for this challenge’s timeline and budget. NO THANKS! I had already ordered the two beautiful sconces, but I quickly sold them on Facebook Marketplace and sourced a new, single vanity light fixture. This new light will be perfectly centered between the two mirrors, requiring only a minor adjustment – a “teeny bit” of drywall cutting to move the light box down and slightly over. Thankfully, the style of the new light is quite similar to my original choice, so I can happily live with this minor, yet necessary, design pivot.
This incident served as a potent reminder that while certain aesthetic goals are easily achievable in new construction, they can become incredibly complex and simply not worth the effort or cost in a remodeling scenario. It’s a common reality in the world of renovation, and learning to adapt is part of the DIY journey.
One of the exciting features of our new vanity is a built-in electrical outlet discreetly tucked away inside one of its drawers. This ingenious addition means I’ll finally be able to leave my hair dryer or curling iron plugged in all the time, eliminating daily untangling and storage woes. How cool is that? To make this convenience a reality, we needed to install a new outlet directly into the wall behind the vanity. This involved more drywall cutting, followed by the familiar cycle of mudding and sanding. I’m currently waiting for the latest layer of mud to thoroughly dry before I can perform one final, meticulous sanding, but otherwise, the walls are expertly prepped and ready for their next stage!
Mastering the Art of Tile Prep: Laying the Groundwork for Lasting Beauty
The Learning Curve: Deep Diving into Tile Installation Research
Confession time: The only tiling experience I’ve ever had was installing a small kitchen backsplash. Tiling an entire bathroom floor and a shower surround feels like a monumental leap from that! Consequently, this week involved dedicating countless hours to intensive research on the proper techniques for installing tile floors and constructing shower surrounds. I won’t lie; I’m incredibly nervous and absolutely determined not to mess this up! The success of a tile job, particularly in a high-moisture environment like a bathroom, hinges entirely on the quality of the preparation and the correct application of materials. Here’s a curated list of the resources I found most invaluable in my quest for tiling knowledge:
- How To Tile A Shower Wall | The Home Depot (A comprehensive guide to preparing and tiling vertical surfaces.)
- Tile Floor Installation: How to Prepare and Lay Tile | The Home Depot (Excellent foundational knowledge for horizontal tile installation.)
- How to Tile A Shower Video (A visual walkthrough of the entire shower tiling process, highly recommended for visual learners.)
- How to Tile Floors for Beginners Video (Breaks down the steps for those new to floor tiling, focusing on common pitfalls.)
- Schluter DITRA Uncoupling Membrane Underlayment Video (Explains the purpose and installation of this popular uncoupling membrane.)
- How to Trowel Thinset Correctly Video | Watch this one! It provides crucial insights into the correct technique for using a trowel and explains the engineering behind proper thinset application, which is vital for adhesion and longevity.
- Thinset, Mortar and Grout Shopping List | This interactive tool from Custom Building Products is incredibly helpful. You simply enter your project specifics, and the program generates a tailored list of recommended products, guiding you through the dizzying array of different mortar types available on the market.
The Golden Rule: Prep Work is Non-Negotiable for Tile Success
One of the primary, resounding messages I gleaned from my many hours of YouTube research and article reading is unequivocally this: the ultimate success or dismal failure of any tile job boils down almost entirely to the quality of your prep work and your diligent use of the appropriate products. Getting the underlayment right, ensuring a perfectly level and stable surface, and applying waterproofing correctly are not merely recommendations; they are the bedrock upon which a beautiful and durable tiled surface rests. Master the underlayment, and you’re more than halfway to a professional-looking finish.
With this newfound understanding firmly in mind, we’ve approached our prep work with an almost obsessive meticulousness. For our floors, we made the conscious decision to use cement board rather than the popular Schluter Ditra uncoupling membrane. Our reasoning was based on the belief that our specific subfloors would benefit significantly from the extra rigidity and structural stability that cement board provides. However, after thoroughly researching the Schluter product, I’m genuinely impressed by its ingenious design and innovative properties. It’s definitely a product I will keep at the forefront of my mind for any future tiling endeavors.
Meticulous Application: Cement Board Installation for a Stable Base
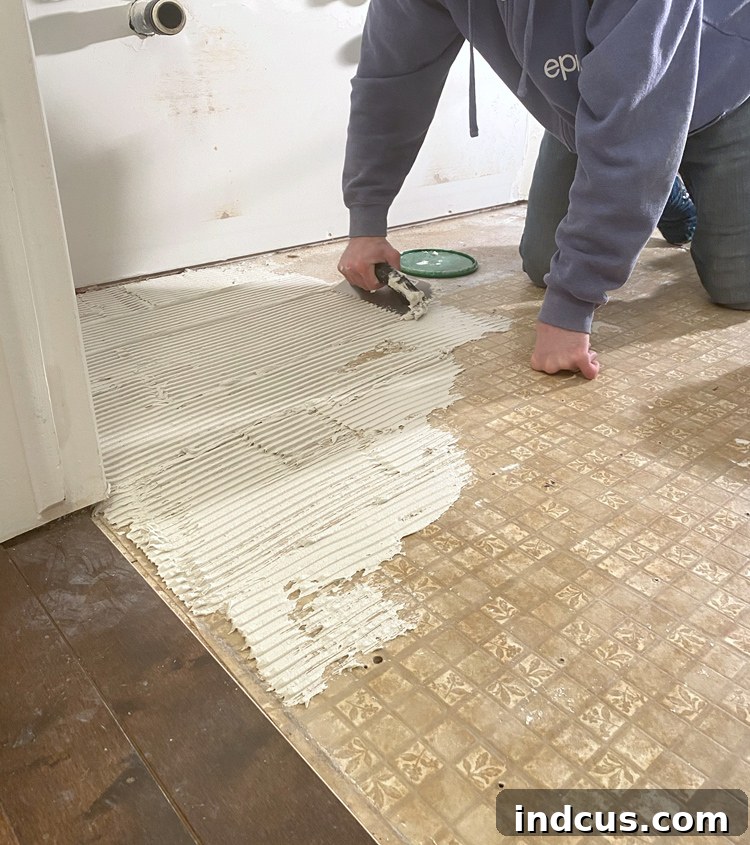
The previous tile installation in this bathroom also utilized cement board as its subfloor, and it held up remarkably well over the years. This gave us confidence in repeating the method. Thus, we meticulously installed new cement board directly over the old linoleum, after thoroughly cleaning and preparing the surface. Following the precise instructions on the thinset bag, we troweled on an even layer of adhesive. We then carefully set the cement board panels into place, securing them with screws at regular intervals, and allowed them ample time to dry and cure. Just yesterday, we returned to the project to tape and mud all the seams, ensuring that every inch of the floor surface was as secure and perfectly level as humanly possible. This attention to detail is paramount to prevent future cracks and ensure a long-lasting tile installation.
The Final Touches: Waterproofing for Peace of Mind
Our journey to completing the shower surround prep is still pending the arrival of a few crucial plumbing parts via mail. Once these essential components are installed, we’ll proceed with adding the final cement board panels to the remaining wall. Following that, we will diligently tape and mud all the joints, ensuring a seamless and structurally sound surface. The ultimate protective step will involve painting on layers of RedGard, a high-performance waterproofing membrane that not only creates an impenetrable barrier against moisture but also actively helps to prevent future cracks in the tile. This waterproofing step is non-negotiable for a shower area, guaranteeing longevity and preventing costly water damage down the line.
As soon as the mud on the floors is fully dry and cured, I’ll be able to embark on the exciting phase of laying the floor tile. I genuinely can’t wait to finally get to some of the “pretty” parts of this renovation job, seeing the vision truly come to life. Be sure to check back next week for another update! Exciting and visually rewarding things are on the horizon, and we’re eager to share every step of the transformation with you!







