
Welcome back to the thrilling saga of our Jeffrey Court Renovation Challenge! In this high-stakes, six-week endeavor, we’re completely overhauling our bathroom, transforming it from drab to dream. This post brings you up-to-speed on our latest progress, including the monumental task of laying our new bathroom floor. If you’re just joining us, you can catch up on our initial plans and the first two weeks of our intense DIY journey through these posts:
- Week 1 Update: Kicking Off the Bathroom Remodel
- Week 2 Update: Demolition and Subfloor Prep
DON’T MISS THE GRAND FINALE: SEE THE FINAL BATHROOM REVEAL HERE!
Your support means the world to me in this competition! It’s incredibly easy to cast your vote: simply click the link below, scroll down until you spot my project picture, and click ‘Vote.’ It takes mere seconds, but your encouragement makes all the difference!
CLICK HERE TO VOTE AND SUPPORT OUR RENOVATION!
The Halfway Mark: Progress, Panic, and the Pursuit of Perfection
It’s hard to believe we’ve already reached the halfway point of this renovation challenge. Time, as they say, flies when you’re having… well, an intense and slightly terrifying DIY experience! To be perfectly honest, I’m feeling a significant amount of stress. The adage that remodeling projects invariably take longer and cost more than anticipated is proving to be incredibly accurate for this bathroom. We’re three weeks in, yet our extensive to-do list feels barely touched. It’s definitely crunch time!
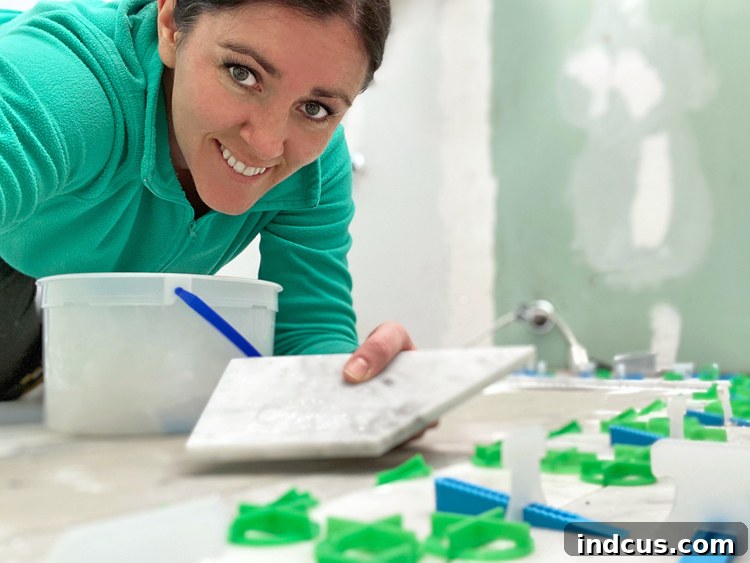
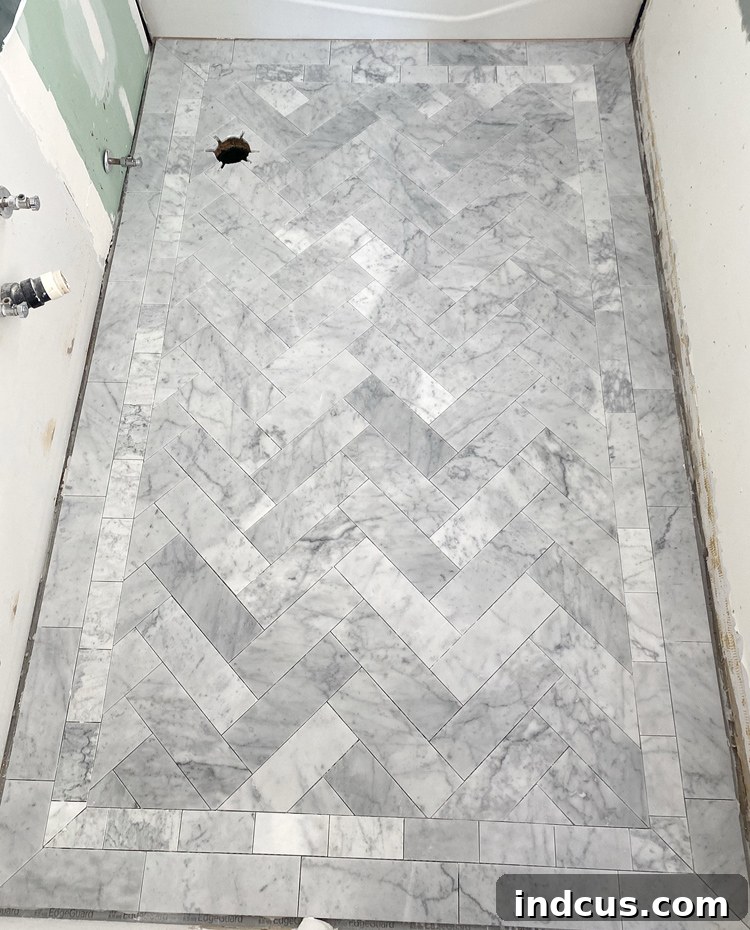
Despite the looming deadlines, I’m thrilled to share a massive milestone: last night, we successfully completed the floor tiling, and I can honestly say it’s absolutely breathtaking. Finally moving past the messy, structural work and into the “pretty” phase has been a huge mental boost. Seeing the stunning Carrara marble laid out has given me a vivid glimpse of the bathroom’s future elegance and renewed my conviction that every ounce of effort will be undeniably worth it. The transformation is already beginning, and it’s truly inspiring.
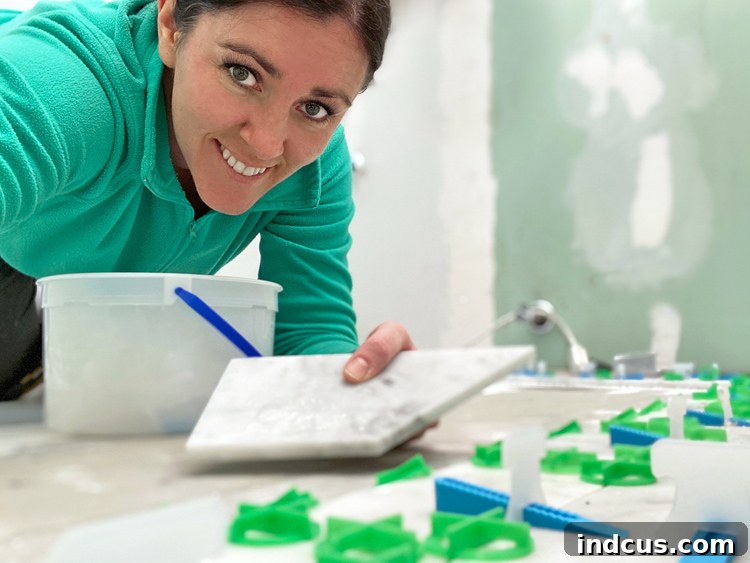
Let’s dive into the details of this week’s triumph: the marble tile flooring installation.
Mastering Marble Tile Installation: Our DIY Journey
Selecting Your Dream Tile: The Allure of Carrara Marble
Choosing the perfect tile was arguably the most challenging decision of this entire bathroom remodel, primarily due to the vast and exquisite selection offered by Jeffrey Court. Each option presented its own charm, but ultimately, my heart led me back to the timeless elegance of Carrara Marble. Four years ago, we installed a marble backsplash in our kitchen remodel, and to this day, it remains my absolute favorite feature in our home. While I initially harbored concerns about potential staining and etching in a high-traffic bathroom environment, thorough research into advanced sealing products provided reassurance. I decided the unparalleled beauty and classic appeal of real marble outweighed the need for diligent maintenance. Nothing quite compares to the genuine article, and for that reason, we committed to a sophisticated mix of 3×6, 4×12, and 6×12 Jeffrey Court Carrara marble tiles to create a dynamic and luxurious floor.
Essential Tiling Tools and Materials for a Flawless Finish
The sheer variety of tiling mortars, spacers, trowels, grouts, and sealers on the market can be overwhelming! It took countless hours of research to confidently select the right products for our specific project. The ideal choice of thinset mortar, grout, and sealant hinges on several critical factors: the tile material itself, its size, and the installation location. Our saving grace throughout this complex selection process was the Custom Building Products website. I wholeheartedly recommend exploring their “Project Shopping List” feature; it’s an invaluable tool for tailoring product choices to your unique renovation needs. I even reached out to their customer service with specific questions, finding their expertise incredibly helpful.
For those embarking on a similar journey of laying a marble tile floor with tiles comparable to ours in size, here’s a comprehensive list of the essential products you’ll need:
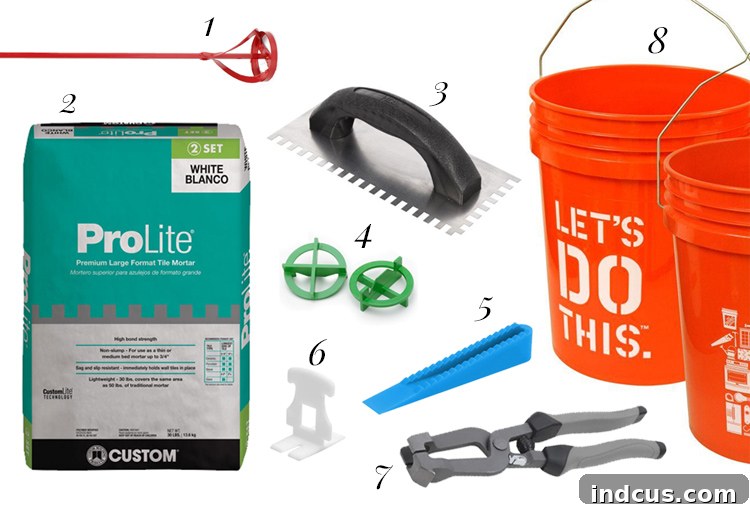
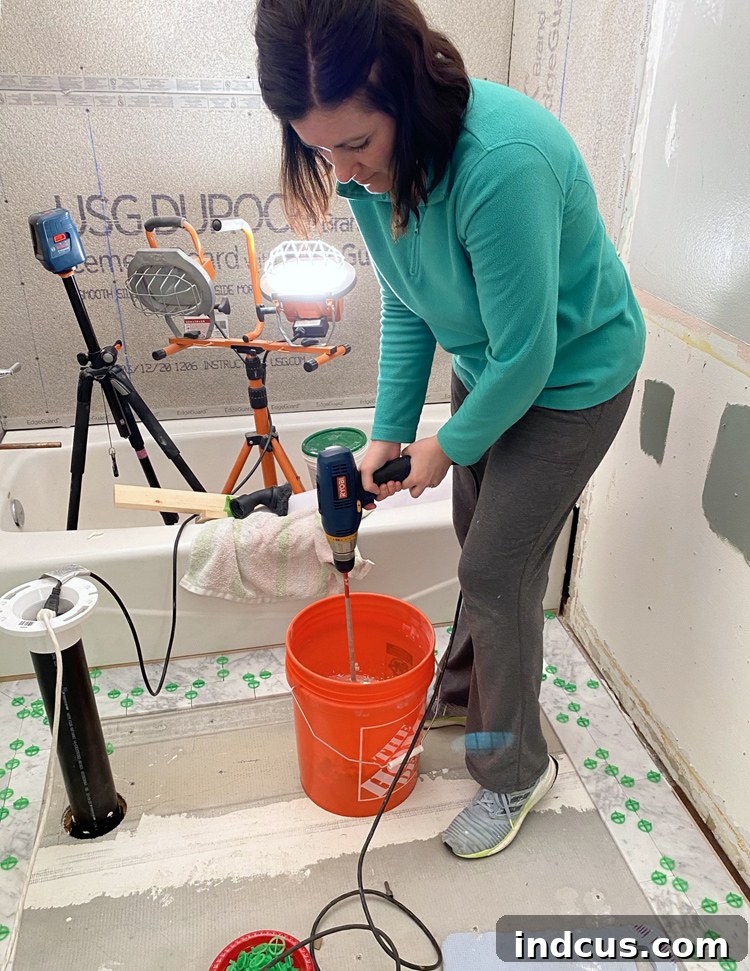
- Cement Mixer Drill Attachment: Indispensable for achieving a consistently smooth, lump-free mortar mix.
- ProLite Thinset Mortar (White): Absolutely crucial to select the WHITE version, especially for light-colored natural stone like Carrara marble, to prevent discoloration.
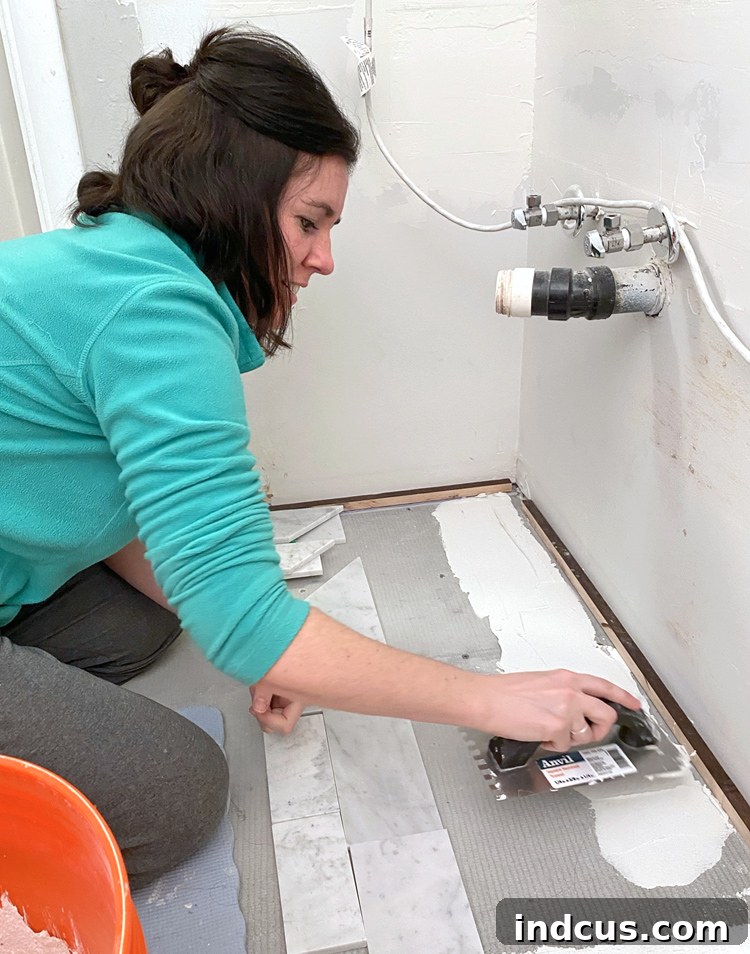
- 1/4 x 3/8 x 1/4 ” Notched Trowel: The specific notch size is vital for ensuring correct mortar coverage for your tile size.
- 1/16 ” Traditional Tile Spacers: Essential for maintaining consistent grout lines, especially with intricate patterns.
- Tile Leveling Wedges: Part of the leveling system, these wedges work with the clips to create a perfectly flat surface.
- Tile Leveling Spacers (Clips): These are the base clips that sit under the tile, holding it in place for leveling.
- Tile Leveling Pliers: A non-negotiable tool for securely tightening the wedges into the clips, saving your fingers and ensuring proper leveling.
- Five Gallon Buckets (2): One for mixing mortar, and a second for immediate tool cleaning.
Crucial Notes on Tiling Supplies:
- Mortar Consumption: For our 5’x8’ bathroom floor, one 30lb bag of ProLite Thinset Mortar was sufficient. Always calculate your needs based on square footage, tile size, and trowel notch.
- Mortar Color Matters: Always opt for white mortar when installing light-colored or translucent tiles like marble. Gray mortar can leach through and visibly darken or discolor your beautiful light tiles over time. Reserve gray mortar exclusively for dark-colored tiles.
- Trowel Notch Size: This detail is more important than many beginners realize. The size and shape of your trowel notches dictate how much mortar is applied and the pattern of the ridges. Proper ridging is critical for achieving maximum adhesion and preventing air pockets (voids) under your tiles, which can lead to cracking. Larger tiles generally require larger notches to ensure sufficient coverage. Always consult the product information sheets for your specific tile and mortar.
- The Two-Bucket System: This simple method can save you a lot of headache. Use one bucket dedicated to mixing mortar. Keep the second bucket filled with water specifically for cleaning your tools, especially the mixer attachment. Dunking the mixer into water immediately after use and swirling it around will prevent mortar from hardening and ruining your equipment.
Demystifying the Tile Leveling System
Tile leveling clips are a relatively modern innovation in tiling, designed to prevent “lippage”—the annoying unevenness where one tile edge sits higher than its neighbor. Having heard rave reviews from fellow DIY enthusiasts, we decided to incorporate them into our project. The system works by placing a white clip beneath each tile intersection, then inserting a blue wedge into the clip from above. The specialized pliers are then used to cinch the wedge, effectively pulling the tiles to a uniform height and ensuring a perfectly flat surface.
Practical Tips for Using Tile Leveling Systems:
- Embrace the Learning Curve: There’s definitely a knack to using these. Don’t start in the most visible area of your bathroom. We wisely began under where the vanity would be installed, allowing us to gain proficiency in a less conspicuous spot. We certainly improved as we went along!
- Leveling vs. Spacing: While excellent for leveling, these clips aren’t always perfect for precise spacing. We had to pay extra attention to ensure our grout lines were consistently aligned. This was especially true given our complex herringbone pattern, which naturally adds a layer of difficulty. Being aware of this distinction from the outset will mitigate frustration.
- Read the Instructions Carefully: Tile leveling systems vary significantly. The first set we purchased was designed only for tiles larger than 12 inches on all sides, rendering them useless for our smaller marble pieces. Always confirm that your chosen system is compatible with your tile size and the thickness of your mortar application.
- Don’t Ditch Traditional Spacers Entirely: For smaller tiles and intricate patterns like ours, we found it necessary to supplement the leveling clips with traditional cross spacers. While the clips are meant for corners, small tiles might not accommodate them perfectly, requiring additional spacing tools to maintain uniform grout lines.
- Over-Purchase Spacers: You will undoubtedly need more spacers than you anticipate, particularly with a herringbone pattern where every corner and intersection requires multiple clips. It’s far better to buy several extra bags and return the unused ones than to make multiple emergency trips to the store, as we learned the hard way!
- Reusable vs. Disposable: The blue wedges are typically reusable, so save them! We’ll be using ours for the shower surround. However, the white base clips are not reusable, necessitating a larger initial purchase. For our project, two bags of wedges and three bags of clips were required.
- The Pliers Are Essential: Do not attempt to press the wedges into place with your bare hands. You’ll quickly discover why. Spending the extra $10 on the specialized pliers is a small investment that prevents hand pain and ensures the wedges are properly seated. The pliers also greatly simplify the removal process later.
- Spacer Removal: While some videos show people simply kicking off dried spacers, this method didn’t work for our particular system. We had to carefully remove each one individually using the pliers, exercising extreme caution to avoid scratching the newly laid marble.
Designing Your Floor: Choosing a Tiling Pattern
The design phase involved extensive experimentation. I explored a dozen different pattern ideas, primarily using our two main tile sizes: 4×12 and 3×6. My vision included some form of a distinct border, with the larger 4×12 tiles filling the main central area. I meticulously sketched and arranged various layouts to visualize the final look:
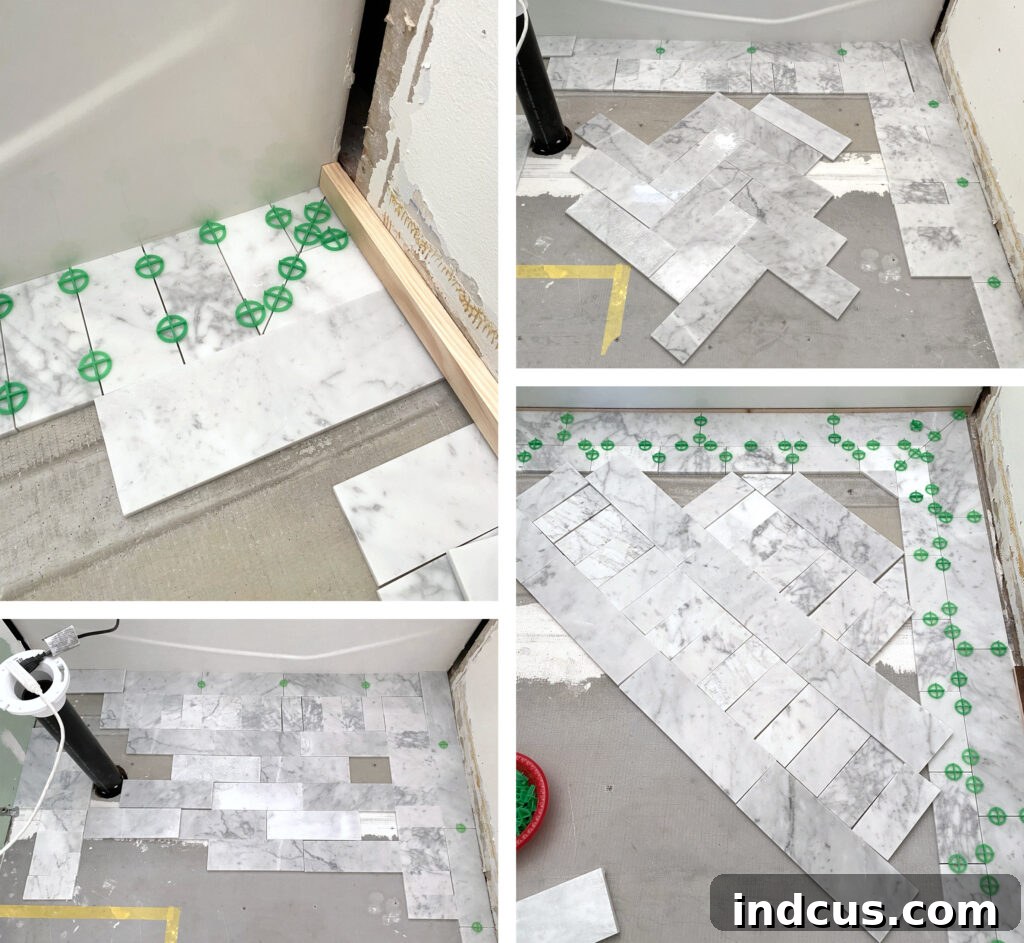
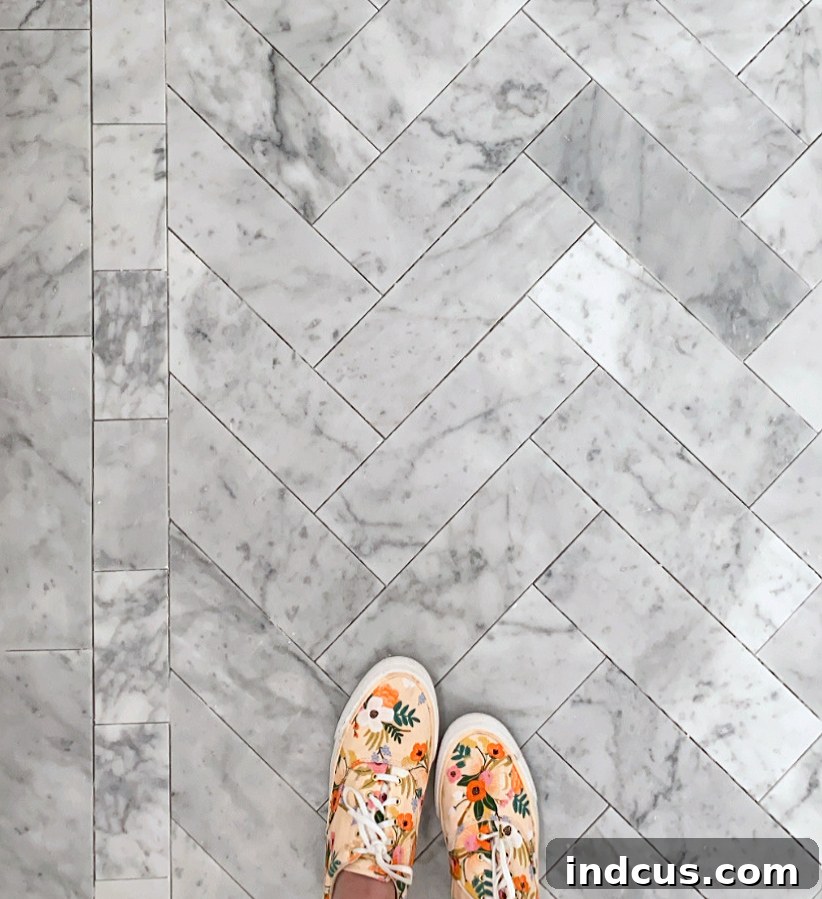
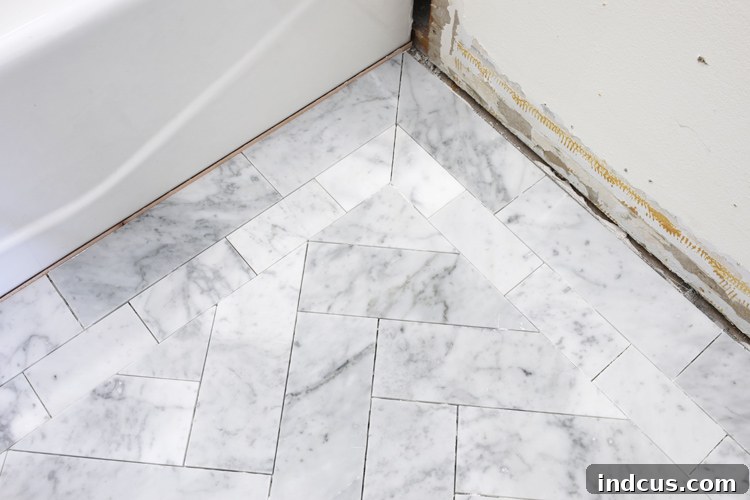
I absolutely adored the clean, stacked look of the 3×6 tiles, but we struggled to integrate it effectively as a border due to how it impacted the corner aesthetics. The “stripey” pattern, combining both tile sizes, also held significant appeal. However, in our pursuit of a classic and traditional bathroom aesthetic, we ultimately decided on a elegant herringbone design for the main floor, complemented by a sophisticated mitered border consisting of a row of 4×12 tiles, followed by a row of 3×6 tiles. This choice added complexity but promised a truly bespoke finish.
Indispensable Tiling Tips for DIY Beginners
If you’re tackling your first tiling project, these hard-won lessons will set you on the path to success:
- Preparation is Paramount: As emphasized in last week’s update, proper subfloor preparation is absolutely non-negotiable. A level, clean, and stable subfloor is the foundation of a successful tile installation. Ignoring this step can lead to cracked tiles, uneven surfaces, and a host of future problems. Invest the time here; it will pay dividends.
- Always Dry Fit Your Layout: This step was crucial for us, especially with our intricate herringbone pattern. Dry fitting involves laying out your entire tile pattern, cutting all pieces to size, and even placing your spacers before applying any mortar. This allows you to troubleshoot potential issues, make necessary adjustments, and confirm that your design fits perfectly without the pressure of fast-drying adhesive. It saves material and prevents costly mistakes.
- Label Your Cuts: For patterns with numerous angled or custom-cut pieces, labeling is a lifesaver. We used a pencil to mark directly on the back of our marble tiles, especially for the perimeter pieces of our herringbone. Alternatively, small pieces of painter’s tape with a Sharpie work well. We even took a photograph of our fully dry-fitted and labeled floor to use as a reference during the actual installation, which proved incredibly helpful.
- Mix Mortar in Small Batches: Mortar has a limited working time before it begins to harden. As beginners, we found ourselves working slower than anticipated. To avoid the stress of racing against the clock and wasting material, mix only small portions of mortar at a time. For our 5’x8’ floor, we divided it into six manageable sections, mixing fresh mortar for each. While this meant cleaning tools multiple times, it was far more effective than struggling with stiff, unusable mortar.
- Master Your Trowel Technique: Believe it or not, how you apply mortar with your trowel significantly impacts the durability of your tile. Before starting, I watched THIS INFORMATIVE VIDEO, which brilliantly explains the importance of creating uniform mortar ridges and why improper application leads to tile failure (e.g., hollow spots that cause cracking). Understanding the “why” behind the technique will motivate you to make those neat, straight trowel lines every time.
- Protect Your Hands: Mortar can be very drying and irritating to the skin. I neglected to wear gloves at the outset and quickly regretted it. Take the few extra seconds to put on a pair of latex or nitrile gloves to protect your hands from the caustic mixture.
- Keep Grout Lines Impeccably Clean: This tip might elicit a chuckle, but it’s vital! Removing wet mortar from grout lines is simple; a toothpick or small tool works wonders. Chisel away dried mortar, however, is a tedious and frustrating task. Immediately after setting each tile, inspect every single grout line and scrape away any mortar that has squeezed up into the cracks. This foresight will save you hours of grueling cleanup later.
- Blend Tile Batches for Natural Stone: Natural stone, like our Carrara marble, exhibits beautiful variations in color, veining, and pattern. To achieve a cohesive and aesthetically pleasing floor, open all your tile packages and mix pieces from different boxes. Lay them out beforehand to “blend” them, ensuring that heavily veined tiles aren’t clumped together and that the overall pattern flows harmoniously across the entire surface.
Valuable Lessons Learned (aka Our “Mistakes”)
Overall, I’m genuinely proud of how our floor turned out. Yet, as with any major DIY project, hindsight always offers opportunities for improvement. Here are a couple of key takeaways we’d implement if we were to embark on this tiling journey again:
- Simultaneous Border and Center Installation: We initially installed the tile border on Friday night, then meticulously fitted the herringbone center section inside it on Saturday. While this seemed logical at the time, it regrettably resulted in minor height discrepancies between the border and the central pattern because we couldn’t effectively use our leveling spacers across the transition. In retrospect, it would have been far better to install the border and the center simultaneously, working from side to side and blending the patterns as we went to ensure a perfectly seamless, level surface.
- Timely Spacer Removal: Along the outside edges of our floor, we used pieces of wood as temporary spacers to ensure everything remained straight during installation. Our oversight was not removing these wood pieces while the mortar was still wet. Consequently, we now have several wood spacers firmly cemented to our new bathroom floor! It’s a comical yet frustrating dilemma. We’re still brainstorming how to remove them without damaging the marble. Stay tuned for that update!
The Road Ahead: Our Extensive Renovation To-Do List
With the floor tiling complete, we’ve made significant progress, but our journey is far from over. Here’s a look at the remaining tasks on our ambitious to-do list for the Jeffrey Court Renovation Challenge:
Remove old tile around tub and showerRemove old tile floorClear out debrisRemove old vanityAdd outlet behind vanityMove light box downRepair drywallRemove toiletClean floor and prepLay down cement boardTape and cement seamsTile floor- Seal floor (essential for our Carrara marble!)
- Grout floor
- Install new plumbing valves in shower
- Install cement board in shower surround
- Tape + Mud cement board seams
- Apply Redgard waterproofing membrane
- Tile shower surround
- Seal shower surround
- Grout shower surround
- Install new vanity
- Install wainscoting wall molding
- Sand, caulk, prime and paint molding
- Install wallpaper above wainscoting
- Install new toilet
- Install light fixtures, mirrors, towel bars, decor, etc.
With just three weeks remaining on the clock, the challenge is very real. Do you think we can get it all done? Stay tuned for more updates on our thrilling DIY bathroom renovation!







