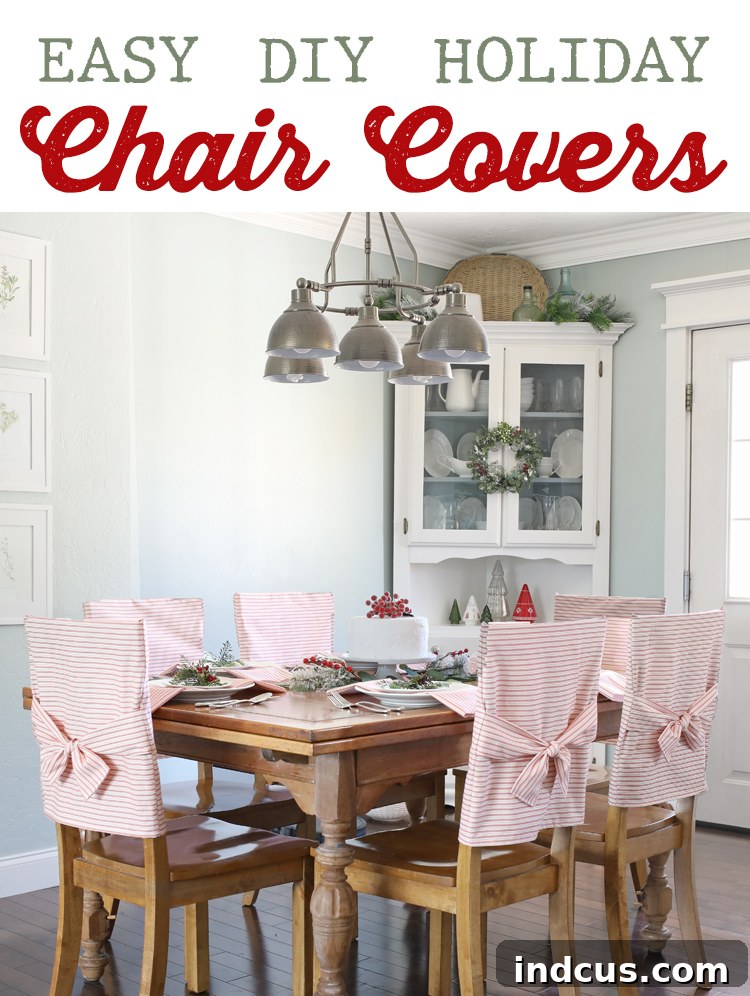
Transform Your Dining Space: A Comprehensive Guide to DIY Chair Back Covers
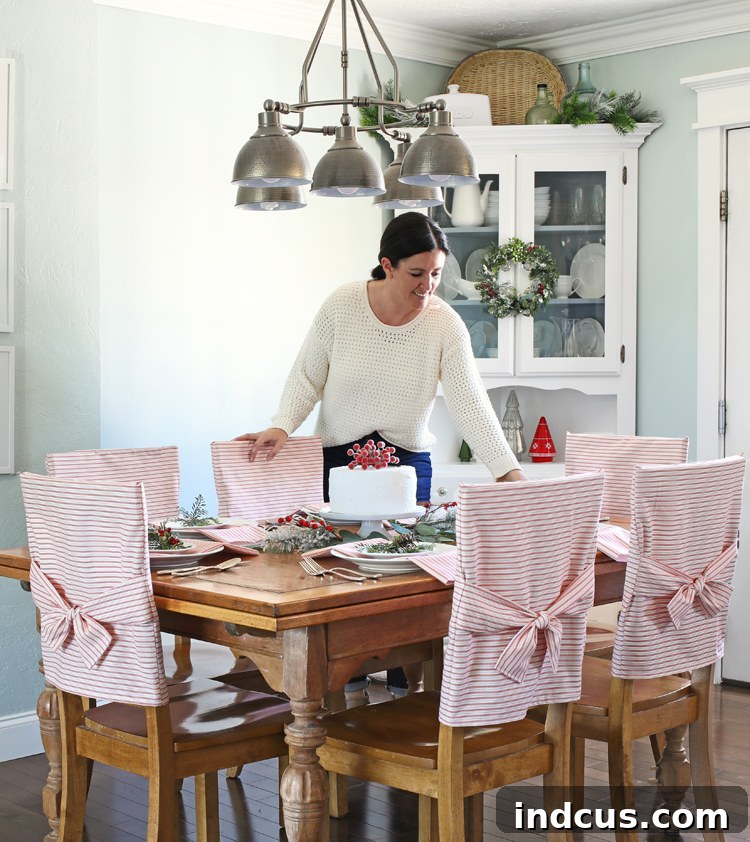
Are you looking for an easy yet impactful way to refresh your dining room decor? Whether you’re aiming to update your aesthetic for a specific season, protect your furniture, or simply inject new life into an older dining set, crafting your own DIY chair back covers is a fantastic solution. This simple sewing project allows you to personalize your space with minimal effort and cost, offering endless possibilities for style and creativity. Forget expensive furniture overhauls; a few yards of fabric can completely transform the ambiance of your kitchen or dining area.
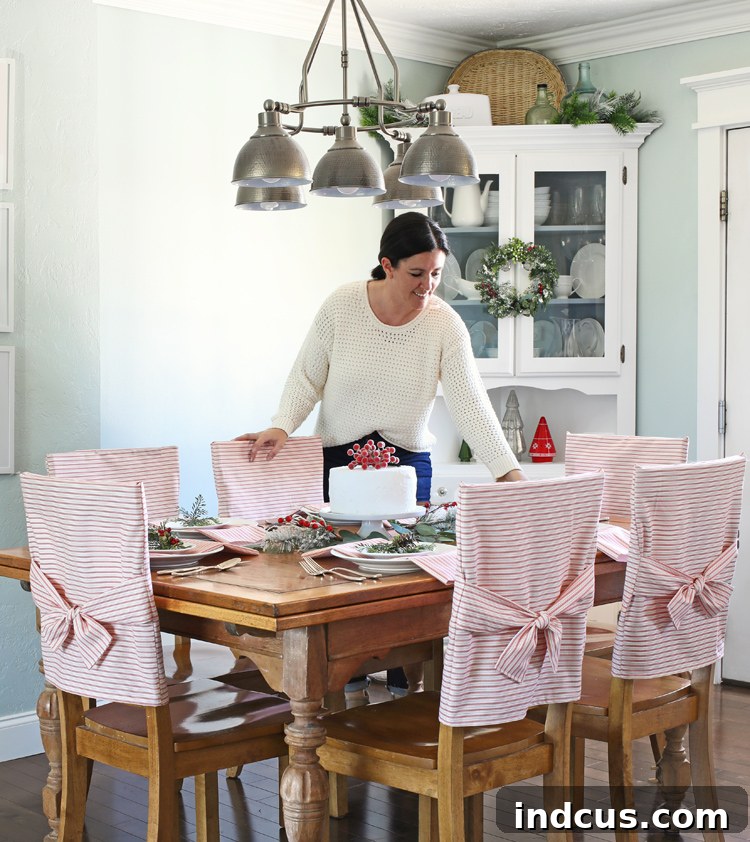
Today, we’re diving into a delightful and straightforward sewing project that will guide you through creating charming chair back covers. Perfect for adding a festive touch during the holidays – think cozy Christmas vibes or vibrant spring freshness – or for simply changing up your everyday decor. I recently made a set using classic red and white ticking stripe fabric, and the result was absolutely enchanting. It instantly brought a cheery, inviting atmosphere to my dining room, proving that sometimes, the simplest changes make the biggest difference. These covers are not just decorative; they offer a practical layer of protection against spills and wear, extending the life of your cherished dining chairs.
Imagine your dining room transformed with custom-made covers that reflect your personal style, ready to impress guests or simply make family meals feel a little more special. This guide will walk you through every step, ensuring even beginner sewers can achieve professional-looking results. Get ready to unleash your creativity and give your dining chairs the stylish update they deserve!
This post is sponsored by Waverly Inspirations, providing high-quality fabrics for all your crafting needs.
Why Choose DIY Chair Back Covers?
- Seasonal Decor: Easily switch out covers for different holidays and seasons. Imagine plaid for autumn, vibrant florals for spring, or classic red and white for Christmas!
- Budget-Friendly Makeover: Instead of buying a new dining set or expensive slipcovers, a small amount of fabric can completely change the look of your existing chairs.
- Personalized Style: Choose from an infinite array of fabrics, patterns, and colors to perfectly match your home’s aesthetic, something off-the-shelf options rarely offer.
- Furniture Protection: Shield your chair backs from everyday spills, dirt, and wear, preserving their original condition, especially useful for families with children or pets.
- Beginner-Friendly Project: This project requires only basic sewing skills, making it an excellent starting point for those new to sewing.
Essential Materials Needed for Your Project
Before you begin, gathering all your supplies ensures a smooth and enjoyable crafting experience. Here’s a detailed list of what you’ll need to create your custom chair back covers:
- Waverly Inspirations Fabric: The heart of your project! Waverly Inspirations offers a vast selection of high-quality, durable fabrics perfect for home decor. Consider patterns that complement your existing decor or seasonal themes. For a festive look, I opted for a timeless red and white ticking stripe, which adds holiday cheer without being overwhelming. Each chair cover typically requires approximately 1/2 yard of fabric, but this can vary based on your chair’s dimensions. It’s always best to measure your chairs first and add a little extra for safety before purchasing your fabric.
- Coordinating Thread: Choose a thread color that either matches your fabric perfectly for a seamless look or provides a subtle contrast if that’s your preferred style. High-quality polyester thread is recommended for its strength and durability.
- Sewing Machine: Any standard home sewing machine will work perfectly for this project. Ensure it’s in good working order and you have a fresh needle suitable for your fabric type.
- Fabric Scissors or Rotary Cutter and Mat: A good pair of sharp fabric scissors is essential for clean, precise cuts. If you prefer, a rotary cutter with a self-healing mat and a clear ruler can make cutting rectangles even faster and more accurate.
- Measuring Tape or Ruler: Accuracy is key for a well-fitting chair cover. A flexible measuring tape is ideal for chair dimensions, while a rigid ruler is great for fabric cutting.
- Pins or Fabric Clips: These will help hold your fabric pieces together securely before sewing, ensuring everything stays aligned.
- Iron and Ironing Board: Pressing your seams and fabric folds as you go is crucial for a crisp, professional finish. Do not skip this step!
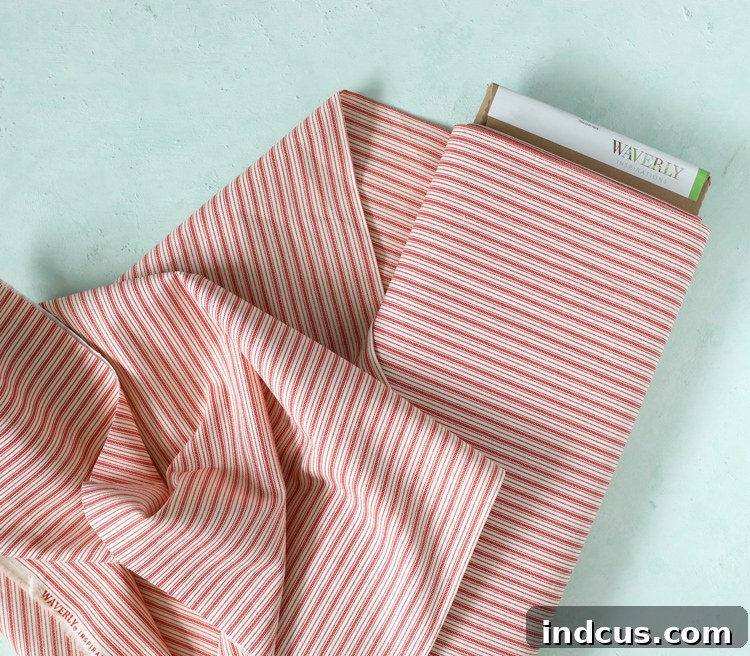
When selecting your Waverly Inspirations fabric at Walmart.com, consider not only the pattern but also the fabric’s weight and care instructions. Medium-weight cotton or canvas blends are excellent choices as they are durable, easy to sew, and machine washable. While I chose a classic holiday stripe, imagine the possibilities: a subtle damask for everyday elegance, a bold geometric for a modern touch, or a vibrant floral for a touch of spring. The beauty of DIY is tailoring it exactly to your taste!
Step-by-Step Instructions: Crafting Your Chair Back Covers
Follow these detailed instructions to create beautifully fitted chair back covers that will enhance your dining space. Remember to press your fabric thoroughly before cutting for the most accurate results.
Step 1: Precise Measurements are Key
Accuracy in measuring is paramount for a perfectly fitting chair cover. Grab your measuring tape and carefully take the following dimensions for one of your dining chairs:
- Width of the Chair Back (Top Edge): Measure across the very top edge of your chair back. This measurement ensures the cover will fit snugly over the top.
- Length of the Chair Back (Desired Drop): Measure from the very top edge of the chair back down to where you want the cover to end. This can be just above the seat, halfway down, or even longer for a more dramatic look.
- Thickness of the Chair Back (Top Edge): Measure the depth of the chair back at its thickest point, usually along the top edge. This dimension is crucial for creating the “pocket” that slides over the chair back.
Record these measurements carefully. It’s always a good idea to measure twice to ensure accuracy before cutting into your fabric.
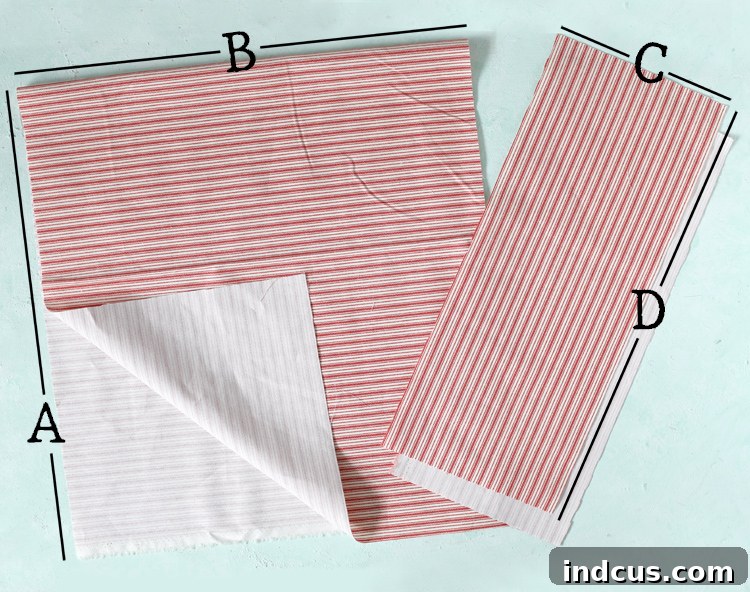
Step 2: Cutting Your Fabric Pieces
For each chair cover you plan to make, you will need to cut three distinct rectangles from your chosen fabric. Ensure your fabric is laid flat and smoothed out before cutting to avoid distortion.
- Main Cover Piece: This large rectangle will form the body of your chair cover.
- [A] Width: Take your chair back width measurement and add 1 inch. This extra inch accounts for 1/2-inch seam allowances on both sides, ensuring enough fabric for neat seams.
- [B] Height: This is a critical measurement for the overall drape. Take your desired chair length measurement, multiply it by 2 (as the fabric will wrap over the chair back), then add the chair thickness measurement, and finally add 2 inches for hemming at the bottom.
Formula: (Chair Length x 2) + Chair Thickness + 2 inches (for hem)
- Decorative Knot Pieces (x2): These two smaller rectangles will form the ties or bow at the back of your chair.
- Cut two rectangles, each measuring 7 inches by 18 inches (refer to measurements [C] and [D] in the original photo for visual guidance).
- Customization Tip: You have creative freedom with these pieces! You can adjust their size and width. For a larger, more dramatic bow, simply double the length (e.g., 7 x 36 inches). If you prefer a simpler, streamlined look, you could use a narrower strip or even substitute a pre-made decorative ribbon for a completely different style. The key is that the two pieces are long enough to comfortably reach across the chair back and be tied securely.
Step 3: Preparing the Decorative Knot Pieces
Now, let’s prepare the tie pieces. This step will create two finished straps for tying.
- Take one of your 7 x 18-inch knot pieces. Fold it in half lengthwise, ensuring the right sides of the fabric are together. This will give you a piece that is approximately 3.5 inches wide by 18 inches long.
- Pin along the long open edge to hold the two raw edges together.
- Using your sewing machine, sew a straight seam along this pinned long edge with a 1/2-inch seam allowance. Backstitch at the beginning and end to secure the stitches.
- Carefully trim the seam allowance down to about 1/4 inch to reduce bulk, especially if your fabric is thick.
- Using a turning tool (or a safety pin attached to one end and pulled through), flip the fabric right side out. This will reveal a neat tube of fabric.
- Once turned, press the tube flat with your iron, ensuring the seam is positioned along one edge or centered, as preferred. This creates a crisp, professional look.
- Fold one end of the pressed tube under by about 1/2 inch and press. Stitch this folded end closed with a straight stitch across, creating a clean, finished end. Leave the other end raw for now; it will be sewn into the main cover.
- Repeat this entire process for the second 7 x 18-inch knot piece.
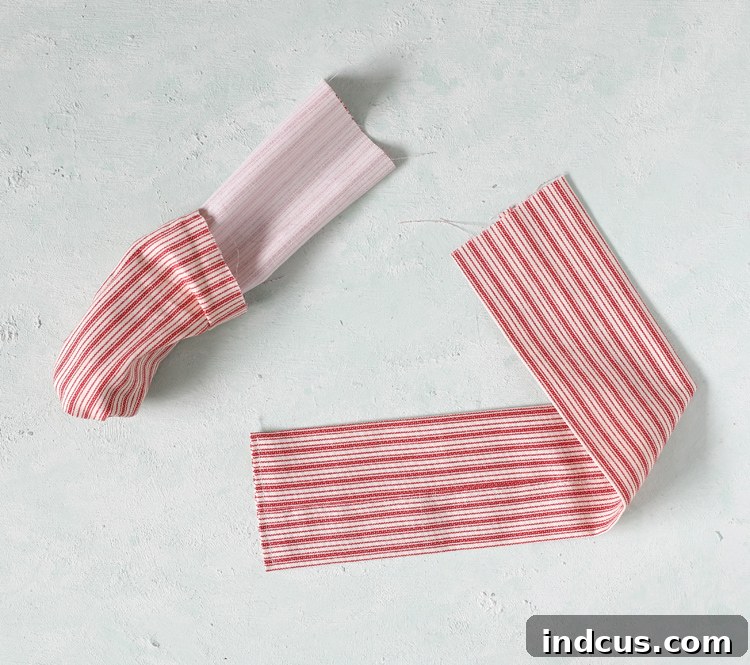
Step 4: Assembling the Main Cover
This step brings the main body of the cover and the decorative ties together.
- Lay your large main cover piece flat with the right side facing up.
- Fold the main cover piece in half widthwise, ensuring the right sides of the fabric are now together. This creates a folded piece with three raw edges (two sides and one open bottom) and one folded top edge.
- Take your two prepared knot pieces (with one finished end and one raw end). Carefully sandwich each raw end of the knot pieces inside the folded main cover. Position them along the outside raw edges of the main cover, aligning the unfinished edge of the knot piece with the outside raw edge of the main cover. Place one knot piece on each side.
- Ensure the finished ends of the knot pieces are tucked inward, away from the raw edges you’re about to sew. The goal is to sew the knot pieces into the side seams so they emerge cleanly when the cover is turned right side out.
- Pin the knot pieces securely in place, ensuring they won’t shift during sewing. Then, pin along both side raw edges of the main cover from the folded top down to the bottom.
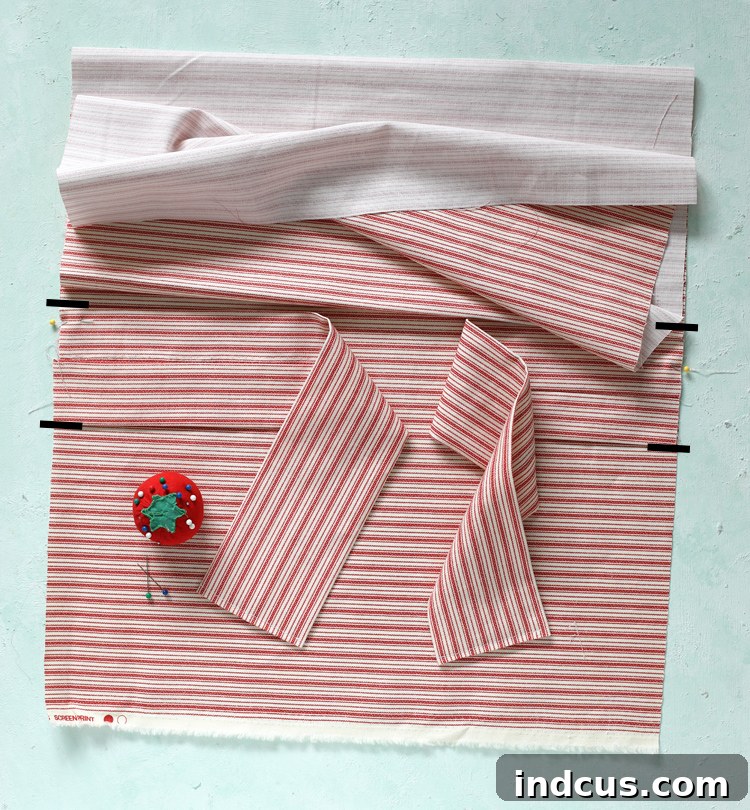
Now, take your pinned main cover to the sewing machine.
- Sew a straight seam down both pinned sides of the cover, using a 1/2-inch seam allowance. Remember to backstitch at the beginning and end of each seam to reinforce it. This process creates a “pocket” or sleeve, designed to slip over the chair back, with the decorative ties neatly integrated into the side seams. The bottom end of the cover should remain open.
- Trim any excess fabric from the seam allowances to about 1/4 inch, particularly at the corners, to reduce bulk and allow for a crisper turn.
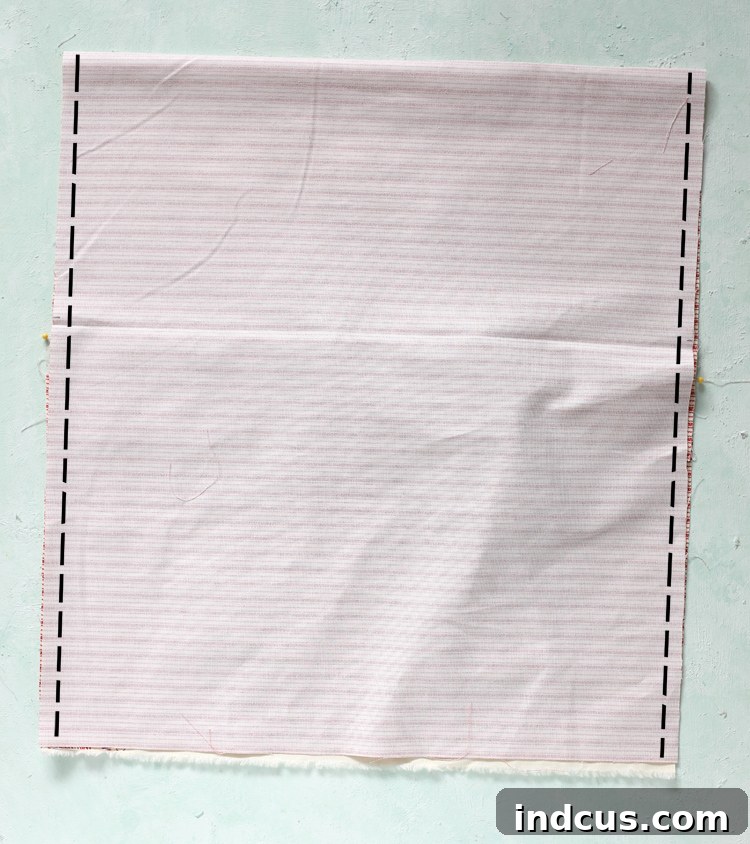
Step 5: Finishing the Bottom Hem
A neat hem adds a professional touch and prevents fraying.
- With the cover still inside out, take the open bottom edge. Fold the raw edge up by 1/2 inch towards the wrong side of the fabric. Press this fold firmly with your iron.
- Fold it up another 1/2 inch, pressing again. This double fold encloses the raw edge, creating a clean, durable hem.
- Pin the hem in place all the way around the bottom opening.
- Sew the hem with a straight stitch close to the inner folded edge. Backstitch at the beginning and end.
- Once the hem is sewn, turn the entire chair cover right side out.
- Finally, press the entire chair cover thoroughly. Pay special attention to all the sewn seams and the hem, ensuring they lay flat and look crisp. This step makes a significant difference in the finished appearance of your cover.
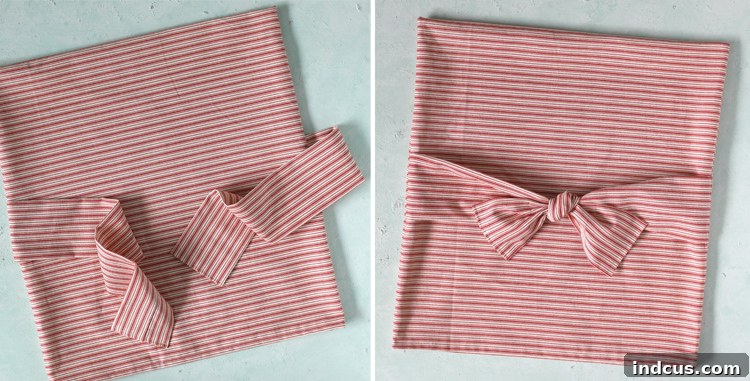
Step 6: Slip On and Style!
Congratulations, your chair cover is complete! Now for the most satisfying part:
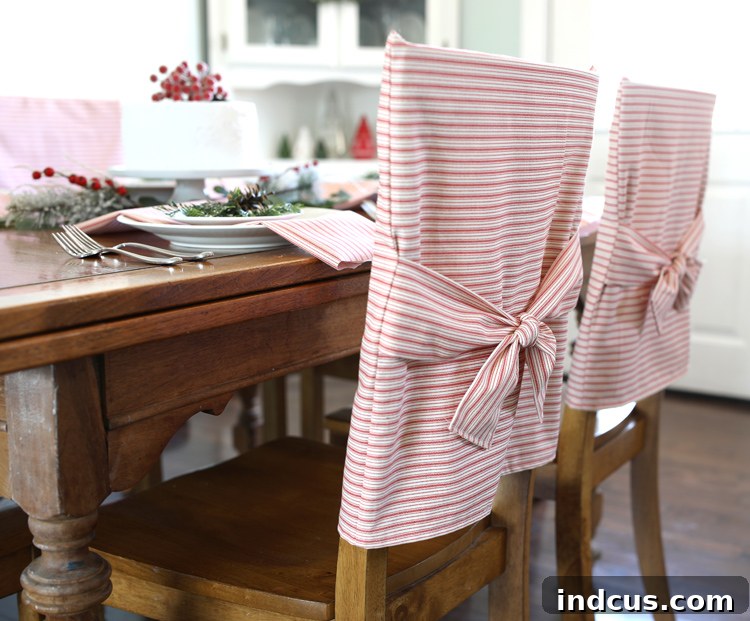
- Gently slip the newly crafted cover over the back of your dining chair. Guide it down until it sits perfectly, covering the back as desired.
- Take the two decorative tie pieces that emerge from the sides. Bring them together at the back of the chair.
- Tie a pretty knot or a charming bow. Experiment with different knot styles to find the look you love most. A simple square knot is elegant, while a fuller bow adds a touch of whimsy.
Customization and Care Tips
The beauty of DIY projects lies in the ability to personalize them to your heart’s content. Here are a few ideas to make your chair covers truly unique:
- Embellishments: Add decorative trim, pompoms, or fringe along the bottom hem for extra flair. You could also embroider a monogram or a simple motif on the front of the cover for a bespoke touch.
- Contrasting Fabrics: Use a different, complementary fabric for the tie pieces to create visual interest. A solid color tie against a patterned cover, or vice-versa, can look stunning.
- Button or Snap Closures: Instead of ties, consider adding decorative buttons with fabric loops or snaps for a different type of closure. This offers a sleeker look.
- Reversible Covers: If you’re feeling ambitious, you could sew two main cover pieces together (right sides together, leaving an opening for turning) to create a reversible chair cover, offering two looks in one!
Care and Maintenance:
Most cotton or cotton-blend fabrics, like those from Waverly Inspirations, are machine washable. To ensure your covers last for years to come:
- Wash in cold water on a gentle cycle.
- Tumble dry on low or air dry to prevent shrinkage and preserve colors.
- Iron on a medium setting if needed, especially to keep those ties looking crisp.
Conclusion: Elevate Your Dining Experience
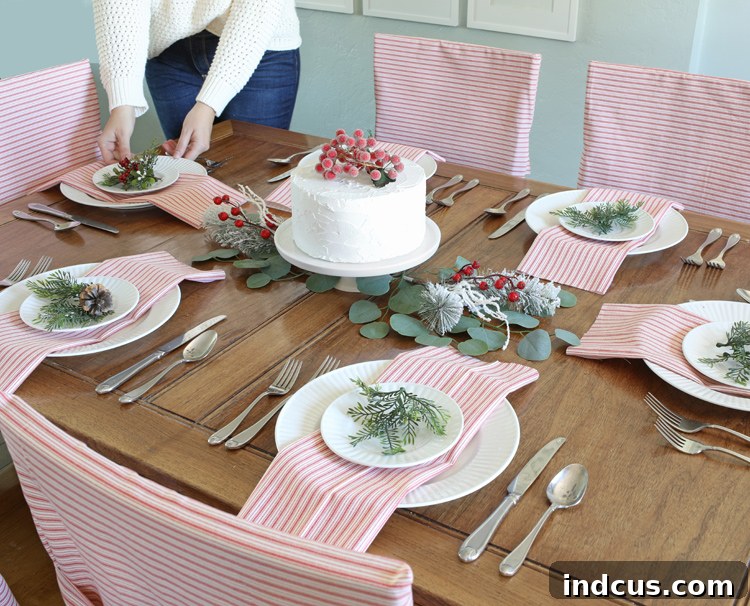
Aren’t these darling? I am absolutely thrilled with how these simple DIY chair back covers turned out. The red and white ticking stripe fabric perfectly captures the spirit of the holidays, making my dining table feel incredibly special and inviting. I can’t wait to pull these out every Christmas season, and I’m already planning future sets for other holidays and perhaps a neutral everyday option!
This project is more than just about sewing; it’s about adding a touch of handmade magic and warmth to your home. It’s a small detail that makes a big impact, transforming your dining room into a cozy, festive haven for family and friends. The joy of creating something beautiful with your own hands, combined with the practical benefits of protecting your furniture and easily updating your decor, makes this project truly rewarding. I hope this detailed guide inspires you to create your own set of unique chair covers. They will undoubtedly become one more cherished element that brings joy and holiday spirit to your family for years to come.
Loved this easy sewing project? Pin it now so you can easily find it later when you’re ready to create your own beautiful chair covers!