
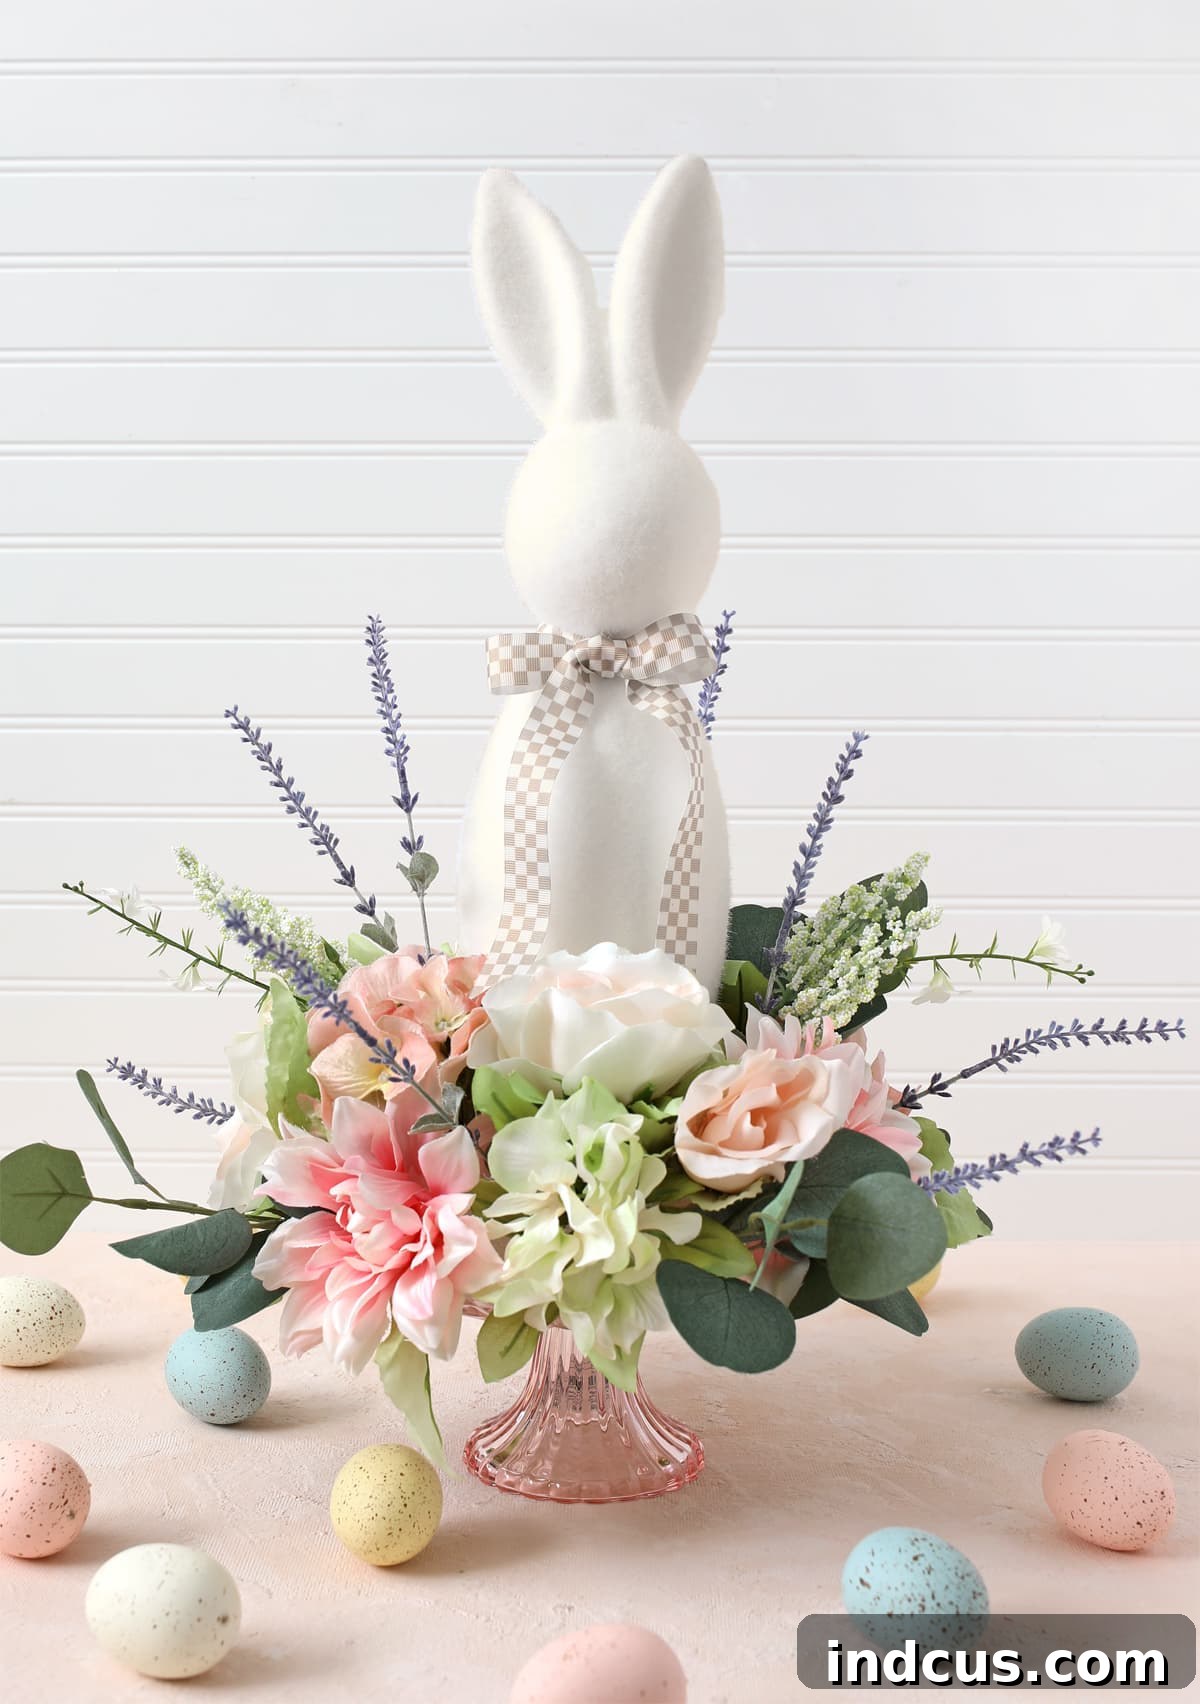
DIY Spring & Easter Floral Centerpiece: Crafting with a Bunny Figurine and Cake Stand
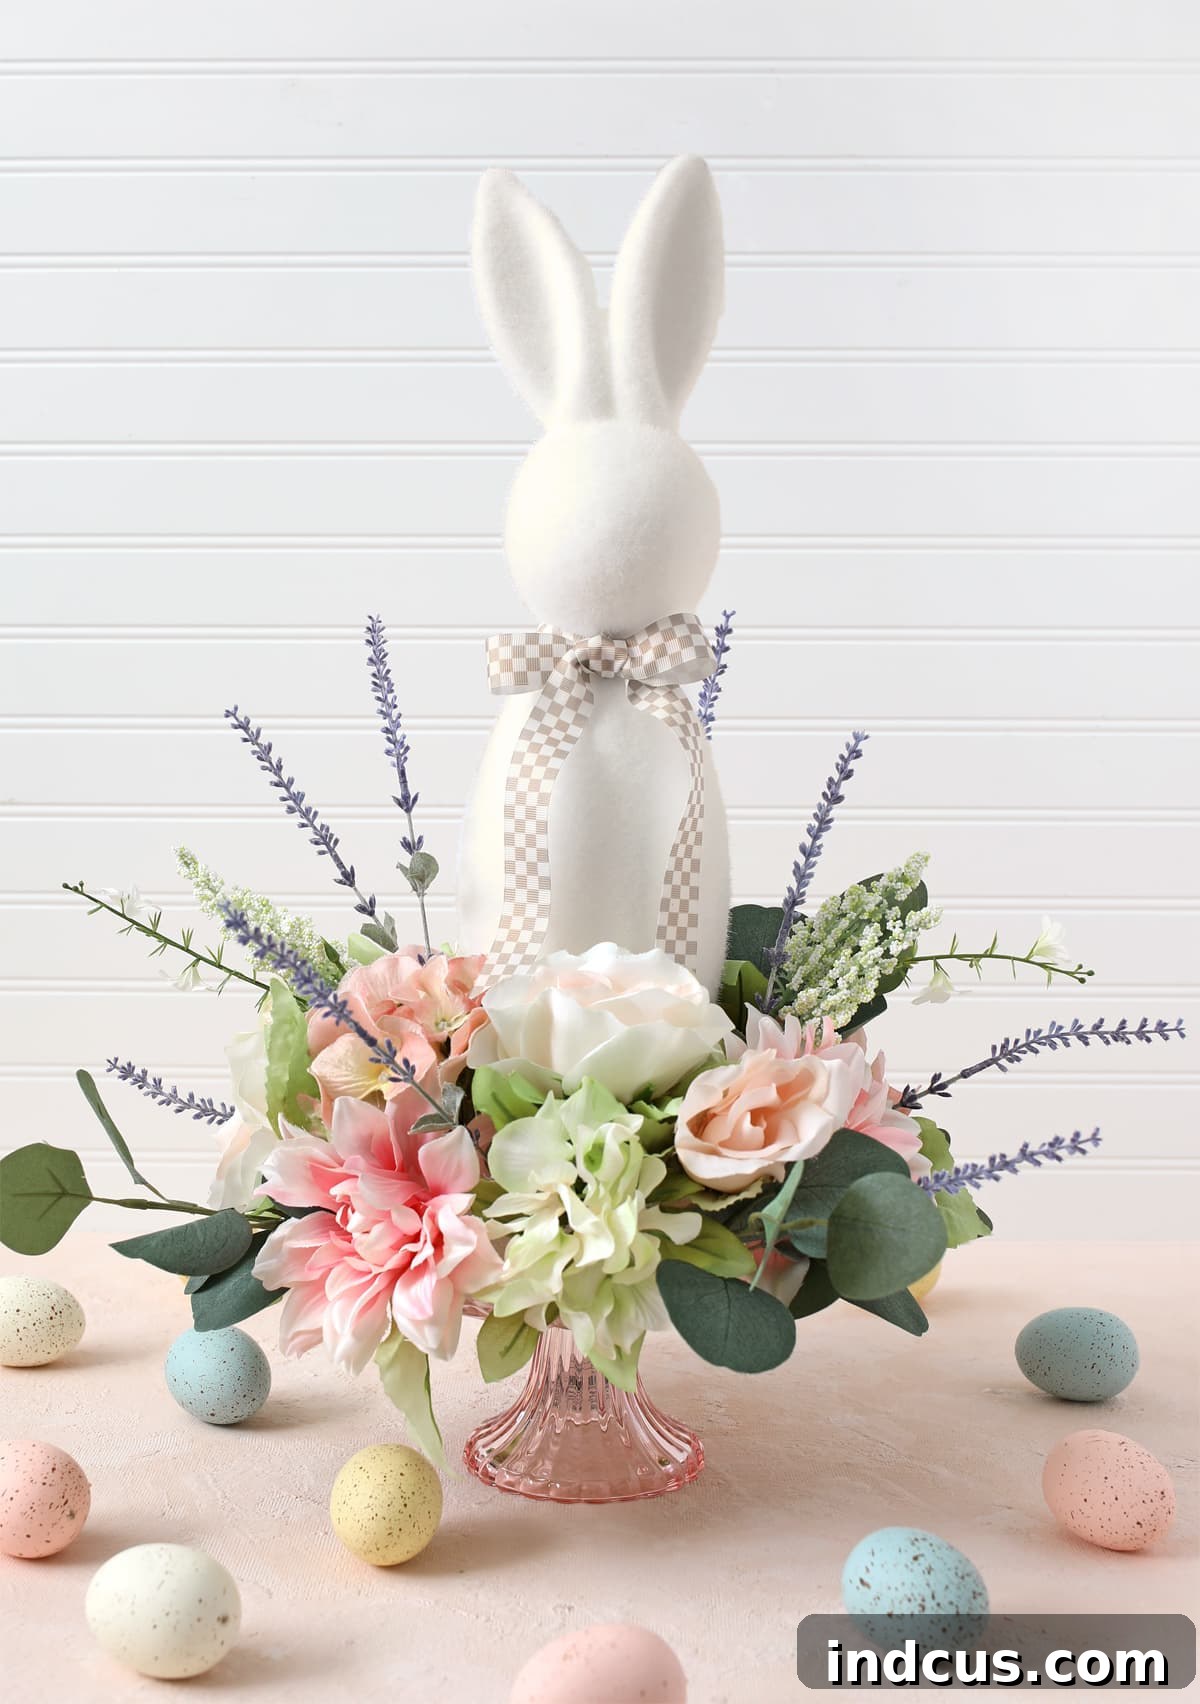
Welcome to a delightful crafting journey where we’ll create an exquisite floral centerpiece, perfect for ushering in the beauty of spring or celebrating the joy of Easter. This simple yet elegant decoration is not only easy to assemble but also incredibly versatile, allowing you to personalize it to match any theme or aesthetic. Imagine a charming bunny nestled amidst vibrant blooms atop a graceful cake stand – a true showstopper for your dining table, entryway, or mantelpiece. In this comprehensive guide, we’ll walk you through every step, offering creative tips and variations to ensure your masterpiece is uniquely yours.
The magic of this DIY project lies in its adaptability. By simply swapping out a few key elements, you can transform the entire look, making it suitable for a variety of occasions beyond Easter and spring. Whether you prefer a whimsical, rustic, or sophisticated style, this craft provides the perfect canvas for your imagination. We’ll explore several design ideas, demonstrating how different combinations of materials can yield dramatically different, yet equally stunning, results. Get ready to unleash your creativity and craft a piece that brings warmth and charm to your home!
This post is sponsored by Hobby Lobby, your ultimate destination for all craft supplies.
Why Choose a DIY Centerpiece for Your Home?
Opting for a handmade centerpiece offers numerous benefits that extend beyond mere decoration. Firstly, it allows for unparalleled personalization. Unlike mass-produced items, your DIY creation will reflect your unique taste, color preferences, and chosen theme, making it a truly special addition to your home. Secondly, it’s often a more budget-friendly option, especially when you can repurpose items you already own or find great deals on craft supplies during seasonal sales. Thirdly, the process of crafting itself can be incredibly therapeutic and rewarding. There’s a distinct sense of accomplishment in bringing a beautiful vision to life with your own hands, providing a wonderful creative outlet. Finally, a DIY centerpiece sparks conversation and adds a heartfelt touch to any gathering, serving as a charming focal point that guests will admire and appreciate.
Essential Materials for Crafting Your Floral Masterpiece
To embark on this creative endeavor, you’ll need just a few fundamental items. The beauty of this craft lies in its simplicity and the ability to customize each component to achieve your desired look. The core elements include a delightful figurine, a sturdy cake plate or tiered stand, some versatile craft foam, and an assortment of beautiful florals or greenery. Remember, the possibilities are endless once you understand the basic framework, allowing for endless creativity and personal expression.
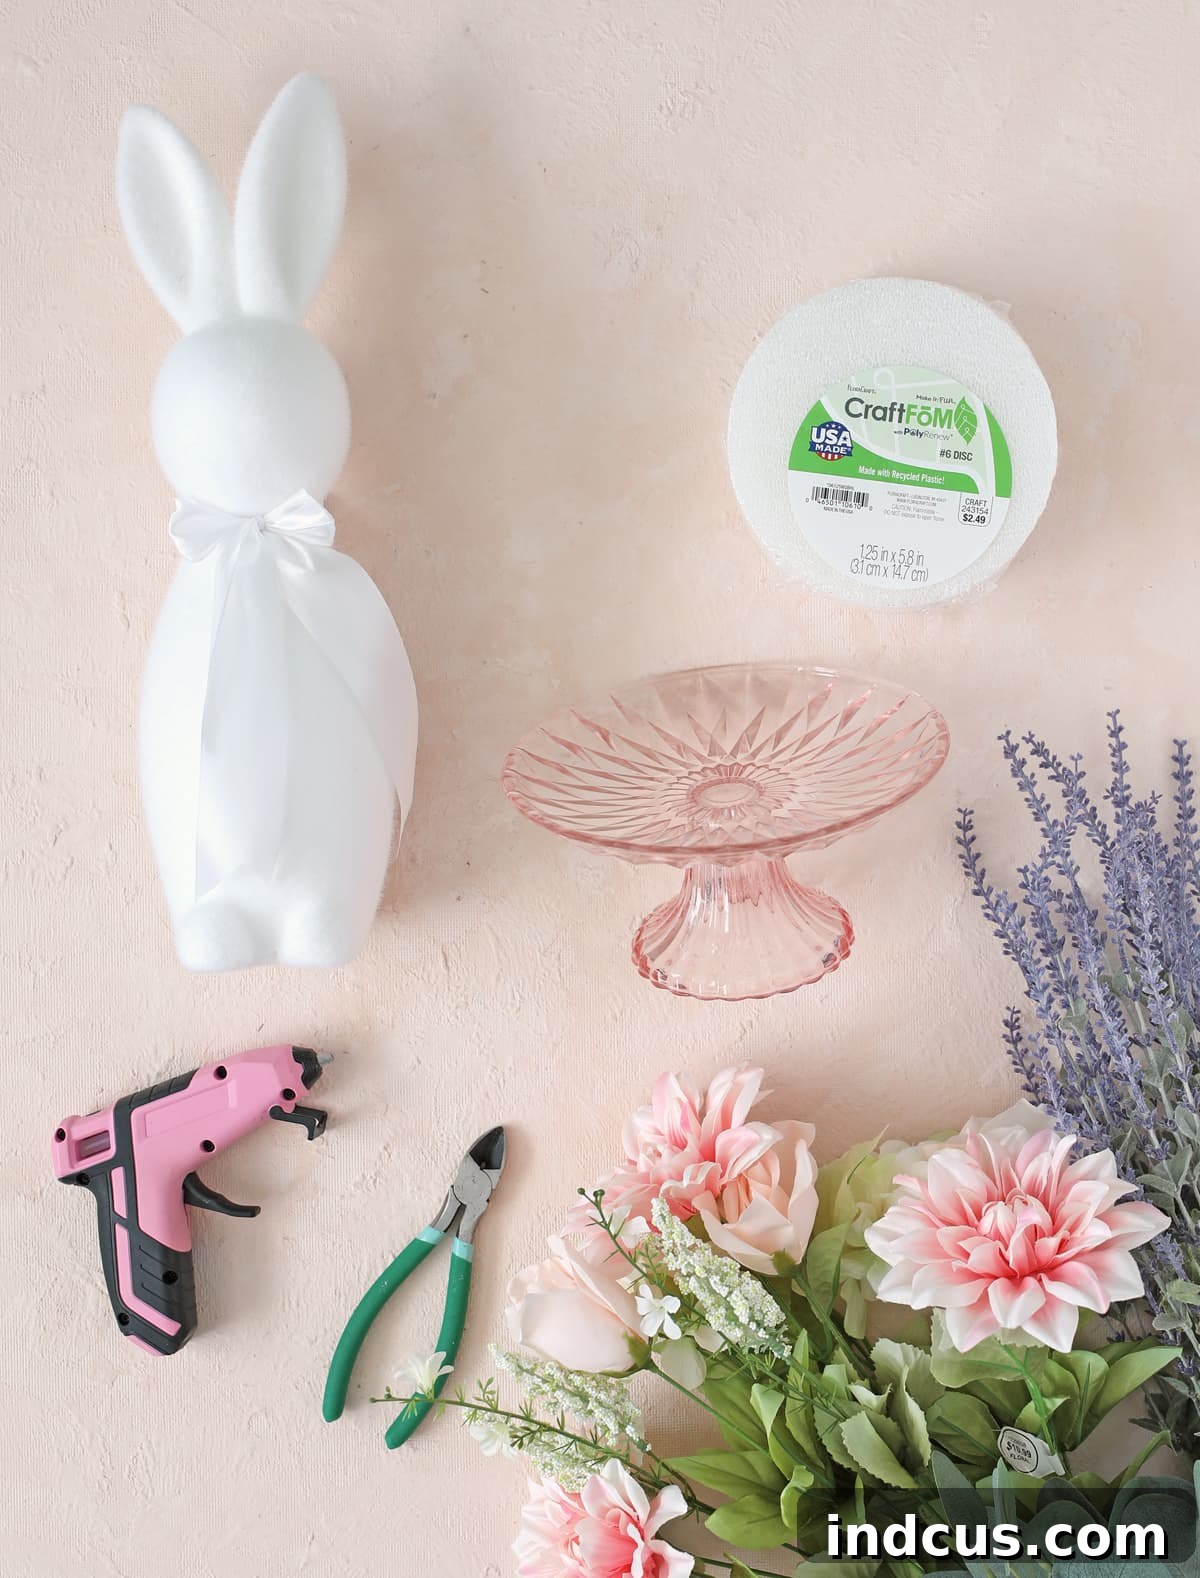
Detailed List of Materials Needed
Gathering your supplies is the first exciting step in bringing your vision to life. We’ve conveniently sourced high-quality, readily available items from Hobby Lobby, known for its extensive and inspiring craft collections. Their spring range is particularly charming this season, offering a wide array of options to perfectly suit your creative vision, from whimsical bunnies to lush floral bushes.
- Bunny Figurine (or any other figurine that fits your theme):
The figurine acts as the central focal point, drawing the eye and setting the tone for your display. Consider the overall aesthetic you’re aiming for – whimsical, elegant, rustic, or modern. Hobby Lobby offers a fantastic selection of Easter and spring figurines, ensuring you’ll find the perfect character for your display. For our variations, we utilized:
- White Flocked Bunny (16 inch Medium Size) – Ideal for a classic, soft, and elegant Easter look, perfect with pastel flowers.
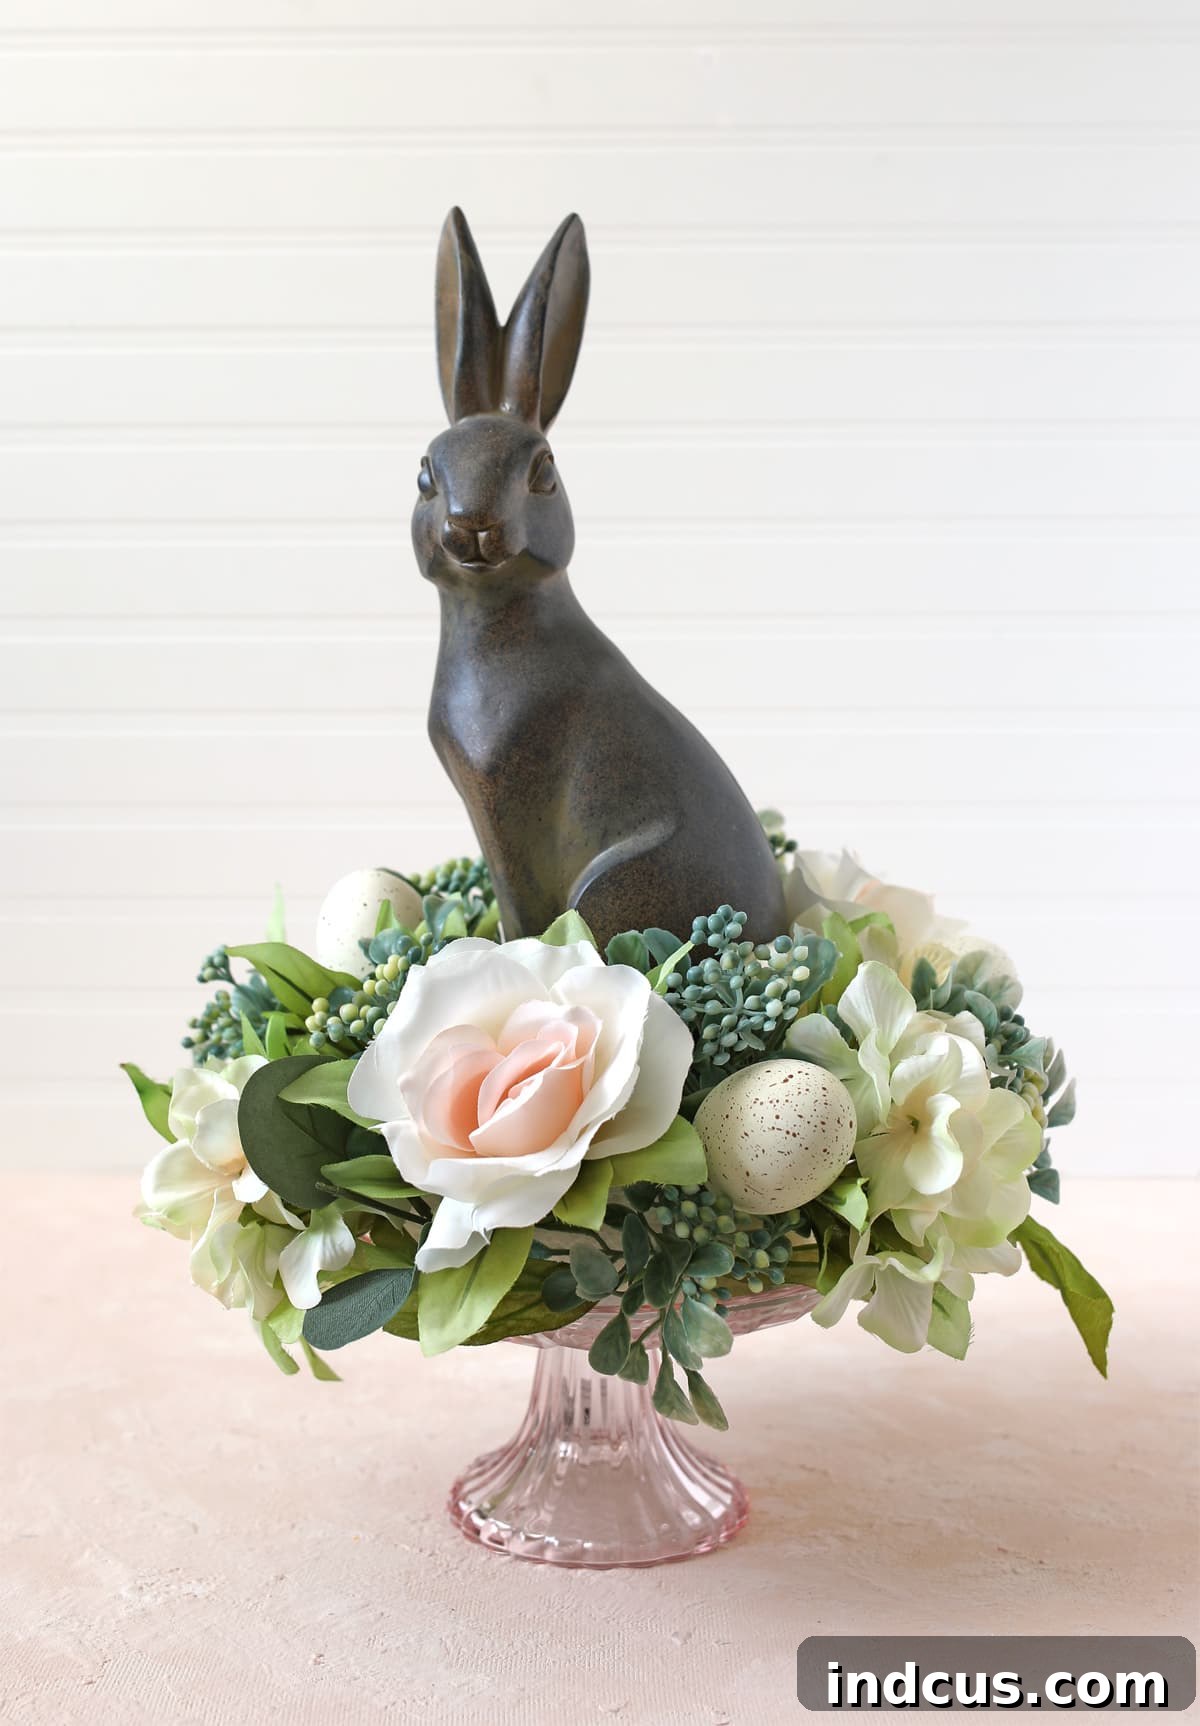
- Brown Rustic Bunny – Perfect for farmhouse or natural-themed decor, especially when paired with earthy tones and greenery.
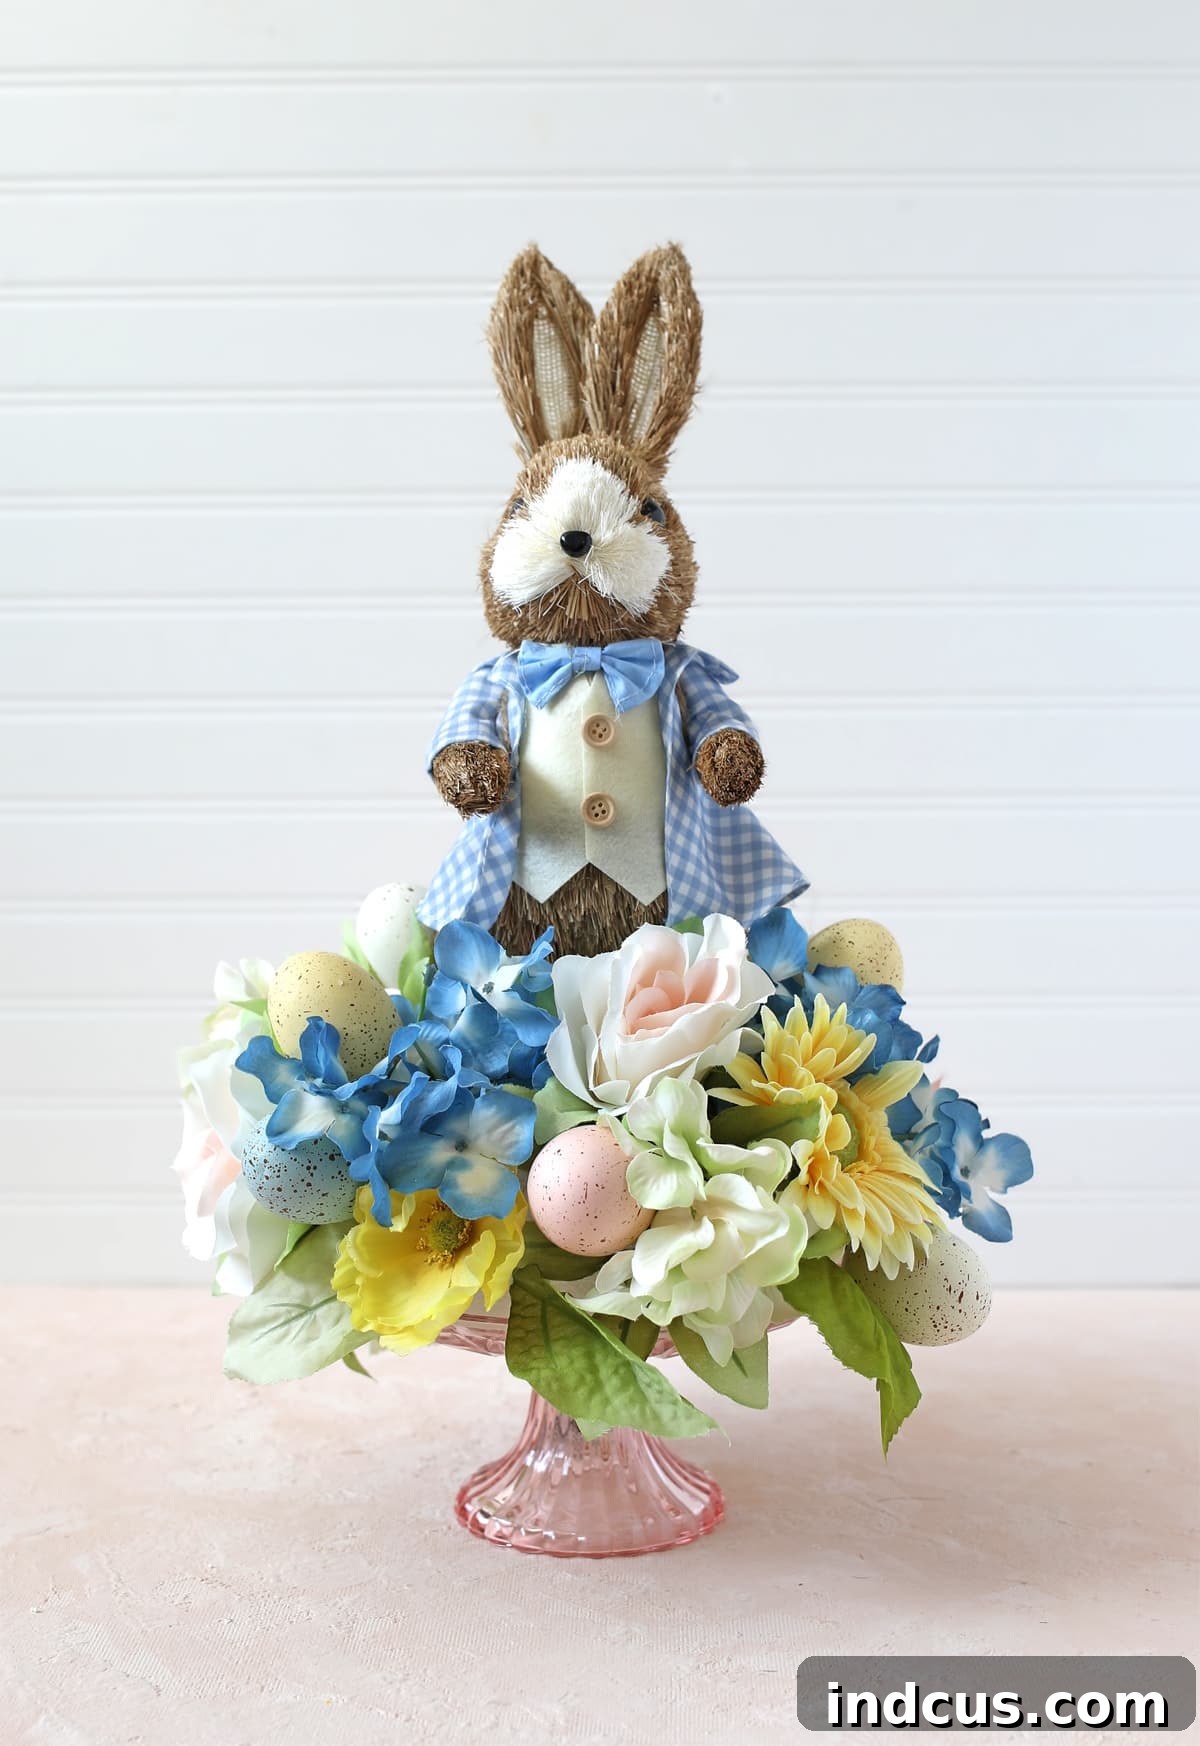
- Gingham Easter Bunny – Adds a touch of charming country appeal, especially vibrant with blue or yellow florals.
Pro Tip: Look for figurines with a flat, stable base for easy attachment to the craft foam.
- Cake Stand or Tiered Tray:
This serves as the elegant base for your centerpiece, elevating it and providing a stable platform for your arrangement. A Glass Cake Stand offers a timeless and sophisticated foundation that complements any decor style. For a more rustic feel, consider a wooden cake stand, or for added height and drama, a multi-tiered tray can create a grander display.
- Craft Foam:
Essential for securing your florals and providing a stable base for your figurine. Craft foam, such as a 1.25″x5.8″ Foam Disc, is easy to cut and holds floral stems firmly in place. Choose a size that fits comfortably within the rim of your cake stand, allowing enough space for flowers around the edges without overcrowding.
- Assorted Spring Florals & Greenery:
The heart of your centerpiece! Opt for high-quality artificial flowers that look realistic and are easy to work with. Consider a mix of textures and sizes to create a dynamic arrangement. For a classic spring or Easter palette, pastels are ideal, but don’t shy away from bolder colors if they fit your theme. Here are some beautiful options we recommend:
- Pink Dahlia, Rose and Hydrangea Bush – A wonderful combination for adding volume, soft color, and varied bloom shapes.
- Flocked Lavender Bush – Adds a touch of delicate texture and a beautiful pastel hue. Lavender has been a personal favorite lately, bringing a calming yet vibrant feel to any arrangement.
- Eucalyptus – Provides essential greenery, creating a lush backdrop and a contemporary touch with its unique leaf shape.
- Tip: Look for floral bushes which often contain multiple types of flowers and greenery on a single stem. This makes it easier to achieve a full, varied look with less effort.
- Floral Shears or Wire Cutters:
A must-have tool for cleanly cutting floral stems without damaging the flowers or your hands. Craft Floral Shears are specifically designed to cut through thick plastic stems and internal wires with ease, preventing frayed edges and making arrangement much smoother.
- Hot Glue Gun + Glue Sticks:
Your trusty tool for securing components firmly in place. Ensure you have plenty of glue sticks on hand for uninterrupted crafting. Always exercise caution when using a hot glue gun to prevent burns.
All these delightful items can be found at Hobby Lobby, making it a convenient one-stop shop for everything you need to create your stunning spring centerpiece with ease and confidence.
Step-by-Step Instructions: Crafting Your Centerpiece
Follow these simple steps to assemble your beautiful floral display. Remember to work carefully, take your time, and enjoy the rewarding creative process!
Step 1: Prepare the Base for Stability
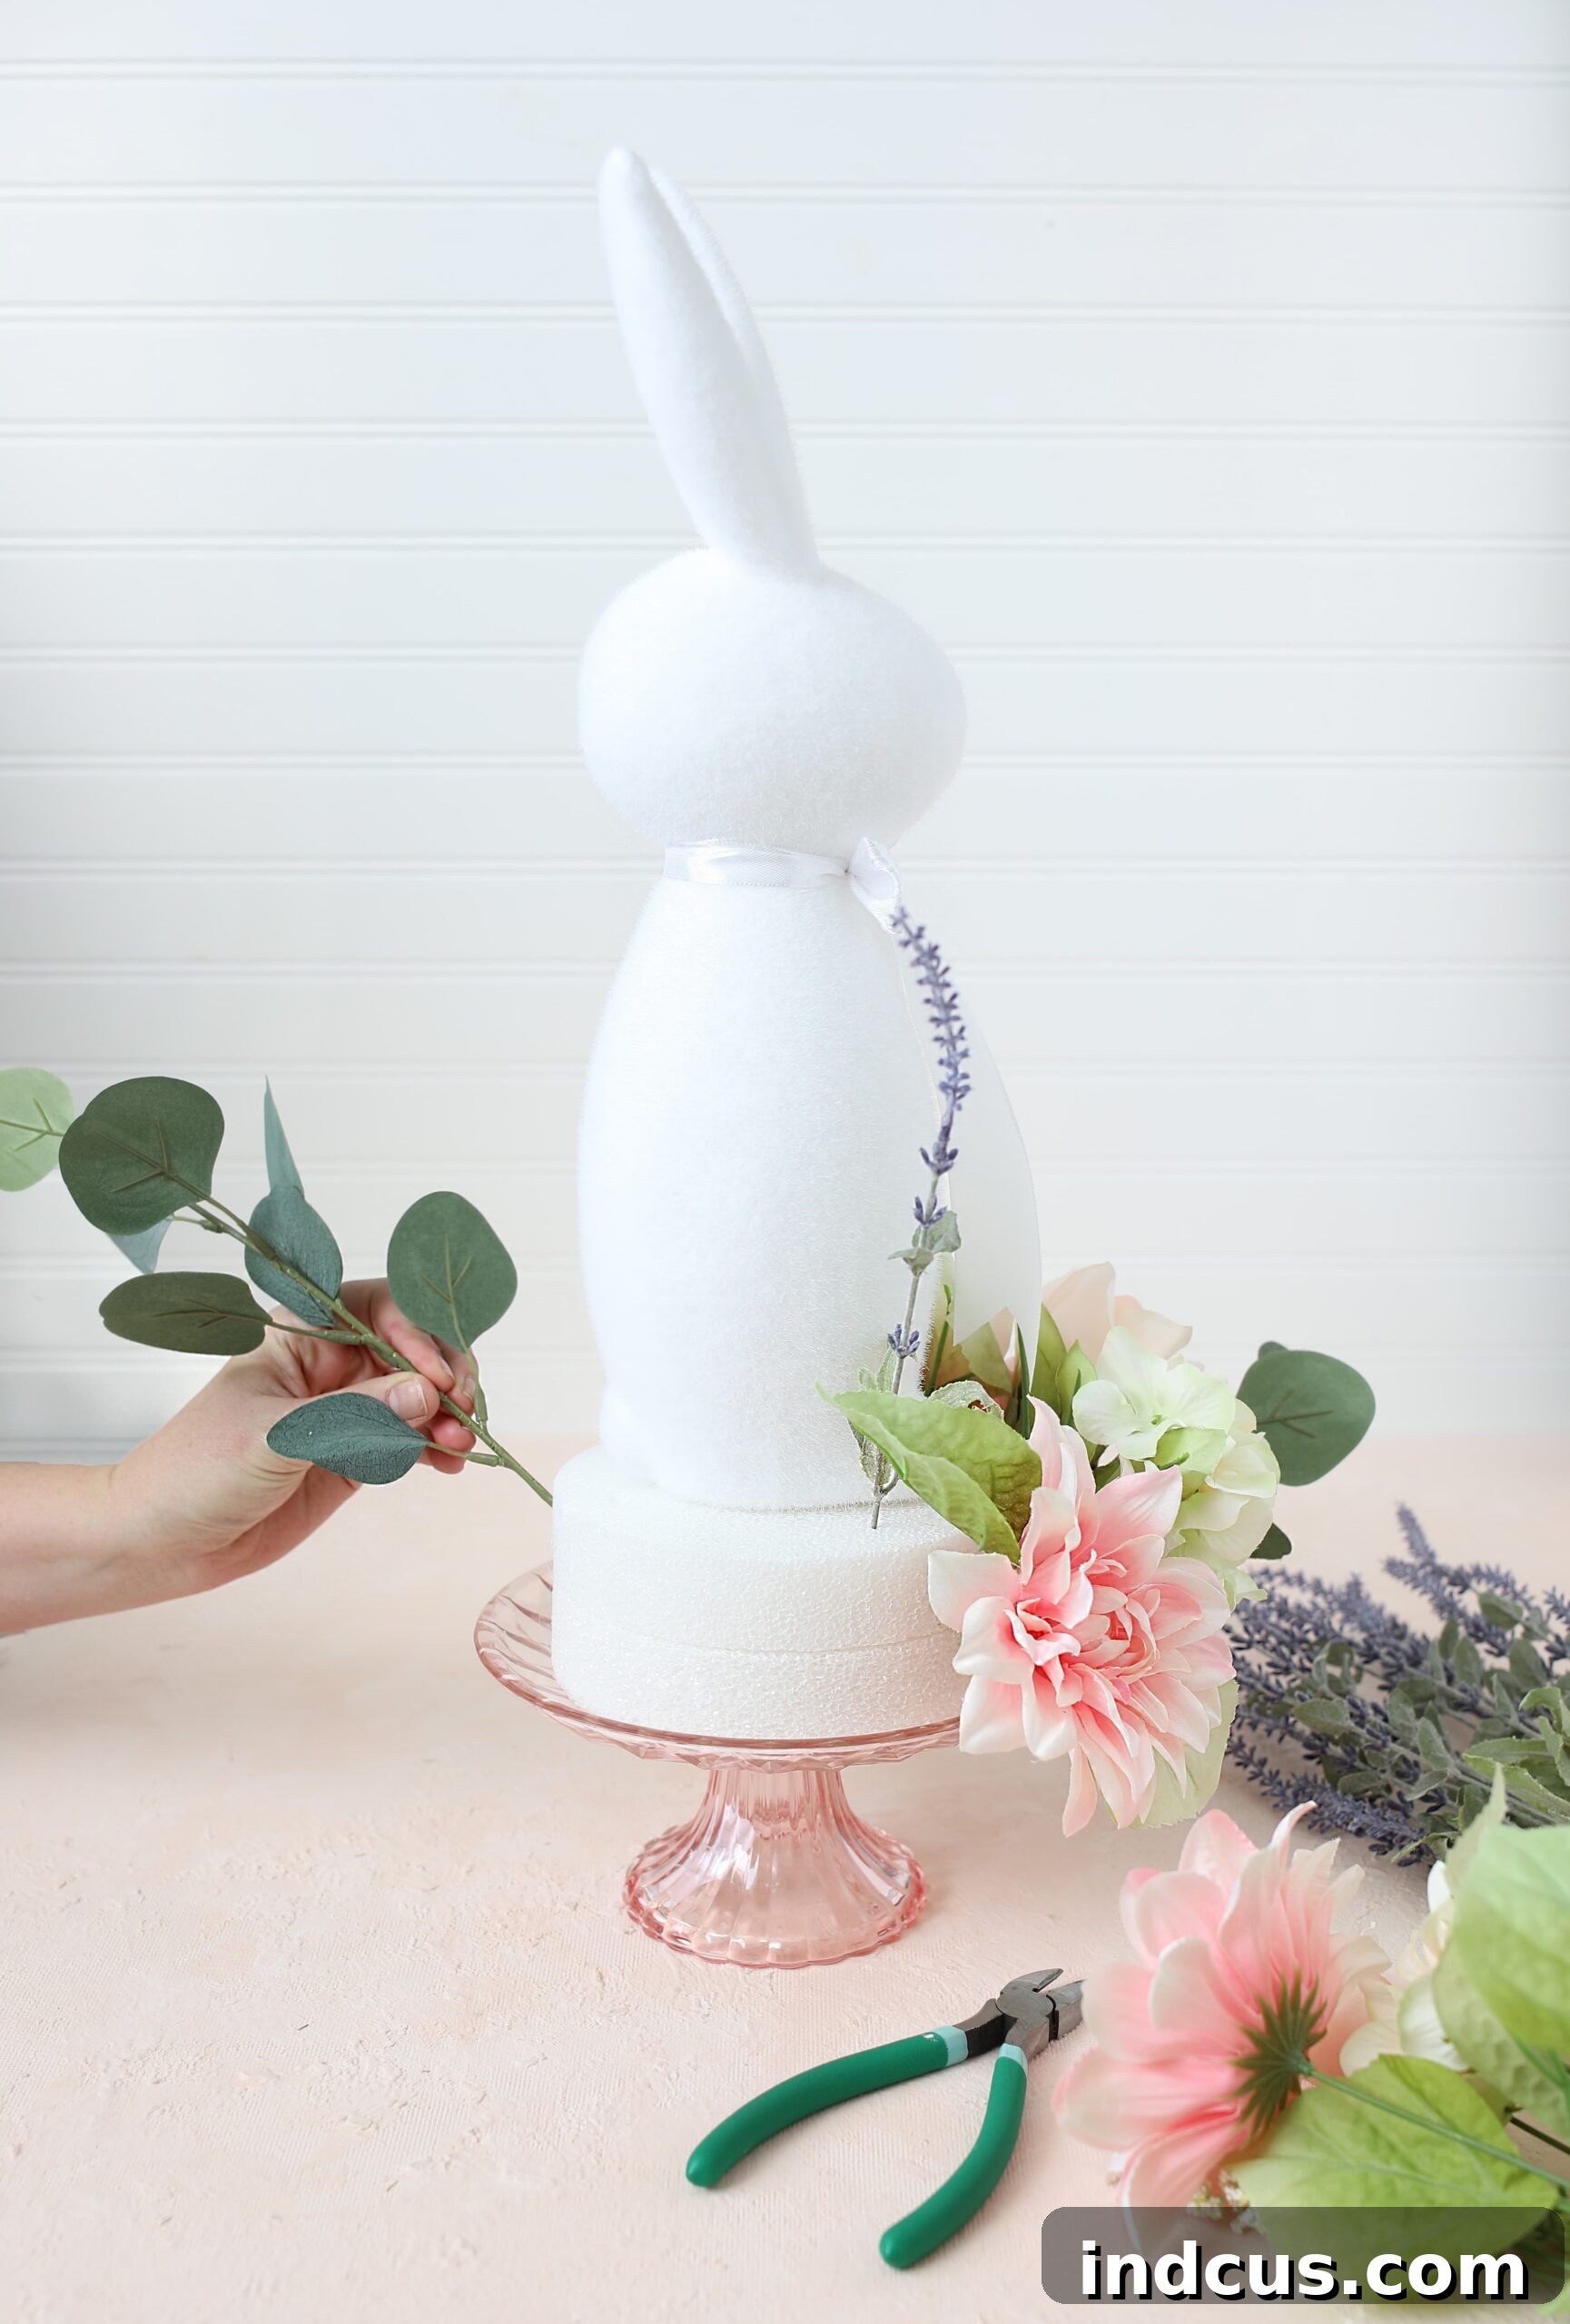
Begin by attaching two craft foam rounds together using your hot glue gun. This crucial step creates a thicker, more stable, and robust base, providing ample depth for securely inserting your floral stems. Once the foam rounds are firmly joined, carefully center them on your chosen cake plate or tiered stand. Apply a generous, even amount of hot glue to the bottom surface of the foam, then firmly press it onto the cake plate, ensuring it’s perfectly centered and well-adhered. Hold it in place for a few moments to allow the glue to cool and set completely before moving to the next step. This stable foundation is paramount for the longevity and overall balance of your exquisite centerpiece.
Step 2: Position Your Chosen Figurine
Next, carefully attach your bunny figurine (or chosen decorative element) to the very top center of the craft foam base. Apply a sufficient amount of hot glue to the base of the figurine, making sure to cover enough surface area for a strong, lasting hold. Press the figurine firmly into the foam, holding it steadily in place until the glue cools and sets completely. This step establishes the main height and central focal point of your arrangement. Take a moment to ensure it’s perfectly upright, centered, and visually balanced from all angles, as this will guide the placement of your florals.
Step 3: Artfully Arrange Your Florals and Greenery
Now for the most creative and fun part – bringing your arrangement to life with vibrant flowers and lush greenery! Using your floral shears, carefully cut individual floral stems from their bushes. Vary the stem lengths slightly to create natural depth, dimension, and movement within your arrangement. Begin by inserting the longer, fuller pieces of greenery (like eucalyptus) into the craft foam around the base of the bunny, establishing a lush, organic foundation. Then, strategically add your main floral blooms, working your way around the figurine. Aim to cover all visible areas of the craft foam, creating a dense, vibrant, and seamless “garden” effect. Don’t be afraid to experiment with placement, stepping back frequently to assess your progress and make adjustments. Keep adding flowers and greenery until you are entirely satisfied with the fullness, balance, color distribution, and overall aesthetic of your floral arrangement. For a cohesive spring or Easter look, traditional pastel colors like soft pink, delicate lavender, light blue, and cheerful yellow work beautifully together. I particularly love incorporating lavender for its unique delicate texture and soothing hue – it’s become a personal favorite, adding an elegant touch!
Design Variations: Unlocking Endless Customization Possibilities
One of the most exciting aspects of this DIY centerpiece is its incredible adaptability. Hobby Lobby’s diverse spring collection means there are countless ways to customize your creation, allowing it to perfectly complement any decor style or personal preference. During my inspiring visit, I couldn’t resist bringing home three different bunny figurines, each inspiring a unique aesthetic and demonstrating the vast potential for customization. Let’s explore some inspiring variations you can easily recreate or use as a springboard for your own imaginative designs.
Whimsical Gingham Charm: A Playful Spring Statement
For a centerpiece that truly exudes playful country charm and a touch of vintage flair, consider incorporating a delightful gingham-patterned bunny. This style pairs wonderfully with bright, cheerful flowers that pop with color. In this particular variation, we showcased a lovely gingham Easter bunny and complemented it with vibrant blue and yellow flowers, creating a fresh, inviting, and utterly charming display. The crispness of the gingham fabric combined with the cheerful pastel blooms makes for a truly delightful spring statement piece that is guaranteed to bring a smile to anyone’s face and infuse your space with joyful energy.
Elegant Neutral Sophistication: A Serene & Modern Aesthetic
If your home decor leans towards a more subdued, minimalist, and sophisticated palette, a neutral-toned centerpiece will be the perfect addition to your space. This option artfully focuses on texture, subtle tonal variations, and organic forms rather than bold, high-contrast hues. For this look, pair a rustic or creamy off-white bunny with delicate white, cream, and muted green florals. Perhaps add some natural elements like dried grasses, subtle branches, or even wisps of cotton for an even more organic and tactile feel. This variation offers a serene, elegant, and timeless look that blends seamlessly into any minimalist, modern farmhouse, or Scandinavian-inspired aesthetic, proving that impactful and beautiful decor doesn’t always require a splash of vibrant color.
Tips for Further Customization & Thematic Adaptation
The true genius of this craft truly lies in its endless possibilities for personalization and adaptation. Beyond adorable bunnies and classic spring florals, you can easily adapt this core concept for almost any season, holiday, or personal preference. Let your creativity soar and inspire you to explore the vast world of DIY decor with these innovative ideas:
- Seasonal Transformations for Year-Round Charm:
- Summer Elegance: Swap the bunny for a charming lighthouse, a rustic sailboat, or a collection of polished seashells. Surround it with bright, cheerful sunflowers, voluminous hydrangeas, or vibrant coastal-themed greenery for a refreshing summer vibe.
- Fall Harvest Delight: Embrace the rich colors of autumn by incorporating miniature pumpkins, decorative gourds, or a whimsical scarecrow figurine. Adorn the base with luxurious autumnal florals like deep red mums, golden sunflowers, and richly textured fall foliage in oranges, reds, and deep greens.
- Winter Wonderland/Christmas Cheer: A festive Santa, a graceful reindeer, or a jolly snowman figurine would be absolutely charming. Embellish the arrangement with natural pinecones, glistening evergreen branches, classic poinsettias, and shimmering berries for a magical holiday display.
- Diverse Figurine Alternatives:
Don’t limit yourself to bunnies! The craft store aisles are brimming with delightful alternatives to personalize your centerpiece further:
- Spring Chicks or Birds: Perfect for a whimsical, nature-inspired display that celebrates new life.
- Religious Symbols: If celebrating Easter’s spiritual aspect, a thoughtfully chosen cross figurine can be a beautiful and deeply meaningful focal point.
- Nursery or Baby Shower Theme: A sweet baby animal (like a lamb or duckling), a tiny rubber duck, or even a small pair of baby shoes surrounded by soft pastel flowers makes an adorable and sentimental centerpiece.
- Themed Miniatures: Small wooden signs with inspiring quotes, miniature birdhouses, or other unique table decorations found at craft stores can add significant character and narrative to your display.
- Exploring Floral Choices:
While high-quality faux flowers offer remarkable longevity and ease of use, consider mixing in fresh blooms for truly special occasions or specific aromas. You can also experiment with different flower types, colors, and textures to create varying moods and styles:
- Wildflower Mix: For a charmingly rustic, bohemian, or garden-fresh look that feels effortlessly natural.
- Monochromatic Scheme: Use various shades and tints of a single color (e.g., different pinks or blues) for sophisticated elegance and a cohesive aesthetic.
- Bold & Bright: Opt for vibrant fuchsias, electric oranges, and tropical teals for a modern pop of color and an energetic, contemporary feel.
- Innovative Base Options:
Beyond traditional cake stands, explore other elevated surfaces to serve as your centerpiece’s foundation:
- Wooden Slices: For an earthy, natural, and rustic appeal, perfect for farmhouse or woodland themes.
- Pedestal Vases: If you prefer a more classical, refined height and sculptural elegance for your display.
- Decorative Trays: For a slightly lower, wider display that can be easily moved and styled alongside other table elements.
- Creating Miniature Versions:
Extend the charm and personalization to individual place settings! Use smaller cupcake stands or even elegant espresso cups with tiny figurines (like mini decorative eggs or small birds) and a few delicate sprigs of flowers. These miniature arrangements can double as adorable place cards, thoughtful party favors, or simply charming accents, adding a personal and memorable touch to your table decor.
The key to successful customization is to think outside the box and combine elements that genuinely resonate with your personal style and the specific atmosphere you wish to create. Every craft store aisle holds a wealth of potential inspiration, just waiting for your creative touch to transform it into something extraordinary.
Spring Centerpiece Video Tutorial
For those who prefer a visual guide, watch the comprehensive video tutorial below to see each step of this beautiful spring centerpiece coming to life. It offers additional practical tips, a dynamic view of the crafting process, and invaluable insights into achieving the perfect floral arrangement.
(Video Placeholder: Embed your video here using your preferred video platform’s embed code.)
Conclusion: Crafting Happiness, One Centerpiece at a Time
As we’ve journeyed through the creation of this charming floral centerpiece, it becomes abundantly clear that crafting is more than just assembling materials; it’s about infusing your living space with personality, celebrating the beauty of the seasons, and finding immense joy and satisfaction in the creative process. Whether you choose the classic pastel bunny, the rustic neutral look, or venture bravely into an entirely new thematic adaptation, your handmade centerpiece will undoubtedly become a cherished part of your home decor, sparking conversations and admiration.
This project is a testament to the powerful idea that beauty doesn’t have to be complicated, expensive, or mass-produced. With a few simple supplies, a dash of imagination, and a willingness to create, you can craft something truly special and unique. We sincerely hope this tutorial has not only equipped you with the practical skills to make this particular centerpiece but has also profoundly inspired you to explore the vast and rewarding world of DIY home decor. Remember, happiness is indeed something you make, and there’s immense, tangible satisfaction in seeing your creative visions bloom into beautiful, tangible reality. Go forth, create with confidence, and let your home reflect the unique beauty and personal touch you cultivate!







