Unlock Your Creativity: Master Custom Screen Print Stencils at Home with IKONART
For every passionate crafter, the quest for perfection often leads to innovative tools that transform creative visions into tangible realities. If you’ve spent countless hours meticulously weeding vinyl, grappling with transfer tape, or struggling with the limitations of traditional stencils, prepare to embark on a revolutionary journey. Today, we’re diving deep into the world of the IKONART screen printing stencil kit – a groundbreaking technology poised to redefine your approach to custom crafting. Say goodbye to frustrating plastic and vinyl; the future of personalized stenciling is here, and it’s nothing short of AMAZING!
This post is proudly sponsored by IKONART Stencils. All insights, opinions, and crafting ideas expressed are genuinely my own. Please note that affiliate links may be utilized throughout this content.
At the heart of the IKONART system lies a truly ingenious technology. These custom screen print stencils are crafted from specialized, light-sensitive materials that undergo a remarkable transformation when exposed to ultraviolet (UV) light. Imagine printing your desired design in crisp black ink onto a special film. When this film is placed over the IKONART stencil material and exposed to UV light, the black areas of your design block the light, preventing those specific parts of the stencil from hardening. Conversely, the surrounding areas, exposed to the UV light, cure and become a durable, sturdy plastic. The magic truly happens during the wash-out phase: the unexposed areas – those corresponding to your black design – dissolve away, revealing a fine, intricate mesh perfect for screen printing. This innovative process allows for unparalleled detail and precision, making even the most complex designs achievable right from your home.
Why IKONART Stencils Are a Game-Changer for Home Crafters and Small Businesses
The benefits of integrating IKONART stencils into your crafting repertoire are vast and transformative. This isn’t just another stencil; it’s a versatile tool that empowers you to create with newfound freedom and efficiency.
- Unleash Limitless Customization: The ultimate dream for any crafter is to bring their unique ideas to life without compromise. With IKONART, if you can print it, you can turn it into a high-quality stencil! This means designs from your favorite software (like Procreate, Canva, or Cricut Design Space), scanned hand-drawn artwork, or even intricate patterns found online can all be transformed into reusable stencils. The possibilities for personalized gifts, bespoke home decor, or unique merchandise are truly endless.
- Remarkable Reusability: Unlike single-use vinyl or flimsy plastic stencils, IKONART stencils are designed for longevity. Properly cared for, these durable stencils can be used dozens, even hundreds of times, making them an incredibly cost-effective and environmentally friendly choice in the long run. This reusability is a major boon for anyone looking to create multiple items with the same design or experiment with different colors and surfaces.
- Effortless, Frustration-Free Process: Say goodbye to the tedious and time-consuming “weeding” process synonymous with vinyl cutting. There’s no delicate peeling away tiny pieces, no wrestling with intricate designs. Similarly, the hassle of transfer tape becomes a distant memory. IKONART streamlines your workflow, allowing you to focus purely on the joy of creation.
- No “Bridges” or Design Compromises: Traditional stencils often require “bridges” to connect isolated elements of a design (like the center of an “O” or “A”). This often leads to design compromises or visible gaps. IKONART’s mesh technology completely eliminates the need for bridges, allowing you to create flawless, uninterrupted designs that look professionally produced.
- Seamless “Islands” and Intricate Details: Complementing the absence of bridges, IKONART excels at creating “islands” – those perfectly isolated elements within a design. This capability, combined with the fine mesh, means you can achieve incredibly detailed and complex designs that would be impossible or exceedingly difficult with any other home-based stencil method. Think delicate typography, intricate mandalas, or highly detailed illustrations.
- Unparalleled Versatility Across Surfaces: From soft fabrics to hard woods, delicate glass to robust metals, and even ceramics, IKONART stencils adhere beautifully to an astonishing array of surfaces. This makes them ideal for diverse projects, whether you’re customizing t-shirts, personalizing wooden signs, embellishing glassware, or adding unique touches to pottery.
- Compatible with Water-Based Paints: IKONART stencils are designed to work seamlessly with virtually any type of water-based paint. This includes standard acrylic craft paints, fabric paints, chalk paints, and even ceramic paints, offering you immense flexibility in your choice of medium.
- Repositionable Adhesive Backing: The gentle adhesive backing on IKONART stencils allows for easy placement and repositioning on your project surface. This is invaluable for ensuring perfect alignment, especially when working on repeating patterns or multi-layered designs. It minimizes errors and enhances the overall precision of your work.
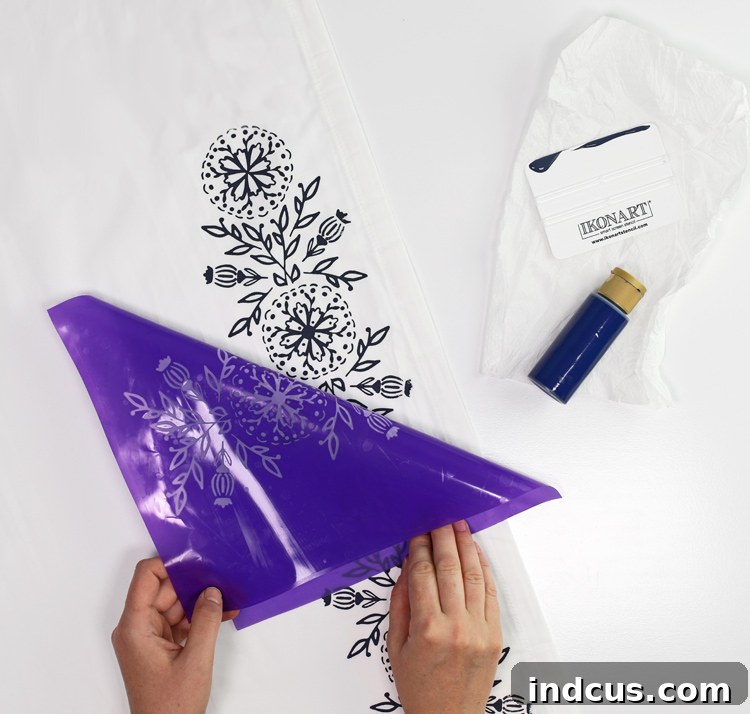
Isn’t this truly revolutionary? I confess, the moment I experienced the effortless precision and incredible detail possible with IKONART, I knew my days of traditional stenciling were forever changed. While the initial investment might seem a little higher than a simple pack of plastic stencils, for small shop owners, dedicated crafters, or anyone serious about producing professional-quality custom items, the reusability and unmatched design capabilities make it an absolutely worthwhile investment. The level of detail you can achieve is simply unparalleled. *heart eyes*
Everything You Need to Get Started: The IKONART Custom Stencil Kit
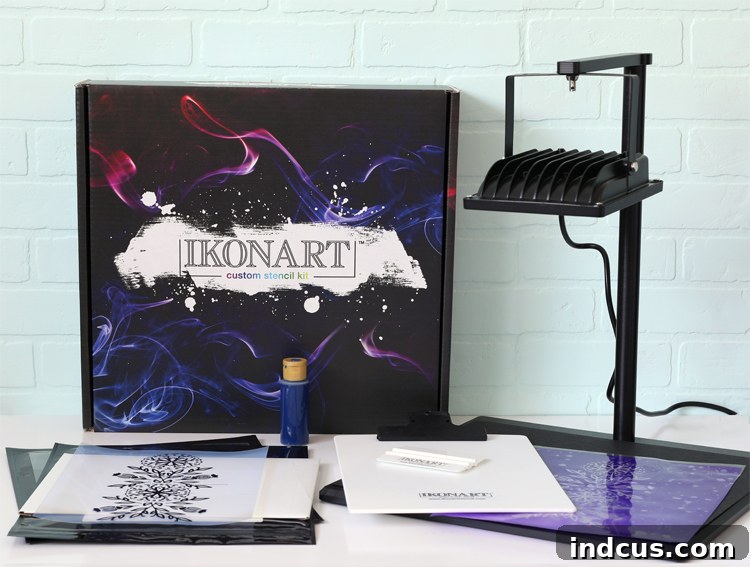
One of the best aspects of the IKONART Custom Stencil Kit is its comprehensiveness. It arrives with every essential tool and material you need to dive into your first screen printing project right out of the box. This thoughtful inclusion eliminates the guesswork and allows you to begin creating immediately.
Here’s a detailed look at what’s included in your kit:
- Exposure Stand: This specially designed stand ensures your UV LED light is positioned at the perfect distance from your stencil film for optimal and consistent exposure, which is crucial for stencil quality.
- UV LED Light: The heart of the IKONART system, this powerful LED light cures the light-sensitive stencil film, defining your design with precision.
- IKONART Stencil Film (10″ x 12″ 5-Sheet Pack): These are your blank canvases, ready to be transformed into custom stencils. The generous size allows for a variety of project scales.
- Inkjet Printer Film (8.5″ x 11″ 5-Sheet Pack): Specifically designed for inkjet printers, these films are optimized to produce dense, UV-blocking black prints of your designs.
- Laser Printer Film (8.5″ x 11″ 5-Sheet Pack): For those who use laser printers, this film ensures crisp, opaque prints essential for the exposure process.
- IKONART Clipboard: A handy tool for managing your stencil film during washing and drying, keeping it flat and secure.
- IKONART Plastic Squeegee: An indispensable tool for evenly spreading paint across your stencil, ensuring a clean and consistent print every time.
- Exposure Stand Setup Guide & User Guide: Comprehensive instructions that walk you through assembly, the stencil-making process, and provide valuable tips for success.
And because I believe everyone should experience this crafting revolution, I’ve secured a fantastic discount code just for you! Head over to ikonartstencil.com and simply enter THECRAFTPATCH at checkout to receive an incredible 15% off your entire order. Don’t miss out on this opportunity to elevate your crafting!
Your First IKONART Project: A Step-by-Step Curtain Stenciling Tutorial
To truly grasp the simplicity and effectiveness of the IKONART system, let’s walk through a complete project together. Today, I’m tackling a common dilemma: expensive home decor. I fell head over heels for a pair of curtains from Anthropologie, priced at a staggering $150 per panel (ouch!). To add to my dismay, they quickly sold out. Unable to shake them from my mind, I decided to take matters into my own hands and create my own DIY version with a sophisticated, custom screen print.
My first step was to design a beautiful Scandinavian-inspired floral pattern. This design captures the aesthetic I adored in the Anthropologie curtains, and I’m excited to share it with you. If you’re inspired to use it for your own projects, you can download the design file here. (A quick note: if you’re attempting to access this file from a work or school district computer, you might encounter restrictions. Please try again from a personal device at home.)
I’ve meticulously broken down each stage of the process below, ensuring you have all the guidance needed. For a dynamic visual demonstration, feel free to skip ahead to the video tutorial.
Crafting Your Custom Screen Print Stencil: The IKONART Process
Step 1: Print Your Design onto the Printer Film
Begin by printing your chosen design onto the specialized PRINTER FILM included in your IKONART kit. The kit thoughtfully provides films compatible with both inkjet and laser printers. For the best results, ensure your printer settings are configured for the highest possible contrast and darkest black output. This opaque black is crucial for blocking UV light effectively during the exposure phase. Once you’ve used the initial supply, you can easily reorder the specific film type that suits your printer.
Step 2: Precisely Expose Your Stencil Film to UV Light
Set up the UV LED light on a stable, flat surface, ensuring it’s free from vibrations. Place the black cardstock (also included for optimal contrast) onto the base of the exposure stand. Carefully lay your IKONART stencil film, shiny side down, onto the black cardstock. Next, position your printed artwork on top of the stencil film. If your design has a specific orientation (like text), make sure you can read it correctly. Finally, cover everything with the clear exposure sheet found in your film pack. Power on the UV light. For designs printed with an inkjet printer, expose for precisely 35 seconds. If you used a laser printer, a shorter exposure time of 30 seconds is required. Accurate timing is paramount here; under-exposure can lead to your design washing out too much, while over-exposure might prevent it from washing out at all.
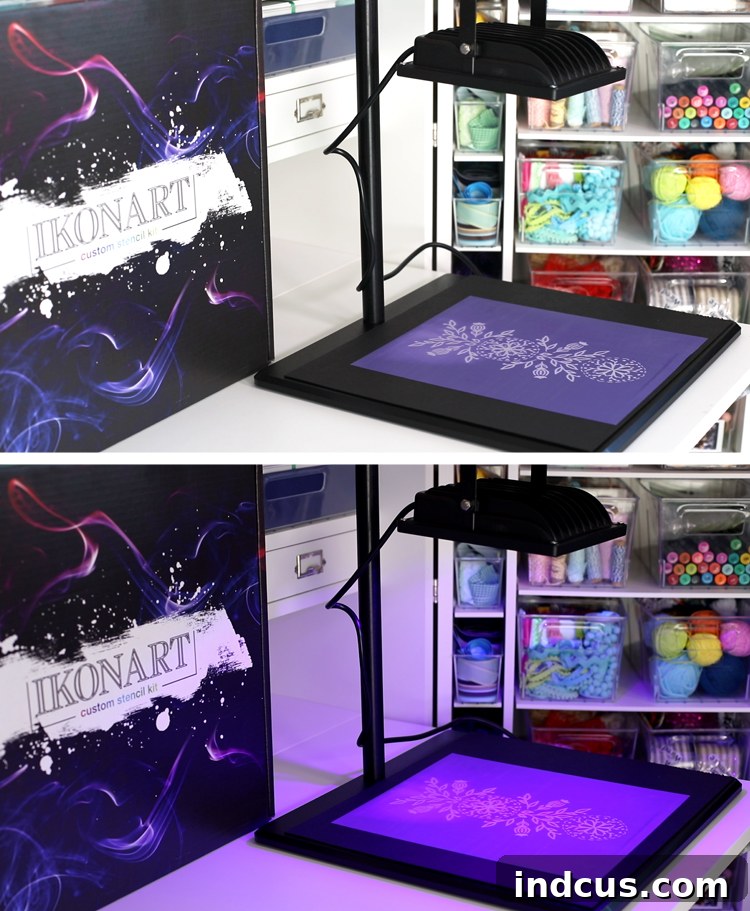
Step 3: Reveal Your Design Through the Wash-Out Process
Immediately after exposure, you won’t discern your design on the stencil film – patience is key! Attach the exposed stencil film to the provided clipboard. Now, take it to a sink and use a spray nozzle with warm or hot water. Begin rinsing the stencil. As you wash, gently rub the surface with your fingers. Like magic, your design will gradually appear, transforming into a perfectly clear and crisp mesh. Continue washing until all the unexposed emulsion has dissolved, leaving your intricate design completely open and distinct. This is often the most satisfying part of the process!
Step 4: Dry and Cure for Enhanced Durability
Once your stencil is thoroughly washed, gently blot away excess water with a soft paper towel. Be careful not to rub vigorously, as the wet mesh is delicate. Hang the stencil to air dry completely for approximately 45 minutes. A crucial final step to maximize your stencil’s lifespan and durability is to cure it. Once the IKONART stencil film is bone dry, place it back under the UV light for an additional 60 seconds. This secondary exposure hardens the stencil further, making it robust and ready for repeated use.
Step 5: The Excitement of Stenciling!
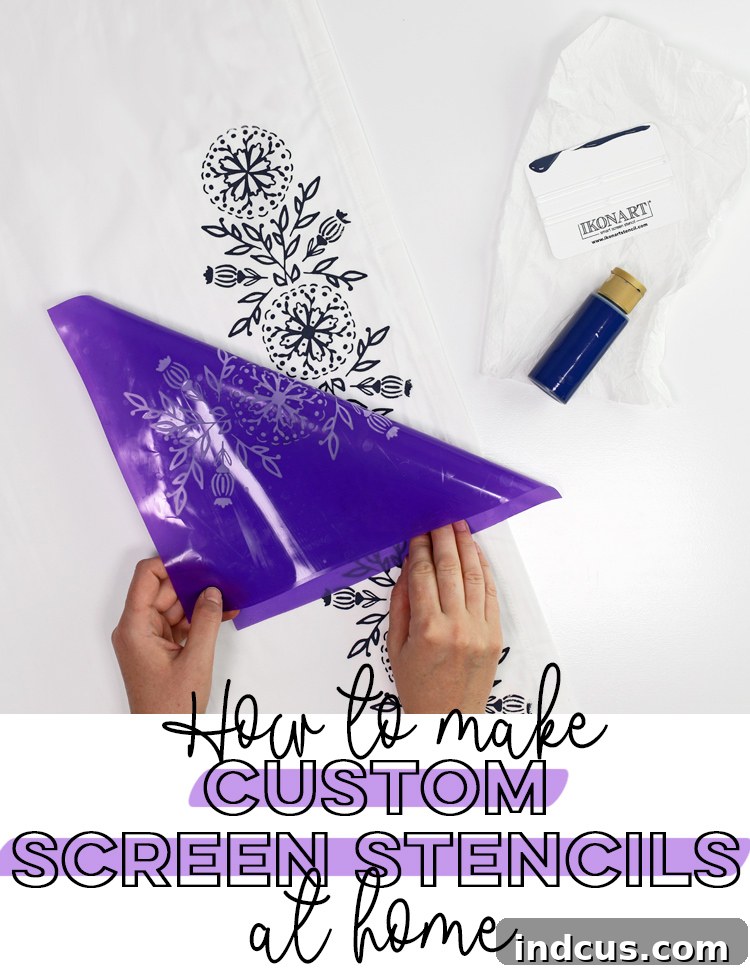
Now, the moment you’ve been waiting for! Carefully peel the clear, shiny carrier sheet from the back of your newly made stencil. Remember to save this sheet, as it’s essential for proper storage and reuse. Position your IKONART stencil onto your project surface, sticky side down, ensuring it adheres smoothly and is perfectly aligned. For paint application, dab a thin line of your chosen water-based paint (I used regular acrylic craft paint for my curtains) along one edge of the design. Then, using the IKONART squeegee, pull the paint firmly and evenly across the entire design area. Ensure every part of the mesh is covered with a consistent layer of paint. On my curtains, I learned the importance of thorough scraping; a few spots where the paint wasn’t pushed through the mesh well enough resulted in a slightly faded appearance. Lesson learned!
For this curtain project, I aimed for a beautiful, repeating pattern along the border. The repositionable nature of the IKONART stencil was invaluable here. I carefully peeled up the stencil, moved it to the next section, and repeated the painting process. Even after multiple applications, and without pressing it down as firmly as the first time, the stencil performed flawlessly, maintaining its adhesive quality and delivering clean prints.
Experience the Magic: IKONART Screen Stencil Video Tutorial
Words can only convey so much. To truly appreciate the simplicity and efficiency of the IKONART system, I highly recommend watching this concise 3-minute video. It beautifully demonstrates each step of the process in action, showcasing just how cool and easy this technology makes custom screen printing.
IKONART Screen Stencil Video Tutorial
The Stunning Results: Custom Curtains and Unbelievable Savings
The anticipation was almost unbearable as I waited for the paint to dry. Once complete, I couldn’t hang my brand new curtains fast enough!
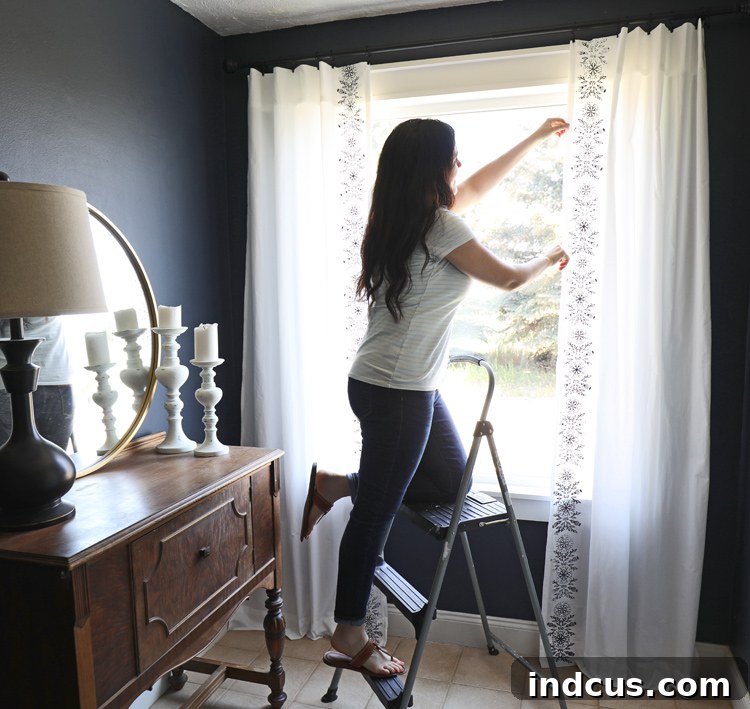
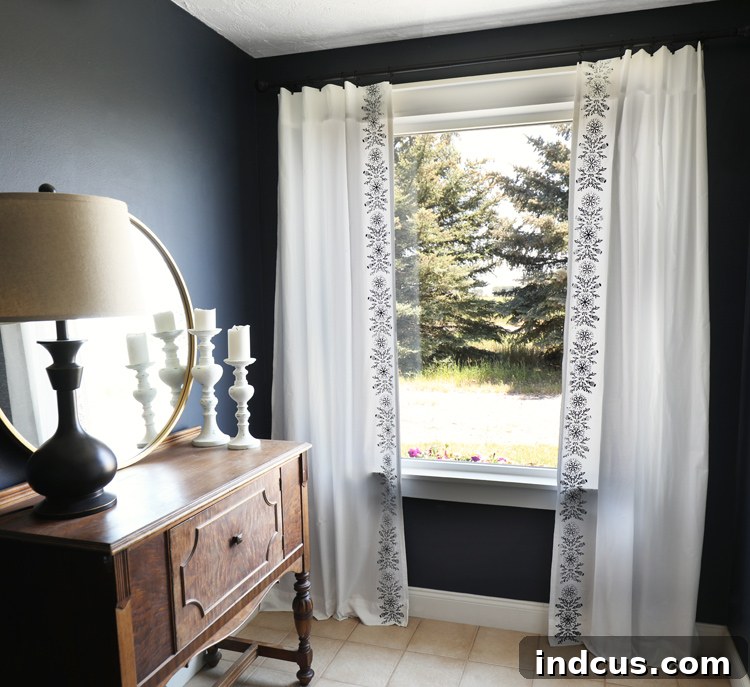
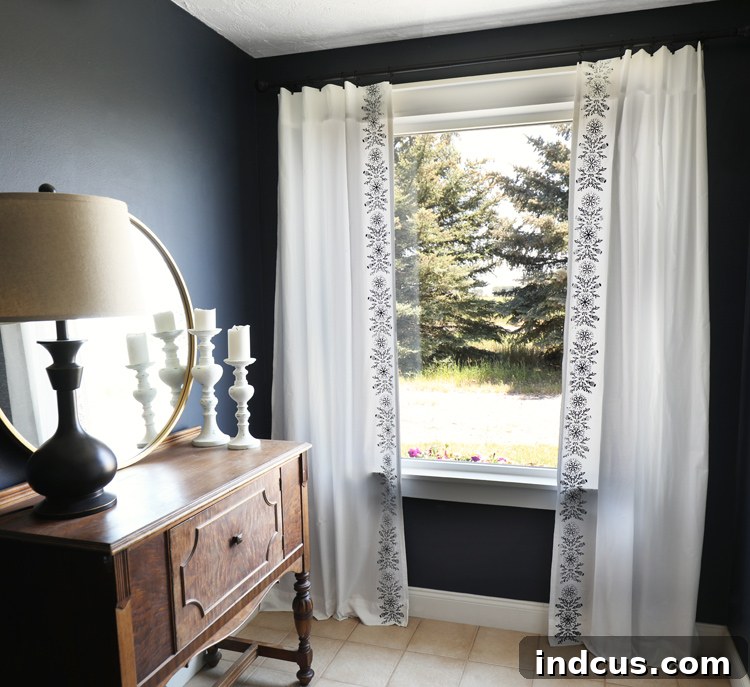
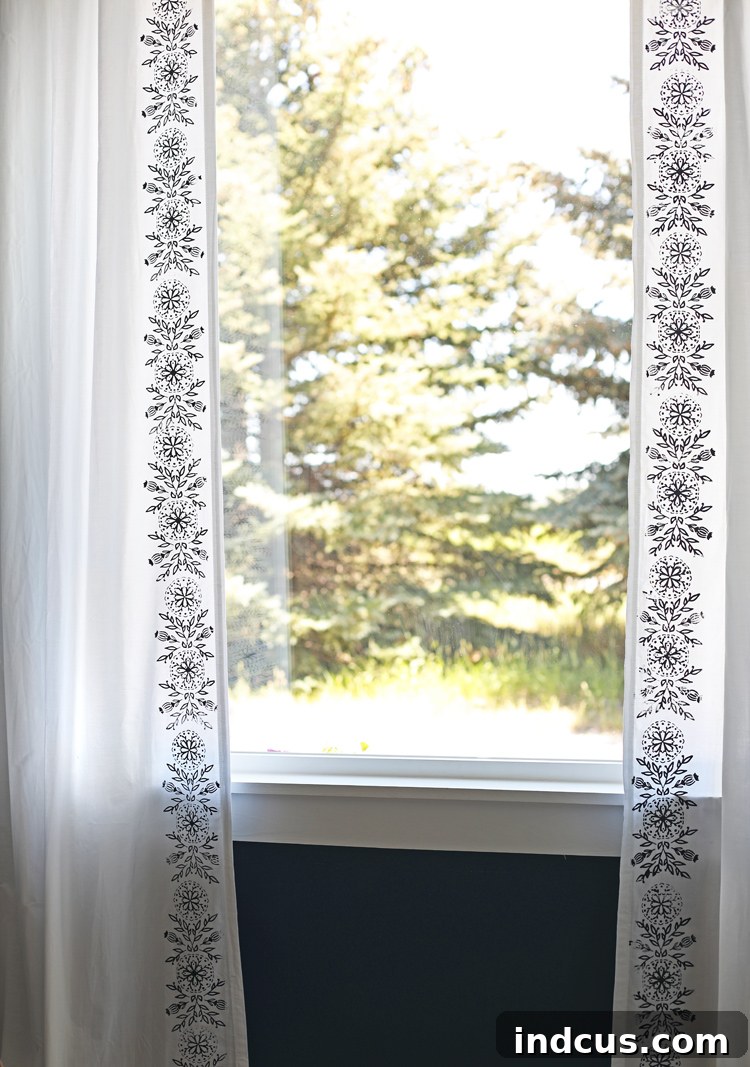
The outcome was absolutely breathtaking! They perfectly captured the chic, minimalist vibe of my original Anthropologie inspiration, and I genuinely loooooooove them more than I ever imagined. The best part? I crafted these stunning curtains from a single $10 flat sheet, simply cut in half. With the paint I already had on hand, this one project resulted in an astounding savings of $290! That means the IKONART stencil kit has already paid for itself, and then some. (Or at least, that’s the very convincing argument I presented to my husband! LOL.) The satisfaction of creating something so beautiful and functional, while saving a substantial amount of money, is truly unmatched.
Extending the Life of Your Stencils: Cleaning and Storage for Reuse
One of the most appealing features of IKONART stencils is their reusability. Once your project is complete, a quick clean is all it takes to prepare your stencil for its next creative adventure. Proper cleaning and storage are key to ensuring its longevity and maintaining its adhesive quality.
How to Clean and Store Your IKONART Stencil for Future Projects:
- Immediate Rinse: As soon as you’re finished stenciling, attach the stencil to your clipboard and thoroughly rinse off all excess paint under running water. Gently rub the surface with your fingers until all paint residue is gone and the mesh looks perfectly clean. Prompt cleaning prevents paint from drying and clogging the mesh.
- Reapply Carrier Sheet: While the stencil is still wet, place it sticky-side-up on a flat, clean surface. Carefully re-apply the clear carrier sheet that you set aside earlier, aligning it perfectly with the stencil.
- Smooth and Dry: Use your squeegee to gently smooth out any excess water and air bubbles from between the stencil and the carrier sheet. This helps the stencil re-adhere properly to its backing. Allow the stencil to dry completely while attached to the carrier sheet before storing it flat in a cool, dry place.
The Verdict: IKONART is a Must-Have for Every Creative
To say I’m impressed with the IKONART stencil kit would be an understatement. It has genuinely transformed my crafting process, making what once felt like a complex endeavor remarkably easy and enjoyable. The finished product – in this case, my custom curtains – boasts such intricate detail and a professional aesthetic that there’s simply no way I could have achieved it with traditional vinyl or plastic stencils. This kit is a powerful tool for anyone looking to elevate their DIY projects, personalize gifts, or even launch a small crafting business.
Ready to revolutionize your crafting? Don’t forget to leverage your exclusive discount! Use the code THECRAFTPATCH at checkout to receive 15% off your entire order. Head over to ikonartstencil.com today and start creating!
Found this project inspiring? Be sure to save it for future reference by pinning the image below to your favorite crafting boards!