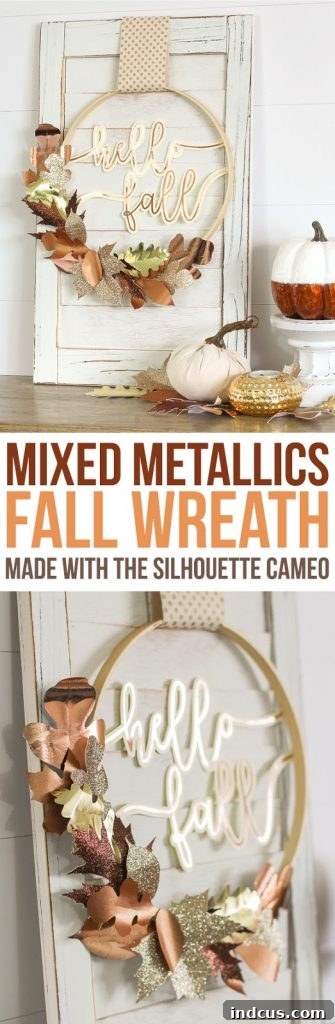
Craft a Dazzling Mixed Metallic Fall Wreath with Your Silhouette Cameo
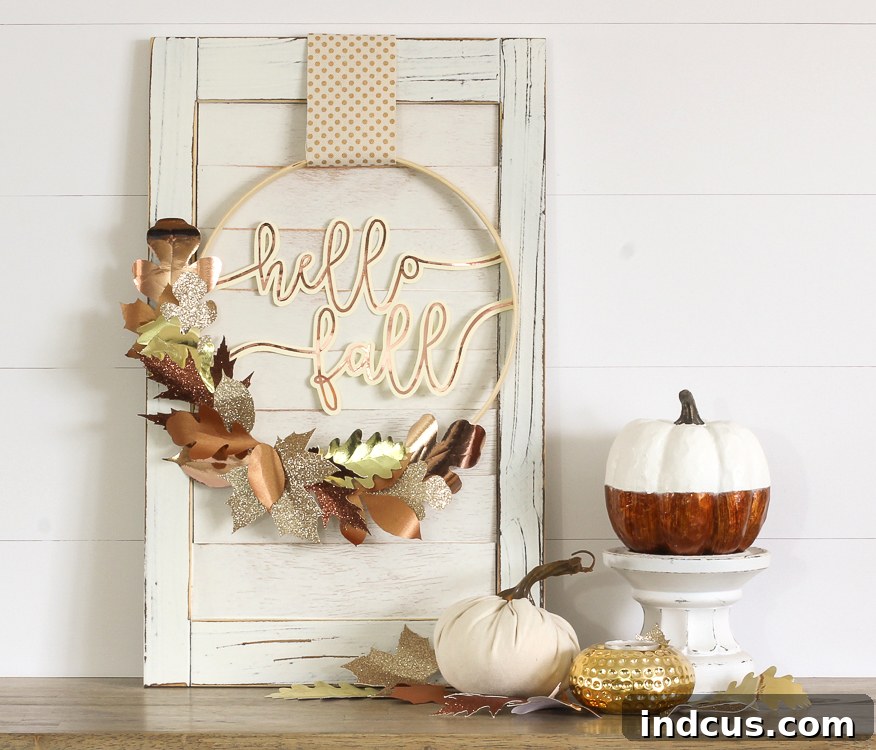
As the crisp autumn air settles in and the leaves begin their vibrant transformation, it’s the perfect time to infuse your home with the cozy spirit of fall. If you’re anything like me, the change of seasons signals the start of exciting new crafting adventures. This year, my goal was to elevate my fall decor with something truly unique and sparkling, stepping away from traditional color palettes to embrace the enchanting allure of mixed metallics. The result? A stunning mixed metallic fall wreath, crafted from exquisite scrapbook paper and shimmering rose gold vinyl, all brought to life with the precision of a Silhouette Cameo machine.
Forget the typical oranges and browns; imagine rich golds, warm coppers, elegant champagnes, deep bronzes, and trendy rose gold tones mingling together to create an eye-catching display. This project marries the warmth of autumn with a touch of modern glamour, making it a standout piece for any entryway, family room, or mantelpiece. In this detailed tutorial, we’ll guide you through each step, from designing your initial text to shaping realistic paper leaves, ensuring you can replicate this gorgeous DIY fall decoration with ease. Get ready to transform simple paper and vinyl into a sophisticated autumnal masterpiece that will undoubtedly capture attention and admiration.
We extend our sincere gratitude to our wonderful friends at Silhouette for their generous sponsorship of this creative endeavor. Their innovative tools make projects like this a joyous and successful experience.
This comprehensive, step-by-step tutorial will empower you to create your very own enchanting fall wreath, utilizing the beauty of metallic and glitter scrapbook papers alongside Silhouette’s captivating new Rose Gold Vinyl. Let’s dive in and craft something truly special for the autumn season!
Essential Materials for Your Metallic Fall Wreath Project
Before embarking on this creative journey, gather all the necessary supplies to ensure a smooth and enjoyable crafting experience. Each item plays a crucial role in bringing your vision of a sophisticated mixed metallic fall wreath to life. Having everything ready at hand will allow you to focus on the artistry of the project without interruption.
- 9″ Wooden Embroidery Hoop: This provides the foundational structure for your wreath, offering a classic and sturdy base.
- Silhouette Cutting Machine: Your indispensable tool for precise cuts of both paper and vinyl, transforming intricate designs into reality.
- Rose Gold Craft Vinyl: The star of the show for your elegant text, providing a stunning metallic shimmer.
- “Hello Fall” Silhouette Cut File: This pre-designed file makes creating the centerpiece text effortless. (Alternatively, you can design your own unique phrase).
- Transfer Tape: Essential for cleanly transferring your vinyl design onto its cardstock backing.
- Various Metallic or Glitter Scrapbook Papers: Select a captivating array of colors such as gold, copper, champagne, bronze, and rose gold. These papers will form your vibrant, dimensional leaves.
- Ribbon: Choose a complementary ribbon (mine was sourced from Hobby Lobby) to create a hanging loop, adding a final touch of charm.
- Hot Glue Gun + Gluesticks: Your go-to for securely attaching the various components of your wreath.
Step-by-Step Instructions to Create Your Mixed Metallic Fall Wreath
Follow these detailed instructions to craft a beautiful and unique mixed metallic fall wreath that will add a touch of sparkle and warmth to your autumn decor.
Step 1: Crafting the Central “Hello Fall” Text
We’ll begin by focusing on the exquisite focal point of your wreath: the “Hello Fall” lettering. This step involves a clever layering technique that adds depth and visual interest to your sentiment. Start by either downloading the “Hello Fall” cut file provided in the supply list or, for a personalized touch, design your own phrase in Silhouette Studio. If you’re designing your own, utilize the “Offset” tool to create a shadow layer, giving your text a beautiful, dimensional outline. Once your design is ready, cut the larger, back shadow layer from a sturdy piece of coordinating cardstock. This layer will provide stability and a subtle contrast. Next, cut the intricate top layer from the breathtaking rose gold craft vinyl. This vinyl is incredibly vibrant and will catch the light beautifully, making your message truly pop.
Doesn’t this rose gold vinyl have an absolutely stunning sheen? Its radiant sparkle instantly elevates any project!
After your design has been precisely cut by your Silhouette machine, it’s time for weeding. Carefully remove all the excess vinyl surrounding your “Hello Fall” design. Take your time with this process, especially with intricate details, to ensure a clean and professional finish. A weeding tool can be incredibly helpful here for pulling away tiny pieces without damaging the main design.
Once your vinyl design is perfectly weeded, apply transfer tape over the top. Press down firmly to ensure the vinyl adheres well to the tape. Then, slowly and carefully peel the transfer tape away, bringing your rose gold vinyl design with it, lifted cleanly from its white paper backing. This step is crucial for maintaining the precise alignment of your intricate lettering.
Now, meticulously layer the rose gold vinyl design on top of your cardstock backing. Position the vinyl just above the cardstock, “hovering” it until you are absolutely certain it is perfectly lined up with the shadow layer beneath. Once satisfied with the alignment, gently press the vinyl down onto the cardstock, working from the center outwards to minimize bubbles. Finally, carefully peel away the transfer tape, leaving your beautifully layered “Hello Fall” text securely in place. This layering technique adds wonderful dimension and a professional touch.
Step 2: Attaching the Text to Your Embroidery Hoop
With your two-layered “Hello Fall” text now complete and looking fabulous, it’s time to integrate it into the structure of your wreath. Carefully place the combined text piece inside the 9-inch wooden embroidery hoop. You’ll notice how the design’s swooshes naturally extend towards the hoop’s edges. This is where you’ll secure your text. Using your hot glue gun, apply a small dab of hot glue at the four strategic points where the text’s swooshes touch the inner rim of the hoop. Hold each spot briefly until the glue sets, ensuring the text is taut and centered within the hoop. This method provides stability while keeping the delicate lettering suspended, creating an elegant visual effect.
Once the glue has fully dried and the text is firmly attached, you may find small bits of the cardstock backing extending beyond the outer edge of the embroidery hoop. For a clean, professional finish, carefully trim any excess cardstock flush with the hoop’s edge. This meticulous detail ensures that your central text element is perfectly integrated and visually cohesive with the hoop, setting the stage for the beautiful leaves that will adorn it.
Step 3: Cutting a Bounty of Metallic Fall Leaves
Now for the heart of your wreath: the gorgeous metallic leaves. Head over to the Silhouette Design Store and explore their vast collection of leaf shapes. To create a natural and varied look for your wreath, I recommend downloading a few different styles and sizes. A mix of maple, oak, and perhaps some generic oval leaf shapes will add wonderful authenticity and visual interest. Once you’ve selected your favorites, import them into Silhouette Studio.
In the software, arrange your chosen leaf shapes to maximize paper usage. Think of it like a puzzle: nestle the leaves together, rotate them, and resize them slightly to fit as many as possible onto a single sheet of your metallic or glitter scrapbook paper. This not only saves material but also speeds up the cutting process. When arranging, remember you’ll need a good number of leaves to create a full and lush wreath, so plan to cut multiple sheets.
Before sending your design to the Silhouette machine, it’s crucial to adjust your cut settings. Glitter cardstock, while stunning, is often quite thick and dense. To achieve a perfectly clean cut without tearing or ragged edges, you’ll likely need a deeper blade setting and potentially a slower speed or a double cut option. Always perform a test cut on a scrap piece of the exact paper you’re using before committing to your main project. This ensures optimal results and saves you from wasting precious paper. Experiment with blade depth, force, and speed until you find the sweet spot that cleanly slices through the glitter cardstock, leaving you with perfectly shaped leaves ready for the next exciting step.
Step 4: Shaping Your Paper Leaves for Lifelike Realism
Cutting the leaves is just the beginning; the magic truly happens when you transform flat paper cutouts into dimensional, realistic foliage. This step is absolutely critical for elevating your wreath from a simple craft to a work of art. If you own an embossing tool with a ball tip, this is its moment to shine. However, if you don’t have one, don’t worry! The rounded end of a paintbrush handle works just as effectively, which is precisely what I utilized for this project.
To begin shaping, place your paper leaves on a soft work surface. A self-healing mat is ideal as it provides gentle resistance, but a folded-up dish towel or a soft foam mat will also work perfectly. This soft surface allows the paper to give slightly as you apply pressure, creating natural contours without tearing. Using the rounded tip of your chosen tool, gently press veins into each leaf. Start from the base of the leaf and drag the tool upwards and outwards, mimicking the natural vein patterns you see on real leaves. Apply varying amounts of pressure to create both prominent central veins and more delicate secondary veins. This subtle detail instantly adds texture and a sense of organic authenticity.
Following the veining, the next crucial step is to curl the leaf ends. Gently roll the edges of each leaf around a pencil or a thin dowel. This action introduces a subtle curve and undulation, preventing your leaves from looking stiff and artificial. Experiment with curling different parts of the leaf – some edges slightly inward, others gently outward – to create a dynamic and varied appearance, just like real leaves caught in a gentle breeze. This technique gives them a beautiful, lifelike movement and makes them appear as if they were just plucked from a tree.
Observe the powerful difference this shaping makes:
One leaf exhibits a natural curve and texture, embodying the grace of a real leaf, while the other remains flat and unmistakably paper. The transformation is remarkable! Once you’ve meticulously added veins and artfully curled the ends of all your paper cutouts, you will be left with a generous pile of breathtaking metallic leaves. These aren’t just paper shapes; they are small works of art, imbued with dimension and realism, ready to bring an unparalleled richness to your autumn decorations. The collective effect of these individually shaped leaves is truly amazing, promising a spectacular finished wreath.
Step 5: Adorning Your Hoop with Metallic Leaves
With your beautifully shaped metallic leaves now ready, it’s time for the exciting assembly phase. Begin by laying out your leaves around the embroidery hoop to visualize your arrangement. Consider how you want them to overlap, layer, and cascade to create a full, organic look. There’s no single “right” way to do this; allow your creativity to guide you. I recommend starting by gluing down a base layer of leaves, ensuring they partially cover the outer ring of the hoop, creating a sense of depth.
Once you have a general idea of your layout, use your hot glue gun to securely attach each leaf to the embroidery hoop. Apply a small dot of glue to the back of the leaf’s stem or base, then press it firmly onto the hoop. Hold it in place for a few seconds until the glue cools and sets. Vary the angles and directions of the leaves to mimic natural growth, ensuring some leaves point outward, others slightly inward, and many overlapping their neighbors. Mix your metallic and glitter paper colors strategically, scattering the rose gold, copper, gold, and champagne tones evenly to create a harmonious and rich visual tapestry. Continue adding layers of leaves, building up fullness and dimension around the hoop, until you are satisfied with the lush and opulent appearance of your wreath. The goal is to create a dynamic display where the different metallic shades catch the light from every angle.
Step 6: Adding the Finishing Touch and Displaying Your Wreath
Your stunning mixed metallic fall wreath is almost complete! The final step involves adding a ribbon for hanging, which not only makes it easy to display but also adds another element of style. Select a ribbon that complements your metallic color scheme—perhaps a deep bronze, a soft cream, or even a sheer ribbon with metallic threads. Cut a length of ribbon, approximately 12-18 inches, depending on how low you want your wreath to hang.
Fold the ribbon in half to create a loop, then thread the folded end under the top of the embroidery hoop, ideally between two leaves to keep it discreet. Pull the loose ends of the ribbon through the loop and tighten gently to secure it with a lark’s head knot. Alternatively, you can simply tie the ends of the ribbon into a sturdy knot at the top of the hoop, forming a loop. Ensure the knot is tight and secure enough to support the weight of your finished wreath. Once the ribbon is attached, adjust its length to your preference.
Now, it’s time for the exciting moment: finding the perfect spot to display your beautiful new fall decoration! Hang it on your front door to welcome guests, above your mantelpiece as a captivating focal point, on a gallery wall to add texture and shimmer, or in a cozy corner of your family room. The mixed metallic shades of rose gold, copper, and gold create a warm, inviting glow and a sophisticated sparkle that will beautifully enhance your autumn decor. Each leaf, carefully shaped and perfectly placed, contributes to a piece that truly celebrates the elegance of fall with a modern twist.
The interplay of the different metallic shades creates such a captivating and rich visual experience, doesn’t it? I am absolutely enchanted by the elegant sparkle and the undeniable warmth these leaves bring to my fall décor. Beyond adorning your embroidery hoop wreath, these versatile metallic leaves offer a myriad of other creative possibilities for seasonal embellishments. Imagine them strung together to form a dazzling garland, draped across a mantelpiece or window frame, or perhaps bundled together as charming jar fillers, creating a shimmering centerpiece. They would also look exquisite simply scattered artfully around a shelf arrangement or nestled in a decorative bowl, adding a touch of sophisticated shimmer to any surface. Their inherent beauty and dimensional quality make them perfect for elevating any autumn-themed display, bringing that desirable touch of mixed metallic luxury throughout your home.
Love this DIY fall wreath idea? Pin it to save for later or share with your crafty friends!