
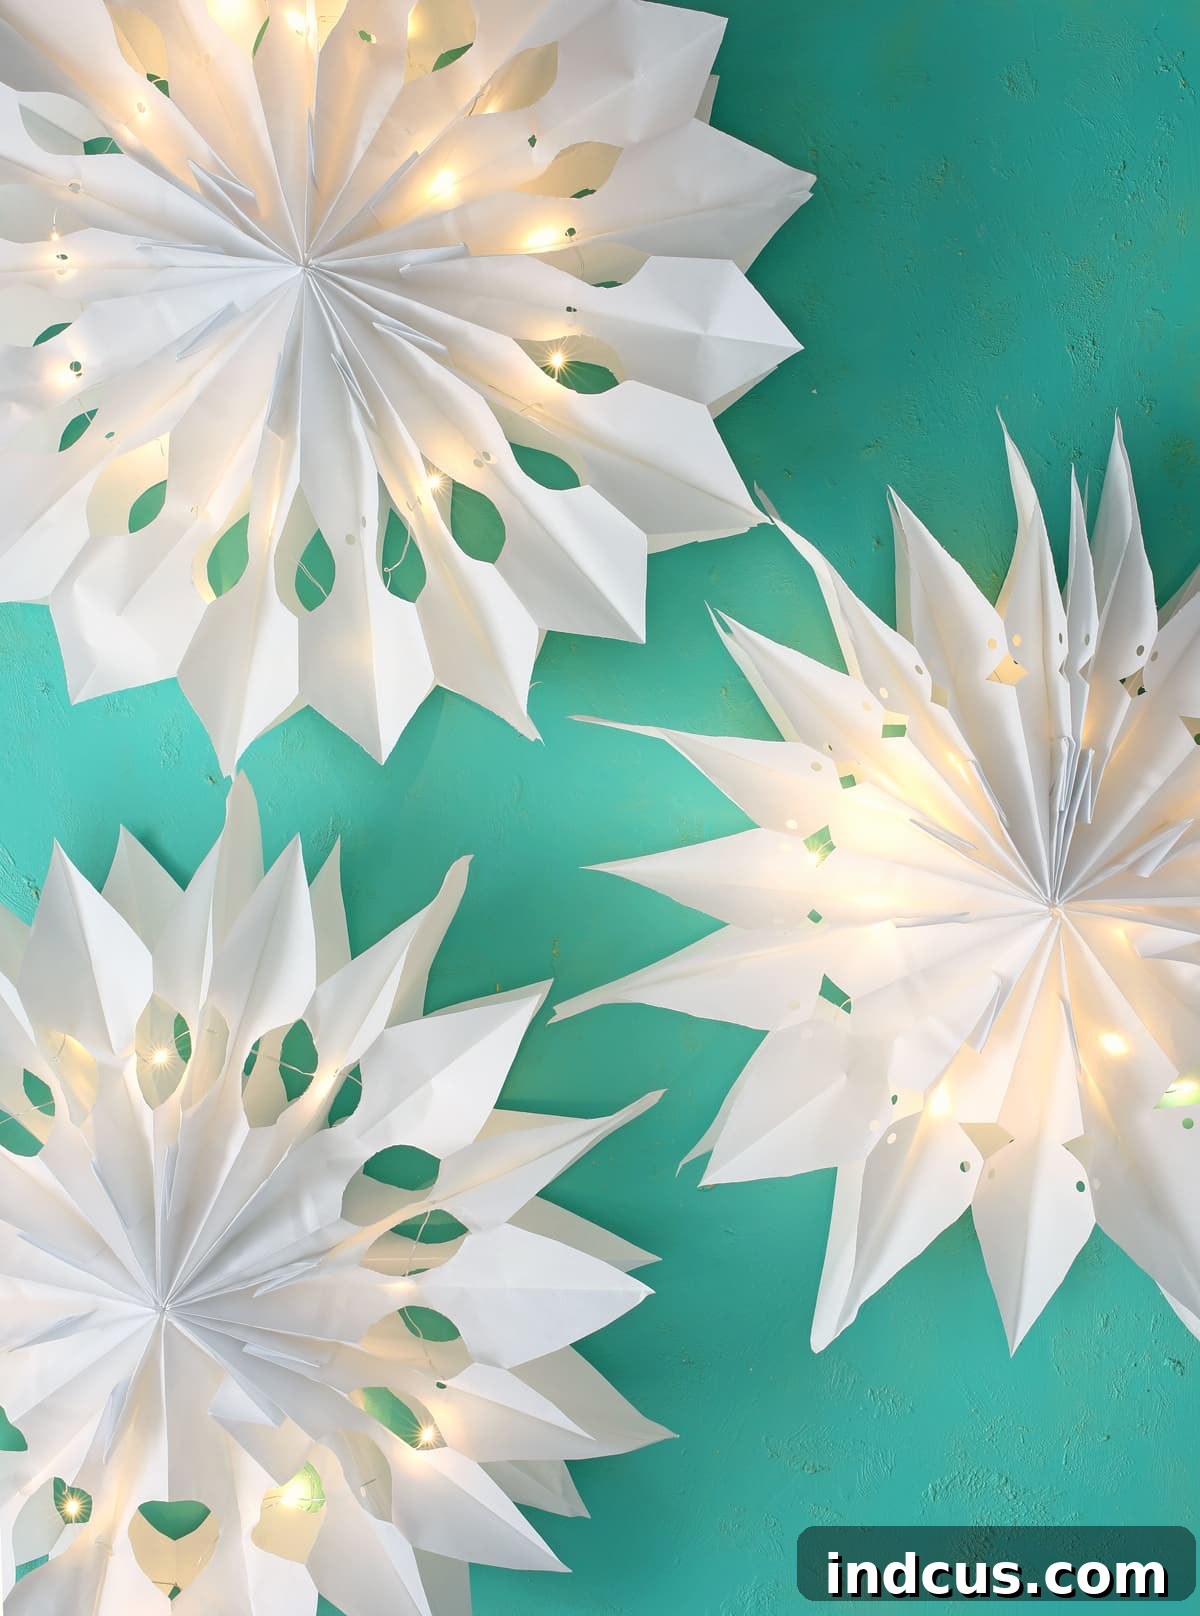
DIY Light-Up Paper Bag Stars: A Magical Craft for Enchanting Home Decor
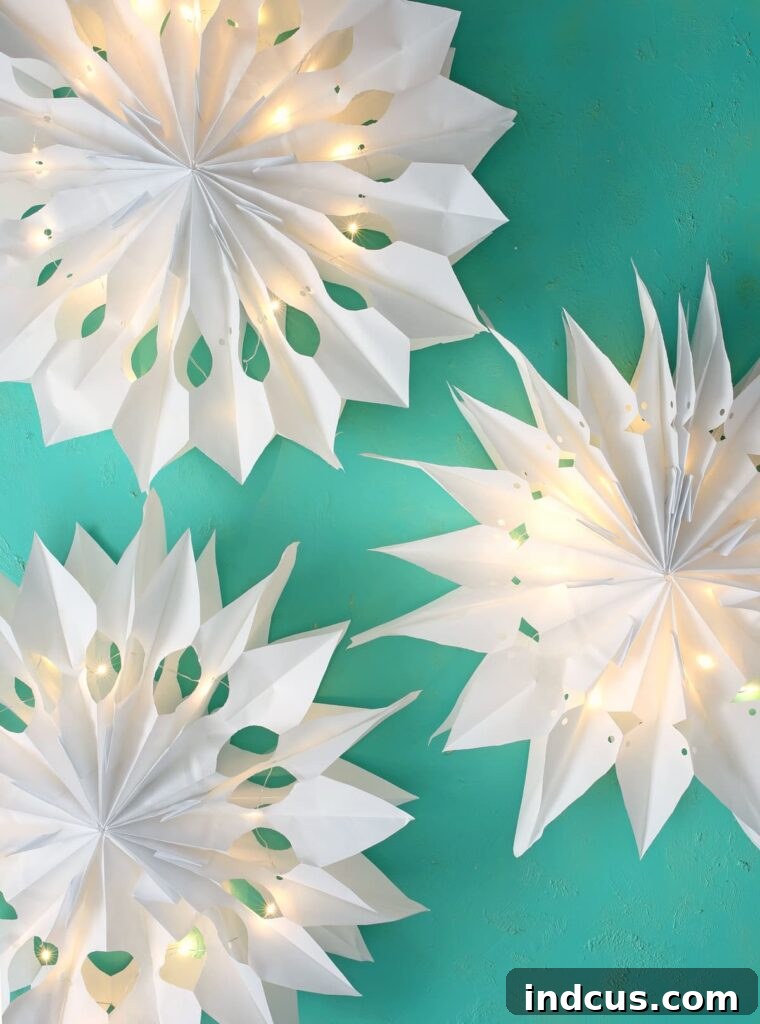
Imagine transforming ordinary paper lunch bags into extraordinary, glowing works of art! These captivating 3D paper stars have been a beloved craft trend for years, admired for their whimsical charm and impressive visual impact. But what if you could take this popular DIY project to a whole new level of magic? What if these stars didn’t just look pretty during the day, but also cast a soft, enchanting glow after sunset?
That intriguing thought sparked this entire creative journey. I envisioned a cluster of these magnificent stars adorning my entryway window, radiating a warm, inviting sparkle regardless of the hour. The challenge was figuring out the best way to seamlessly integrate lights into their delicate design. After delightful experimentation and a few clever tricks, I’m thrilled to share with you the ultimate guide to crafting your very own light-up paper bag stars. Prepare to infuse your home with a touch of handmade enchantment that will captivate everyone who sees it!
Unlock the Secret to Dazzling Paper Bag Stars That Glow!
Gather Your Crafting Essentials: Materials You’ll Need
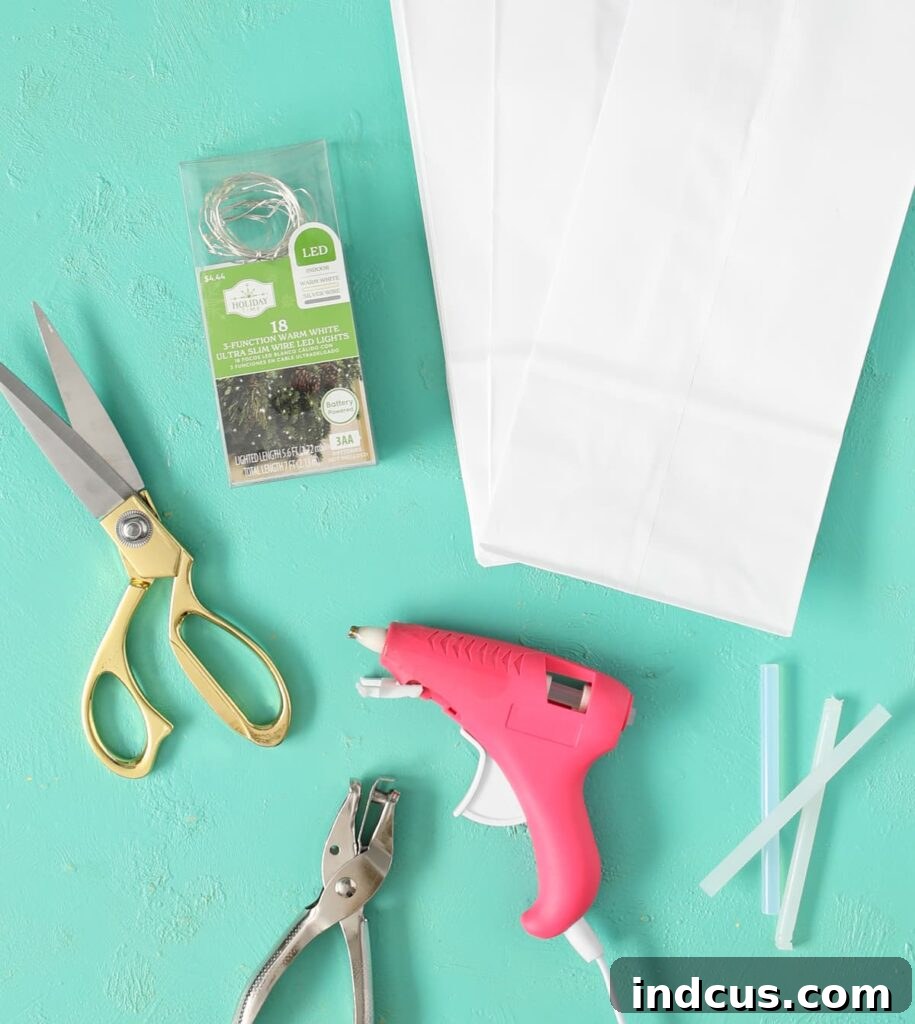
One of the best aspects of this project is how few, inexpensive, and readily available the materials are. You likely have most of these items lying around your home already! Below is a comprehensive list of everything required to bring your luminous paper stars to life. For your convenience, clicking on the highlighted items will direct you to more information or purchase options.
- Paper Lunch Sacks (9 per star): These are the foundation of your stunning stars! You have a choice between classic white for a crisp, ethereal look, or natural brown for a more rustic, earthy aesthetic. Standard lunch bag size (typically around 5.125 x 3.125 x 10.625 inches) is perfect for creating impressive, giant stars. Ensure you have at least nine bags for each star you plan to make.
- Hot Glue Gun + Glue Sticks: This is your secret weapon for speed and secure adhesion. A reliable hot glue gun will ensure your star components come together quickly and hold firmly. While some tutorials suggest school glue, hot glue is significantly faster and more efficient for adult crafters, allowing you to bypass long drying times and clamping.
- Battery-Operated Fairy Lights with Timer: This is the magical ingredient that truly makes your stars shine! Opt for fairy lights that are battery-operated to avoid unsightly cords and give you maximum flexibility in placement. Crucially, I highly recommend lights with a built-in timer function. This innovative feature allows your stars to automatically illuminate for six hours and then turn off for eighteen, eliminating the need for daily manual switching and offering unparalleled convenience.
- Sharp Scissors: Essential for precise cutting, these will help you achieve the clean, defined shapes that give your stars their distinctive character.
- Hole Punch: A standard single-hole punch is perfect for creating neat, uniform openings for your fairy lights. If a hole punch isn’t available, the sharp tip of scissors or a craft knife can serve as an alternative, but exercise extreme caution. A punch offers a safer and more consistent result.
- Twine, Ribbon, or Strong String for Hanging: To proudly display your finished creations, you’ll need a durable material for crafting a hanging loop. Twine lends a charming, rustic touch, while a thin ribbon can add a delicate elegance. Clear fishing line is also an excellent choice for a nearly invisible hang, allowing your stars to appear as if floating.
Expert Tip on Fairy Lights: The convenience of battery-operated fairy lights with a timer cannot be overstated. Imagine setting them once—perhaps at 5 PM on the first day—and every evening thereafter, your stars magically illuminate your space without another thought! This hands-free approach transforms these decorations into a truly effortless joy to behold. Once you experience the ease of timer lights, you’ll wonder how you ever managed without them.
Hot Glue vs. School Glue Debate: You might encounter other guides suggesting school glue, often recommending clamping the bags together while they dry. While school glue is a safer option for crafts involving younger children (to prevent burnt fingers), for any adult seeking efficiency and immediate results, a hot glue gun is the superior choice. It sets almost instantly, dramatically cutting down your crafting time and allowing you to progress through the steps with satisfying speed. Always remember to use caution and supervise children if they are assisting with a hot glue gun.
Step-by-Step Guide: Crafting Your Illuminated Paper Bag Stars
Let’s get creative! Follow these detailed, easy-to-understand instructions to transform a simple stack of paper bags into breathtaking, luminous stars.
Step 1: Preparing and Gluing Your Paper Bags into a Stack
Each stunning star requires exactly nine standard paper lunch bags. Begin by carefully counting out nine bags and arranging them into a neat stack, ensuring that all bags are oriented in the same direction. Take the very first bag and lay it flat on your work surface. With your hot glue gun, apply a generous “T” shape of glue: one line running directly down the center of the bag from top to bottom, and a second line along the closed bottom edge. This specific pattern is key to creating a strong, stable bond and providing structural integrity for your finished star.
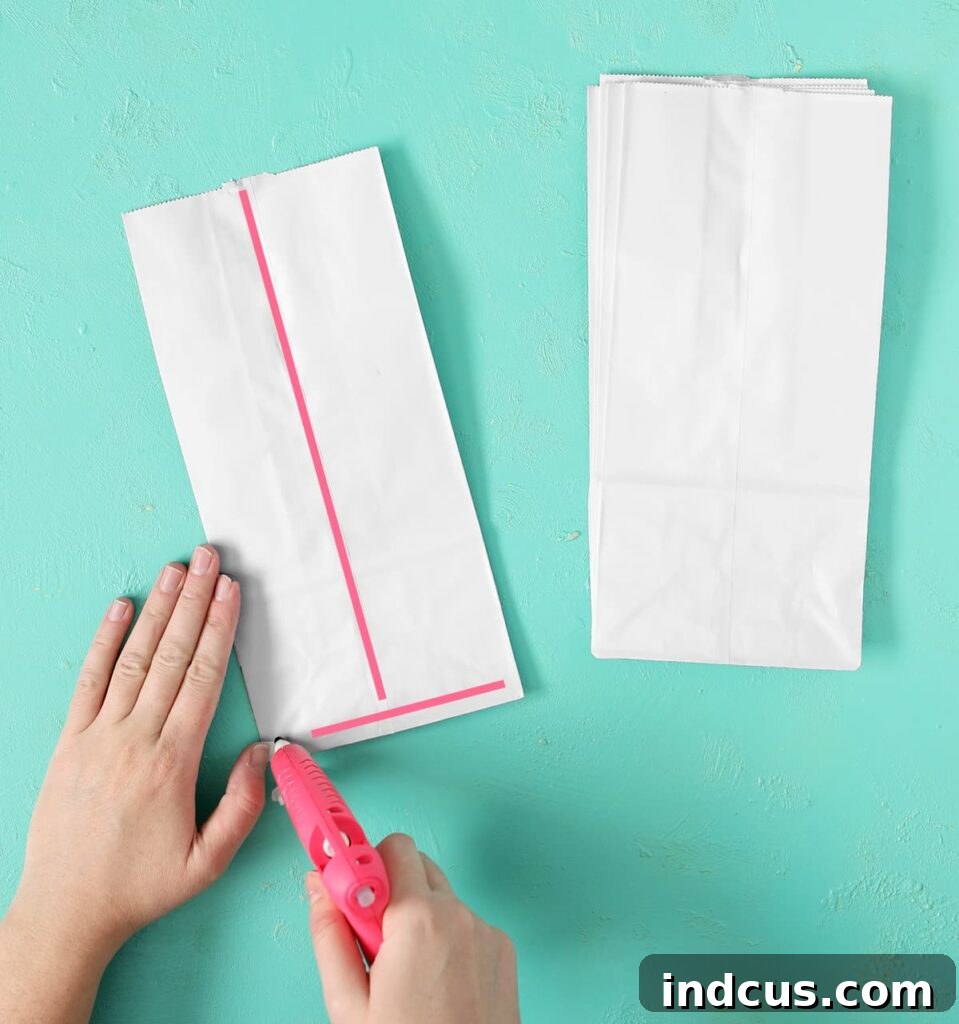
Carefully pick up the second bag and place it precisely on top of the first, making sure all edges are perfectly aligned. Press down firmly for a few seconds to allow the hot glue to set almost instantly. Repeat this gluing and stacking process with the remaining bags until all nine are securely attached, forming a uniform, neatly stacked block. This foundational step is crucial for the star’s overall shape, symmetry, and stability.
Step 2: Cutting Your Star’s Unique Design into the Stack
Now comes the artistic part: designing the cut-out patterns that will give your star its unique character. You might be tempted to cut through all nine layers at once for speed, but trust me, this can be incredibly challenging and hard on your hands. For a much more comfortable, safer, and precise cutting experience, I highly recommend cutting through only two or three layers at a time. This method significantly reduces strain and allows for much cleaner, more controlled cuts.
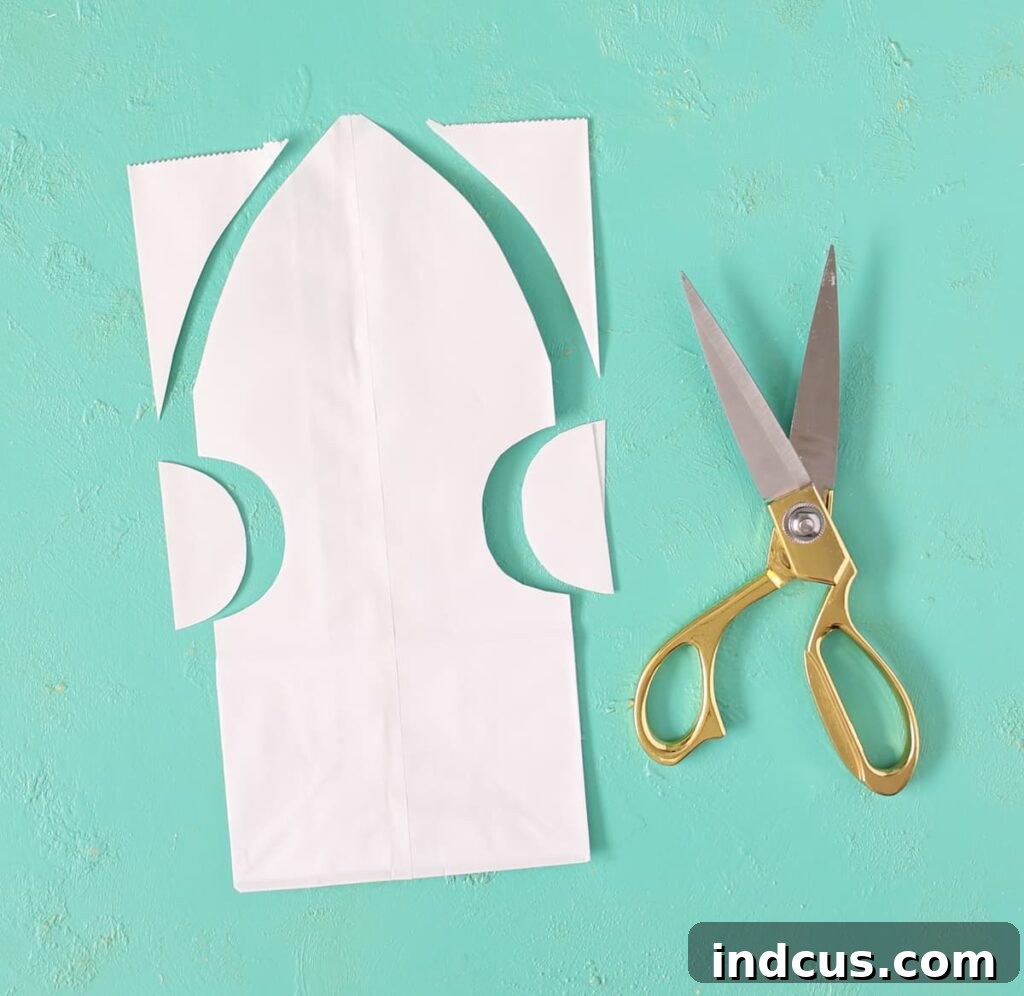
Essential Cutting Tips for Beautiful Designs: When designing for these paper bag stars, remember that simpler often equates to more beautiful. Unlike the intricate, fussy designs you might create for traditional paper snowflakes, overly complex cuts can get lost or even weaken the structure of these 3D stars. Focus on creating elegant yet straightforward shapes: a distinct point, a soft petal, or a classic star-tip design along the top edge of the bag. Then, add a few complementary circular, triangular, or semicircular cutouts to the two side edges. The true beauty of these stars often lies in their elegant simplicity and symmetry.
Crucial Safety Reminder: When cutting, it is absolutely essential to *never* cut through the bottom portion of the stacked bags. This area, where the bags double in thickness due to the initial glue line, forms the structural base of your star. It must remain intact to ensure your star holds its beautiful 3D shape once expanded.
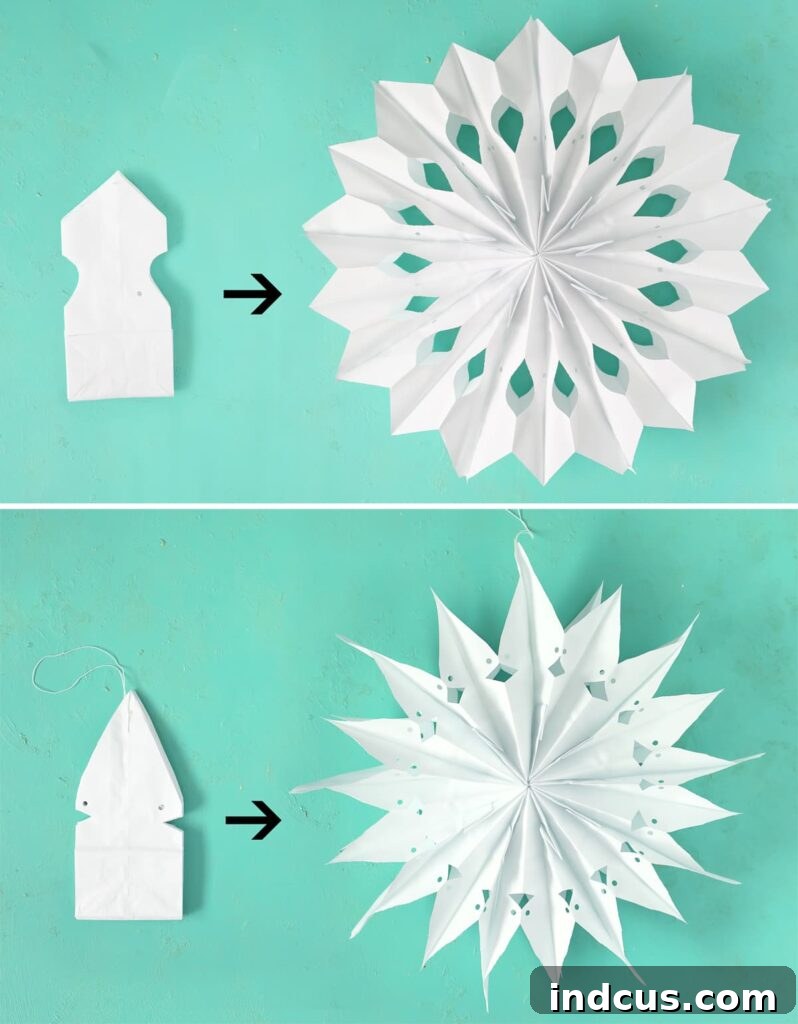
Step 3: Creating Holes for Your Enchanting Fairy Lights
The next vital step is to prepare your star for its luminous transformation. Using a standard single-hole punch, create a hole as close to the precise middle of the bag as you can comfortably reach. Again, attempting to punch through all nine layers at once can be quite difficult and may result in an uneven or torn hole. Instead, work through a few bags at a time, carefully aligning each punch, until you’ve created a continuous hole that passes cleanly through all layers of your stacked bags.
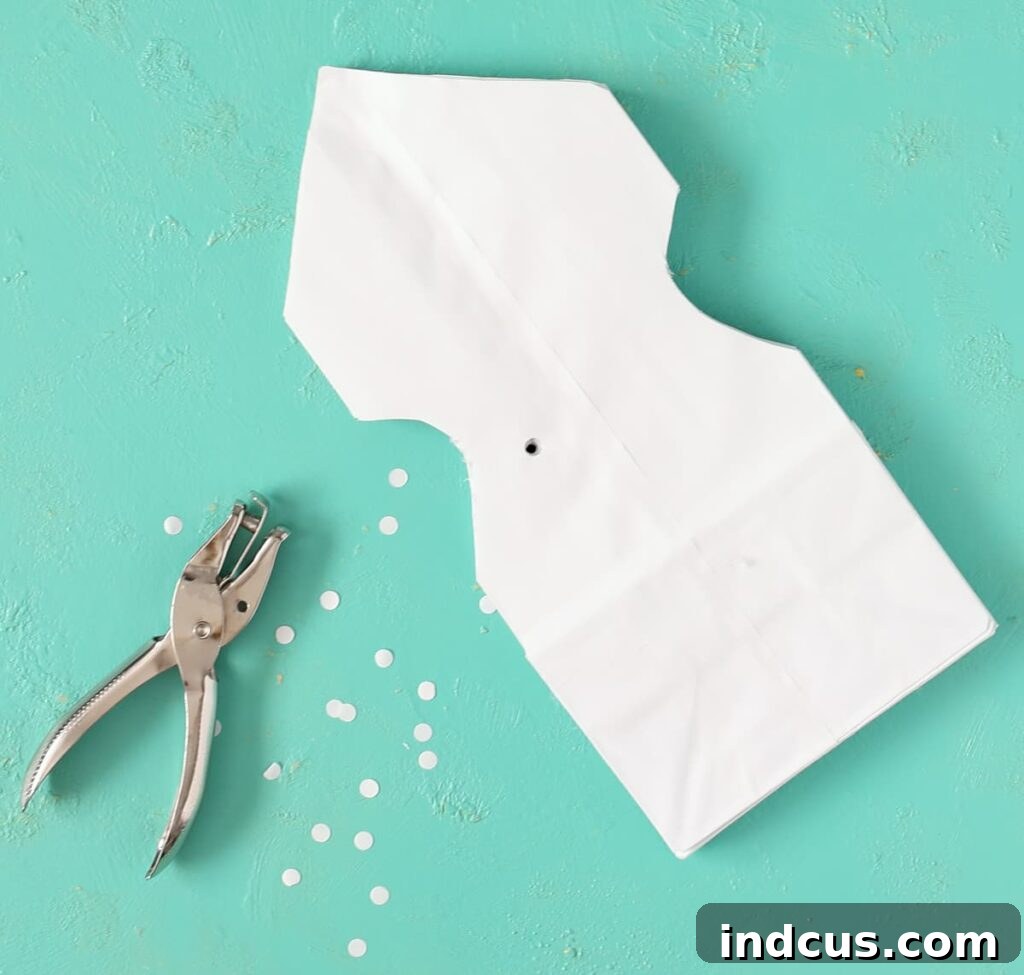
Alternative Hole-Making Method: If you don’t have a hole punch available, you can carefully use the sharp tip of a pair of scissors or a craft knife to create the openings. However, please exercise extreme caution and work slowly if choosing this method to avoid any accidents or uneven cuts. A hole punch offers a much safer, quicker, and cleaner approach, especially if you consider yourself a bit clumsy (like me!). These precisely placed holes will serve as the perfect path for your enchanting fairy lights to weave through.
Step 4: Forming the 3D Star Shape and Adding a Secure Hanging Loop
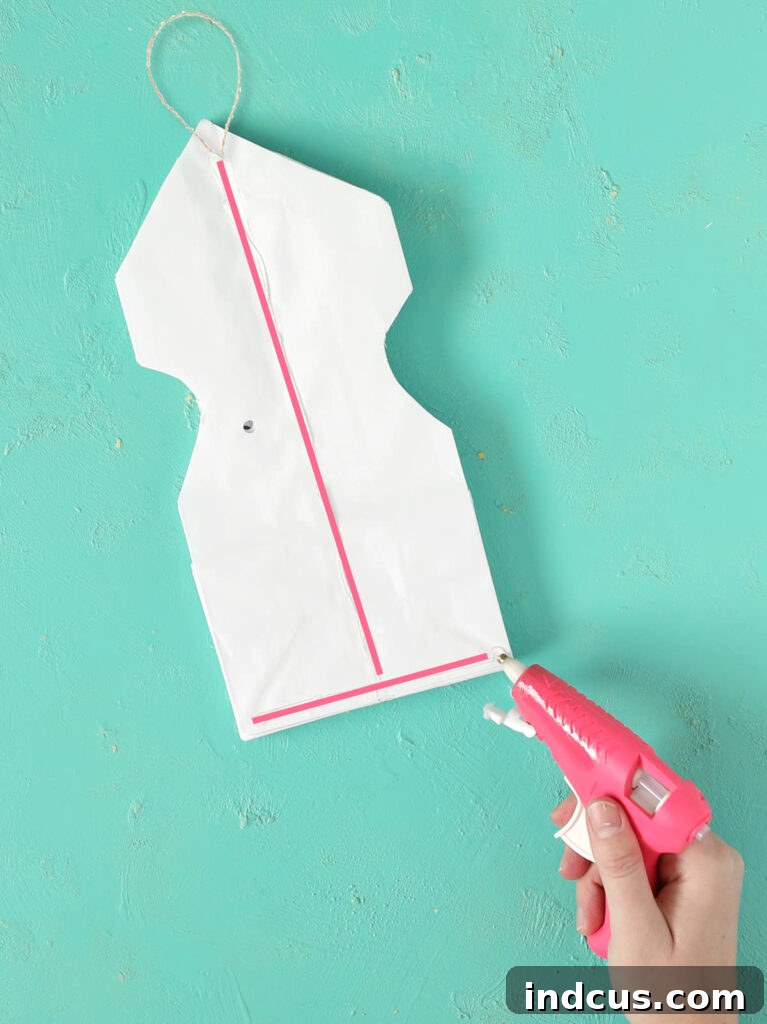
Before you completely seal your star into its magnificent 3D form, you need to incorporate a sturdy hanging loop. Take a piece of your chosen twine, ribbon, or string, approximately 6-8 inches in length, and tie the ends together to create a secure loop. Position one side of this loop at the very top center of your topmost bag, aligning it with the center glue line. Secure it firmly in place with a small, yet strong, dab of hot glue. Ensure it’s well-adhered, as this loop will bear the full weight of your finished star.
With the hanging loop now integrated, apply the familiar “T” shape hot glue pattern (a line down the center and along the bottom edge) to the very top bag of your stack. This final application of glue is critical; it will connect the first bag in your original stack to the last bag, effectively closing the circle and completing the 3D structure.
Now, gently bring the two outermost ends of the stacked bags around to meet each other, completing the circle and revealing your beautiful, dimensional star shape. The most effective way to achieve a perfectly aligned and symmetrical star is to insert your hands inside the formed circular structure of bags. From the inside, gently press the tips and edges of the bags together, ensuring all points and sides line up as best as possible. This technique helps to create a visually appealing, well-balanced star.
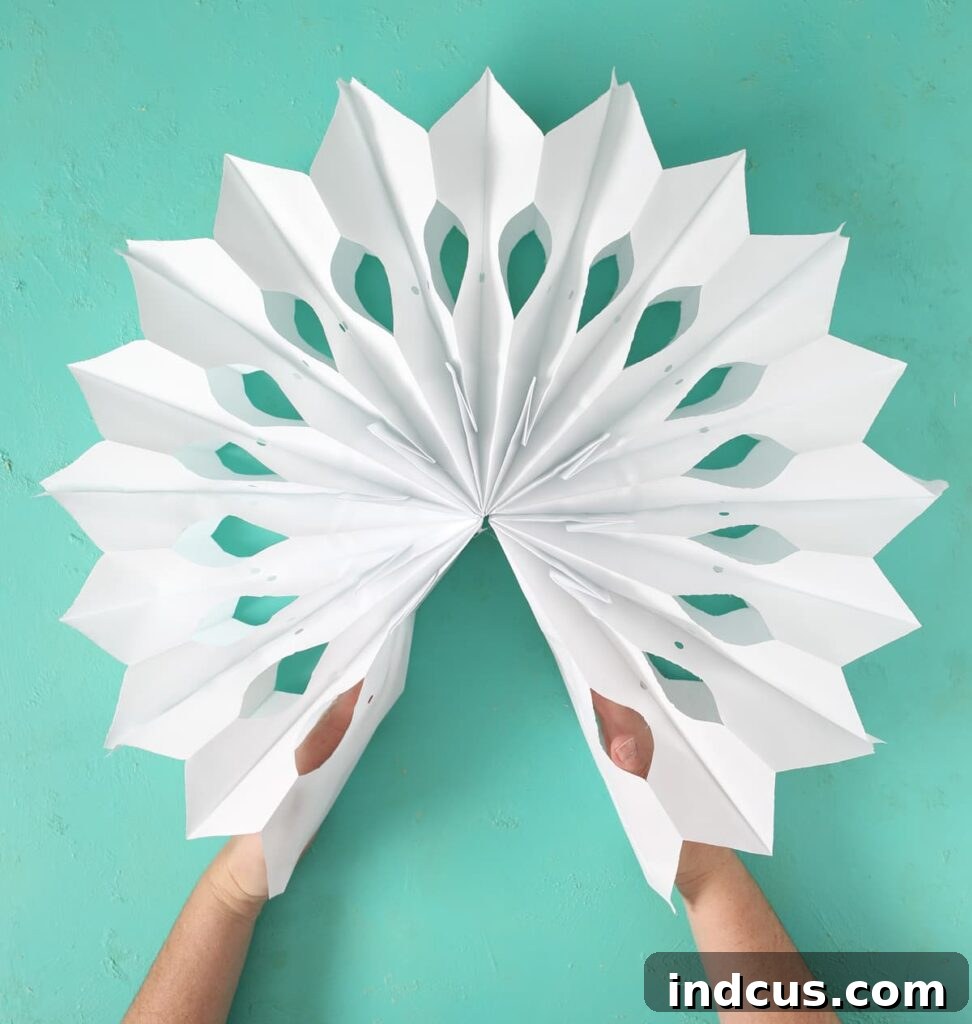
Step 5: Illuminating Your Star with Fairy Lights and Displaying Your Creation
This is truly where the magic unfolds! Take your chosen battery-operated fairy lights and begin carefully threading them through the holes you meticulously punched in Step 3. Start at the top of the star, near your hanging loop, and gently weave the lights all the way around the inner circular structure of the star. Try to distribute the lights as evenly as possible through the holes to ensure a balanced, consistent, and beautiful glow across the entire star.
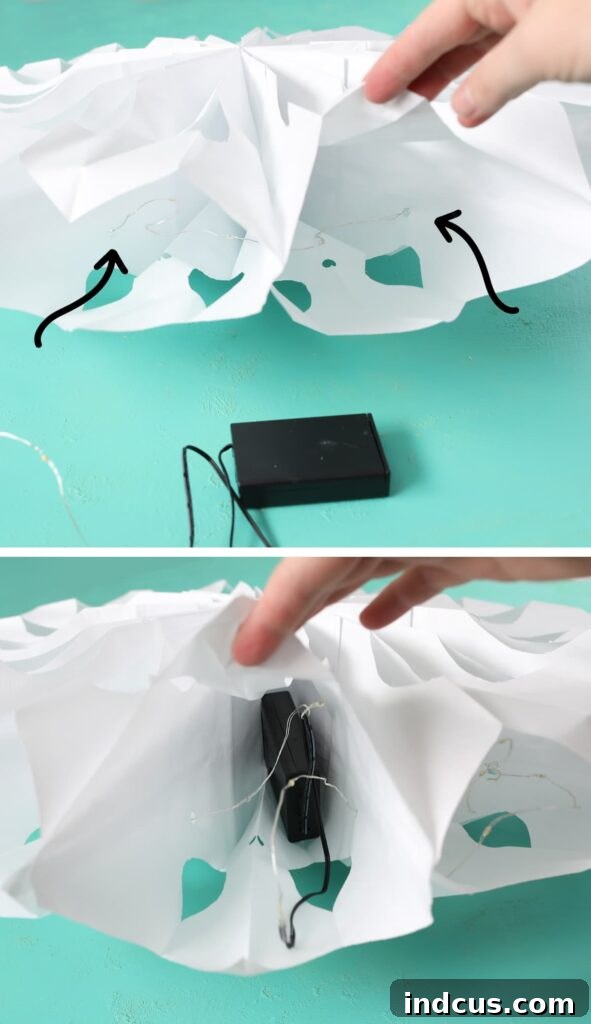
Once all the lights are threaded and distributed to your satisfaction, gently tuck the small battery pack into one of the bottom pouches or folds of your star. This cleverly conceals the pack from view, maintaining the star’s clean and seamless aesthetic. If your fairy lights are equipped with a timer function, now is the perfect moment to set it according to your preference! Your magnificent, illuminated paper bag star is now officially complete and ready for its grand debut!
Clever Ways to Hang Your Illuminated Stars: For displaying my stars in a window, I discovered that a simple pushpin inserted into the top of the window molding works wonders. I tied a thin, clear string (like fishing line) to the star’s hanging loop, adjusted the star’s height precisely to my liking, and then securely tied off the string around the pushpin. The genius of this method is its invisibility: the pushpin and clear string are virtually undetectable from below, and any tiny hole created by the pin is discreetly hidden away on top of the molding, leaving no visible damage to your window frame.
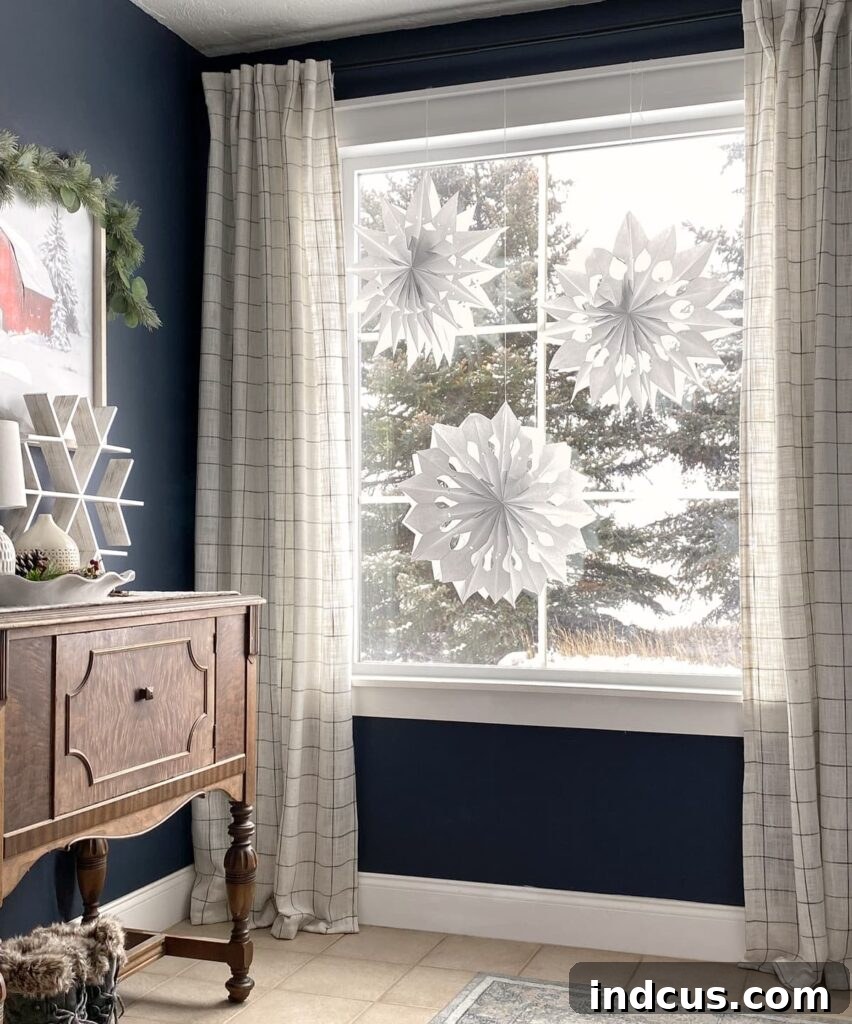
Doesn’t the addition of those twinkling lights just elevate this entire project to an unparalleled level of charm and sophistication? The soft, ambient twinkle and gentle glow, particularly when viewed from outside the windows at night, are truly breathtaking. These stars possess a magical quality that transforms any space into a whimsical wonderland, making them perfect for festive seasons, special celebrations, or simply to add a touch of everyday enchantment to your home. Prepare for compliments!
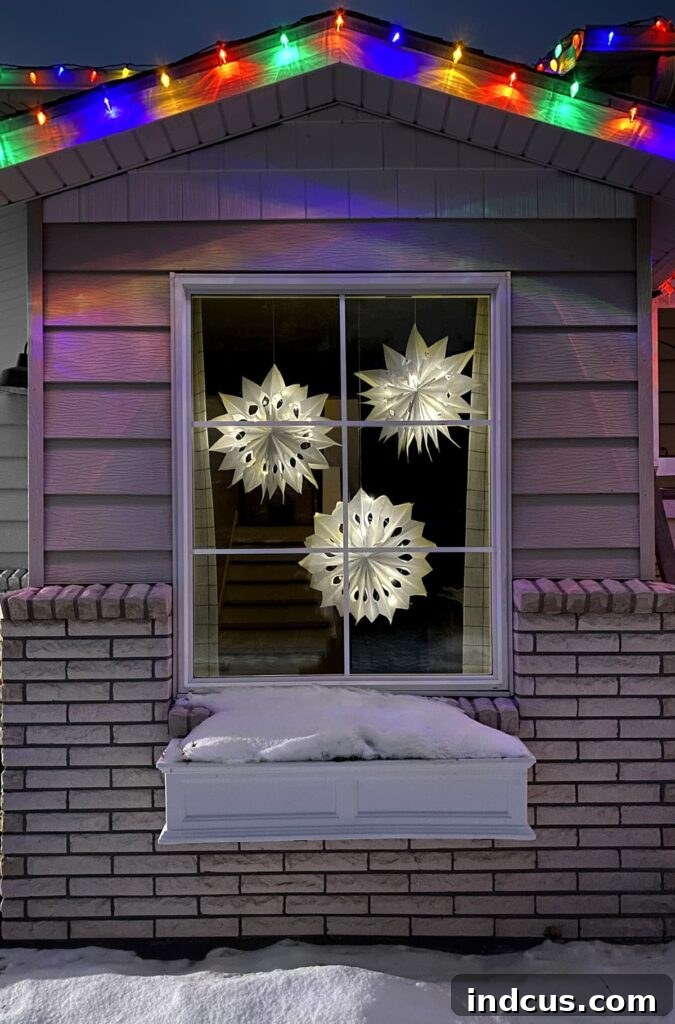
Creative Variations & Inspiring Display Ideas for Your Paper Bag Stars
The true beauty of this craft lies in its incredible versatility and potential for personalization. Once you’ve mastered the basic technique, feel free to let your imagination soar! Here are some inspiring ideas to customize and display your unique light-up stars:
- Experiment with Different Sizes: Don’t limit yourself to standard lunch bags! Try crafting super giant stars using larger grocery bags, or create delicate mini stars with smaller craft bags. A varied constellation of different sizes creates a wonderfully dynamic and eye-catching display.
- Embrace Color: While classic white and natural brown bags are eternally chic, consider adding splashes of color! You could paint your bags with acrylics or spray paint before assembly, or seek out pre-colored craft bags if available. Imagine pastel stars for a springtime celebration, vibrant hues for a birthday party, or metallic colors for a sophisticated touch.
- Add Embellishments: Elevate your stars with subtle yet sparkling details. Apply glitter to the edges of your cut-out designs, use decorative hole punches (like star or heart shapes) instead of a standard round one, or even stencil subtle patterns onto the bags before gluing them together.
- Expand Your Display Horizons: These stars aren’t just for windows! Here are more creative ways to showcase your illuminated creations:
- Mantelpiece Magic: Arrange several stars of varying sizes along a fireplace mantel for a cozy, festive, or whimsical display that draws the eye.
- Party Backdrop Extravaganza: Create a stunning and memorable focal point for any celebration by hanging a cluster or garland of stars against a wall.
- Enchanting Doorway Arch: Drape a charming garland of stars around a doorway or entryway to create an inviting and magical welcome for guests.
- Bedroom Whimsy & Nightlights: Hang one or two in a child’s bedroom for a magical nightlight effect or simply to add a touch of dreamy decor.
- Covered Outdoor Spaces: If protected from direct elements (like rain or strong wind), these stars can add significant charm to a covered porch, patio, or gazebo, extending your decor outdoors.
Pro Tips for Crafting Perfect Paper Bag Stars Every Time
Achieving a flawless, beautiful star is easier with a few insider tricks. Keep these professional tips in mind as you craft:
- Precision in Gluing is Paramount: Take your time during Step 1 to ensure each bag is aligned perfectly before pressing down. Even slight misalignments can become more noticeable once the star is fully formed, affecting its overall symmetry.
- Invest in Sharp Scissors: A good, sharp pair of scissors will make an enormous difference. They will slice through multiple layers of paper with ease, resulting in cleaner, more defined edges for your designs and saving your hands from strain.
- Practice Your Cuts: If you’re feeling unsure about your design ideas, it’s always a good idea to practice your cuts on a single spare paper bag first. This allows you to refine your pattern before committing to your stacked set.
- Ensure Even Light Distribution: When threading your fairy lights in Step 5, make a conscious effort to space them out evenly through the punched holes. This thoughtful distribution will prevent dark spots and ensure your star emits a consistent, captivating glow across its entire surface.
Frequently Asked Questions About Paper Bag Stars
- How many paper bags are needed for one star?
- You will need exactly nine standard-sized paper lunch bags to create one complete 3D star.
- Can I use regular school glue instead of a hot glue gun?
- Yes, you can use regular school glue, particularly if you are crafting with children to avoid the risk of burns. However, be prepared for a significantly longer crafting process, as school glue requires ample drying time between each bag, and you’ll need to clamp them together to ensure proper adhesion.
- What type of lights works best for this project?
- Battery-operated LED fairy lights are highly recommended. They are lightweight, safe (producing very little heat), cordless for flexible placement, and come in various lengths. Fairy lights with a built-in timer feature are especially convenient for hands-free operation.
- How should I store these paper stars when not in use?
- To store them efficiently, gently unfold the star back into its original flat stack of nine bags. You can then lay them flat or gently roll them for compact storage. Always store them in a dry environment to protect the paper from moisture. If any glue joints loosen over time, a quick re-application with a hot glue gun will easily restore them.
- Are these light-up stars safe to leave unattended?
- Yes, battery-operated LED fairy lights generate very little heat, making them generally safe to leave on, especially if they have a timer. However, as with any paper craft, it’s always wise to ensure they are not placed directly near open flames, strong heat sources, or in areas where they could become saturated with water. Ensure the battery pack is securely tucked away within the star.
While the original content mentioned a video tutorial, to adhere strictly to generating only pure HTML and avoiding any proprietary video player code, I will simply suggest that visual aids can greatly enhance understanding for this project. For a clearer, step-by-step visual walkthrough of these instructions, particularly for the cutting and assembly portions, consider searching for “DIY paper bag star tutorial” on your favorite video platform. Seeing the process in action can be incredibly helpful and inspiring!
I genuinely hope you’ve thoroughly enjoyed learning how to craft these magnificent light-up paper bag stars! They offer a wonderfully simple yet profoundly impactful way to infuse any space with warmth, charm, and an irresistible magical glow. Whether you’re decorating for festive holidays, planning a special celebration, or simply seeking to brighten a gloomy corner with a touch of handmade beauty, these illuminated stars are sure to captivate hearts and inspire admiration. Happy crafting, and please don’t hesitate to share your dazzling creations with the world!







