
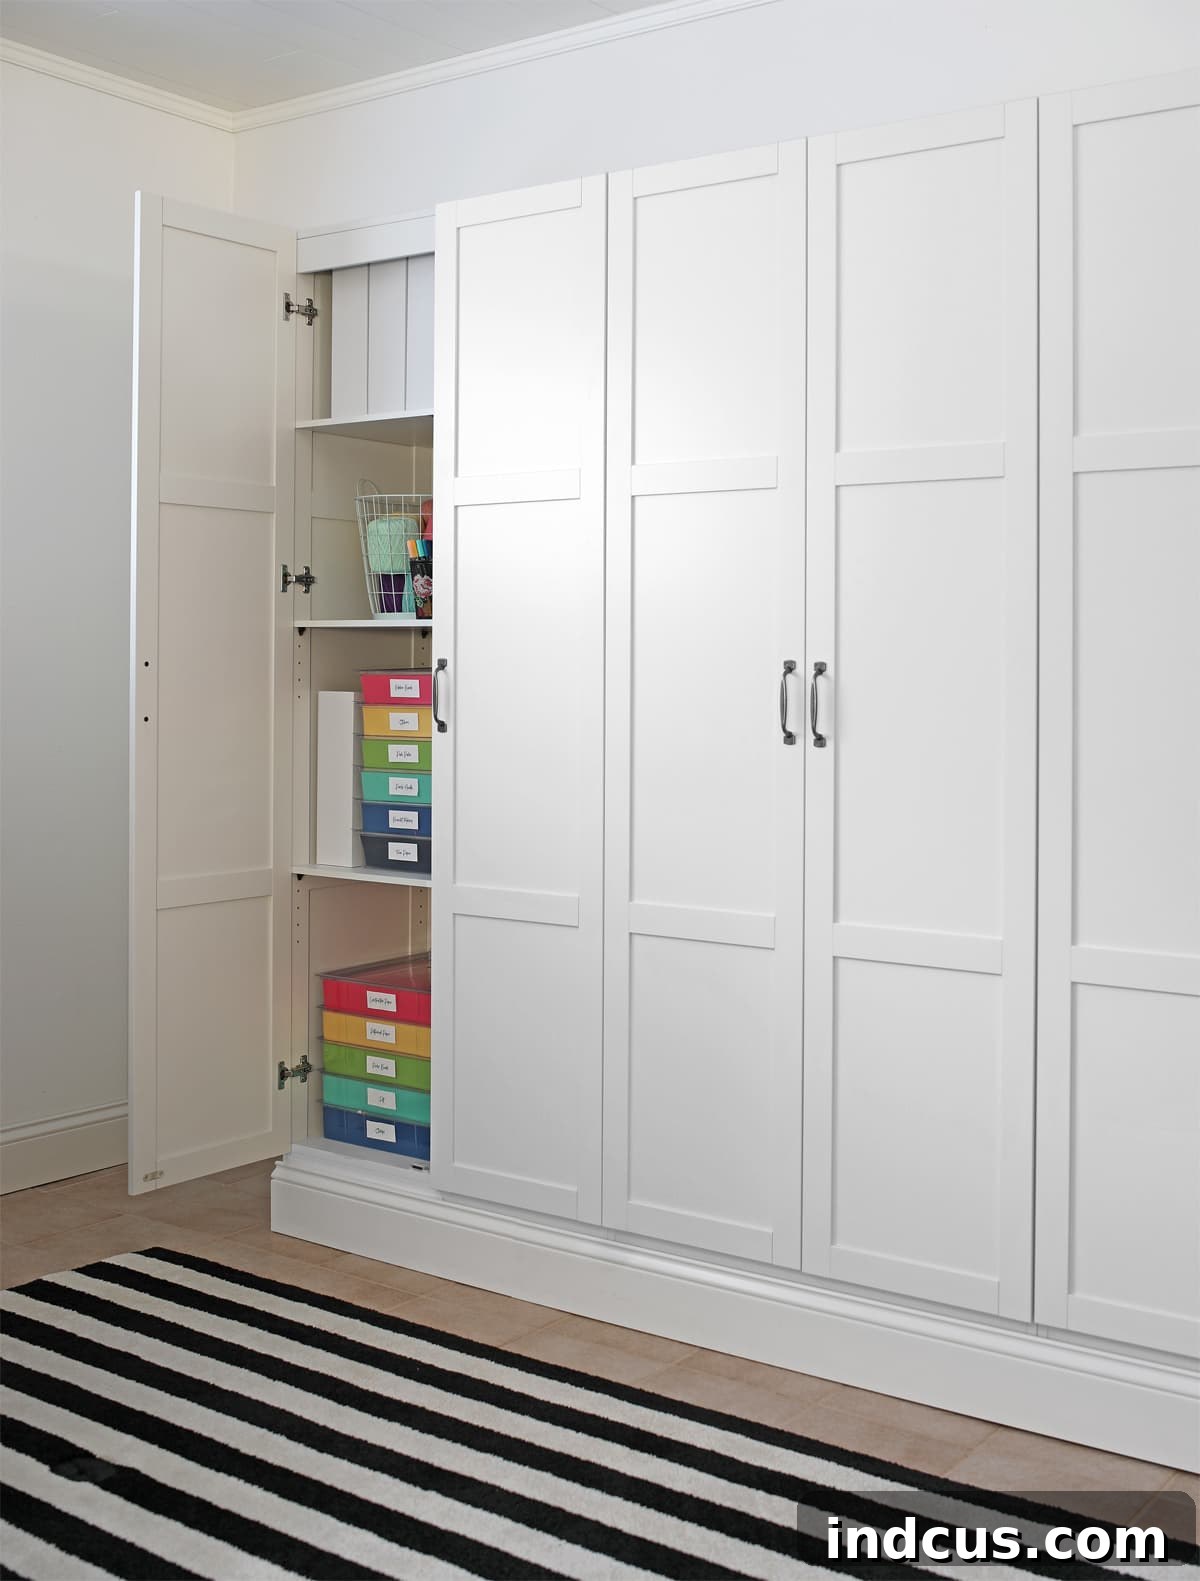
Transform Your Space: Achieving a Custom Built-In Look with Off-the-Shelf Cabinets on a Budget
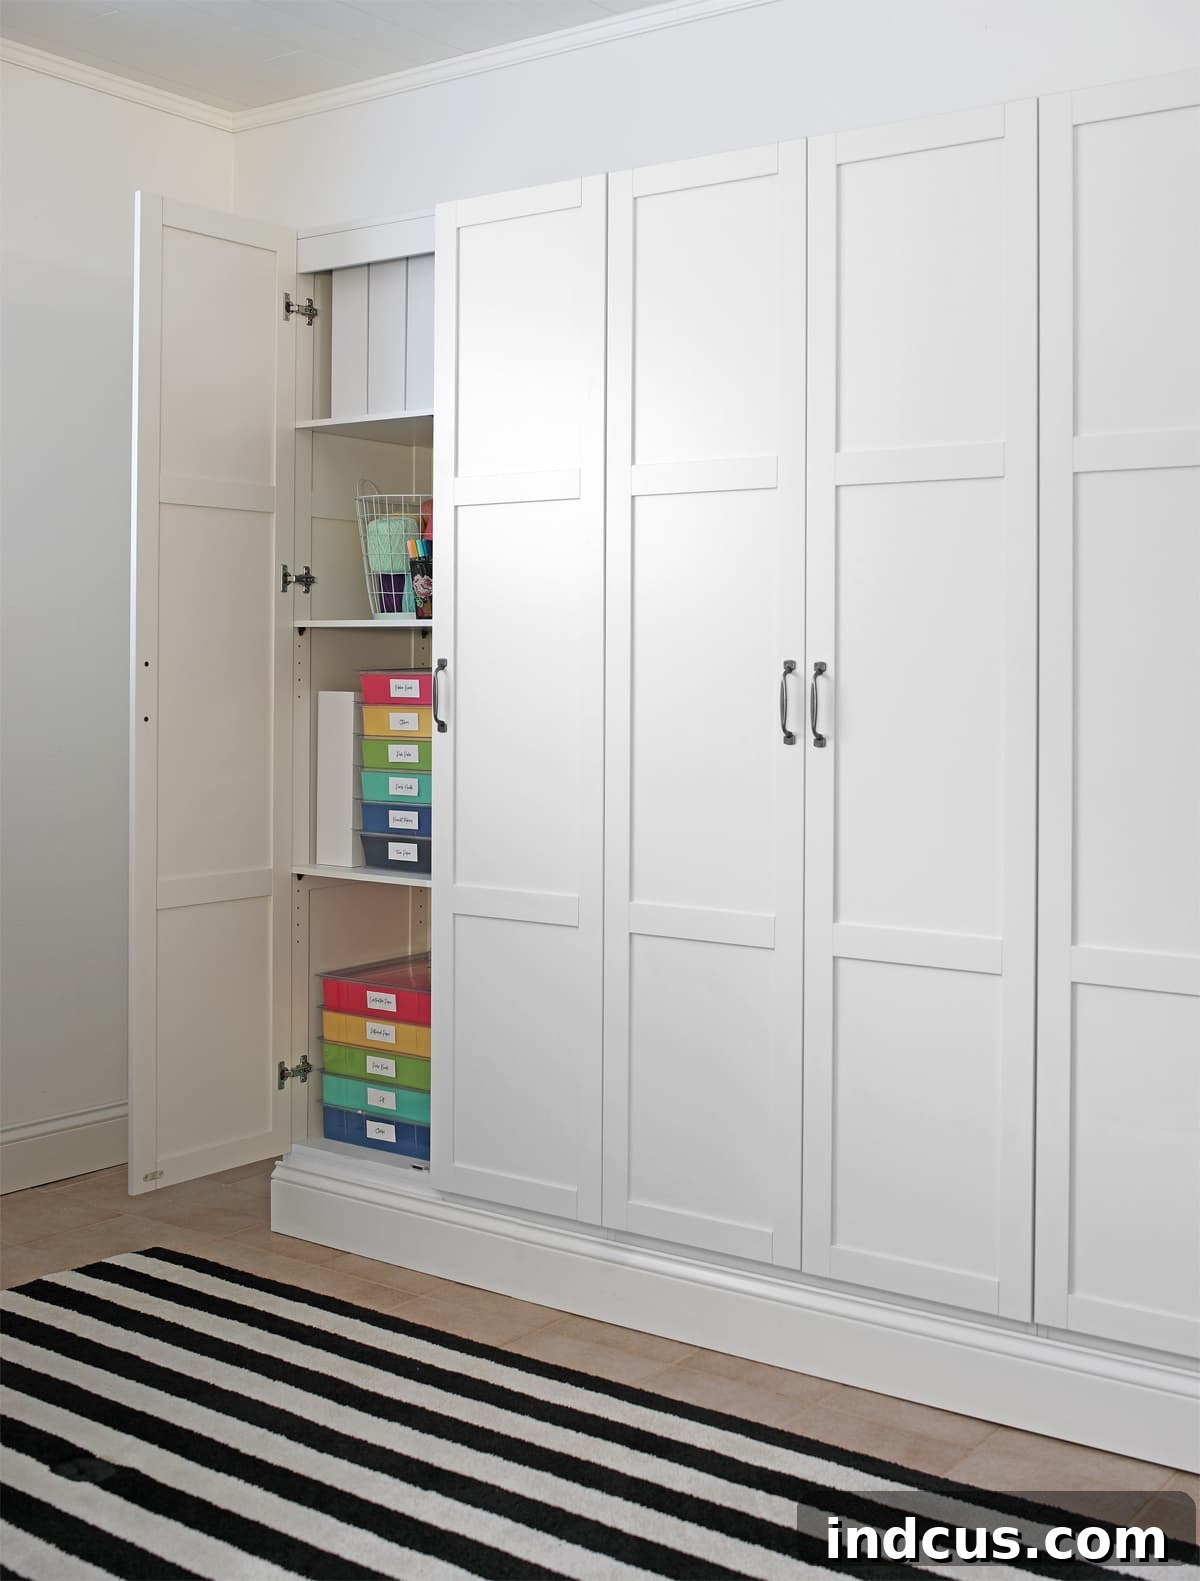
Are you dreaming of gorgeous, integrated storage that looks like it was custom-made for your home, but without the hefty price tag? You’re in luck! This comprehensive guide will show you how to achieve the luxurious aesthetic of custom built-ins using readily available, off-the-shelf cabinets. We’ll dive into an exciting DIY project that transformed a cluttered, underutilized craft room area into a highly functional and beautifully organized storage wall, proving that a custom look doesn’t have to break the bank.
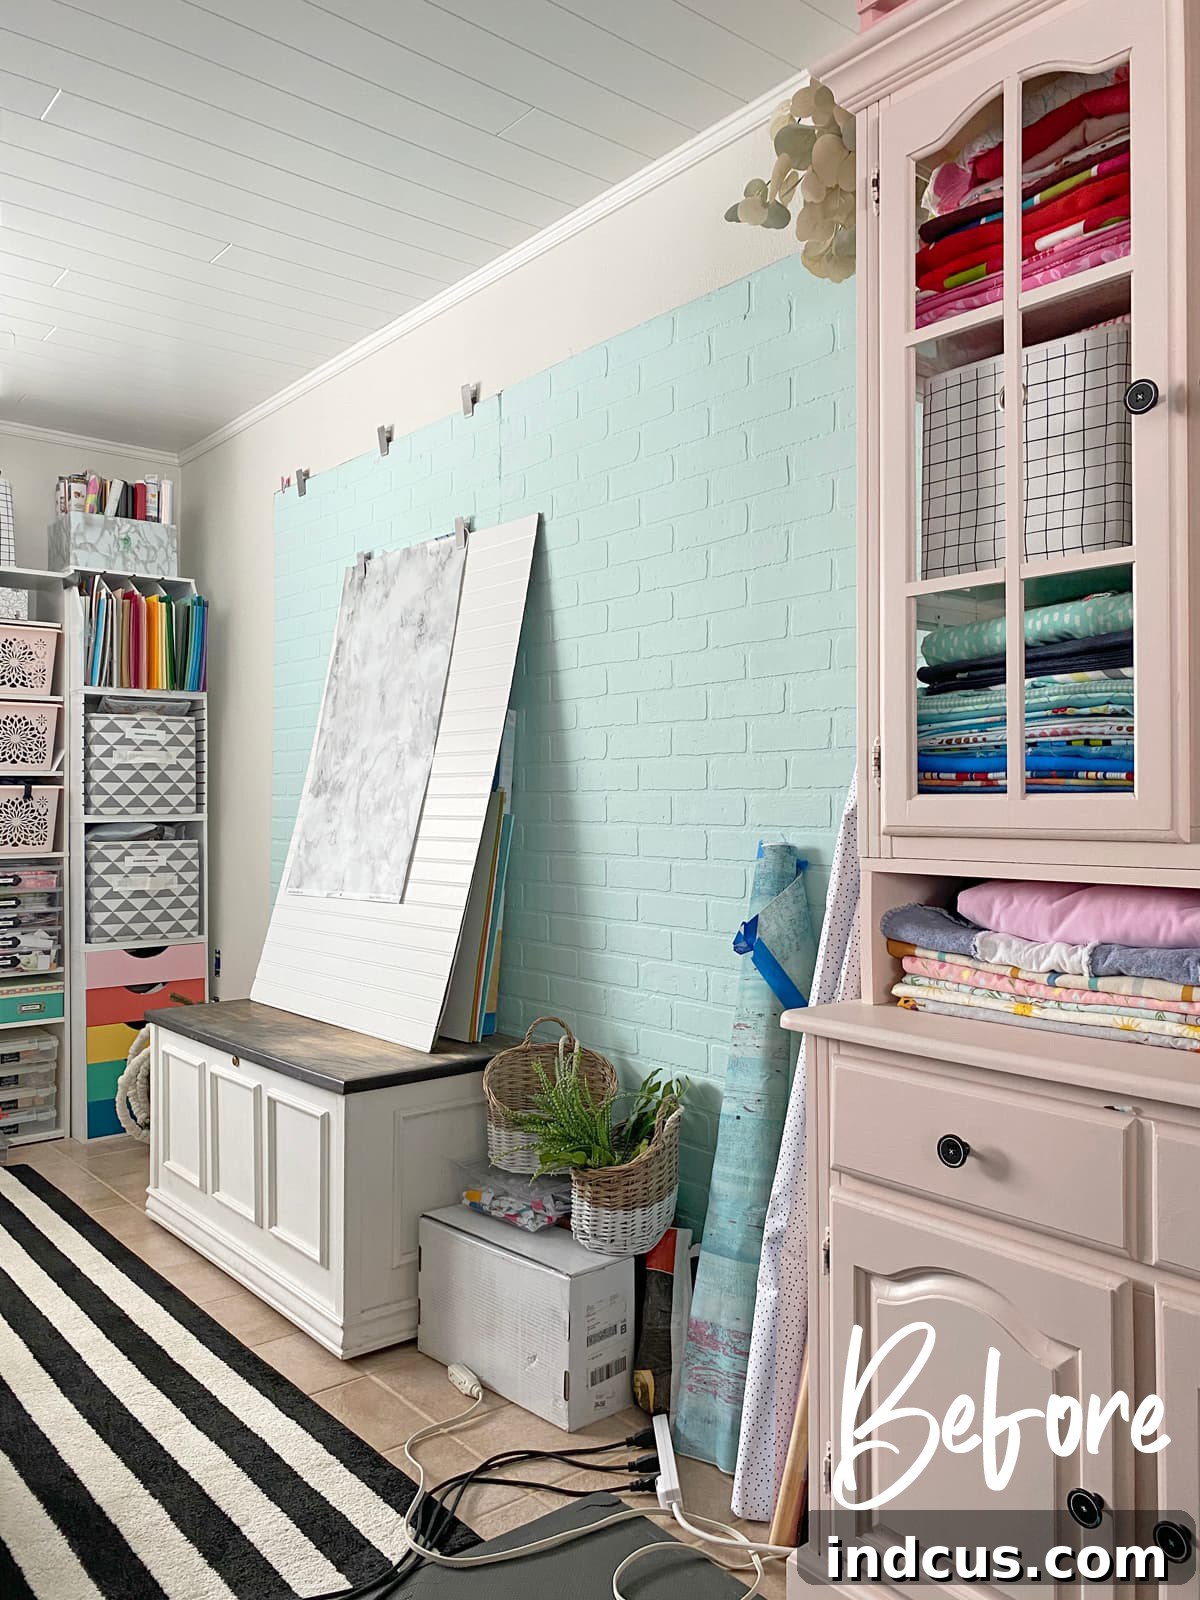
Every home has those areas that just don’t seem to function optimally. For me, it was a particular corner of my craft room. Despite numerous attempts to tidy, it remained a magnet for clutter, failing to provide the organized workspace I desperately needed. Here’s a glimpse of the “before” – even after a quick tidy-up, the potential for improvement was undeniable!
This post is sponsored by Sauder. I reached out to them with my idea and they agreed to partner.
For years, a blue faux brick panel served as an occasional photography backdrop, but its primary function had become a dumping ground. Craft supplies, half-finished projects, and miscellaneous items seemed to migrate naturally to either side of an old cedar chest, creating a chaotic visual and an inefficient storage situation. This area was severely underperforming, wasting valuable space and stifling my creativity. I knew it was time for a significant change – a true transformation that would maximize storage and bring order to the chaos. My objective was clear: I wanted to create a streamlined, integrated storage system that would provide both functionality and a polished, custom aesthetic, all while adhering to a realistic budget.
The initial brainstorming involved evaluating several options. Custom carpentry, while ideal in terms of tailored design, quickly proved to be far beyond my budget. Freestanding storage units often look disjointed and fail to provide the seamless integration I was seeking. It became apparent that the most viable and satisfying path forward would be to hack readily available, off-the-shelf cabinets. This popular DIY approach allows for significant cost savings without compromising on the desired built-in appearance. This strategy would enable me to leverage the affordability of mass-produced furniture while applying simple modifications to create a high-end, bespoke feel.
During my search for the perfect foundational pieces, the Sauder Select Storage Cabinet consistently stood out. It checked all the boxes for what I envisioned for my craft room storage wall. Here’s a breakdown of why these cabinets were the ideal choice for this ambitious DIY project:
- Optimized Closed Storage: The ability to conceal clutter behind doors was paramount. This feature prevents visual overwhelm, creating a serene and organized environment. It also eliminates the need to invest in expensive, aesthetically pleasing storage bins, allowing me to utilize the containers I already own, saving both money and time, and reducing overall consumption.
- Ample Shelf Depth: The generous depth of the shelves ensures they can accommodate a wide array of craft supplies, tools, and storage bins, including many common sizes. This was critical for truly maximizing every inch of space and ensuring efficient organization for various items, from fabric bolts to paint sets.
- Adjustable Shelving for Customization: The flexibility of adjustable shelves is a game-changer for organizing items of varying heights and shapes. This feature allows for a truly customized interior layout, adapting to everything from tall vinyl rolls to small notions, ensuring no space goes to waste and allowing for future reorganization as needs evolve.
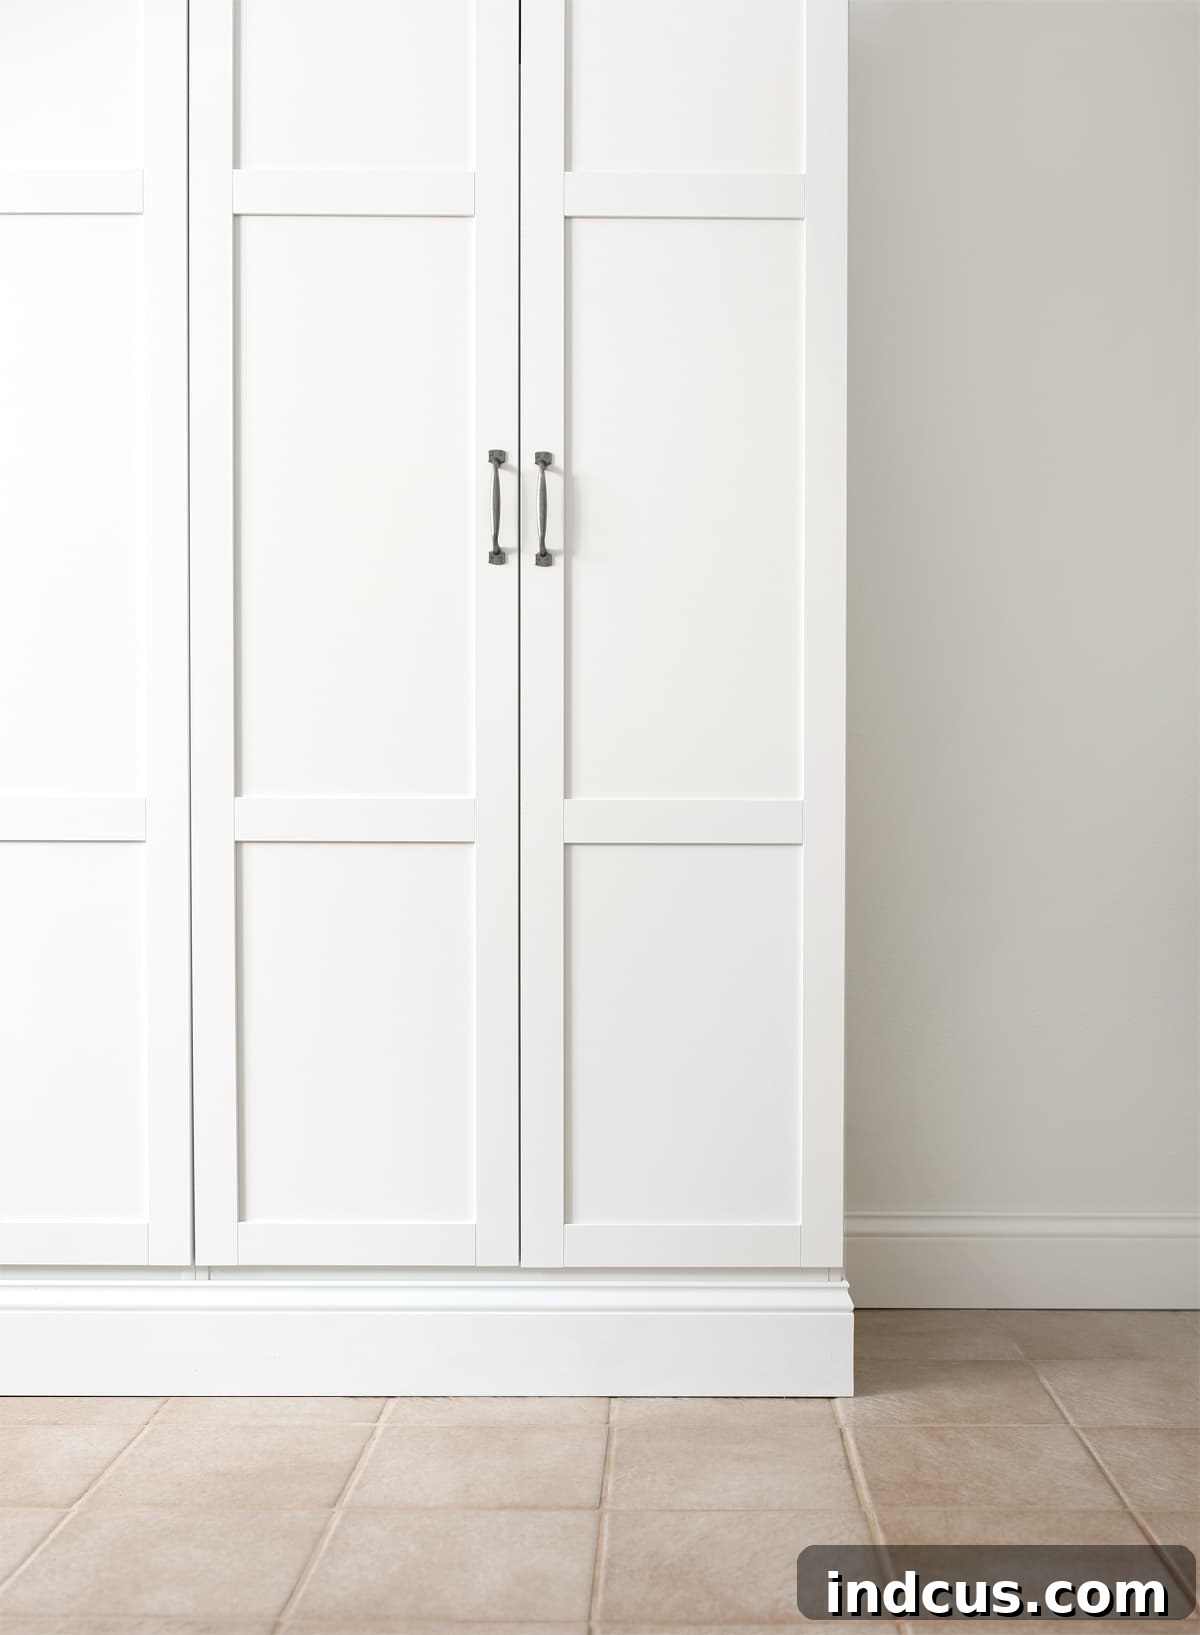
- Elegant Shaker Style Doors: The classic white shaker style doors offer a timeless and sophisticated aesthetic. This design choice contributes significantly to the “custom built-in” illusion, blending seamlessly with various interior design themes and elevating the overall look of the room with its clean lines and minimalist appeal.
- Exceptional Value and Affordability: The price point of these cabinets is incredibly reasonable, especially when considering the significant storage capacity and stylish design they provide. For budget-conscious DIYers seeking high impact without high costs, Sauder cabinets offer outstanding value. Always keep an eye out for sales, which can make them even more attractive and accessible.
One of the initial hurdles with any flat-pack furniture is the assembly process, which can sometimes be daunting. However, I’ve had extensive experience building various pieces over the years, and I can confidently say that these Sauder cabinets came with exceptionally clear, easy-to-follow instructions. This made the assembly surprisingly straightforward and relatively quick, setting a positive tone for the entire project right from the start. A well-designed instruction manual, complete with clear diagrams and concise steps, is truly a significant win in the world of DIY, saving both time and potential frustration.
It’s important to set realistic expectations regarding materials. These cabinets are constructed from laminated particle board, not solid wood. While this makes them lightweight and incredibly affordable, it also means they require mindful handling. They are not designed for heavy-duty commercial use or prolonged exposure to moisture, which can cause swelling and damage. Therefore, it’s crucial to consider your intended use and environment when deciding if these cabinets are suitable for your specific project. For my craft room, where they will be treated with care and won’t face rough conditions or excessive humidity, they are perfectly adequate and offer an excellent balance of cost, aesthetics, and functionality. Understanding the material limitations allows for proper care and ensures the longevity of your beautiful new built-ins.
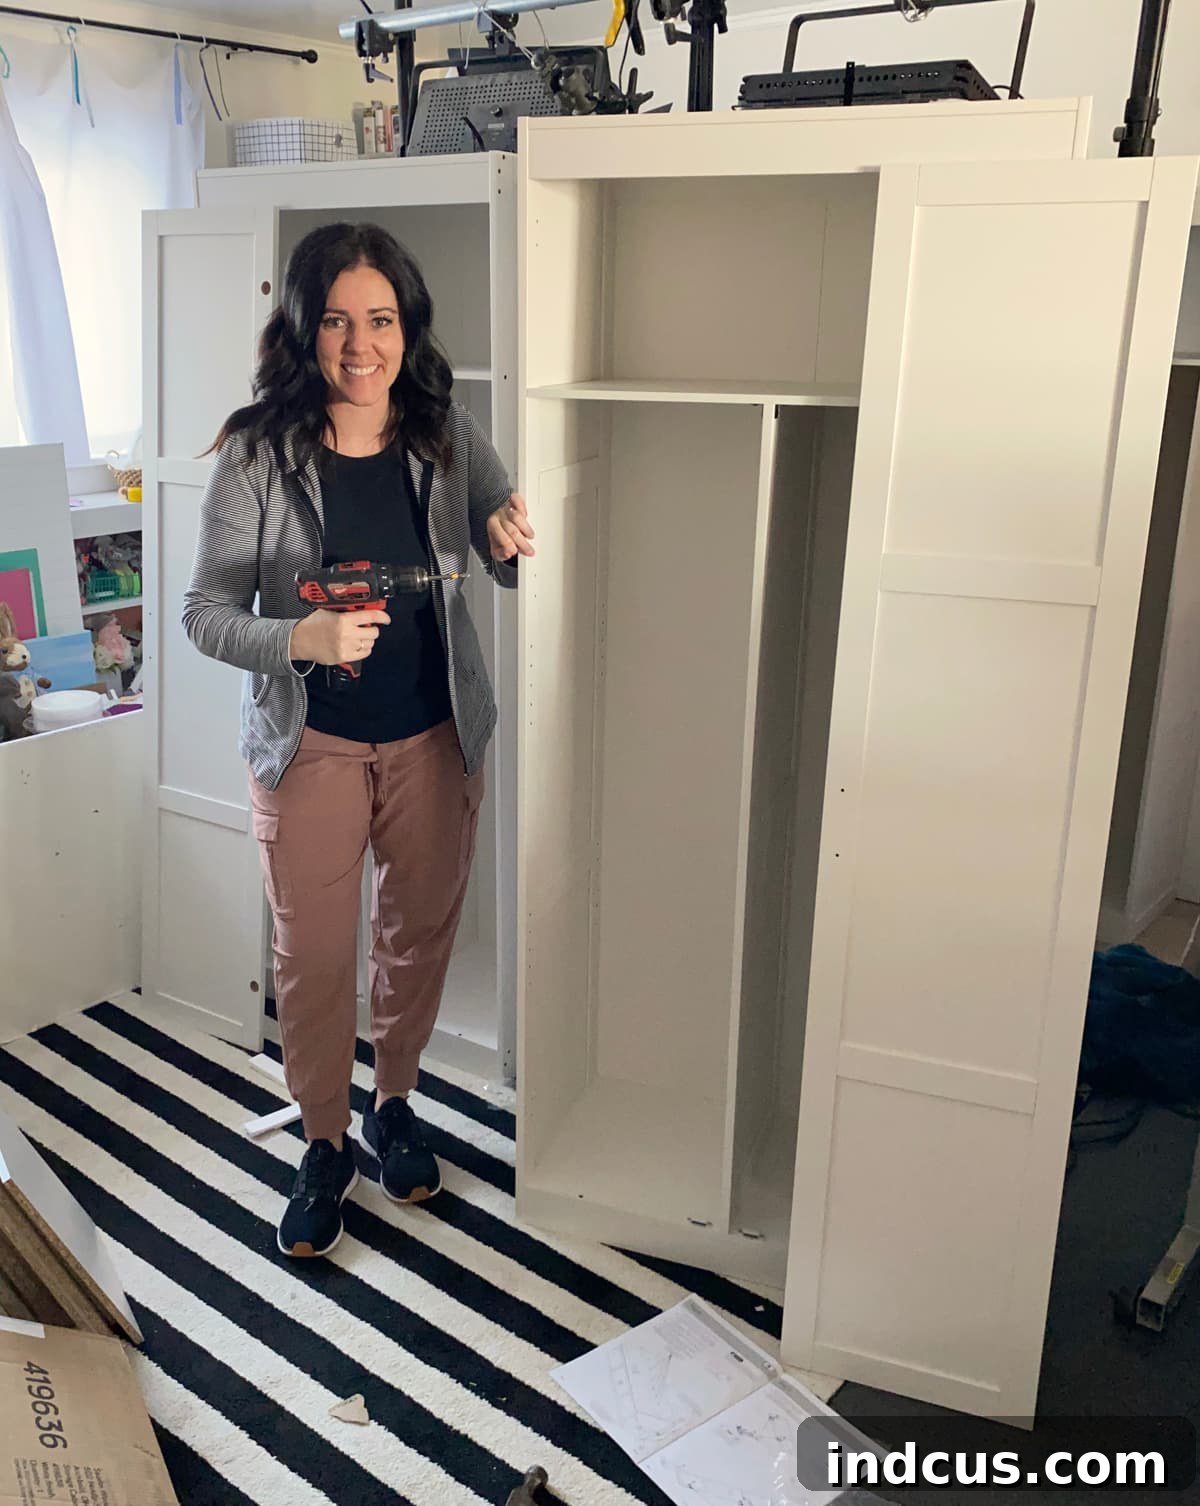
With four cabinets to assemble, I was initially prepared for a lengthy process. However, thanks to the clear instructions and a bit of determination, I was able to build each unit entirely by myself – a truly satisfying achievement! This individual accomplishment filled me with confidence for the subsequent steps. Once all four individual cabinets were standing, structurally sound and ready, the real magic began: the transformation from separate, freestanding pieces into a cohesive, custom-built storage wall. This phase required careful planning and precise execution to create the seamless, integrated look of bespoke cabinetry that would visually anchor the room.
Building the Foundation: The Essential Base Platform
To truly elevate the cabinets and imbue them with the authentic look of custom built-ins, creating a sturdy base platform was a crucial first step. This foundational element serves several vital purposes: it raises the cabinets off the floor, protecting them from spills and minor impacts, and it provides a level, continuous surface that is essential for a truly seamless installation. While I often rely on my eye for quick measurements, for this particular component, which demands utmost precision, I enlisted the expert help of my husband. His meticulous approach to measurement, often down to 32nds of an inch, ensured the base was perfectly square and precisely dimensioned to match the combined footprint of the cabinets. This unwavering attention to detail is absolutely vital for the overall success and stability of the project, especially when dealing with multiple units that need to align flawlessly for a professional finish.
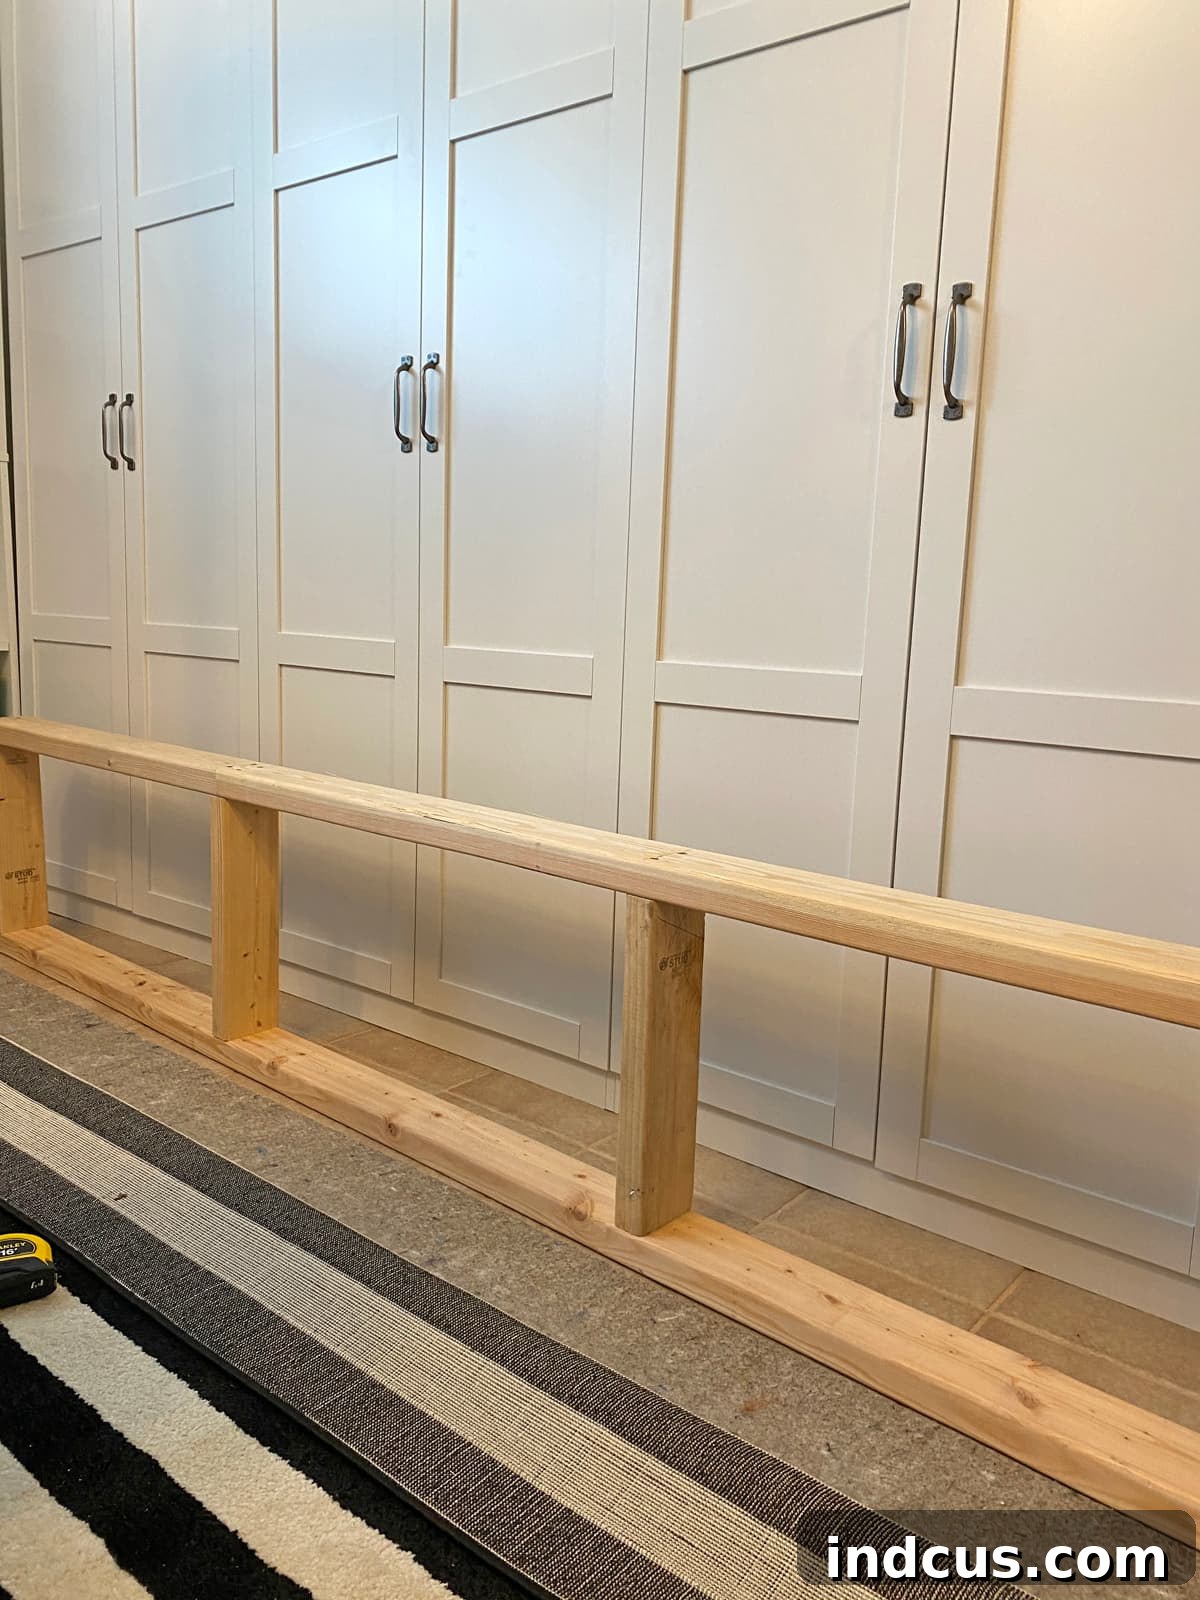
The base platform was expertly constructed from robust 2×4 lumber, engineered to be exactly the same width and depth as all four cabinets when they are pushed together side-by-side. What makes this base particularly effective and robust are the three strategically placed brace pieces running perpendicular through the center. These braces are positioned precisely where the vertical edges of each adjacent cabinet will meet. Their purpose is twofold and critical for long-term durability: they provide essential continuous support to the outer edges of each individual cabinet from below, preventing any potential sagging or instability over time, and they significantly enhance the overall rigidity and sturdiness of the entire assembled unit. This meticulously crafted foundational element is undeniably key to achieving that solid, custom-built feel that differentiates this project from simple freestanding furniture.
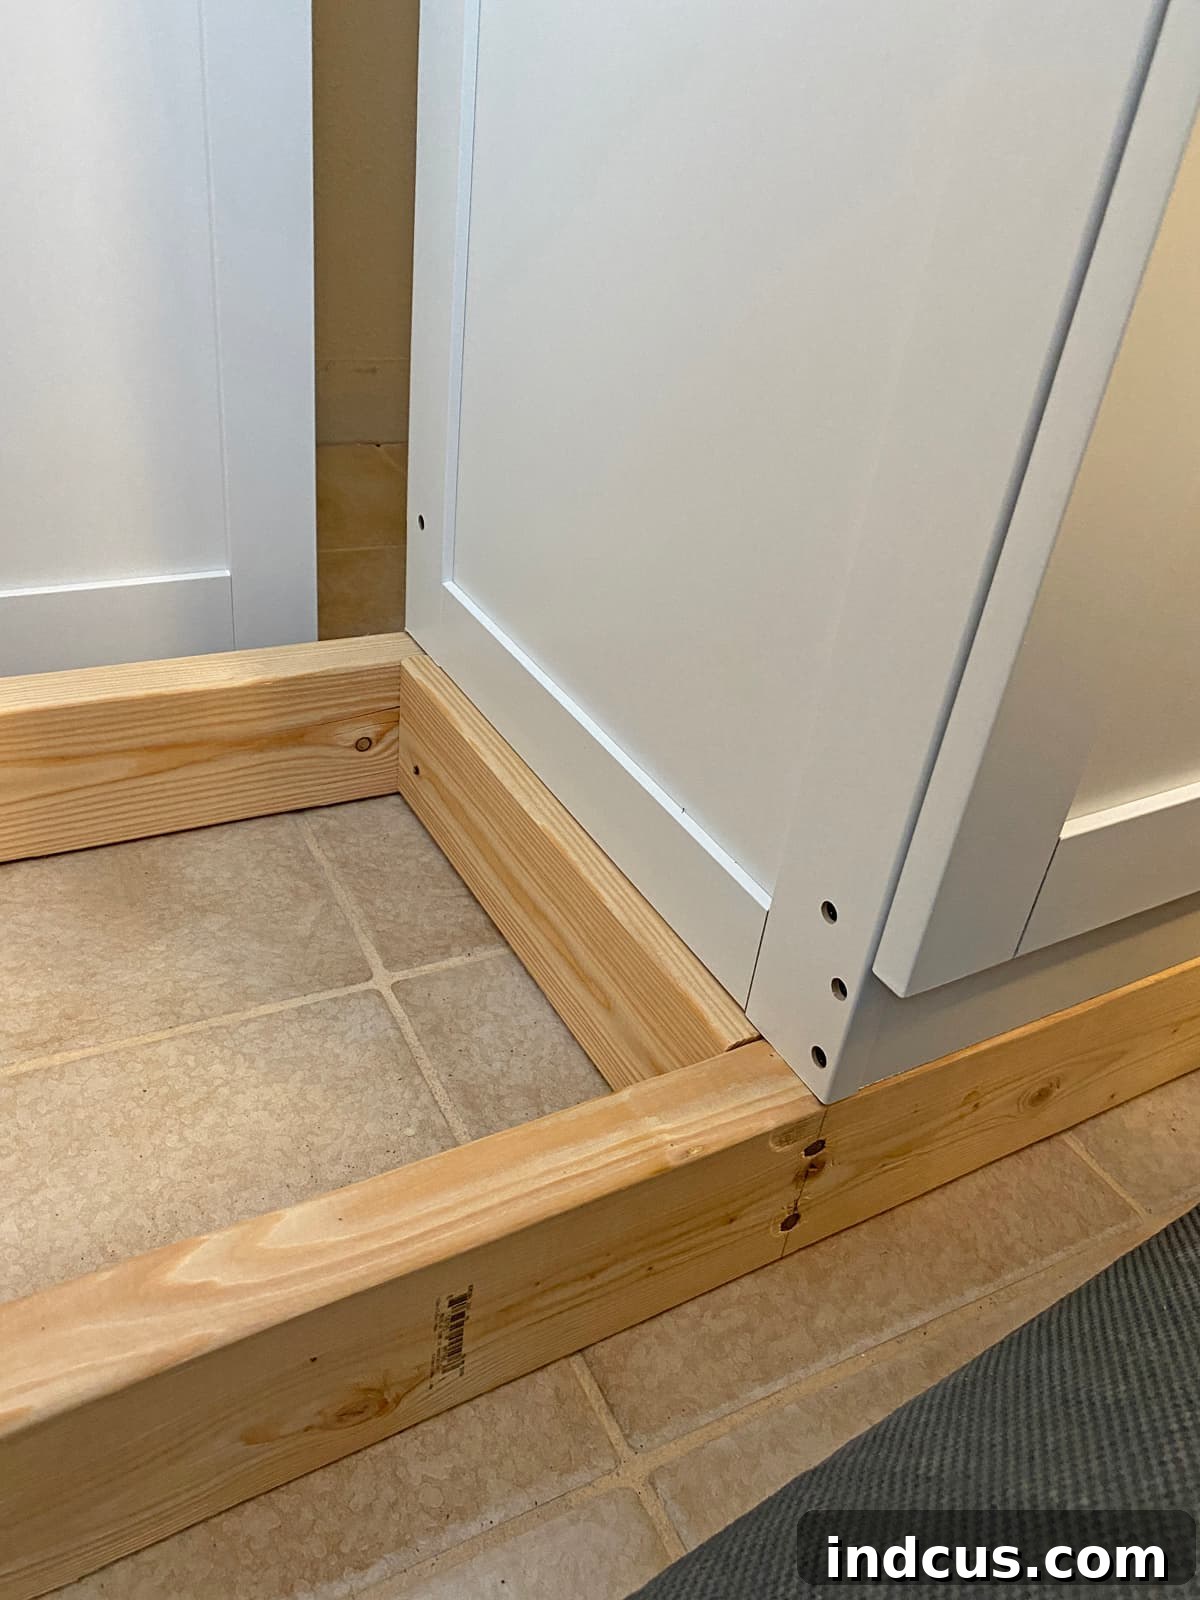
As depicted in the accompanying image, observe how the edge of the initial cabinet is carefully positioned to sit exactly halfway across one of the central support braces. This precise alignment is not arbitrary; it is a deliberate and crucial step in ensuring structural integrity. When the next cabinet is subsequently placed on the platform immediately beside it, its corresponding outer edge will rest securely on the other half of that same shared support brace. This intelligent method ensures that every seam between adjacent cabinets is adequately and continuously supported from underneath, creating a robust, level, and unified surface across the entire length of the built-in unit. This meticulous detail is absolutely essential for achieving a truly seamless and durable installation that will withstand daily use and maintain its custom appearance for years to come.
Securing and Unifying the Cabinets for a Seamless Look
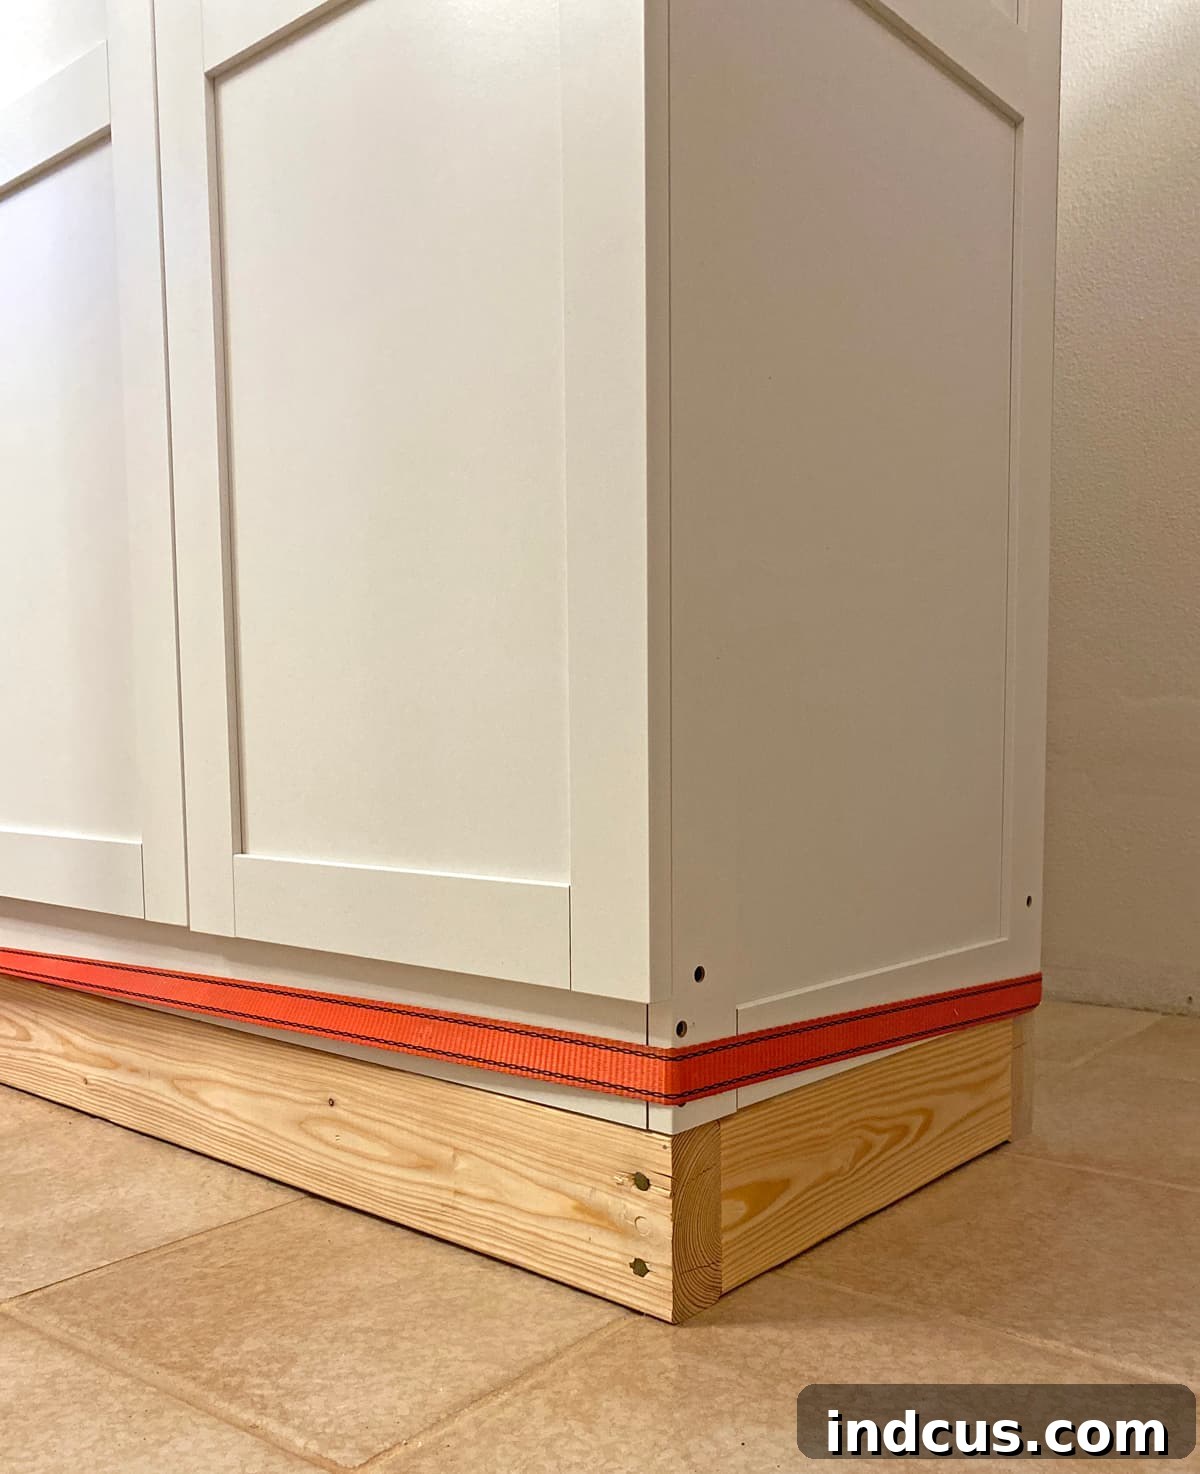
Once all four cabinets were carefully positioned and roughly aligned on the custom-built base platform, the next critical step was to unify them into a single, monolithic unit. Even with careful manual placement, minor gaps can often exist between individual flat-pack furniture pieces, detracting from the desired built-in aesthetic. To eliminate these imperfections and ensure a tight, seamless connection, we employed a simple yet highly effective technique: a heavy-duty cam strap. Wrapping the strap firmly around the entire collective of four cabinets and progressively tightening it allowed us to mechanically “suck” them together. This pressure effectively eliminated any visible gaps between the individual units, creating a solid, continuous surface that is fundamental to the custom look.
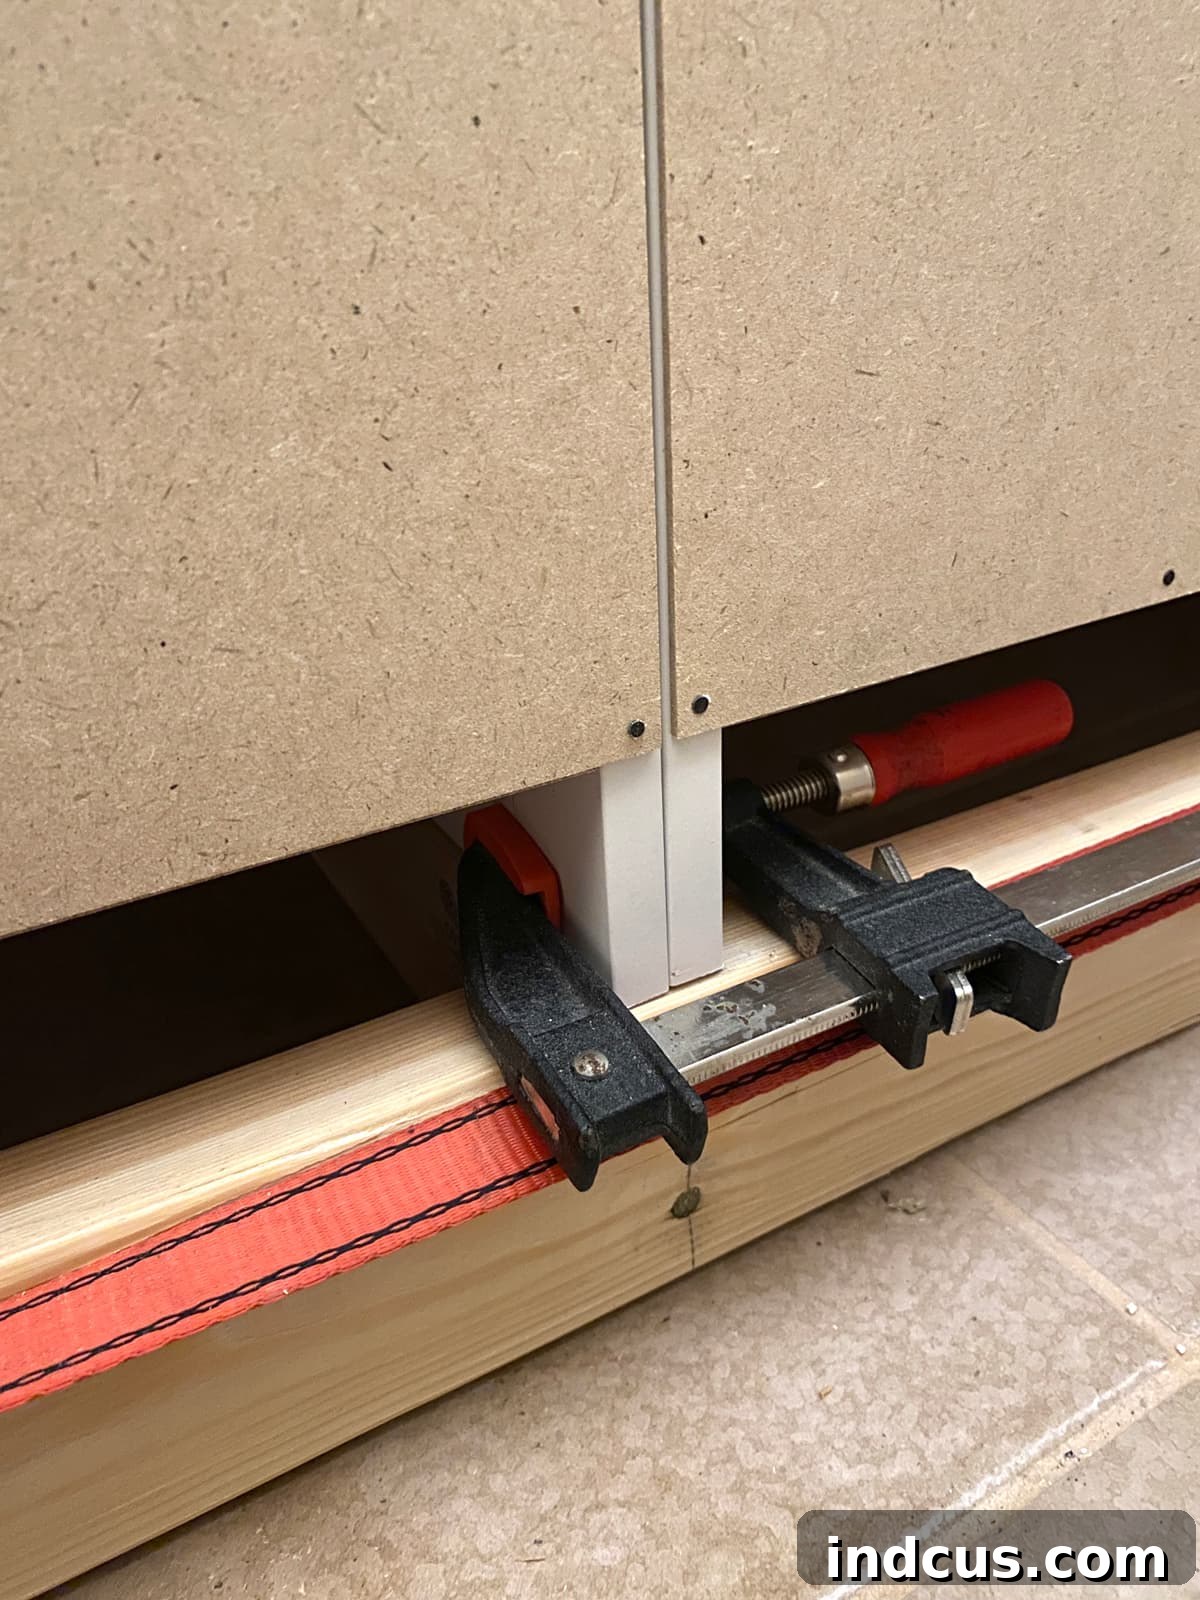
Achieving perfect alignment of the front faces is paramount for a truly professional-looking built-in. After tightening the cam strap to bring the cabinet bodies together, we used sturdy clamps on the back legs of each adjacent cabinet. This provided the necessary leverage to make minute adjustments, ensuring that the front edges of each cabinet were perfectly flush and aligned with its neighbor. This step, while seemingly minor and requiring patience, makes a profound difference in the final appearance. By meticulously eliminating any unevenness or protruding edges, we successfully concealed the “off-the-shelf” origin of the cabinets, elevating them to a more authentic custom aesthetic. Precision at this stage directly translates to a superior, high-quality finish.
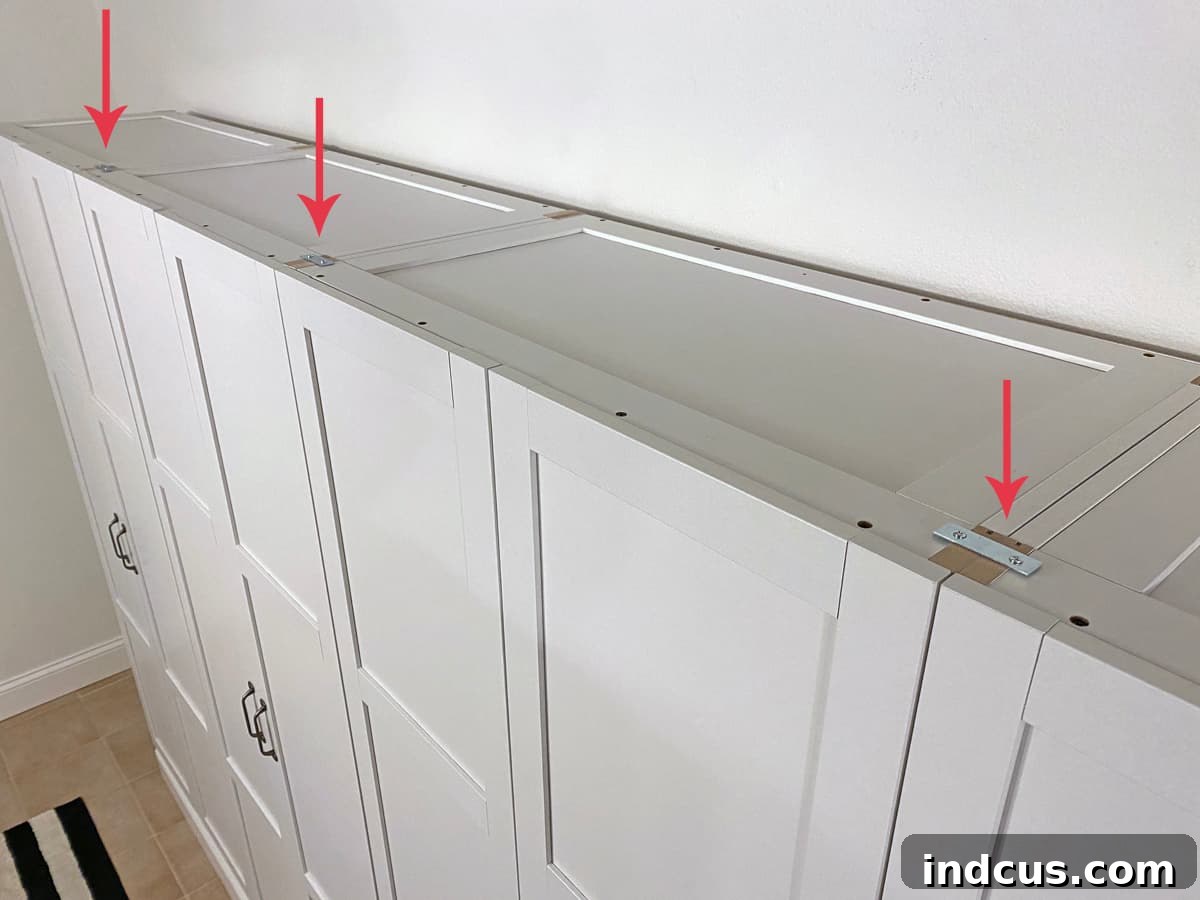
With all four cabinets tightly secured side-by-side and their front faces perfectly aligned, the final structural connection involved permanently reinforcing the seams from above. We utilized flat metal brackets, strategically screwing them across the three points where the cabinets met along their top surfaces. These brackets serve a crucial purpose: they permanently lock the cabinets together, preventing any future shifting, separation, or movement. This robust mechanical bond ensures the entire unit acts as one solid, integrated piece of furniture, further cementing the illusion of a single, custom-built structure. This step is absolutely critical for the long-term stability and maintaining the pristine integrity of the seamless appearance, providing peace of mind that the built-ins will endure for years to come.
The Finishing Touch: Baseboards for a True Custom Aesthetic
The moment of truth, and arguably the most exciting and transformative step in this entire DIY built-in project, was the meticulous installation of the baseboard trim around the newly unified cabinet structure. This seemingly simple addition is precisely where the magic truly happens, elevating the ordinary off-the-shelf units to the distinguished status of genuine built-ins. Once the baseboards were meticulously installed and properly integrated, these four separate cabinets astonishingly began to appear as one continuous, custom-designed piece of furniture, seamlessly and permanently integrated into the room’s architecture. We opted to use the exact same style of baseboards already present throughout the room, which is a key trick for achieving a perfectly matched, high-end, and cohesive finish. To ensure a professional appearance, all corners were carefully mitered, creating tight, virtually invisible joints that further enhance the illusion of custom millwork. This critical detail is absolutely essential for achieving a truly bespoke and polished look, making it indistinguishable from a professionally installed custom unit.
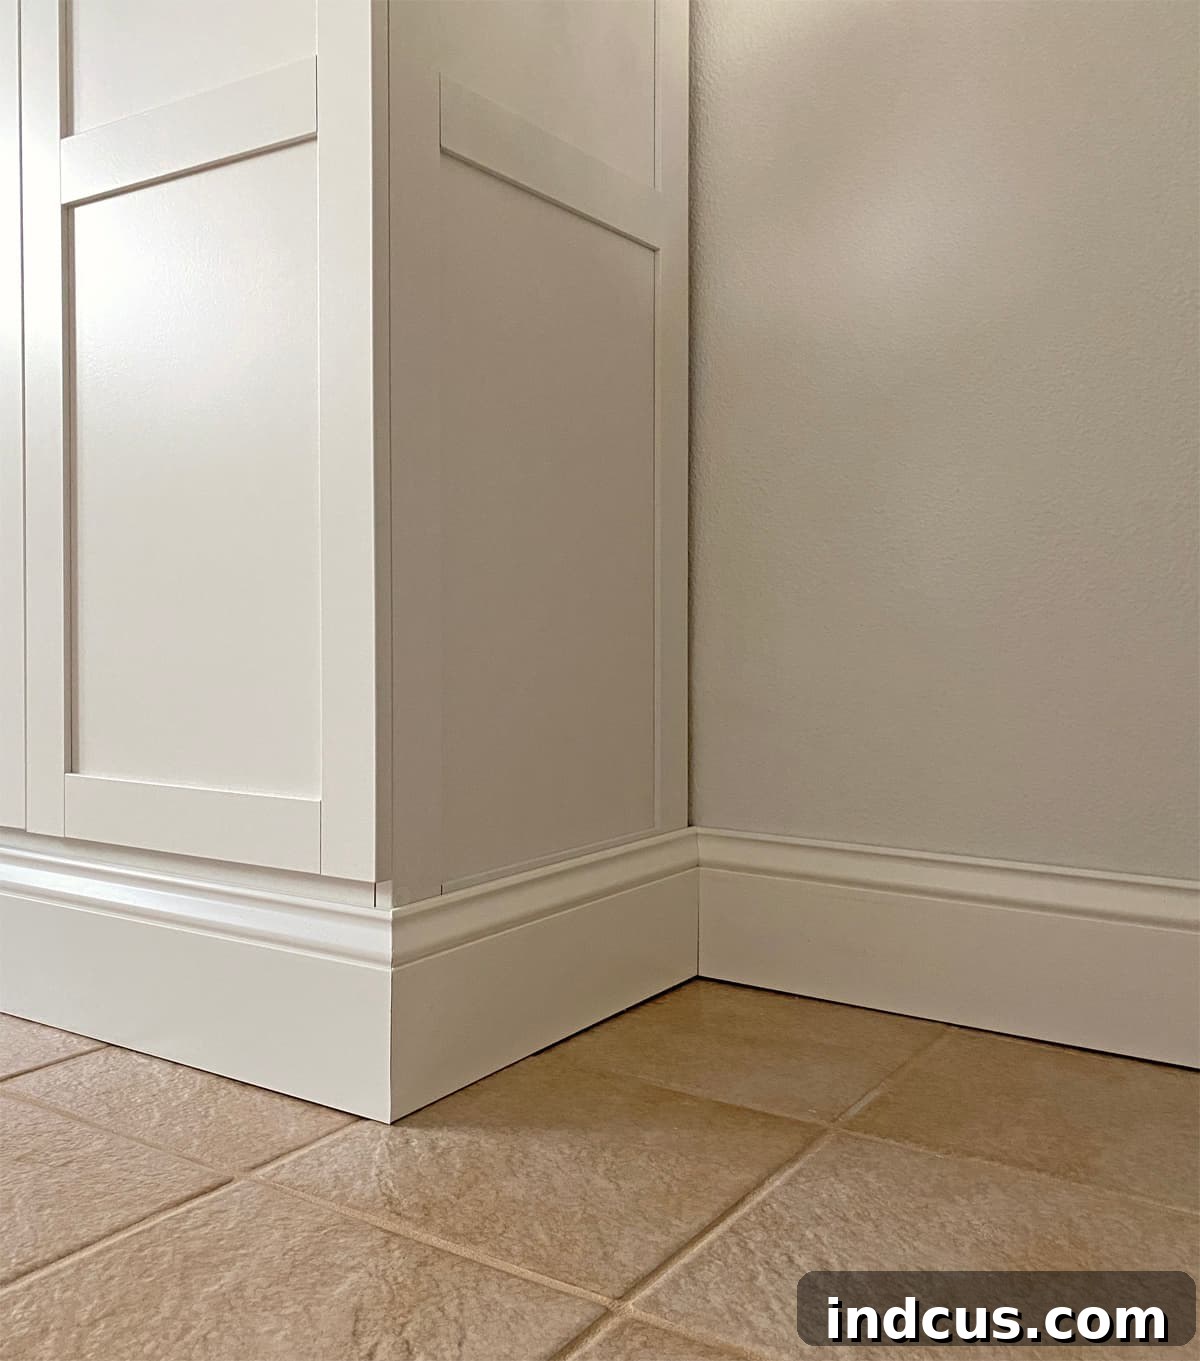
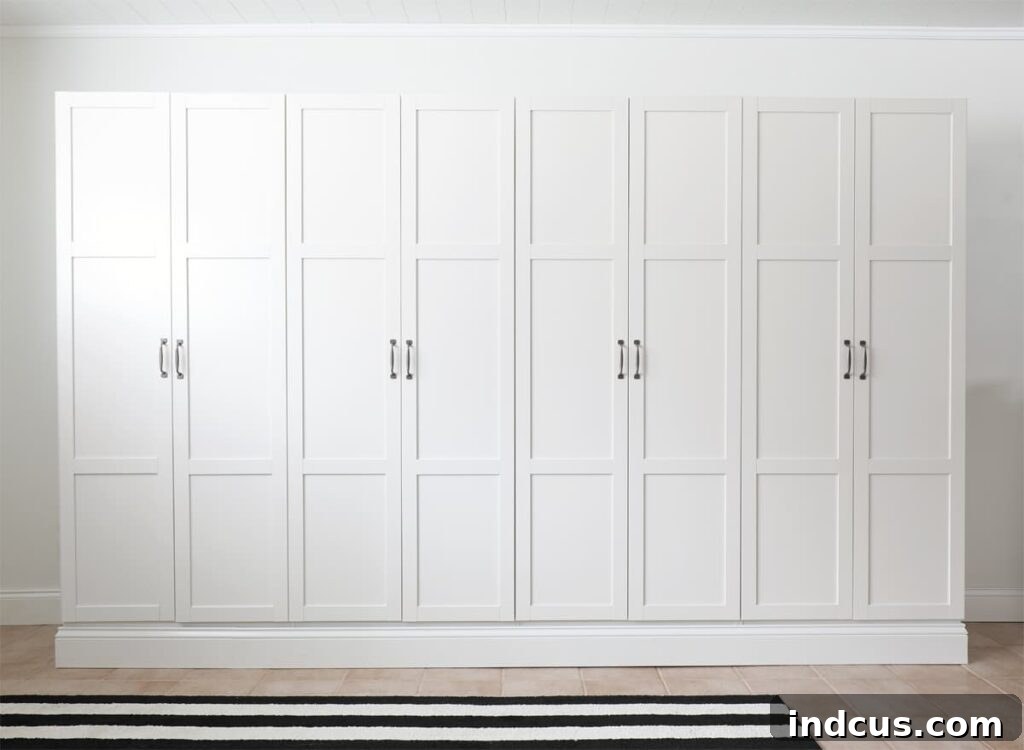
The final touches of caulking any small gaps and meticulously filling nail holes were crucial for achieving absolute perfection in the finish. These often-overlooked details are what truly separate a good DIY project from an exceptional one. Once these final cosmetic steps were complete, the transformation was nothing short of astounding. These previously inexpensive, flat-pack cabinets now exuded the sophisticated charm and bespoke quality of a custom-built storage wall. The result was not merely satisfactory; it was exactly what I had envisioned – a seamless, professional, and incredibly functional addition to my craft room. The feeling of accomplishment, combined with the sheer delight of having such a beautiful and organized space, was immense. I am absolutely in love with this dramatic and impactful home improvement!
Embracing Organization: Maximizing New Storage Potential
The most immediate and impactful benefit of this DIY built-in project is the sheer volume of organized storage now available, which has completely revolutionized my craft room. This expansive wall of cabinetry provides an incredible amount of space, allowing me to finally tuck away all those half-finished projects, seasonal decor, overflowing craft supplies, and various odds and ends that once piled up in disarray. Behind the clean, elegant shaker-style doors, everything is neatly hidden from view, contributing to a calm, visually uncluttered, and inspiring workspace free from distracting visual noise. This newfound order has not only decluttered the physical room but also cleared my mind, making it significantly easier to focus on creative tasks and manage my projects with greater efficiency.
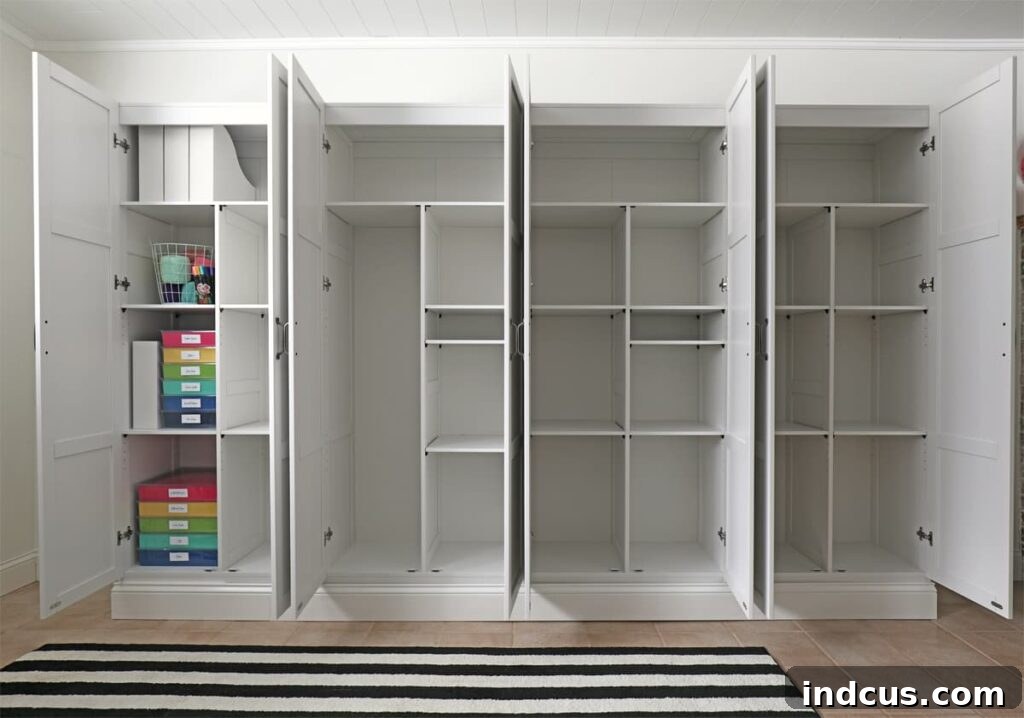
Each of the four cabinets is thoughtfully equipped with multiple adjustable shelves, offering a good degree of flexibility for internal organization. While I might wish for a few more holes to allow for even finer, more granular shelf adjustments – a common desire with many flat-pack units – the existing options are still highly functional and versatile. For instance, I needed one particularly tall section to store large bulletin board paper rolls and vinyl backdrops, so I simply reconfigured two shelves to effortlessly create that extra vertical space, cleverly relocating them to other parts of the cabinets where shorter items reside. This inherent adaptability ensures that even unique or oddly shaped items can find a proper and accessible home, optimizing every cubic inch of storage available and preventing dead space.
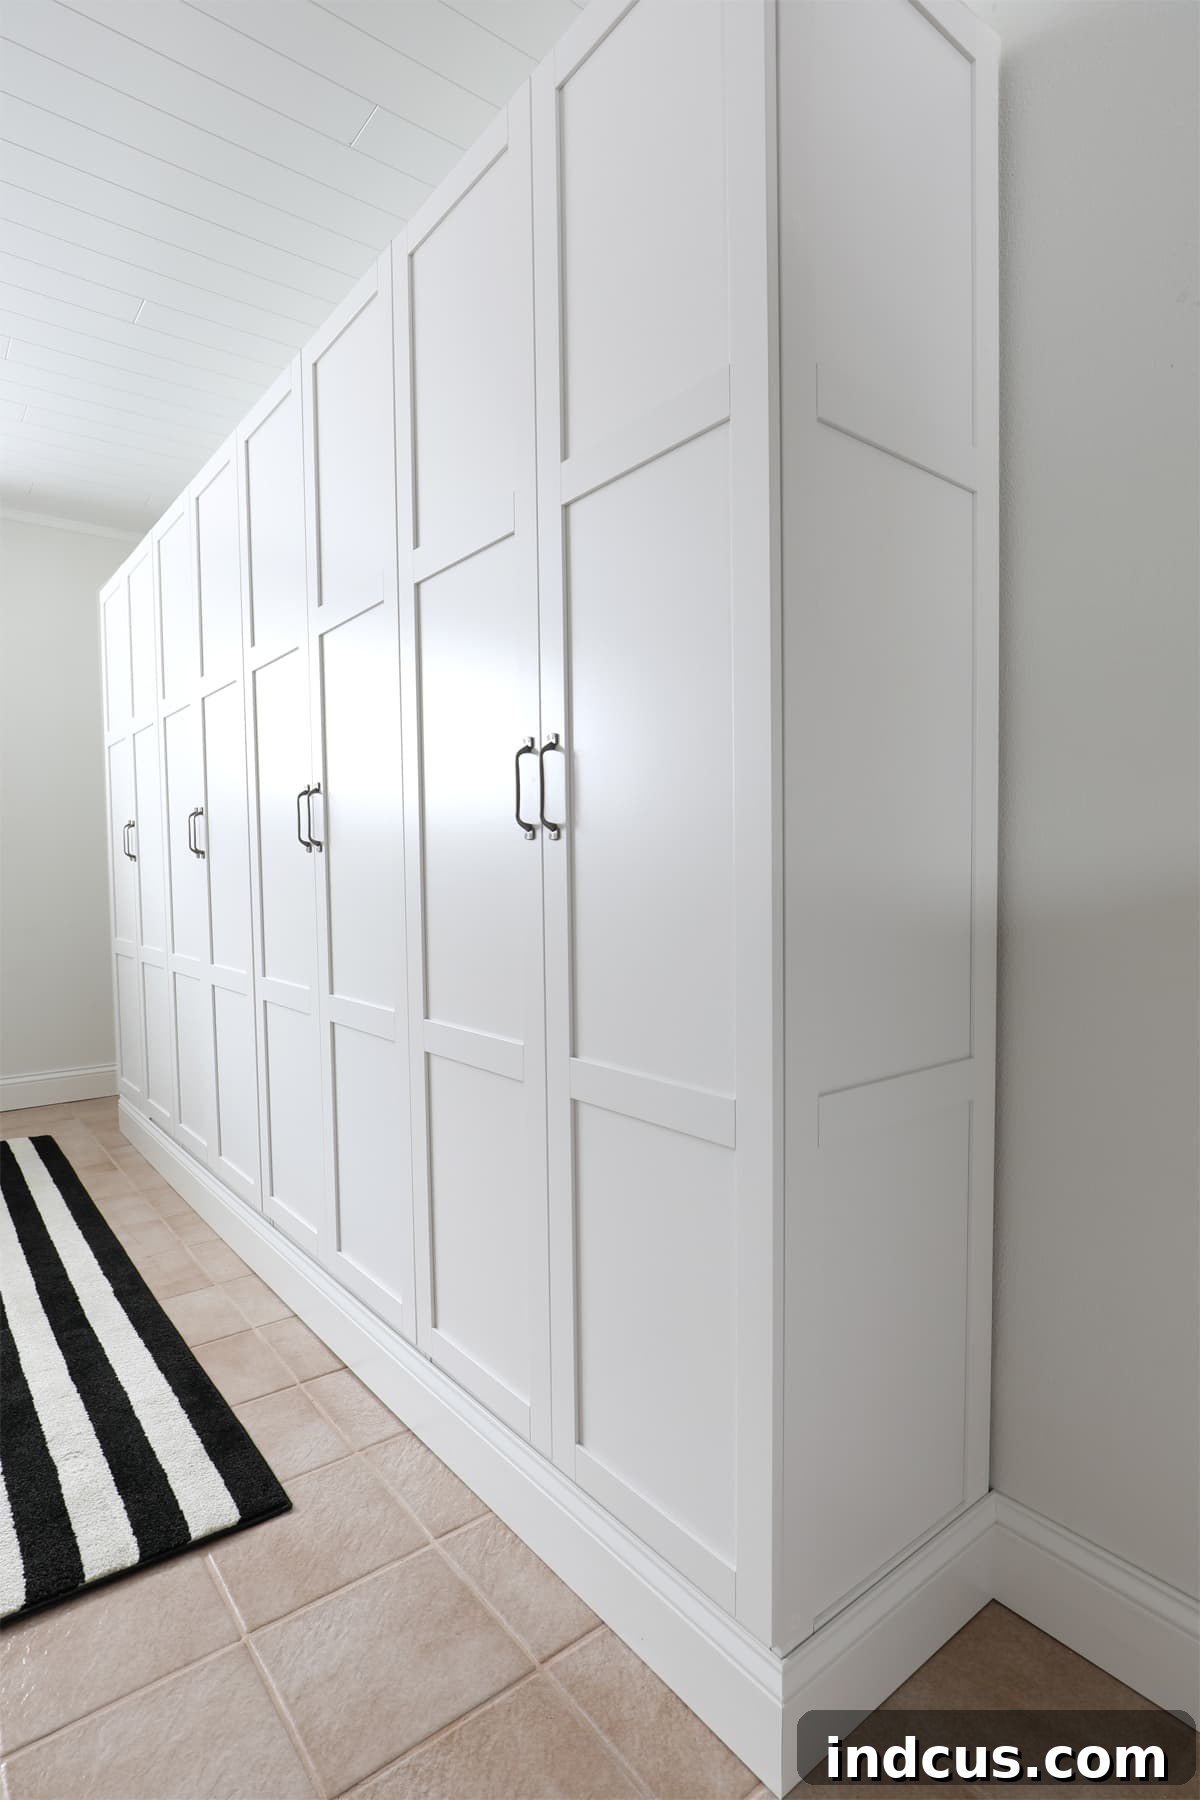
Spanning nearly ten feet in length, this impressive storage wall offers an unparalleled capacity for organization, transforming what was once a chaotic corner into a beacon of efficiency. The aesthetic transformation is truly striking; it’s not just about enhanced functionality, but also about the dramatic visual upgrade it brings to the entire space. The once-cluttered area has been reimagined into a sophisticated and efficient hub, making the entire craft room feel more professional, inviting, and inspiring. It looks incredibly sharp, provides a clean backdrop, and elevates the entire ambiance of the space, promoting a sense of calm and productivity.
I am absolutely thrilled to begin the satisfying process of filling these new cabinets and meticulously organizing my craft room. My preliminary plan involves dedicating one cabinet section specifically for kids’ craft supplies, making them easily accessible yet neatly contained. Another will be for various home décor items and seasonal storage, keeping them safe and dust-free. A third cabinet will house all my current works-in-progress and supplies for upcoming projects, ensuring I can grab what I need without searching. As for the fourth cabinet, I’m holding off on a definitive decision until I see how the other sections perform and what remaining storage needs arise. This phased approach allows for optimal customization and ensures every cabinet serves its purpose efficiently, adapting to my evolving creative requirements.
Beyond the immediate benefits of increased storage and a polished, professional look, one of the unforeseen yet highly valuable advantages of this “built-in” approach is its inherent flexibility. Should my family ever decide to move to a new home, or if the purpose of this room in our current home changes in the future – perhaps from a craft room to a home office or guest space – these cabinets are designed in a way that allows for relatively easy disassembly. This means we can reconfigure them for a new space, repurpose them for different needs in another room, or even move them as a unit, offering a level of adaptability and future-proofing that traditional, permanently installed custom built-ins often lack. It’s an investment in both current organization and future versatility.
I will certainly provide updates on how this robust and elegant storage solution continues to serve my craft room needs in the months and years to come. However, based on the initial impact and immediate benefits, I have incredibly high hopes for its long-term success and durability. This project is a testament to the power of a good old DIY solution, proving that with a little creativity, strategic planning, and careful effort, even the most daunting craft room storage problems can be solved beautifully, affordably, and with a truly custom finish. Here’s to organized spaces, boundless creativity, and the satisfaction of a job well done!







