Mastering the Four-Sided Rib Knit Border: An Essential Guide for Knit Blanket Patterns
Are you an avid knitter who loves the classic, polished look of a rib knit border on your blankets? Many knitting patterns provide instructions for top and bottom ribbing, but achieving that beautifully framed effect on all four sides can often feel like a puzzle. If you’ve ever found yourself wishing for a seamless, continuous rib knit edging that encircles your entire blanket, then you’ve come to the right place! This comprehensive tutorial will guide you step-by-step through a clever technique to add a professional, neatly finished rib knit border to any knit blanket pattern, ensuring a gorgeous outcome every time.
The beauty of a rib knit border extends beyond mere aesthetics. It provides a natural elasticity that prevents the edges of your blanket from curling, giving your project a more structured and enduring finish. While traditional patterns might only feature this elegant detail on two sides, this method empowers you to elevate your knitting, creating a truly custom and high-quality piece. Whether you’re making a cozy baby blanket, a warm throw for your sofa, or a luxurious lapghan, this technique will transform your creations from handmade to artisan.
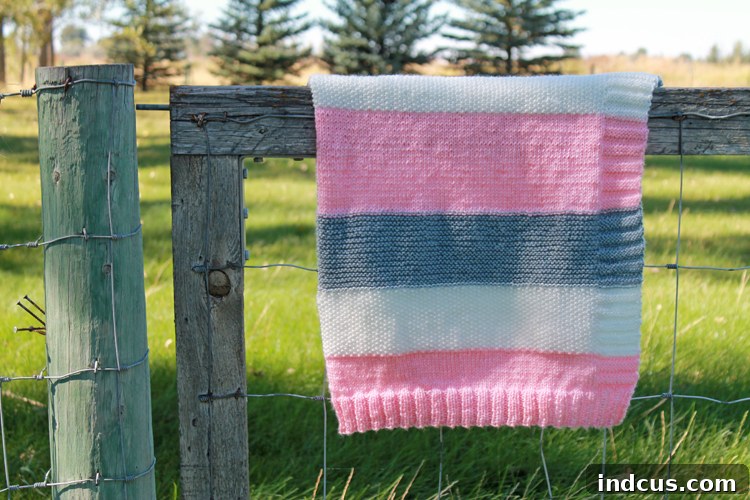
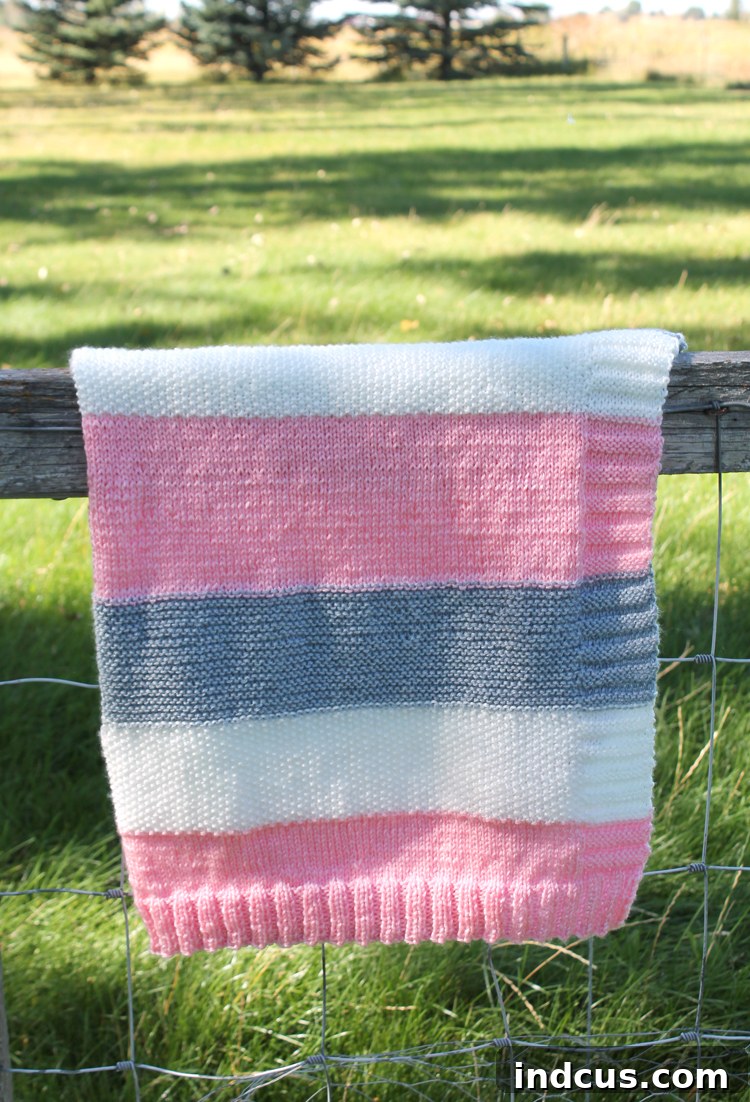
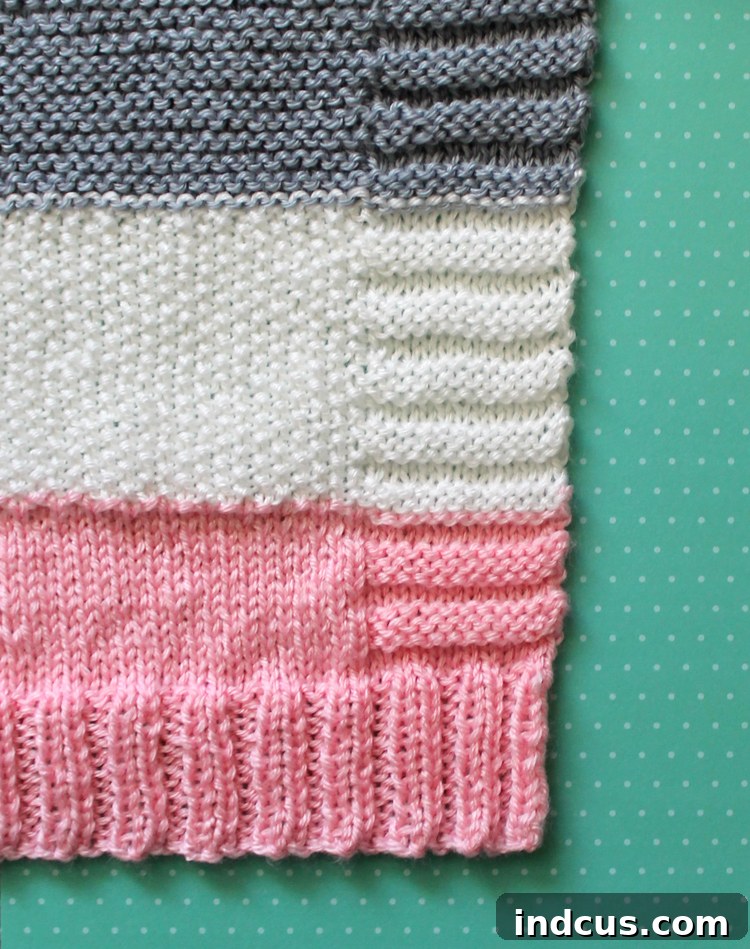
This versatile approach can be seamlessly integrated with virtually any stitch combination you choose for the center section of your blanket. Feel free to unleash your creativity by incorporating different yarn colors to craft striking stripes, intricate color blocks, or whatever design truly speaks to you. In the stunning blanket featured in our photos, the knitter skillfully employed a different stitch pattern for each colored section. This not only added rich texture and visual interest but also served as an excellent opportunity to practice and refine various knitting skills – a testament to the adaptable nature of this technique.
Why a Rib Knit Border is a Must-Have for Your Blankets
A rib knit border is much more than just a decorative element; it’s a strategic design choice that significantly enhances the overall quality and longevity of your knitted blankets. Here’s why it’s an absolute game-changer:
- Prevents Curling: Many stitch patterns, especially stockinette, have a natural tendency to curl at the edges. The inherent elasticity and balanced tension of ribbing counteract this, ensuring your blanket lays flat and beautiful.
- Adds Structure and Weight: Ribbing creates a denser fabric, adding a lovely weight and drape to the edges of your blanket. This makes the finished item feel more substantial and luxurious.
- Professional Finish: A well-executed rib border frames your work, giving it a polished, store-bought appearance that elevates the entire project. It’s the mark of a thoughtful and skilled knitter.
- Timeless Aesthetic: The classic K2P2 (knit two, purl two) rib stitch is universally appealing and complements almost any main blanket pattern, from simple garter to complex cables.
- Enhanced Durability: The robust nature of ribbing makes the edges more resilient to wear and tear, prolonging the life of your cherished handmade blanket.
Gather Your Essential Tools: Materials You’ll Need
Before casting on, ensure you have all the necessary supplies ready. Having everything at hand will make your knitting process smooth and enjoyable:
- Yarn: Choose a yarn appropriate for your desired blanket. Consider the fiber content (wool for warmth, cotton for breathability, acrylic for easy care) and weight (e.g., worsted, chunky, DK). The amount will depend on the blanket size, but always err on the side of having extra.
- Circular Knitting Needles: You’ll definitely want circular needles, even if you’re knitting flat. They comfortably hold a large number of stitches, preventing your work from stretching or falling off. Select a needle size that is appropriate for your chosen yarn weight, typically recommended on the yarn label.
- Stitch Markers: These are invaluable for marking the divisions between your border stitches and the main body stitches. They help you stay on track, especially when you’re working the repeating rows.
- Tapestry Needle (or Yarn Needle): Essential for weaving in all your yarn ends cleanly and securely, ensuring your blanket looks neat and won’t unravel.
- Scissors: For cutting yarn.
- Measuring Tape: To accurately measure your blanket as it grows, ensuring you achieve your desired dimensions.
The Overall Pattern Summary: Your Roadmap to a Ribbed Masterpiece
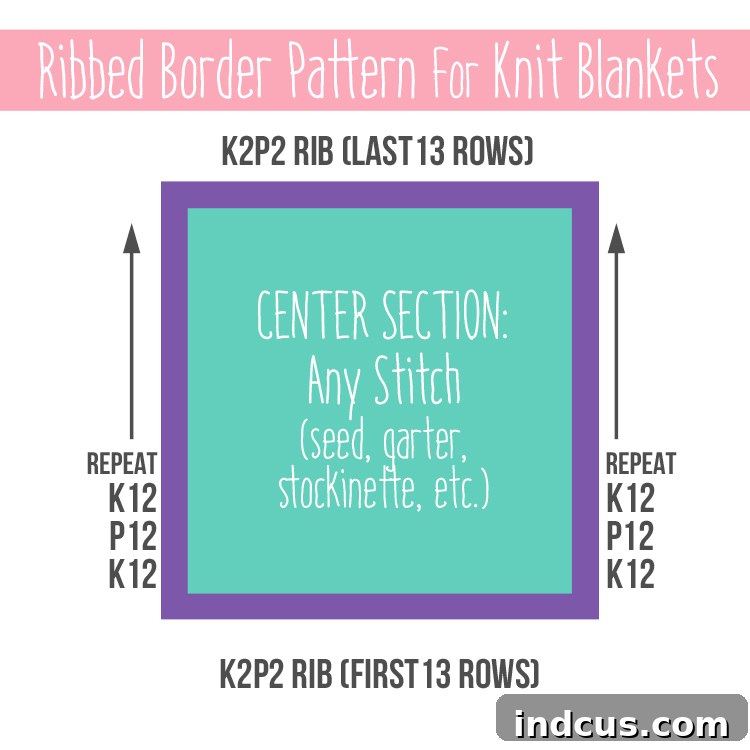
Let’s dive into the core mechanics of this elegant blanket construction. The trick to achieving a four-sided rib border lies in establishing the bottom border first, then knitting the side borders simultaneously with the blanket’s body, and finally finishing with a matching top border. This creates a beautifully cohesive frame around your entire project.
Step 1: The Foundation – Casting On and the Initial Border
Begin by casting on 136 stitches onto your circular needles. The number 136 is ideal for this specific blanket, but it’s crucial to understand the underlying principle: your starting stitch count must be divisible by 4. This is because we are creating a K2P2 rib, which requires groups of 4 stitches to maintain its pattern perfectly across the entire row. If you plan a different ribbing (e.g., K1P1), you would adjust your cast-on count accordingly. Choose a casting-on method that you find comfortable and that provides a flexible edge, such as the long-tail cast-on.
Rows 1-13: Establishing the Bottom Rib Border
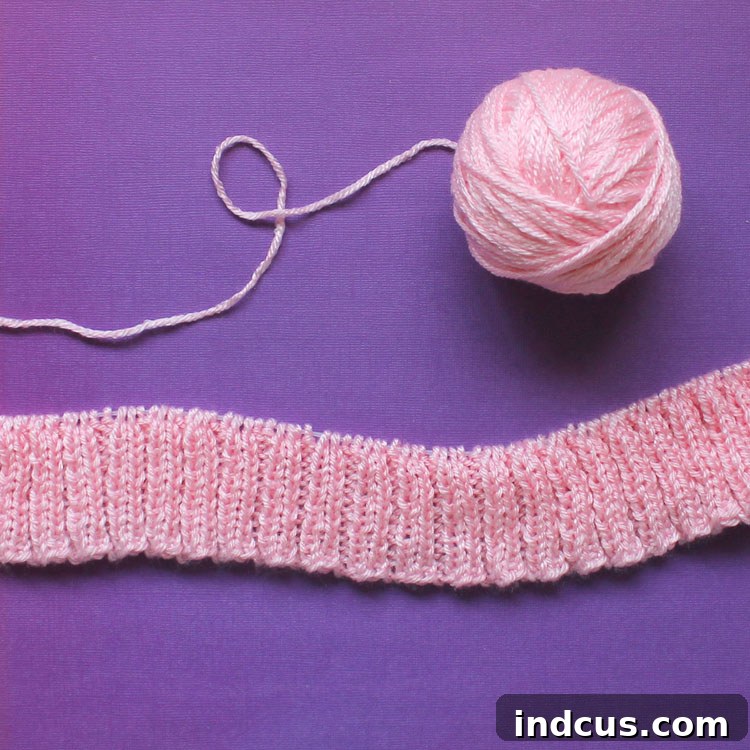
For the first 13 rows, you will work entirely in a K2P2 (knit two, purl two) rib stitch. This creates the bottom border of your blanket. This is a common and highly effective rib pattern, known for its elasticity and clean appearance. Work each stitch precisely, ensuring consistent tension to create a smooth and even border. After 13 rows, you will have a beautiful, springy edge that will prevent your blanket from curling.
Step 2: Crafting the Side Borders and Blanket Body Simultaneously
This is where the magic happens! From this point on, you will be knitting the side borders and the main body of the blanket in the same rows. This technique ensures a continuous, seamless look.
Preparing for the Main Body: Marking Your Stitches
Before starting Row 14, it’s highly recommended to place stitch markers. Count 12 stitches from the beginning of your row and place a marker. Then count 12 stitches from the end of your row (the last 12 stitches) and place another marker. These markers delineate your side borders (the first 12 stitches and the last 12 stitches) from the central body stitches. This visual cue will prevent errors and make it much easier to follow the pattern.
Row 14: Beginning the Side Borders
Knit 12 stitches (K12) for the first side border. These 12 stitches will be worked in K2P2 ribbing throughout the blanket’s length to maintain the ribbed edge. After your K12, you will then knit the rest of the row in whatever stitch pattern you have chosen for the body of your blanket. Work your chosen body stitch until you reach your second stitch marker, which indicates the beginning of the last 12 stitches. Finally, K12 again for the second side border, also in K2P2 ribbing.
Row 15: Continuing the Rib and Body
Purl 12 stitches (P12) for the first side border, continuing the K2P2 rib pattern. Then, work the body of the blanket in your chosen stitch pattern (this might be knit, purl, or a more complex pattern depending on your choice). Once you reach the second stitch marker, purl 12 stitches (P12) for the last side border, completing the K2P2 rib.
Row 16: Reinforcing the Side Borders
Knit 12 stitches (K12) for the first side border. Continue working the blanket body in your chosen stitch. Then, K12 for the last 12 stitches, maintaining the K2P2 rib for the second side border.
Repeat Rows 14-16 Until Desired Length
Continue repeating Rows 14, 15, and 16. These three rows form the core of your blanket construction. You will repeat this sequence until your blanket reaches the desired length, or until you are satisfied with its size and are ready to add the final border. Remember to periodically lay out your blanket and measure it to ensure you’re on track to achieve your target dimensions.
Choosing Your Blanket Body Stitch
The beauty of this pattern lies in its adaptability. You can use any stitch you desire for the main body of the blanket, making each project uniquely yours. Here are a few popular ideas:
- Garter Stitch: Simple, reversible, and lays flat. A great choice for beginners.
- Stockinette Stitch: Creates a smooth, V-shaped fabric. Pair with the rib border to prevent curling.
- Seed Stitch: Offers a lovely textured, dotted appearance and is also reversible.
- Basketweave Stitch: Provides a visually interesting, checkered texture.
- Cables or Lace: For more experienced knitters, these patterns can add incredible depth and sophistication.
Consider knitting a small swatch of your chosen body stitch and the rib border together to see how they interact before committing to the full blanket.
Changing Yarn Colors for Stripes or Blocks
To create a striped or color-blocked blanket, simply introduce your new yarn color at the beginning of a new row. Tie off the old color, leaving a tail of a few inches, and tie on the new color securely. Don’t forget to weave in all your ends as you go or at the end for a neat finish.
Step 3: The Grand Finale – The Top Border
Once your blanket has reached its desired length and you’ve completed a full repeat of Rows 14-16, it’s time to add the finishing touch – the top rib border, mirroring the bottom.
Last 13 Rows: Completing the Frame
For these final 13 rows, you will stop working your chosen body stitch and revert to knitting K2P2 rib all the way across for every stitch in each row. This creates a harmonious, continuous ribbed frame around your entire blanket, perfectly matching the bottom and side borders. Maintain the same consistent tension you used for the initial border to ensure a uniform look.
Step 4: Binding Off for a Professional Finish
After completing your final 13 rows of K2P2 rib, it’s time to bind off your stitches. To maintain the elasticity and neatness of your rib border, it’s best to bind off in pattern. This means you will knit the knits and purl the purls as you bind off each stitch. Be careful not to bind off too tightly, as this can create a stiff, constricted edge. A slightly looser bind-off will ensure your top border matches the flexibility of the rest of the blanket.
Finishing Touches: Elevating Your Handmade Creation
The work doesn’t end when the knitting needles are put down. A few crucial finishing steps will ensure your blanket looks its absolute best:
- Weaving in Ends: Take the time to carefully weave in all yarn tails using your tapestry needle. This not only makes your blanket look tidy but also secures the yarn, preventing unraveling. Aim to weave ends into stitches of the same color for an invisible finish.
- Blocking: While optional, blocking can dramatically improve the appearance of your finished blanket. It helps to even out your stitches, relax the fibers, and set the final shape and dimensions of your project. Depending on your yarn, you might wet block, steam block, or spray block. This step can transform a good blanket into a truly exceptional one.
Tips for Success on Your Rib Knit Blanket Journey
- Swatch, Swatch, Swatch: Always knit a gauge swatch before starting your blanket. This ensures your stitch count and row count will match the desired dimensions, and helps you identify if your needle size is correct for your chosen yarn and tension.
- Consistent Tension: Strive for even tension throughout your knitting. Inconsistent tension can lead to uneven stitches and a less polished look. Practice makes perfect!
- Stitch Markers are Your Friends: Don’t underestimate the power of stitch markers. They are invaluable for keeping track of your border stitches, especially when you’re engrossed in your main body pattern.
- Don’t Be Afraid to Experiment: Once you understand the basic framework, feel free to play with different rib patterns (e.g., K1P1, K3P1) for your borders, or explore complex stitch patterns for the body.
- Correcting Mistakes: It’s okay to make mistakes! Learning how to “read your knitting” and fix errors like dropped stitches or incorrect purls will save you time and frustration in the long run.
Troubleshooting Common Issues
- Edges Still Curling: If your side borders are still curling, double-check that you are consistently maintaining the K2P2 ribbing for all 12 border stitches on both sides. Also, ensure your bind-off isn’t too tight.
- Inconsistent Border Width: This usually points to tension issues. Try to relax your hands and maintain a steady pace. Blocking can often help to even out minor inconsistencies.
- Lost Track of Rows: Use a row counter, or simply mark down each completed row on paper. This is especially helpful for the initial and final 13-row sections.
I genuinely hope that this detailed tutorial provides you with the clarity and confidence to create beautiful blankets with perfect four-sided rib knit borders. As a fellow crafting enthusiast, not a professional knitter, my aim is simply to share effective techniques that have worked for me. Embrace the process, enjoy the meditative rhythm of knitting, and take pride in crafting something truly special with your own hands. Happy crafting!