Unleash Your Inner Patriot: Four Festive Fourth of July Tie-Dye T-Shirt Ideas
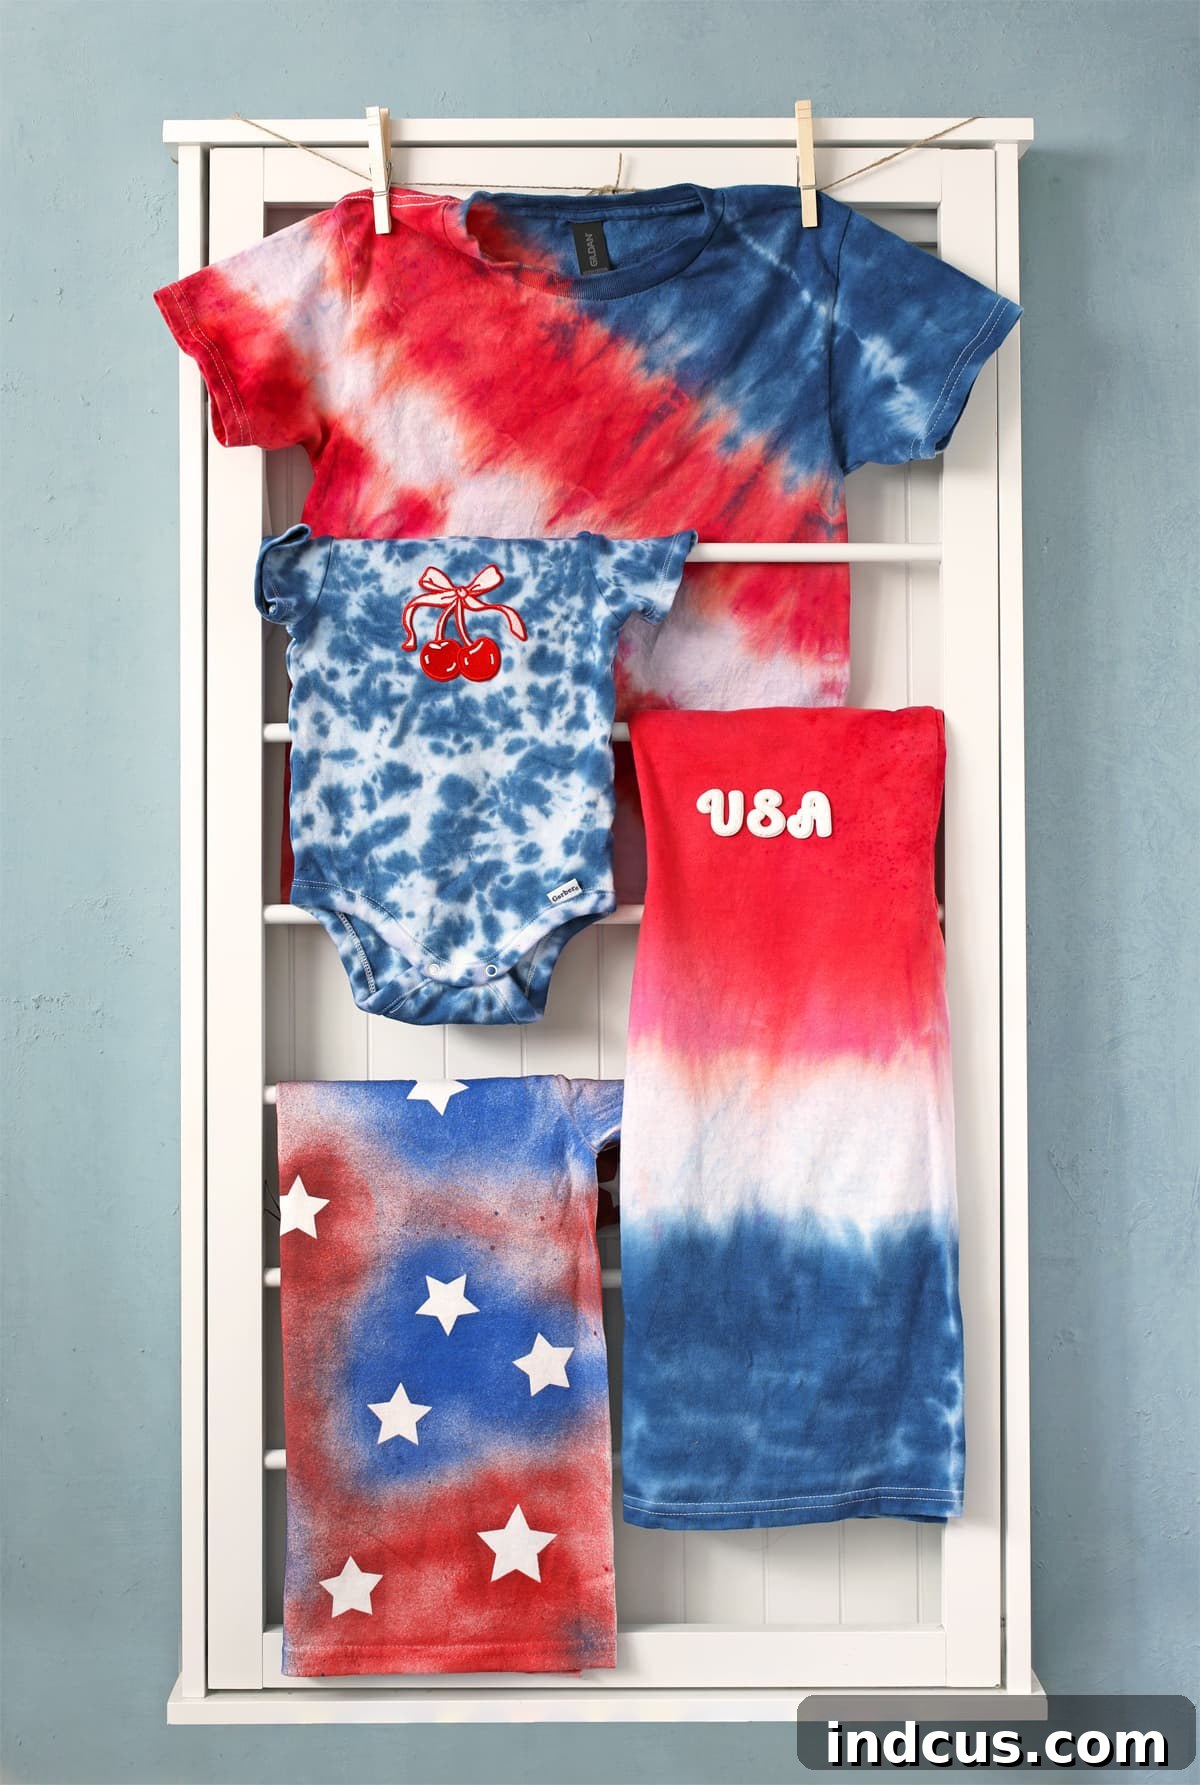
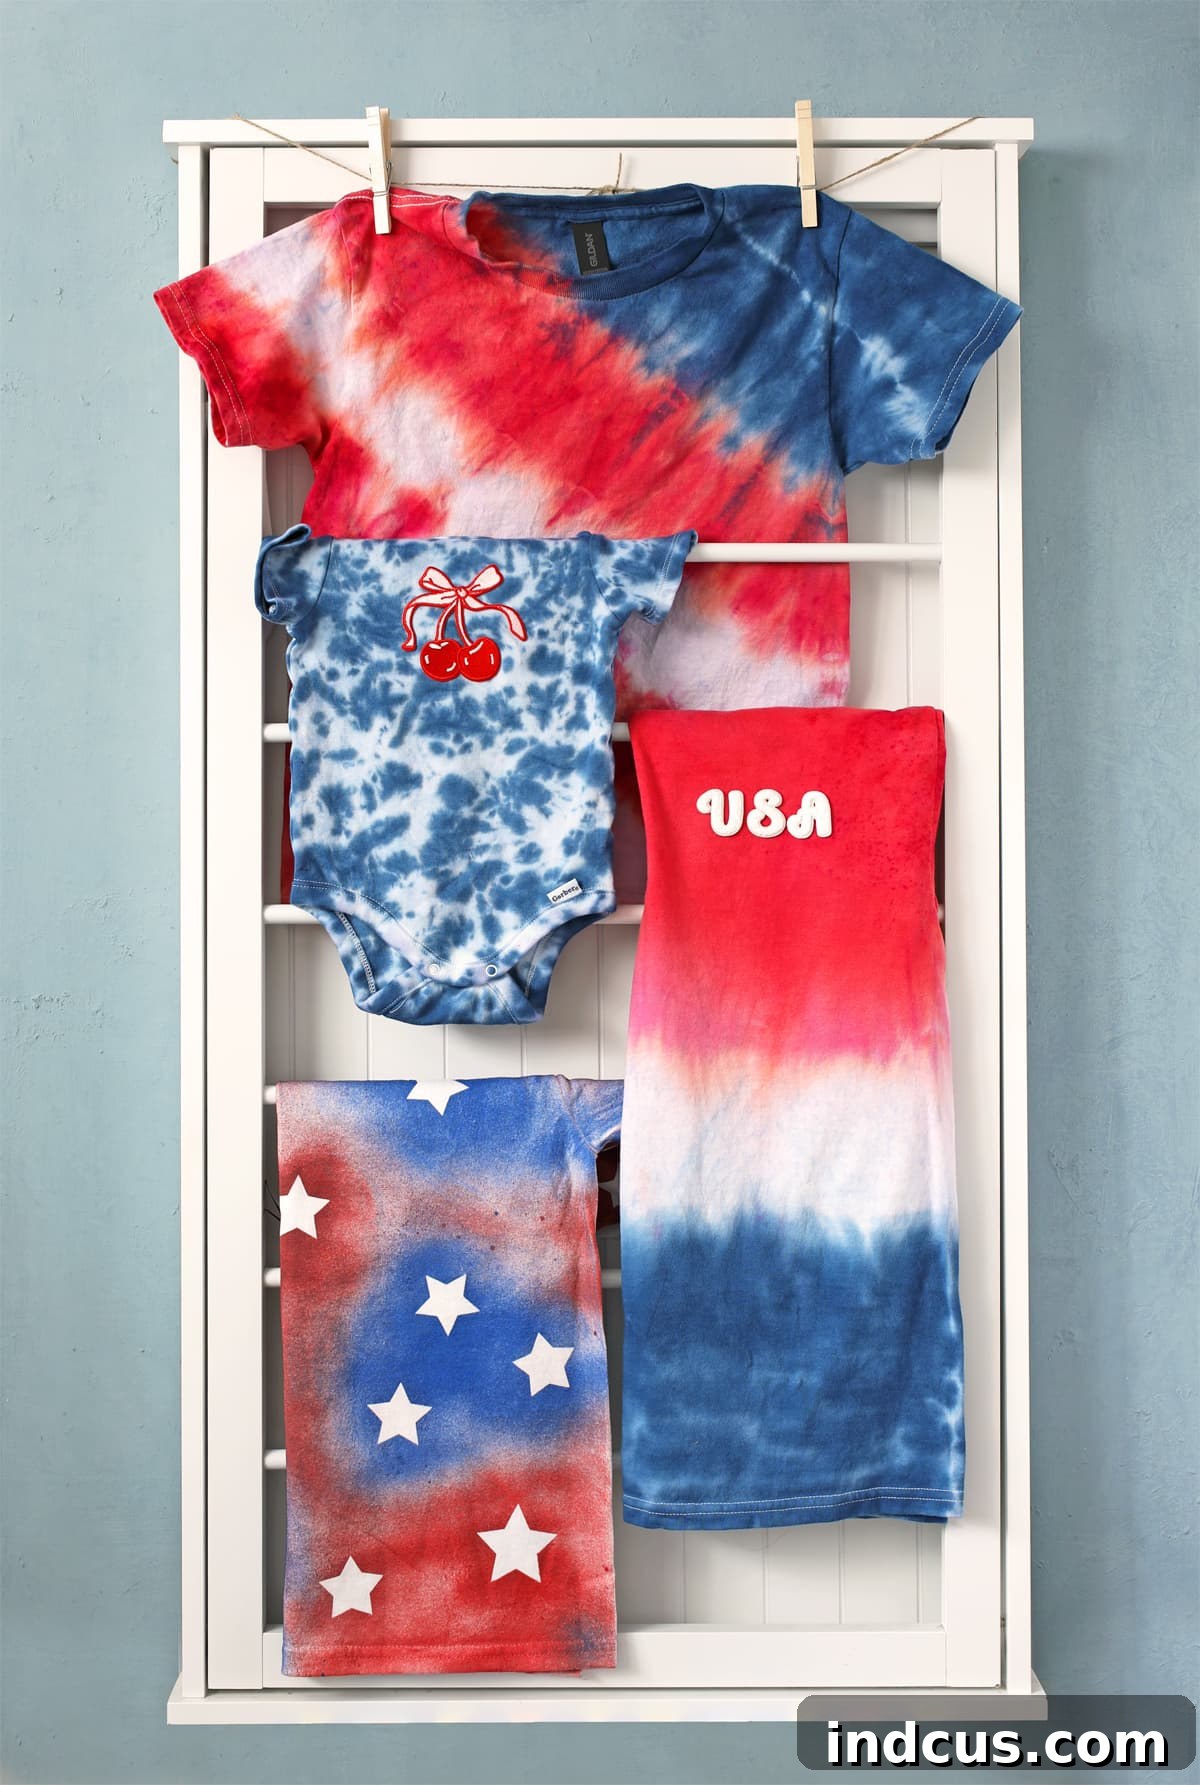
There’s nothing quite like celebrating the Fourth of July with a splash of vibrant red, white, and blue! Whether you’re attending a backyard BBQ, watching fireworks light up the night sky, or simply enjoying a summer day, a patriotic t-shirt is the perfect way to show your spirit. And what could be more fun and unique than creating your very own custom tie-dye design? This guide will walk you through four exciting and easy tie-dye t-shirt ideas, perfect for Independence Day and all your summer adventures. We’ll cover everything from classic patterns to modern twists, ensuring you have the perfect festive attire. Get ready to transform plain white tees into wearable works of art!
This post is sponsored by Hobby Lobby.
Gather Your Creative Arsenal: Essential Supplies for Patriotic Tie-Dye
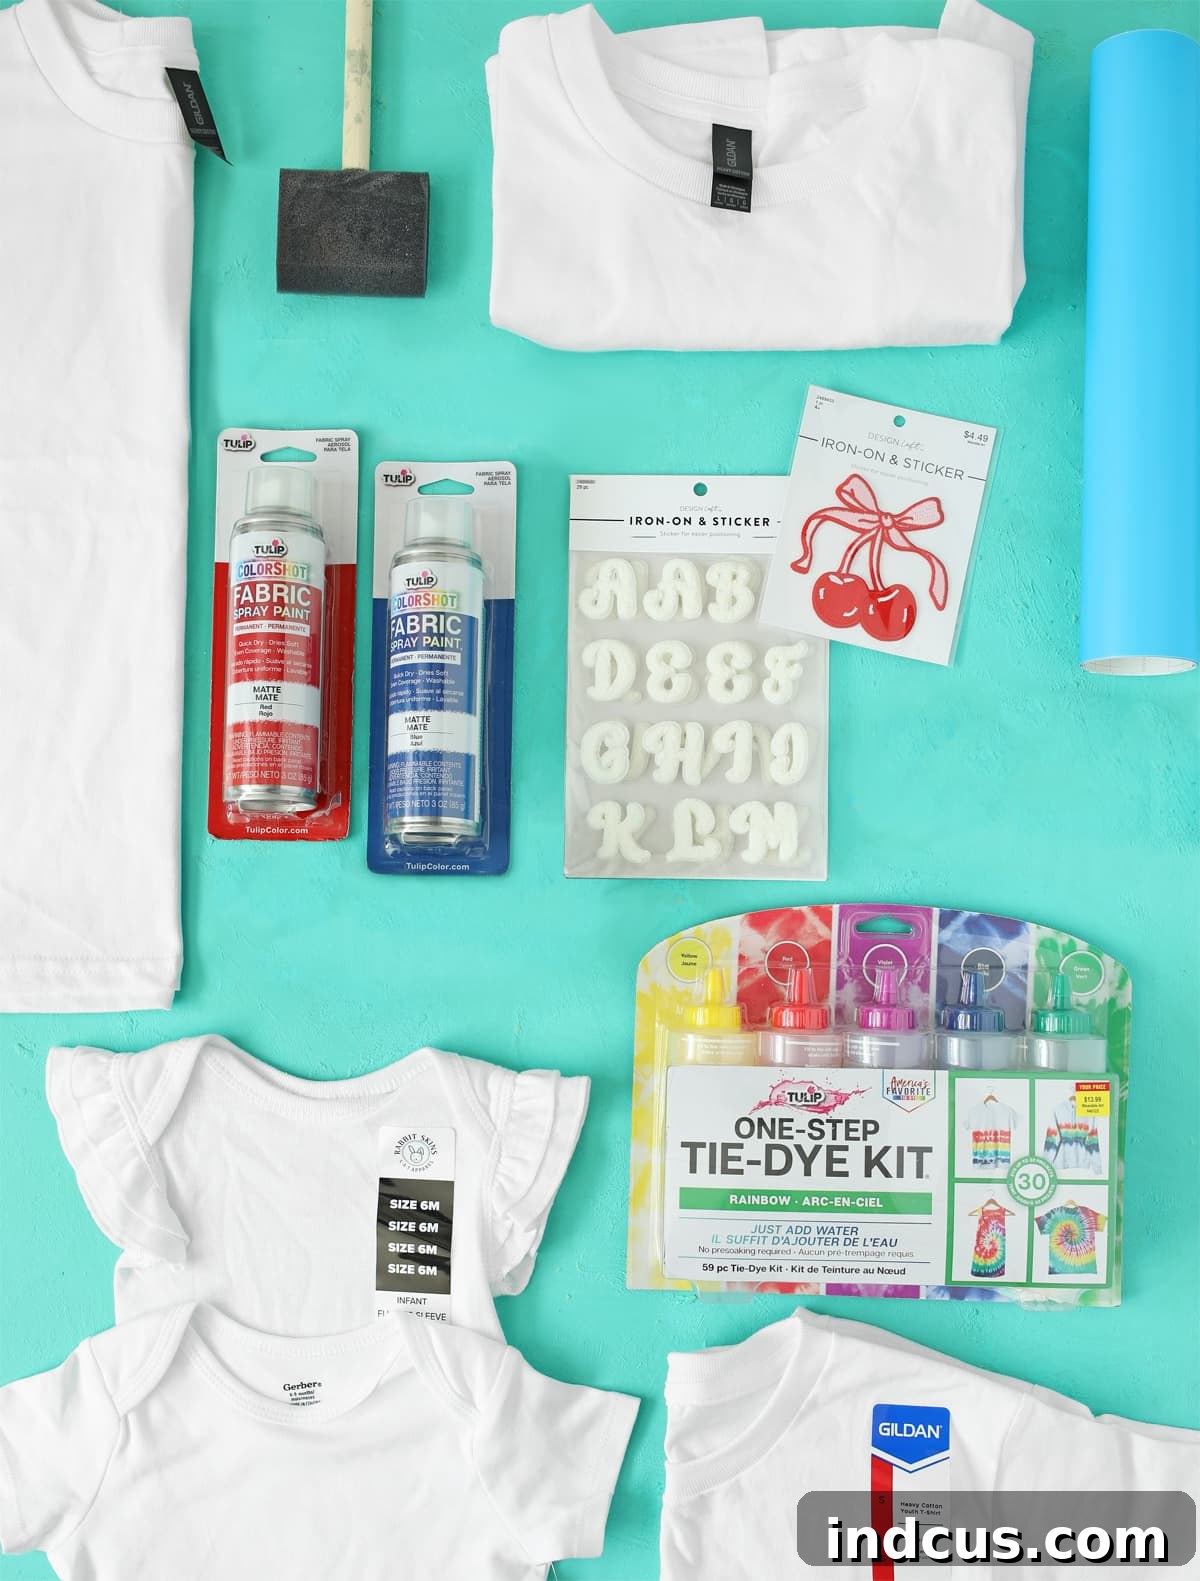
Before diving into the dyeing process, let’s ensure you have all the necessary tools and materials. The beauty of these projects is that almost everything you need can be conveniently found at one fantastic store: Hobby Lobby. Their extensive selection and great prices make it simple to gather all your supplies in one go, saving you time and effort.
Materials Needed:
- White Cotton Shirts: Choose 100% cotton shirts for the best dye absorption and most vibrant results. Hobby Lobby offers a wide variety of sizes and styles for the whole family, ensuring everyone can participate in the fun.
- Tie Dye Kit with red and blue dye: A one-step kit is incredibly convenient, usually including dye powders, squeeze bottles, rubber bands, and gloves. Look for kits specifically designed for vibrant results on natural fibers.
- Fabric Spray Paint (Blue + Red): This offers a unique alternative to traditional liquid dye, perfect for creating different textures and effects, like our stencil idea.
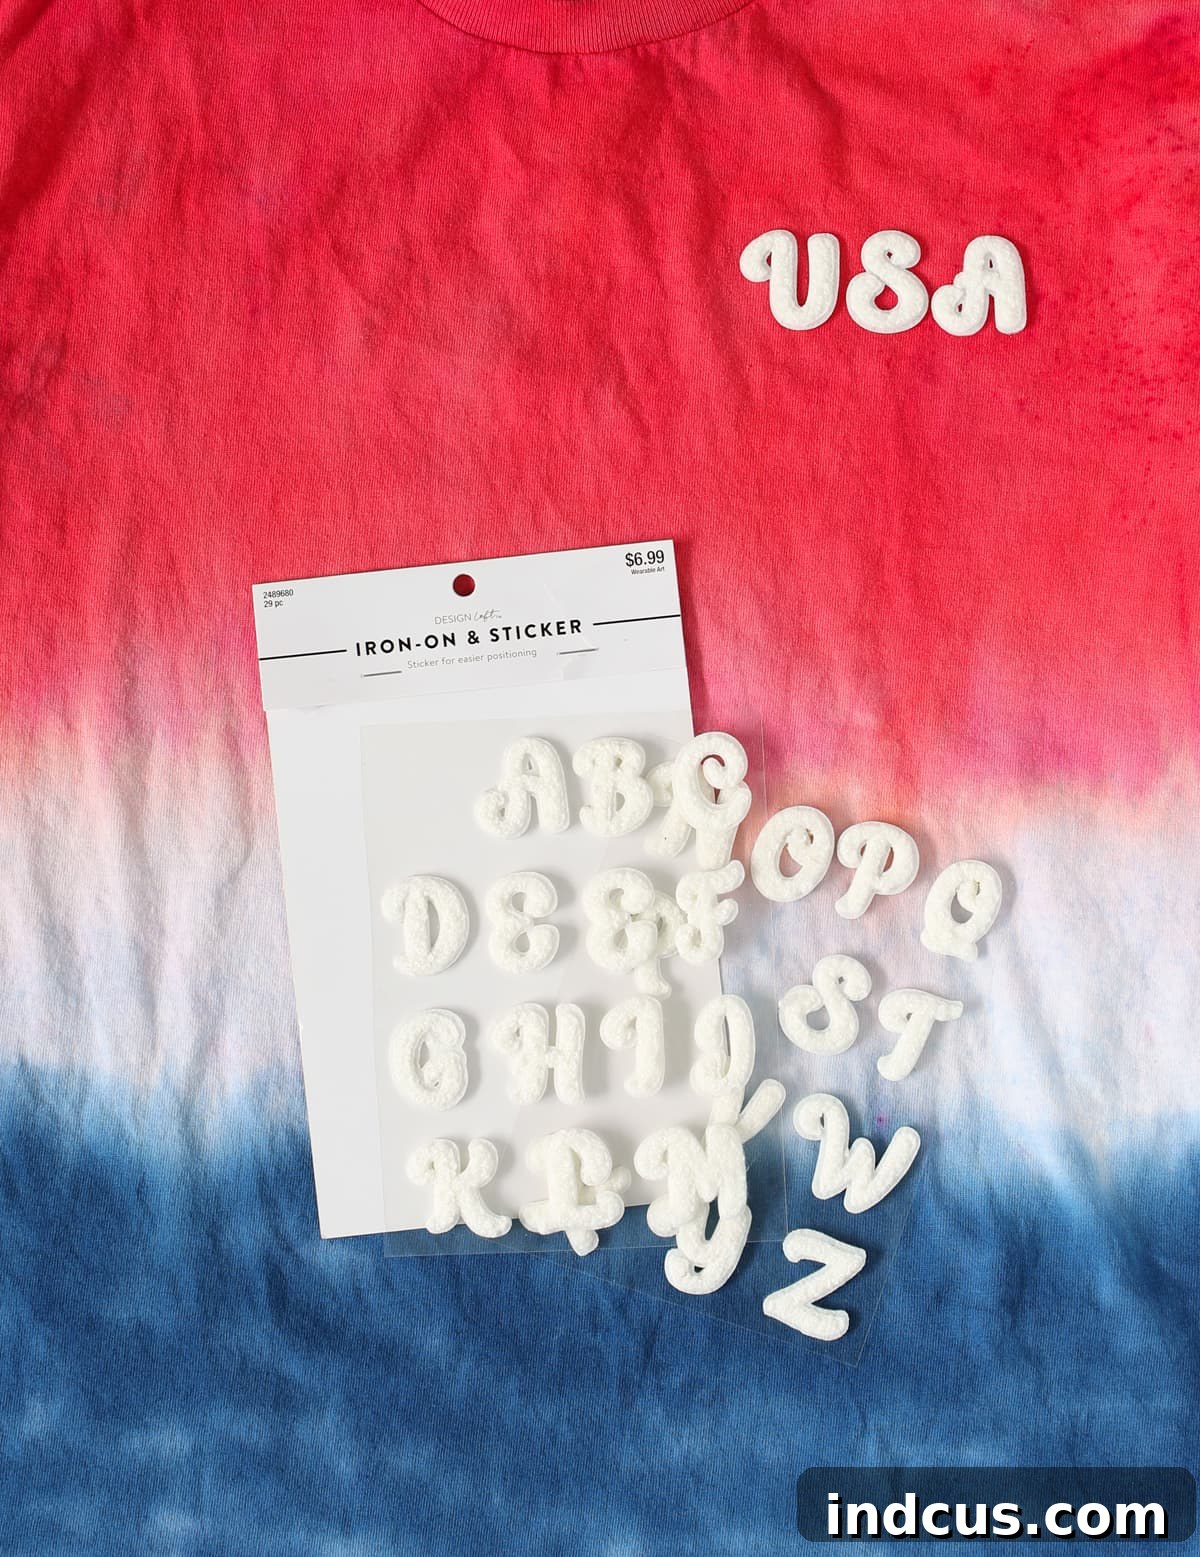
- Iron-On Letter Patches: These add a personalized touch, allowing you to spell out words like “USA” or initials. They are a quick and easy way to elevate your tie-dye design.
- Iron-On Cherry + Bow Patch: Beyond letters, decorative patches offer a charming embellishment to complement your tie-dye patterns. Hobby Lobby has a delightful array of options.
- Adhesive Vinyl, Stencil Material, or Contact Paper: Essential for creating crisp, reverse-stenciled designs with fabric spray paint. Any of these adhesive materials will help you achieve clean lines for shapes like stars.
Having all these supplies from a single destination like Hobby Lobby makes your DIY project much smoother and more enjoyable. You’ll find their prices competitive, and the sheer variety of options for embellishments ensures your patriotic shirts will truly stand out!
Master the Art of Tie-Dye: General Tips for Success
Before we jump into specific shirt designs, here are some invaluable tips to ensure your tie-dye experience is successful, enjoyable, and as mess-free as possible. These guidelines apply to all tie-dye methods and will help you achieve professional-looking results while minimizing cleanup.
Tips for Success
- **Prepare Your Workspace:** Tie-dye can be wonderfully messy! I highly recommend doing this project outdoors or in a well-ventilated area, especially if children are participating. Lay down plenty of protection. A great hack is to cut a large plastic party tablecloth into four parts; these can then double as plastic wrap to cover your dyed shirts overnight while the dye sets, preventing leaks and keeping the colors separate.
- **Protect Your Hands:** Don’t forget to wear gloves! Tie-dye dyes are powerful and will absolutely stain your fingers, which isn’t the most stylish look for days afterward. Most tie-dye kits come with gloves, but it’s always wise to have an extra pair on hand.
- **Rubber Bands vs. Zip Ties:** While tie-dye kits typically include rubber bands, zip ties can offer a significantly easier and tighter cinch, leading to sharper, more defined patterns. However, zip ties can be a bit more expensive. Consider your budget and desire for convenience when making your choice. Both work well, but zip ties often provide a less strenuous experience, especially for intricate folds.
- **Pre-Wash Your Shirts:** Always wash new shirts before dyeing to remove any sizing or factory chemicals that might interfere with dye absorption. Do not use fabric softener, as it can also inhibit the dye from penetrating the fibers evenly.
- **Damp is Key (for traditional tie-dye):** For most traditional tie-dye techniques (excluding spray dye), a damp shirt is crucial. It allows the dye to spread and wick through the fabric more effectively than a dry shirt, but not so much that it’s dripping wet, which can dilute colors or create unwanted muddling.
- **Rinse Until Clear:** After the dye has set, rinsing is a critical step. Rinse your shirts under cold water until the water runs completely clear. This prevents excess dye from bleeding onto other parts of the shirt or other clothes in the wash.
- **Follow Dye Kit Instructions:** Always refer to the specific instructions provided with your tie-dye kit for best results regarding dye mixing, setting times, and final washing.
Crafting Your Red, White, and Blue: Step-by-Step Shirt Designs
Now that you’re prepared, let’s explore four unique and exciting ways to create patriotic tie-dye shirts. Each design offers a distinct look, from subtle blends to bold patterns, ensuring there’s a perfect style for everyone in your family.
Idea Number One – The Bomb Pop Ombre: A Sweet Patriotic Blend
Capture the essence of summer with this delightful Bomb Pop Ombre design, reminiscent of your favorite frozen treat. This technique creates a beautiful gradient effect, transitioning from bold red to crisp white, and finally to vibrant blue.
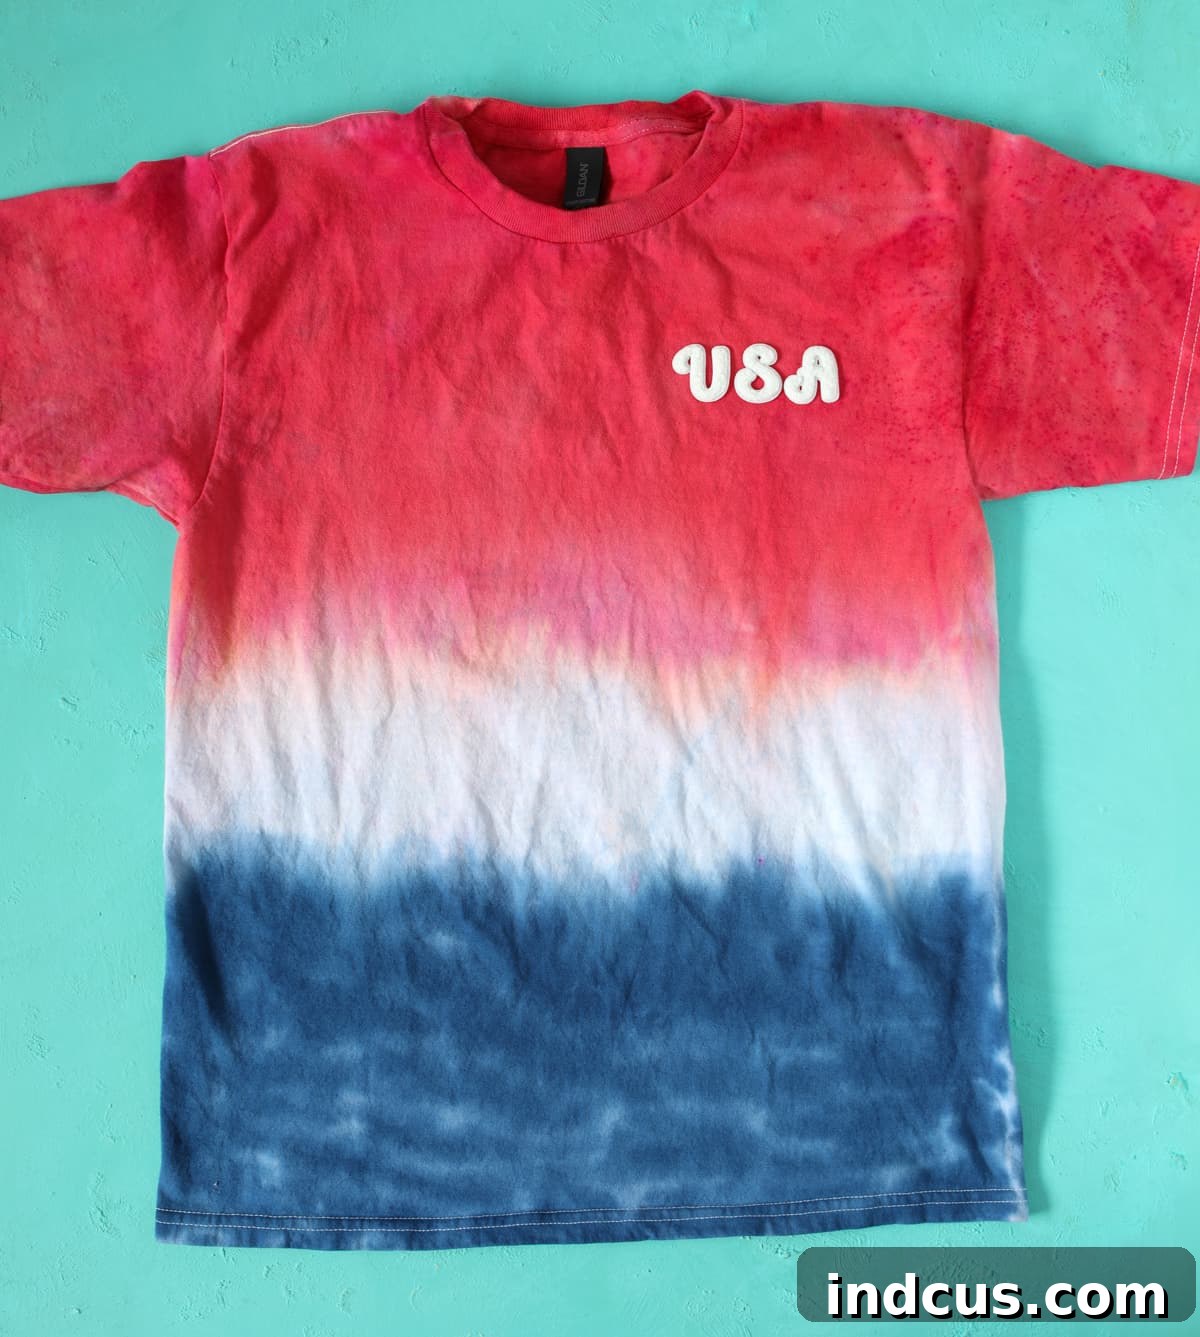
- **Prepare the Shirt:** Begin by getting your white cotton shirt wet, then wring it out thoroughly until it’s damp but not dripping. This ensures even dye absorption.
- **Apply the Ombre Dye:** Lay the damp shirt flat on your protected work surface. Carefully apply red dye to the top quarter of the shirt. Next, apply blue dye to the bottom quarter of the shirt. It’s crucial to leave a significant white space in the middle to achieve the ombre effect; the dyes will naturally spread and fade into this central area. Be exceptionally careful to avoid dripping dye onto the pristine white section. If desired, use a foam brush to gently encourage the dye to spread evenly, creating a smoother transition.
- **Set the Dye:** Carefully roll the wet, dyed shirt up in plastic wrap or one of your cut tablecloth sections. Ensure that the red and blue dyed sections do not touch each other, as this could cause unwanted color blending. Allow the dye to sit and set for a minimum of six hours, or ideally, overnight, to achieve maximum color vibrancy.
- **Rinse Thoroughly:** After the dye has set, rinse the excess dye out of the shirt using cold water. A great method is to hang your shirt on a clothesline outside and use a garden hose, rinsing continuously until the water runs completely clear. This prevents any unwanted bleeding later.
- **Wash and Dry:** Finally, wash and dry the shirt according to the specific instructions provided on your tie-dye package. This usually involves a cold water wash with a small amount of detergent, followed by a tumble dry or air dry.
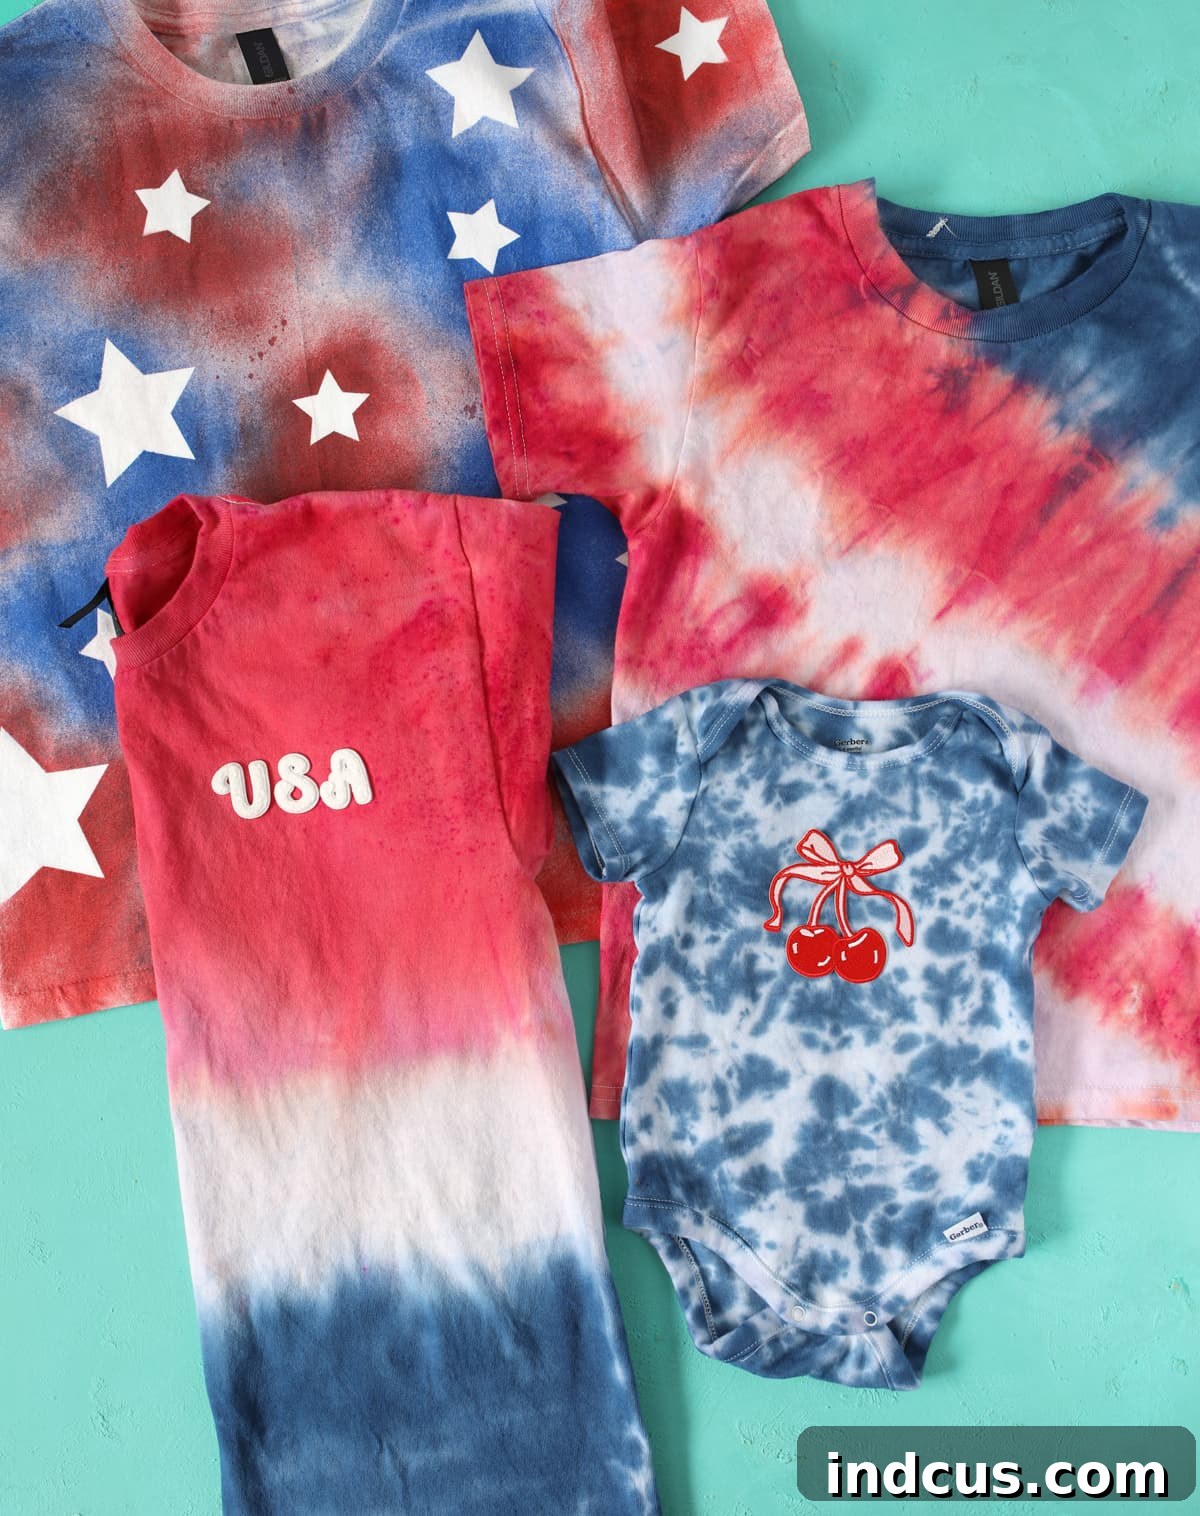
- **Add Iron-On Patches:** Once your shirt is completely dry, it’s time for the fun embellishment! Choose your iron-on letter patches (I loved the puffy letters) and arrange them to spell out a patriotic message like “USA” on the pocket area or wherever you desire. These patches are incredibly easy to apply: simply stick them down and follow the clear ironing instructions on the back of the patch packaging. The result is a uniquely adorable and personalized patriotic tee!
Idea Number Two – Patriotic Striped Tie-Dye Shirt: Bold Stripes Forever
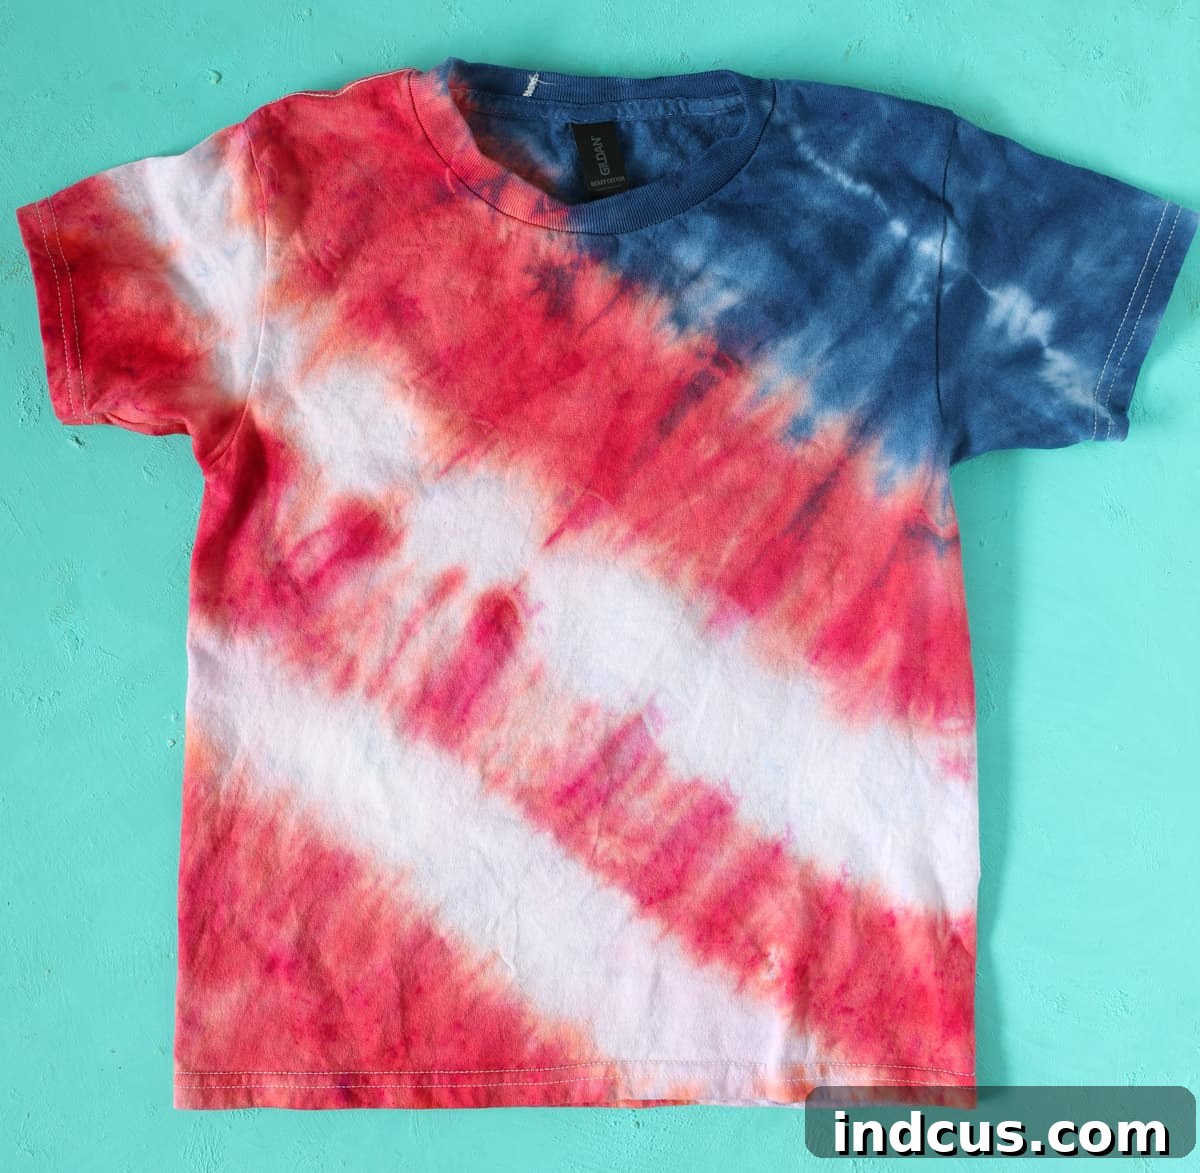
Embrace a classic and timeless patriotic look with a bold striped tie-dye design. This technique, while appearing complex, is surprisingly achievable and creates a striking visual impact perfect for the Fourth of July.
- **Prepare the Shirt:** As with the ombre design, begin by wetting your white cotton shirt and then wringing it out until it is damp but not dripping.
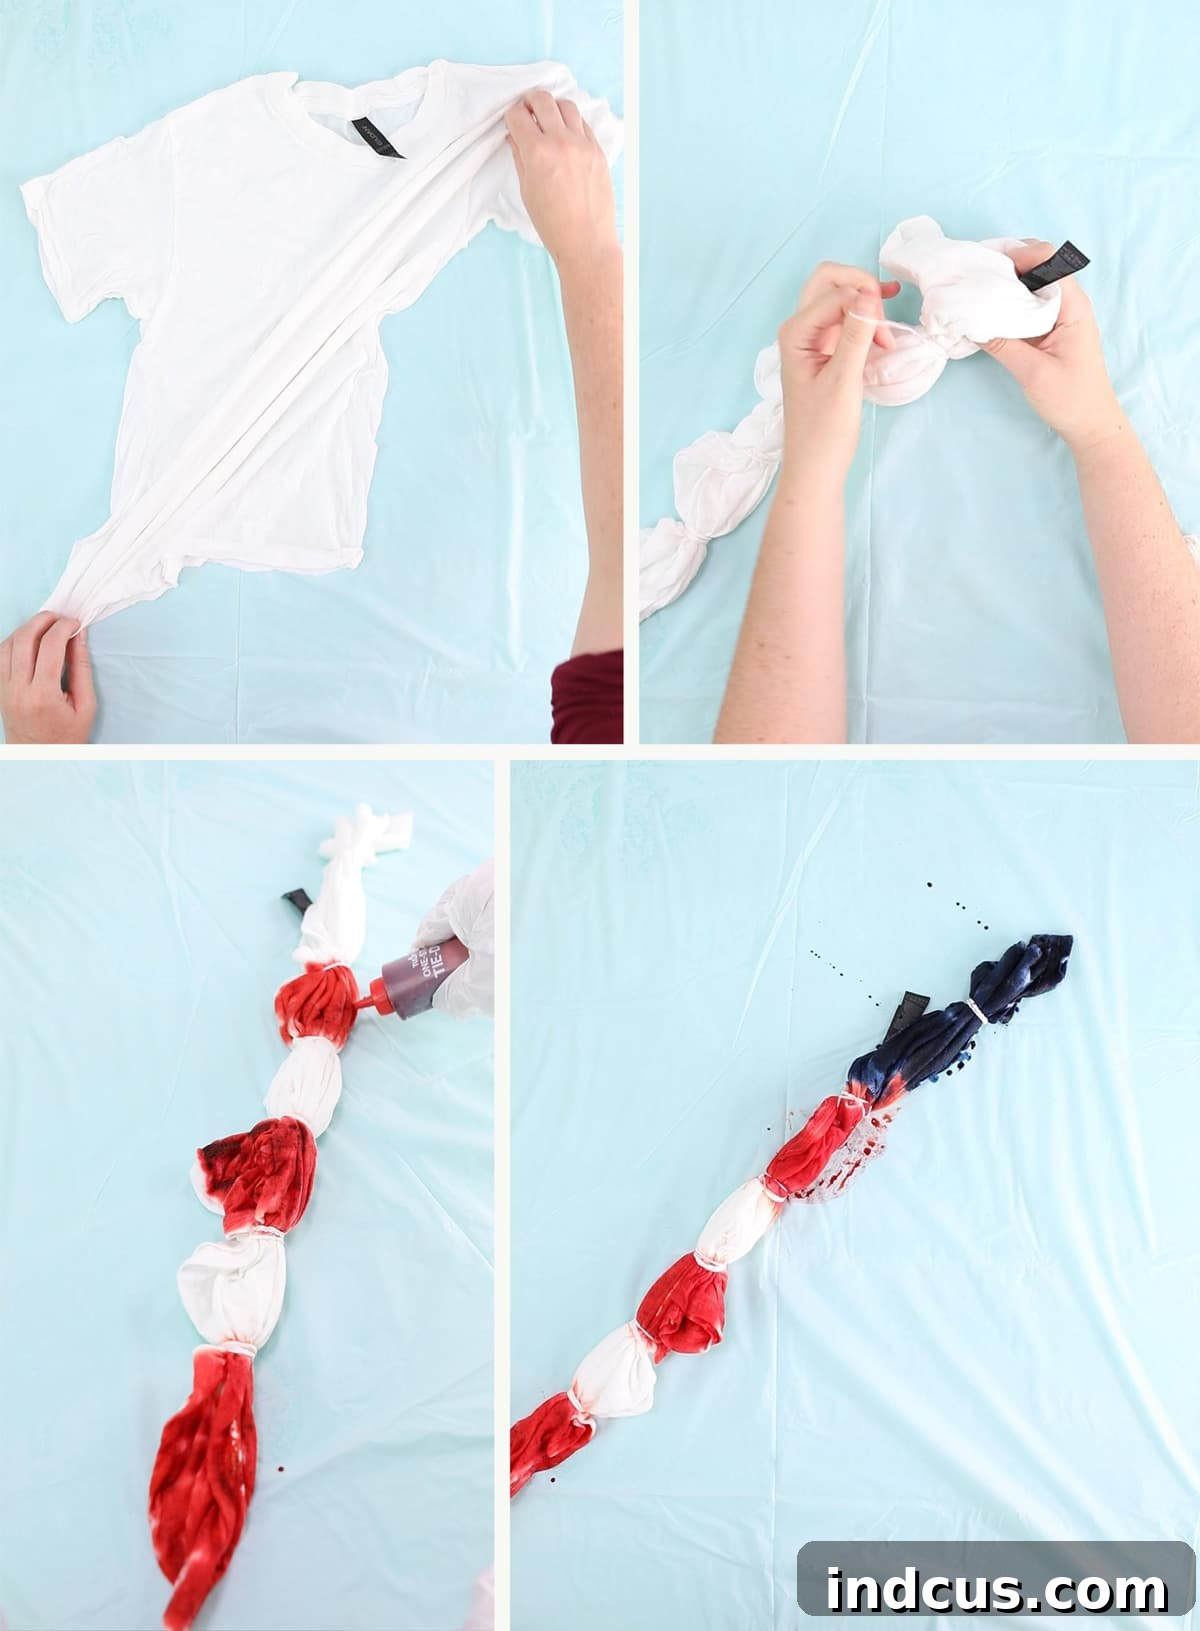
- **Fold for Stripes:** Lay the damp shirt out completely flat on your protected surface, smoothing out any wrinkles. Visualize a diagonal line stretching across the shirt, from the top right shoulder down to the bottom left hem. Carefully begin to fold the shirt accordion-style, gathering the fabric towards this imaginary center line. Continue folding until all the shirt fabric meets in a tight, diagonal bundle. Use rubber bands (or zip ties for sharper lines) to clamp the shirt tightly into approximately seven equal sections along this folded line. The tighter the folds and ties, the crisper your stripes will be.
- **Apply the Dye:** Now it’s time to add color. Apply red dye to sections one, three, and five (counting from either end of your folded bundle). Then, fill in sections six and seven with blue dye. Ensure you flip the shirt over and apply dye to both sides of each designated section for full saturation. Exercise extreme caution to prevent accidental color mixing between sections.
- **Set the Dye:** Carefully roll the dyed shirt up in plastic wrap or a tablecloth section, ensuring that the different colored areas remain separate to prevent unintended blending. Allow the dye to set for at least six hours, or preferably overnight, for vibrant colors.
- **Rinse Thoroughly:** Rinse the excess dye out of the shirt under cold running water until the water runs completely clear. This is a crucial step to prevent future bleeding and achieve clean stripes.
- **Wash and Dry:** Finally, wash and dry your patriotic striped shirt according to the instructions on your tie-dye kit. You’ll be amazed by the crisp, bold lines you’ve created!
Idea Number 3 – Playful Scrunch Dye with a Charming Patch Accent
The scrunch dye method is wonderfully versatile, creating an organic, cloud-like pattern that’s always unique. Paired with a cute iron-on patch, this design offers a sweet and effortless patriotic statement.
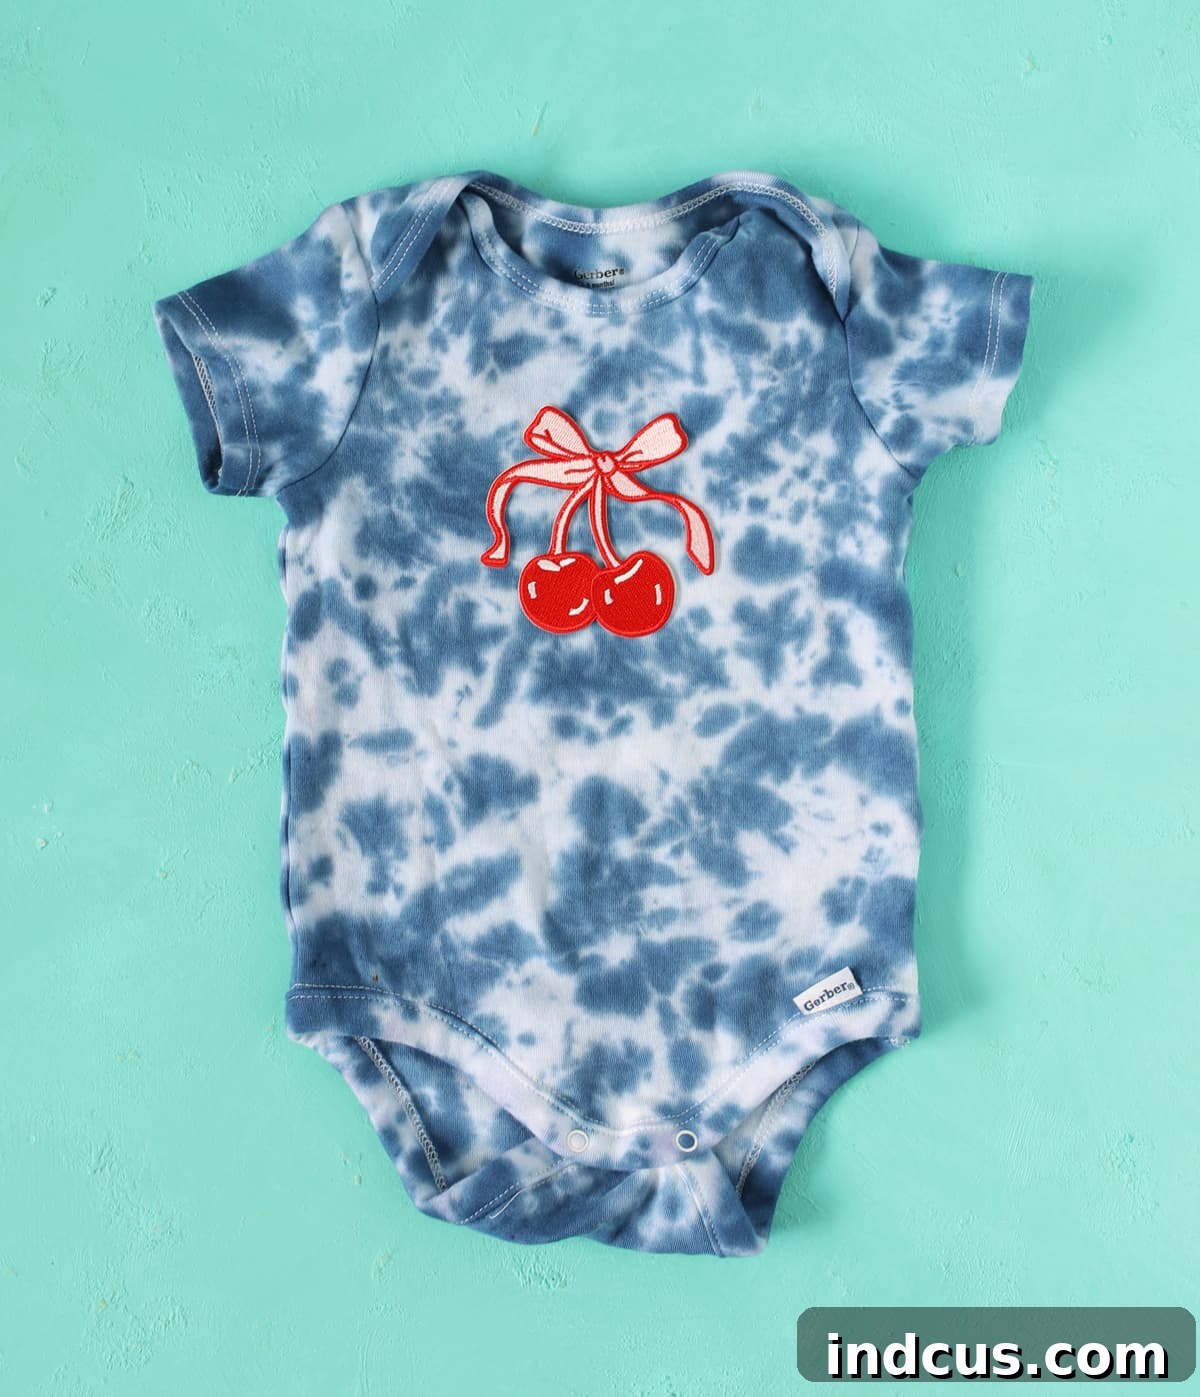
- **Prepare the Shirt:** Get your white cotton shirt wet, then wring it out until it’s damp but not dripping.
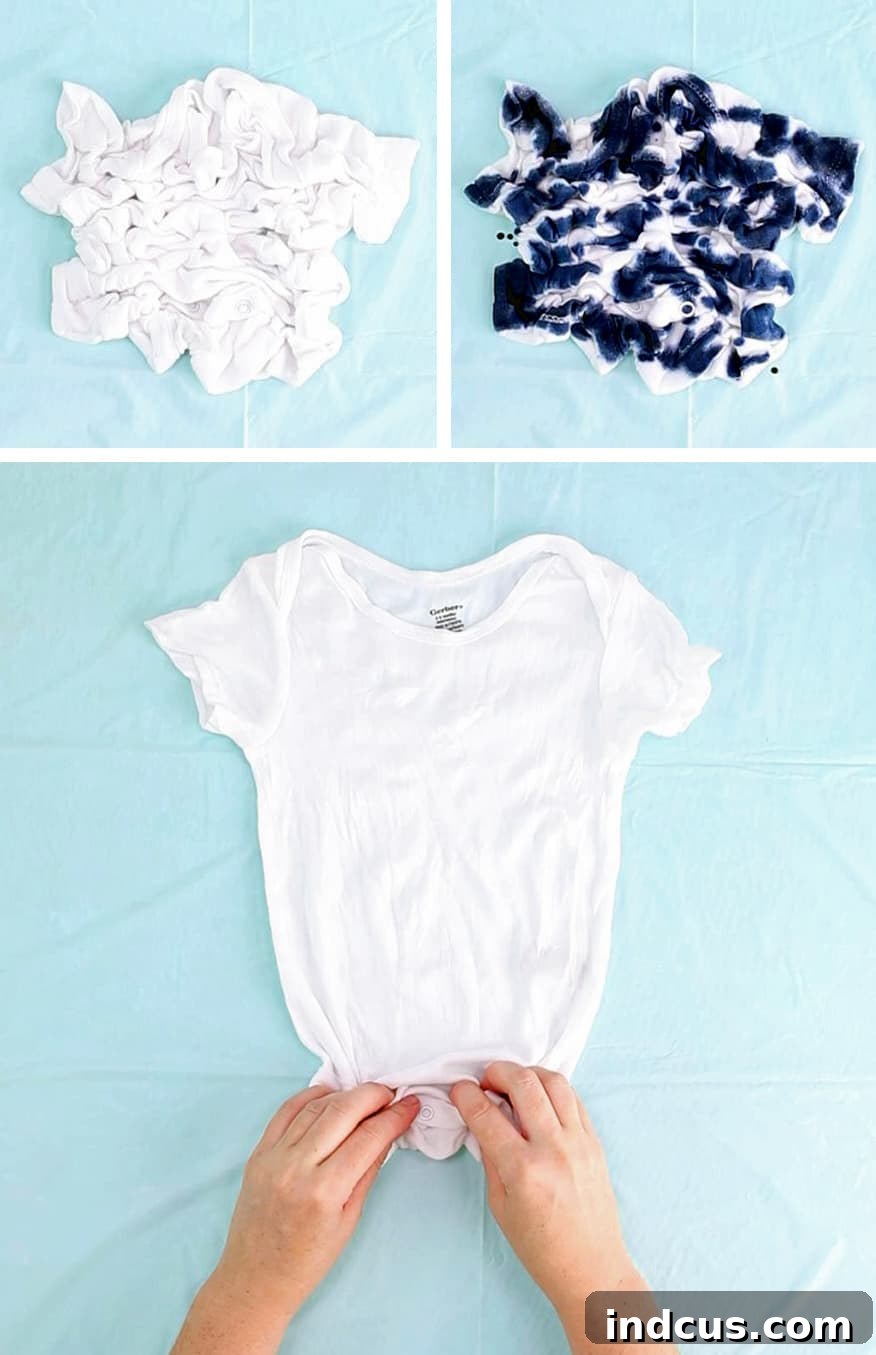
- **Scrunch the Fabric:** Lay the damp shirt flat on your protected work surface. Now, using your fingertips, gently push and gather the shirt fabric towards the center, creating a series of peaks and valleys, much like dimpling the top of a focaccia bread. Aim for a relatively compact, rounded shape.
- **Apply the Blue Dye:** Carefully apply blue dye to the “peaks” of the scrunched shirt, leaving the “valleys” (the lower areas between the scrunches) white. The white spaces will give your shirt that classic tie-dye look. Exercise precision here; applying too much dye can saturate the white areas, resulting in a mostly blue shirt rather than a scrunch pattern. Carefully flip the shirt over, maintaining its scrunched shape as best as possible, and repeat the dyeing process on the other side.
- **Set the Dye:** With the scrunched shape intact, carefully wrap the shirt in plastic wrap or a tablecloth section, creating a sealed environment to block out air. This allows the dye to set properly. Let the dye sit for at least six hours or overnight.
- **Rinse Thoroughly:** Rinse the excess dye out of the shirt with cold water until the water runs clear. A hose and clothesline are great for this.
- **Wash and Dry:** Wash and dry the shirt according to your tie-dye kit’s instructions.
- **Adorn with a Darling Patch:** Once the shirt is completely dry, it’s time for the “best part”—adding a charming iron-on patch! This step is very straightforward; simply follow the clear instructions on the patch’s packaging. I absolutely adore the cherry patch, but Hobby Lobby offers a vast array of other cute designs that would be perfect for the Fourth of July or any summer occasion. Take a moment to explore their selection – you’ll likely want to make a million shirts once you see all the possibilities!
Idea Number 4 – Innovative Spray Dye with Reverse Stencil Stars
This final shirt idea is truly unique, offering a modern twist on traditional tie-dye by utilizing fabric spray paint instead of liquid dye. The result is a vibrant, graphic look that’s less messy and quicker to achieve, perfect for creating crisp designs like stars.
You’ll find fabric spray dye right alongside other tie-dye products at Hobby Lobby, and it’s an exciting medium to experiment with for patriotic designs. This method offers distinct advantages, particularly when you want to achieve defined shapes and less saturation than traditional liquid dyes.
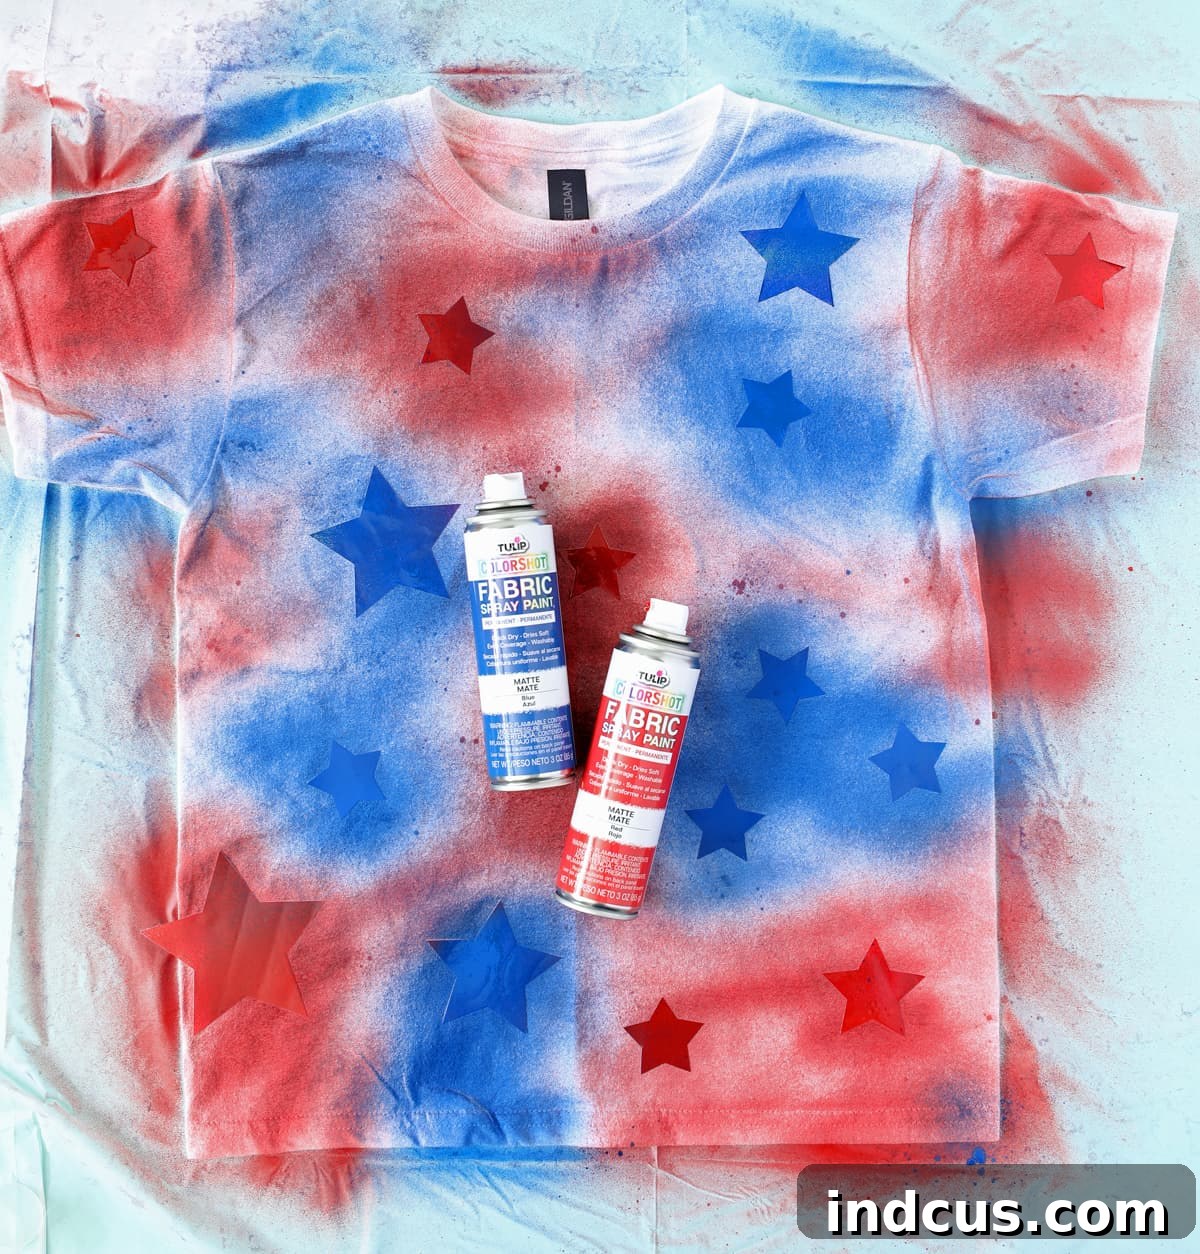
- **Start with a Dry Shirt:** Unlike traditional tie-dye, this product is applied to a completely DRY shirt. Lay your dry white cotton shirt flat on a plastic tablecloth or other protected surface. Ensure your workspace is well-ventilated, preferably outdoors, due to the paint fumes.
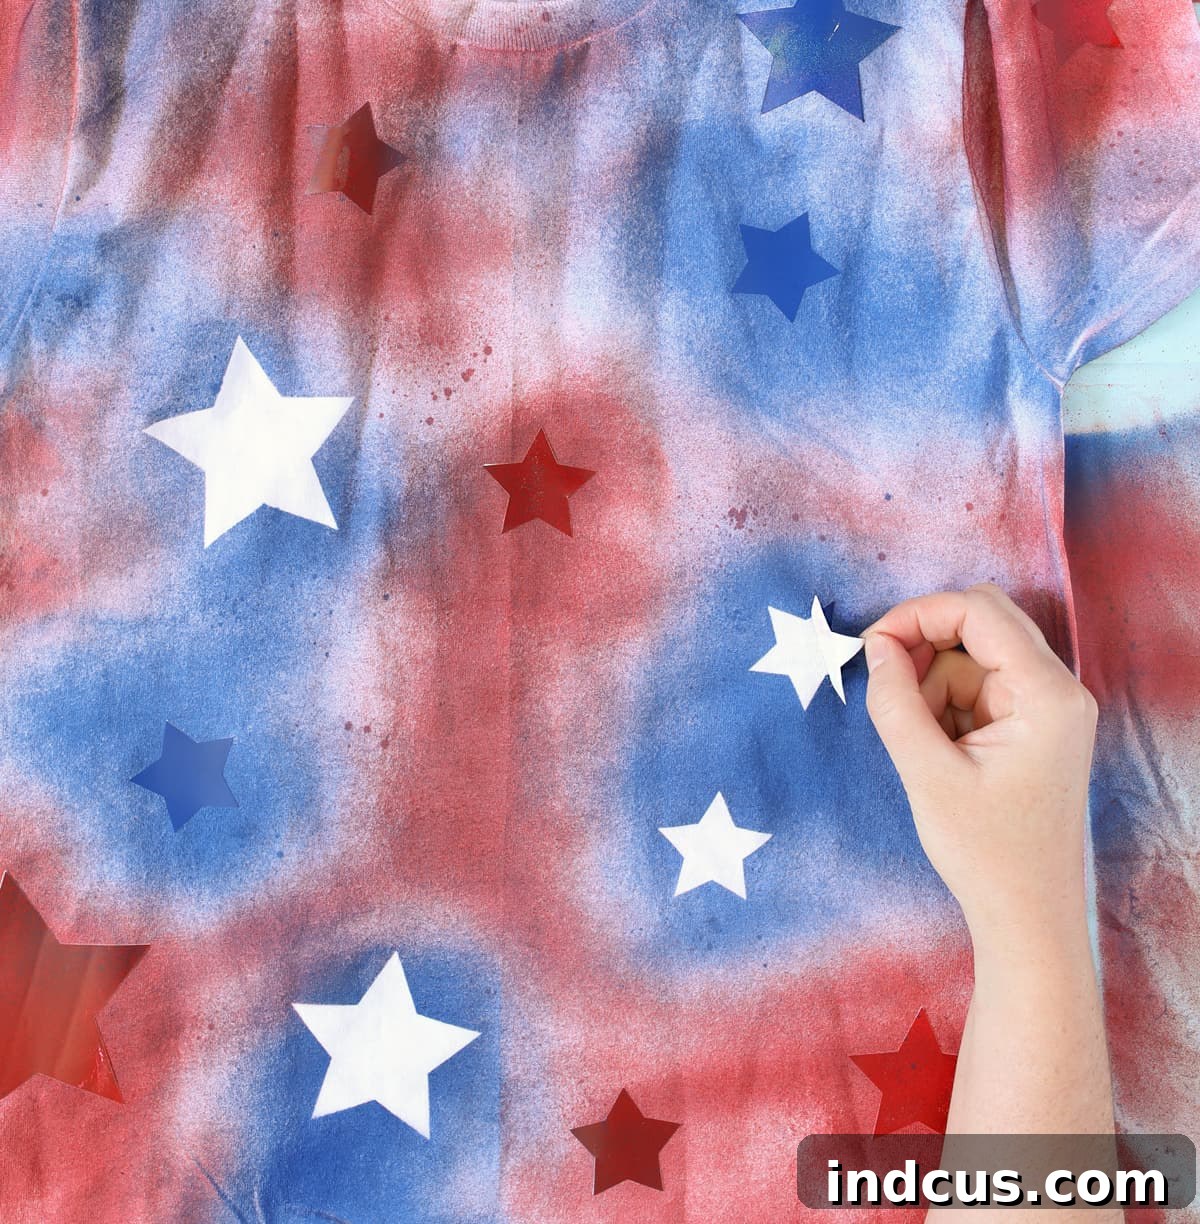
- **Create Your Stencil:** To add a striking star pattern, cut various star shapes out of adhesive vinyl, stencil material, or even contact paper. Place these adhesive stars randomly or in a specific pattern all over the shirt. All types of adhesive vinyl tend to work equally well for this purpose, so use whatever you have on hand. The adhesive quality is key to preventing paint from seeping underneath.
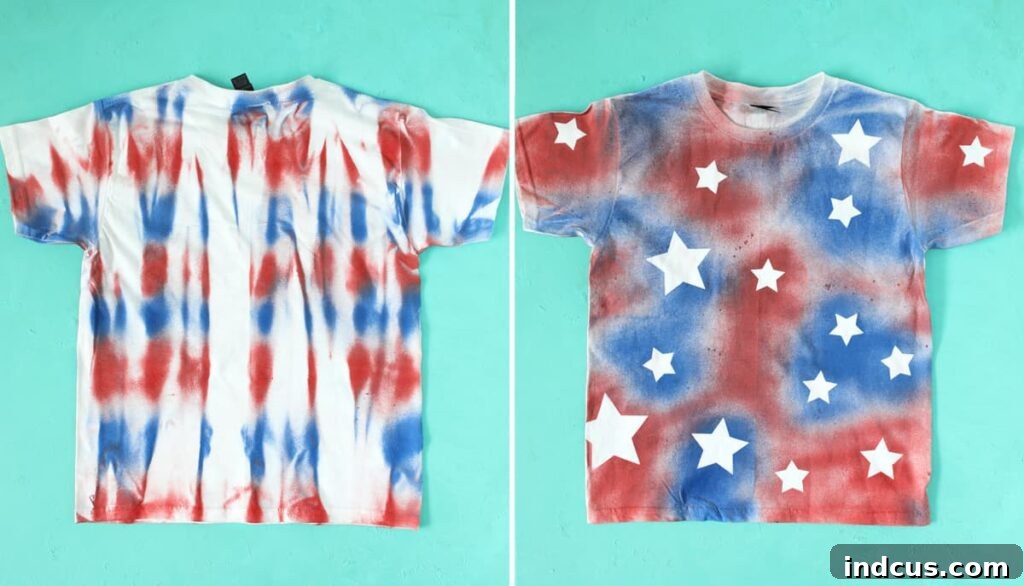
- **Apply the Spray Dye:** Follow the instructions on your fabric spray paint bottle for shaking and application distance. Begin spraying your chosen colors (red and blue work wonderfully for patriotic stars) all over the shirt, including over the stenciled areas. I created a random, artistic pattern on the front. Let the paint dry for approximately 30 minutes, or until touch-dry. Then, carefully flip the shirt over and repeat the process on the other side. For a unique effect, I scrunched the shirt into vertical folds on the back and sprayed horizontal stripes across these folds, which created a really cool, textured look when dry.
- **Reveal Your Stars:** Allow the shirt to dry completely (this might take a few hours depending on humidity and how much paint you applied). Once fully dry, carefully peel off the adhesive vinyl stars to reveal crisp, white star shapes underneath your vibrant spray-dyed background! This “reverse stencil” technique is incredibly satisfying.
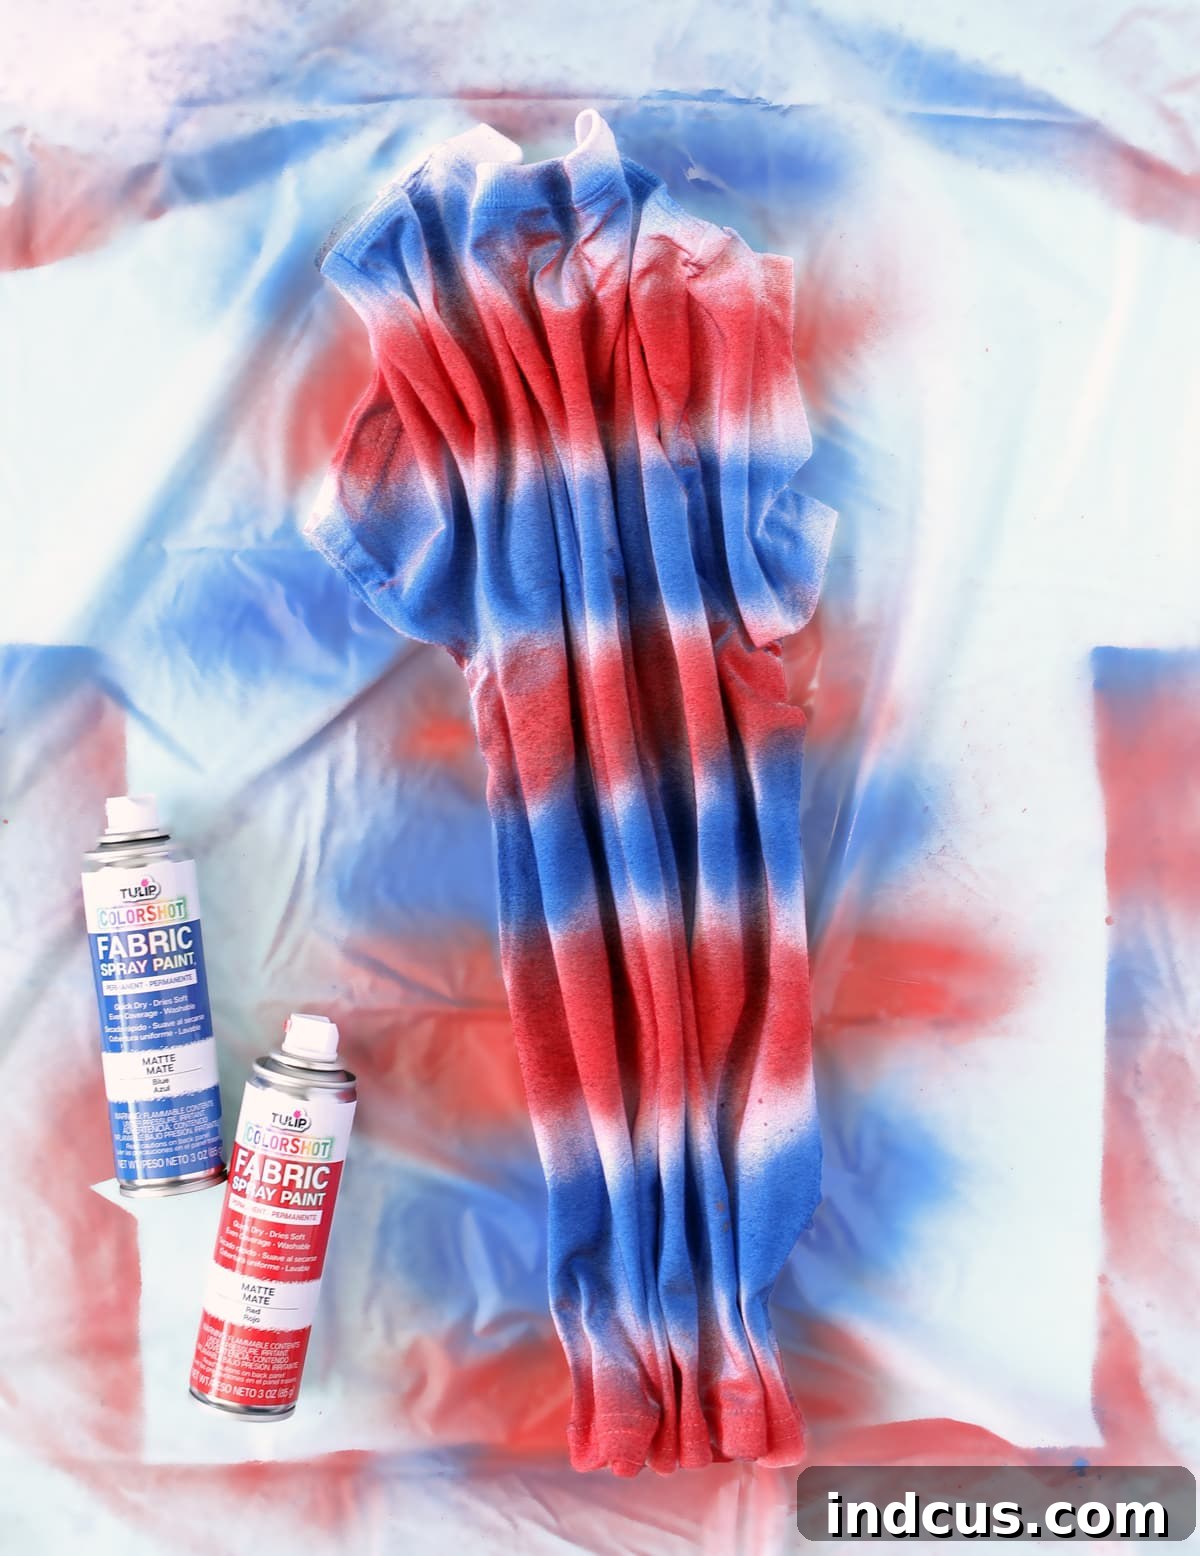
The packaging for fabric spray paint typically states that the shirt is washable after 72 hours. While I captured these photos before that drying period, allowing the full cure time will ensure your design is durable and lasts through many washes. One important note: you will definitely want to do this shirt outside. The fumes from the fabric spray paint can be quite strong. However, despite the scent, this method is significantly less messy and often quicker than traditional liquid tie-dye, making it a fantastic option, especially for achieving clean stripes or stencil designs. I’ll certainly be using it again!
Your Patriotic Creations Come to Life: Video Tutorial
Seeing these techniques in action can make all the difference! For a visual guide to all four patriotic tie-dye shirt ideas, be sure to watch the comprehensive video tutorial below. It offers a dynamic overview of each step, from folding to dyeing, helping you visualize the process and gain confidence before starting your own project.
Share Your Spirit!
With these four fantastic patriotic tie-dye ideas, you’re all set to create unique and festive apparel for the Fourth of July and beyond. Each method offers a fun way to express your creativity and showcase your American pride. Whether you prefer the subtle gradient of the Bomb Pop Ombre, the bold statement of the Patriotic Stripes, the artistic randomness of the Scrunch Dye with a charming patch, or the modern crispness of the Spray Dye with reverse stencils, there’s a project here for every skill level and aesthetic preference.
Which tie-dye design has captured your imagination the most? Are you leaning towards a classic look or eager to try the innovative spray dye method? We’d love to hear which shirt is your favorite and which one you’ll be making to celebrate the Fourth of July this year! Share your thoughts and plans in the comments below – happy crafting!
Explore More Tie-Dye Adventures
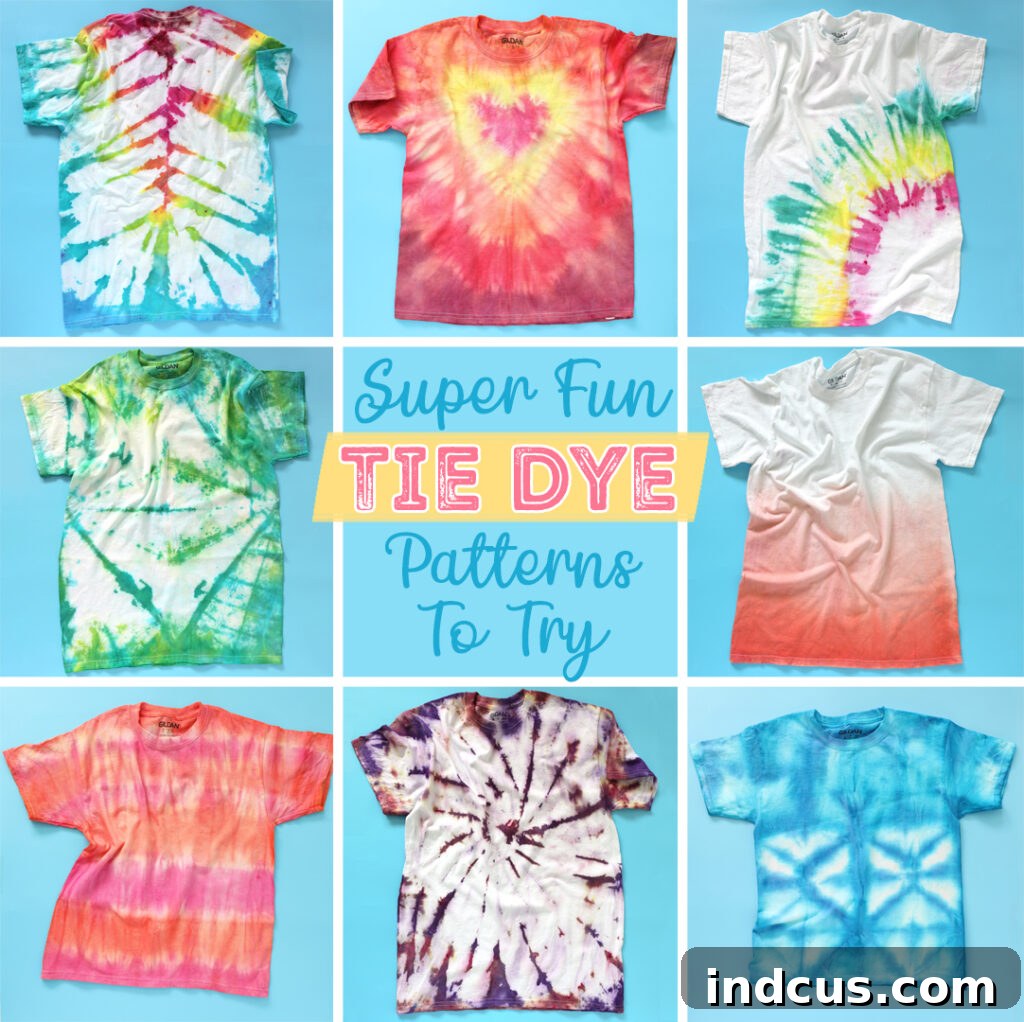
If these ideas have sparked your creativity and you’re hungry for even more tie-dye inspiration, be sure to check out our extended collection of cool tie-dye patterns. Discover new techniques, folds, and color combinations to keep your tie-dye journey going strong all year long!