
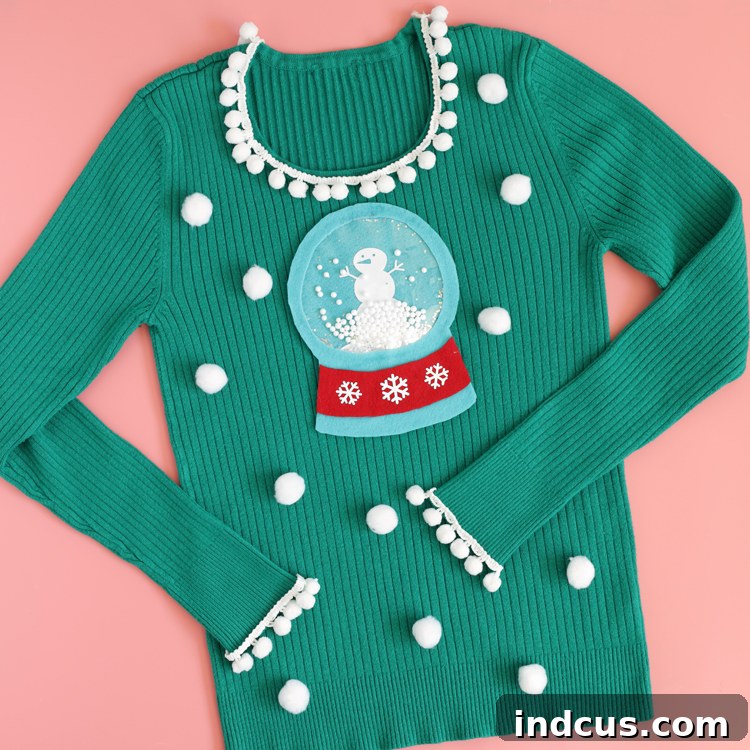
Craft the Ultimate Holiday Statement: Your Own DIY Working Snow Globe Ugly Christmas Sweater!
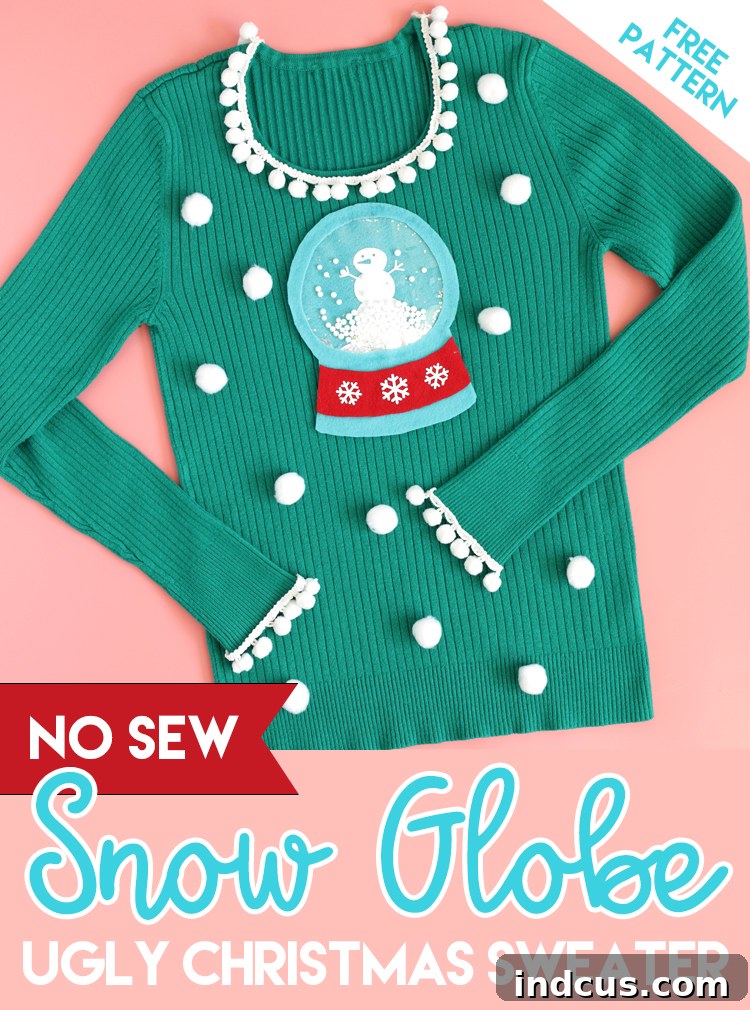
The holiday season is synonymous with joy, festive gatherings, and, of course, the ever-popular ugly Christmas sweater party! If you’re looking to truly stand out from the crowd this year, why settle for a store-bought garment when you can create a masterpiece that’s as unique as it is charmingly hideous? Today, we’re diving into a delightfully creative project that will not only secure your win at any ugly sweater contest but also spark conversation and spread genuine holiday cheer: a DIY Ugly Christmas Sweater featuring a real, working snow globe!
Imagine the delight on people’s faces as they realize your sweater isn’t just adorned with a static image, but a miniature winter wonderland that you can actually shake! This project combines simple crafting techniques with a touch of ingenuity, resulting in a wearable piece of art that embodies the spirit of festive fun. We’ll guide you through each step to transform an ordinary sweater into an extraordinary, personalized holiday statement. Get ready to embrace the gaudy, the glittery, and the gloriously ugly!
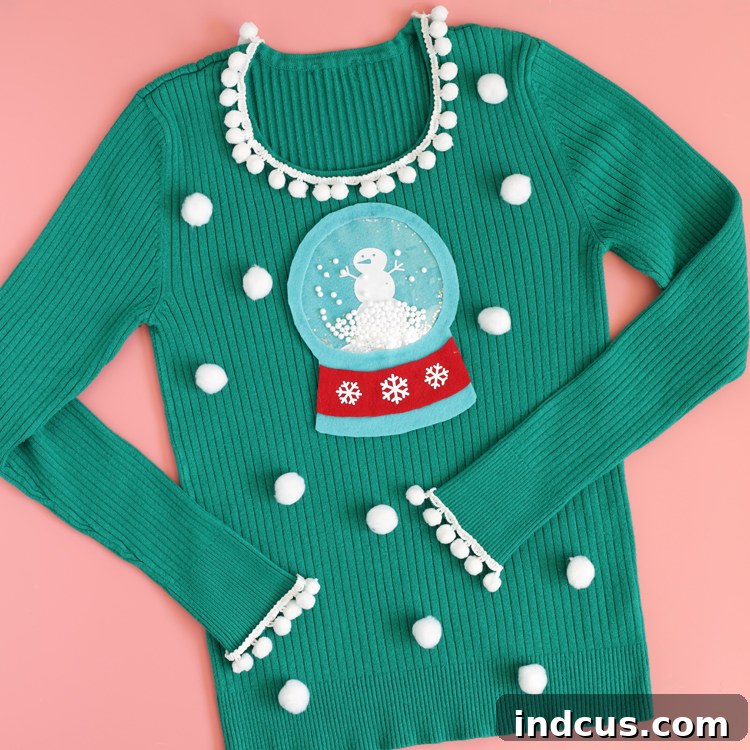
Why a DIY Snow Globe Ugly Christmas Sweater is Your Go-To Holiday Project
Ugly Christmas sweater parties have evolved from a quirky niche to a beloved holiday tradition. They offer a fantastic excuse to be playful, irreverent, and utterly festive without a hint of self-consciousness. But in a sea of generic sweaters featuring light-up reindeer or oversized bows, how do you make your mark? The answer lies in innovation and personalization. A working snow globe sweater isn’t just “ugly”; it’s interactive, memorable, and a testament to your crafting prowess. It’s an instant conversation starter and a genuine showstopper that embodies the very essence of holiday kitsch with a sophisticated DIY twist.
This project is perfect for crafters of all skill levels. Whether you’re a seasoned DIY enthusiast or just looking for a fun weekend activity, our detailed instructions will ensure your success. Plus, the satisfaction of creating something so unique and personal is a reward in itself. Get ready to turn heads and jingle bells with your custom-made, one-of-a-kind snow globe sweater!
This post is proudly sponsored by Aleene’s Glues, whose exceptional Fabric Fusion adhesive is central to bringing this festive vision to life.
Here’s how you can make your own Snow Globe Ugly Christmas Sweater and become the undisputed champion of holiday fashion:
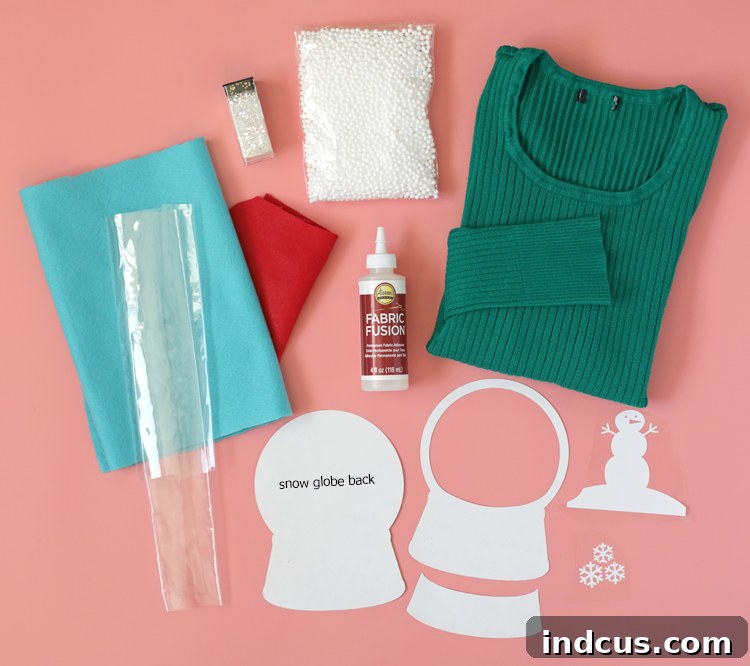
Gathering Your Creative Arsenal: Materials Needed
Before embarking on this exciting crafting journey, ensure you have all your supplies ready. Having everything at hand will make the process smoother and more enjoyable. Here’s what you’ll need:
- Sweater: Choose an old sweater that you’re willing to transform. A solid color works best as a canvas, allowing your snow globe to truly pop. Think about the fit – you’ll want something comfortable that can hold the added weight without stretching too much.
- Aleene’s Fabric Fusion Permanent Fabric Adhesive: This is the secret sauce for a durable, long-lasting snow globe. Its strong bond and flexibility make it ideal for fabric projects, ensuring your creation withstands the rigors of holiday festivities.
- Red and Blue Felt: These traditional holiday colors are perfect for creating the snow globe’s base and accent pieces. Feel free to experiment with other colors that complement your chosen sweater or reflect your personal style.
- Snow Globe Pattern: A free, downloadable pattern is provided at the end of this post, making it easy to create a perfectly shaped globe.
- Clear Vinyl Tablecloth Fabric: This is crucial for the “glass” of your snow globe. Opt for a medium-weight vinyl that’s clear and flexible enough to work with, but sturdy enough to hold its shape and contents. You can find this in most fabric or craft stores.
- Fake Snow and/or Glitter: What’s a snow globe without snow? Choose fine fake snow for a realistic effect, and add glitter for extra sparkle and festive magic. A mix of both creates wonderful visual interest.
- Fabric Scissors: Sharp fabric scissors are essential for clean, precise cuts, especially when working with felt and vinyl.
- Iron On Vinyl Snowman and Snowflakes: These add delightful winter imagery to your globe. If you have a craft cutting machine (like a Cricut or Silhouette), you can create intricate designs. Alternatively, pre-cut iron-on patches or felt cutouts work just as well.
- Loose White Pom Poms: These will serve as charming “snowballs” or additional fluffy embellishments on your sweater, adding texture and dimension.
- Pom Pom Trim: A festive trim to frame your snow globe or adorn other parts of your sweater, enhancing its “ugly” charm.
Crafting Your Wearable Winter Wonderland: Step-by-Step Guide
Now that you have all your materials, let’s dive into the creative process of making your unique snow globe ugly Christmas sweater. Follow these steps carefully to ensure a durable and dazzling result.
Step 1: The Foundation – Printing and Cutting Your Snow Globe Pattern
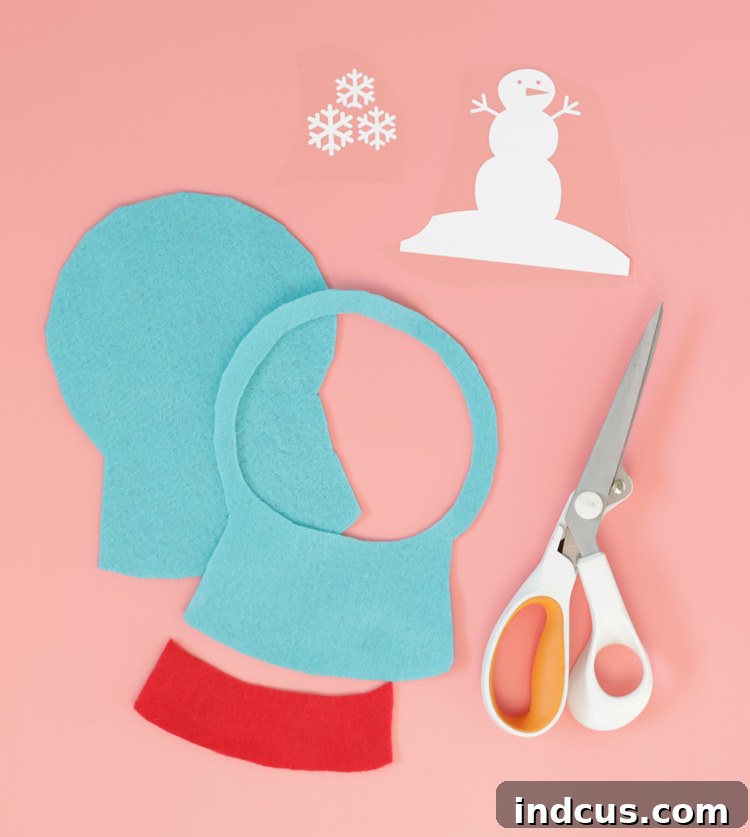
Begin by downloading the free snow globe pattern, conveniently located at the end of this guide. Print it out onto standard copy paper. Accuracy here is key, so double-check that your printer settings haven’t distorted the size. Carefully cut out each individual piece of the snow globe pattern. These pieces will serve as your templates for cutting the felt, ensuring perfect symmetry and fit for your snow globe. You might consider using a heavier cardstock for the pattern if you plan to make multiple sweaters or want more durable templates.
Step 2: Customizing Your Centerpiece – Creating the Snowman and Snowflakes
The snowman is the star of your snow globe! If you possess a craft cutting machine, now is the time to utilize it to cut your snowman and snowflake designs from iron-on vinyl. This method offers crisp, professional-looking details. Should you not have access to a vinyl cutter, don’t despair! You can easily cut a snowman shape from white felt using your fabric scissors, or even paint a festive snowman directly onto the felt piece that will form the back of your snow globe. This is where your personal touch truly shines through, so feel free to get creative with other winter figures like reindeer or gingerbread men!
Step 3: Creating the Globe’s Window – Applying the Clear Vinyl
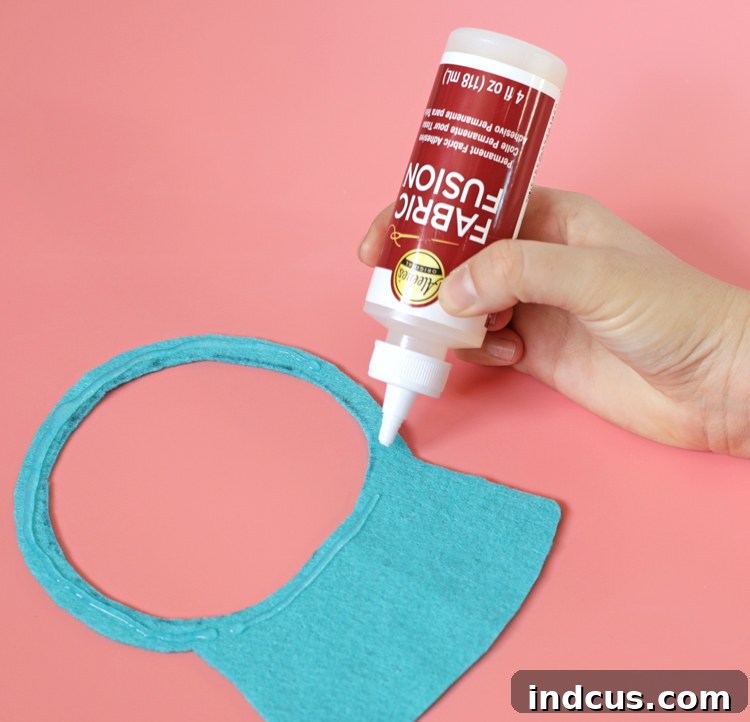
Take the FRONT GLOBE piece of your felt. Apply a continuous, even ring of Aleene’s Fabric Fusion glue all the way around the back perimeter of this piece. The goal is to create a strong, unbroken seal. Carefully press a piece of your clear tablecloth vinyl onto the glue, ensuring it adheres firmly across the entire glued ring. It is absolutely critical that the glue forms a complete seal around the vinyl to prevent any fake snow or glitter from escaping later. Allow a short period for the glue to set slightly before moving on, ensuring a robust bond.
Step 4: Bringing the Scene to Life – Assembling and Filling the Globe
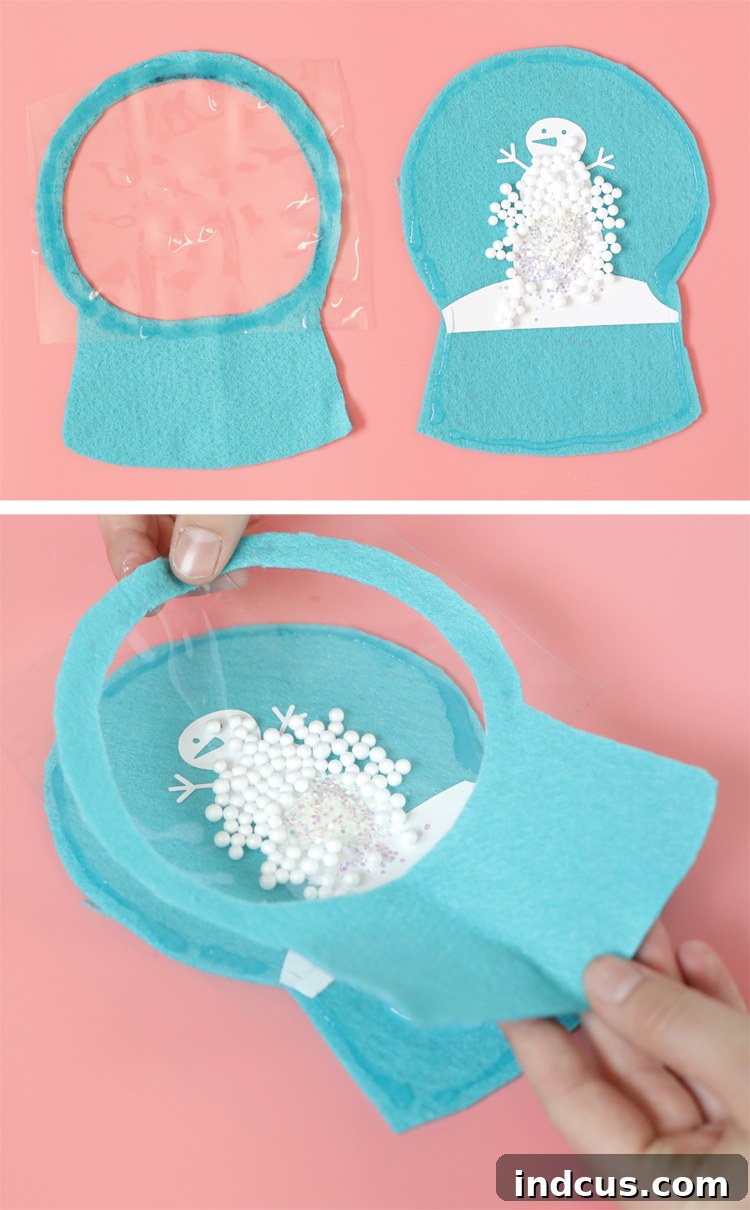
Now it’s time to build the interior of your snow globe! First, carefully iron your vinyl snowman and snowflakes onto the designated BACK GLOBE felt piece. Once these are securely in place, lay the back globe piece flat. Generously sprinkle your fake snow and glitter into the center of the globe, directly over your snowman scene. Be mindful not to overfill, as you still need room for the “snow” to move. Next, apply another continuous bead of Aleene’s Fabric Fusion around the outer edge of the BACK GLOBE piece. Carefully take your front globe piece (with the vinyl window attached) and sandwich it onto the back piece, meticulously lining up the outside edges of the felt. Press firmly to ensure good contact and a tight seal. This step is vital for containing your snow and glitter. Allow the globe to dry undisturbed for a substantial 2-4 hours, or even longer, before shaking. This extended drying time prevents the snow or glitter from getting stuck in any still-wet glue, ensuring a perfectly functioning globe.
Step 5: Refining the Globe – Trimming and Embellishing the Base
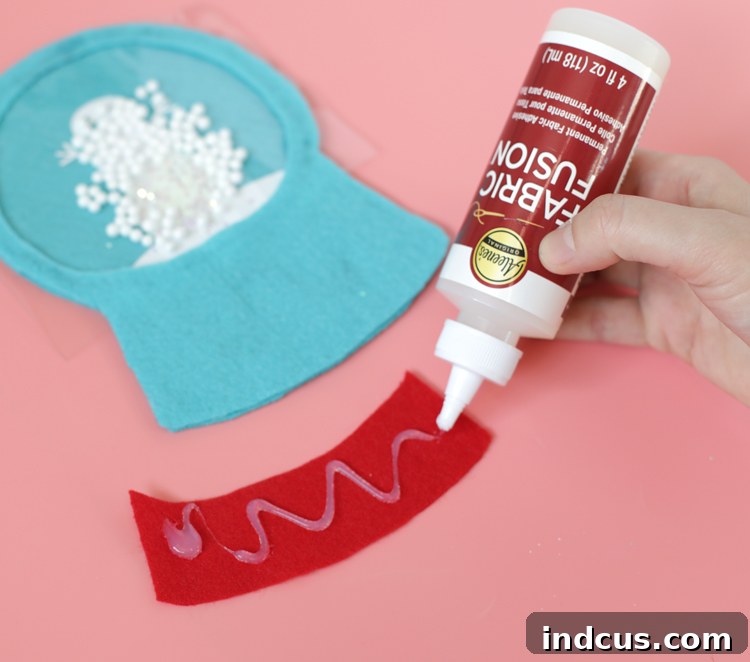
Once your snow globe is completely dry and the glue has fully cured, carefully inspect it. You might find some excess vinyl or felt peeking out from the edges; now is the time to neatly trim these away using your fabric scissors, creating a clean and professional finish. Next, take the decorative base piece for your snow globe (cut from felt using the pattern). Apply a line of Fabric Fusion along the top edge of this base piece and securely attach it to the bottom of your completed snow globe. This adds a nice finishing touch and a classic snow globe aesthetic.
Step 6: Protecting Your Canvas – Prepping the Sweater for Attachment
This is a crucial, often overlooked, step! Before you glue anything to your sweater, place a protective barrier inside. A piece of cardboard, aluminum foil, or plastic wrap slipped between the front and back layers of your sweater will prevent the glue from seeping through and accidentally adhering the two sides together. Trust us, learning this the hard way is not fun!
Step 7: The Grand Finale – Attaching the Globe and Decorating Your Ugly Masterpiece
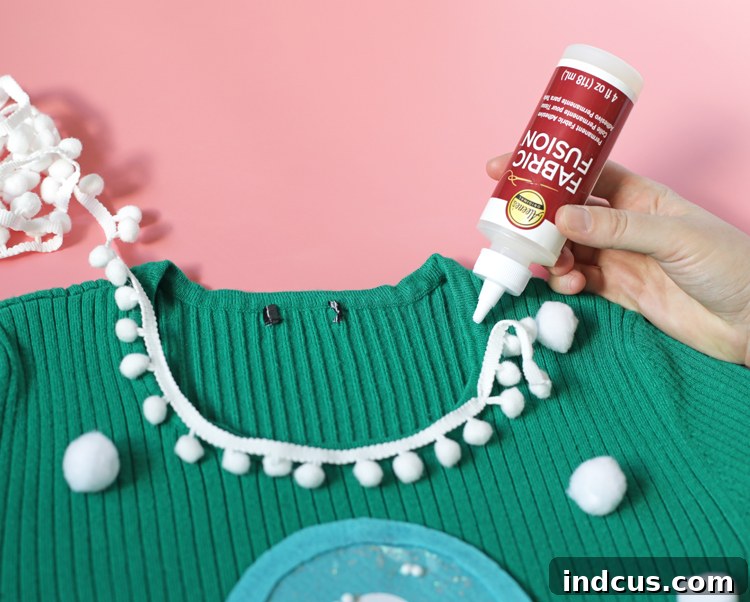
With your sweater prepped, apply a generous amount of Aleene’s Fabric Fusion to the back of your finished snow globe. Carefully position and press the snow globe onto your desired spot on the sweater. Hold it firmly in place for a few moments to ensure initial adhesion, then allow it to dry completely. While the globe is drying, this is your opportunity to unleash your inner “ugly sweater” designer! Go wild with the loose white pom poms, strategically placing them to mimic snowdrifts or playful snowballs around your globe. Apply pom pom trim along the edges of the sweater, around the neck, or even framing your snow globe for extra festive flair. Remember, when it comes to ugly Christmas sweaters, more is always merrier! Don’t be afraid to add extra embellishments like tinsel, small ornaments (secured with glue or stitching), or even battery-operated LED lights to truly make your sweater a dazzling spectacle. The uglier, the more charming!
Tips for Elevating Your Ugly Christmas Sweater Game
While the working snow globe is undeniably the star, there are many ways to enhance your sweater and ensure it’s the talk of the party:
- Lighting it Up: Consider integrating small, battery-operated LED fairy lights around your snow globe or woven into other elements of your sweater. This adds a magical glow, especially in dimly lit party environments.
- Layering Textures: Don’t limit yourself to just felt and pom poms. Incorporate different textures like tinsel, faux fur, jingle bells, or even small, unbreakable ornaments for a truly tactile experience.
- The “Uglier the Better” Philosophy: Embrace maximalism! The charm of an ugly sweater lies in its delightful absurdity. Don’t shy away from clashing colors, excessive embellishments, or whimsical holiday motifs.
- Durability Check: Before wearing, give your sweater a gentle shake to ensure all elements are securely attached. For delicate additions, a few stitches with a needle and thread can provide extra reinforcement alongside the glue.
- Personalize, Personalize, Personalize: Add your initials, a funny holiday phrase, or elements that reflect your personality. This makes your sweater truly one-of-a-kind.
Congratulations! You’ve successfully crafted an unforgettable DIY working snow globe ugly Christmas sweater. This festive creation is more than just a piece of clothing; it’s a statement of holiday spirit, creativity, and a guaranteed crowd-pleaser. Get ready to jingle, sparkle, and shake your way through the most wonderful time of the year!
Download your FREE snow globe pattern here and start crafting today!
Loved this festive DIY idea? Don’t let it get lost in the holiday rush! Pin it to your favorite Christmas crafts board on Pinterest so you can easily find it year after year. Share your creations with us using #UglySnowGlobeSweater!
This post is sponsored by Aleene’s. All opinions and creative directions are entirely my own. We only recommend products we genuinely love and use in our crafting adventures!







