
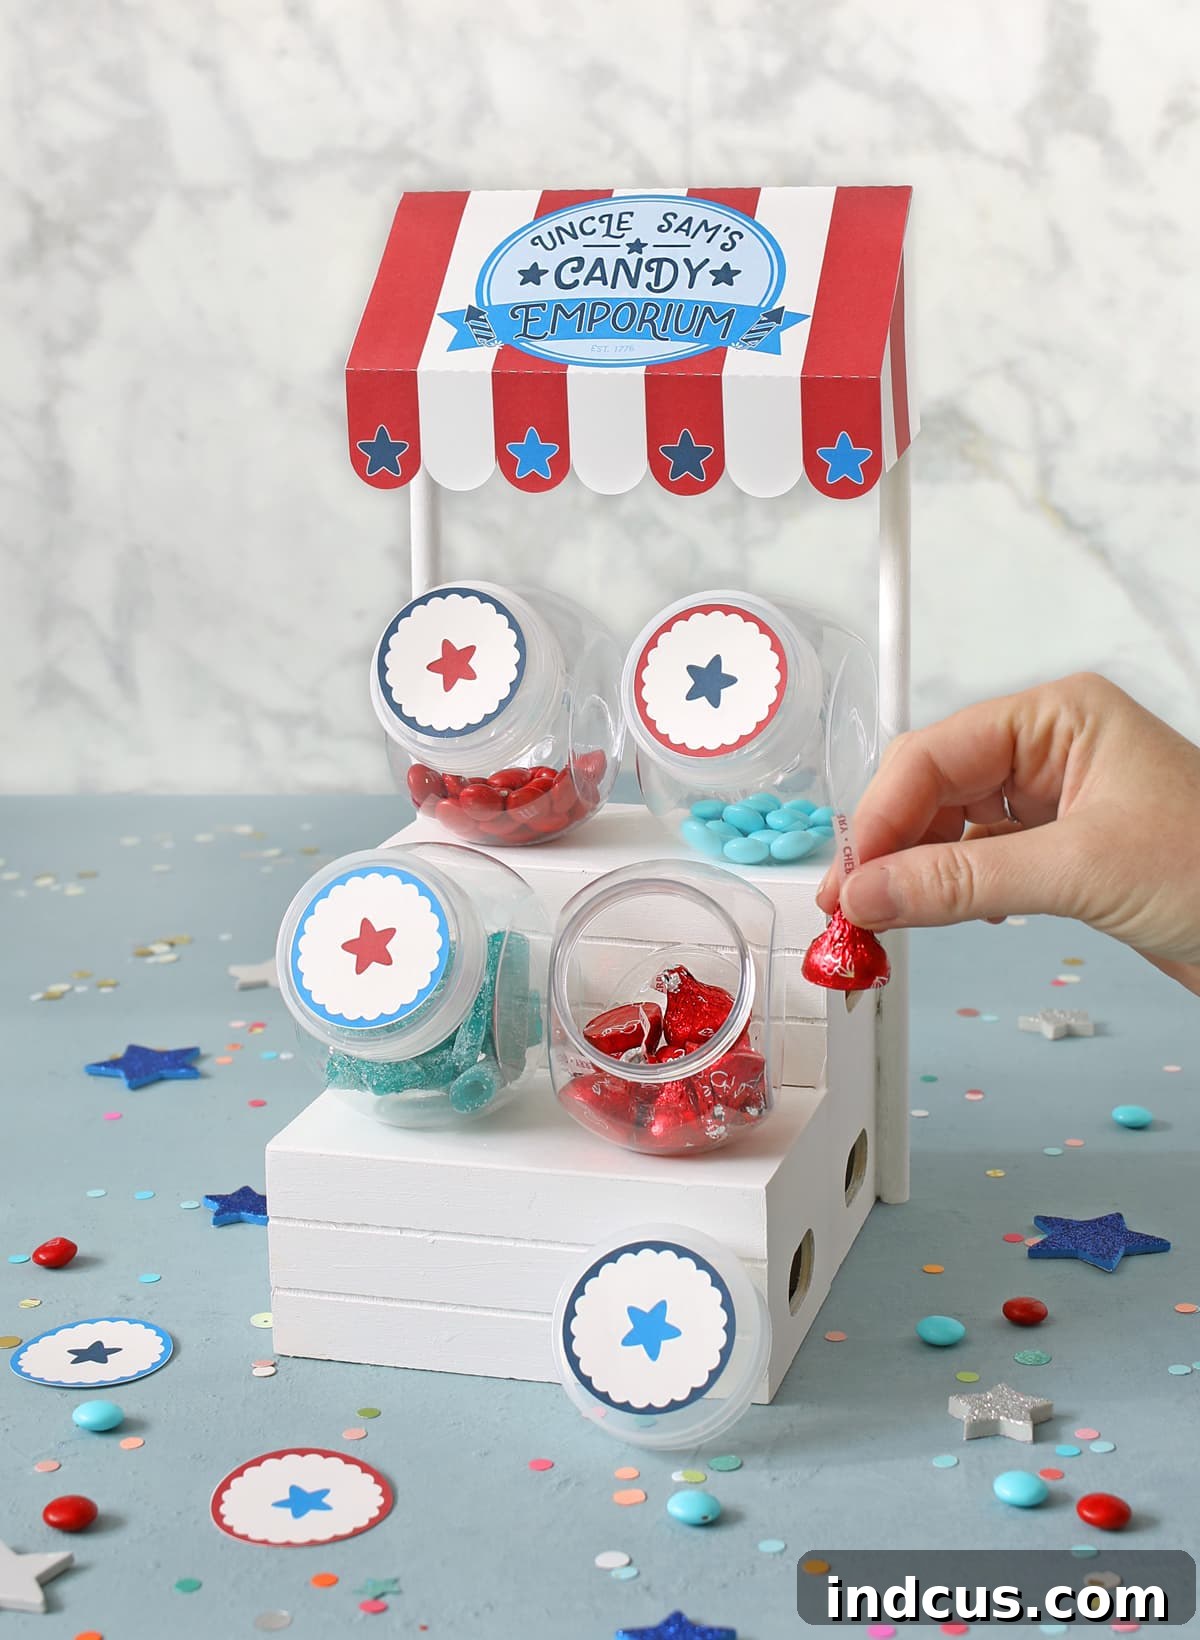
Craft a Festive Patriotic Candy Shop for the Fourth of July – Your Ultimate Dollar Tree DIY Guide!
Get ready to celebrate Independence Day with a splash of creativity and a dash of sweetness! This year, transform ordinary Dollar Tree finds into an adorable, patriotic candy shop, perfect for your Fourth of July festivities. Imagine a charming display, “Uncle Sam’s Candy Emporium,” brimming with red, white, and blue treats, all crafted by hand. This project is not only incredibly fun and easy but also exceptionally budget-friendly, making it an ideal activity for crafters of all skill levels, including families looking for a delightful summer project.
Inspired by the success of our previous seasonal candy shops—including delightful versions for Valentine’s Day, a whimsical St. Patrick’s Day stand, and an enchanting Easter display—we’re thrilled to introduce our latest creation: a patriotic masterpiece designed to honor the Fourth of July. This DIY candy shop isn’t just a craft; it’s a statement piece that adds unique charm and festive spirit to any celebration.
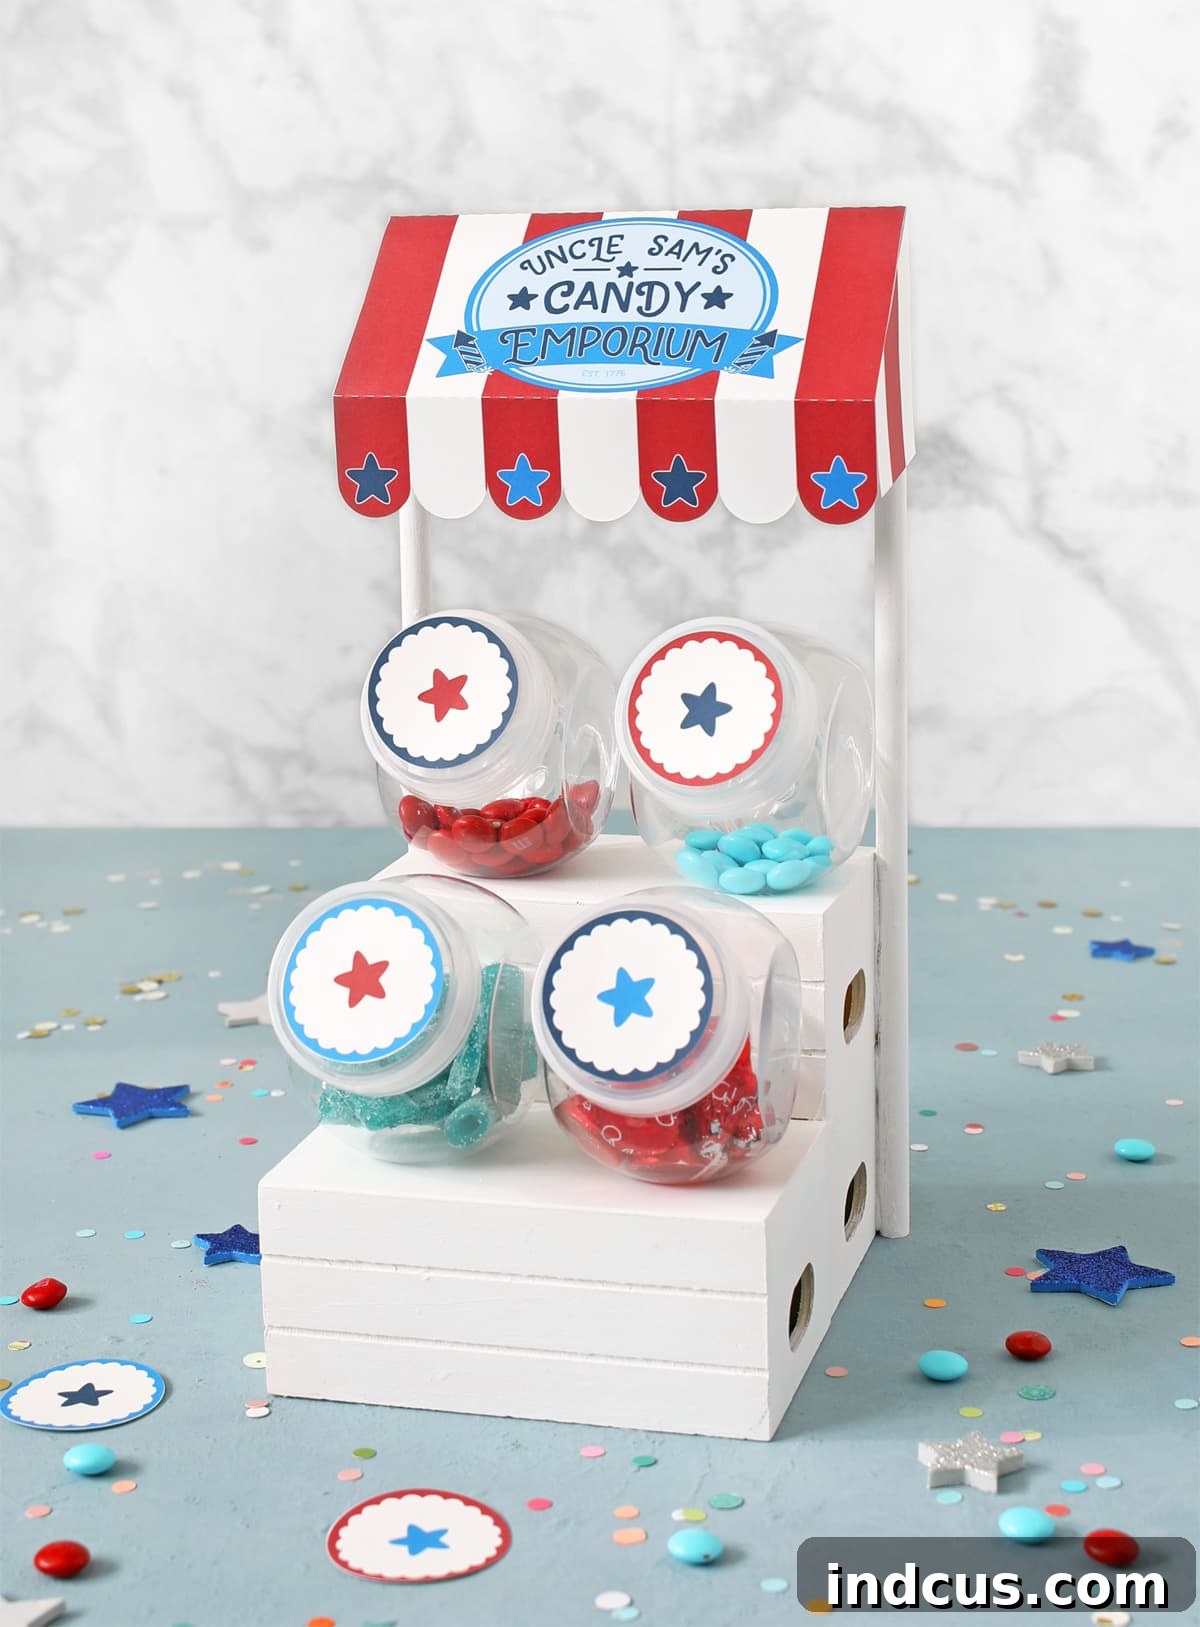
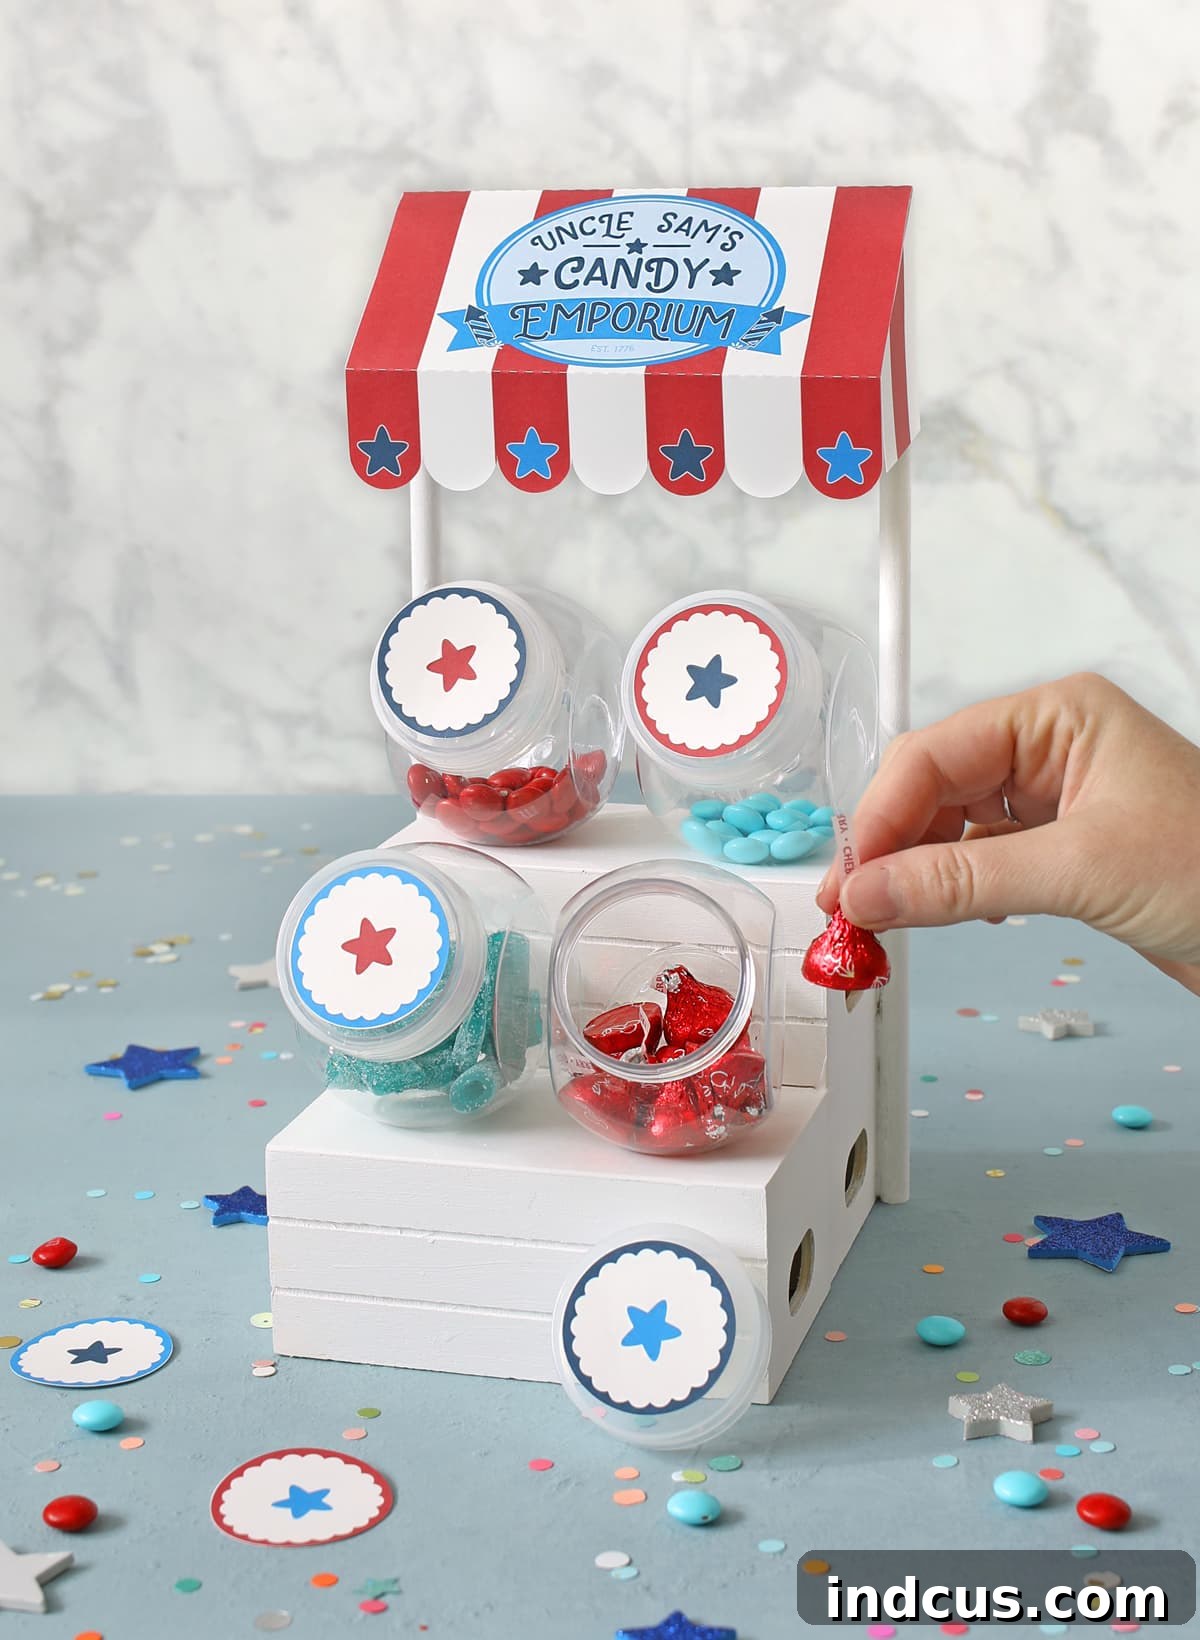
This time, our beloved mini candy shop gets a vibrant patriotic makeover, proudly rebranded as “Uncle Sam’s Candy Emporium.” The transformation is nothing short of delightful, evoking a sense of nostalgic Americana. It’s truly a fantastic way to blend your love for crafting with the joyous spirit of Independence Day. Ready to create your own?
Follow along as we guide you through each step, ensuring you can replicate this charming Dollar Tree candy shop with ease. We’ll detail every material and instruction, making this DIY accessible and enjoyable. Gather your supplies, and let’s embark on this festive crafting journey!
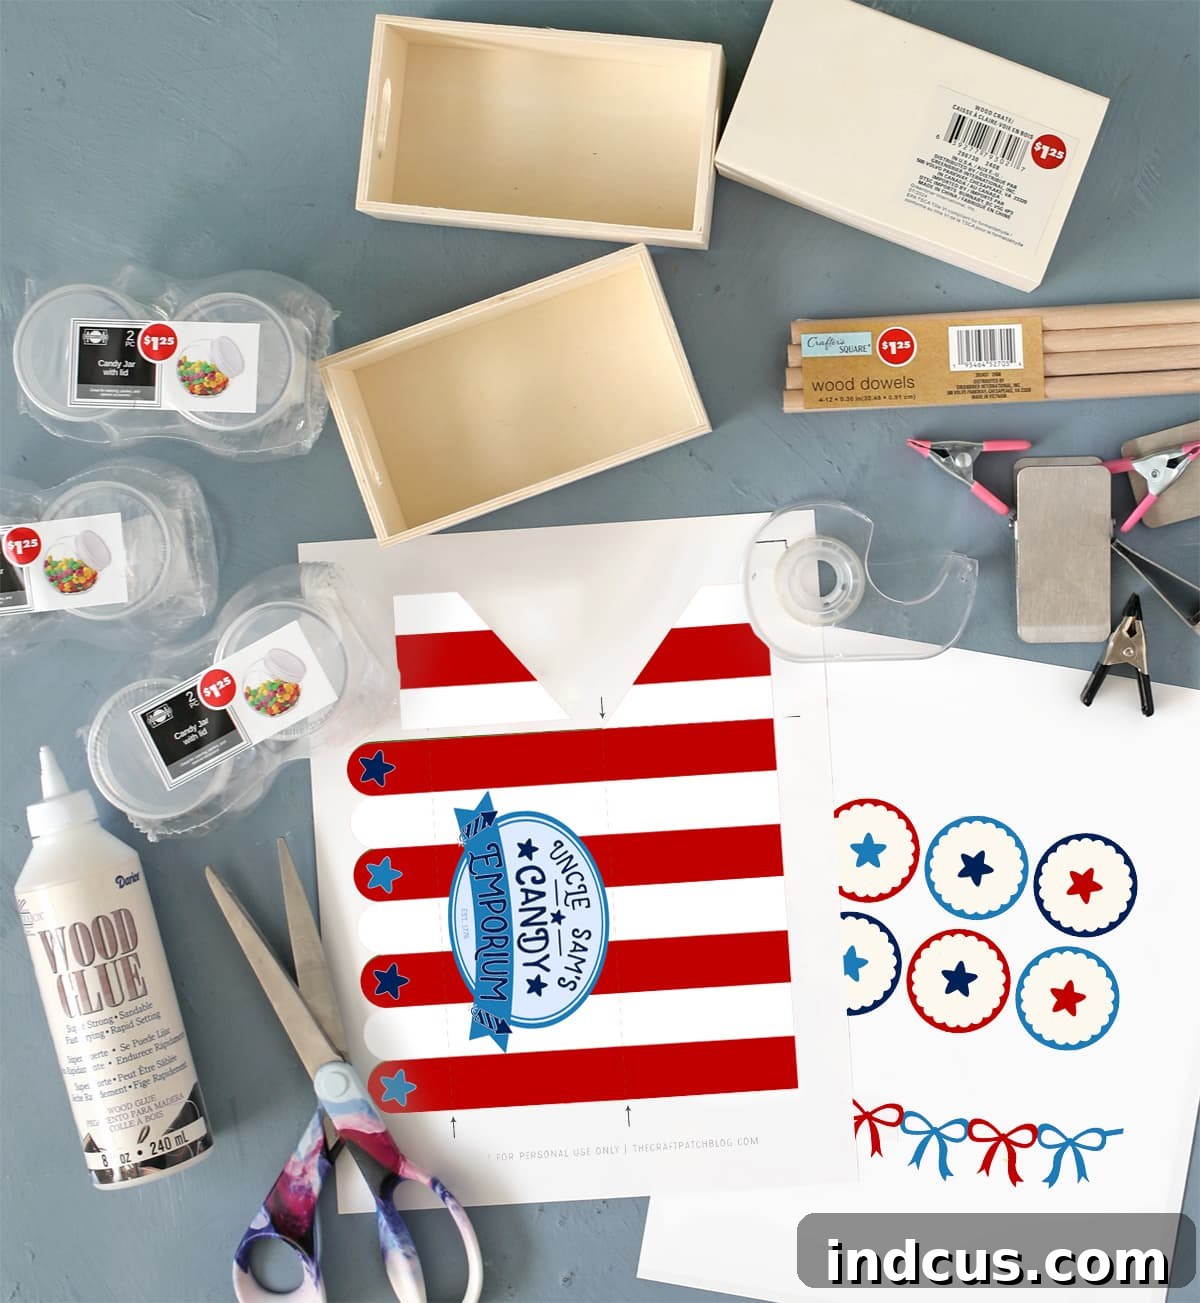
Essential Materials for Your Patriotic Candy Shop
One of the best aspects of this DIY project is its affordability. Nearly all the supplies can be found at your local Dollar Tree, keeping costs minimal without compromising on charm. Here’s a detailed list of what you’ll need to create your very own Uncle Sam’s Candy Emporium:
- Printable Fourth of July Awning: This custom design adds the perfect thematic touch. You’ll find the download link at the bottom of this post, available in both SVG and PDF formats for your convenience.
- 3 Wooden Crates: These form the sturdy foundation of your candy shop. Look for the “Crafter’s Square Wood Crate with Handles” at Dollar Tree. Their compact size is ideal for creating a mini stand. (For reference: Dollar Tree Link)
- Wooden Dowels: You’ll need two for supporting the awning. A pack of “Crafter’s Square Wood Dowels (4 ct)” will provide more than enough. (For reference: Dollar Tree Link)
- Small Candy Jars with Lids (4 total): These mini jars are perfect for holding your festive candies. A “Mini Candy Jars with Lids (2-pack)” from Dollar Tree should suffice. While I initially bought six, four proved to be the ideal number for balance and aesthetic appeal on this particular stand. (For reference: Dollar Tree Link)
- White Cardstock: Essential for printing your awning and jar lid decorations. Cardstock provides better durability and a professional finish compared to regular paper.
- Wood Glue: For securely bonding the wooden crates together, ensuring a stable structure.
- Clamps: “Crafter’s Square Metal Craft Clamps (6ct packs)” are perfect for holding your glued pieces in place while they dry, which is crucial for structural integrity. (For reference: Dollar Tree Link)
- Hot Glue Gun + Glue Sticks: Your trusty companion for quick and strong adhesion, especially for attaching the dowels.
- Clear Tape: For attaching the awning and jar lid decorations, allowing for easy removal and swapping for future holiday themes.
- White Craft Paint + Paint Brush: To give your candy shop a clean, versatile base coat. Acrylic craft paint works perfectly.
While I’ve included links to the exact Dollar Tree items for your reference, please note that these links are primarily to help you identify the products. It’s generally more practical and economical to purchase these items directly from your local Dollar Tree store, as online orders often require buying in bulk (e.g., 24 units), which isn’t necessary for this project.
You might notice I initially acquired six candy jars but ultimately used only four. My initial thought was to place two additional jars on the “counter” space in front of the main stand, but I found the aesthetic was cleaner and more balanced with just four. However, feel free to experiment with the number of jars to suit your personal preference and candy shop vision!
Step-by-Step Instructions to Build Your Uncle Sam’s Candy Emporium
Creating this patriotic candy shop is a rewarding process, and with these detailed instructions, you’ll find it surprisingly simple. Let’s get crafting!
Step 1: Assemble the Crate Structure
Begin by carefully removing any store stickers from all three wooden crates. These stickers can be stubborn, so take your time to ensure a clean surface. Once peeled, arrange two crates side-by-side on the bottom, with the third crate stacked centrally on top. Crucially, ensure all crates are oriented upside down, meaning their solid bottom sides face upwards. This creates a flat, sturdy surface for your candy shop’s counter and display shelves. Apply a generous amount of wood glue to the joining surfaces of the crates. Press them firmly together, then secure them with clamps. Wood glue requires time to cure properly, so give the assembled structure at least an hour to dry. This patience ensures a robust and stable foundation for your candy shop, preventing wobbles as you proceed to the next steps.
Step 2: Attach the Dowel Supports
Next, it’s time to add the supports for your awning. Position the two wooden dowels vertically on each side of the top-stacked crate at the back of your structure. While wood glue might seem like the obvious choice for wood, I highly recommend using a hot glue gun for this step. Hot glue excels at creating an instant, strong bond, and its thicker consistency allows it to mold around the dowels, filling any small gaps or uneven spots in the wood. This provides superior adhesion and stability, ensuring your awning will stand firm. My previous attempts with wood glue for this specific part were less successful, confirming that hot glue is indeed the superior option here.
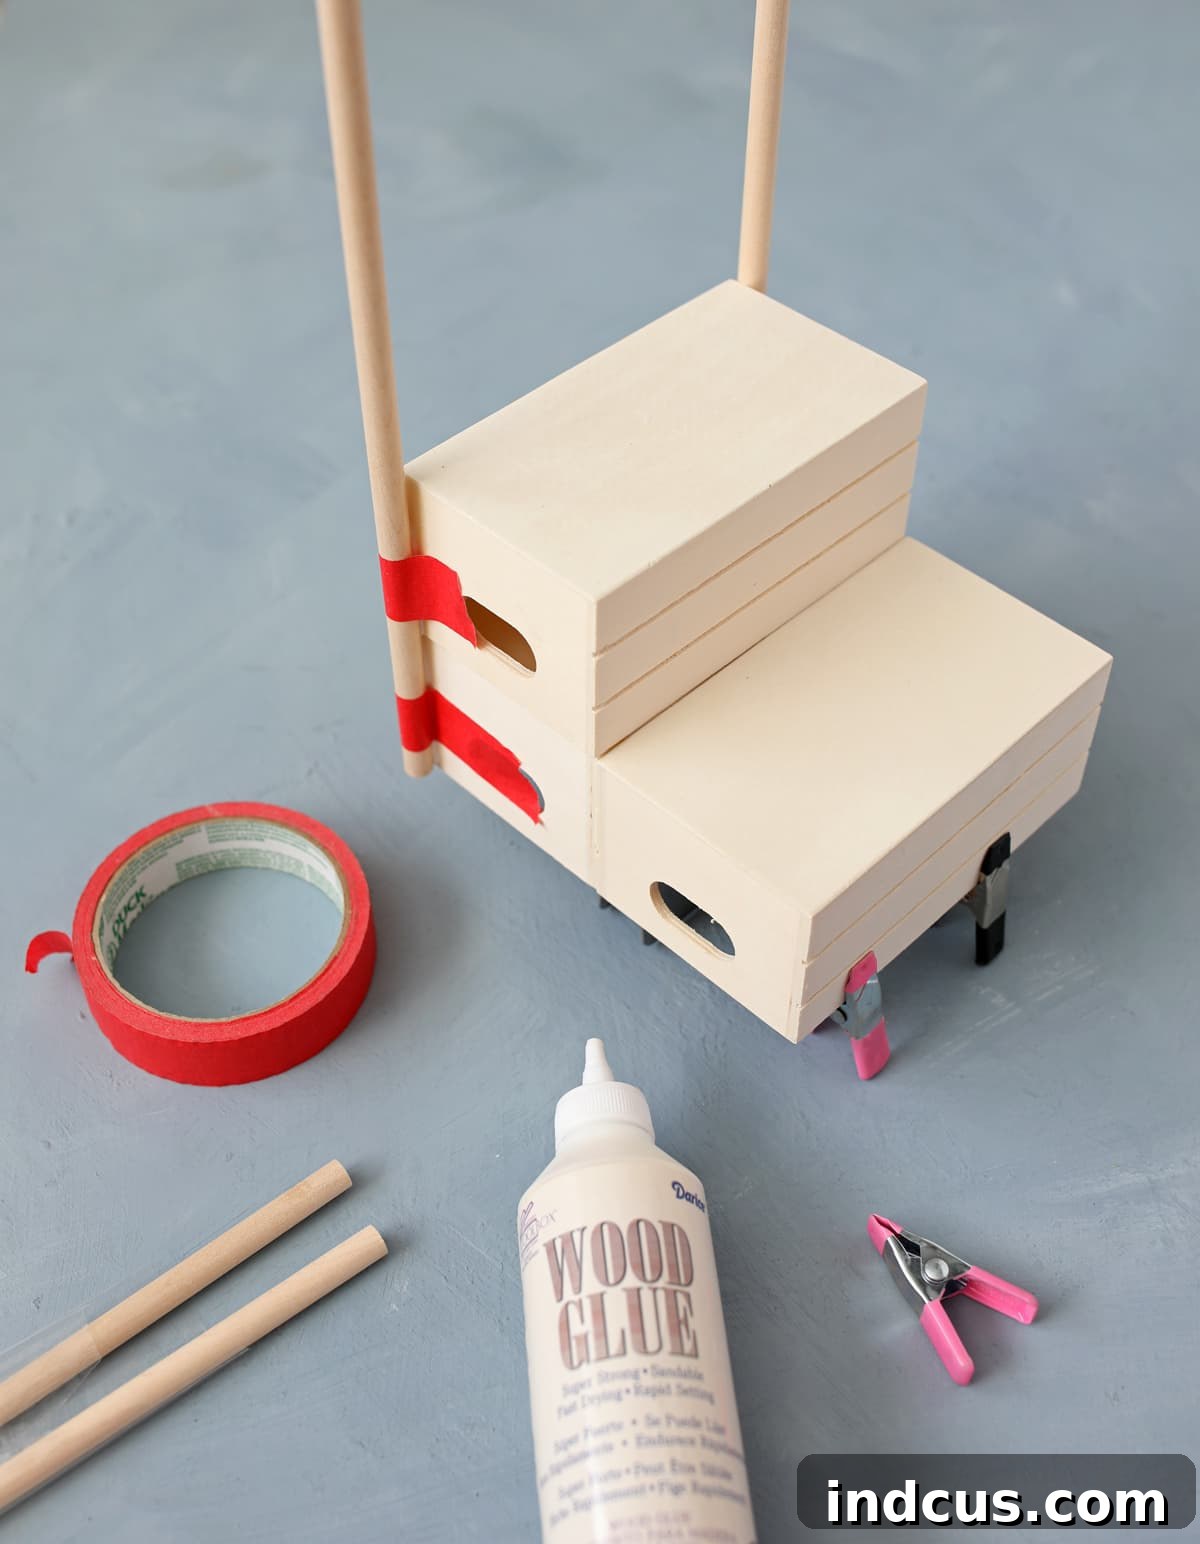
Step 3: Paint Your Candy Shop Base
With the main structure assembled and the dowels firmly in place, it’s time to give your candy shop a fresh coat of paint. You have the flexibility to use either spray paint for a quicker application or regular white craft paint applied with a brush. I strongly suggest painting the entire structure white. Not only does white provide a clean, crisp base that beautifully contrasts with the patriotic awning, but it also offers incredible versatility. Should you decide to create other seasonal versions of the candy shop in the future, a white base allows you to easily swap out awnings and decorations without having to repaint the entire structure. Ensure even coverage and allow ample drying time before moving on.
Step 4: Prepare and Assemble the Awning Printables
The awning is what truly brings the “Uncle Sam’s Candy Emporium” theme to life! Download the printable awning file (available at the end of this post) and print it onto white cardstock. Cardstock is essential here as it provides the necessary rigidity for the awning to hold its shape beautifully. I’ve thoughtfully created two distinct file variations to cater to different crafting preferences:
- SVG File: Ideal for those who own an electronic cutting machine like a Silhouette or Cricut. This allows for precise, automated cutting, saving you time and effort.
- PDF Version: Perfect for crafters who prefer to cut by hand. This version is designed for easy cutting with scissors or a craft knife.
Be sure to download the file that best suits your equipment. Both printables include the main large awning shape and a smaller, separate piece that forms one side of the awning. This design ensures that the entire awning fits perfectly onto a standard piece of paper, regardless of your chosen cutting method.
Please Note: To expedite sharing this craft, some tutorial photos for the awning assembly are reused from our Cupid’s Candy Shoppe project. Rest assured, the construction methods are identical, ensuring you receive clear and accurate guidance.
Electronic Cutting Machine Instructions
If you are fortunate enough to own a Silhouette or Cricut machine, utilizing the provided SVG file will make this step incredibly fast and accurate. This “print and cut” feature streamlines the process, allowing your machine to perfectly cut the design after printing. For those new to using a Silhouette machine or needing a quick refresh, I highly recommend reviewing this detailed Print and Cut tutorial. It covers all the essentials to ensure a successful cut.
A Few Important Tips for Machine Users:
– Registration Marks: Before sending your design to print, always remember to activate your registration marks within your cutting machine’s software. These marks are crucial for the machine to accurately locate and align the printed design on the page, ensuring your cuts are precise and perfectly match the printed graphics.
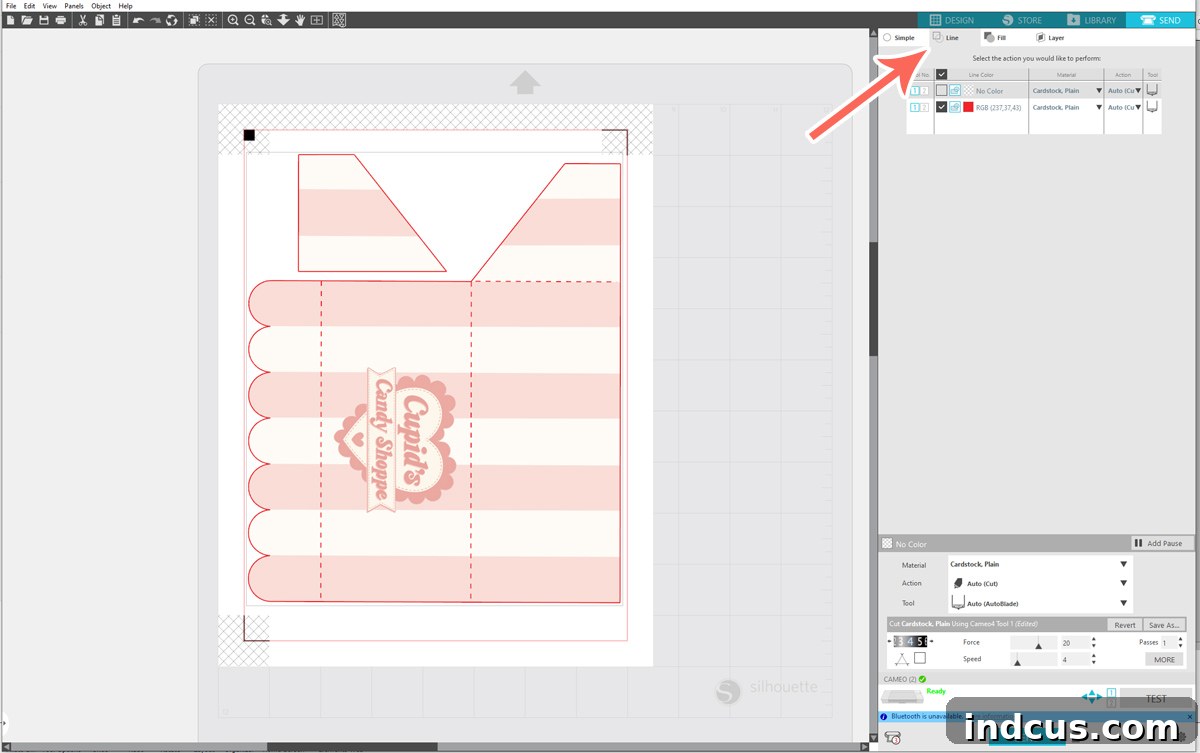
– Cut Settings: When you navigate to the “SEND” tab to send your design to the machine, you might initially see numerous cut lines appearing where they shouldn’t. To correct this, select the “LINE” sub-tab within the software. This setting instructs your machine to cut only along the defined outlines of your design, preventing unwanted cuts across the graphic. Your screen should resemble the image below, showing only the intended cut lines, before you send it to your machine for cutting.
Cutting By Hand Instructions
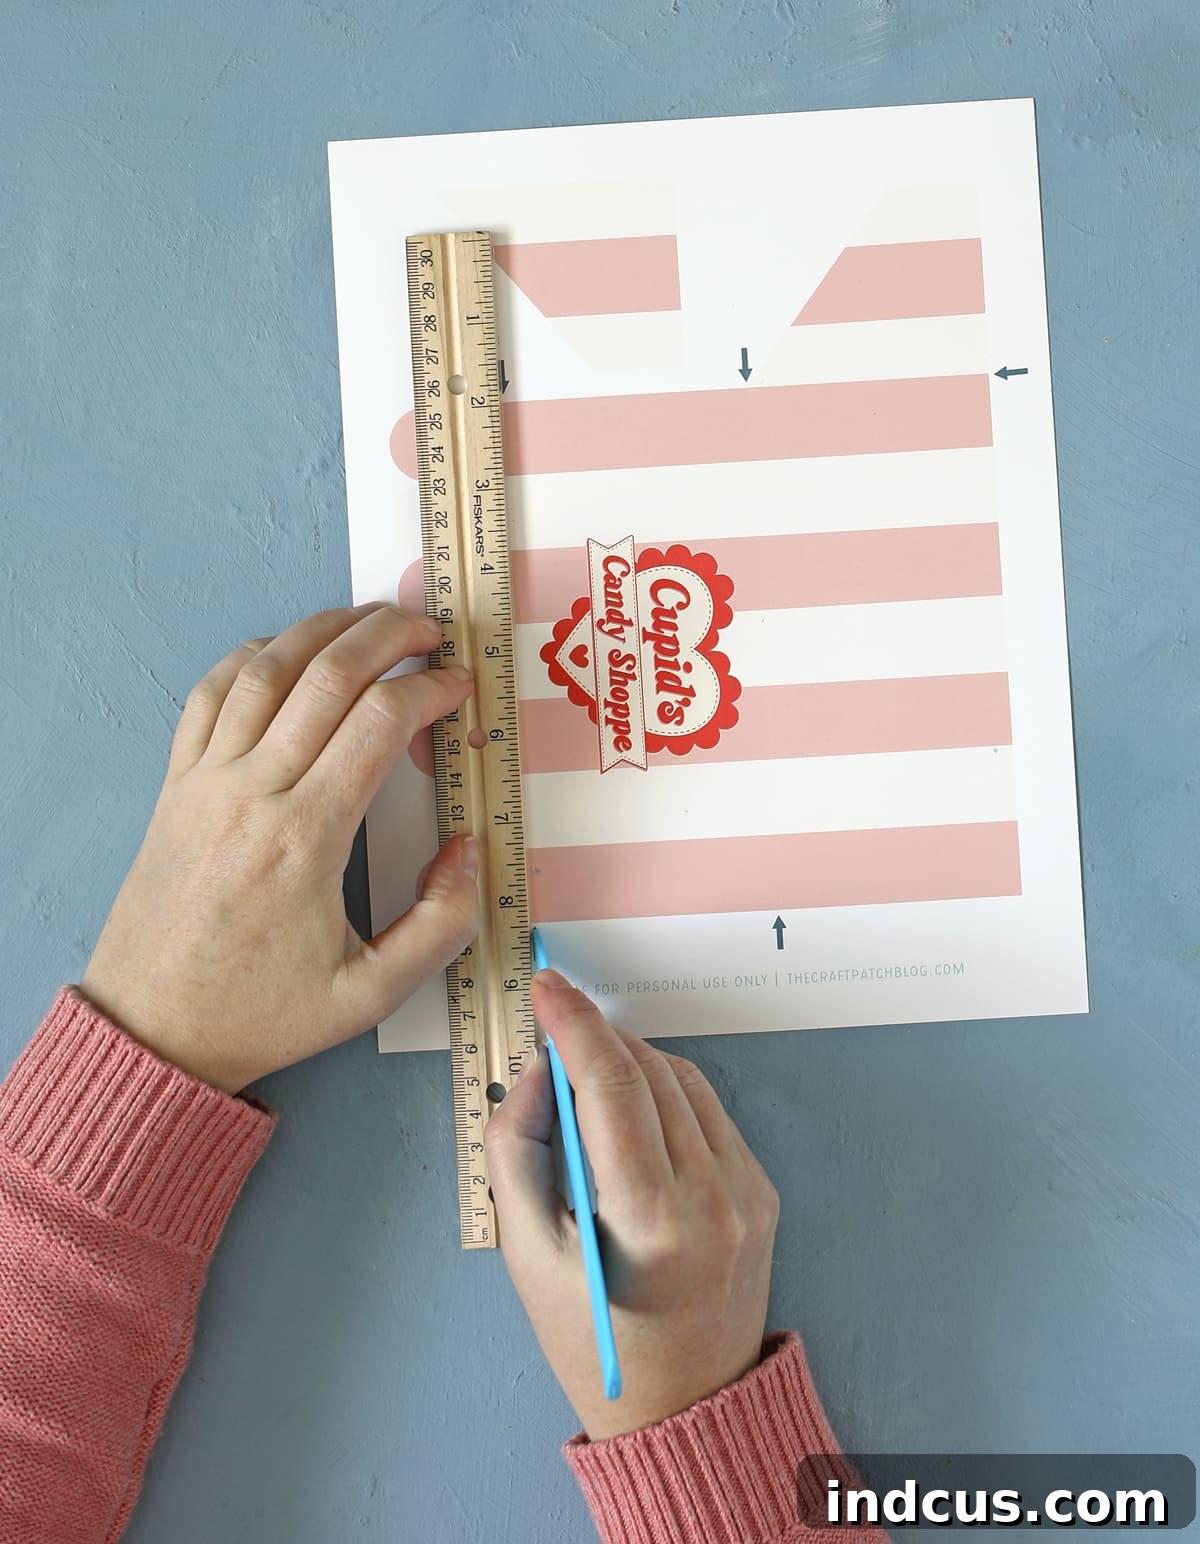
Don’t have an electronic cutting machine? No problem! You can absolutely still create this charming craft. Simply download the PDF version of the awning design and print it onto white cardstock. Before you begin cutting, take a moment to use a scoring tool and a ruler along the subtle gray arrows indicated on the printable. Scoring these lines creates crisp, clean folds, resulting in a much more professional finish. After scoring, carefully cut out both shapes. I intentionally designed the printable this way—with fold lines subtly marked—so that once assembled, there are no visible lines on your beautiful finished awning, ensuring a flawless appearance.
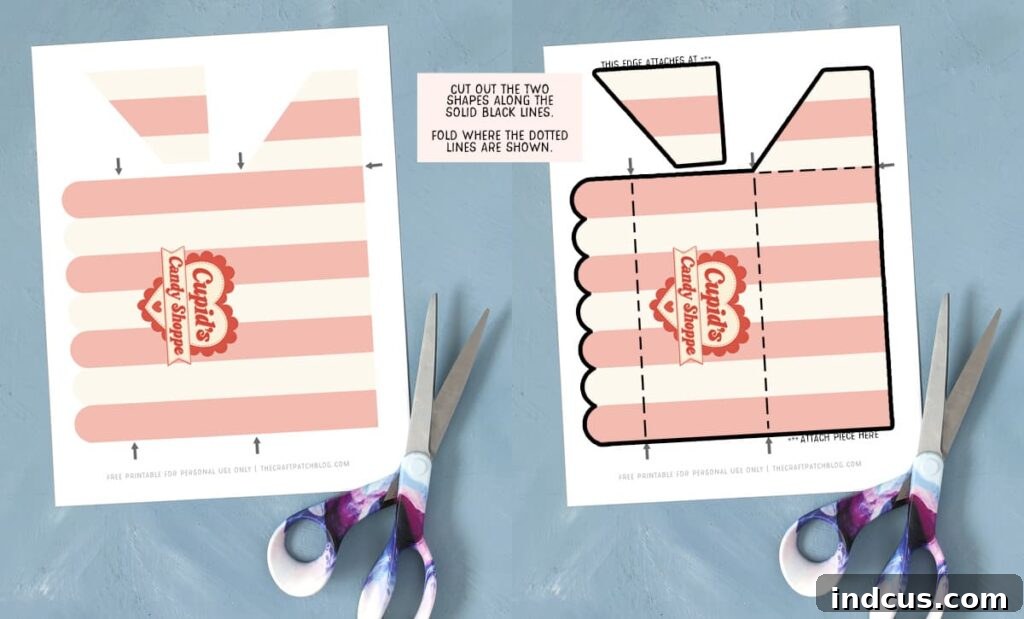
Once you’ve cut out the two main shapes for your awning, it’s essential to understand how they fit together. The image below highlights the outlines to clarify exactly where you should cut and where the smaller, separate piece attaches to the larger main awning. Take a close look; can you distinguish the extra piece and visualize its connection point?
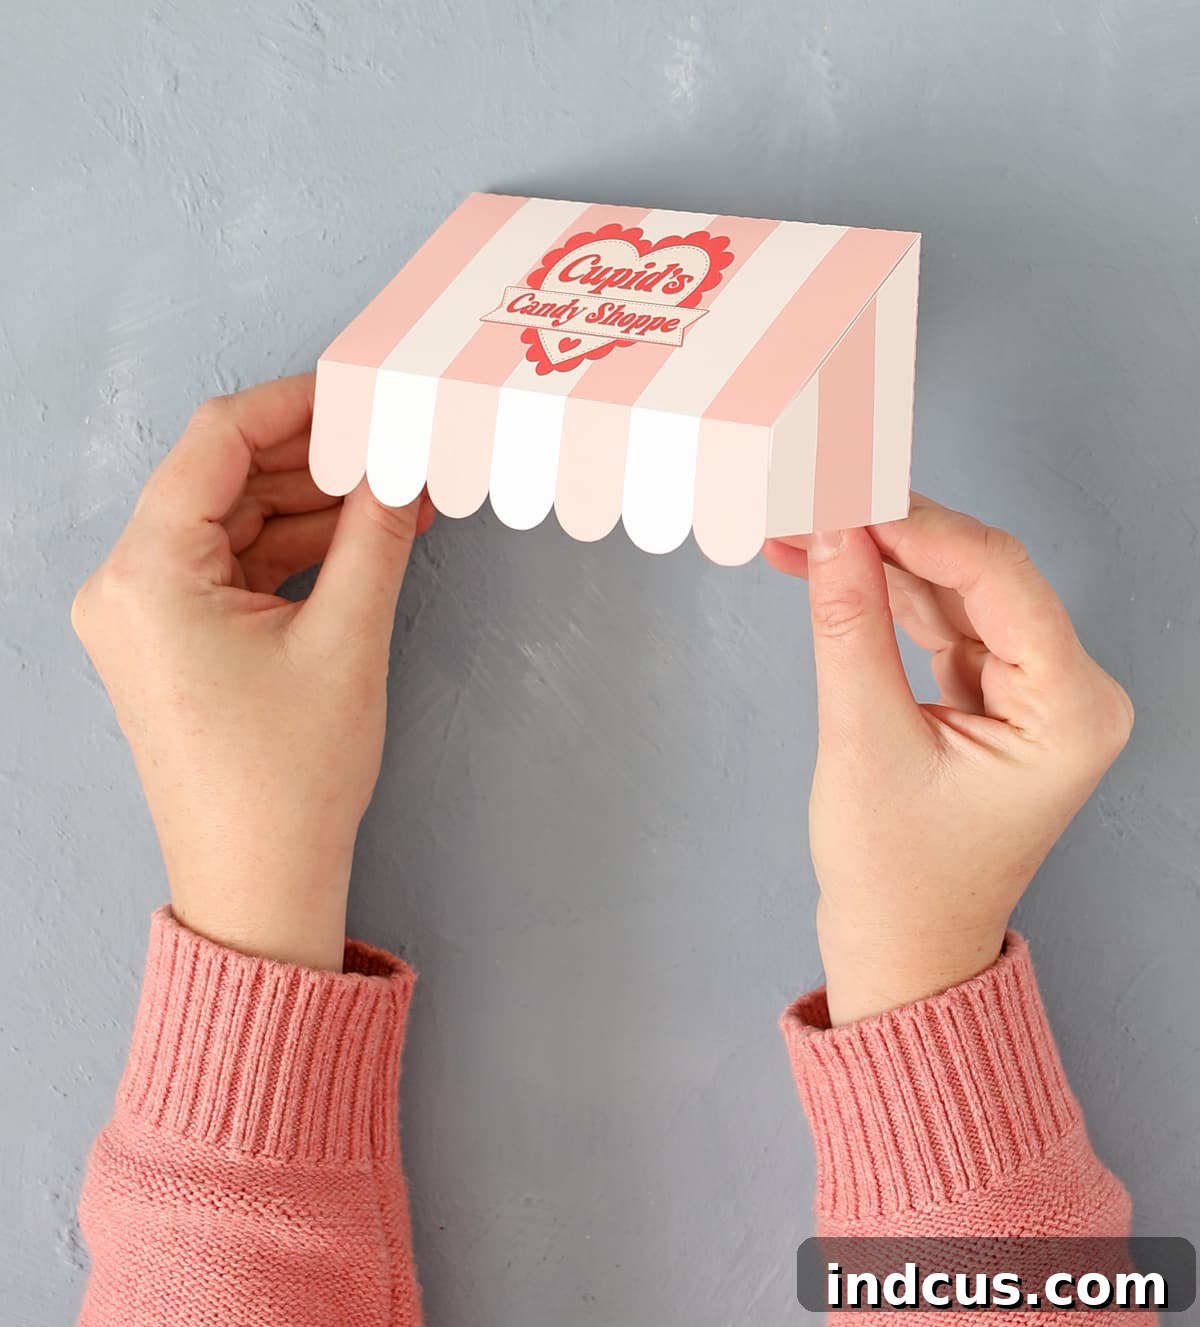
After successfully cutting out both pieces, the next step is folding. Carefully fold all designated fold lines away from you, creating sharp creases. Then, use clear tape to attach the smaller side pieces of the awning to the central main section. This creates the three-dimensional structure of the awning. If you’re unsure about this assembly, the video tutorial below provides a clear visual demonstration. Upon completion, your awning should resemble the image provided, ready to adorn your candy shop:
Step 5: Attach the Awning
Now, bring your beautifully assembled cardstock awning to your wooden structure. Position it carefully over the dowels and secure it in place with a few small pieces of clear tape. Using tape is a deliberate choice here; it allows for easy removal of the awning later on. This flexibility is fantastic, as it means you can effortlessly peel off the patriotic awning and replace it with a new design for another holiday or season, transforming your candy shop without permanent alterations. This makes your Dollar Tree candy stand a truly versatile piece of decor!
Step 6: Decorate the Candy Jar Lids
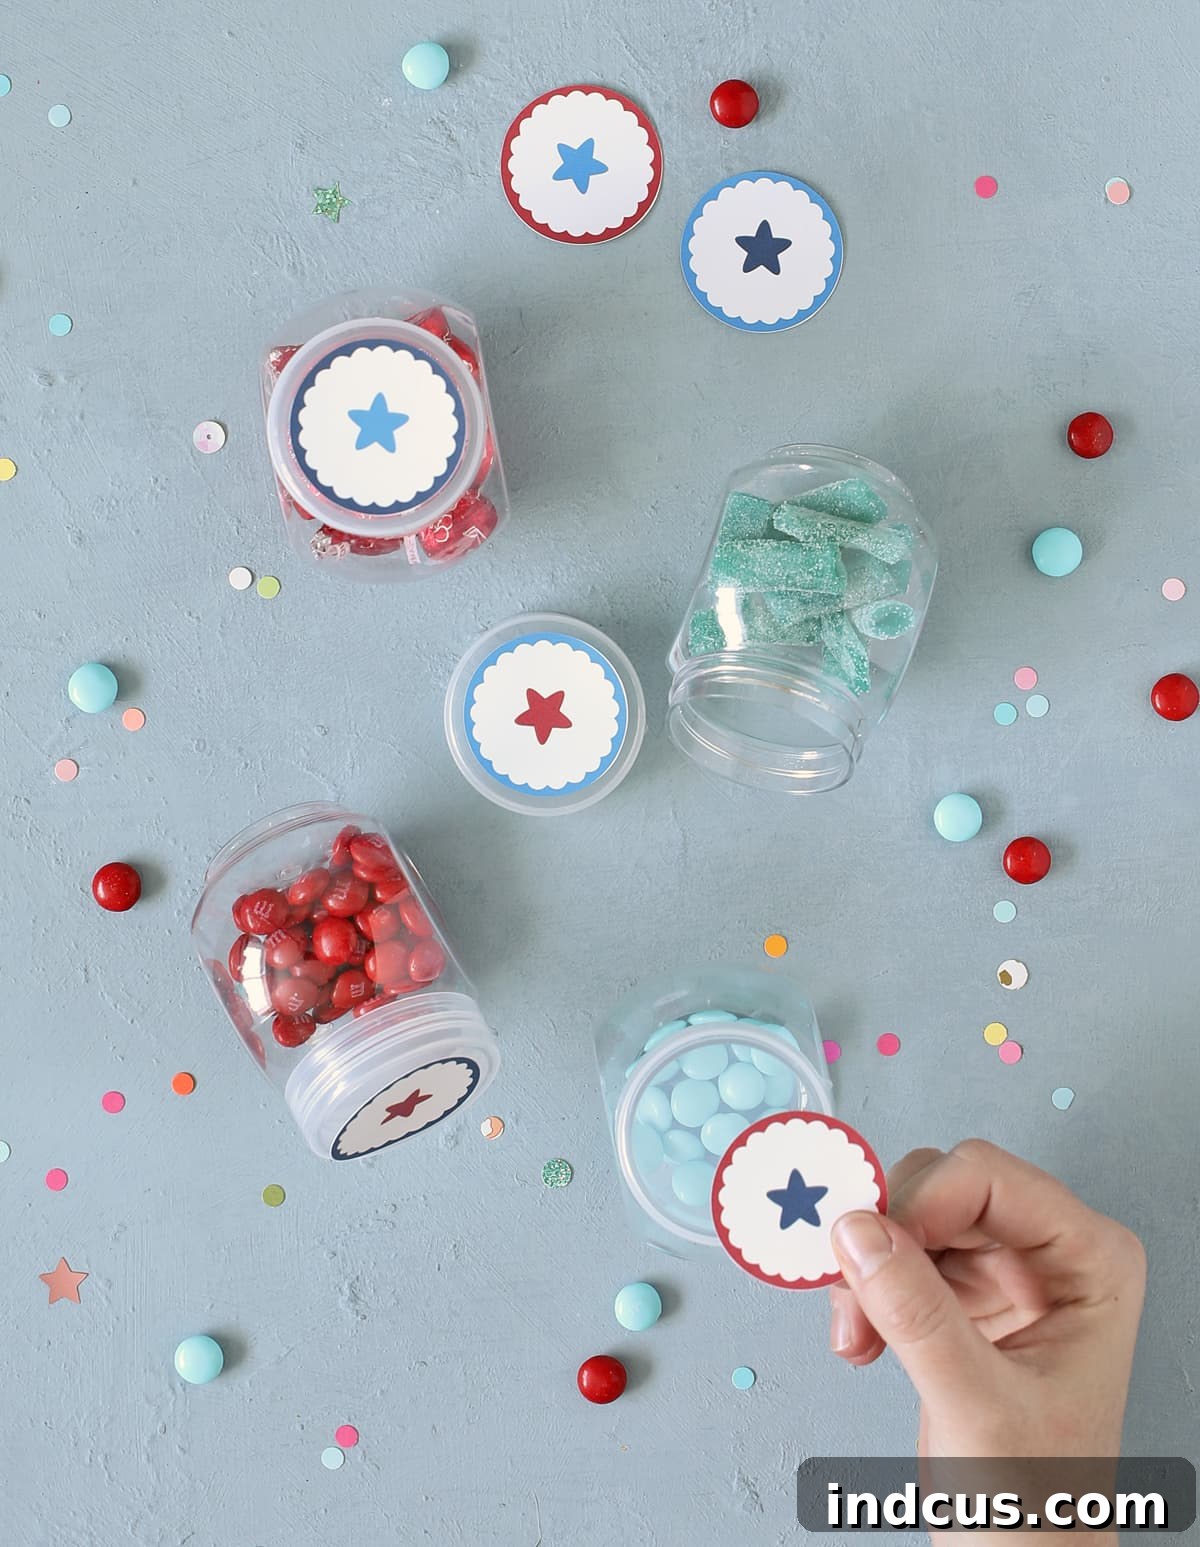
To add an extra layer of festive charm and cohesive design, I’ve created matching circular designs specifically for the candy jar lids. These delightful printables are included in the same downloadable folder as the awning, so be sure to grab them! Simply print them onto white cardstock, carefully cut out each circular design, and then attach them to the tops of your small candy jar lids. A small loop of clear tape on the back of each cutout works perfectly for this—it’s quick, secure, and allows for easy removal if you wish to change themes in the future. This simple addition makes your Uncle Sam’s Candy Emporium truly complete and ready for delicious treats!
Watch the Full Video Tutorial
Sometimes, seeing the steps in action makes all the difference! For a complete visual guide to assembling your patriotic candy shop, watch our detailed video tutorial below. It covers all the essential techniques, from gluing the crates to attaching the awning, ensuring you can follow along with confidence.
I am absolutely thrilled with how this patriotic candy shop turned out! It’s a vibrant tribute to the Red, White, and Blue, bringing an undeniable festive charm to any space. This delightful candy stand will be an absolute joy to display throughout June and July, serving as a cheerful centerpiece for your Independence Day celebrations or simply as a charming piece of summer decor.
The versatility of this Dollar Tree DIY project is truly its strength. Once you’ve created this patriotic version, you’ll be eager to explore other themes! In fact, I’m currently putting the finishing touches on an equally adorable summer-themed candy shop design, perfect for farmers’ market vibes or simply celebrating the sunny season. Be sure to keep an eye out for that one—you won’t want to miss it!
Explore Our Entire Candy Shop Printables Collection
Loved creating your Uncle Sam’s Candy Emporium? The fun doesn’t stop here! Our mini candy shop concept is a year-round crafting adventure. Discover all the other delightful seasonal and holiday-themed candy shop printables to keep your display fresh and festive throughout the year. Each design brings unique charm and can be easily swapped onto your existing Dollar Tree structure, making it a truly adaptable piece of home decor. Click on any of the links below to explore the full tutorials and download your next candy shop theme!
-
Cupid’s Candy Shoppe Valentine’s Day Craft
A sweet and romantic craft perfect for Valentine’s Day, featuring charming heart-themed printables.
-
DIY Easter Candy Shop
Bring spring cheer with bunnies, eggs, and pastel colors in this adorable Easter-themed candy stand.
-
Farmer’s Market Fruit Stand Candy Shop Craft
A fresh and vibrant design evoking the charm of a rustic farmer’s market, ideal for summer decor.
-
Halloween Candy Shop Craft
Get spooky with this fun Halloween version, perfect for trick-or-treaters or festive decorations.
-
Shamrock Sweets Shop St. Patrick’s Day Craft
A lucky green-themed craft to celebrate St. Patrick’s Day with a charming sweets display.
-
Patriotic Candy Shop Craft
The very craft you’re reading about! A fantastic way to show your national pride with sweets.







