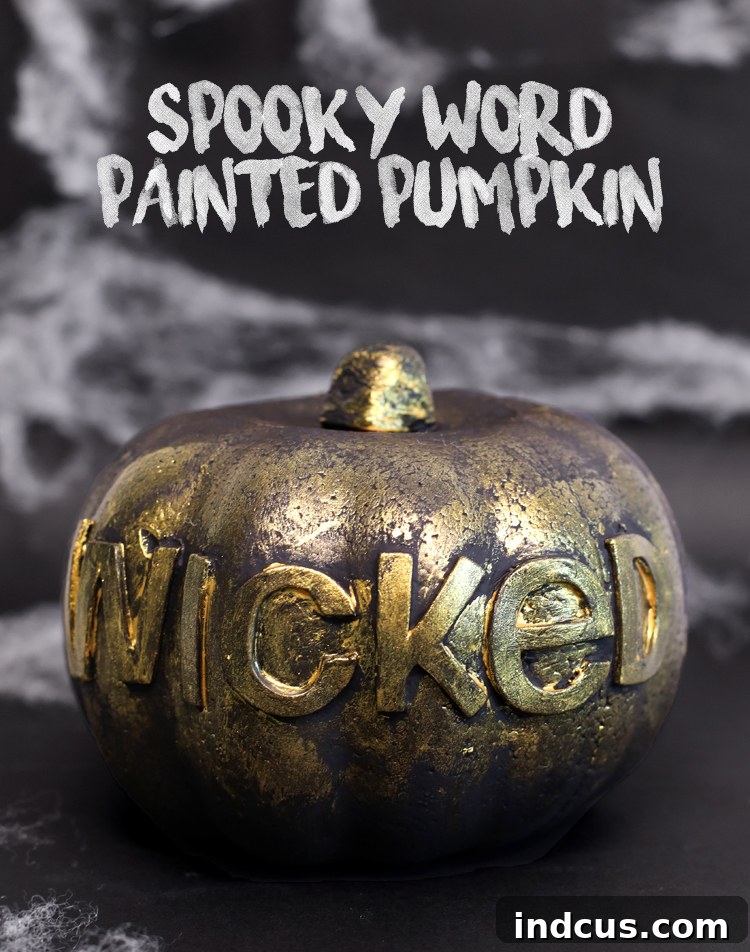
DIY Witch’s Spell Book Painted Pumpkin: A Spooky Halloween Masterpiece
As the leaves begin to turn and a crisp chill fills the air, our thoughts inevitably drift to Halloween—a time for spooky transformations and creative decor. If you’re searching for a unique, captivating, and surprisingly simple Halloween craft that stands out from the traditional carved pumpkin, look no further! This project will guide you through creating an eerie, aged “witch’s spell book” themed painted pumpkin, adorned with weathered metallic words that seem to whisper ancient incantations.
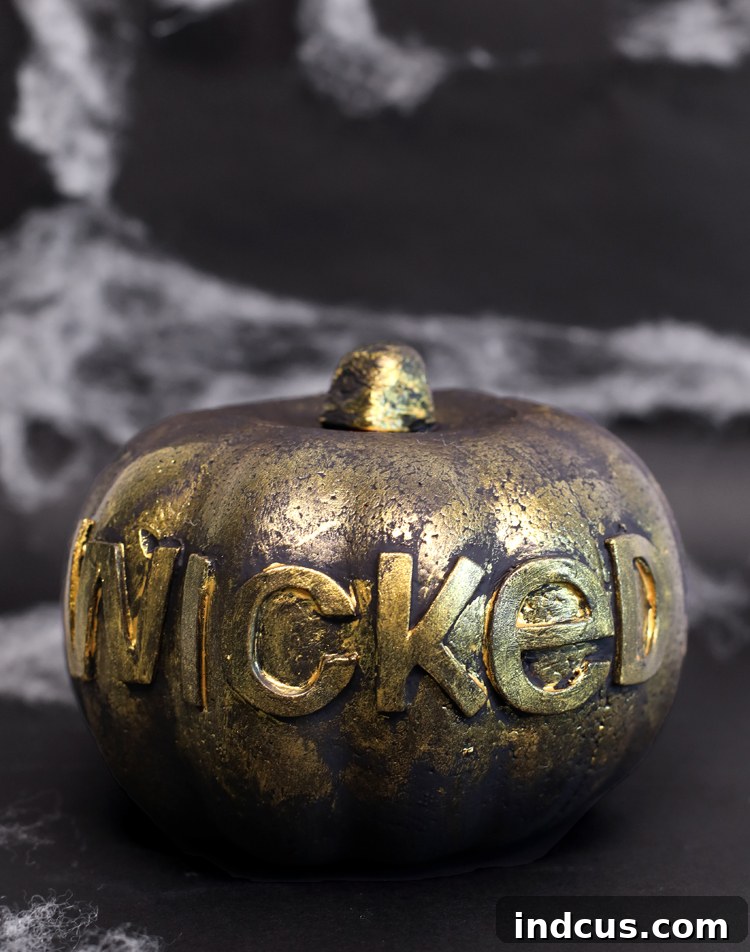
Imagine a pumpkin that looks like it’s been pulled straight from a forgotten crypt or a mysterious witch’s personal collection. With a base of deep, matte black and carefully applied metallic gold accents, this pumpkin will evoke the charm of antique forbidden texts and the mystique of a sorcerer’s lair. It’s a fantastic way to add a touch of gothic elegance and genuine spookiness to your Halloween display, whether it graces your mantelpiece, porch, or serves as a bewitching centerpiece.
The beauty of this project lies in its accessibility. You don’t need to be an expert crafter or possess advanced artistic skills. With just a few common craft supplies and our detailed step-by-step instructions, anyone can conjure up this enchanting piece of Halloween art. We’ll show you exactly how to achieve that perfectly aged, metallic weathered look that gives this pumpkin its undeniable character. Get ready to transform an ordinary pumpkin into an extraordinary object of fascination and fright!
Why Choose the Witch’s Spell Book Pumpkin for Your Halloween Decor?
In a sea of carved jack-o’-lanterns and plastic decorations, this witch’s spell book pumpkin offers a refreshing and sophisticated alternative. Here’s why it’s the perfect addition to your Halloween celebrations:
- Uniquely Spooky Aesthetic: It transcends the typical “cute” or “gory” Halloween themes, offering a refined gothic and mystical vibe. The black and gold combination is inherently elegant yet undeniably eerie.
- No Carving, No Mess: Forget the slime and struggle of carving! This project is clean, enjoyable, and doesn’t involve sharp tools, making it a great option for families. Plus, no rotting pumpkin to dispose of post-Halloween if you use a faux pumpkin.
- Highly Customizable: While we suggest a spell book theme, the technique can be adapted to any word or phrase. Think “Beware,” “Hocus Pocus,” “Poison,” or even a simple “Boo!” The possibilities for personalization are endless.
- Reusable and Durable: When crafted on a faux pumpkin, this decoration can be cherished and reused year after year, becoming a treasured part of your annual Halloween traditions.
- Versatile Decor Piece: Its antique-inspired appearance allows it to blend seamlessly with various decor styles, from rustic farmhouse to modern gothic. It looks fantastic as a standalone piece or as part of a larger Halloween tableau.
- Budget-Friendly: Utilizing common craft supplies, this project is kind to your wallet, proving that impressive Halloween decor doesn’t have to come with a hefty price tag.
Gathering Your Enchanted Supplies for a Bewitching Craft
Before you begin your magical transformation, gather all your ingredients—er, supplies! The items needed are straightforward and readily available at most craft stores or online. Remember, using good quality materials can make a significant difference in the final look and durability of your spell book pumpkin.
Materials Needed
(affiliate links included for your convenience)
- Pumpkin (Fake or Real): The foundation of your spell book. Faux pumpkins (foam, plastic, or paper mache) offer durability and reusability, perfect for a lasting decoration. Real pumpkins provide an authentic texture, but ensure they are firm and blemish-free for the best painting surface.
- Foam Letter Stickers: These are the secret to crisp, professional-looking lettering without the need for perfect handwriting. Look for varying fonts and sizes to match your desired aesthetic. If you’re feeling adventurous or artistic, stencils or even freehand painting (with careful outlining) are alternatives.
- Matte Black Paint: This will be your base coat, creating the dark, mysterious backdrop for your “spell book.” A matte finish is crucial as it absorbs light and provides a perfect contrast for the metallic gold, enhancing the aged effect. Acrylic craft paint works wonderfully.
- Gold Metallic Craft Paint: The shimmering key to achieving that ancient, weathered look. A rich, antiqued gold or bronze metallic paint will work best. This will be sparingly applied to create highlights and an illusion of age.
- Paint Brush: A standard flat brush, about 1-2 inches wide, is ideal for applying the base coat. You might also want a smaller, finer brush for any touch-ups or intricate details if you deviate from the sticker method.
- Paper Towel or Old Rag: Absolutely essential for the metallic glaze technique! It will help you control the amount of gold paint and achieve the subtle, distressed finish.
A Note on Pumpkins: If you opt for a real pumpkin, ensure you wash it thoroughly with soap and water and let it dry completely before painting. This removes dirt, oils, and residues, allowing the paint to adhere properly and preventing peeling. For faux pumpkins, a quick wipe-down to remove dust is usually sufficient. While I’ve linked to specific paints on Amazon, always check your local craft store—you might find them for a better price and support a local business!
The Spellcasting Process: Step-by-Step Guide to Your Witch’s Book Pumpkin
Now that you’ve gathered all your supplies, it’s time to bring your witch’s spell book pumpkin to life. Follow these steps carefully to achieve a truly enchanting and spooky result.
Instructions
- Prepare Your Canvas and Lay the Foundation with Letters:
Begin by ensuring your pumpkin is clean and dry. If using a real pumpkin, any moisture or debris will hinder paint adhesion. Next, carefully apply your foam letter stickers to the pumpkin. Think about the word or phrase you want to spell out. Popular choices include “Hocus Pocus,” “Spells,” “Beware,” “Poison,” or a spooky family name. Arrange the letters evenly, paying attention to spacing and alignment. Press them down firmly to ensure good adhesion, especially around the edges. If you find the stickers aren’t sticky enough (which can sometimes happen with older stickers or textured pumpkins), a tiny dab of craft glue on the back of each letter can secure them in place. The goal is to prevent any black paint from seeping underneath the letters in the next step, as this will compromise the crispness of your final design.
- Embrace the Darkness – The Matte Black Base Coat:
With your letters securely in place, it’s time to paint the entire pumpkin, including over the foam letters, with your matte black paint. Apply the paint in even strokes, ensuring full coverage. The matte finish is key here, as it will provide a deep, non-reflective background that perfectly contrasts with the metallic gold later. This step might require two coats to achieve a completely opaque and uniform black surface. Allow each coat to dry completely before applying the next. Patience during drying times is crucial to avoid smudges and ensure proper paint adhesion. Work in a well-ventilated area.
- Unveiling Ancient Magic – The Weathered Gold Effect:
This is where the magic truly happens and your spell book takes on its ancient, weathered appearance! Once the black paint is absolutely dry to the touch, squirt a very small amount of metallic gold paint onto a paper towel or an old rag. The key here is “less is more.” You’re not aiming to paint the gold on; instead, you’re gently rubbing and dabbing it. Lightly dab the paper towel onto the raised surfaces of your foam letters, then gently rub and wipe the excess paint as you go. Focus on the edges and the top surfaces of the letters, allowing the black paint to show through in the recessed areas. This technique creates a beautiful, distressed effect, making the letters appear as though they’ve been worn by time. You can also lightly fade the gold paint around the immediate vicinity of the words on the pumpkin’s surface to enhance the aged look, mimicking a worn book cover. If you apply too much gold, quickly wipe it away with a clean part of your paper towel before it dries. You can always add more gold if needed, but it’s much harder to remove excess once it’s set. The goal is a subtle, ancient glow, not a fully gold-painted surface.
Tips for a Perfectly Bewitching Outcome
To ensure your witch’s spell book pumpkin is nothing short of enchanting, consider these additional tips:
- Patience with Drying Times: Rushing the drying process between coats can lead to a sticky, uneven finish or cause the paint to peel. Allow ample time for each layer to cure fully, especially before applying the metallic effect.
- Experiment with Words and Fonts: Don’t limit yourself to just one word. Consider a short phrase, a year, or even symbols if you have suitable stickers. Different font styles can drastically change the mood, from elegant script to bold, block letters.
- Consider Sealing for Longevity: If you’re using a real pumpkin or want to protect your faux pumpkin for years to come, consider applying a clear, matte sealant spray once all the paint is completely dry. This will protect the paint from moisture and handling, making your creation more durable.
- Test the Metallic Technique: If you’re unsure about the “less is more” approach with the gold paint, try practicing on a piece of scrap cardboard or even a small, inconspicuous area of the pumpkin first. This will help you get a feel for the amount of pressure and paint needed.
- Creative Placement: Think about where your pumpkin will be displayed. On a dark shelf, nestled among faux spiderwebs, or illuminating a shadowy corner, this pumpkin will cast an impressive, eerie presence. It also makes a fantastic centerpiece for a Halloween dinner party or a magical prop for a costume party.
Beyond the Spell Book: Other Spooky Creations with This Technique
Once you’ve mastered the weathered metallic glaze technique on your spell book pumpkin, you’ll discover its potential extends far beyond! This versatile painting method can be applied to a myriad of other Halloween crafts, helping you create a cohesive and captivating haunted display.
- Potion Bottles: Transform ordinary glass bottles into ancient-looking potion vessels. Paint them black, then use the gold technique to highlight raised designs or labels.
- Decorative Boxes: Small wooden or cardboard boxes can become mysterious “treasure chests” or “reliquaries.” Paint them black and add metallic accents, perhaps with spooky symbols or words.
- Candle Holders: Give plain candle holders a gothic makeover. The weathered black and gold effect adds instant age and drama, perfect for flickering candlelight.
- Picture Frames: Paint old frames black and distress them with gold to frame spooky artwork, antique photographs, or even Halloween-themed quotes.
- Faux Skulls and Bones: While perhaps not for everyone, applying this technique to plastic skulls or bones can give them a truly ancient, unearthed appearance, contrasting beautifully with other decor.
The key is to apply the same principles: a dark, matte base, followed by a careful, restrained application of metallic paint to highlight textures and create an illusion of age and wear. This technique is incredibly effective for creating a cohesive, vintage, and decidedly spooky atmosphere for your Halloween festivities.
Caring for Your Enchanted Decor
To ensure your witch’s spell book pumpkin remains a cherished piece of your Halloween decor for seasons to come, a little care goes a long way:
- For Faux Pumpkins: If you’ve used a faux pumpkin, it’s virtually immortal! Store it in a cool, dry place wrapped in tissue paper or bubble wrap to protect the painted surface from scratches and dust. Avoid extreme temperatures.
- For Real Pumpkins: Even with a sealant, a real painted pumpkin has a limited lifespan. Keep it in a cool, dry location to slow down the decomposition process. Avoid direct sunlight or excessive moisture. If you notice any signs of decay, it’s best to dispose of it to prevent mold or pests.
- Cleaning: For light dust, gently wipe the surface with a soft, dry cloth. Avoid abrasive cleaners or excessive rubbing, which could damage the paint or the weathered effect.
I absolutely adore the way this painted pumpkin turned out, embodying the perfect blend of spookiness and antique charm. The weathered metallic effect adds so much depth and character, truly making it look like an artifact from a bygone era of magic and mystery. I can’t wait to explore this painting technique further on other Halloween crafts, bringing that same captivating aged aesthetic to more of my seasonal decorations.
Don’t miss out on even more inspiration! Discover 30+ more creative ways to paint a pumpkin to fuel your festive crafting endeavors.
Pin this enchanting idea so you don’t forget it for your next Halloween creation!