
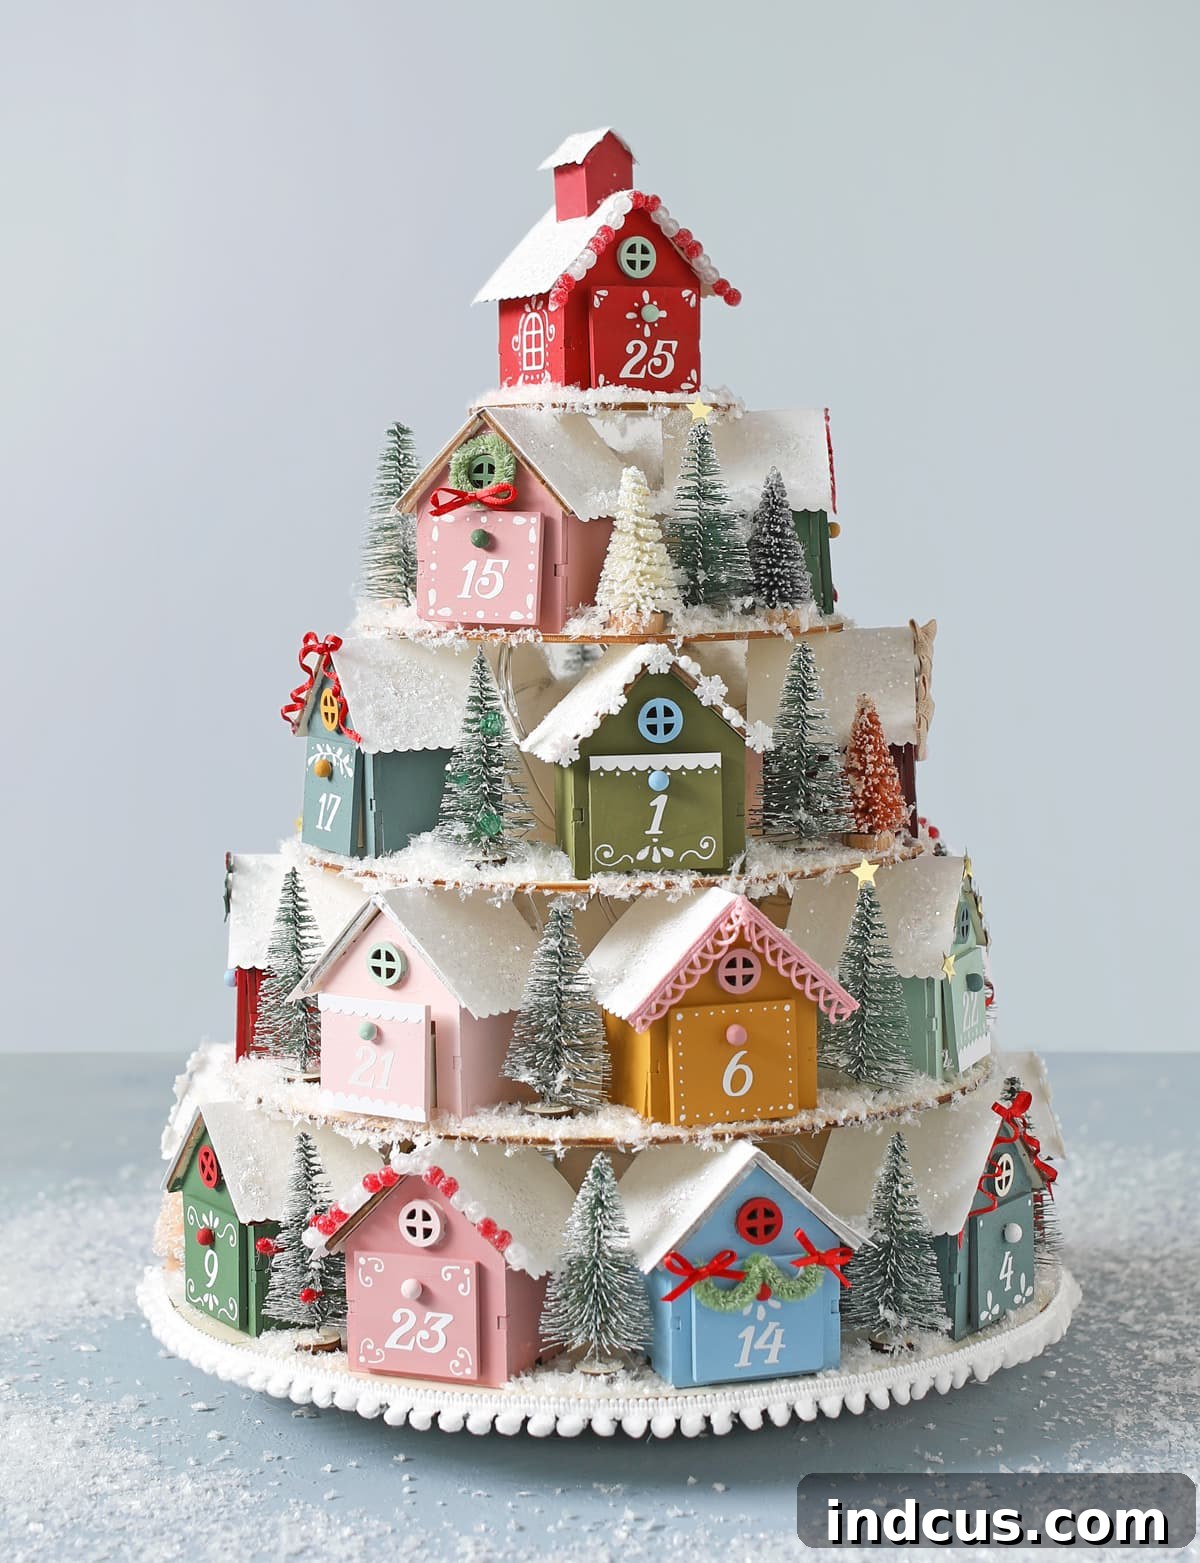
Craft the Most Enchanting DIY Advent Calendar: A Snowy Vintage Christmas Village
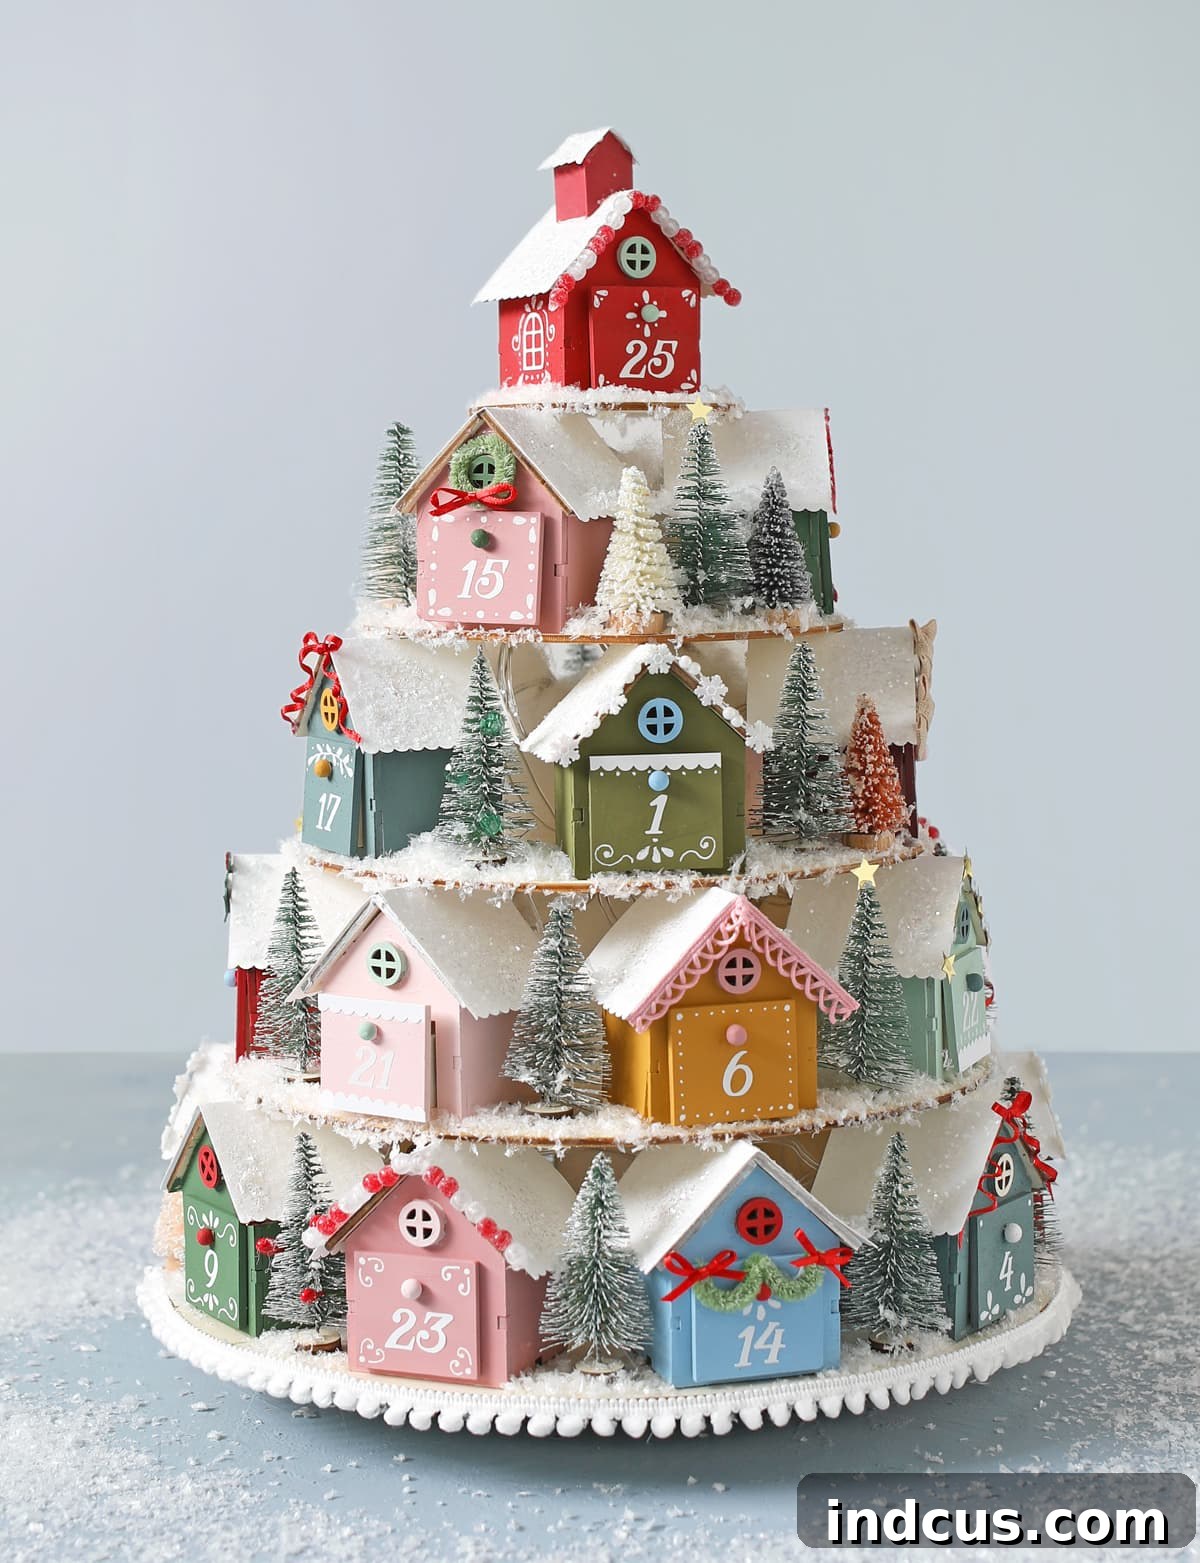
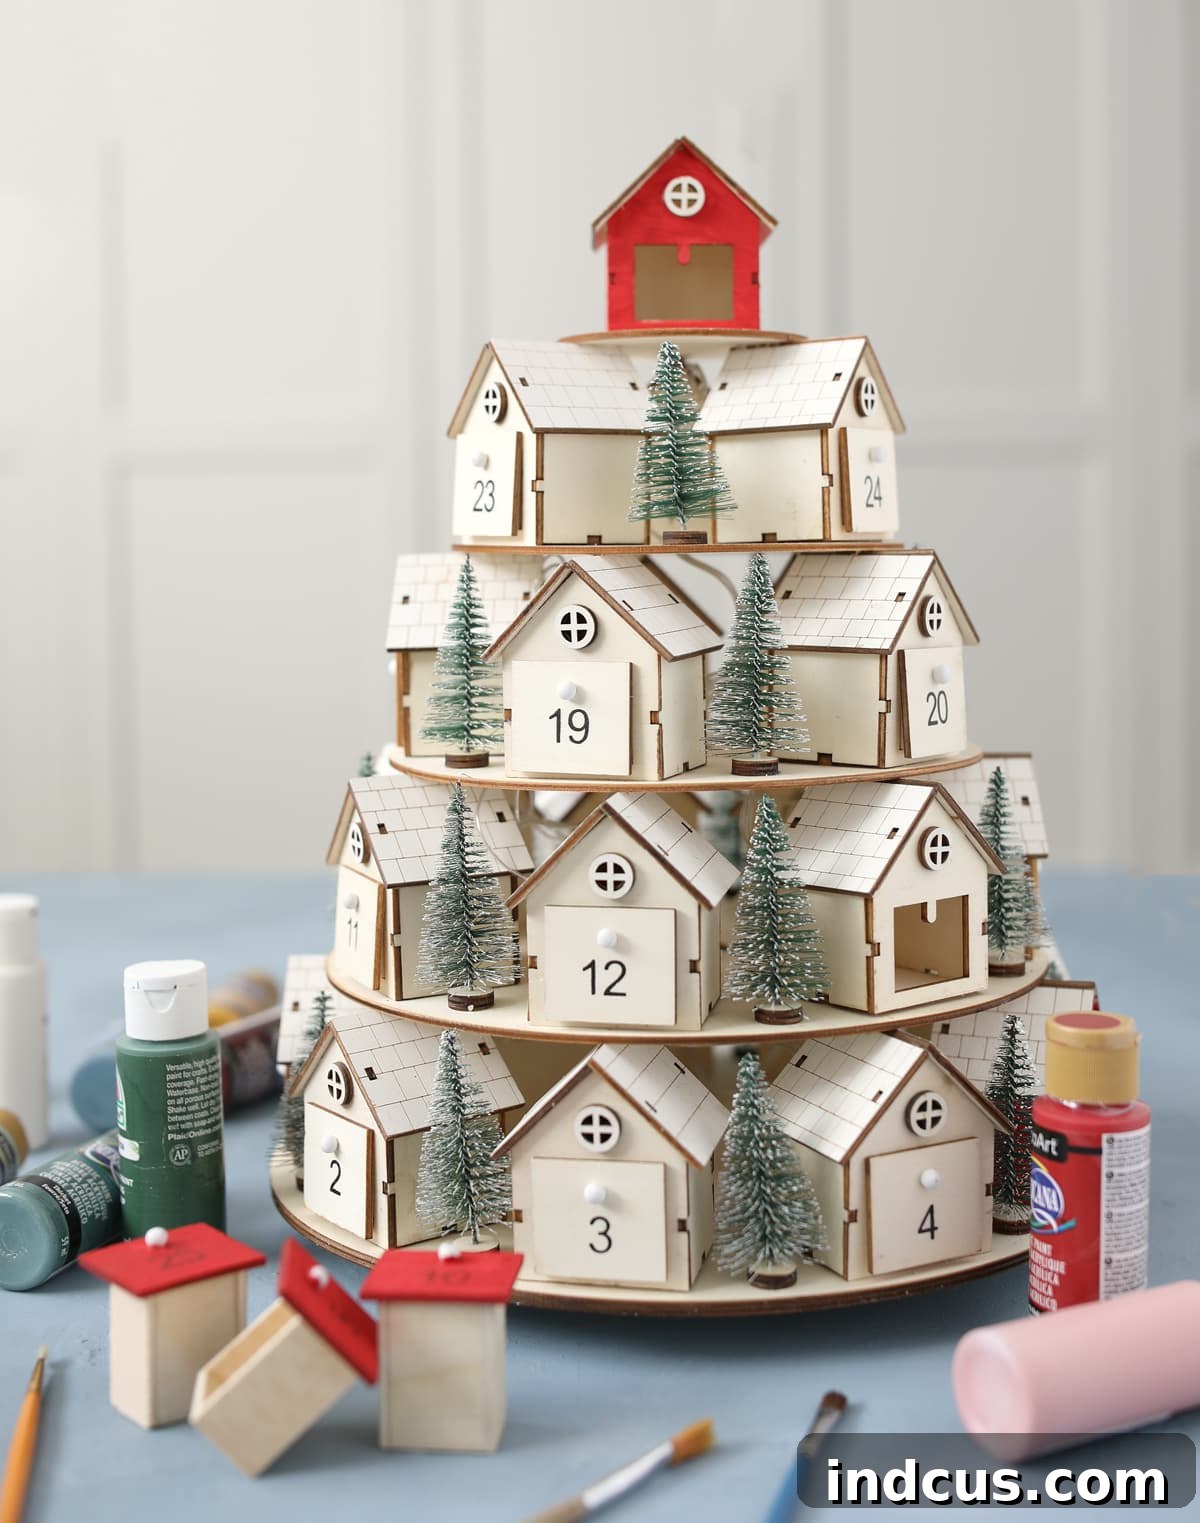
There’s something truly magical about counting down the days to Christmas with a beautifully crafted advent calendar. Last year, I stumbled upon the most adorable house-themed advent calendar at Hobby Lobby and was instantly smitten. In a moment of hesitation, I decided to go home and ponder the purchase. A few days later, to my dismay, they were completely sold out! This year, determined not to make the same mistake, I practically sprinted to grab one the moment I saw them back on the shelves. Join me on this creative journey as I transform this simple wooden structure into a breathtaking, snowy vintage Christmas village advent calendar, filled with festive charm and anticipation.
This post is sponsored by Hobby Lobby.
The beauty of this particular advent calendar base is its incredible versatility. I’ve seen countless interpretations online, making it quite a challenge to settle on a single design theme for my own. To spark your imagination, I’ve curated a collection of inspiring ideas on this dedicated Pinterest Board. Additionally, there’s a vibrant Facebook group specifically for enthusiasts of this Hobby Lobby advent calendar, where members share their unique creations and offer a wealth of inspiration. Simply search for “Hobby Lobby Advent Calendar Ideas” on Facebook to discover this wonderful community.
Ultimately, my vision for this project was to capture the nostalgic elegance of vintage paper Christmas houses, often referred to as Putz Houses. These charming miniatures are renowned for their vibrant colors, intricate architectural details, and, most notably, their signature glitter-dusted roofs, evoking a sense of old-world holiday wonder. My goal was to infuse these elements into a functional and dazzling advent calendar that would stand as a cherished centerpiece for years to come.
A fair warning before you embark on this delightful endeavor: this is a truly immersive project. It took me approximately 18 hours to bring my vision to life. While it’s certainly a significant time commitment, every moment was an absolute joy. I found immense satisfaction in crafting, often losing track of time while listening to audiobooks and watching my little village come to life. Consider it a wonderful opportunity for a mindful, creative escape during the busy holiday season. However, setting realistic expectations about the time investment is always a good idea.
Throughout the process, I also encountered a few learning opportunities (let’s call them “happy accidents”) and discovered valuable tips. If you’re planning to create your own vintage village advent calendar, keep reading! I’ll share my insights and guide you through the steps, helping you avoid some of my initial “chaotic ways.” LOL.
Let’s begin by gathering the essential supplies that will help us transform this wooden structure into a festive masterpiece.
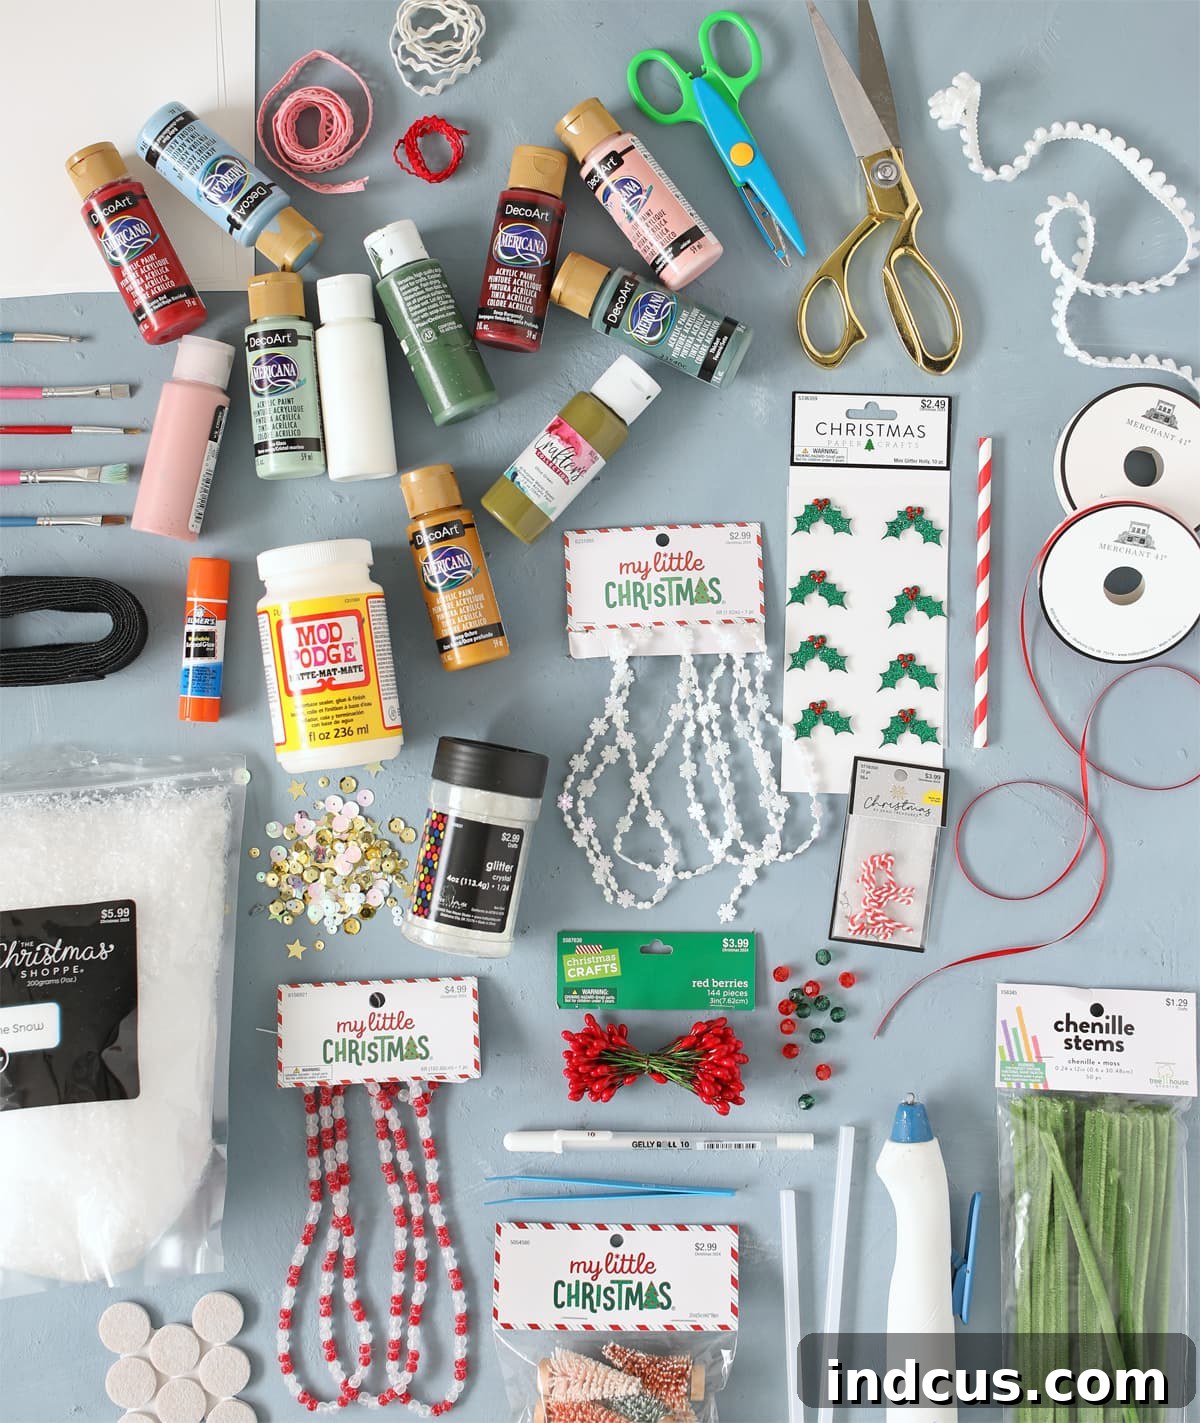
Materials Needed for Your Vintage Christmas Village
Crafting your own bespoke advent calendar requires a thoughtful selection of materials. The items listed below are the foundation for achieving that classic Putz house aesthetic, allowing for both structure and sparkling details.
- Light Up Village Rotating Advent Calendar (check local store availability as online stock varies | SKU: 5982814)
- White Cardstock (for creating custom roofs and details)
- Acrylic Craft Paint (a range of colors to bring your village to life; specific colors I used are shown below)
- Assorted Small Paint Brushes (essential for intricate details and window painting)
- White Gel Pens (perfect for delicate Scandinavian-style embellishments)
- Hot Glue Gun + Glue Sticks (for secure and fast adhesion)
- Mod Podge (the magical adhesive for glitter and sealing)
- Crystal Glitter (to achieve that iconic snowy, sparkling roof effect)
- Faux Snow (for a whimsical, winter wonderland finish)
- Velcro (for the clever battery pack solution)
- Felt Furniture Bumpers (to elevate the base and hide the battery pack)
- Scallop Edge Scissors (a must-have for charming Putz house rooflines)
- Optional Accessories (These delightful extras allow for endless personalization and festive flair):
- Moss Green Chenille Stems (ideal for crafting tiny wreaths and garlands)
- 1/8″ Red Ribbon (for bows, accents, or mini garlands)
- White Pom Pom Trim (adds a soft, snowy border)
- Snowflake Mini Garland (for delicate winter accents)
- Mini Berries (perfect for miniature wreaths or festive clusters)
- Beaded Mini Garland (adds a touch of sparkle and texture)
- Tiny Bottle Brush Trees (to create a miniature forest scene)
- Ric Rac or Other Decorative Trim (for unique architectural details)
- Beads, Sequins, Buttons, Etc. (for adding personalized touches and sparkle)
While this list provides a solid starting point, don’t limit your creativity! When browsing Hobby Lobby, be sure to explore the “My Little Christmas” section, which is a treasure trove of mini decor perfect for these small houses. The general Christmas crafts section also holds many delightful surprises. Remember to also “shop your craft room” – you might discover forgotten bits and bobs like sequins, buttons, or ric rac that can add unique character to your village.
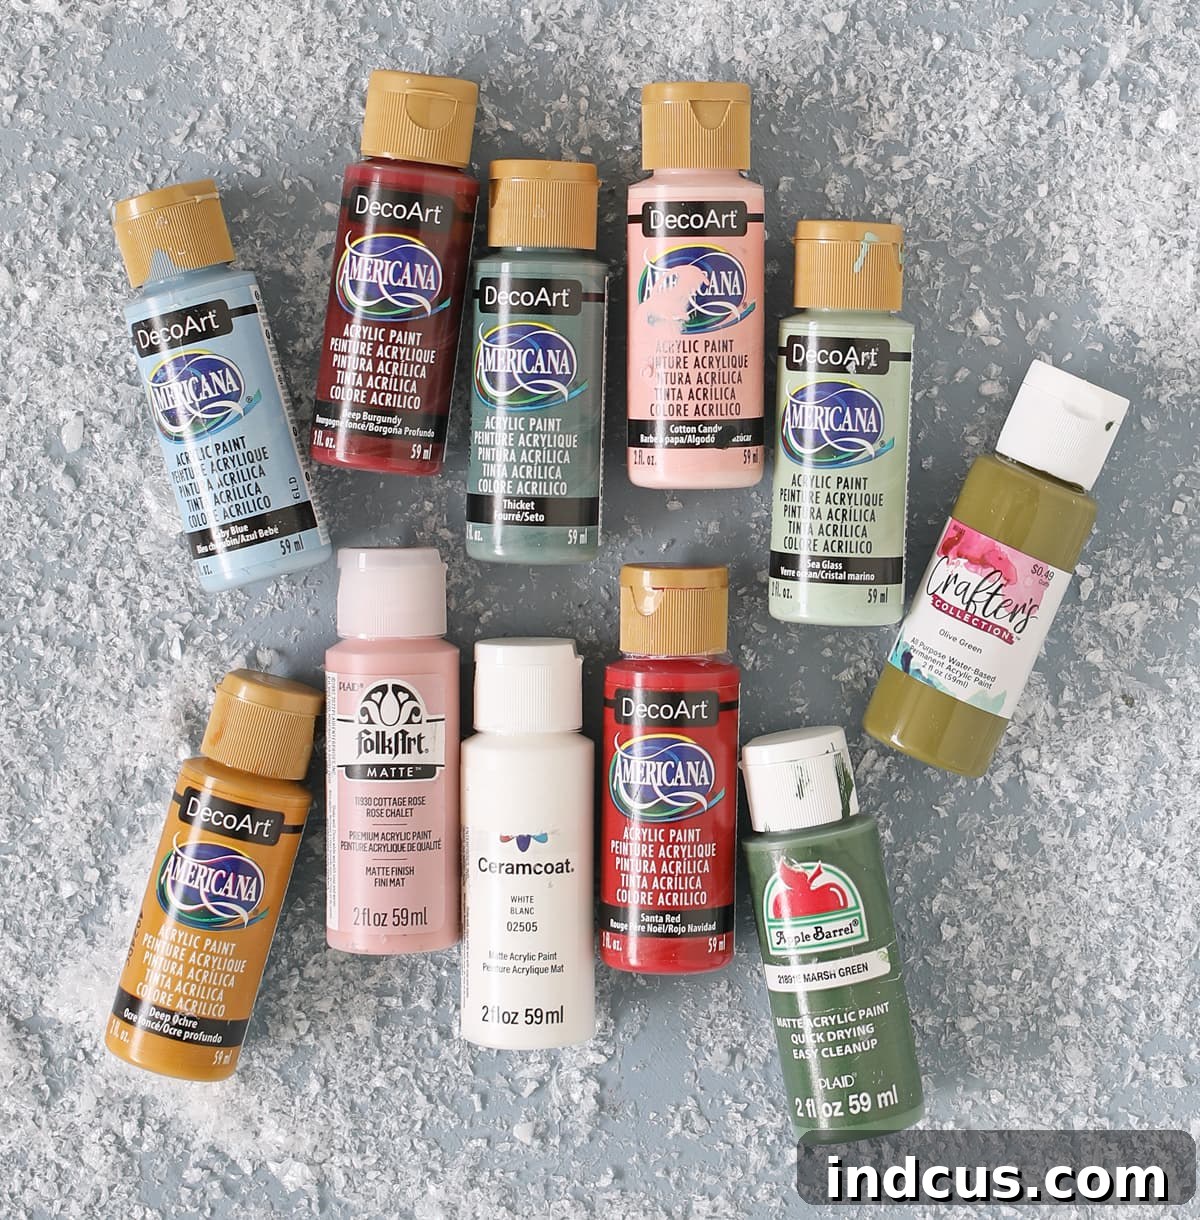
I often receive inquiries about the exact paint shades I use for my craft projects. To make it easier for you to replicate this vintage aesthetic, I’ve captured a photo of all the paint bottles, showcasing the specific colors that contribute to the charming, retro palette of our Christmas village.
Step-by-Step Instructions: Building Your Vintage Advent Village
Transforming your advent calendar base into a vintage Christmas village is a rewarding process, and following these steps will guide you through each phase of creation, from preparation to the final festive details.
Step 1: Preparation is Key – Sand and Prime! This is where my first “lesson learned” comes into play, so please, don’t be like me! The absolute first thing you should do is gently sand any rough spots on the wooden structure to ensure a smooth surface. Following that, use a spray primer to prime the entire advent calendar. I truly wish I had done this from the beginning. Priming creates an ideal base for your paint, allowing it to adhere more evenly, requiring fewer coats, and ultimately making the entire painting process significantly smoother and easier. If you want a fully painted, opaque finish with no wood grain showing through, priming is a non-negotiable step.
Interestingly, some crafters in the Facebook group opted to disassemble their entire advent calendar before painting. This involved carefully using a heat gun to warm up the glue securing each tier to the roofs of the houses below, then gently prying the sections apart with a butter knife. While I was hesitant to try this due to concerns about damaging the piece, I can certainly appreciate the advantages. Painting each component separately would undoubtedly make it much easier to reach all surfaces and achieve a flawless finish, especially in the intricate corners and edges.
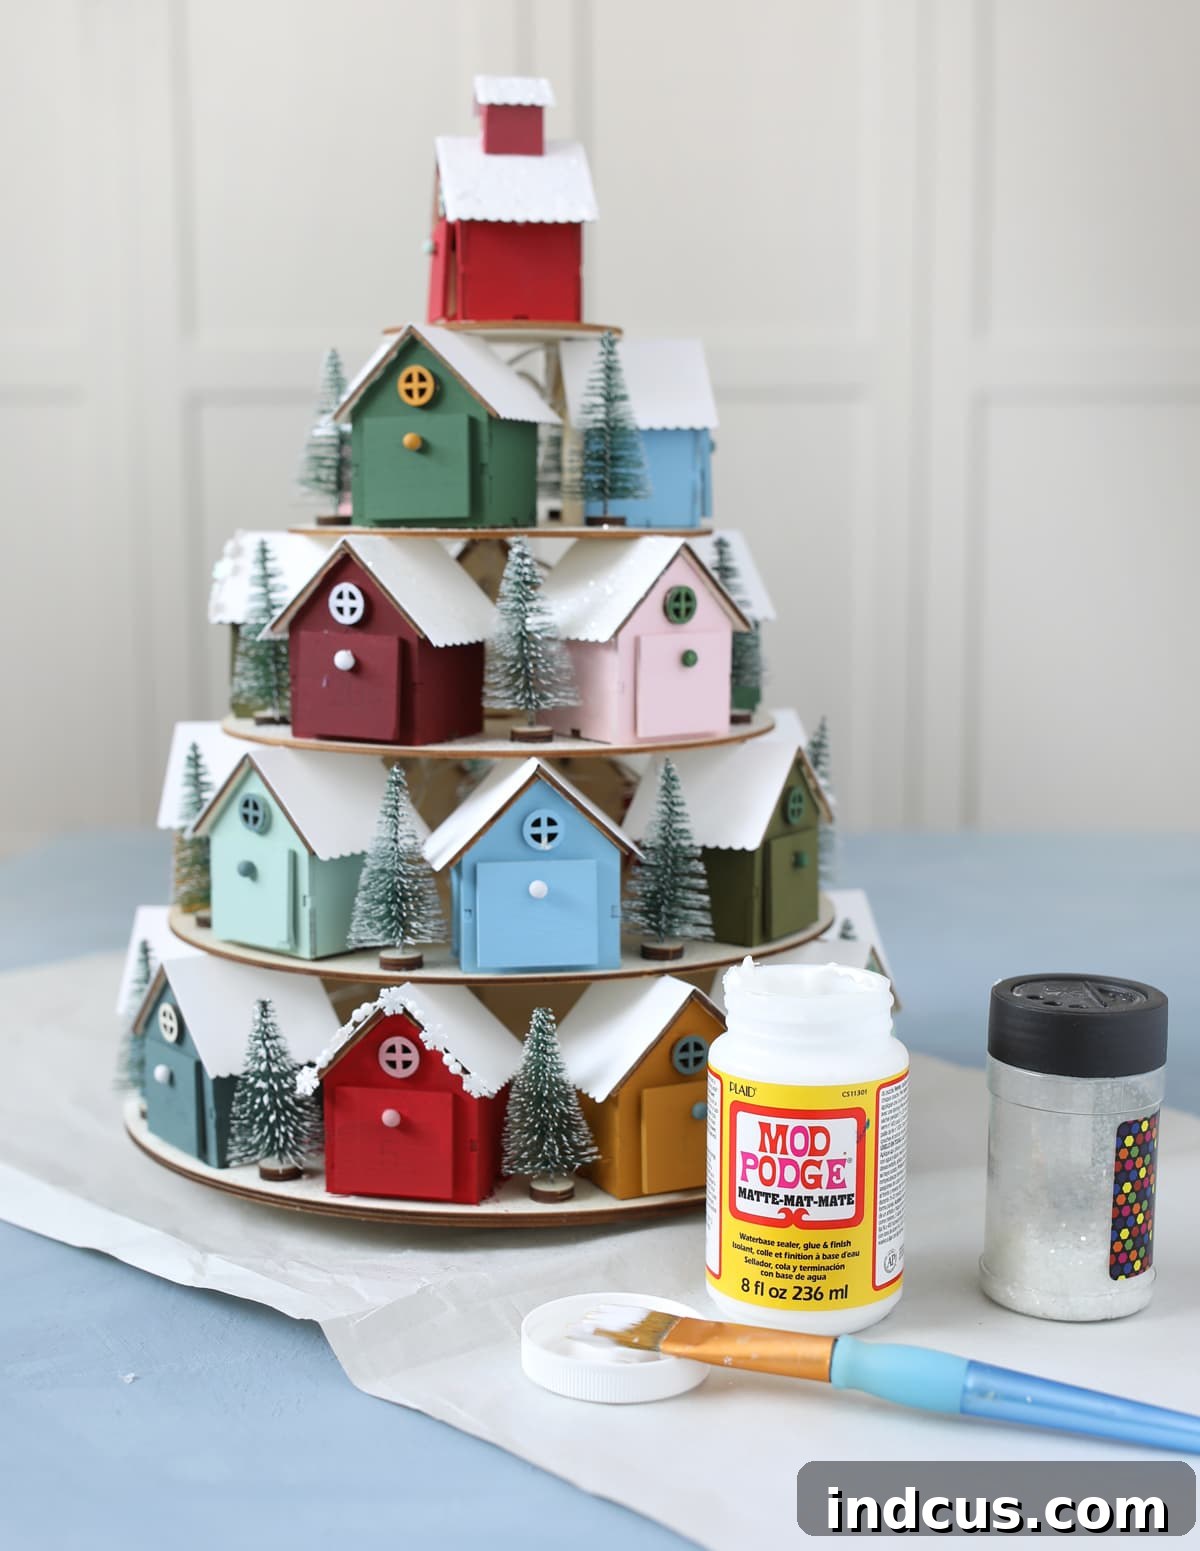
Step 2: Laying Down the Base Colors With your calendar prepped and primed (if you heeded my advice!), it’s time to apply the base colors to all the houses. I decided against removing the integrated trees; instead, I carefully bent them out of the way to ensure my brush could reach every side of each house. Even with a good primer, expect to apply two coats of paint for full coverage, and some lighter or trickier colors might even require three. Once your base colors are completely dry, use your teeniest paint brush to add contrasting colors to the windows and door knobs. Keep baby wipes handy for any small “oopsies” or to clean up edges, allowing for precise and clean detailing.
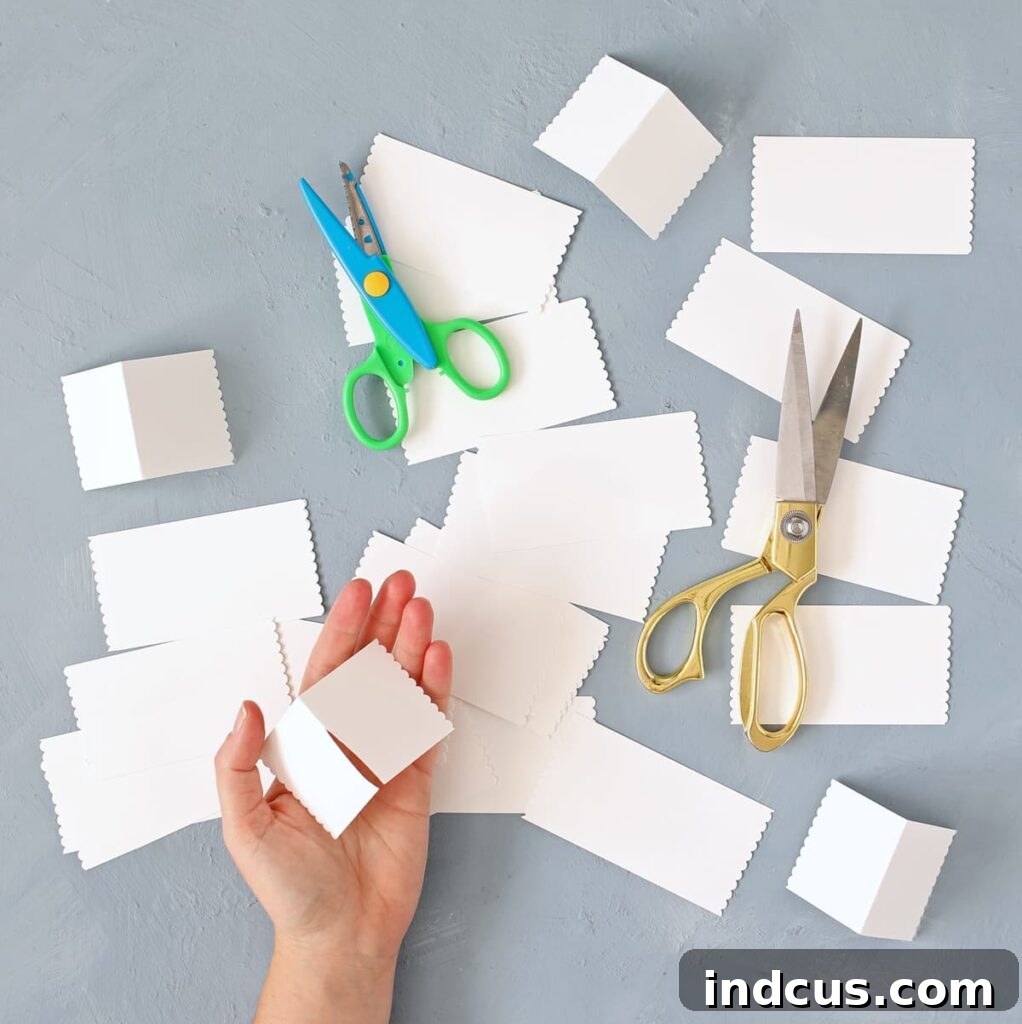
Step 3: Creating Charming Scalloped Paper Roofs To truly capture the essence of vintage Putz houses, I knew the houses needed distinctive paper roofs with charming scalloped edges. This step significantly elevates the aesthetic, adding that desired old-world character. I began by cutting strips of white cardstock to the appropriate size for each house. Then, using my trusty scallop-edge scissors, I carefully cut the two ends of each roof piece, creating that lovely decorative border. Here’s the challenge I initially underestimated: because the houses are permanently attached to the tier above them along the existing roofline, you’ll need to cut a small slit along the ridgeline of each paper roof. This allows the paper to slide neatly into place over the existing wooden roof. Be aware that each house might vary slightly in size, so it’s best to measure and cut each paper roof individually. It’s a meticulous step, but the result is well worth the effort. Again, disassembling the tiers would have simplified this particular step considerably.
Once all the custom paper roofs were carefully glued onto the tops of the houses, it was time for the signature glitter treatment. I generously coated each roof with a thick layer of Mod Podge, then liberally sprinkled them with sparkling crystal glitter. This stage was, admittedly, pure joyful chaos, but utterly enchanting! In hindsight, a more organized approach would have been to lay out all the pre-cut paper roofs, apply the Mod Podge and glitter, let them dry completely, and *then* attach them to the houses. Or, for an even simpler route, opting for pre-glittered cardstock from the outset would have saved a glittery mess! But as crafters know, sometimes the journey is as fun as the destination, and we certainly got it done with plenty of sparkle.
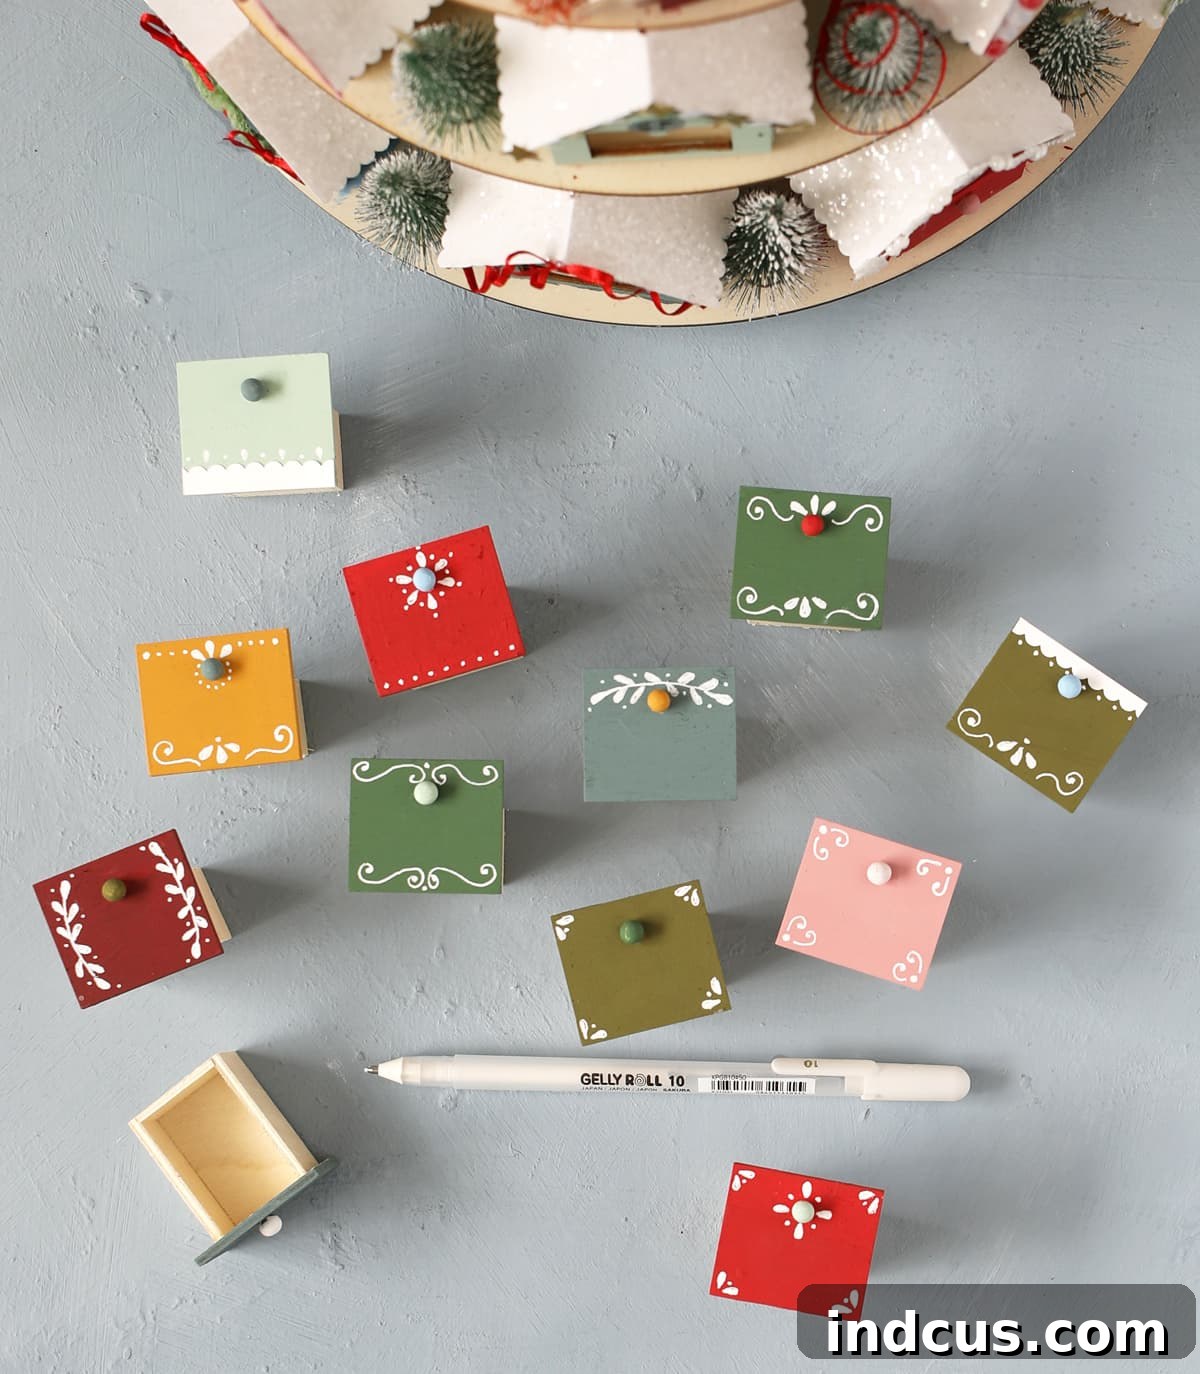
Step 4: Adding Hand-Painted Scandinavian Details To infuse each house with even more personality and a touch of folk-art charm, I decided to hand-paint intricate Scandinavian-style details onto the little doors. Armed with my favorite white gel pen, I created delicate swirls, dots, and whimsical doodles. This simple step adds a wonderful layer of handmade character and visual interest, making each house truly unique and echoing the detailed craftsmanship often found in vintage decorations. It’s a chance to let your artistic side shine with small, precise strokes.
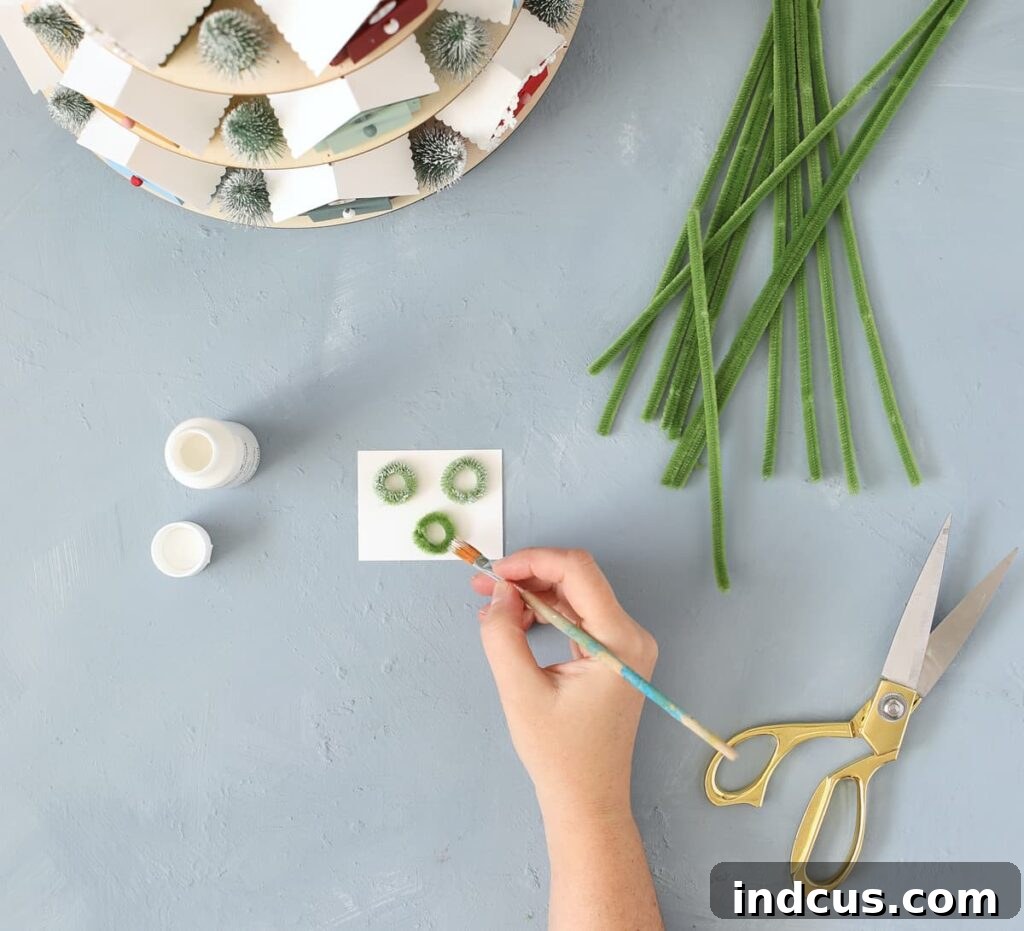
Step 5: Embellishing with Miniature Details and Festive Flourishes This was, without a doubt, the most enjoyable part of the entire project – bringing each house to life with tiny embellishments! My goal was to give every single house a distinct personality, making the village feel vibrant and alive. I also took the opportunity to decorate some of the integrated bottle brush trees, giving them a frosted appearance. I crafted my own miniature wreaths and garlands from moss green chenille stems, twisting them into shape and then lightly brushing them with white paint to simulate a dusting of snow. This DIY approach worked like a charm and added an authentic, personal touch. While you absolutely *can* purchase pre-made mini wreaths and garlands, there’s a special satisfaction in creating them yourself, if you enjoy doing things the “hard way” like I do!
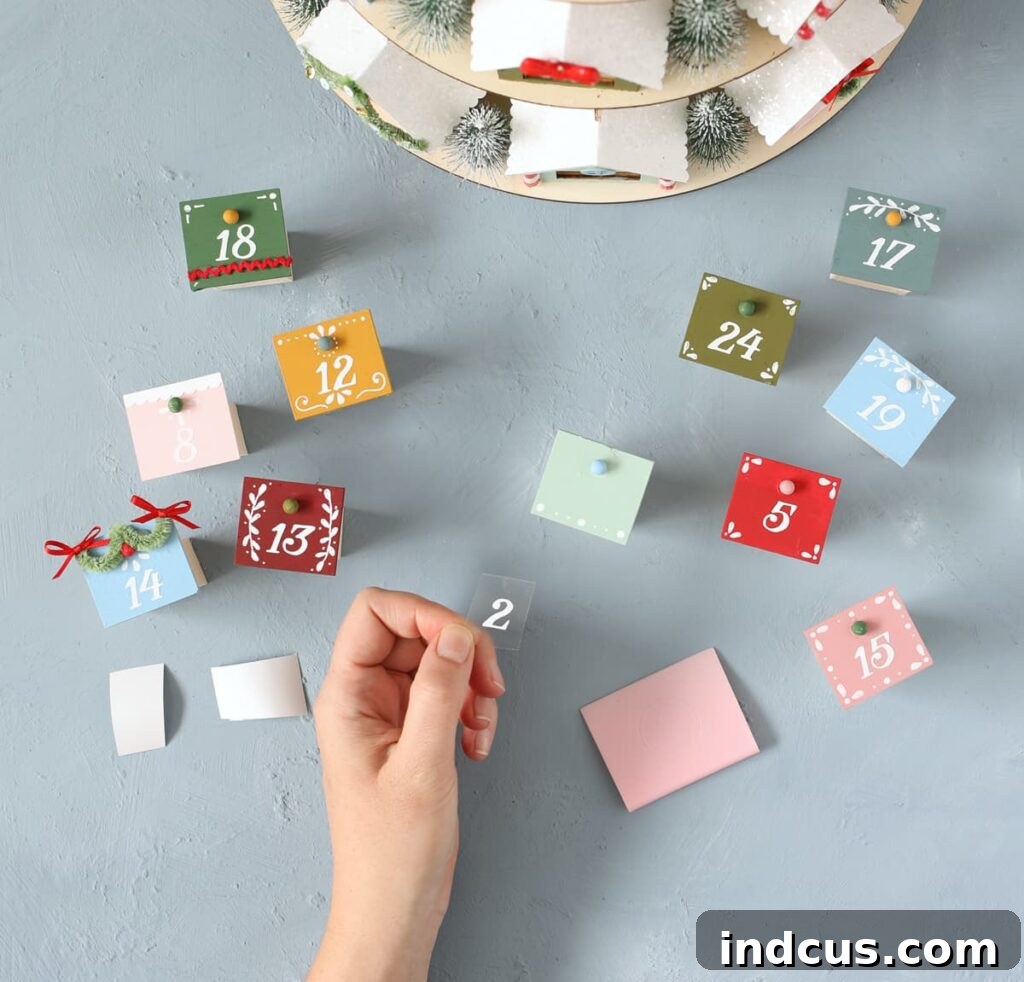
Step 6: Adding the Advent Numbers The original numbers on the advent calendar were painted over during the base coating, so I needed to add new ones. To achieve a clean and uniform look, I utilized my Silhouette cutting machine to cut fresh numbers out of white adhesive vinyl. The font I selected, “Herschel Regular,” perfectly complemented the vintage aesthetic of the village. These vinyl numbers were then carefully applied to each door. If you don’t own a craft cutting machine, don’t worry! You can easily purchase number stickers, or for a truly handmade touch, draw them on with your white gel pen. For reference, the numbers I cut were approximately 1/2 inch tall, a perfect size for visibility on the small doors.
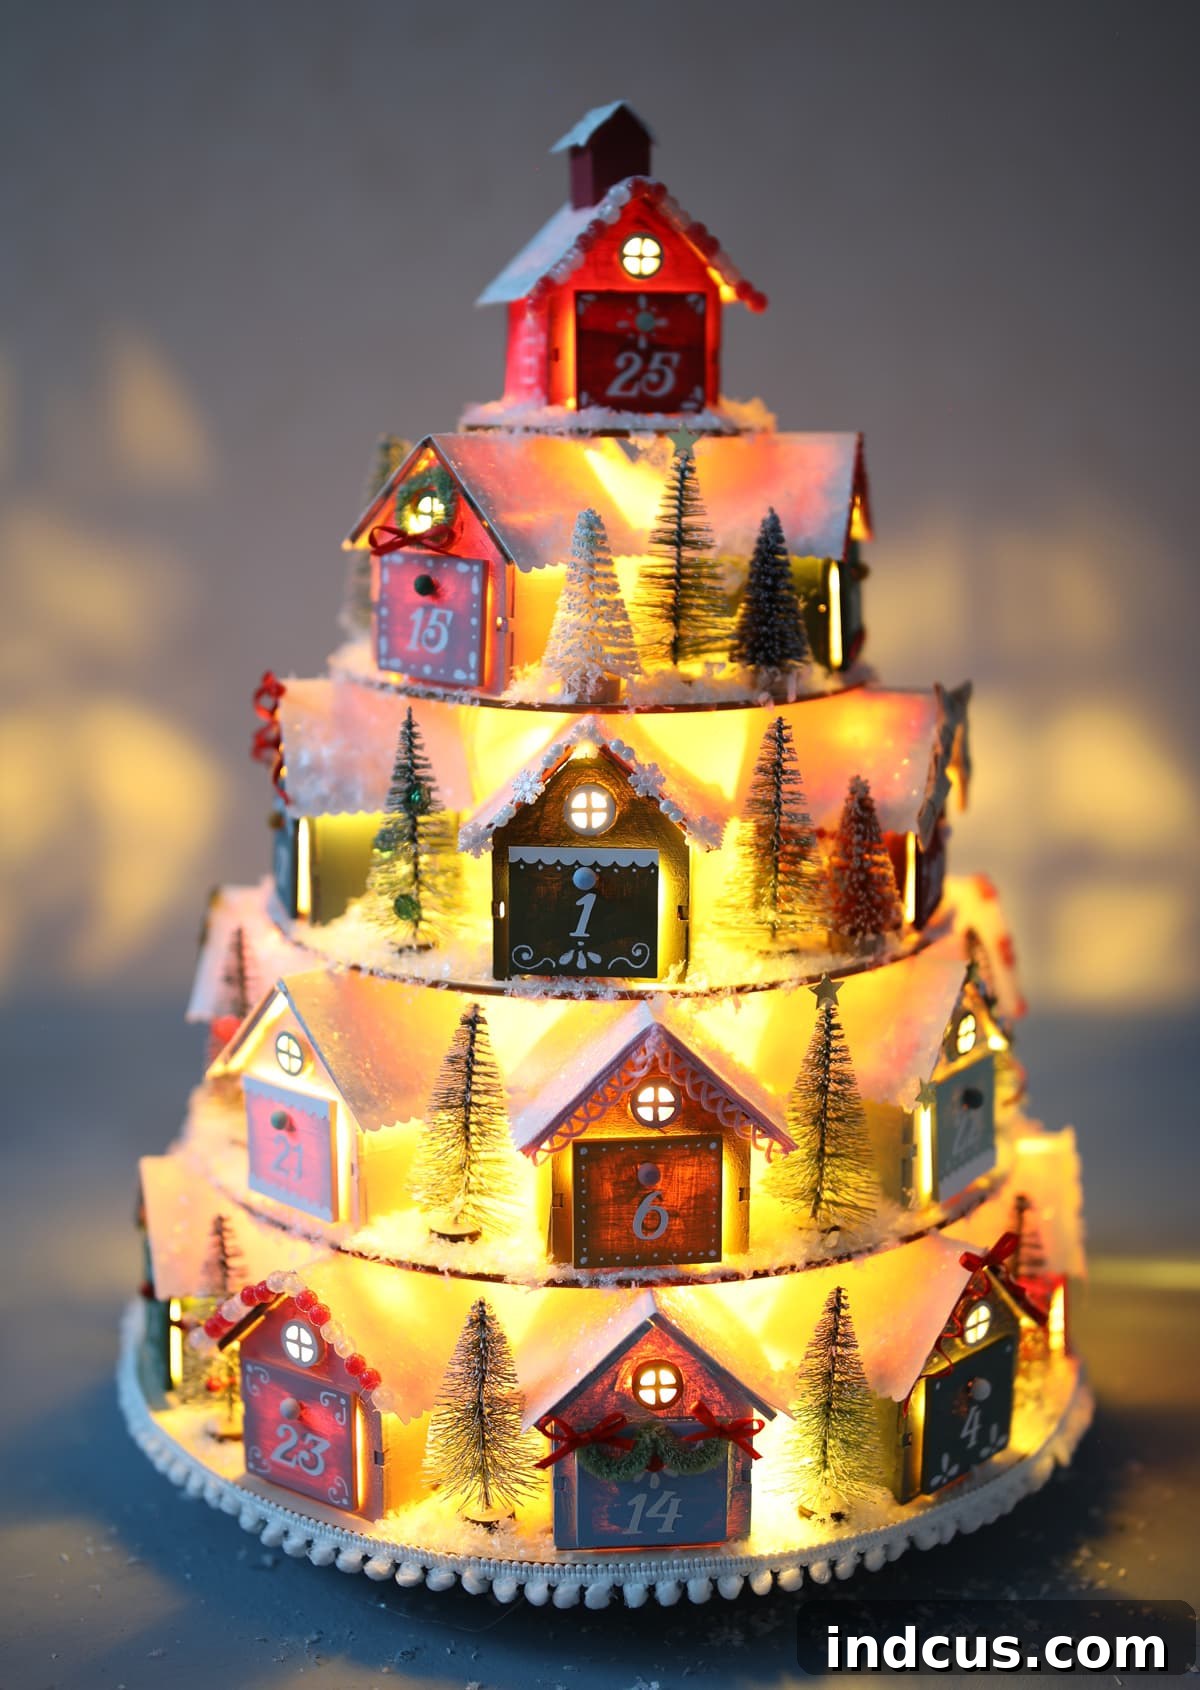
Step 7: The Clever Battery Pack Solution Let’s talk about functionality! This entire village lights up, adding a truly magical glow, especially in the evening. However, the battery pack, while essential, was a bit unsightly and just slightly too tall to discreetly tuck away beneath the base. My ingenious solution involved adding two layers of felt furniture bumpers to the rotating turntable underneath the advent calendar. This subtle elevation provided just enough clearance to then securely attach the battery pack to the underside with Velcro. The result? The village still rotates smoothly, the lights are easily accessible for switching on and off, and when the batteries eventually need replacing, I can simply detach the pack. Problem elegantly solved!
Step 8: Embellishing the Base with Pom Pom Trim To add a soft, snowy border and enhance the whimsical feel, I carefully glued white pom pom trim along the bottom edge of my advent calendar. It adds a delightful finish! I’m still contemplating whether to extend this charming trim to the edges of the other tiers as well. Your opinion would be greatly appreciated – please leave a comment and let me know what you think!
Step 9: The Final Touch – A Blanket of Faux Snow The grand finale to our snowy vintage village is, of course, the addition of faux snow. To create this enchanting winter landscape, I simply smeared a layer of white craft glue onto all the horizontal surfaces of the houses and tiers. While the glue was still wet, I generously sprinkled on the faux snow, allowing it to settle and create a realistic, fluffy effect. Once the glue and snow were completely dry, I gently vacuumed away any excess, leaving behind a pristine, snow-covered village scene that truly brings the whole piece to life.
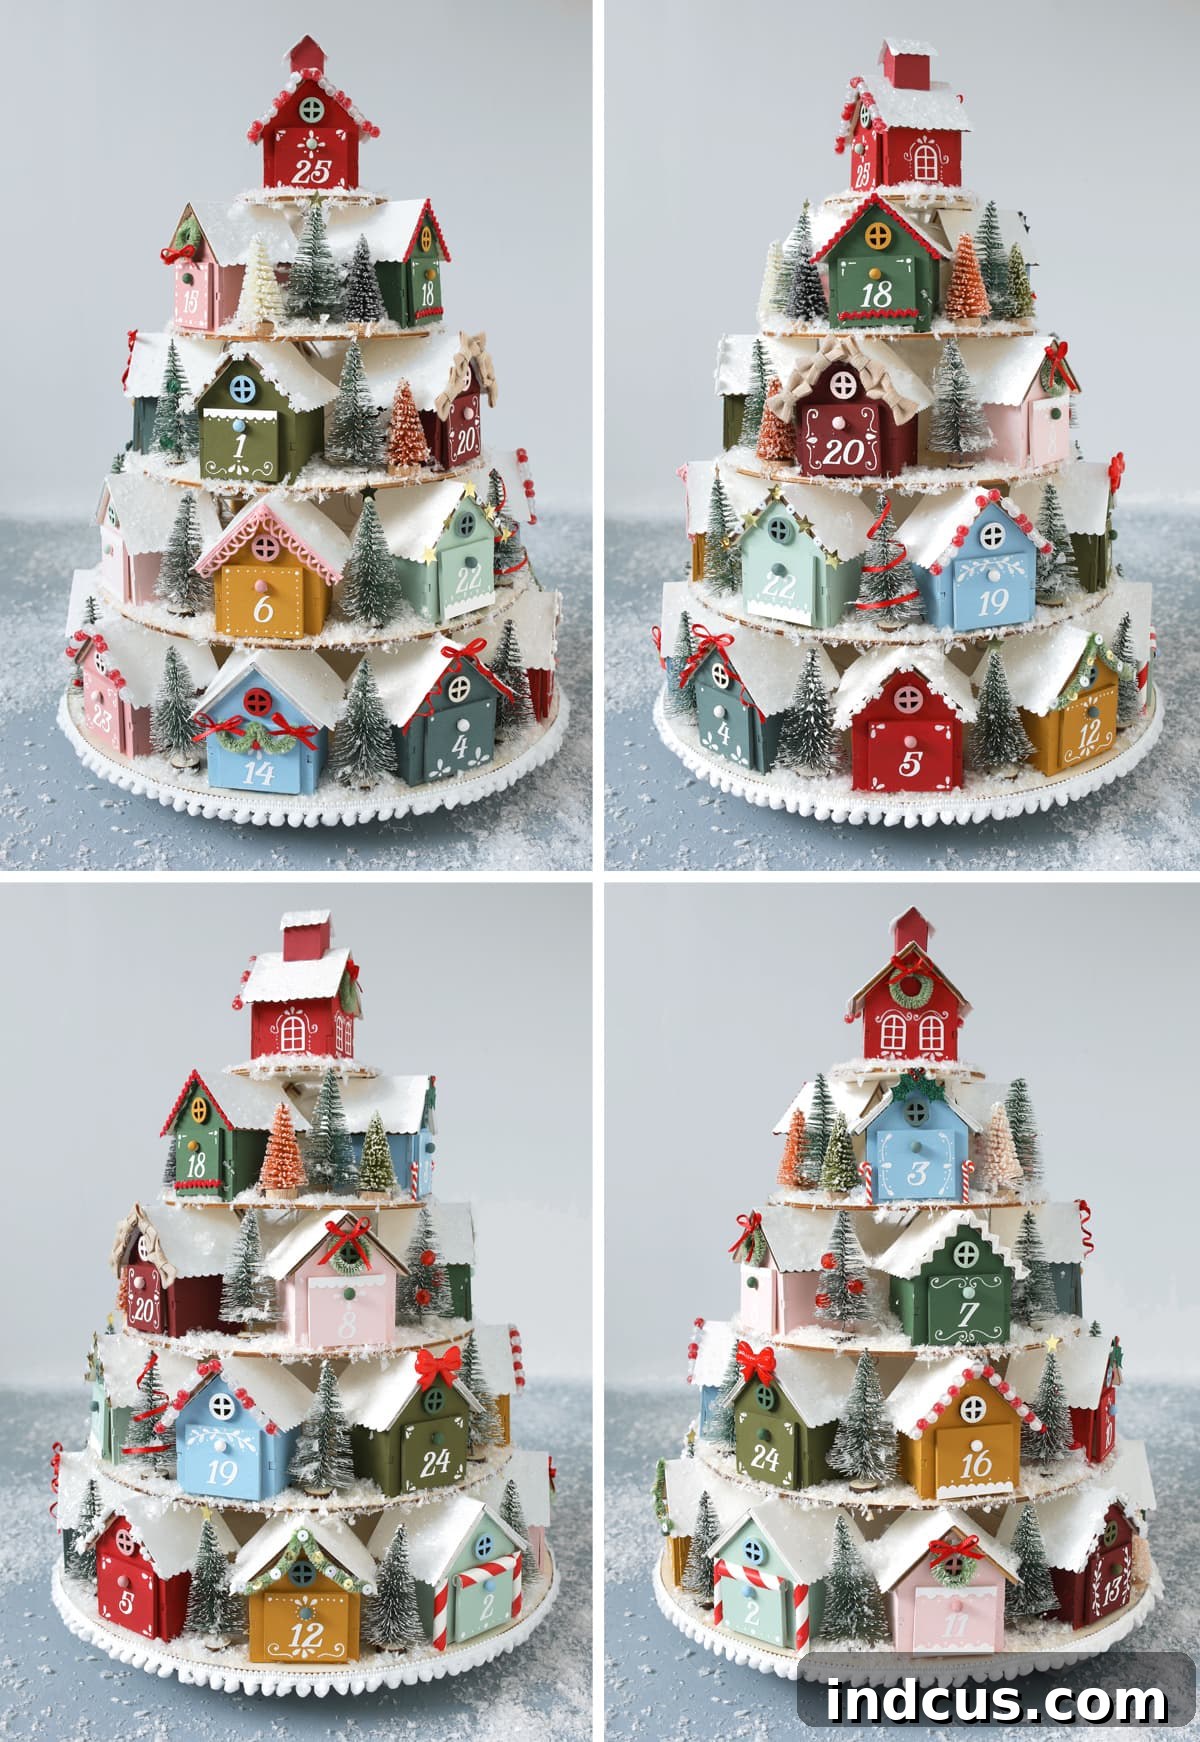
And now, prepare to be enchanted as we admire the culmination of our crafting efforts. Let’s just oohhh and aaahhh over all the intricate details and undeniable cuteness, shall we?
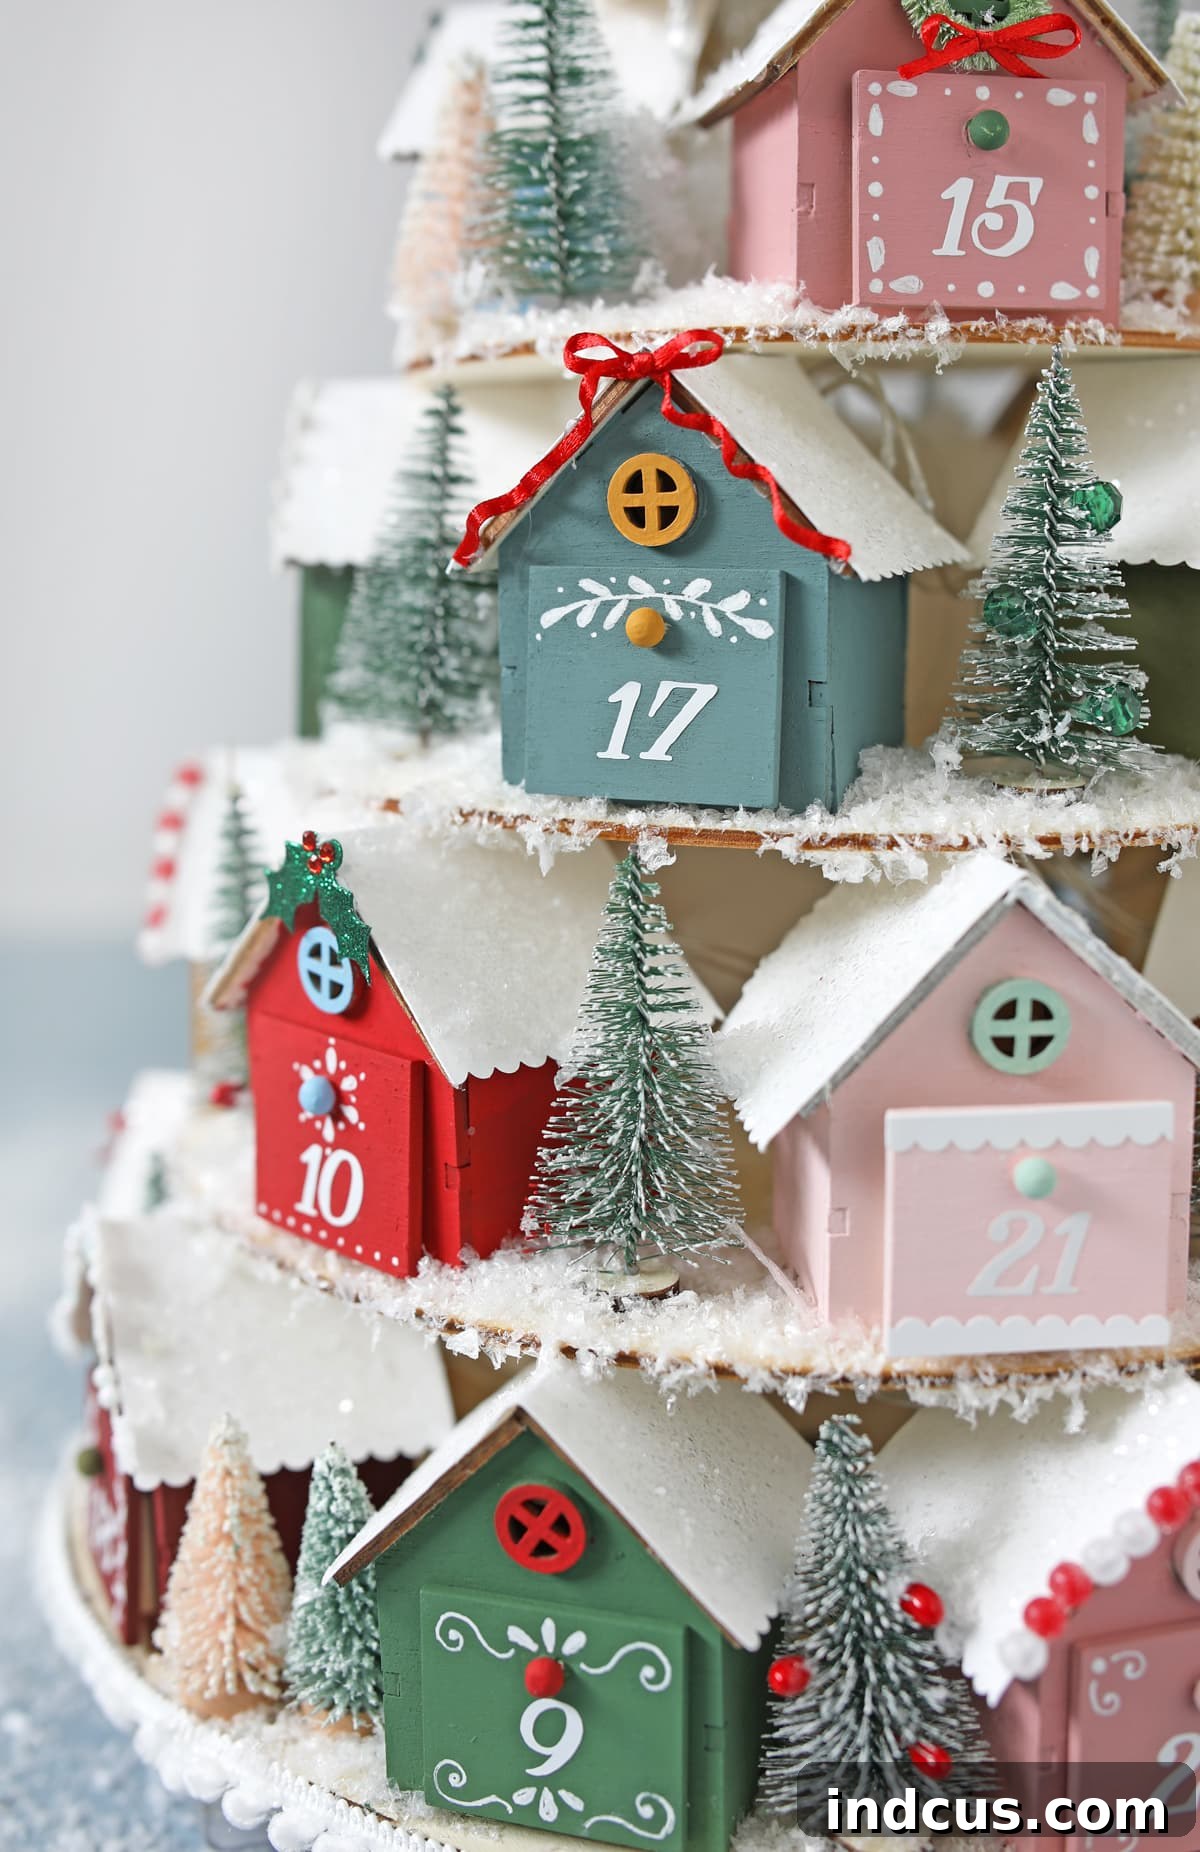
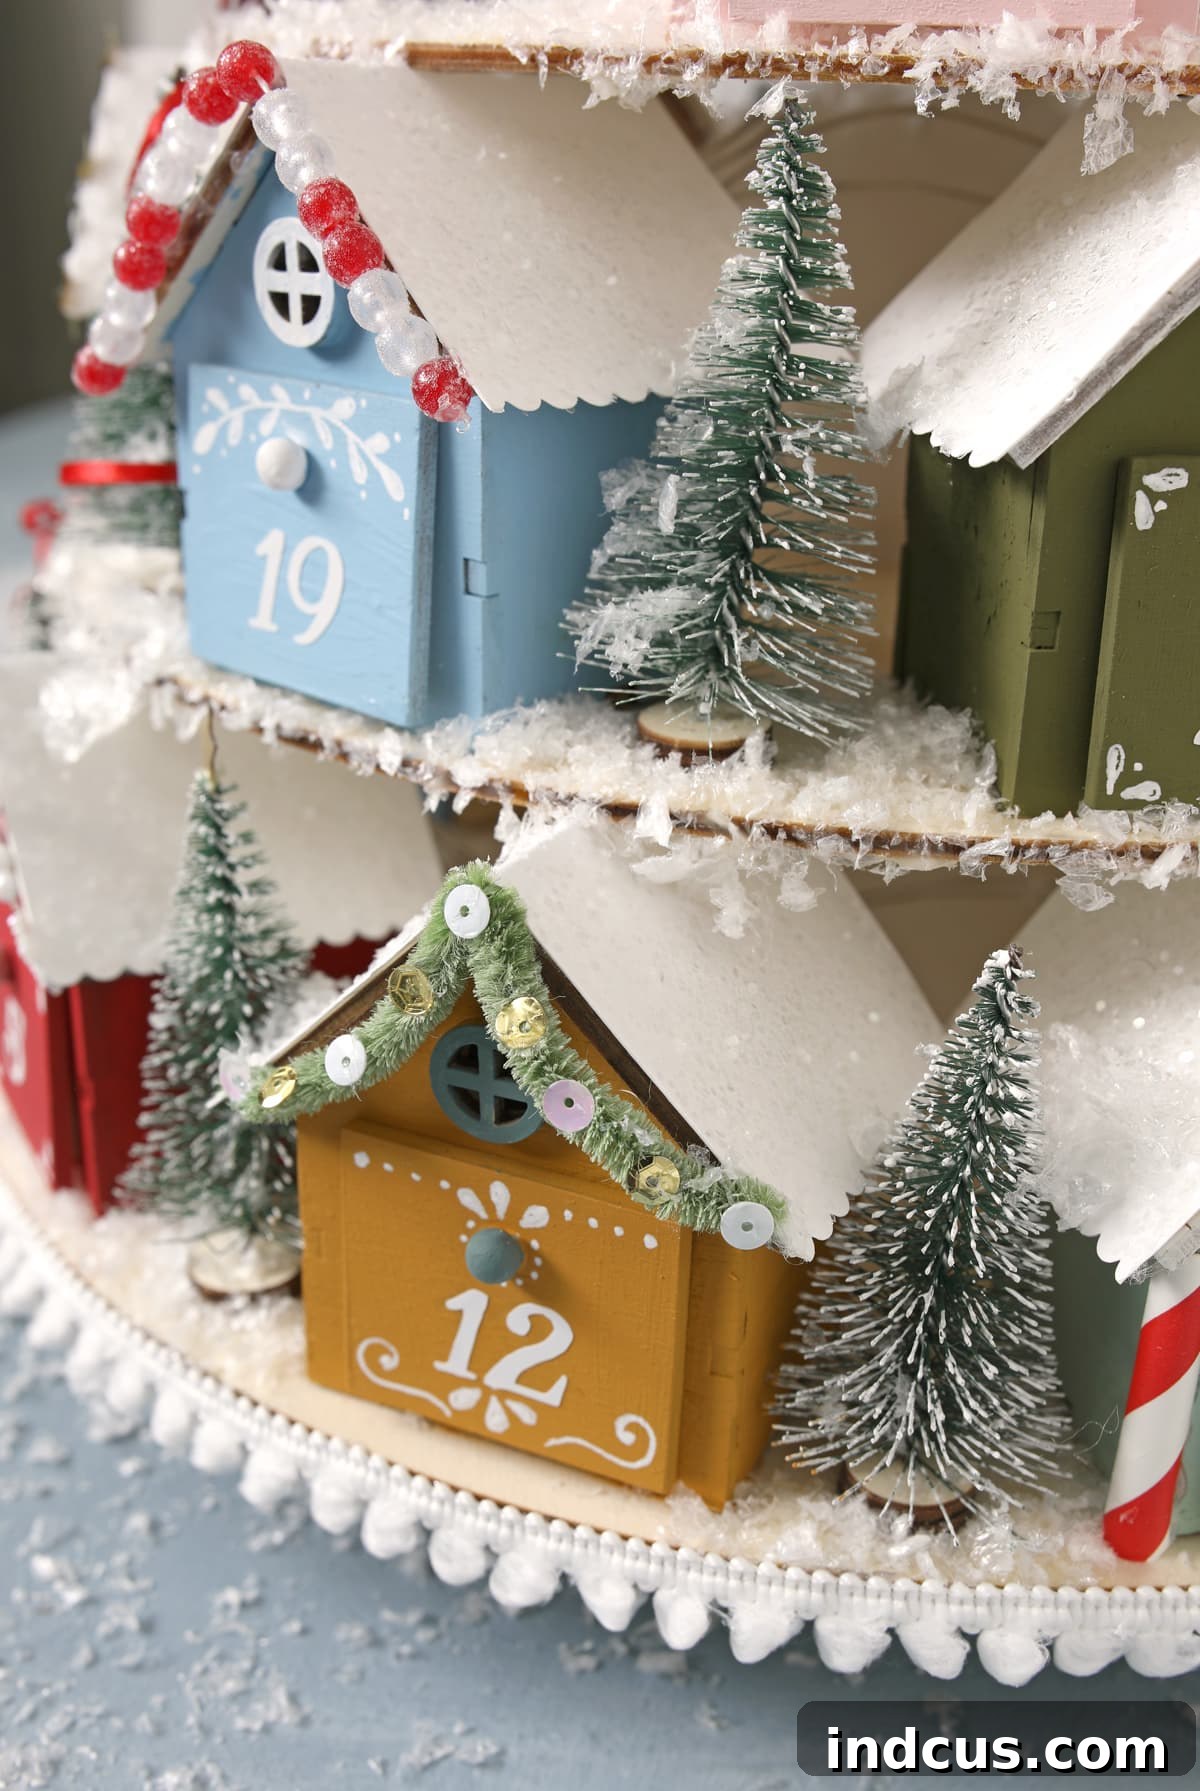
I make no apologies for the generous number of photos. This project was a labor of love, a true passion piece that took many dedicated hours to create. It has become my cherished “baby,” and I’m thrilled to share every single angle and detail with you, hoping it inspires your own creative endeavors.
Oh, I nearly forgot to mention one charming detail! I crafted the elegant cupola atop the highest building entirely from cardstock. It’s these small, intricate additions that truly elevate the vintage aesthetic and add a refined touch to the village skyline.
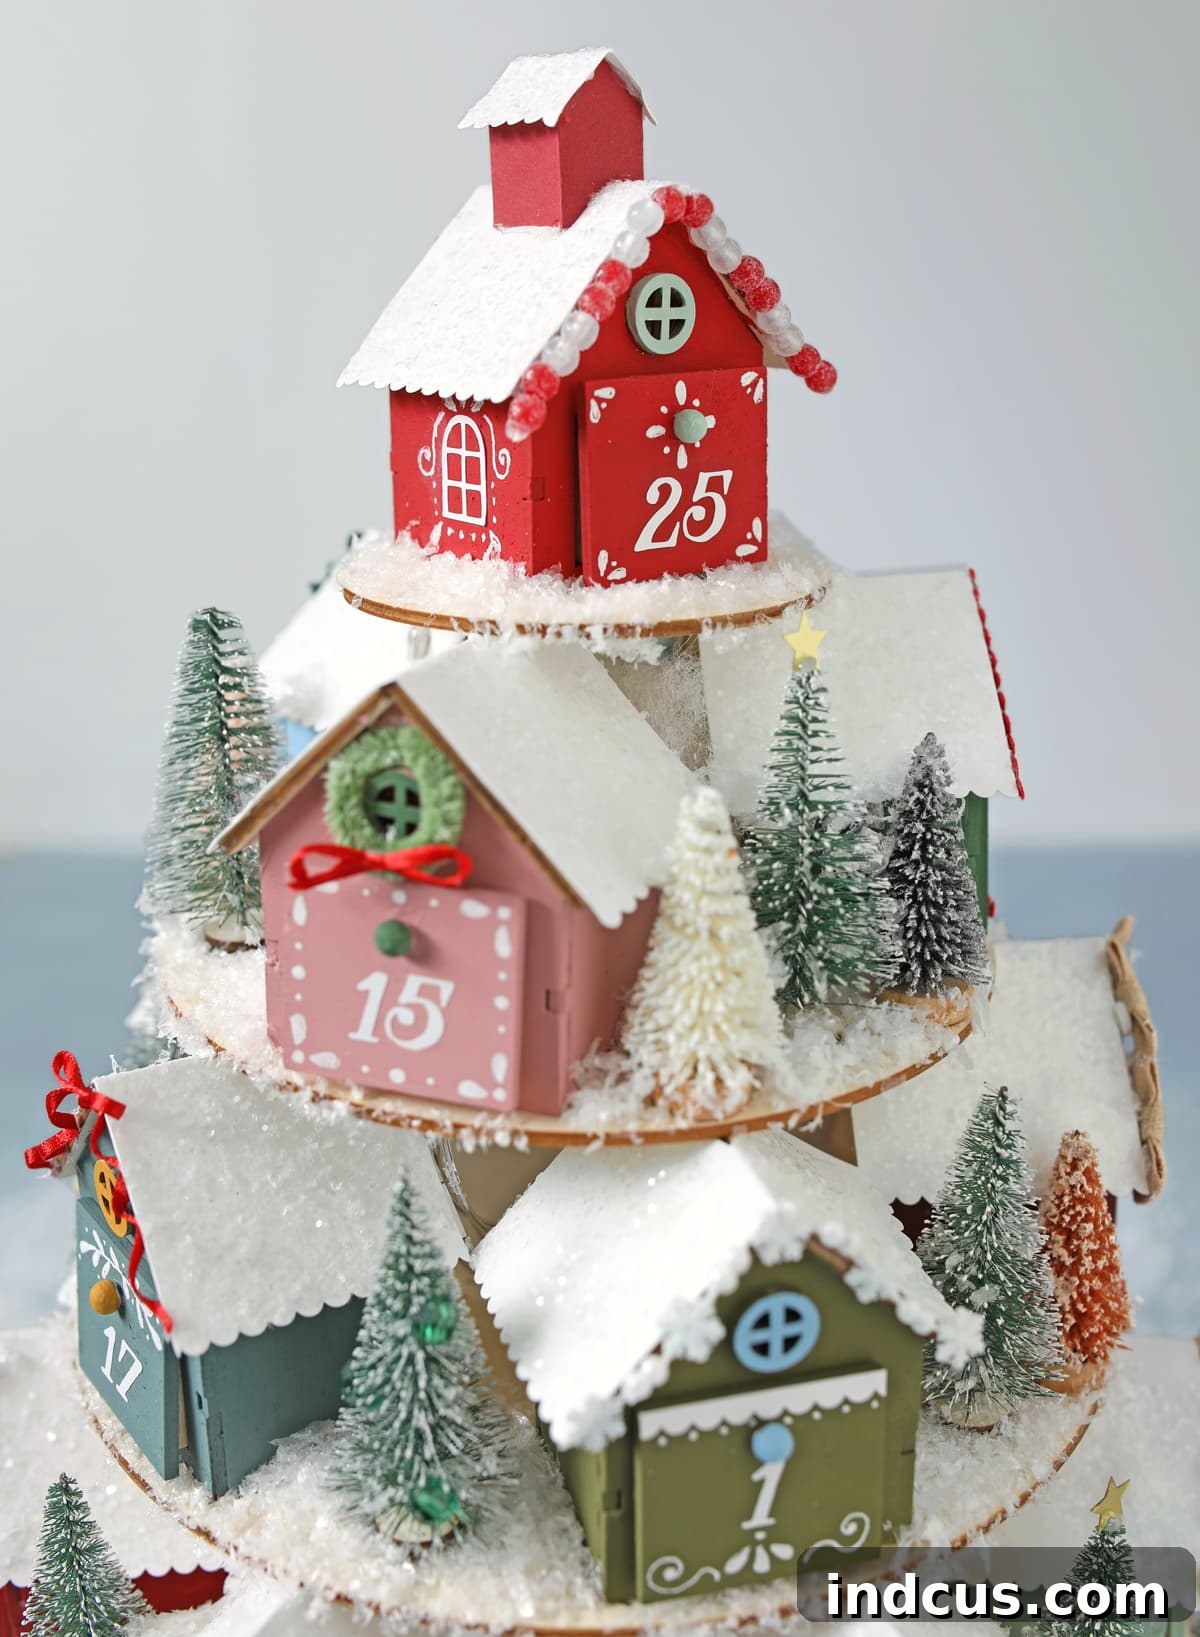
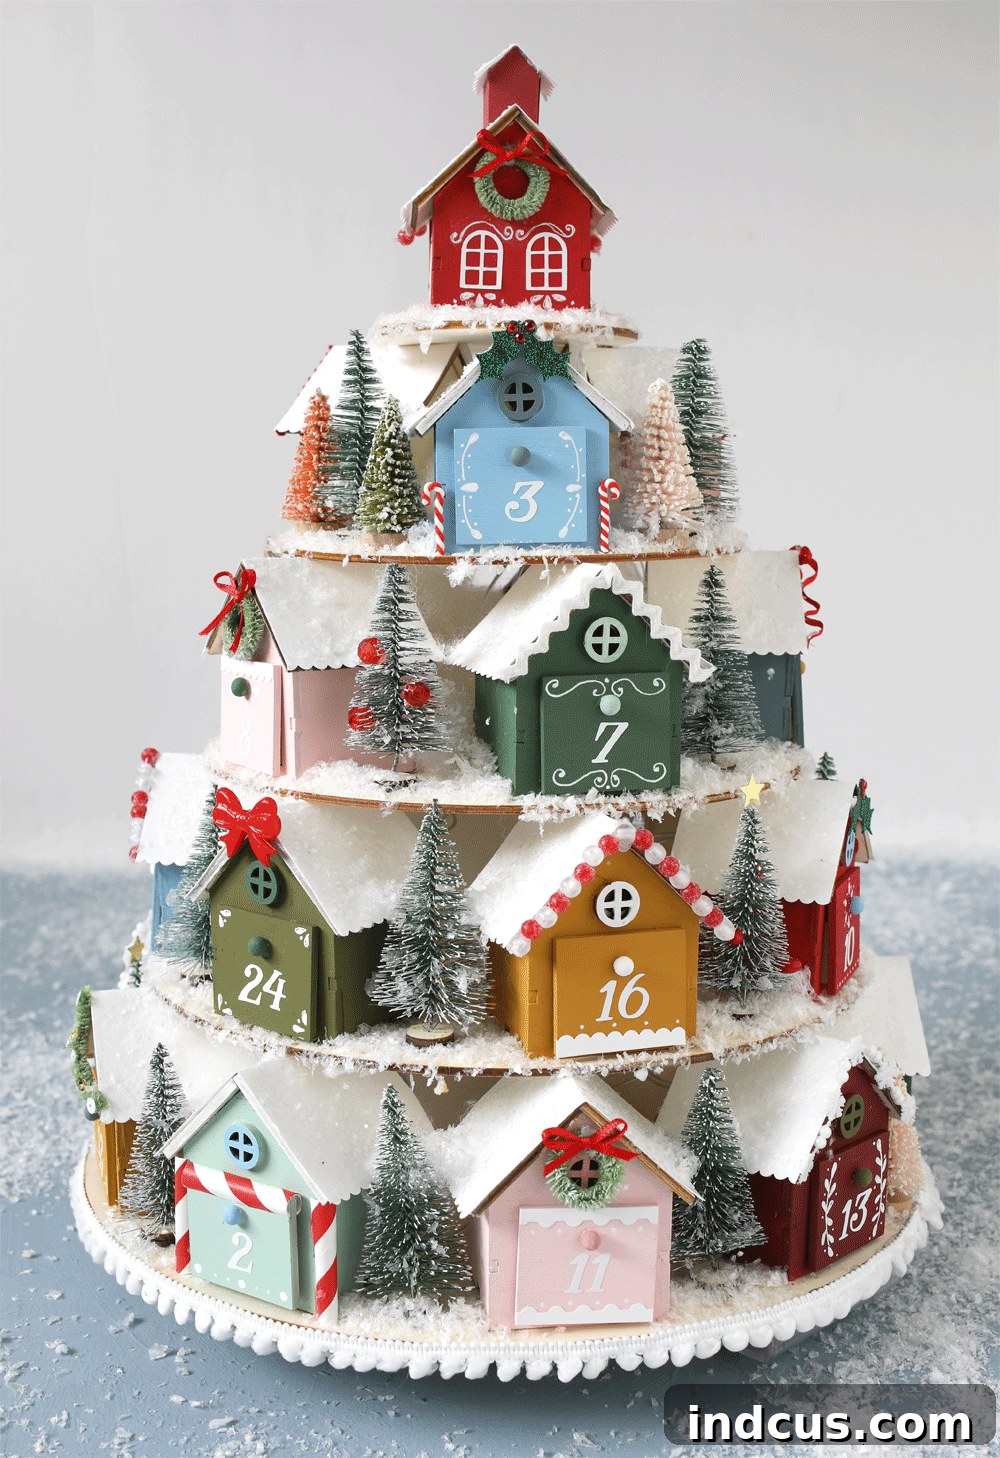
This little Christmas village truly has captured my heart. Every hand-painted detail, every sparkling roof, and every tiny embellishment contributes to a piece that feels both nostalgic and utterly new, a testament to the joy of handmade holiday decor.
And of course, no showcase of a light-up village would be complete without a glimpse of its magic at night. The soft glow emanating from within the houses creates an undeniably enchanting ambiance, transforming the scene into a warm, inviting spectacle that truly embodies the spirit of Christmas.
Watch the Christmas Village Advent Calendar Come to Life!
For a dynamic overview of the crafting process and to see the rotating, light-up village in action, be sure to watch the accompanying video below!
I sincerely hope this detailed guide has been both helpful and inspiring, empowering you to create your own magnificent advent calendar. Keep an eye out for these coveted houses at your local Hobby Lobby store, and prepare for a truly rewarding crafting experience. I’ve also been brainstorming some really fun and unique ideas for what to tuck inside each little drawer, making the daily countdown even more exciting!
Discover my creative advent calendar filler ideas here, perfect for adding an extra layer of charm to your holiday countdown!
This handmade Christmas village advent calendar is more than just a decoration; it’s a future heirloom, a piece that my children will undoubtedly treasure for many Christmases to come. I envision it proudly displayed near my vintage ornaments Christmas tree, where their combined nostalgic charm will create a truly magical holiday tableau. Happy crafting!







