DIY Valentine’s Day Candy Shoppe: An Adorable & Affordable Dollar Tree Craft
Transform your home into a whimsical sweet spot this Valentine’s Day with our “Cupid’s Candy Shoppe” display! If you’ve been searching for a charming, budget-friendly project to delight your family, look no further. This DIY candy station, crafted almost entirely from Dollar Tree finds, is an absolute dream come true for spreading love and sweetness.
After packing away the festive holiday decor, like my beloved hot cocoa station, I felt a creative itch to bring some fresh, romantic cheer into our home. I wanted something special for the kids, a centerpiece that would capture the magic of Valentine’s Day. A quick trip to the Dollar Tree sparked an idea: why not create a miniature candy store, brimming with treats and adorable details?
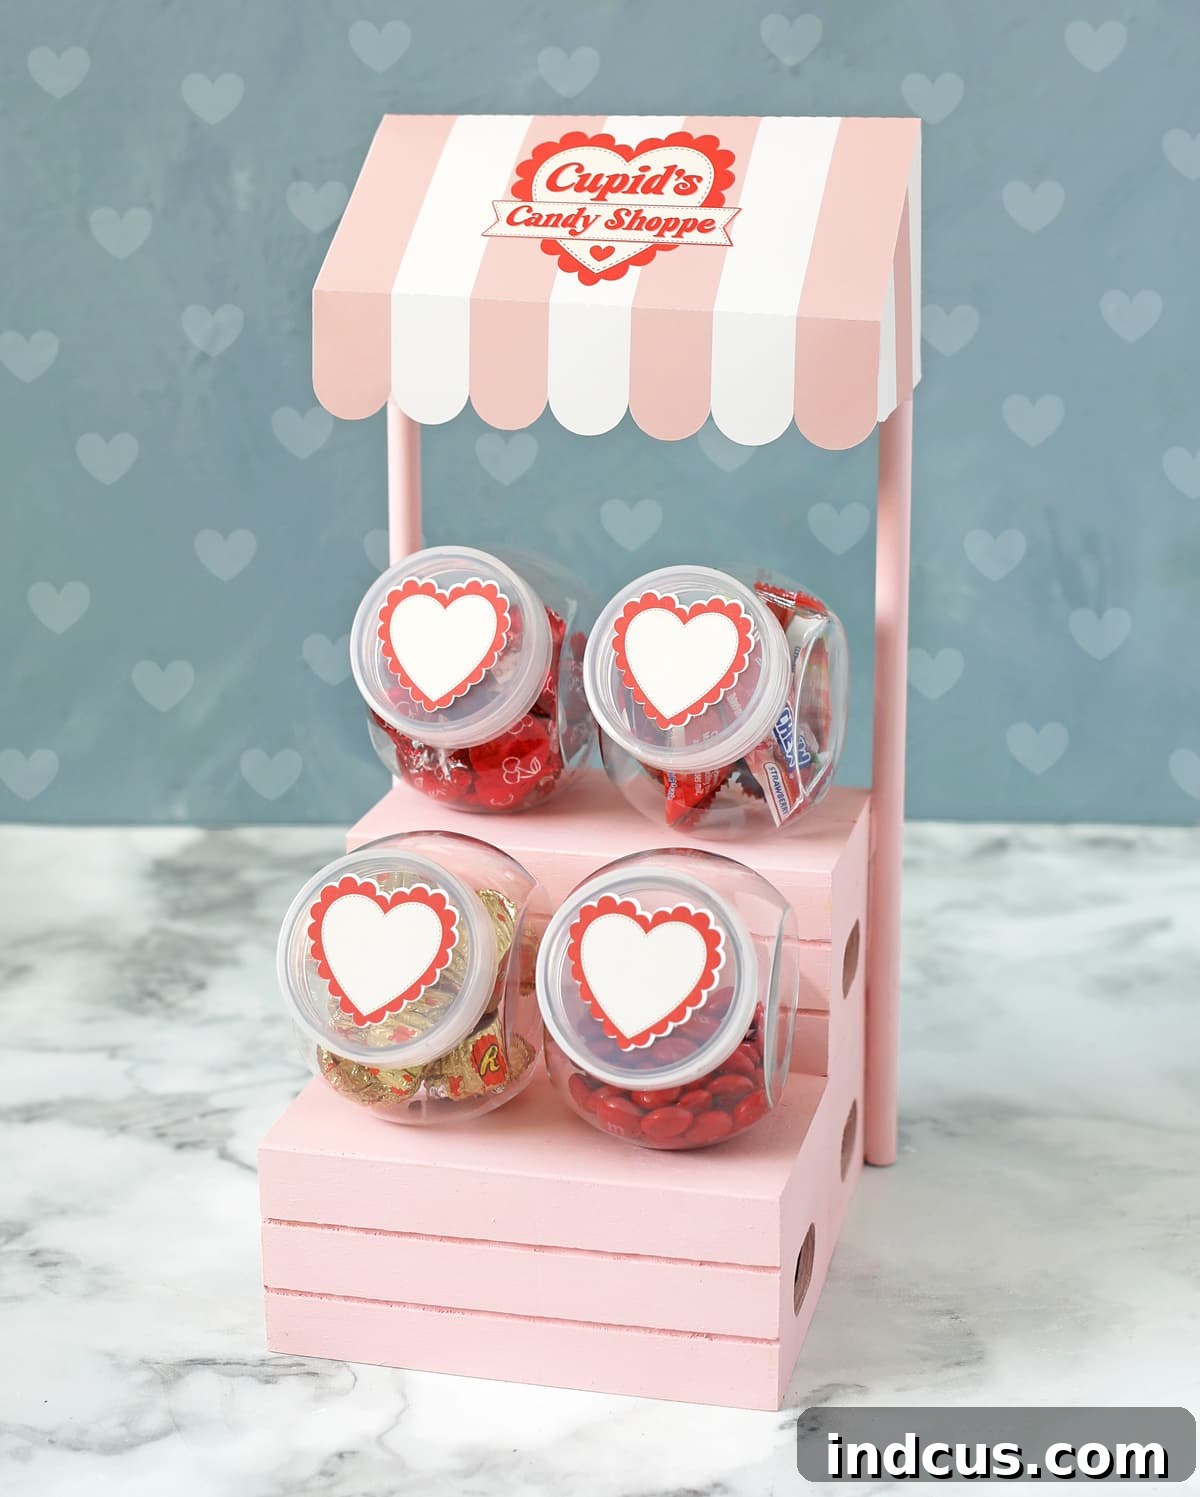
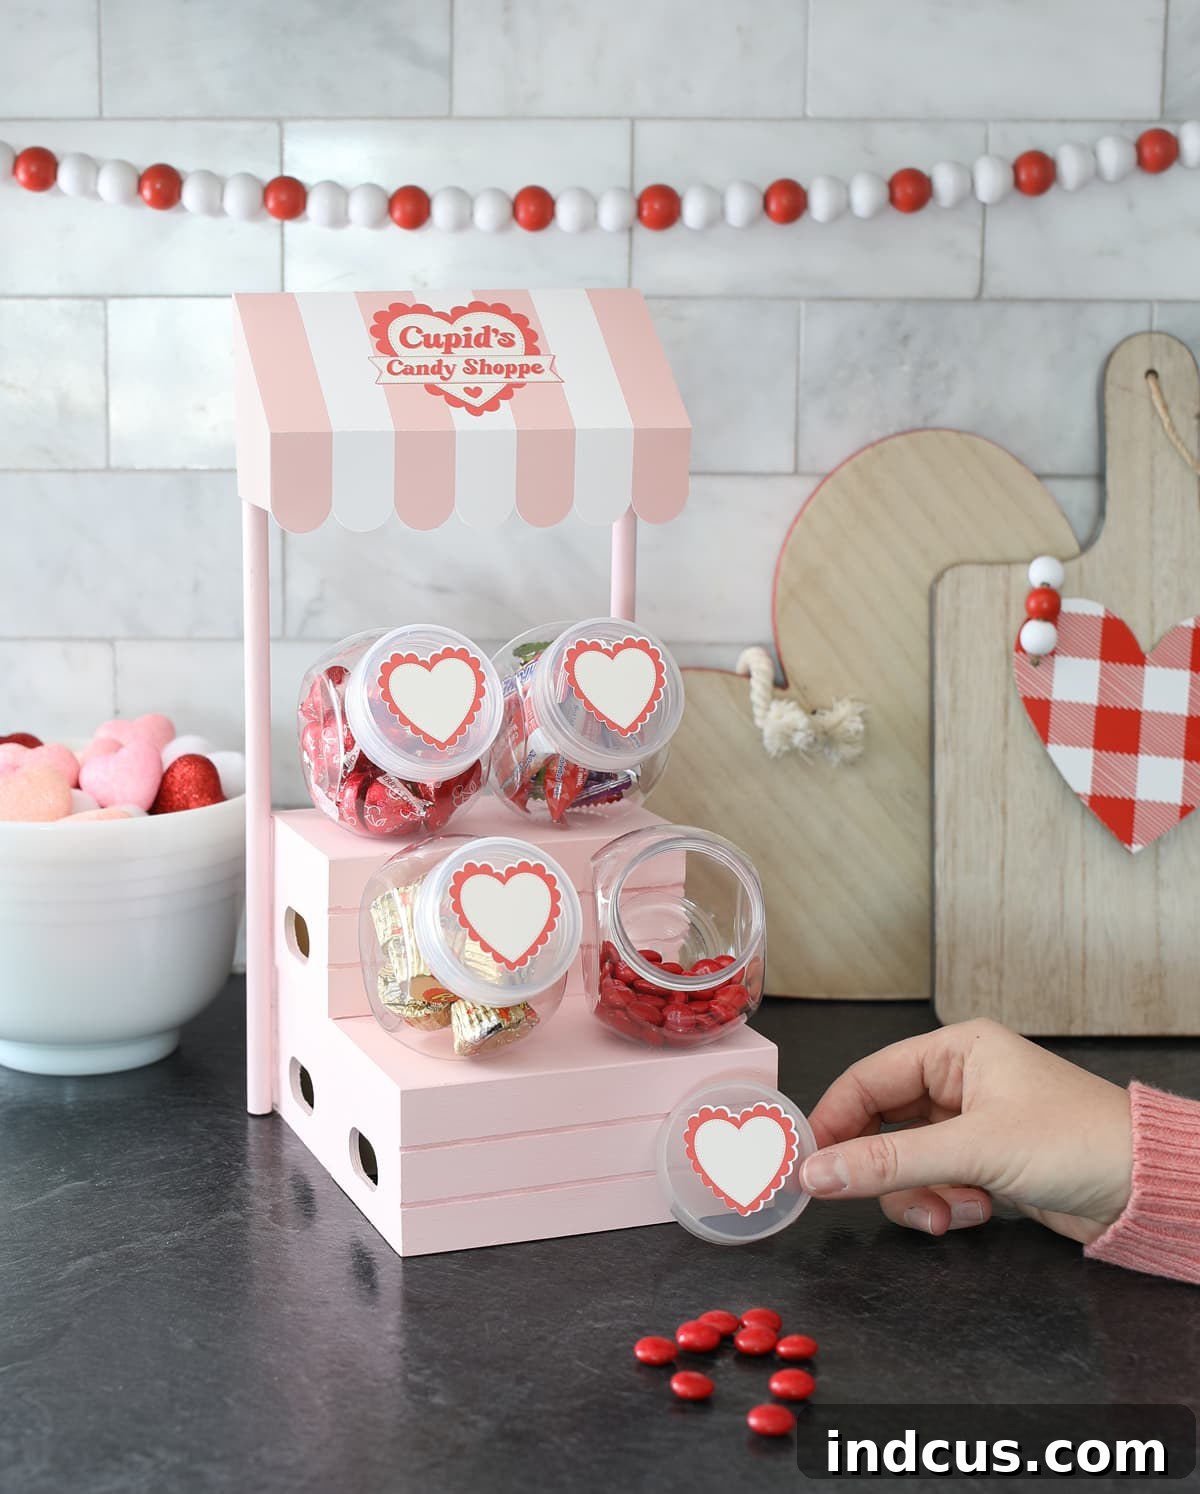
And so, “Cupid’s Candy Shoppe” was born! This charming little stand, reminiscent of a classic sweet shop, is not only incredibly cute but also a fantastic way to add a personalized touch to your Valentine’s decor. It’s perfect for gifting, party displays, or simply as a fun, interactive treat station for your loved ones. Get ready to impress without breaking the bank!
Ready to bring this adorable craft to life? Let’s dive into the simple steps and create a beautiful candy display that will surely be a highlight of your Valentine’s festivities.
Materials You’ll Need for Your Cupid’s Candy Shoppe
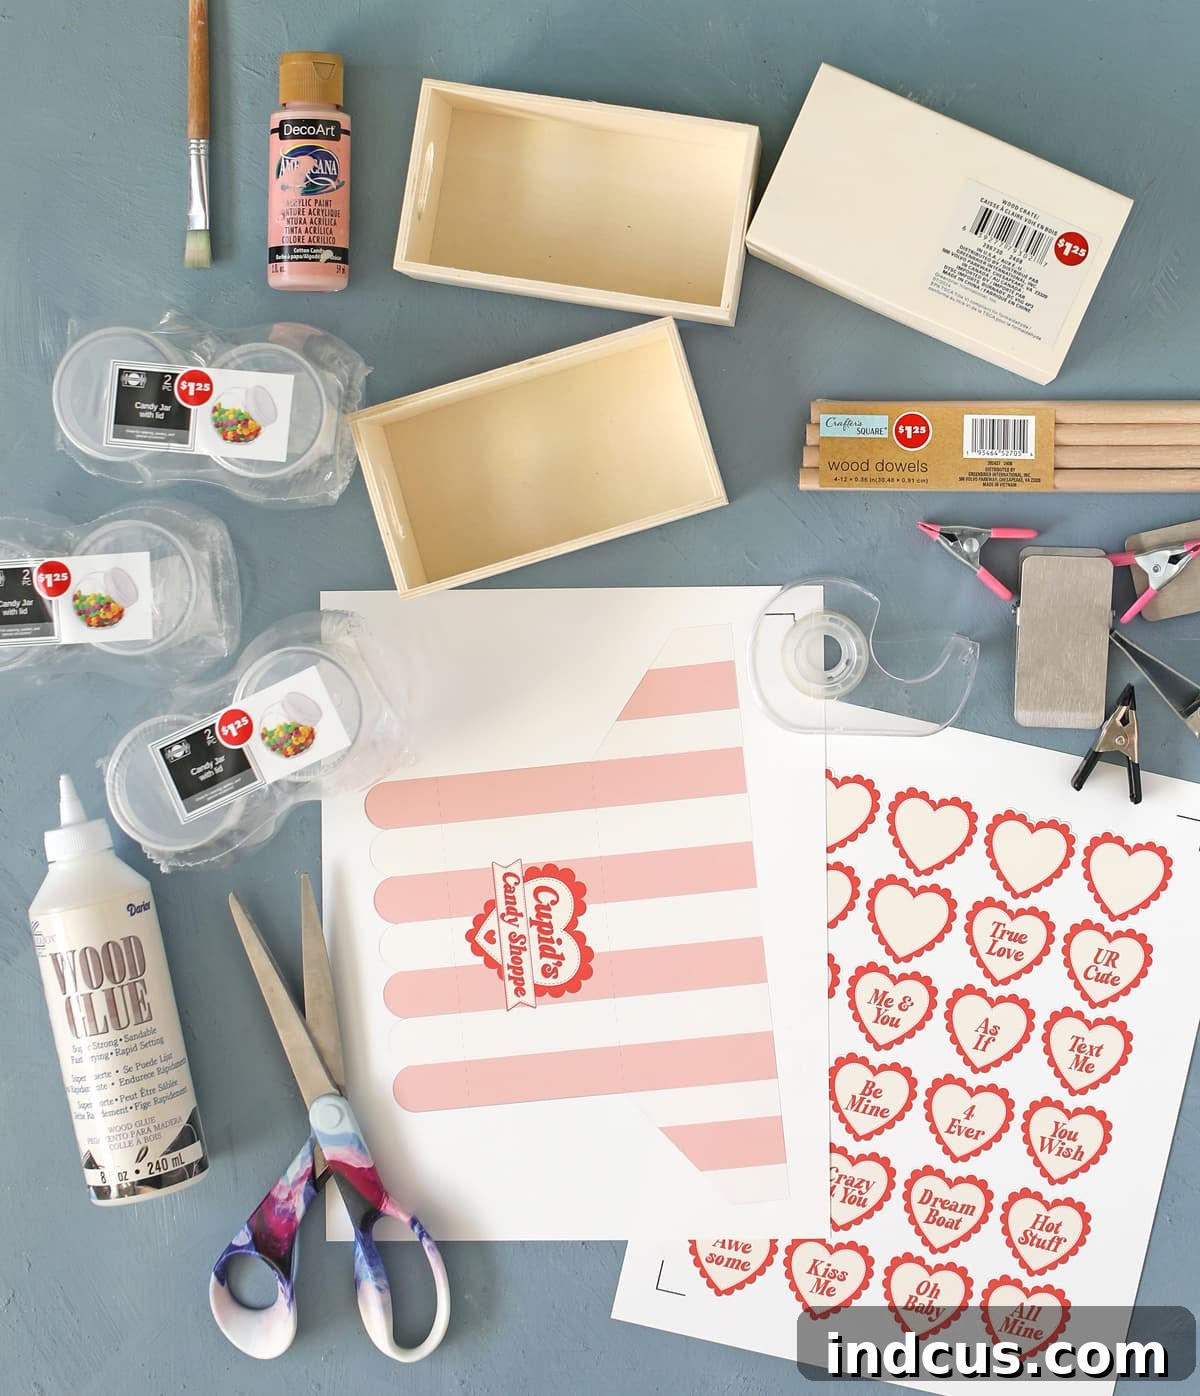
One of the best parts about this project is its affordability! Almost every item listed below can be found at your local Dollar Tree, making this a truly budget-friendly craft. While I’ve included links for reference to show you exactly what to look for, remember it’s much more economical to purchase these items in-store rather than online, as online purchases often require buying in bulk.
- 3 Wooden Crates: These form the sturdy base and structure of your candy stand. Their rustic charm is perfect for this project.
- Wooden Dowels: Essential for supporting the adorable awning, adding to the authentic “shoppe” feel.
- Small Candy Jars with Lids (4 total): Perfect for displaying a variety of sweets. I initially bought six but found four was the ideal number for this design. You can always add more if you wish to extend your display!
- White Cardstock: For printing your custom awning and decorative hearts. Choose a sturdy weight for the best results.
- Printable Cupid’s Candy Shoppe Awning & Jar Heart Labels: (Download available at the bottom of this post). These free printables are what truly bring the “shoppe” to life with their charming design.
- Wood Glue: For a strong, lasting bond between the wooden crates.
- Craft Clamps: Crucial for holding the crates securely while the wood glue dries.
- Hot Glue Gun + Glue Sticks: Your go-to for quick adhesion, especially useful for attaching the dowels.
- Craft Paint or Spray Paint: Choose a color that screams Valentine’s Day! I opted for a soft “Cotton Candy” pink.
Pro Tip: When visiting Dollar Tree, keep an eye out for similar items if the exact ones linked aren’t available. Craft supplies can vary by store, but often you’ll find suitable alternatives that work just as well!
Step-by-Step Guide: Building Your Cupid’s Candy Shoppe
Crafting this delightful candy display is a rewarding experience, suitable for crafters of all levels. Follow these detailed instructions to bring your own “Cupid’s Candy Shoppe” to life!
Step 1: Assembling Your Wooden Crate Base
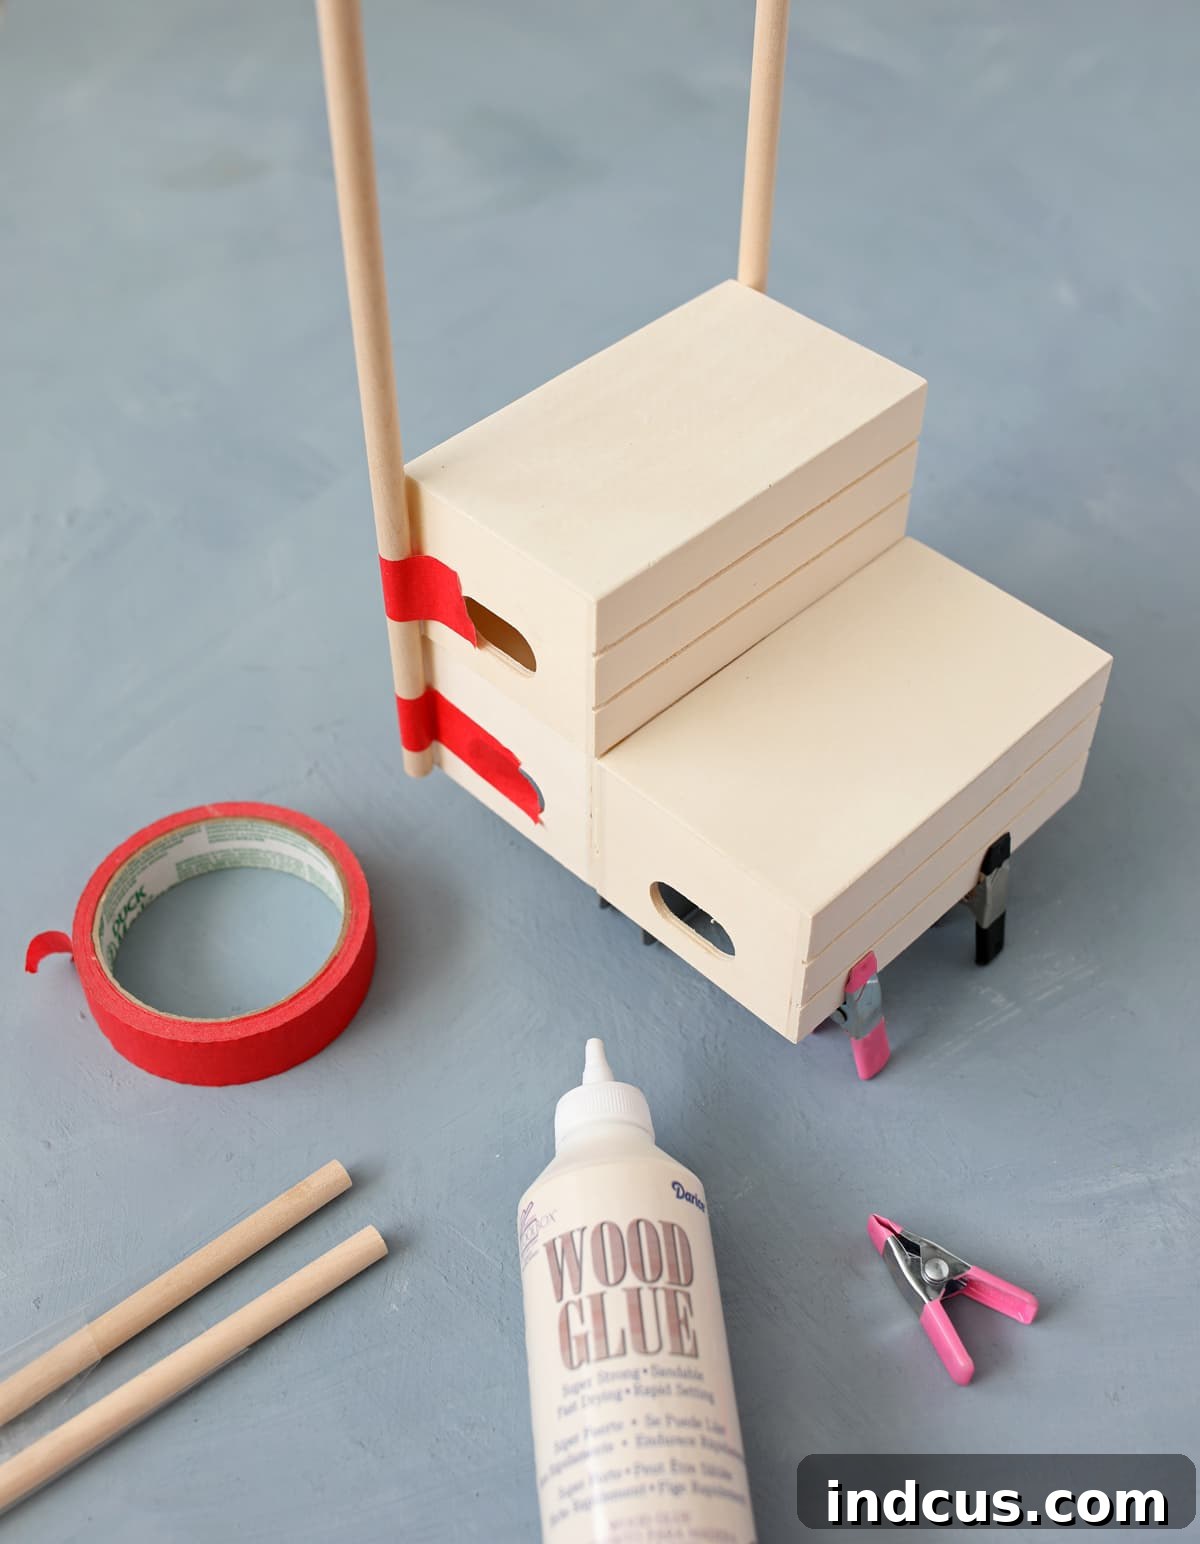
Preparation: Begin by carefully removing any store stickers or labels from all three wooden crates. This ensures a clean surface for gluing and painting. Once clean, arrange two crates side-by-side on a flat surface. These will form the sturdy bottom tier of your candy shoppe.
Gluing the Base: Apply a generous amount of wood glue along the top edges of these two bottom crates. Then, center the third crate directly on top, ensuring it is upside down so its solid bottom side faces upwards, creating a seamless shelf. This “upside down” orientation is key for a flat, stable surface for your candy jars.
Securing & Drying: Use your craft clamps to firmly hold the crates together. Apply even pressure across the glued seams. Wood glue requires time to cure completely, so I highly recommend allowing at least one hour for drying, or even longer if possible, to ensure a robust and stable structure. Patience here prevents wobbly creations!
Step 2: Attaching the Dowel Supports
Placement: Once your crate structure is perfectly dry and stable, it’s time to add the dowels that will support your awning. Position two dowels vertically on each side of the top-stacked crate, at the back. These should run along the side edges, providing a framework for your awning.
The Hot Glue Advantage: I initially tried wood glue for this step and quickly learned my lesson! For attaching dowels to the crate, a hot glue gun is undeniably superior. Hot glue sets almost instantly, effectively molds around the cylindrical dowels, fills any slight uneven gaps in the wood, and provides significantly better adhesion for this particular application. Apply a bead of hot glue along the dowel and press it firmly against the crate, holding it for a few seconds until set.
Step 3: Painting Your Candy Shoppe
Color Choice: Now for the fun part – adding color! With the structure assembled and dowels in place, it’s time to paint. I chose DecoArt’s “Cotton Candy” craft paint, a soft pink that perfectly complements the Valentine’s theme. Feel free to choose any color that sparks joy or matches your existing decor.
Paint Application: You have options for painting. If you’re in a warm, well-ventilated area, spray paint offers quick, even coverage. However, if conditions aren’t ideal, or if you prefer a more hands-on approach, regular craft paint works beautifully. Apply thin, even coats, allowing each layer to dry completely before adding the next. This prevents drips and ensures a smooth, professional finish. You may need two or more coats for opaque coverage, especially if painting a light color over natural wood.
Step 4: Crafting the Cupid’s Candy Shoppe Awning
Design & Printables: The awning is the star feature that transforms your crates into a true “shoppe.” I designed a cute, striped awning with a scalloped edge, specifically for this project. After several prototypes, I perfected a 3D design that is both charming and easy to assemble.
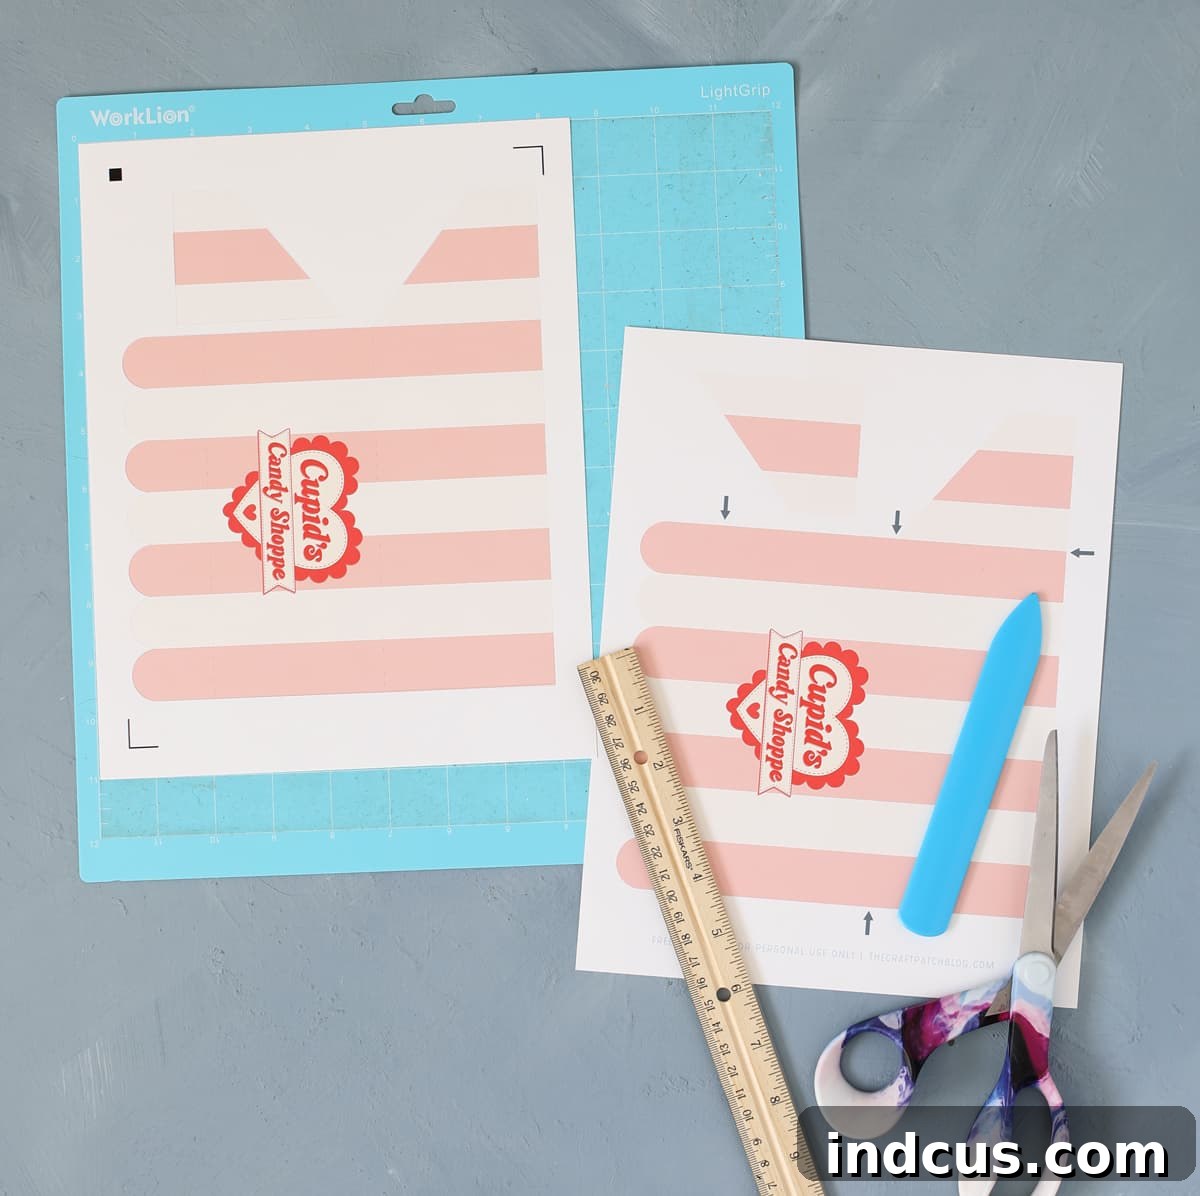
You’ll find two variations of the printable in the download folder at the bottom of this post: one optimized for electronic cutting machines (like Silhouette or Cricut) and another for cutting by hand. Both versions include the main large awning shape and a smaller separate piece that forms one side of the awning. This split design allows the entire pattern to fit on a standard piece of cardstock.
Electronic Cutting Machine Instructions (Silhouette or Cricut)
For those with a Silhouette or Cricut machine, the SVG file provides an incredibly fast and precise way to create your awning. This “Print and Cut” method ensures perfect alignment and crisp edges every time.
- Print & Cut Tutorial: If you’re new to this technique or need a quick refresher, refer to this helpful Print and Cut tutorial.
- Registration Marks: Crucially, remember to turn on your registration marks in your machine’s software before sending your design to the printer. These marks are how your cutting machine accurately locates the printed design on the page, ensuring your cuts align perfectly with the printed pattern.
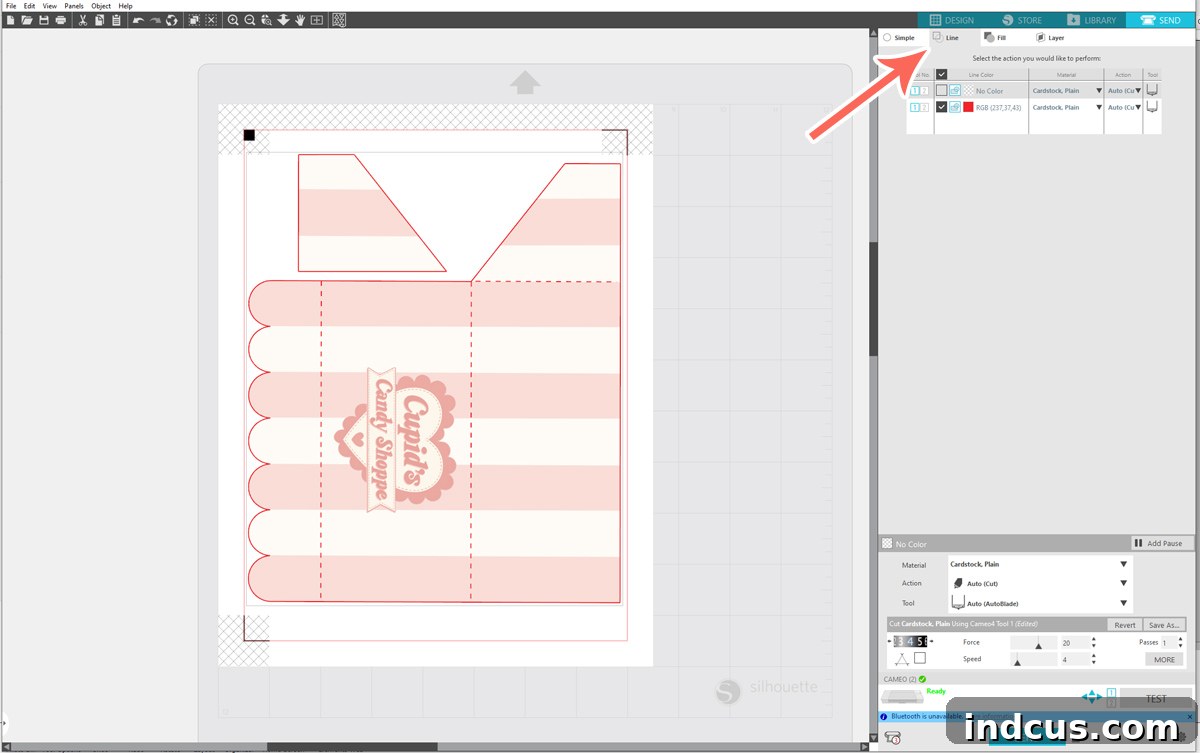
- Cutting Settings: When you navigate to the “SEND” tab to send the design to your machine, you might initially see many extraneous cut lines. To avoid this, select the “LINE” sub-tab. This will ensure that your machine only cuts the defined lines of the design, specifically around the awning shape and not the internal print. Your screen should resemble the image below, showing only the outline to be cut.
Cutting By Hand Instructions
No electronic cutter? No problem! This craft is still perfectly achievable by hand, offering the satisfaction of a completely handmade touch. Download the PDF version of the design and print it onto your white cardstock.
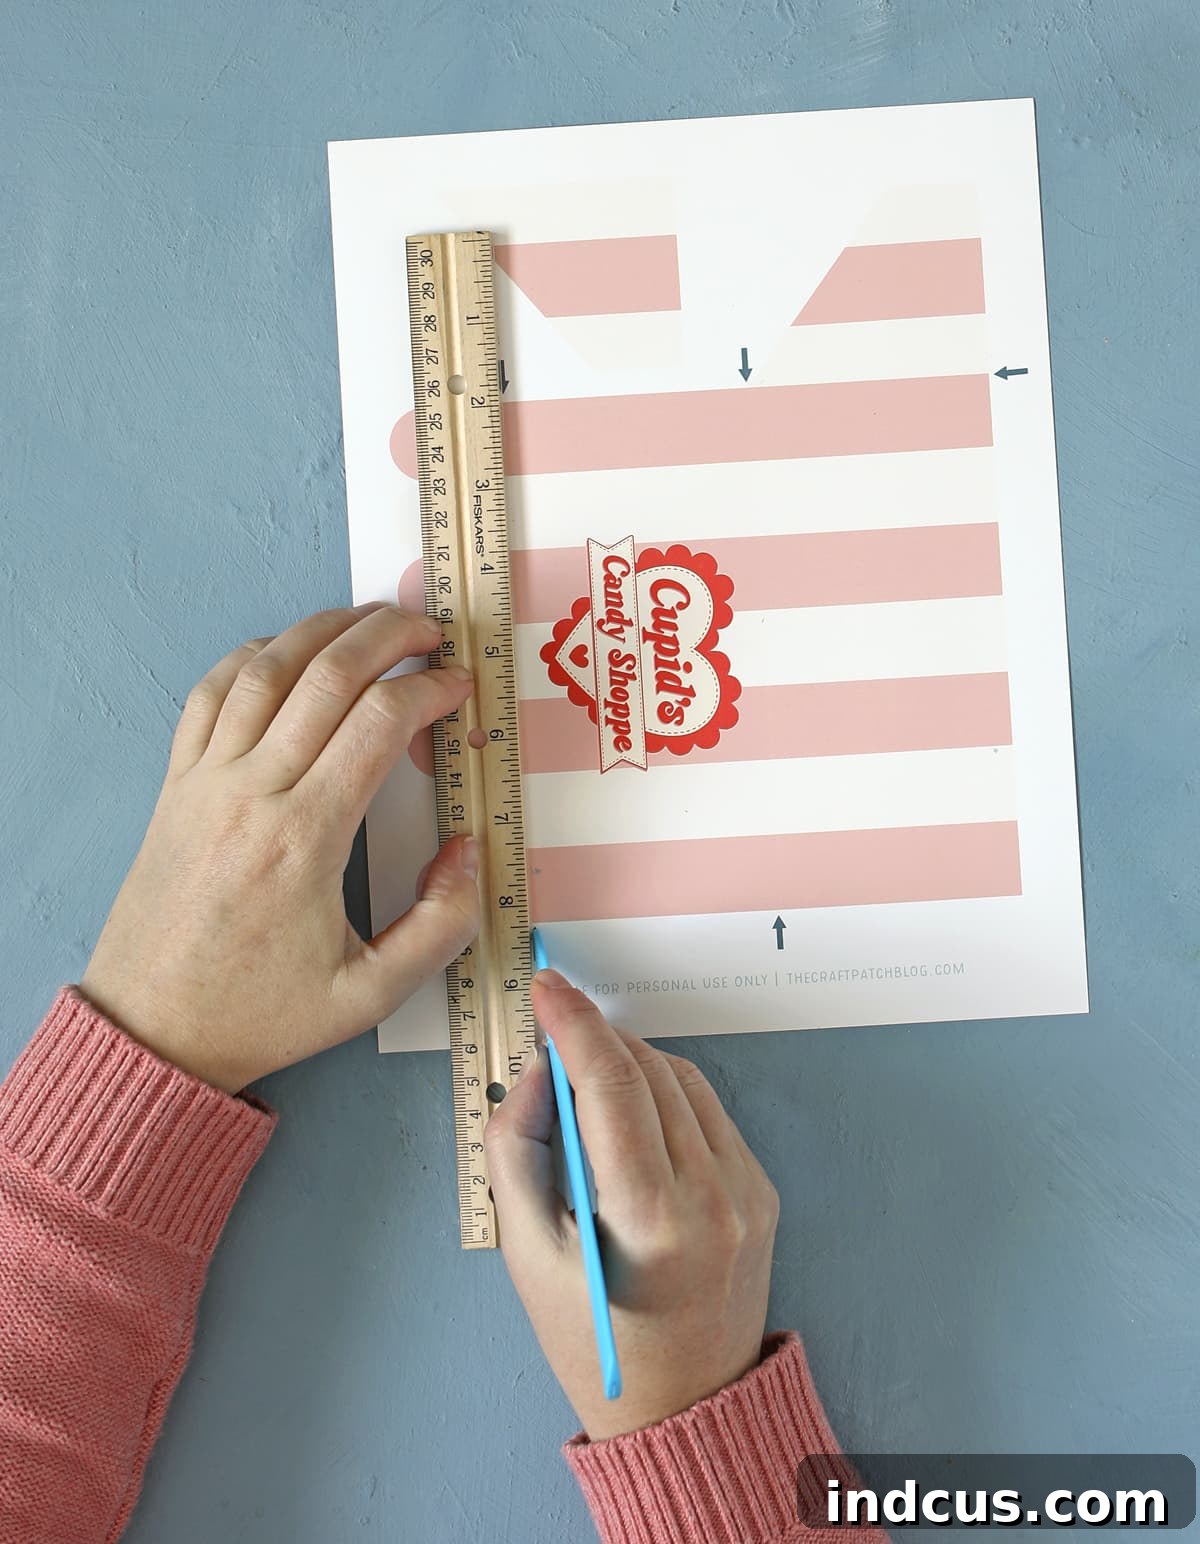
- Scoring for Precision: Before cutting, use a scoring tool (or a dull butter knife) and a ruler to create crisp fold lines. The gray arrows on the printable indicate exactly where these fold lines should be. Scoring ensures clean, straight folds without unsightly creases or tears on your finished project.
- Accurate Cutting: Carefully cut out the two shapes. The image below highlights the cutting lines to help you visualize where to cut, including the main awning piece and its separate side attachment. This method ensures no visible lines remain on the front of your completed awning.
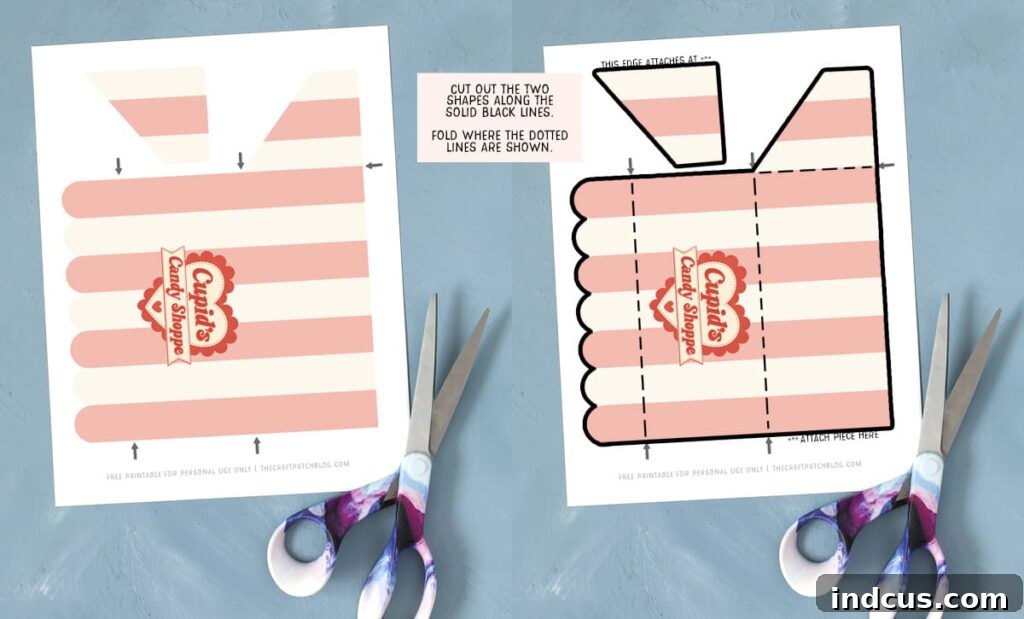
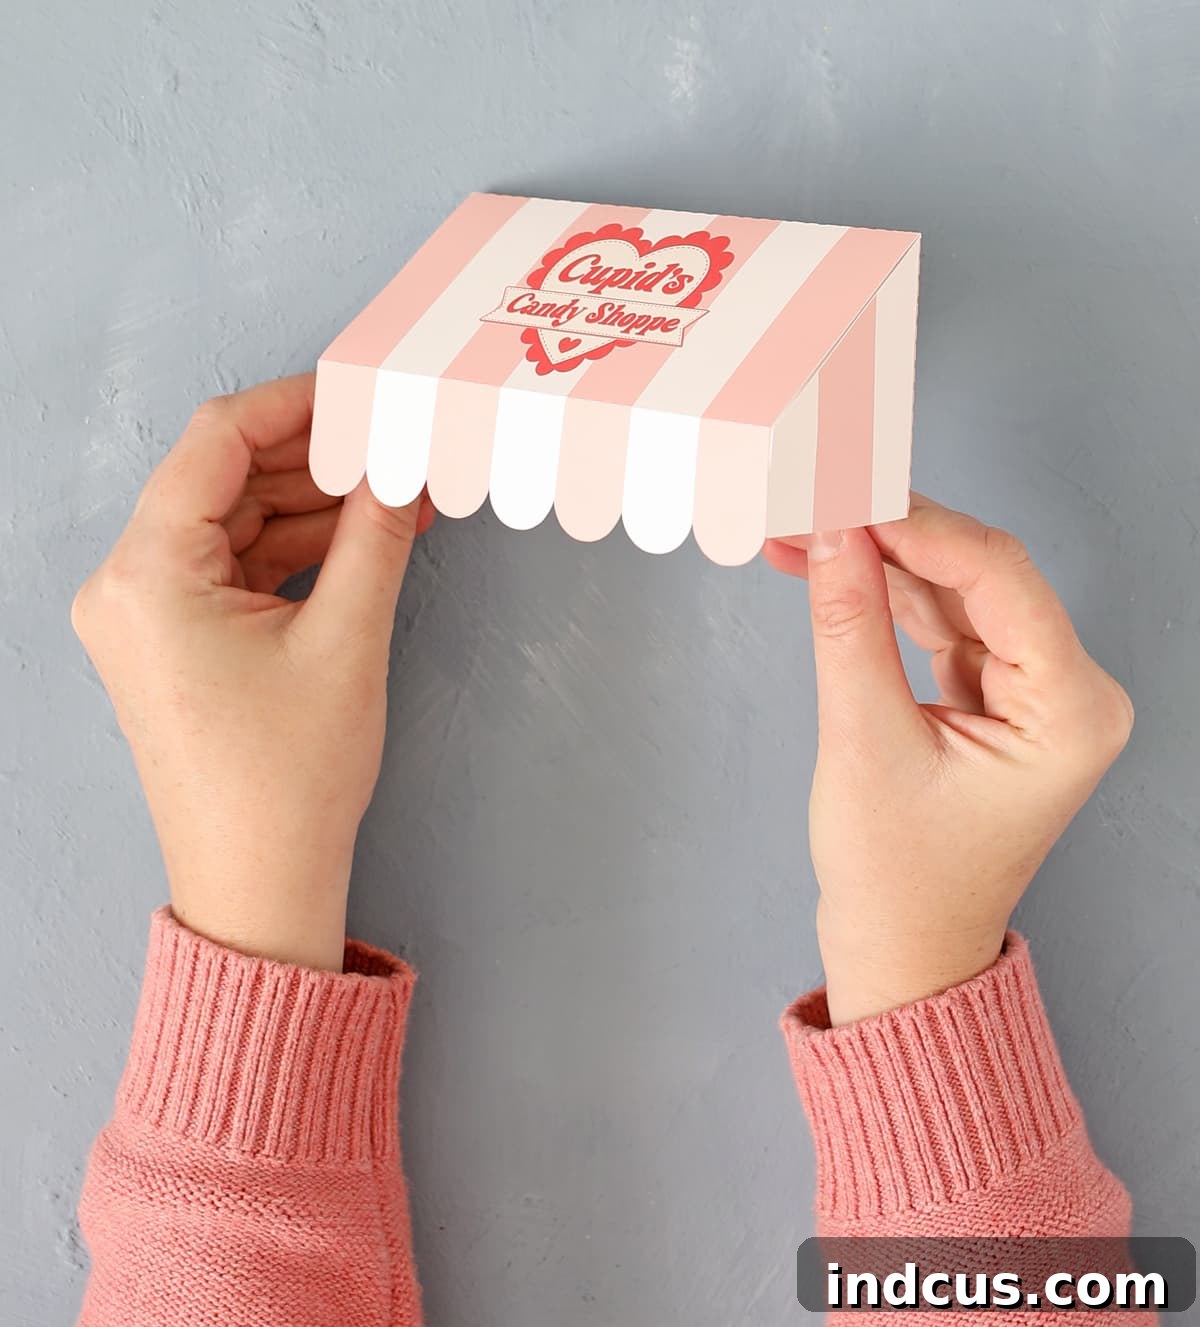
Awning Assembly: Once both shapes are meticulously cut out, regardless of your chosen method, fold all designated fold lines away from you. This creates the essential 3D structure. Then, use clear tape (or a thin line of hot glue for a more permanent bond) to attach the smaller side pieces to the main center awning. If you need a visual guide, refer to the video tutorial provided below. When assembled correctly, your awning will look like the photo below, showcasing its beautiful dimensional form.
Step 5: Attaching the Awning to Your Shoppe
Secure the Awning: With your beautiful awning ready, it’s time to attach it to the dowel supports. I recommend using a few pieces of clear tape initially. This allows you to easily adjust its position and ensure it’s perfectly straight and centered before committing to a permanent bond. Once satisfied, you can reinforce it with a small dab of hot glue on each dowel. Using tape also offers the flexibility to gently disassemble the awning for compact storage after Valentine’s Day, allowing you to reuse your “Cupid’s Candy Shoppe” year after year!
Step 6: The Sweet Finishing Touches
Decorating the Jars: To add an extra layer of charm, I designed matching heart printables for the candy jar lids. These are included in the same downloadable folder as the awning. You’ll find a variety of hearts: some blank, and others featuring sweet conversation heart messages. This gives you the freedom to pick your favorites, or even write in the names of the candies you’re using on the blank ones for an organized and personalized display.
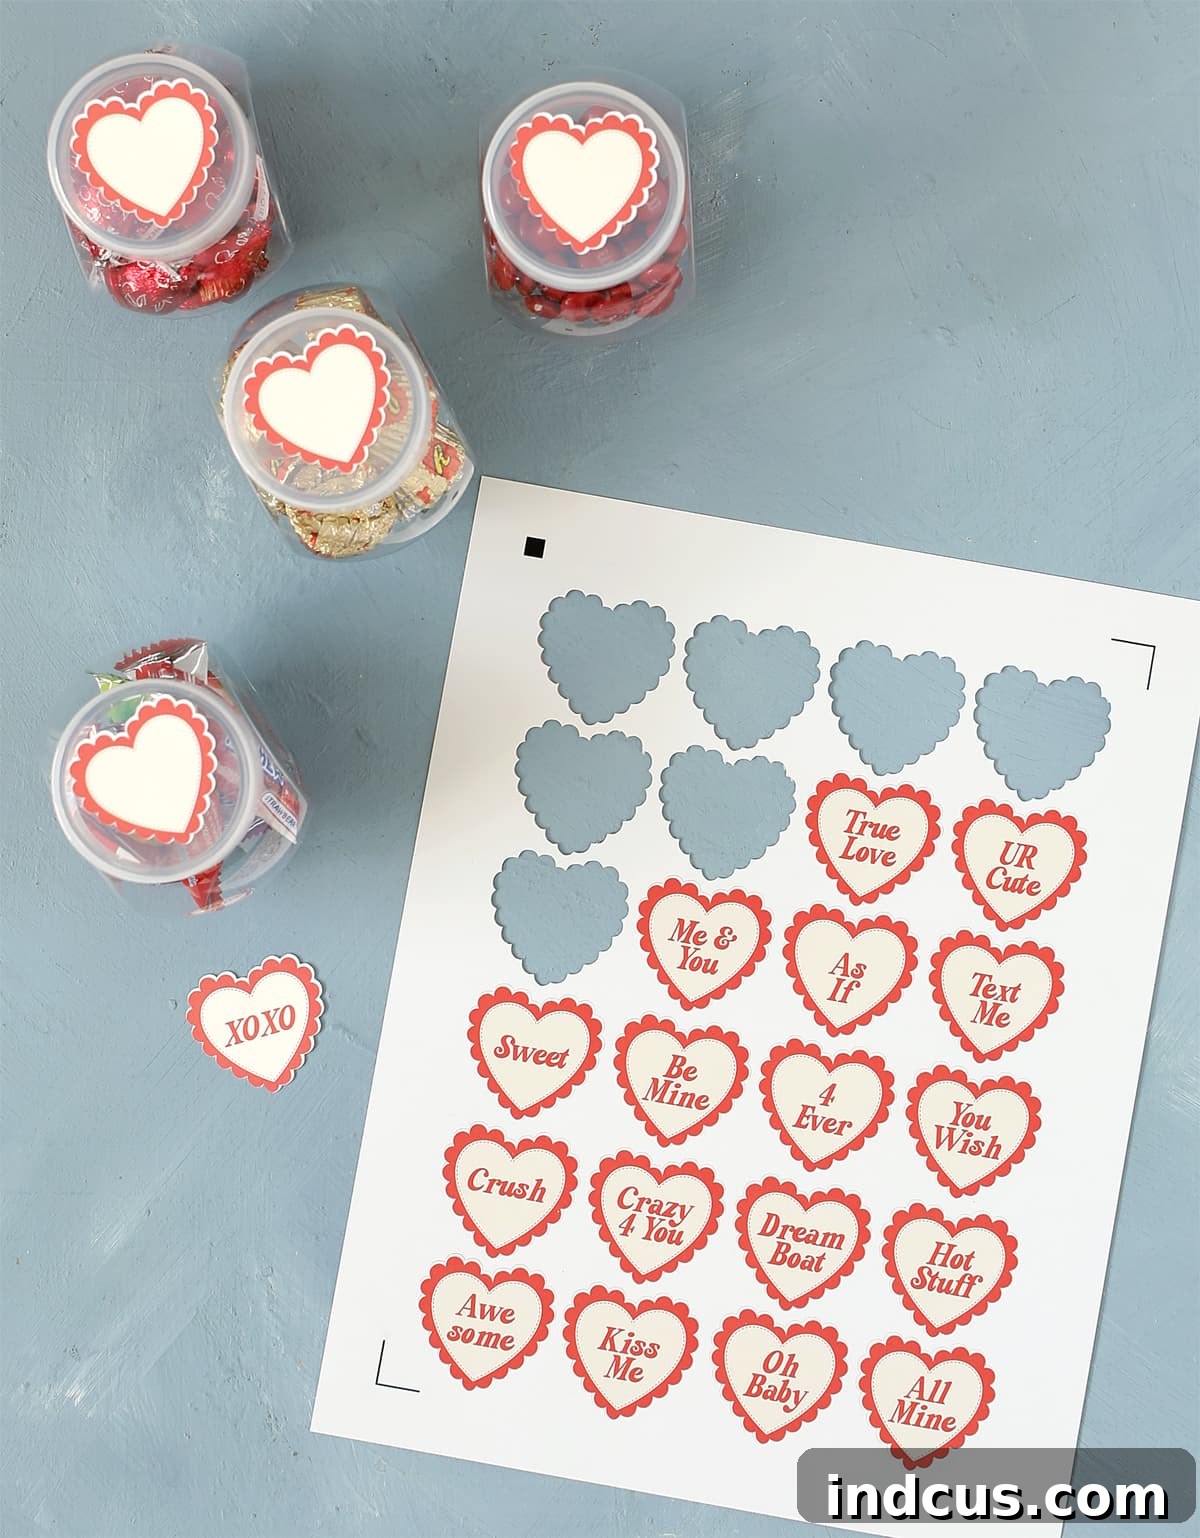
Fill with Treats! The final and most delightful step: filling your jars with an assortment of colorful candies! Think classic Valentine’s treats like conversation hearts, chocolate kisses, gummy bears, or even custom-colored M&Ms. Arrange the filled jars artfully on the different tiers of your wooden candy stand. Step back and admire your beautiful, handmade Valentine’s Day candy shop – it’s officially open for business!
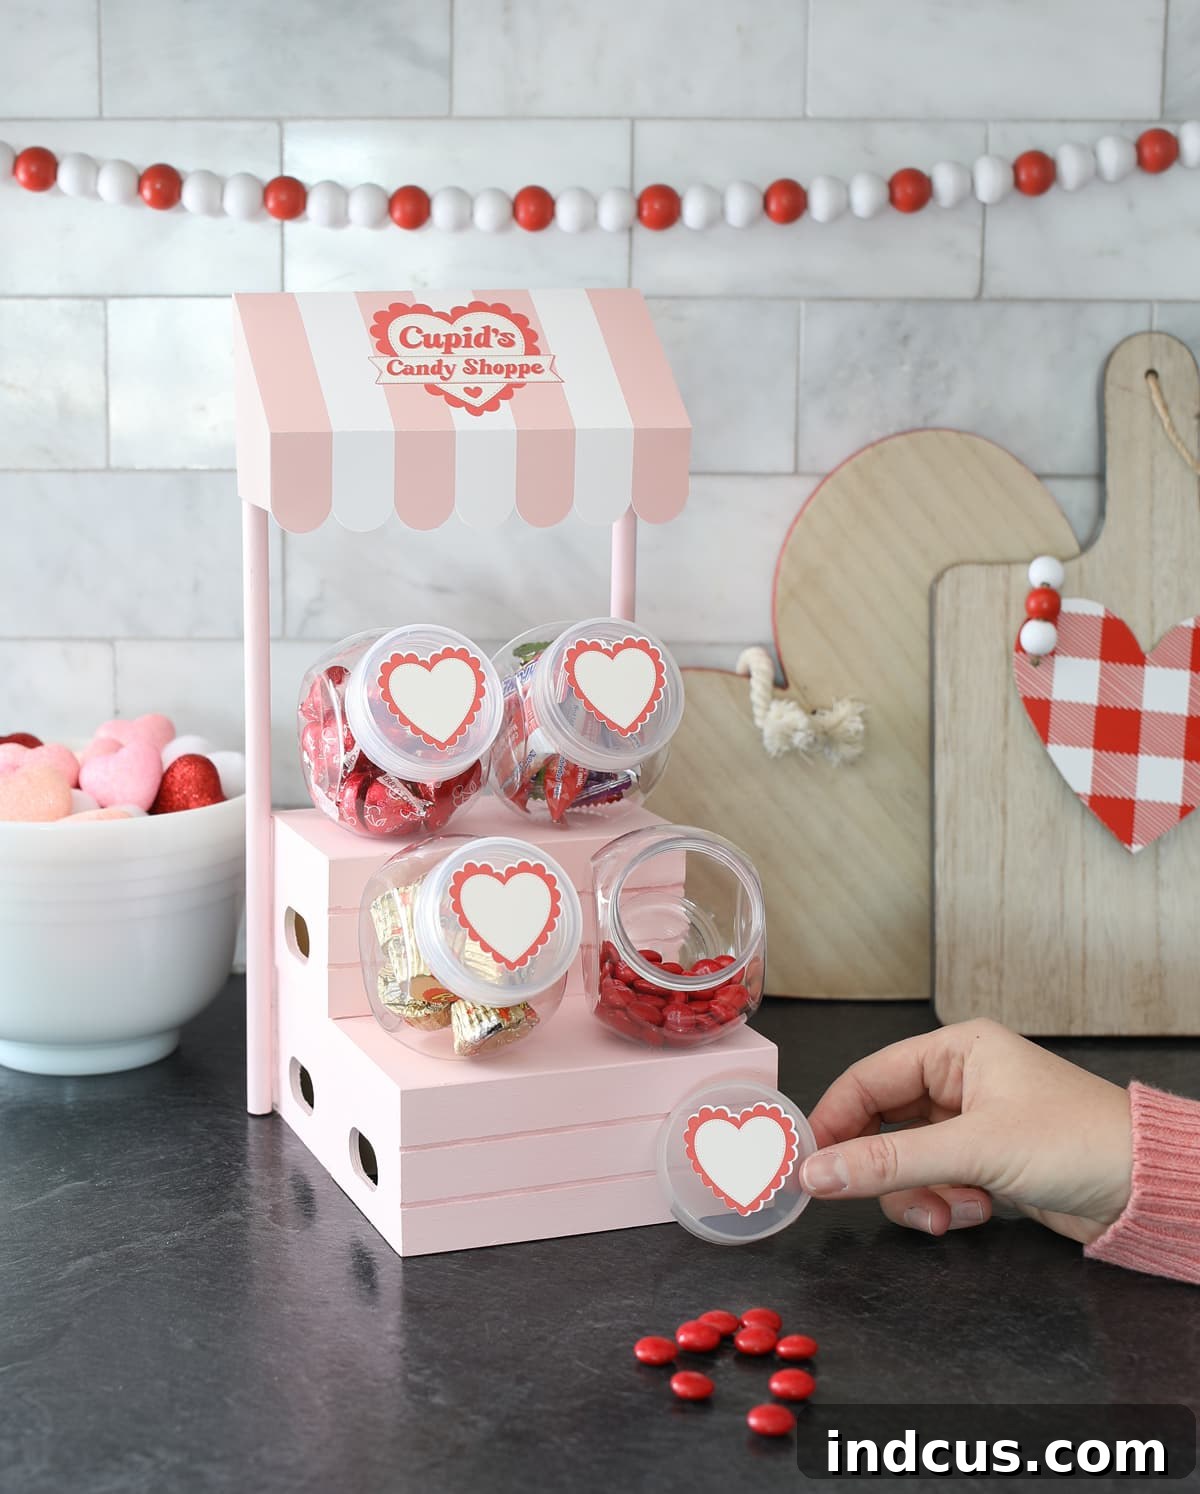
Watch the Cupid’s Candy Shoppe Video Tutorial
Prefer to follow along visually? This detailed video tutorial walks you through each step of creating your Valentine’s Day candy shoppe, offering helpful tips and tricks along the way. Perfect for visual learners!
Why You’ll Love This DIY Valentine’s Day Craft
I absolutely adore how this “Cupid’s Candy Shoppe” turned out! It’s not just a craft; it’s a delightful piece of festive decor that I plan to use for many Valentine’s Days to come. For approximately $7.50 in materials (excluding candy), it’s an incredibly affordable way to bring significant cheer into your home. The joy it brings is truly priceless.
The anticipation of my kids seeing this charming display when they get home from school fills me with happiness. It’s these small, thoughtful gestures and handmade creations that truly fill our home with warmth, love, and unforgettable memories. This candy shoppe is more than just a place for treats; it’s a beacon of creativity and family fun.
Creative Customization & Year-Round Fun
While designed for Valentine’s Day, the beauty of this wooden crate candy stand lies in its versatility. Imagine customizing it for other holidays and seasons!
- Easter: Fill it with pastel eggs and bunny-themed treats, transforming it into an “Easter Bunny’s Sweet Stop.”
- Summer: Decorate with vibrant colors, mini fruit shapes, and red, white, and blue candies for a patriotic “Summer Sweet Stand.”
- Halloween: Darker paint, spooky printables, and creepy candies can turn it into a “Haunted Candy Hut.”
- Christmas: Think red and green, candy canes, and festive chocolates for a “Santa’s Sweet Shop.”
By simply changing the paint color and the printable awning, you can adapt this basic structure for countless occasions, making it a truly invaluable piece of DIY decor. It’s also a fantastic project to involve older children in, allowing them to choose colors, printables, and arrange candies, fostering their creativity and giving them ownership of a fun family project.
Explore More Seasonal Candy Shoppe Printables!
Love this idea? Don’t stop at Valentine’s Day! We’ve created a whole collection of themed printables to transform your DIY candy stand for every season and celebration. Get inspired to create a year-round rotation of delightful candy shoppes!
-
Cupid’s Candy Shoppe Valentine’s Day Craft
-
DIY Easter Candy Shop
-
Farmer’s Market Fruit Stand Candy Shop Craft
-
Halloween Candy Shop Craft
-
Shamrock Sweets Shop St. Patrick’s Day Craft
-
Patriotic Candy Shop Craft