Embrace Winter in Style: Craft Your Own Custom DIY Ear Muffs with a Simple Kit
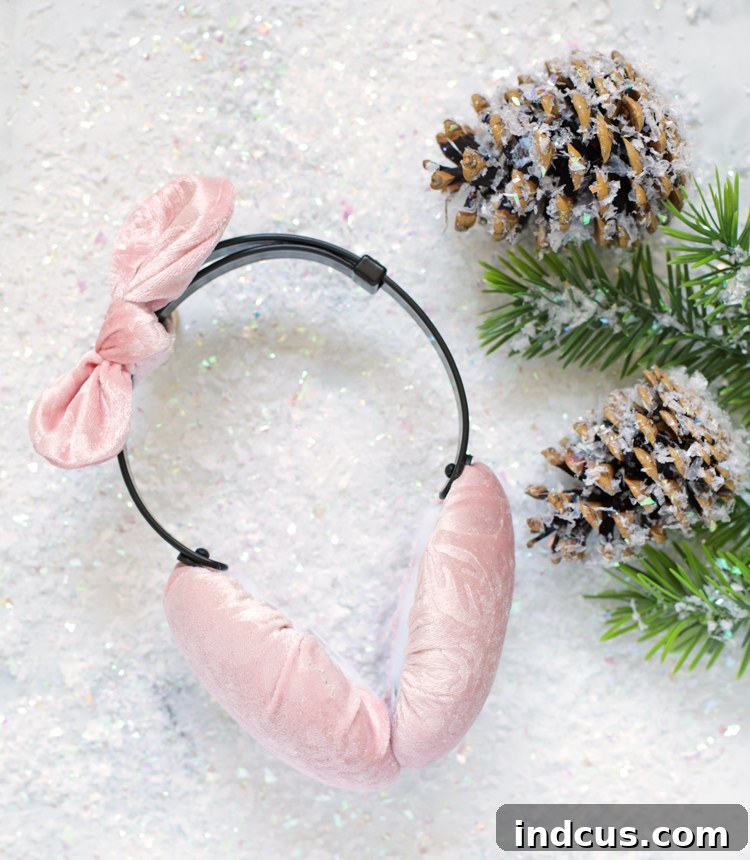
As the crisp autumn air gives way to the chill of winter, it’s time to prepare for the colder months ahead. What better way to keep cozy and express your personal style than with a pair of custom-made DIY ear muffs? Forget generic store-bought accessories; with the help of a convenient pre-made kit, crafting your own unique ear warmers is surprisingly simple, even for novice crafters. All you need is the kit, a fabric you adore, and a touch of creativity to bring your vision to life.
This comprehensive guide will walk you through every step of transforming a basic kit into a fashionable and functional accessory. From assembling the sturdy frame to sewing the perfect fabric covers and adding those special personalized touches, you’ll discover how easy it is to create ear muffs that reflect your individuality. Get ready to banish the cold and welcome winter with warmth and unparalleled style!
Why Craft Your Own Custom Ear Muffs? The Benefits of DIY Warmth
There’s an undeniable charm and satisfaction in creating something with your own hands, especially when it results in a practical item that reflects your unique taste. Making your own custom DIY ear muffs offers a multitude of benefits:
- Unleash Your Style: The most compelling reason to DIY your ear muffs is the freedom to choose any fabric, pattern, or embellishment imaginable. Whether you prefer vibrant florals, cozy plaid, luxurious faux fur, or a minimalist solid color, your ear muffs will be a true extension of your wardrobe and personality.
- Perfect Fit and Comfort: While the kit provides the frame, the way you craft the fabric covers ensures a snug yet comfortable fit. You control the material that rests against your ears, opting for the softest and warmest options available.
- Thoughtful, Handmade Gifts: Custom ear muffs make incredibly thoughtful and personal gifts for friends and family. Imagine gifting a pair made with their favorite color or a fabric that reminds you of them – a truly heartwarming present for any occasion.
- Cost-Effective Crafting: Compared to designer ear muffs, making your own can be a more budget-friendly option, especially if you have fabric scraps or remnants on hand. The kit provides the essential structural components, and your creativity fills in the rest.
- Beginner-Friendly Project: Thanks to the pre-made kit, the most complex parts of ear muff construction are already handled. This project primarily involves simple sewing and gluing, making it an excellent entry point for those new to crafting or looking for a quick and rewarding project.
- Sustainable and Eco-Conscious: Repurpose fabric scraps, old sweaters, or even upcycle materials to give them a new lease on life. This approach not only reduces waste but also adds a unique story to your custom ear muffs.
Visual Guide: Watch Our DIY Ear Muff Video Tutorial
Sometimes, seeing is believing! To give you an even clearer understanding of how these DIY ear muffs come together, we’ve prepared a concise video tutorial. This short, easy-to-follow video demonstrates each step of the process, from assembling the kit components to attaching the fabric covers. It’s the perfect visual companion to our written instructions, ensuring you feel confident and ready to create your own personalized ear muffs.
Gather Your Essentials: Materials Needed for Your Custom Ear Muffs
Before you embark on your ear muff making journey, ensure you have all the necessary supplies. The beauty of this project lies in its simplicity, requiring only a few key items:
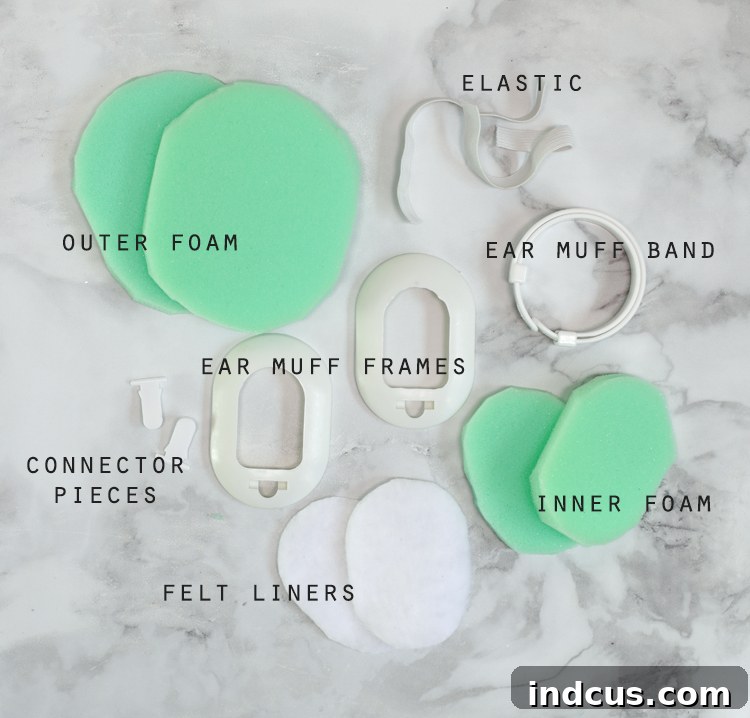
- DIY Ear Muff Kit: This is the foundation of your project. These kits typically include all the rigid components: the ear muff frames, inner and outer foam pieces, felt liners, connector knobs, and the adjustable headband. Kits are often available with frames in classic black or crisp white, allowing you to choose the best base for your chosen fabric.
- Fabric: Approximately 8″x16″ of your chosen fabric will be sufficient for one pair of ear muffs. This is where your personality shines! Consider fabrics that are soft, warm, and comfortable against the skin. Popular choices include:
- Fleece or Flannel: Excellent for warmth and softness.
- Faux Fur: Adds a luxurious and cozy touch.
- Quilting Cotton: Offers a vast array of patterns and colors, but may require a soft lining for comfort.
- Knit Fabrics: Provide stretch and comfort, ideal for a snug fit.
- Recycled Sweaters: A fantastic eco-friendly option for unique texture and warmth.
Choose a fabric that is easy to work with and complements your desired aesthetic.
- Hot Glue Gun + Glue Sticks: An essential tool for quickly and securely attaching the foam and felt pieces to the ear muff frames. Ensure your glue gun is hot enough for a strong bond.
- Sewing Machine: While it’s possible to hand-sew, a sewing machine will make the process of creating the fabric covers much faster and result in more professional-looking stitches.
- Matching Thread: Select a thread color that either perfectly matches your chosen fabric or provides a subtle, complementary contrast. All-purpose polyester thread is usually suitable.
- Free Fabric Cutting Guide: This printable pattern piece is crucial for accurately cutting your fabric covers. Download and print it at 100% scale to ensure the correct size.
Having all these materials ready before you begin will ensure a smooth and enjoyable crafting experience.
Here are the pieces typically included in a standard DIY ear muff kit:
Step-by-Step Guide: Assembling the Ear Muff Frame
The first stage of creating your custom ear muffs involves assembling the structural components of the kit. This part is largely about precise placement and secure gluing to ensure a comfortable and durable base for your fabric covers.
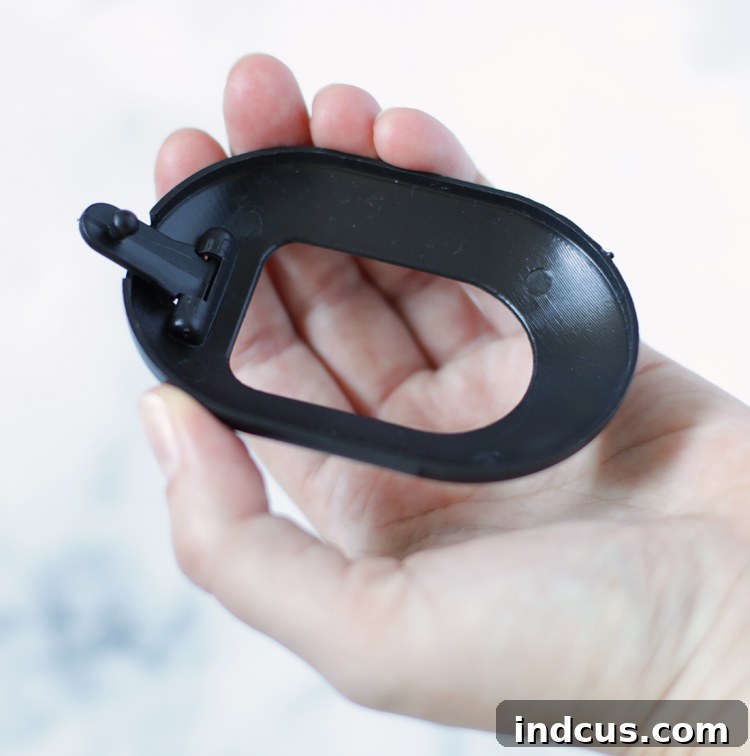
Step 1. Attach the Connector Knobs to the Ear Muff Frames. Take a close look at the connector knobs and the slots on the ear muff frames. These knobs are designed to snap into place in a specific orientation. Gently but firmly press the connector knobs into the designated slots on the ear muff frames. It’s crucial to ensure they are inserted in the correct direction, as shown in the accompanying image, to allow the headband to properly attach later. You should feel a satisfying ‘click’ as they lock into position, indicating a secure connection.
Step 2. Secure the Inner Foam Piece. Now, take one of the soft inner foam pieces. Apply a continuous, thin bead of hot glue along the inside rim of one ear muff frame. Work quickly, as hot glue sets fast. Carefully press the inner foam piece into place, ensuring it is centered and adheres firmly to the glued rim. This foam piece provides essential cushioning and insulation for your ears, so a good, even bond is important.
Step 3. Adhere the Felt Liner Piece. Next, take a felt liner piece. This piece typically has a softer, fuzzier side designed to rest against your ear. Apply a small amount of hot glue to the back of the felt liner, or sparingly on top of the already secured inner foam piece. Carefully press the felt liner onto the inner foam piece, making sure the fuzzy, soft side is facing outwards. This layer adds an extra touch of comfort and warmth, enhancing the overall feel of your ear muffs.
Step 4. Attach the Outer Foam Piece. Flip the ear muff frame over to the outside. Take an outer foam piece. Apply hot glue to the outer rim of the frame. Carefully center the outer foam piece over the frame and press it down firmly. This outer foam piece helps give your ear muff its characteristic dome shape and provides additional structure and padding for the fabric cover.
Step 5. Repeat for the Second Ear Piece. To complete the frame assembly, simply repeat steps 1 through 4 for the second ear piece. Ensure that both frames are assembled symmetrically and that all pieces are securely glued into place. Take a moment to inspect both frames, ensuring they are mirror images of each other and ready for their fabric covers.
Crafting the Fabric Ear Muff Cover: Sewing for Style and Comfort
With the frames assembled, it’s time to bring your chosen fabric into the picture. This section involves some basic sewing to create the custom covers that will encase your ear muff frames.
Step 1. Precision Cutting of Fabric Pieces. Begin by printing out the Free Fabric Cutting Guide. Ensure it’s printed at 100% scale for accurate sizing. Pin the pattern piece to your chosen fabric and carefully cut out two identical pieces of fabric. Precision here is key, as these pieces will form the snug covers for your ear muffs. Take your time to get clean, even cuts.
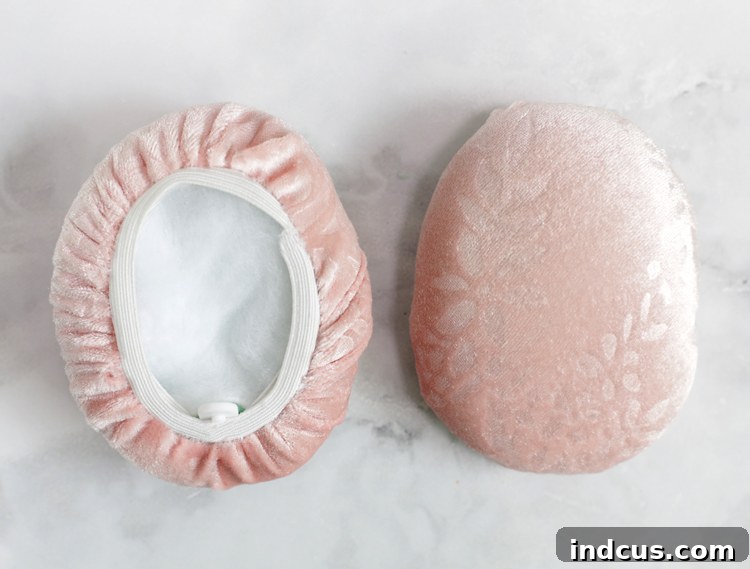
Step 2. Attaching the Elastic for a Snug Fit. Lay one of your cut fabric pieces flat with the RIGHT side (the side you want to be visible) facing up. Take a piece of elastic (usually provided in your kit or easily purchased separately). Place the elastic along the raw edge of the fabric piece, on the right side. Using your sewing machine, begin sewing the elastic to the fabric, starting with a strong back stitch to secure it. As you sew, gently pull the elastic tight, allowing the fabric to slightly scrunch and gather around it. Continue sewing around the entire edge of the fabric, ensuring the elastic stretches all the way around and its two ends meet to form a neat circle. This technique creates a casing that will snugly fit over the ear muff frame, providing both structure and a polished finish. Maintaining consistent tension on the elastic will ensure an even gather.
Step 3. Stretching the Fabric Cover Over the Ear Muff Frames. Once the elastic is securely sewn, it’s time to fit the fabric cover onto your assembled ear muff frame. Carefully stretch the fabric cover over the entire ear muff frame, ensuring the gathers created by the elastic are evenly distributed around the edge. Work the fabric smoothly around the dome, tucking the elastic edge securely into the groove where the outer foam meets the frame. This step requires a bit of gentle manipulation to achieve a wrinkle-free and taut fit, showcasing your chosen fabric beautifully.
Final Touches: Bringing Your Custom Ear Muffs Together
With both ear pieces covered in your fabulous fabric, the final step is to connect them with the headband, bringing your personalized ear muffs to completion.
Step 4. Connecting the Ear Muff Band to the Frames. Take the ear muff band (also known as the headband). Locate the holes or slots on either end of the band. Carefully align these holes with the connector pieces (the knobs you snapped into place in Step 1 of frame assembly) on both ear muff frames. Gently but firmly push the band onto the connector pieces until you hear and feel them click securely into place. This click confirms that the band is properly attached and will hold your ear muffs together reliably. Test the adjustability of the band to ensure it slides smoothly, allowing for a comfortable fit.
Unleash Your Creativity: Endless Customization Ideas
The true joy of making your own ear muffs lies in the endless possibilities for customization. Beyond choosing your favorite fabric, here are a myriad of ways to truly personalize your creation:
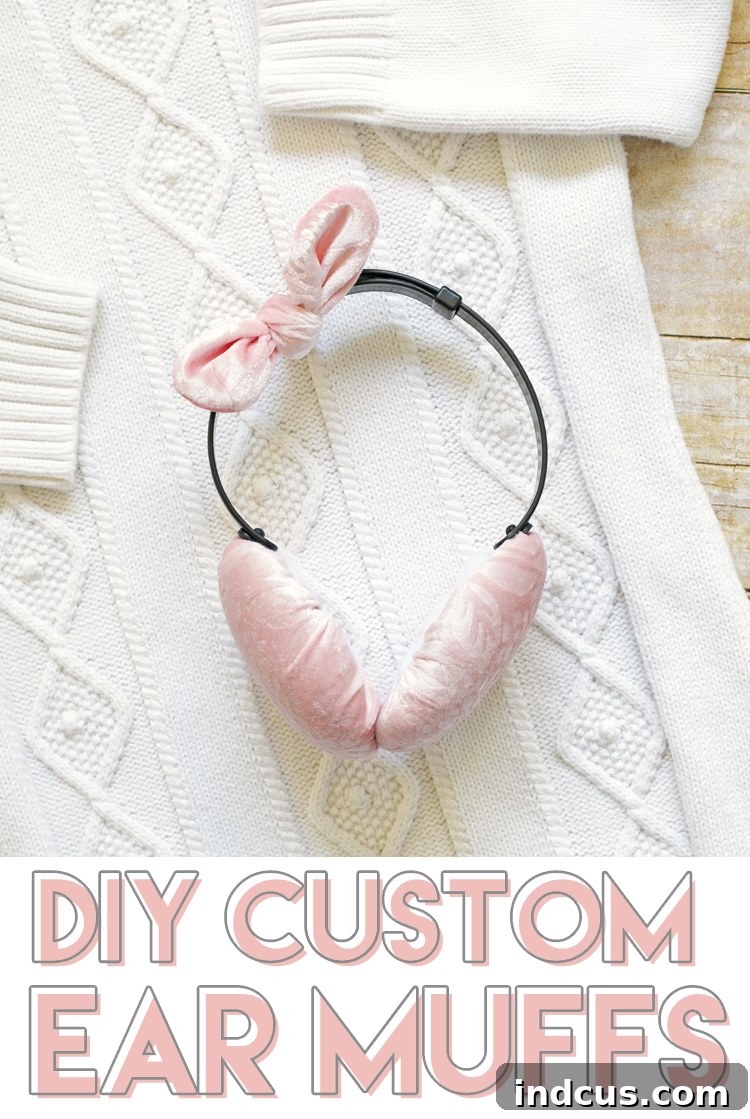
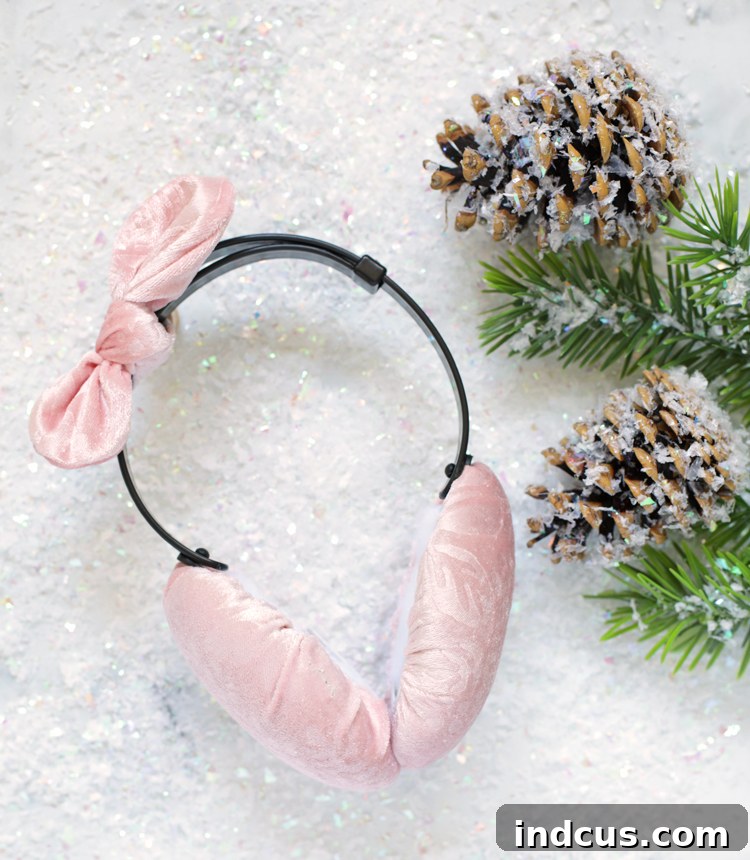
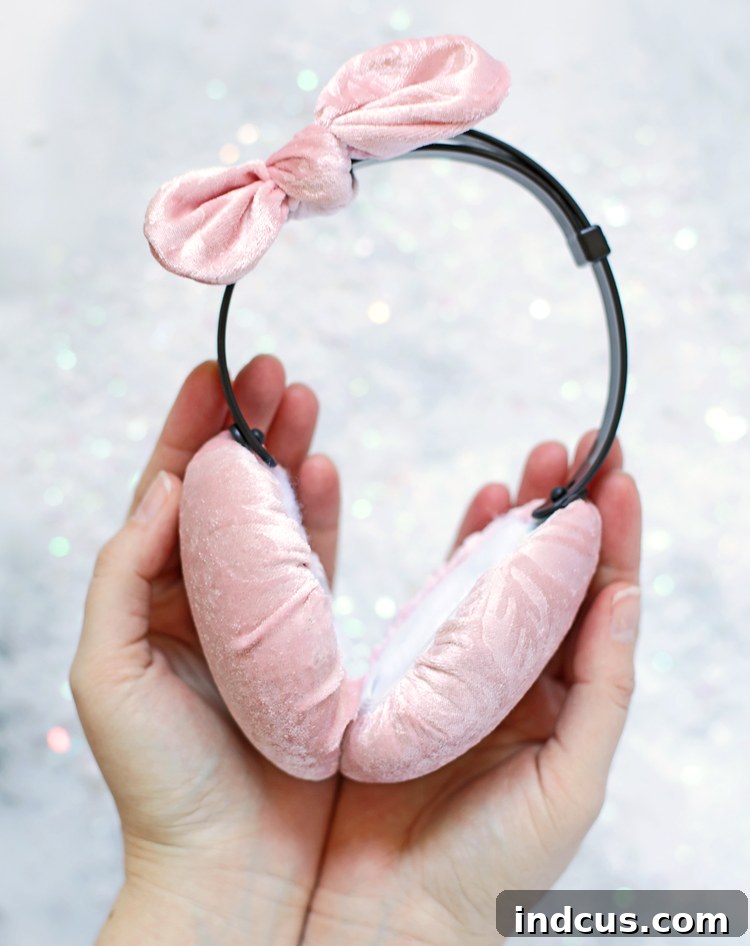
- Fabric Bows and Ruffles: As demonstrated, a simple fabric bow can add an adorable touch. To replicate the bow in the image, cut two rectangles of fabric (e.g., 9 inches by 2 inches), round off the ends, and sew them right sides together, leaving a small opening for turning. Flip it right side out, stitch the opening closed, and tie it around the headband for a charming accent. You could also create ruffles by gathering a longer strip of fabric and sewing it along the edge of the ear muff covers.
- Embroidered Details: Hand-embroider initials, small designs, or decorative stitches onto your fabric covers before assembling them. This adds an elegant, bespoke touch.
- Appliques and Patches: Iron-on or sew-on patches are a quick and easy way to add character. Think cute animal faces, logos, or whimsical shapes. Similarly, fabric appliques (like felt cutouts of stars or hearts) can be sewn or glued onto the covers. My friend Amy, for instance, created some incredibly charming fuzzy owl ear muffs by appliquing felt eyes and beaks onto her fabric covers!
- Animal Ears: Attach small fabric ears (like cat, bear, or bunny ears) to the top of the ear muff band or directly onto the ear muff covers for a playful, whimsical look. These can be sewn from felt or matching fabric and stuffed lightly for dimension.
- Beads, Sequins, and Rhinestones: For a touch of sparkle, carefully glue or sew beads, sequins, or small rhinestones onto the fabric. This works especially well for festive or glamorous ear muff designs.
- Pompoms and Tassels: Attach small pompoms or tassels to the sides of the ear muffs where they connect to the band for a fun, bouncy accent.
- Repurposed Materials: Get creative with your fabric source! Old sweaters, scarves, denim scraps, or even patterned t-shirts can be given a new life as ear muff covers. This not only makes your ear muffs unique but also embraces sustainable crafting.
- Mix-and-Match: Don’t be afraid to use different fabrics or embellishments for each ear muff for an asymmetrical, avant-garde look.
The key is to let your imagination run wild! Anything goes when it comes to personalizing your custom ear muffs. They are a canvas for your creativity, ensuring you’ll have a one-of-a-kind accessory that truly stands out.
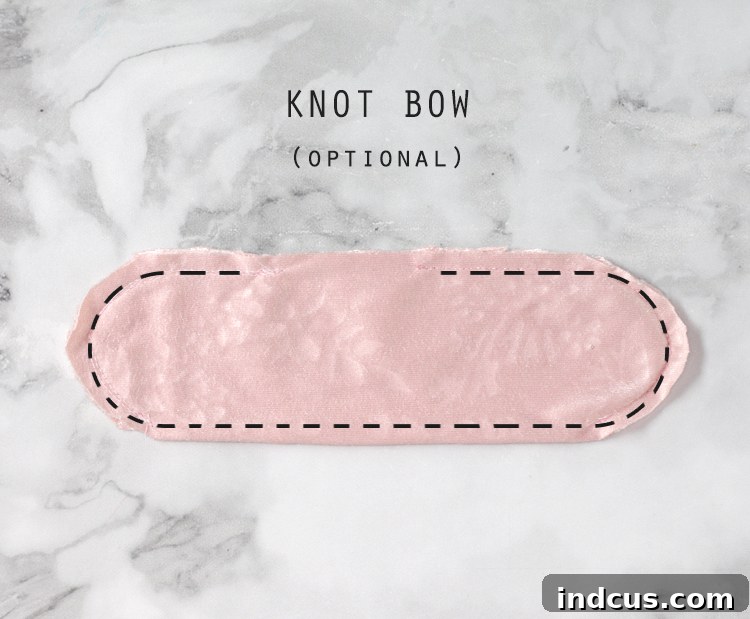
Once your bow is sewn, carefully flip it right side out through the opening you left. Gently push out the rounded ends for a neat finish, and then hand-stitch the opening closed. Now, tie this adorable bow onto the ear muff band in a decorative knot, adding that extra touch of charm.
Tips for Success and Caring for Your Handmade Ear Muffs
To ensure your DIY ear muffs are not only beautiful but also durable and long-lasting, consider these tips:
- Test Your Glue: Before applying hot glue to the ear muff components, do a small test on a scrap piece of similar plastic and foam to get a feel for how quickly it sets and how much is needed for a strong bond without excess.
- Even Elastic Tension: When sewing the elastic to your fabric covers, try to maintain consistent tension. This will result in an evenly gathered fabric and a smooth finish once stretched over the frame.
- Fabric Choice Matters: While almost any fabric can be used, consider its weight and stretch. Thicker fabrics might be harder to gather, while very thin ones might show the underlying foam.
- Patience with Stretching: When stretching the fabric cover over the ear muff frame, take your time. Gentle pulling and adjusting will prevent wrinkles and ensure a snug fit around the edges.
- Spot Clean Gently: For most custom ear muffs, especially those with glued components or delicate embellishments, spot cleaning is recommended. Use a damp cloth with mild soap to gently clean any soiled areas. Avoid submerging them in water.
- Air Dry Completely: If any part of your ear muffs gets wet, allow them to air dry completely before storing to prevent mildew or damage to the foam.
- Store Carefully: To maintain their shape and prevent crushing, store your ear muffs in a way that doesn’t put pressure on the ear cups. A hatbox or a designated shelf space is ideal.
Making your own custom DIY ear muffs is a fulfilling project that blends practicality with personal expression. With a simple kit and a dash of creativity, you can easily craft a pair of ear warmers that not only keep you toasty but also perfectly complement your unique style. So, pick your favorite fabric, get your glue gun ready, and prepare to step out in comfort and bespoke fashion this winter!
Loved this project? Pin it to your favorite DIY or crafting board so you can easily find it again later and inspire others!