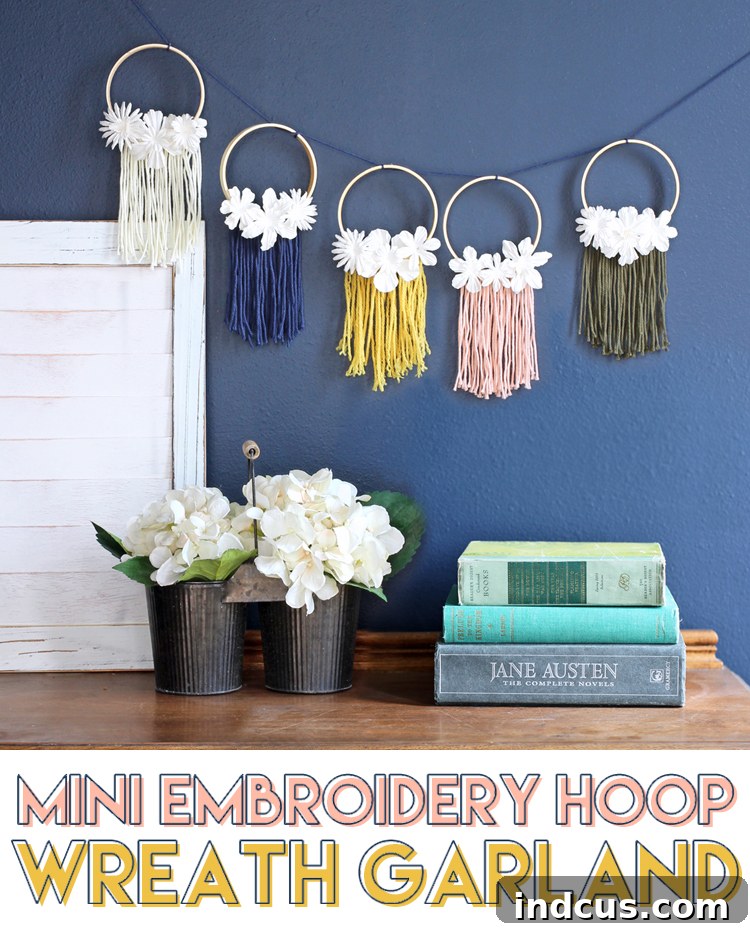
DIY Boho Mini Embroidery Hoop Garland: Easy Macrame Yarn & Paper Flower Craft Tutorial
Unleash your creativity and infuse your living space with a warm, handmade bohemian vibe. This detailed tutorial will guide you through crafting a beautiful and trendy garland using readily available mini wooden embroidery hoops, soft cotton yarn, and charming paper flowers. It’s an unexpectedly simple project that delivers significant visual impact, perfect for adding a personalized, cozy aesthetic to any room. Whether you’re a seasoned crafter or just starting your DIY journey, this project is designed for everyone to enjoy. Get ready to dive into the world of creative home decor and make something truly unique!
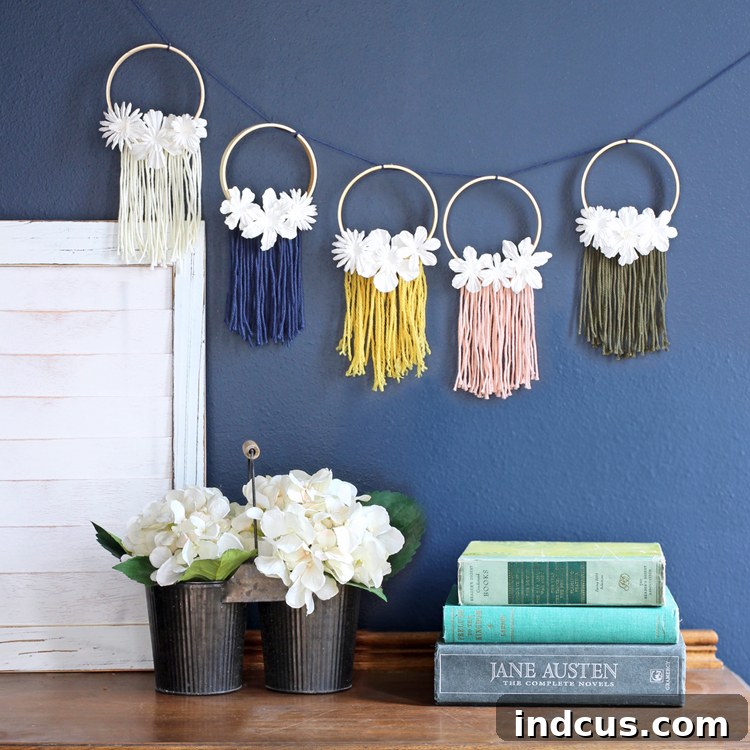
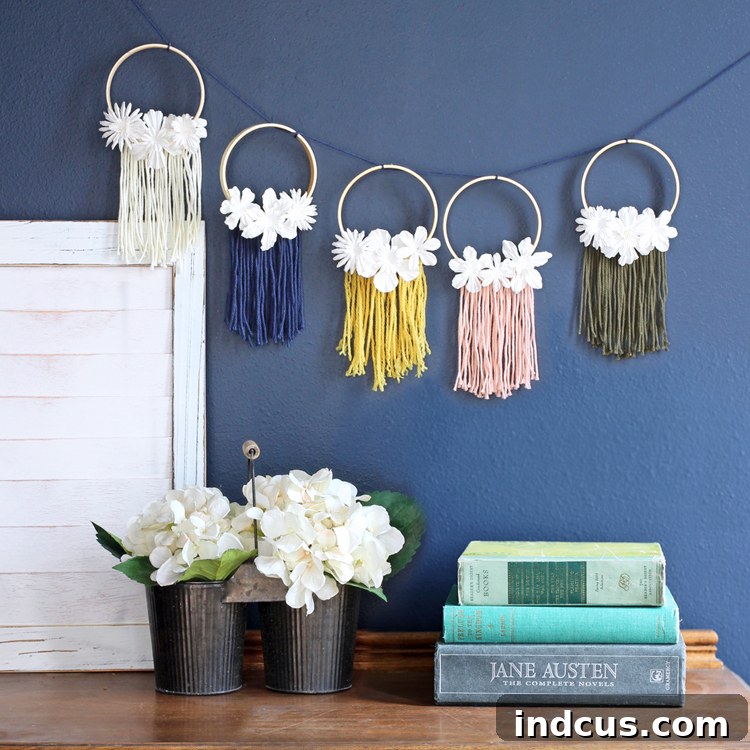
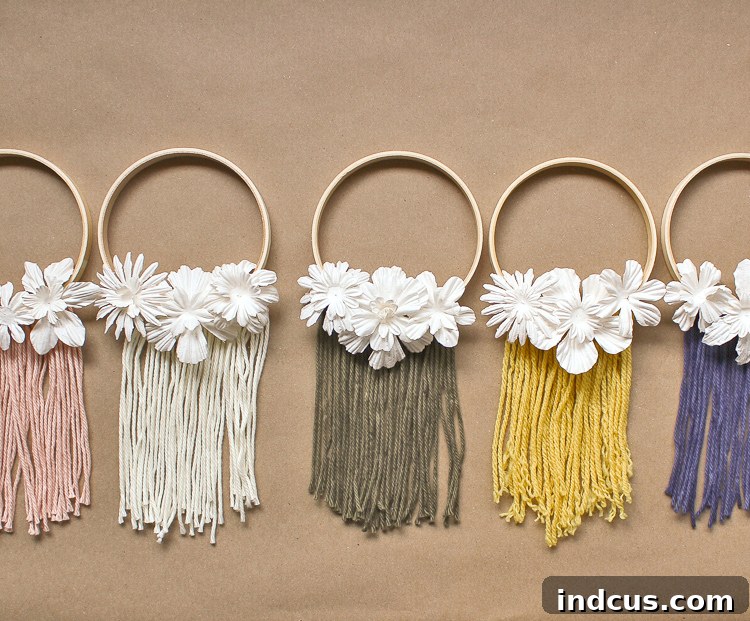
Today’s craft seamlessly blends some of the most popular home decor ideas: the rustic charm of wooden hoops, the textural appeal of yarn, and the delicate beauty of paper flowers. We’ll show you exactly how to construct an adorable garland from small embroidery hoop wreaths, adorned with vibrant, funky boho-style “macramé” yarn and delightful paper flowers. We use the term “macramé” in a relaxed sense here, as the technique primarily involves simple string attachments rather than intricate knot work, making it wonderfully accessible for beginners. This project is a fantastic way to introduce a relaxed, artistic, and modern bohemian touch into your home decor without requiring advanced crafting skills or extensive experience.
Are you eager to tap into your inner artist and create a unique piece that reflects your personal style? Let’s gather our supplies and embark on this exciting journey to craft your very own boho mini embroidery hoop garland!
Essential Materials for Your DIY Boho Hoop Garland Project
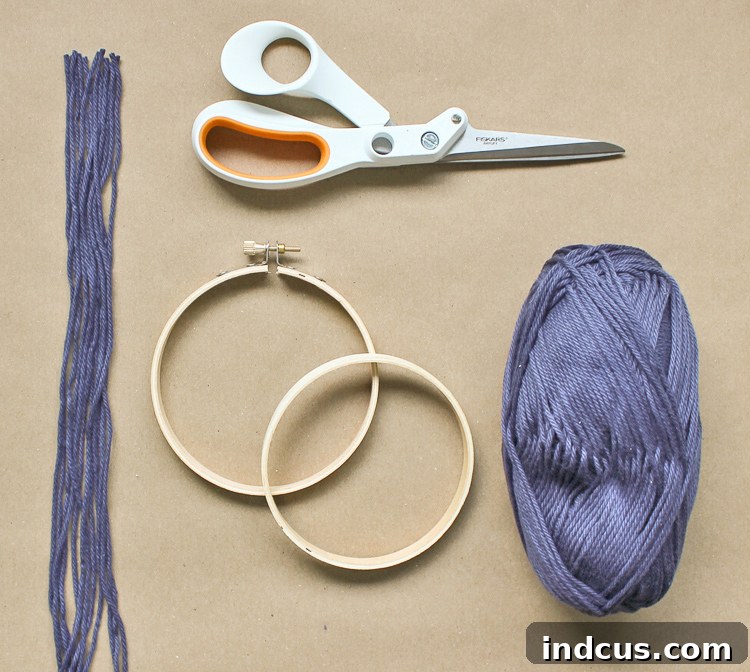
Before we begin crafting, it’s vital to gather all the necessary materials. Each item plays a crucial role in achieving the desired bohemian aesthetic and ensuring your garland is both beautiful and durable. Here’s a detailed list of what you’ll need, along with helpful tips for selecting the best options for your project:
- 4-inch Wooden Embroidery Hoops: These hoops will form the individual mini wreaths that make up your garland. Wooden hoops are ideal for their natural, rustic charm, which perfectly complements the bohemian theme. While 4-inch hoops create a balanced and compact garland, you can experiment with slightly larger or smaller sizes to introduce varying dimensions and visual interest. Ensure the hoops are smooth and free of any splinters to prevent snagging your yarn or fingers.
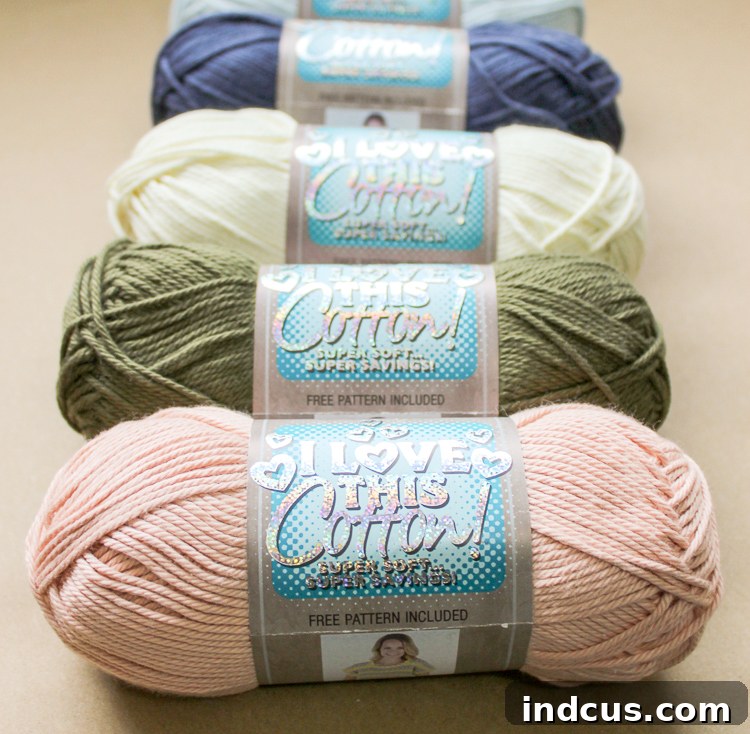
- Cotton Yarn (e.g., “I Love This Cotton” or similar brands): Cotton yarn is highly recommended for this project due to its soft texture, excellent durability, and its ability to hold knots and shapes beautifully. Its natural fibers enhance the organic, tactile feel of the garland. Choose colors that resonate with your personal style or match your existing home decor. Earthy tones, delicate pastels, or even a mix of vibrant hues can create distinct moods and aesthetics. Don’t hesitate to explore textured yarns for an added layer of visual depth and character.
- White Paper Flowers (pre-made or self-crafted): Paper flowers add a delicate, whimsical, and elegant touch to your mini wreaths. While pre-made flowers offer incredible convenience and a consistent look, crafting your own allows for complete customization in terms of size, shape, and color. White or off-white flowers provide a classic, ethereal aesthetic, but feel free to choose colors that complement your yarn or add a contrasting pop. Many online resources offer excellent tutorials for making rolled paper flowers, if you prefer a more hands-on, DIY approach.
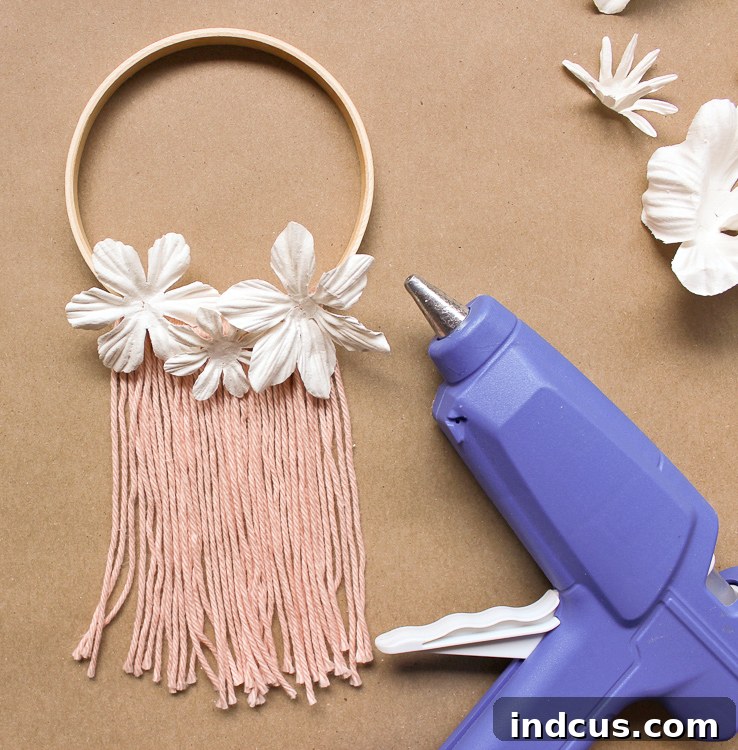
- Hot Glue Gun + Gluesticks: An indispensable tool for quickly and securely attaching your paper flowers and any other embellishments. Make sure you have an ample supply of glue sticks, and always practice safety precautions when working with a hot glue gun. A low-temperature glue gun can be a great option for beginners to minimize the risk of burns.
- Sharp Scissors: Essential for precise and clean cuts of both your yarn strands and any paper elements. Good quality scissors make a significant difference in the final appearance of your craft.
- Twine, Jute Cord, or Thin Ribbon: This material will be used to string your finished mini hoops together to form the complete garland. Natural fibers like twine or jute cord are highly recommended as they beautifully enhance the rustic, bohemian aesthetic of the project. Choose a material that is sturdy enough to hold the weight of the hoops and that complements your chosen yarn colors.
Step-by-Step Guide to Crafting Your Boho Hoop Garland
Step 1: Preparing Your Wooden Embroidery Hoops
The initial and crucial step in creating your charming garland is to prepare the wooden embroidery hoops. Each standard embroidery hoop is composed of two distinct rings: an inner, plain wooden ring and an outer ring that features a metal fastener used for tightening fabric. For the purpose of this unique garland project, we will only be utilizing the inner, plain wooden ring. Carefully loosen the metal fastener on the outer hoop and gently separate the two rings. You can set the outer ring aside; it’s a versatile piece that can be creatively repurposed for other small crafting projects, such as mini dreamcatchers, or saved for traditional embroidery work. The inner ring provides a clean, smooth, and minimalist base for attaching your “macramé” yarn and delicate floral decorations, ensuring that each segment of your garland has a professional and aesthetically pleasing foundation.
Step 2: Attaching the Boho Yarn “Macramé” Fringe
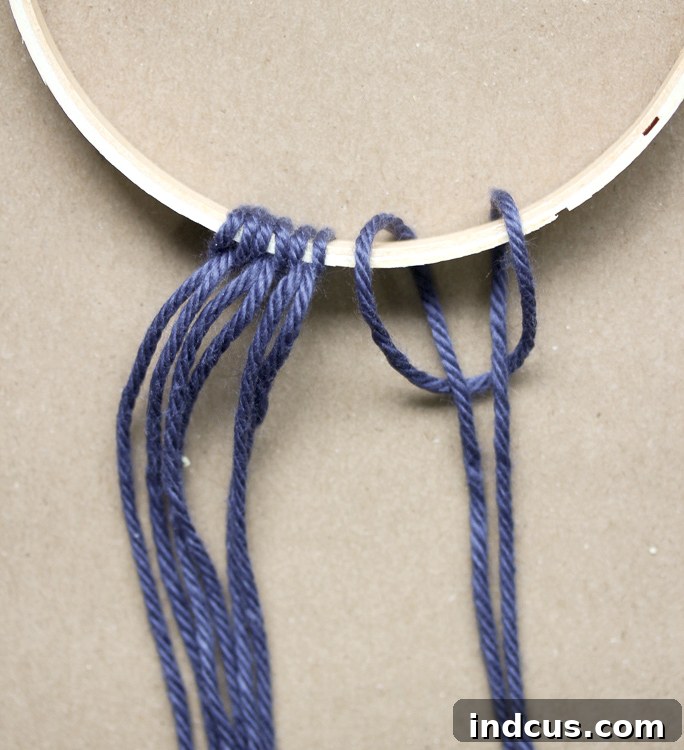
Now, let’s add the soft, flowing yarn elements that will give your garland its signature bohemian character. Begin by cutting approximately twenty individual pieces of your chosen yarn. Each piece should measure between 8 to 10 inches in length. Maintaining consistency in length will result in a uniform and polished fringe, though you can also intentionally vary the lengths slightly to create a more organic, textured, and free-spirited appearance. Once all your yarn pieces are cut, take each individual strand and fold it precisely in half, creating a loop at one end.
Next, you will attach these folded yarn pieces to the bottom half of your plain wooden hoop using a simple yet incredibly secure knot known as the lark’s head knot. This knot is highly favored for attaching cords or strands to a base and is remarkably easy for crafters of all skill levels to master. Here’s how to form a lark’s head knot:
- Fold a single yarn strand in half, ensuring the two raw ends meet and creating a loop at the top.
- Position this loop over the top of the wooden hoop.
- Bring the two loose ends of the yarn up and thread them through the loop you created.
- Pull the loose ends firmly to tighten the knot securely around the wooden hoop. Make sure it’s snug but not distorting the hoop.
Repeat this process until you have attached all twenty pieces of yarn, ensuring they are evenly spaced across the bottom section of the hoop. The objective is to create a soft, fringe-like waterfall effect that beautifully mimics traditional macramé without requiring any complex knotting techniques. Feel free to experiment with a mix of different yarn colors on a single hoop for a vibrant, multi-toned effect, or stick to one color for a more cohesive and understated look. This step truly defines the bohemian character of your garland, adding essential texture, movement, and visual interest.
Step 3: Embellishing with Delicate Paper Flowers
With your yarn fringe elegantly in place, it’s now time to add the charming floral embellishments that will complete the intricate aesthetic of your mini wreaths. You have two excellent options for acquiring your flowers, allowing you to choose based on convenience and your desire for customization:
- Pre-made Paper Flowers: Opting for a package of pre-made paper flowers offers unparalleled convenience and ensures a consistent look across all your hoops. They are available in a wide array of sizes, colors, and styles, allowing you to quickly select those that perfectly fit your design vision. This is an ideal choice if you’re short on time or prefer a less involved crafting process.
- DIY Rolled Paper Flowers: For those who relish a more hands-on approach and desire complete customization, crafting your own rolled paper flowers is an incredibly rewarding alternative. You can use a cutting machine like Silhouette or Cricut for precise and efficient cuts, or simply cut spiral shapes by hand from cardstock or specialty paper. An excellent resource for this is a dedicated rolled paper flower tutorial, which will guide you through the process of creating beautiful, three-dimensional blooms. This method allows you to select exact paper types, specific colors, and create unique flower designs perfectly tailored to your garland.
Once you have your chosen flowers, carefully arrange them onto the wooden hoop, typically positioned above where the yarn is attached. For maximum visual interest, depth, and a professional, lush finish, it is highly recommended to layer several flowers of varying sizes on top of each other. This creates a rich, organic, and more natural appearance. Use your hot glue gun to securely attach each flower to the wooden hoop. Apply a small, controlled dab of hot glue to the back of the flower and press it firmly onto the hoop, holding it in place for a few seconds until the glue sets. Be cautious not to use too much glue, as excess can be visible and detract from the delicate beauty of the flowers. Consider adding small paper leaves, tiny fabric scraps, or other subtle botanical elements to further enhance the natural and intricate appeal of each mini wreath.
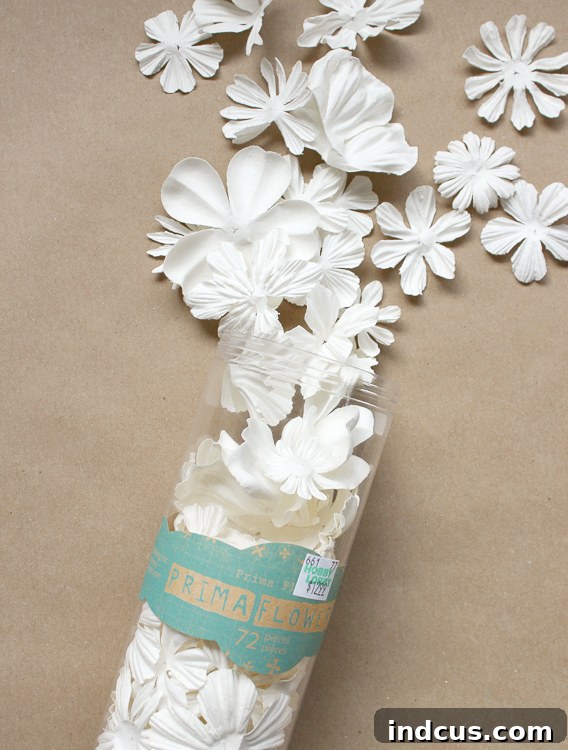
Continue adding flowers until you are completely satisfied with the arrangement on each hoop. Each mini hoop should now feel like a complete, tiny work of art, bursting with bohemian charm and ready for assembly.
Step 4: Assembling Your Bohemian Garland
The final exciting step involves bringing all your beautifully crafted mini hoops together to form a cohesive, enchanting, and unified garland. This process is quite straightforward and offers opportunities for further customization based on your desired look and overall length.
Begin by selecting a strong yet aesthetically pleasing material for stringing your hoops. Natural twine, sturdy jute cord, or a thin, coordinating ribbon are all excellent choices that perfectly complement the bohemian theme. Start by cutting a generous length of your chosen string material; it should be significantly longer than your anticipated final garland length, allowing for secure knots, hanging loops at the ends, and flexibility during assembly.
Now, securely tie one end of your string to the very top of your first decorated mini hoop. To ensure that each hoop remains evenly spaced and consistently faces the same direction along the garland, it is essential to tie a knot above each hoop. Decide on your preferred spacing between each hoop – typically an interval of 3 to 6 inches works well for a balanced and visually appealing look. Once you’ve determined your spacing, tie a secure knot in the string at that interval, effectively creating a fixed point, before threading and attaching the next hoop. This method creates a stable, fixed position for each element, preventing them from sliding, clustering together, or rotating undesirably.
Continue this rhythmic process: thread a decorated hoop onto the string, tie a knot immediately above it, measure your desired spacing, tie another knot, and then thread the next hoop. Repeat this sequence until all your beautifully adorned mini hoops are securely incorporated into the garland. Once all hoops are attached and spaced to your satisfaction, tie a final knot at the very end of the garland string, ensuring you leave sufficient extra length for convenient hanging. For enhanced durability and peace of mind, you can dab a tiny amount of hot glue on each knot to prevent it from loosening over time.
Once assembled, step back and admire your magnificent creation! You now possess a unique, handmade boho garland, brimming with character and ready to beautifully adorn your home. The adjustable length and fully customizable elements make this project incredibly versatile for various spaces and occasions, allowing your personal style to shine through.
Tips for Customization and Displaying Your Boho Garland
One of the greatest joys of engaging in DIY crafting is the unparalleled ability to personalize your creations. This mini embroidery hoop garland project is incredibly versatile and can be effortlessly adapted to suit a myriad of styles, seasonal themes, and decorative purposes. Here are some inspiring ideas to spark your imagination and guide your next crafting adventure:
Personalize Your Design to Reflect Your Style
- Explore Diverse Color Schemes: Experiment boldly with different yarn and paper flower colors to precisely match specific holidays (e.g., warm reds and deep greens for a festive Christmas, soft pastels for an inviting Easter display), complement existing room aesthetics (e.g., serene muted tones for a minimalist look, vibrant, playful colors for a cheerful nursery), or align with seasonal themes (e.g., earthy oranges, deep browns, and rich reds for a cozy autumn feel).
- Introduce Varying Textures: Elevate your garland by incorporating other textural elements. Consider threading small wooden beads onto the yarn strands, adding delicate faux leaves alongside your paper flowers, or even integrating tiny dried flowers for an authentic, organic botanical touch. Experimenting with different yarn textures, such as chunky wool, delicate lace, or metallic threads, can also add unique visual interest and tactile appeal.
- Mix Hoop Sizes: While using only 4-inch hoops creates a uniform and cohesive look, consider incorporating a thoughtful mix of 3-inch, 4-inch, and 5-inch hoops for a more dynamic, eclectic, and visually engaging garland. This thoughtful variation in size can add a sophisticated, designer-like quality to your handcrafted piece.
- Creative Embellishments: Beyond just flowers and yarn, let your imagination run wild with additional embellishments. You could add small charms, intricately painted wooden shapes, whimsical tiny pom-poms, or even small tassels for extra flair. Think about elements that truly resonate with your personal style and the overall theme you wish to convey.
- Adjust Garland Length: Customize the number of hoops you use to create a garland that perfectly fits your intended display area. A shorter garland might be ideal for adorning a small shelf or a window frame, while a longer one can elegantly drape across a fireplace mantel, a large wall, or even an entryway.
Inspiring Places to Display Your Handmade Garland
This wonderfully versatile boho garland can significantly enhance almost any space in your home, adding character and warmth:
- Living Room: Drape it artfully across a fireplace mantel, above a comfortable sofa, or along a favorite bookshelf to instantly introduce warmth, texture, and a distinctive handmade touch.
- Bedroom: Hang it gracefully above your bed as a serene focal point, along a curtain rod, or on an empty wall to cultivate a tranquil and artistic ambiance, promoting relaxation.
- Nursery or Kids’ Room: The soft textures, delicate flowers, and customizable colors make it a charming and whimsical addition to a child’s space, adding a comforting and visually stimulating element.
- Entryway: Create a welcoming and inviting atmosphere for guests by displaying your cozy handmade decoration near your front door or in your foyer.
- Party Decor: Utilize it as a unique and memorable backdrop for special celebrations such as baby showers, bridal showers, or any bohemian-themed party, creating a festive focal point.
- Craft Studio or Home Office: Infuse your workspace with inspiring, creative energy and a touch of your own artistic flair, making the environment more enjoyable and productive.
Care and Maintenance for Longevity
To ensure your beautiful, handcrafted garland remains pristine and vibrant for years to come, gently dust it regularly with a soft, dry cloth or a delicate feather duster. It’s advisable to avoid exposing it to direct sunlight for extended periods, as this can cause the paper flowers and yarn colors to fade over time. If you need to store it, place it carefully in a dry, cool area, ideally in a protective box, to help maintain its shape and structural integrity.
Why Embark on This Delightful DIY Project?
Beyond the undeniable charm and aesthetic appeal of the finished product, embarking on this DIY mini embroidery hoop garland project offers a multitude of enriching benefits:
- Remarkable Simplicity: This project is incredibly beginner-friendly, requiring no complex techniques, specialized tools, or prior crafting experience. The steps are straightforward and easy to follow.
- Cost-Effectiveness: Most of the required materials are budget-friendly and readily available at local craft stores or online, making this an accessible project for everyone.
- Profound Personalization: Every garland you create will be uniquely yours, a true reflection of your individual taste, style, and creative vision. No two will ever be exactly alike.
- Mindful Activity: The process of crafting can be a wonderfully relaxing, therapeutic, and meditative activity, offering a calming creative outlet and a deeply satisfying sense of accomplishment upon completion.
- Unique Home Decor: Stand out from the crowd of mass-produced decor items with a truly distinctive, handmade piece that adds character, tells a story, and sparks conversation.
We sincerely hope you thoroughly enjoyed this detailed tutorial and feel genuinely inspired to create your very own exquisite mini embroidery hoop garland. It’s a truly rewarding project that beautifully combines simplicity with stunning results, perfectly suited for enhancing any space with a unique, handmade, and distinctively bohemian touch. Don’t forget to pin this project to your favorite craft boards so you can easily revisit it later or share it with fellow DIY enthusiasts and friends!