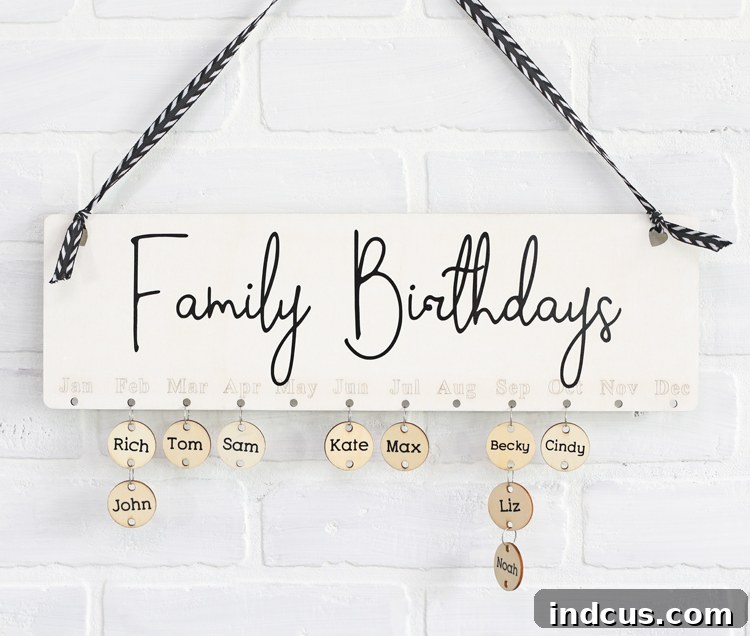
Create a Beautiful & Easy DIY Family Birthday Board: Never Forget a Birthday Again!
Craft a Personalized Perpetual Calendar – The Perfect Gift for Grandparents and a Charming Home Decor Piece
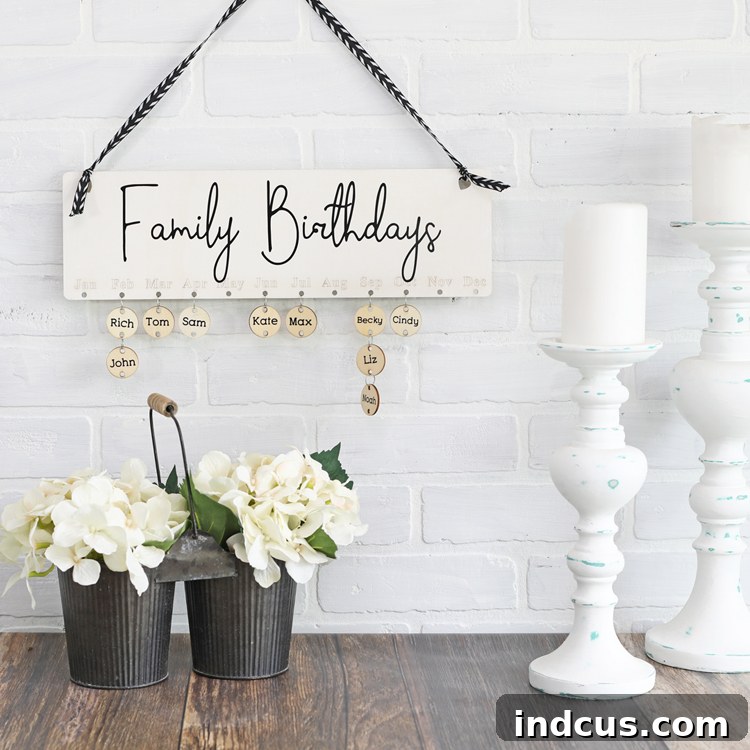
In our busy lives, remembering every single family birthday can feel like a Herculean task. Between school events, work deadlines, and daily errands, it’s easy for a special date to slip through the cracks. But what if there was a beautiful, tangible way to keep all those important family milestones in one central, charming location? Introducing the DIY Family Birthday Board – a gorgeous and incredibly easy craft project that not only serves as a practical reminder but also becomes a cherished piece of family decor.
I remember my grandma’s version hanging proudly in her home – a rustic wooden board, hand-painted with delicate country blue and mauve hearts, meticulously displaying the birthdays of every grandchild, child, and great-grandchild. As a kid, I was captivated by it, tracing my fingers over each name and date, feeling a deep connection to our extended family tree. While her board holds immense nostalgic value, I envisioned a modern take on this timeless concept, updating it with a fresh, contemporary aesthetic that still radiates warmth and sentiment. This isn’t your grandma’s birthday calendar; it’s a stylish, perpetual birthday tracker designed for today’s homes.
This personalized family birthday calendar isn’t just a practical tool; it’s also an incredibly thoughtful and heartfelt gift. If you’re someone who loves to craft meaningful handmade gifts for the holidays, special occasions, or just because, then this project is perfect for you. Imagine the joy on a grandparent’s face as they unwrap a custom-made board featuring all their beloved family members. It’s a gift that keeps on giving, year after year, celebrating new additions and cherished memories alike.
One of the best aspects of this DIY project is its accessibility. You don’t need to be an expert crafter or have a garage full of specialized tools. In fact, you can find an affordable and comprehensive kit on Amazon that includes nearly everything you need to get started. This convenience removes much of the guesswork and allows you to focus on the creative, personalized touches that will make your board truly unique.
Why a DIY Family Birthday Board is a Must-Have
Beyond its charm, a DIY family birthday board offers numerous benefits:
- Effortless Organization: Say goodbye to scattered sticky notes, digital calendar alerts that get lost, or frantically searching through old planners. All family birthdays are displayed prominently and perpetually.
- A Heartwarming Keepsake: This board becomes a visual representation of your family tree, celebrating each individual and their unique place within the family unit. It’s a wonderful heirloom to pass down through generations.
- Personalized Home Decor: Unlike generic wall art, this piece is deeply personal and can be customized to perfectly match your home’s aesthetic, whether it’s modern farmhouse, rustic chic, minimalist, or eclectic.
- The Perfect Gift: It’s an ideal present for grandparents, parents, aunts, uncles, or even a newlywed couple starting their own family. It shows thoughtfulness and a personal touch that store-bought gifts often lack.
- Engaging Craft Project: This project is simple enough for beginners but offers plenty of room for creative expression. It’s also a fantastic group activity for a “girls’ night in,” a craft club, or a Super Saturday event.
Supplies You’ll Need to Create Your Own Family Birthday Board
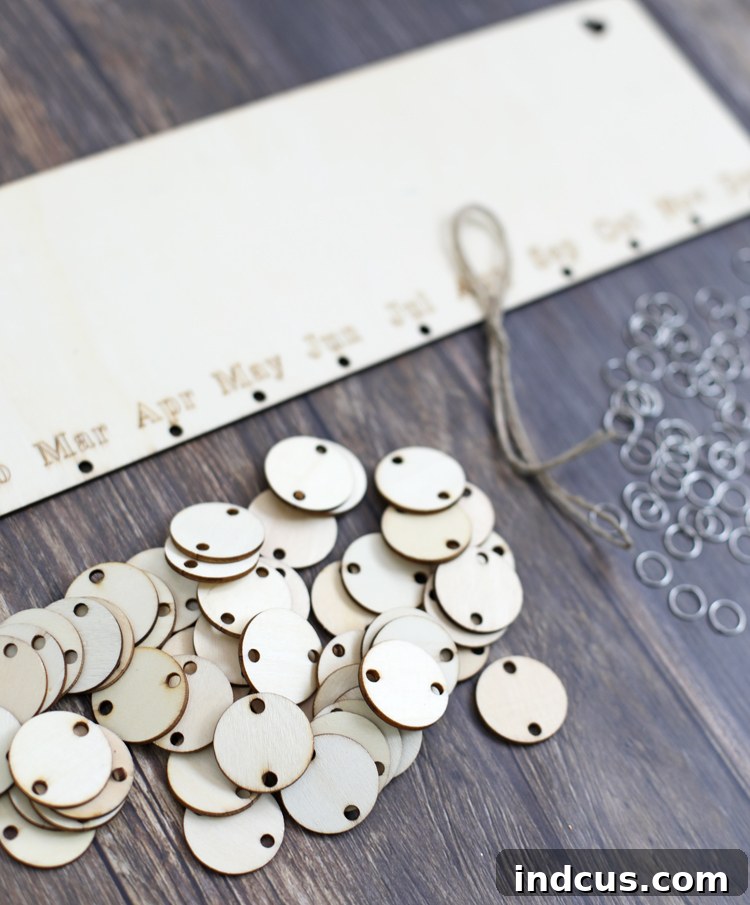
The beauty of this project lies in its simplicity. With just a few key items, you’ll be well on your way to crafting a beautiful, functional family birthday calendar. Please note that the following links are affiliate links, which means I may earn a small commission if you make a purchase, at no extra cost to you.
- Wooden Birthday Board Calendar Kit: This kit typically includes the main wooden board, blank wooden circles (or other shapes like hearts/stars) for names and dates, and the metal jump rings needed to connect them. It’s the foundational element that makes this craft so easy.
- Craft Paint: Choose colors that complement your home decor or the recipient’s style. Acrylic craft paints work wonderfully and come in an endless array of hues.
- Ribbon or Twine: While the kit often includes twine for hanging, a beautiful ribbon can add a personal touch and enhance the aesthetic. This is entirely optional but highly recommended for customization.
- Tools for Lettering (Choose One):
- Adhesive Vinyl & Cutting Machine: A Silhouette or Cricut machine offers crisp, professional-looking lettering.
- Paint Pens: For those without a cutting machine, fine-tip paint pens (oil-based or acrylic) are an excellent alternative for hand-lettering.
- Stencils: Pre-made stencils can also help achieve a neat look without special machines.
- Paintbrushes: Various sizes for applying paint to the board and, if desired, to the wooden circles.
- Small Cloth or Paper Towel: For the whitewashing technique or general cleanup.
Step-by-Step Guide: Crafting Your Modern Family Birthday Board
This simple craft doesn’t require complex instructions, but attention to detail will ensure a professional and beautiful result. If you prefer a visual guide, a video tutorial is available at the bottom of this post.
Step 1: Prepare and Paint the Main Board
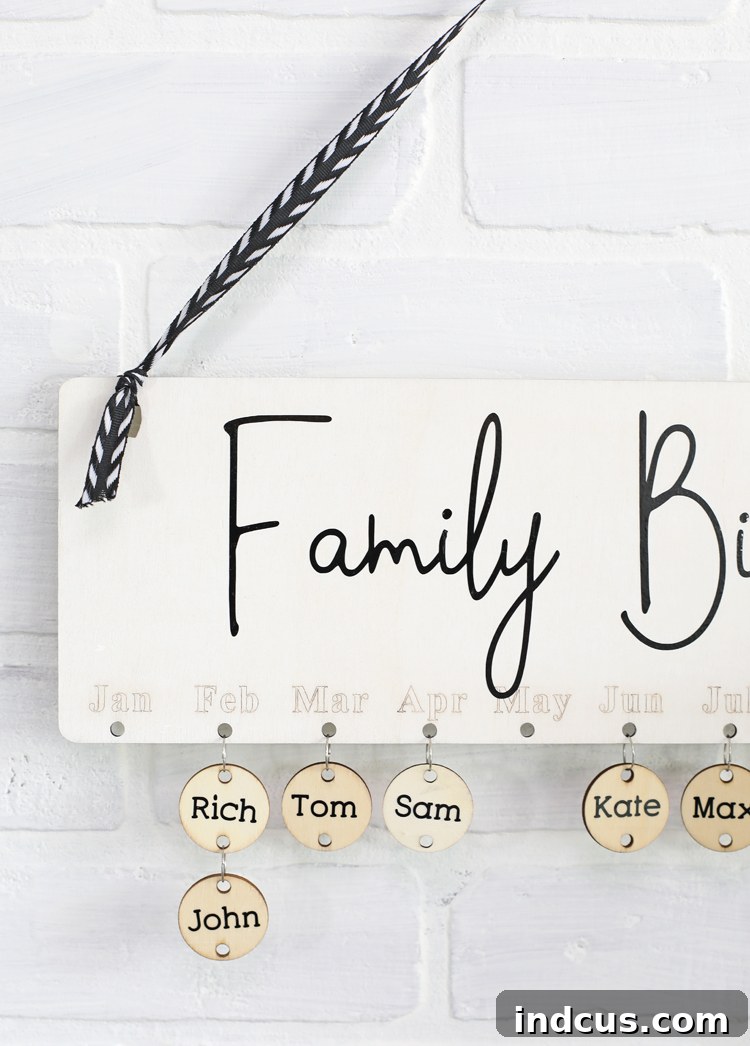
Begin by giving your main wooden board its foundational look. For a charming modern farmhouse vibe, I opted for a light whitewash finish. To achieve this, mix equal parts matte white craft paint and water. Stir thoroughly until well combined. Using a paintbrush, lightly brush this diluted paint mixture over the entire surface of the wooden board. The goal is a subtle, translucent layer that allows the natural wood grain to show through, creating a soft, aged appearance. Allow it to dry completely. If you prefer a different look, you could apply a solid color, stain the wood for a richer tone, or even create a distressed finish by sanding after painting. I chose to leave the individual wooden circles in their natural wood state, but you could paint these as well to match your board or in coordinating colors.
Step 2: Add the “Family Birthdays” Title
The title of your board makes it clear what its purpose is. For a clean, professional look, I recommend using a cutting machine like a Silhouette or Cricut. Measure your board (the example board is approximately 15.5″ x 4.75″) to determine the ideal size for your lettering. Design the words “Family Birthdays” (or “Our Family,” “Family Celebrations,” etc.) in your chosen font. I used “Simple Game” for its clean lines. Cut the design from black adhesive vinyl. Carefully apply the vinyl to the top center of your painted and dried board using transfer tape. If you don’t have a cutting machine, you can achieve a similar effect using stencils and paint, or by carefully hand-lettering with a paint pen.
Step 3: Personalize the Wooden Circles with Names and Dates
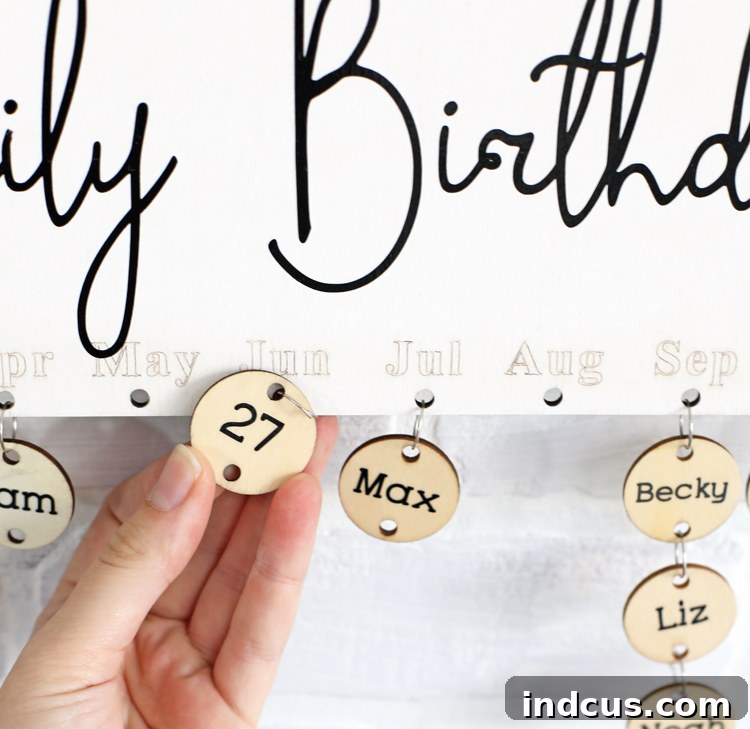
This is where the magic happens – bringing your family’s special dates to life. Take each small wooden circle. On one side, carefully write the name of a family member. On the reverse side, write their corresponding birth date (e.g., “Jan 15”).
- Using Adhesive Vinyl: If you’re using a cutting machine, cut each name and date from adhesive vinyl. This method, while time-consuming for many circles, yields exceptionally crisp and clean results that look very polished.
- Using Paint Pens: For hand-lettering, high-quality paint pens are your best friend. Choose a fine-tip pen for precision. Practice on a scrap piece of wood first. Allow each name and date to dry completely before flipping to the other side. You might consider adding a clear sealant (like a spray-on polycrylic) over the names and dates once dry to protect them, especially if the board will be handled frequently.
Step 4: Assemble and Link the Circles to Their Months
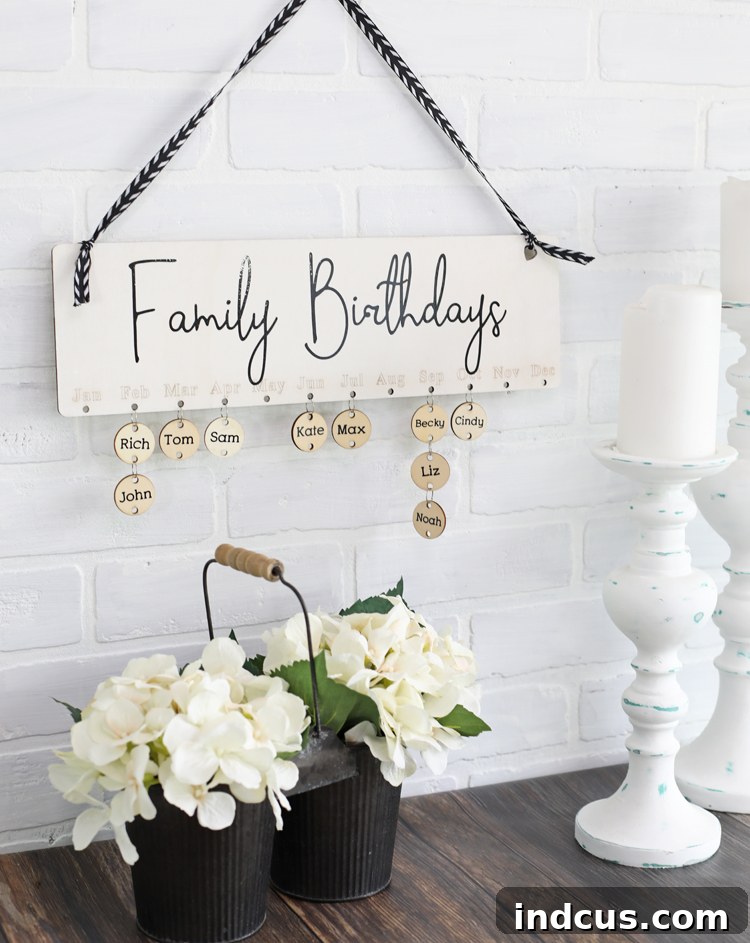
Now, it’s time to bring all the pieces together. The birthday board kits come with a series of small metal jump rings. For each month on the main board, attach the corresponding family birthday circles. Use the metal rings to link one circle to the next. If there’s more than one birthday in a given month, you’ll create a chain of linked circles hanging from that month’s hook or hole. Ensure the names are facing forward when the board is hanging. This creates a beautiful cascading effect that’s easy to read at a glance.
Step 5: Add a Hanging Element
The final touch is to add the hanging mechanism. Your kit will likely include twine for this purpose. Thread the twine through the pre-drilled heart-shaped holes located on each corner of the main board and tie securely. Alternatively, you can swap out the simple twine for a more decorative element. Consider using a beautiful satin ribbon that matches your decor, a rustic jute twine for a more natural look, or even a sturdy chain for an industrial aesthetic. This small detail can significantly enhance the overall look of your personalized birthday tracker.
Customization Ideas to Make Your Board Truly Unique
The joy of DIY is the freedom to customize! While the modern farmhouse vibe of this specific sign is charming and widely appealing, you can easily tailor it to any decor style or personal preference. Here are some ideas to spark your creativity:
- Paint Finishes: Instead of whitewash, try a solid color like navy blue, charcoal gray, or a soft pastel. Experiment with ombre effects, distressing techniques for a vintage feel, or even adding a touch of glitter or metallic paint for extra sparkle.
- Circle Embellishments: Add tiny self-adhesive rhinestones, small painted dots, or even miniature photos to each circle for an extra personal touch. You could also vary the shapes of the hanging pieces – some kits come with hearts, stars, or even little rectangles.
- Lettering Styles: Play with different fonts for the main title and the names. Mix and match styles – a formal script for names and a bold sans-serif for dates, for instance. Use different vinyl colors or paint pen colors to differentiate between immediate family, extended family, or even close friends.
- Seasonal Themes: For each month, consider adding a tiny painted or vinyl graphic that represents the season or a holiday, like a snowflake for December or a flower for April.
- Add Pet Birthdays: Don’t forget your furry family members! Create special paw print shaped circles for their birthdays.
- Board Shape & Size: While the kit comes in a standard size, you could adapt these steps to a larger or smaller custom-cut wood piece if you’re feeling more adventurous.
- Group Crafting: This project is fantastic for a social gathering! Host a “Birthday Board Bash” with friends or family. Everyone can make their own board, or you can collaborate on one large family board for a shared gift. It’s a wonderful way to connect and create together.
Maintaining and Expanding Your Birthday Board
One of the best features of a perpetual birthday calendar is its adaptability. As your family grows, so too can your board! Simply prepare new wooden circles for new arrivals (babies, spouses, adopted family members) and link them into the appropriate month. This continuous evolution makes the board a living, breathing testament to your family’s journey and celebrations. Store any extra blank wooden circles from your kit in a safe place so you’re always ready to add new names.
Conclusion: A Timeless Craft for Cherished Memories
The DIY family birthday board is more than just a craft; it’s an investment in family connection, organization, and personalized home decor. It’s a charming conversation starter, a beautiful reminder of loved ones, and a truly heartfelt gift that will be appreciated for years to come. Whether you’re making it for your own home or as a special present for grandparents, this project offers immense satisfaction and a tangible way to celebrate the most important people in your life. So gather your supplies, unleash your creativity, and embark on this delightful journey to create a cherished family heirloom!
Birthday Board Video Tutorial
For those who are visual learners or simply prefer to watch the process unfold, here’s a quick video tutorial that walks you through each step of creating your family birthday board. Watch, learn, and get inspired to make your own!