
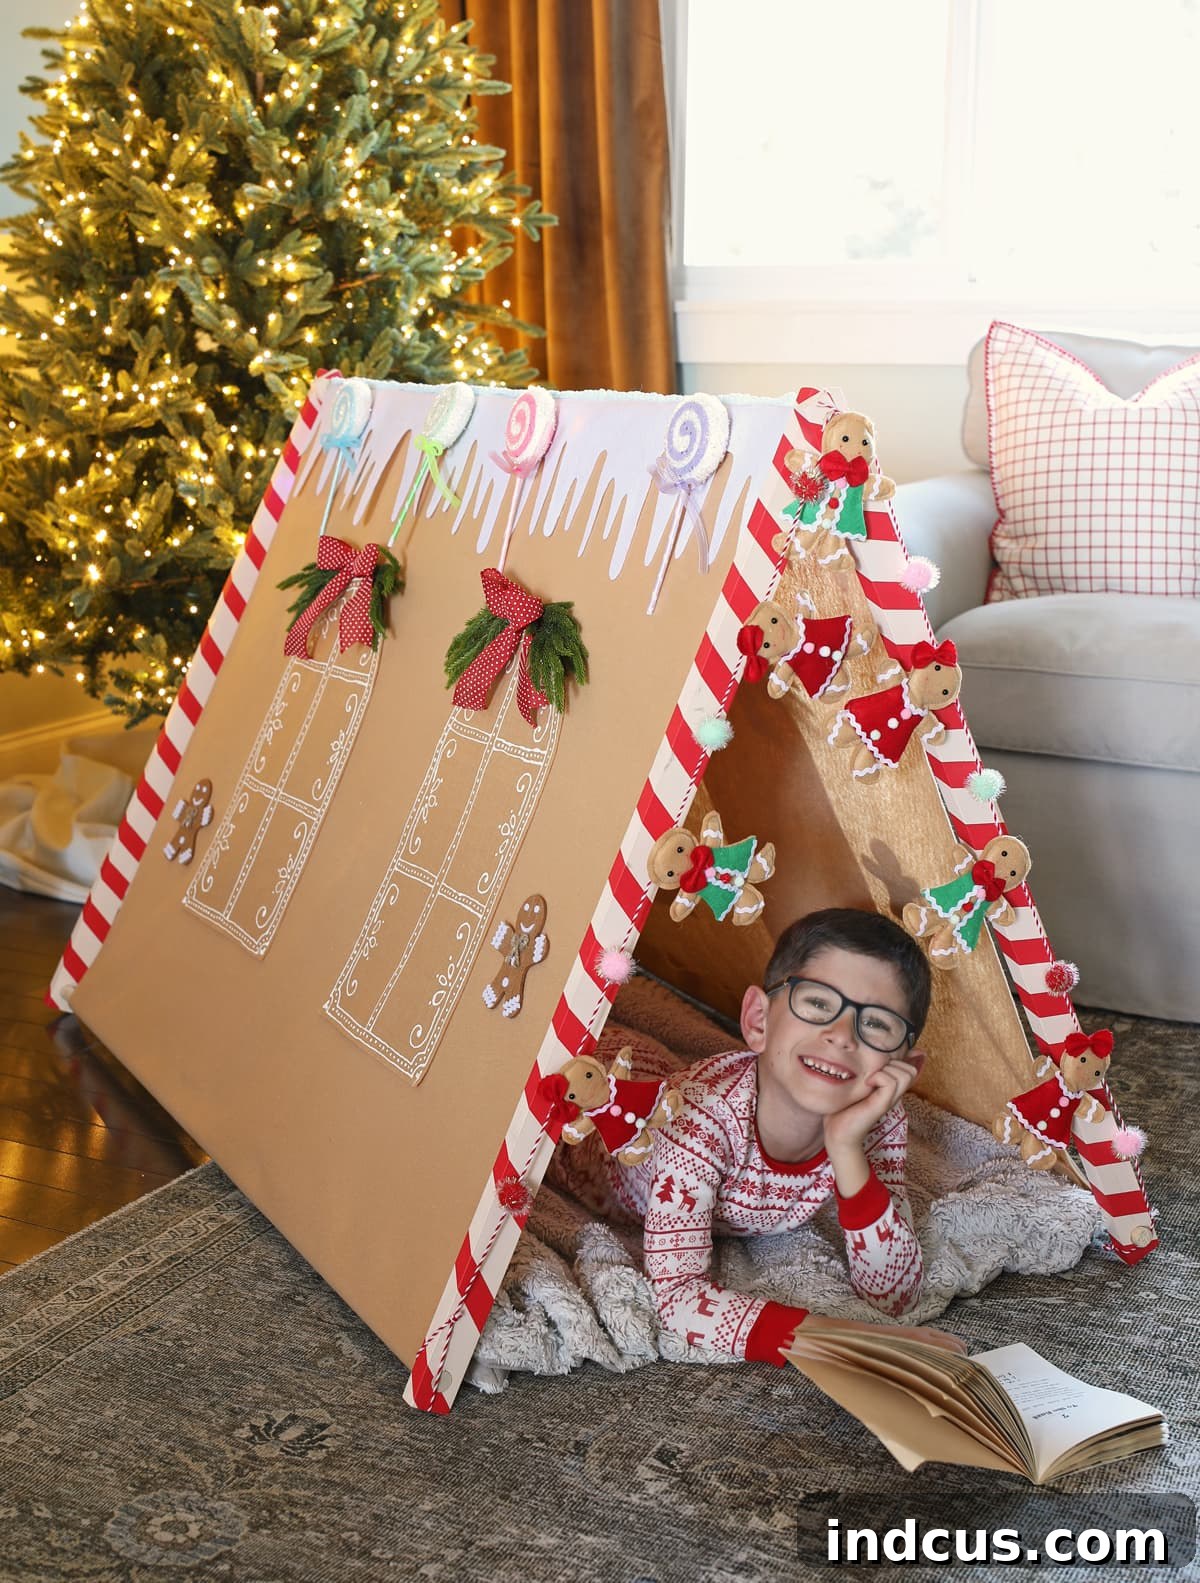
Craft a Magical No-Sew Gingerbread House Play Tent for Kids This Christmas!
Transform your child’s playtime into a festive wonderland with this charming DIY gingerbread house play tent. Learn how to create a delightful hideaway that sparks imagination, all without needing a sewing machine!
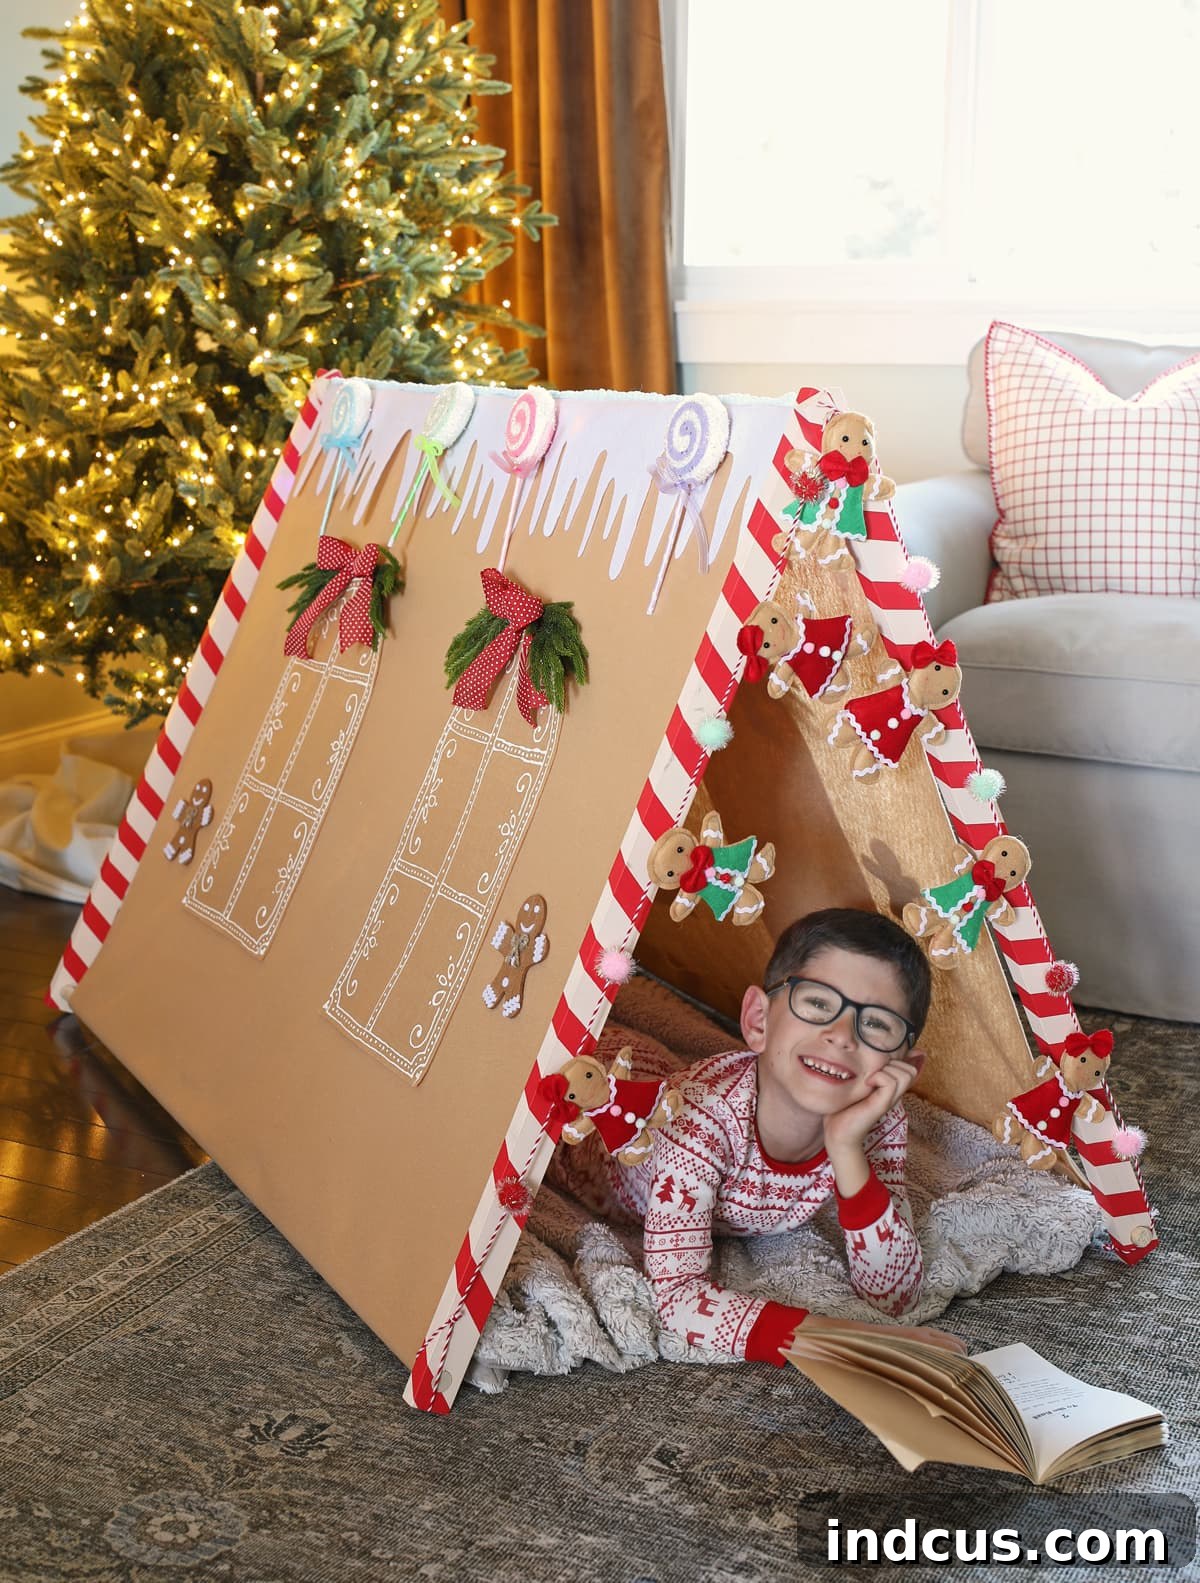
The holiday season is a magical time of year, filled with warmth, wonder, and the joy of creating cherished memories. What better way to capture that festive spirit than by crafting a special, personalized space for your little ones? Today, we’re diving into a delightful Christmas project that will bring immense joy to your kids or grandkids: a charming DIY no-sew gingerbread house play tent!
Imagine a cozy nook where children can escape into worlds of their own, whether reading a favorite story, playing with toys, or simply dreaming of sugarplums and jingle bells. This adorable play tent isn’t just a craft; it’s an invitation to imaginative play and a centerpiece for holiday cheer. And the best part? It’s surprisingly simple to make, requiring no sewing skills whatsoever, making it accessible for crafters of all levels.
This festive gingerbread house play tent is designed to be a perfect hideout, igniting creativity and providing a comfortable retreat during the bustling holiday season. Its sweet, candy-inspired decorations and sturdy, yet portable, frame make it an ideal addition to any home looking to add a touch of handmade magic this Christmas.
This post is sponsored by Hobby Lobby, helping us bring creative holiday ideas to life.
Gather Your Gingerbread House Play Tent Supplies
Before we embark on this exciting DIY journey, let’s ensure we have all the necessary materials. Sourcing your supplies is part of the fun, and with a clear list, you’ll be well-prepared to create your dream gingerbread play tent. We’ll be using a combination of readily available craft and hardware store items to build both the sturdy frame and the delightful felt covering.
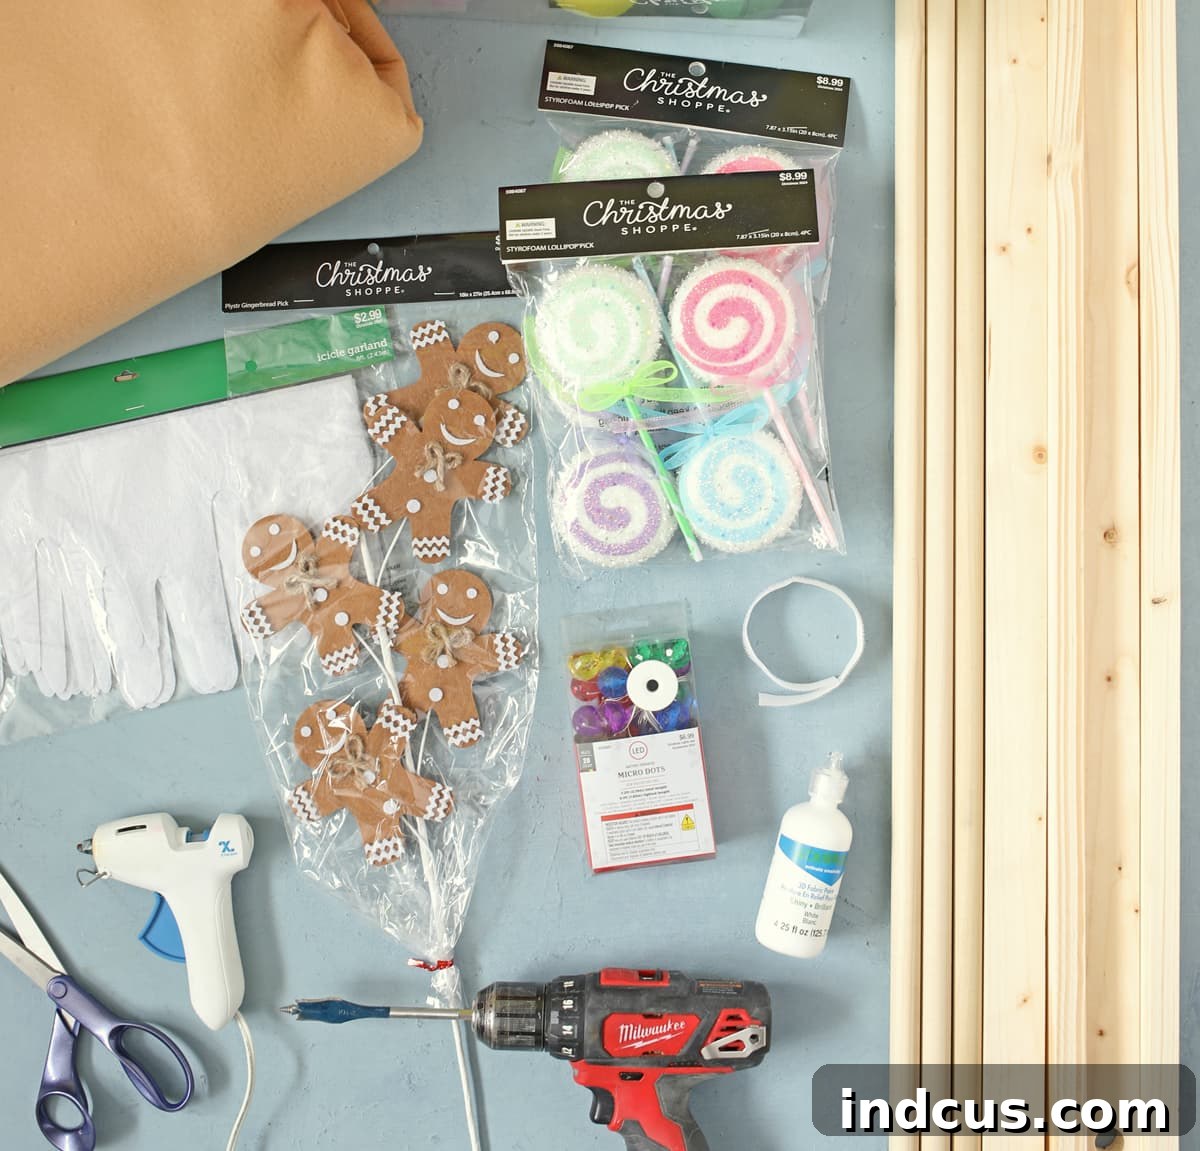
Essential Materials Needed
Click on any highlighted item in the supply list for more information and direct links to products.
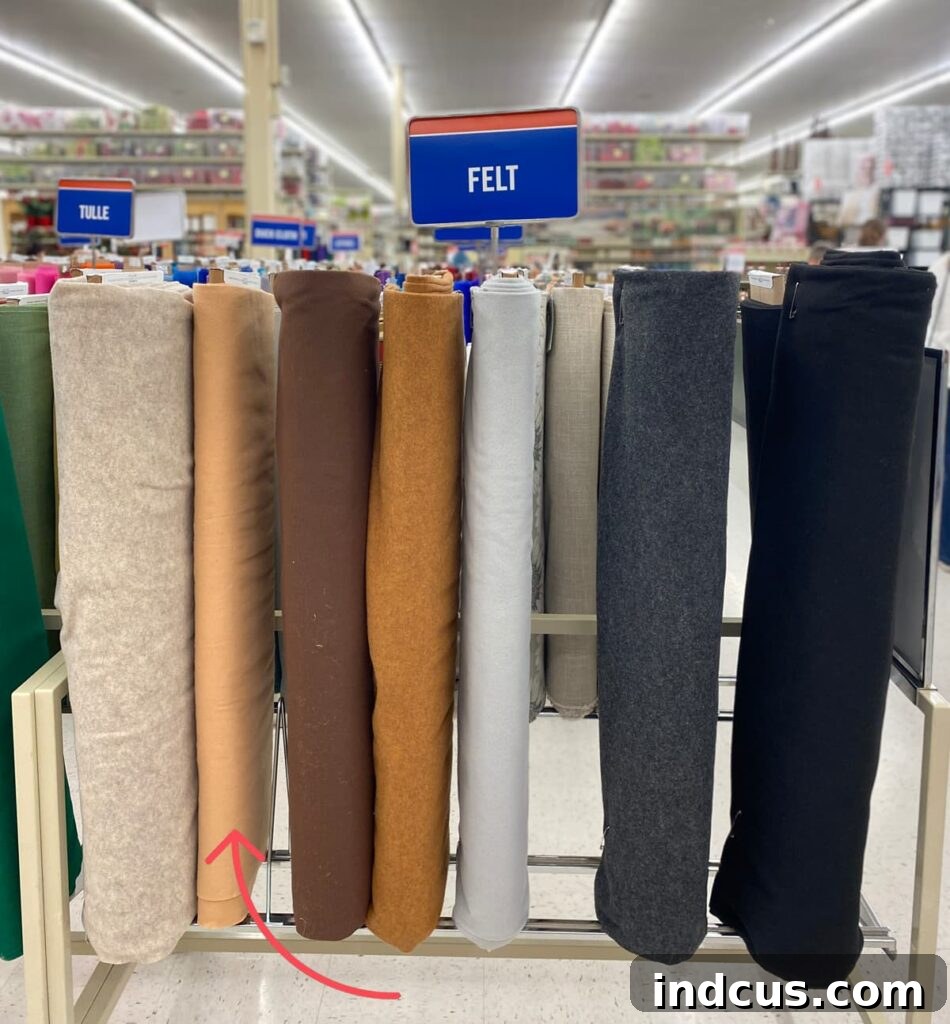
- Felt Fabric: 1 2/3 Yards in Cashmere (a light tan shade). Felt is chosen for its no-fray edges and soft texture, perfect for a cozy tent. You’ll appreciate its ease of use in a no-sew project.
- Wood Boards: (4 count) 1″ x 2″ x 4′. These sturdy planks will form the base and structure of your tent frame, providing stability.
- Wooden Dowels: (3 count) 3/4 Inch, 4 Foot Length. Dowels are crucial for connecting the wooden boards and forming the iconic A-frame shape of the tent.
- Drill + 3/4 Inch Drill Bit: Essential for creating precise holes in your wooden boards to accommodate the dowels. Safety first when using power tools!
- Fabric Scissors: A sharp pair of scissors will make clean cuts through the felt fabric.
- Rotary Blade + Mat + Ruler: (Optional, but highly recommended for precision) These tools ensure perfectly straight and square cuts, elevating the professional look of your finished tent. They’re especially helpful when working with large pieces of fabric.
- White Puff Paint: This fun 3D fabric paint will allow you to create intricate “icing” details on your felt gingerbread house, making it look truly edible!
- Icicle Garland: Adds a whimsical, snowy touch to the roofline of your gingerbread tent, enhancing its festive appeal.
- Hook and Loop Fastener: (4 count) 3/4″ White Sew-On. We’ll be utilizing the “scratchy” side to secure the felt to the wooden frame, leveraging felt’s natural ability to cling to Velcro.
- Red or White Masking Tape: Used for decorating the wooden frame to mimic classic candy canes, adding a playful pop of color.
Optional Decorations and Accessories (Highly Recommended for Gingerbread Charm!)
These extra touches truly transform your tent into a magical gingerbread house, allowing for customization and interactive play. Feel free to explore and select items that speak to your creative vision and your child’s preferences.
- Polka Dot Burlap Ribbon: Perfect for creating charming bows for window swags or other decorative accents.
- Pine and Berry Picks: (2 count) These can be disassembled to create mini greenery swags above your windows, adding a touch of natural beauty.
- Floral Wire: Essential for assembling your greenery picks into decorative swags.
- Colorful Battery Operated String Lights: To create a warm, inviting glow inside the tent, making it even more enchanting for nighttime stories.
- Gingerbread and Pom Pom Garland: Adds an extra layer of festive decoration and texture around the tent.
- Glitter Swirl Lollipop Picks: Mimic giant lollipops, perfect for adorning your gingerbread house exterior.
- Gingerbread Men Picks: Classic gingerbread figures to complete the theme.
- Candy Cane Chenille Stems: Versatile for creating small candy cane decorations or adding details.
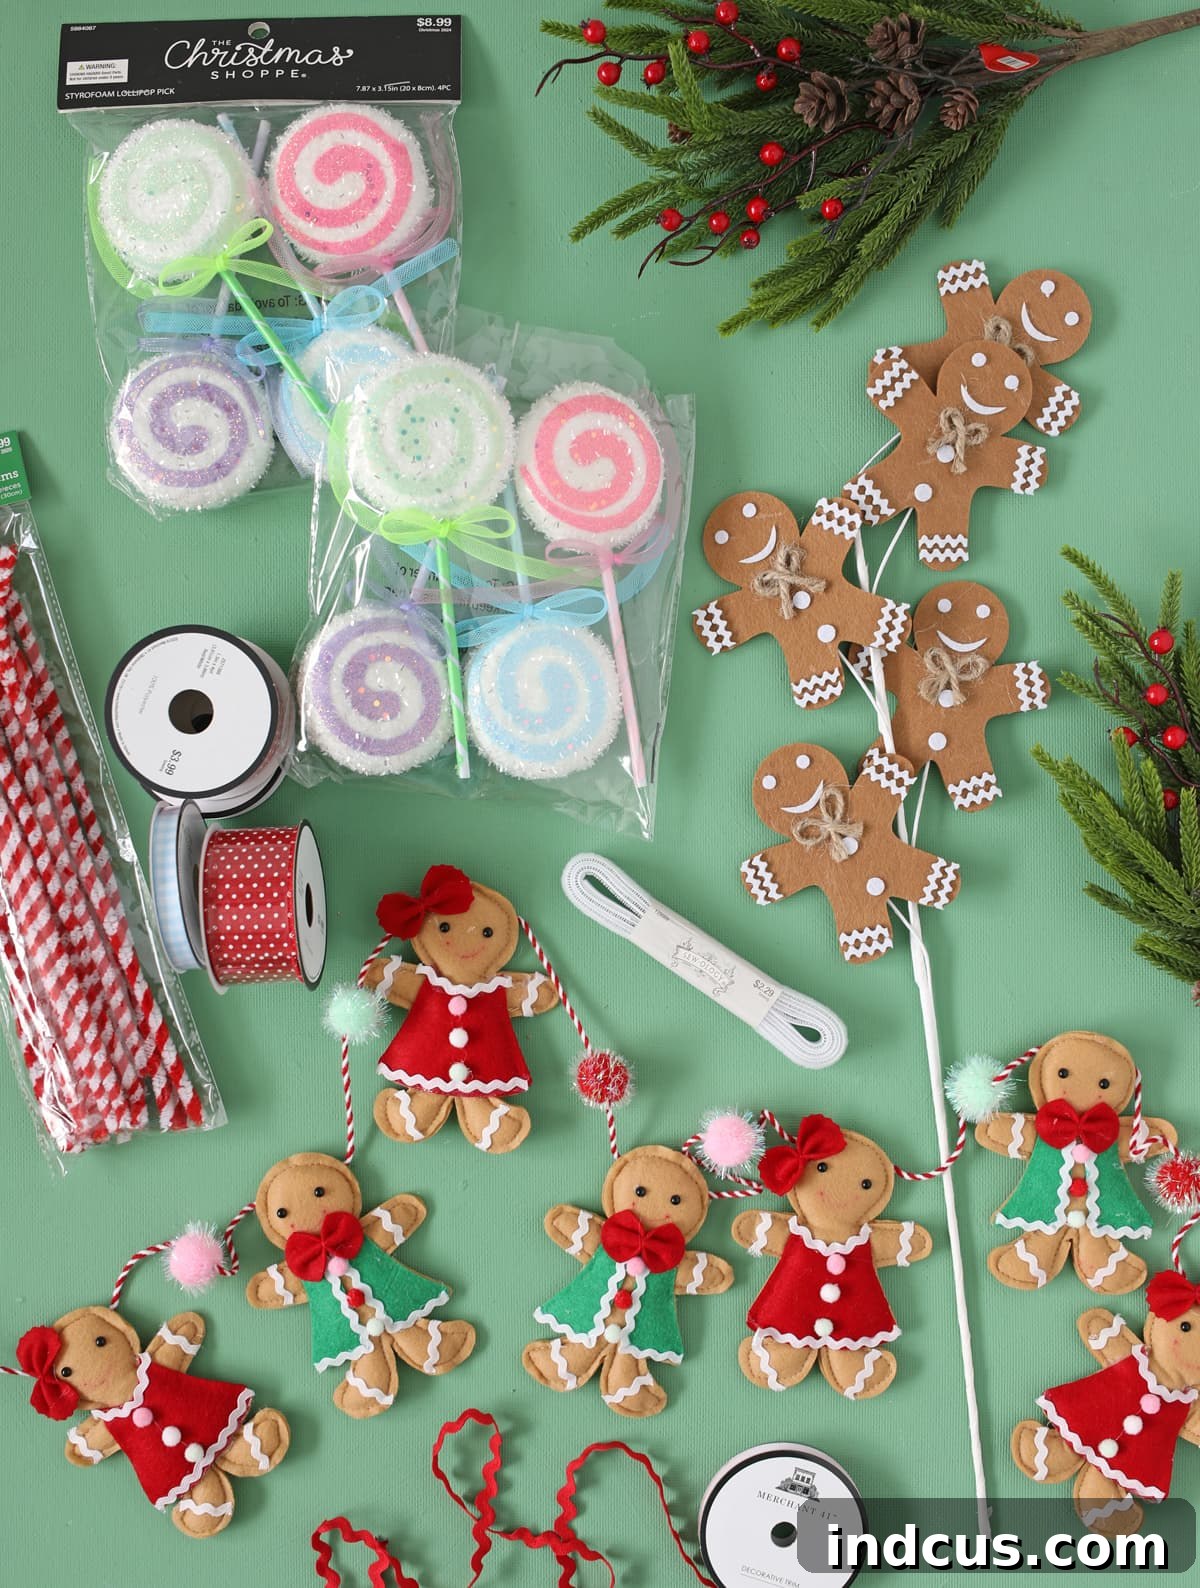
Most of the festive and craft items for this project, including the colorful decorations, were sourced from Hobby Lobby. I found everything I needed there, with the exception of the standard wood boards and the longer 4-foot length dowels, which are typically found at a local hardware store.
When searching for the felt fabric, head to the fabric section. If you’re new to purchasing fabric, simply grab the entire bolt of felt and take it to the cutting counter. Request 1 2/3 yards, and the friendly staff will cut it to your specifications. I chose a lovely light tan color named “Cashmere” for its classic gingerbread look, but Hobby Lobby also offers a beautiful camel shade called “Copper Canyon” if you prefer a richer hue. Both options provide an excellent base for your gingerbread creation. You can compare both shades in the image below:
Hobby Lobby truly shines when it comes to gingerbread-themed decorations. The aisles are brimming with an incredible variety of candy-inspired embellishments, making it deliciously difficult to choose just a few! I highly recommend taking a stroll through their Christmas craft section to see what delightful accessories catch your eye. There are so many fun options, from glittery lollipops to charming gingerbread figures. Better yet, bring your children along – they’ll love picking out their favorite “candies” to adorn their very own gingerbread house.
Step-by-Step Instructions: Building Your Gingerbread House Play Tent
Building The Sturdy A-Frame Structure
The foundation of our play tent is a simple yet robust wooden A-frame, designed for both stability and easy storage. Follow these steps carefully to construct a safe and durable frame.
Step 1: Preparing Your Wood Boards. Begin by taking your four 1″ x 2″ wood boards. If you purchased longer 6′ boards, you’ll need to cut them down to 3 feet in length each. This size is ideal for creating a comfortable and child-friendly play tent. Always ensure you measure precisely and use appropriate safety gear when cutting wood.
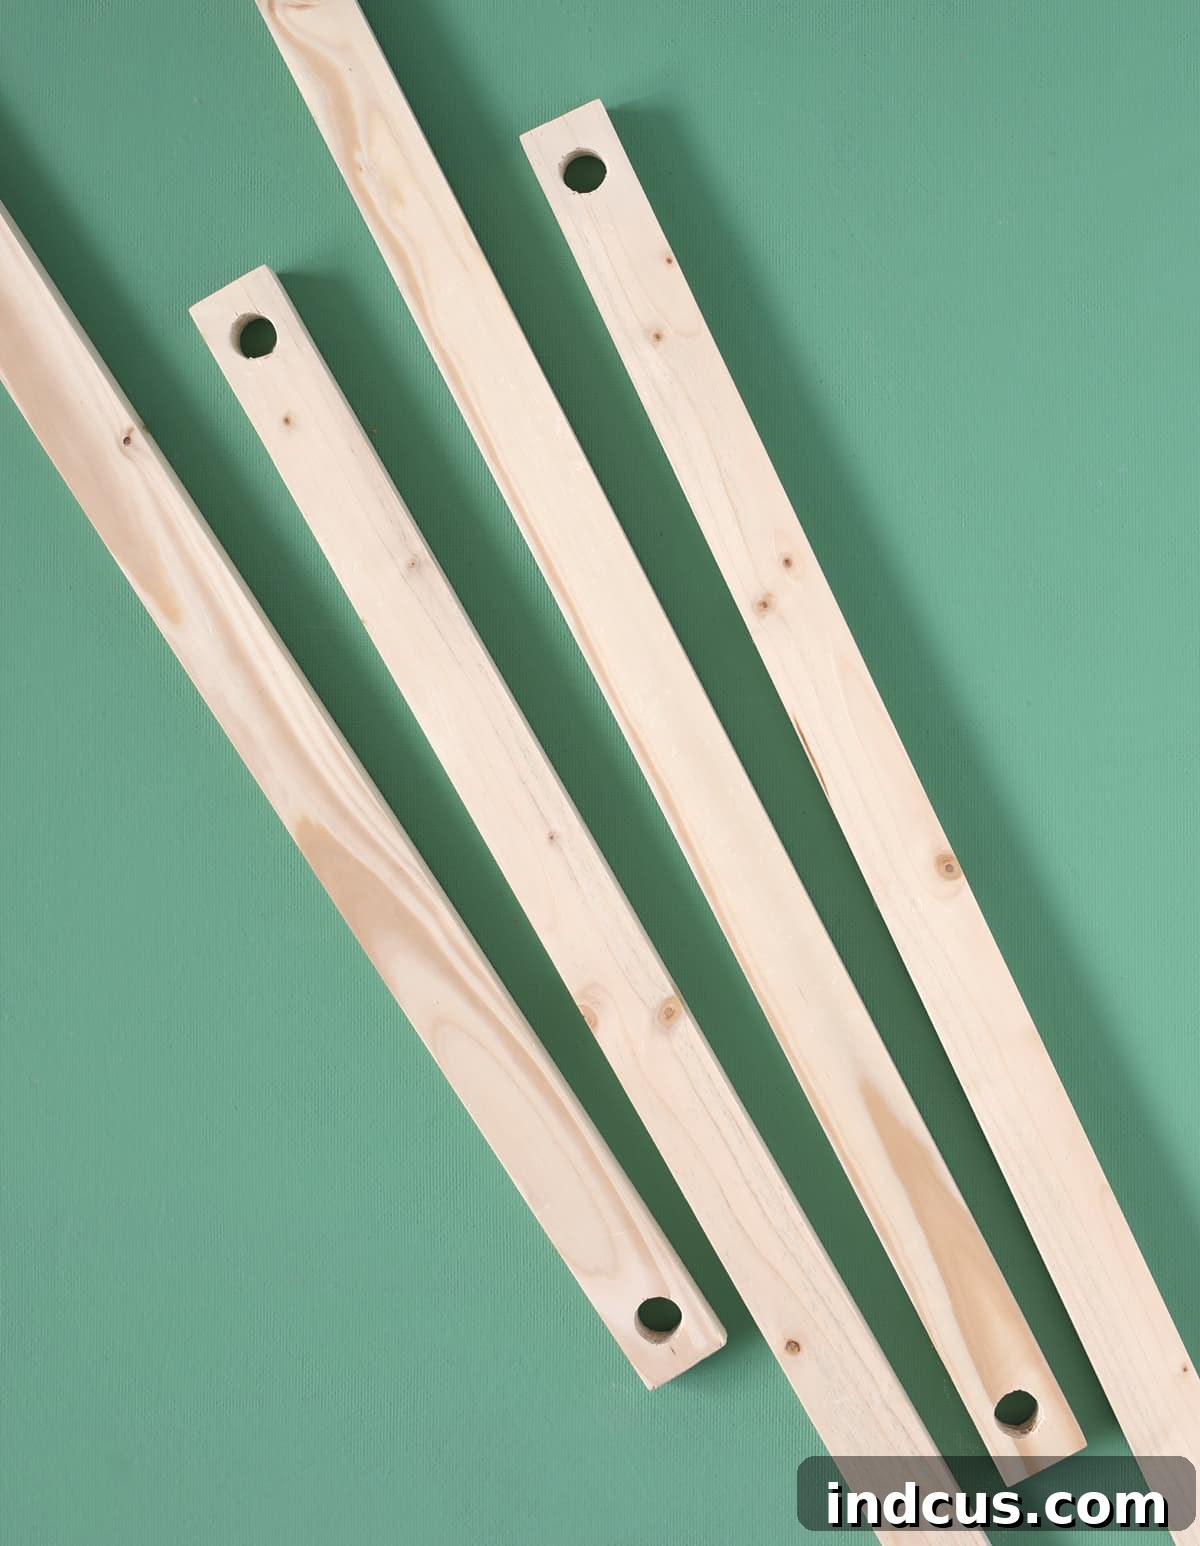
Step 2: Drilling Holes for Dowel Connections. With a 3/4″ drill bit, carefully drill a hole into each end of all four 1″ x 2″ boards. Precision is key here; aim for the center of the board’s end to ensure a stable frame. These holes will serve as connection points for your wooden dowels, allowing the frame to be assembled and disassembled easily. Your boards should now have a drilled hole at both ends, ready for the next step:
Step 3: Sanding for Safety and Smoothness. After drilling, thoroughly sand all your wood boards. Pay close attention to the drilled holes and cut edges to remove any splinters, rough spots, or sharp corners. This not only makes the frame safer for children but also ensures a smoother finish for painting. Test fit your dowels into the holes; if they are too tight, continue sanding the inside of the holes until the dowels slide in with a snug but manageable fit. You want them to hold firmly without being impossible to assemble or disassemble.
Step 4: Decorating Your Candy Cane Frame. Now for a touch of whimsy! Paint your wooden boards. I chose a very light pink spray paint, specifically “Pink Peony,” for a subtle and sweet base. Once the paint is dry, wrap the boards with red masking tape in a spiral pattern to create an enchanting candy cane effect. If red masking tape is hard to find, an alternative is to paint the boards entirely red and then use white masking tape for the stripes. This step adds a significant visual impact and contributes wonderfully to the festive theme. Do not skip this delightful detail – it truly brings the frame to life!

Step 5: Assembling the A-Frame Tent Structure. With your boards prepared, it’s time to assemble the frame. Take one of your 4-foot dowels. Insert two of your decorated wood boards onto one end of this dowel, and the remaining two boards onto the other end. This dowel will form the top ridge, or peak, of your tent’s roofline. Ensure the boards are positioned correctly to form the triangular shape.
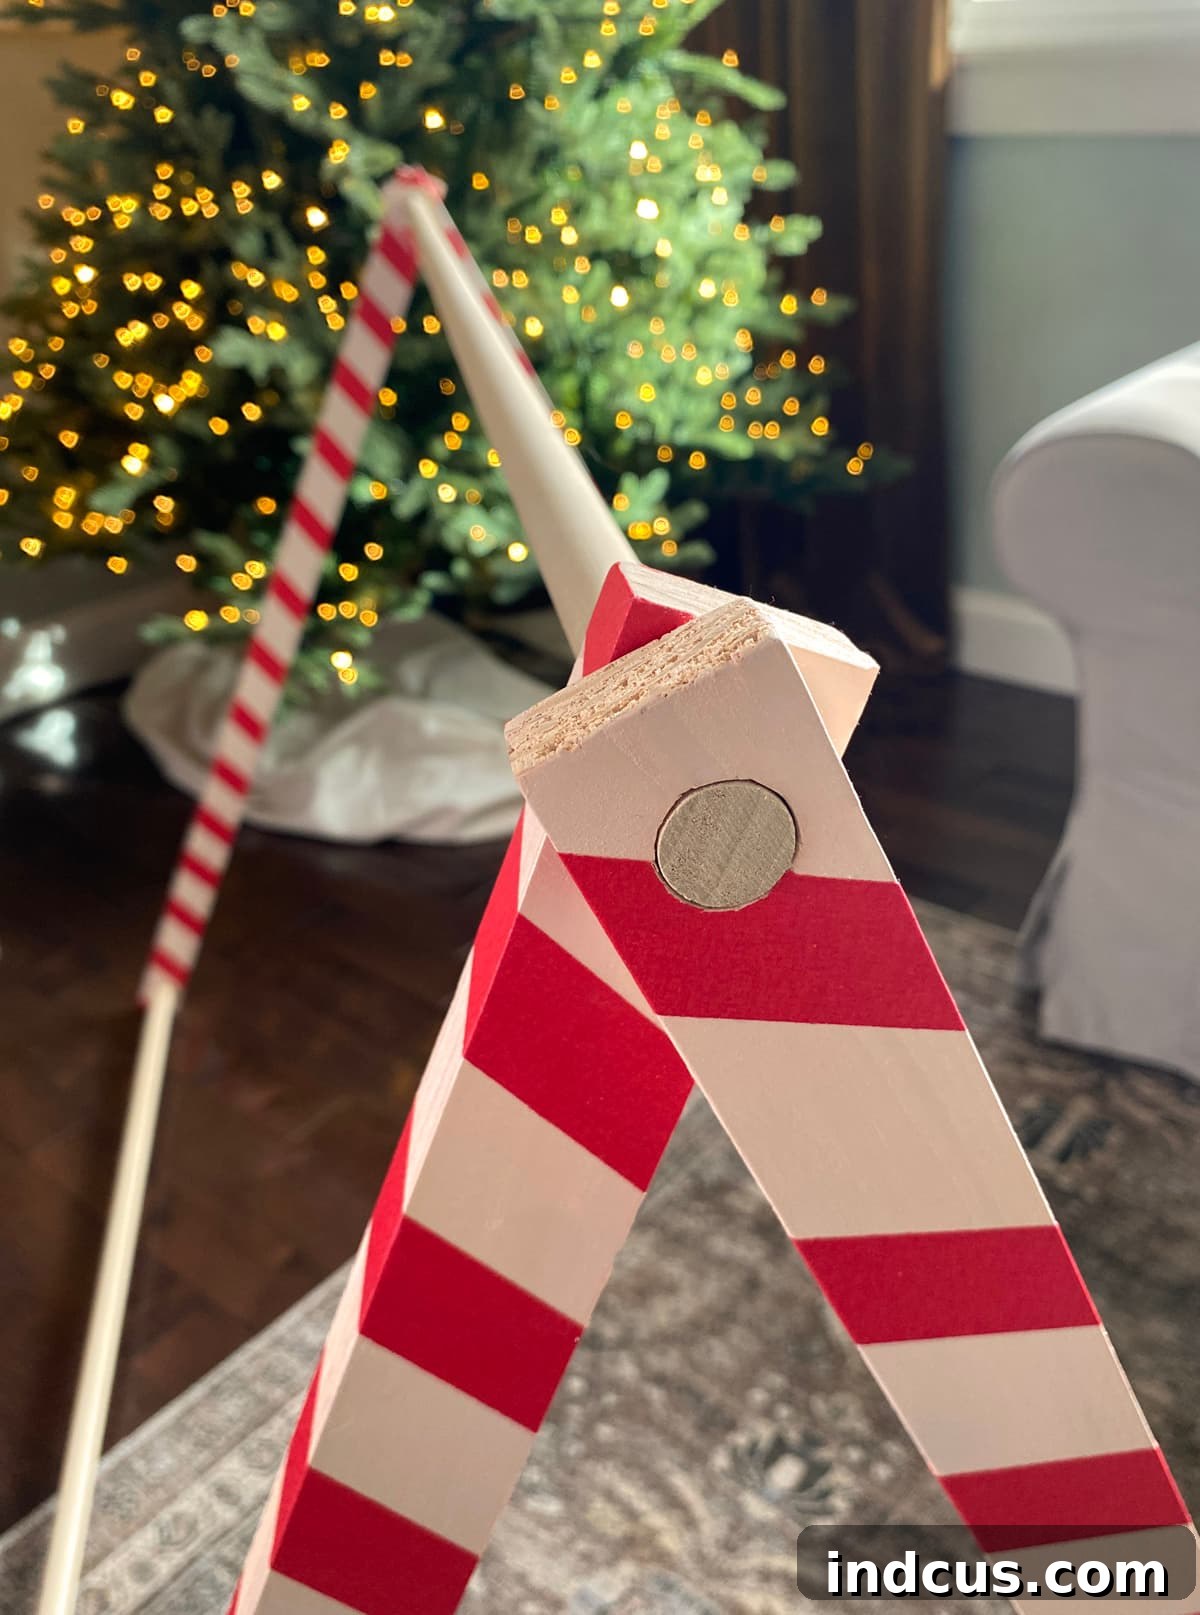
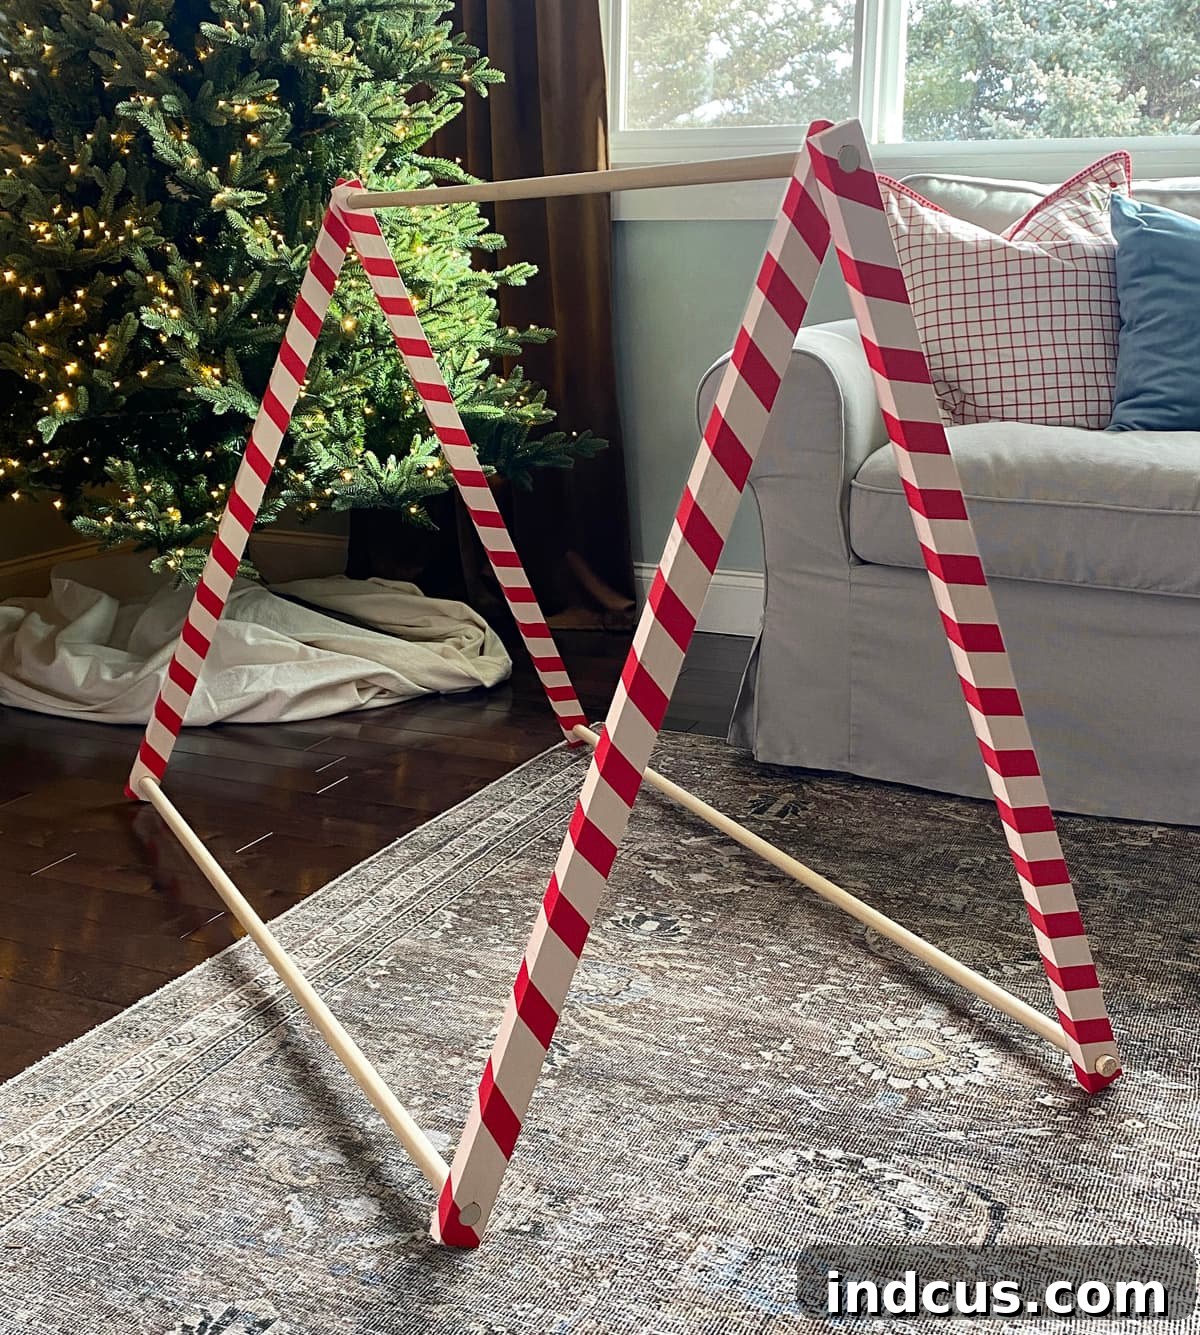
Next, gently spread the bottom ends of the boards apart to widen the structure. Now, insert the remaining two dowels into the open holes at the bottom of the four vertical boards. These two dowels will form the bottom two sides of the tent, providing stability and serving as the attachment points for your felt covering. Your completed tent frame will now resemble a classic A-frame structure, ready for its gingerbread transformation!
Your finished tent frame should look like this, a sturdy and festive skeleton awaiting its charming gingerbread “skin”:
Crafting The Felt Gingerbread Tent Covering
Now that our frame is ready, it’s time to bring our gingerbread house to life with a cozy felt covering. Felt is an excellent choice for a no-sew project due to its non-fraying nature and wonderful texture.
Step 1: Cutting the Felt Fabric. The felt fabric from Hobby Lobby conveniently comes in a 72″ width, which is ideal for the height of our tent. This means you primarily need to cut it to the correct length. My felt piece measured approximately 44″ x 72″. For the cleanest, straightest lines, I recommend using a quilting mat, rotary blade, and ruler. If these tools aren’t available, simply measure carefully, mark a straight line with a ruler, and cut with your fabric scissors. Don’t worry about perfection; it will still look fantastic! Remember to set aside any extra felt fabric, as we’ll be using it for details later.
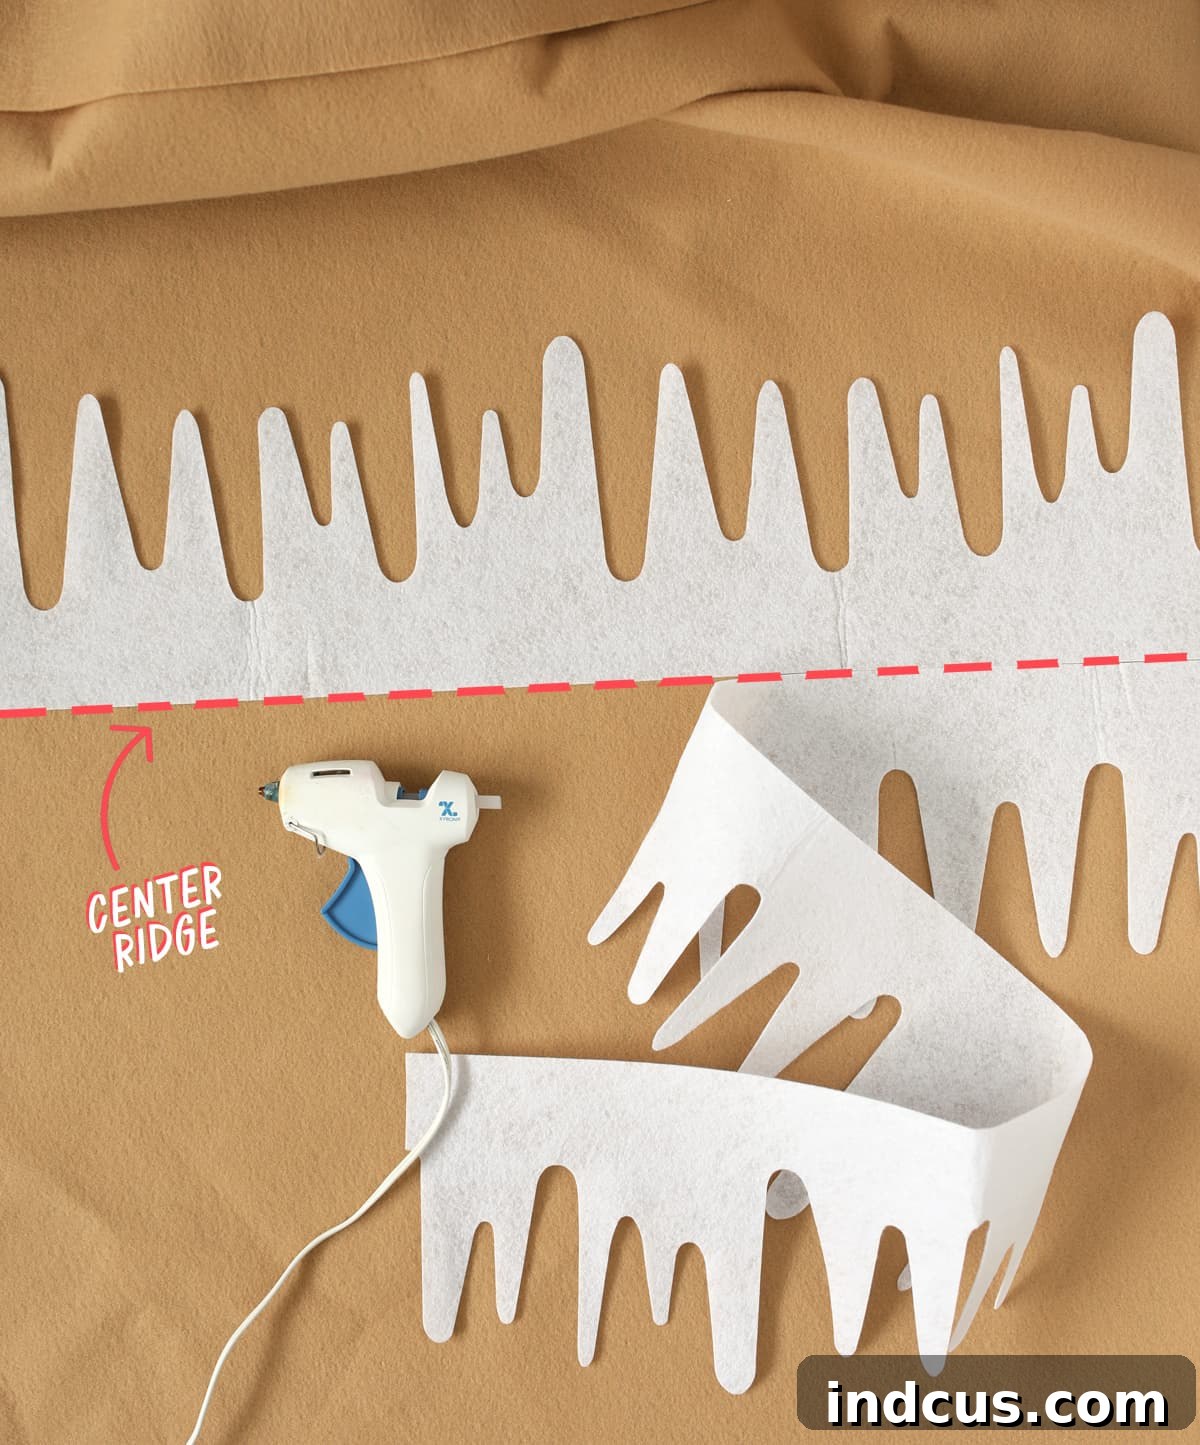
Step 2: Adding Festive Icicle Trim. Locate the center ridge line of your felt fabric – this will correspond to the top peak of your tent’s roof. Using hot glue, carefully attach the felt icicle garland along both sides of this ridge line. Trim any excess garland so the icicles line up neatly with the side edges of your felt. I found that one package of icicle garland was the perfect amount for this project, which is always a pleasant surprise! The icicles add a wonderful frosty touch, enhancing the gingerbread house’s wintery charm.
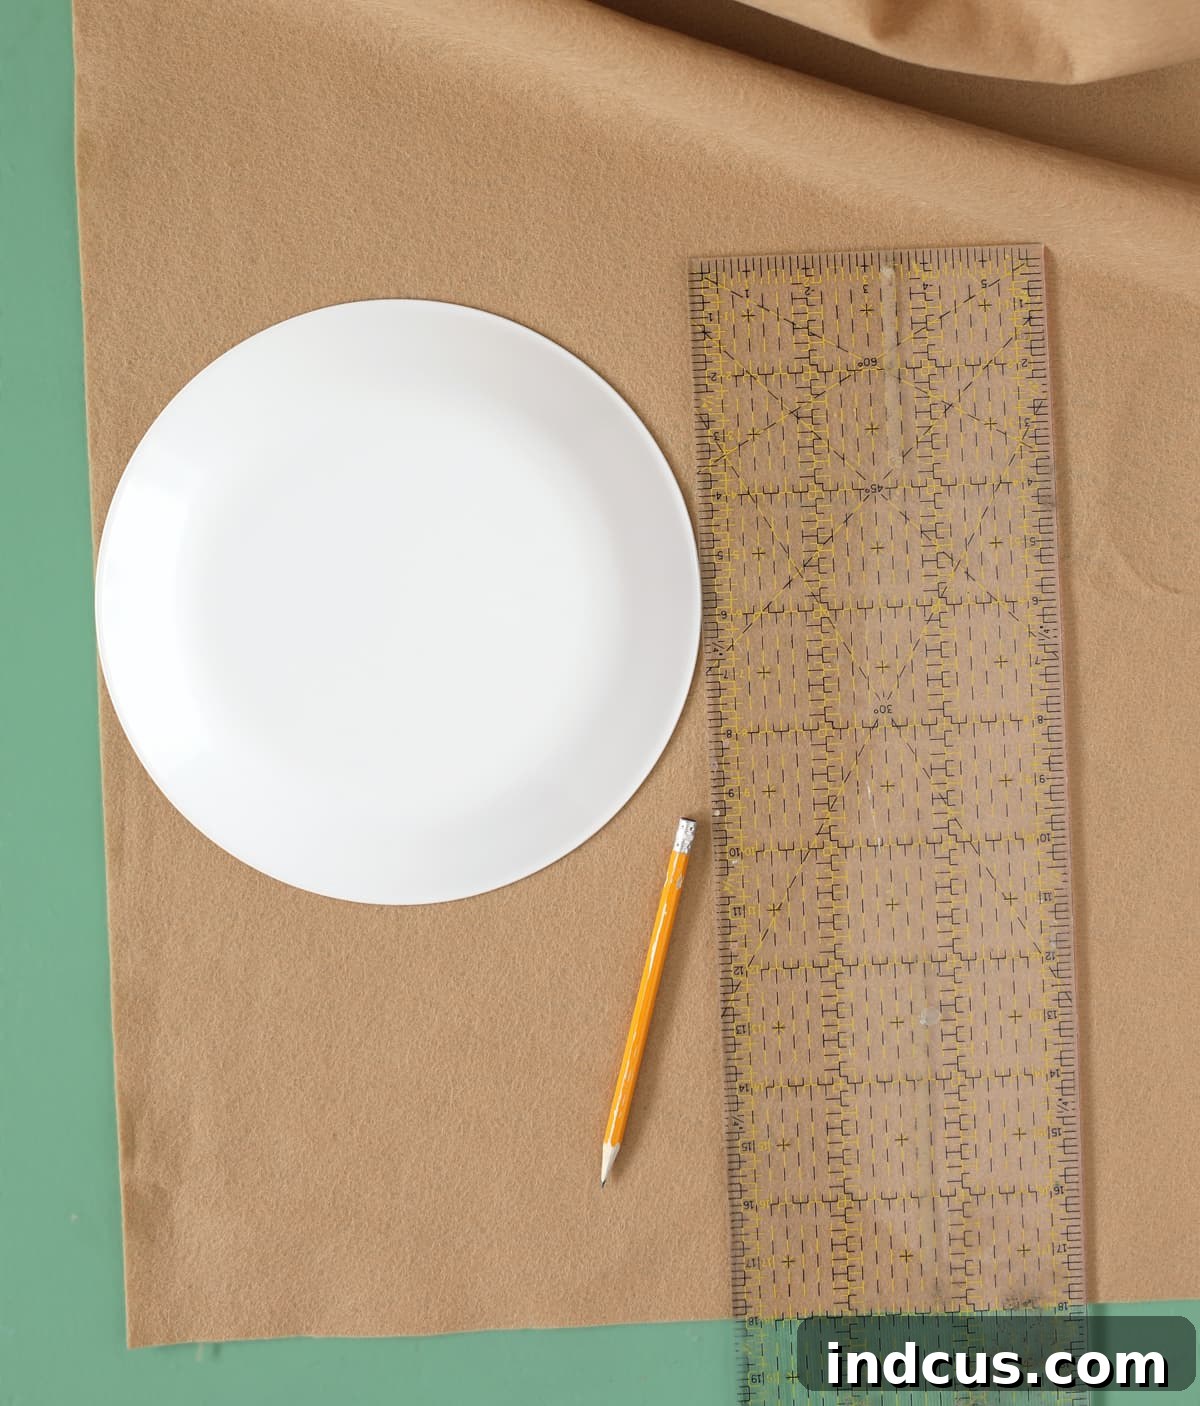
Step 3: Crafting Charming Arched Windows. Using your extra brown felt fabric, cut out two window shapes. To achieve a lovely rounded top, I used a dinner plate as a template for the arch. Then, I drew straight lines down from the plate’s edge to form charming arched windows, reminiscent of classic gingerbread house designs. My windows ended up measuring approximately 10.5 inches wide and 17 inches tall, a good size for visible details. Feel free to adjust the size to your preference.
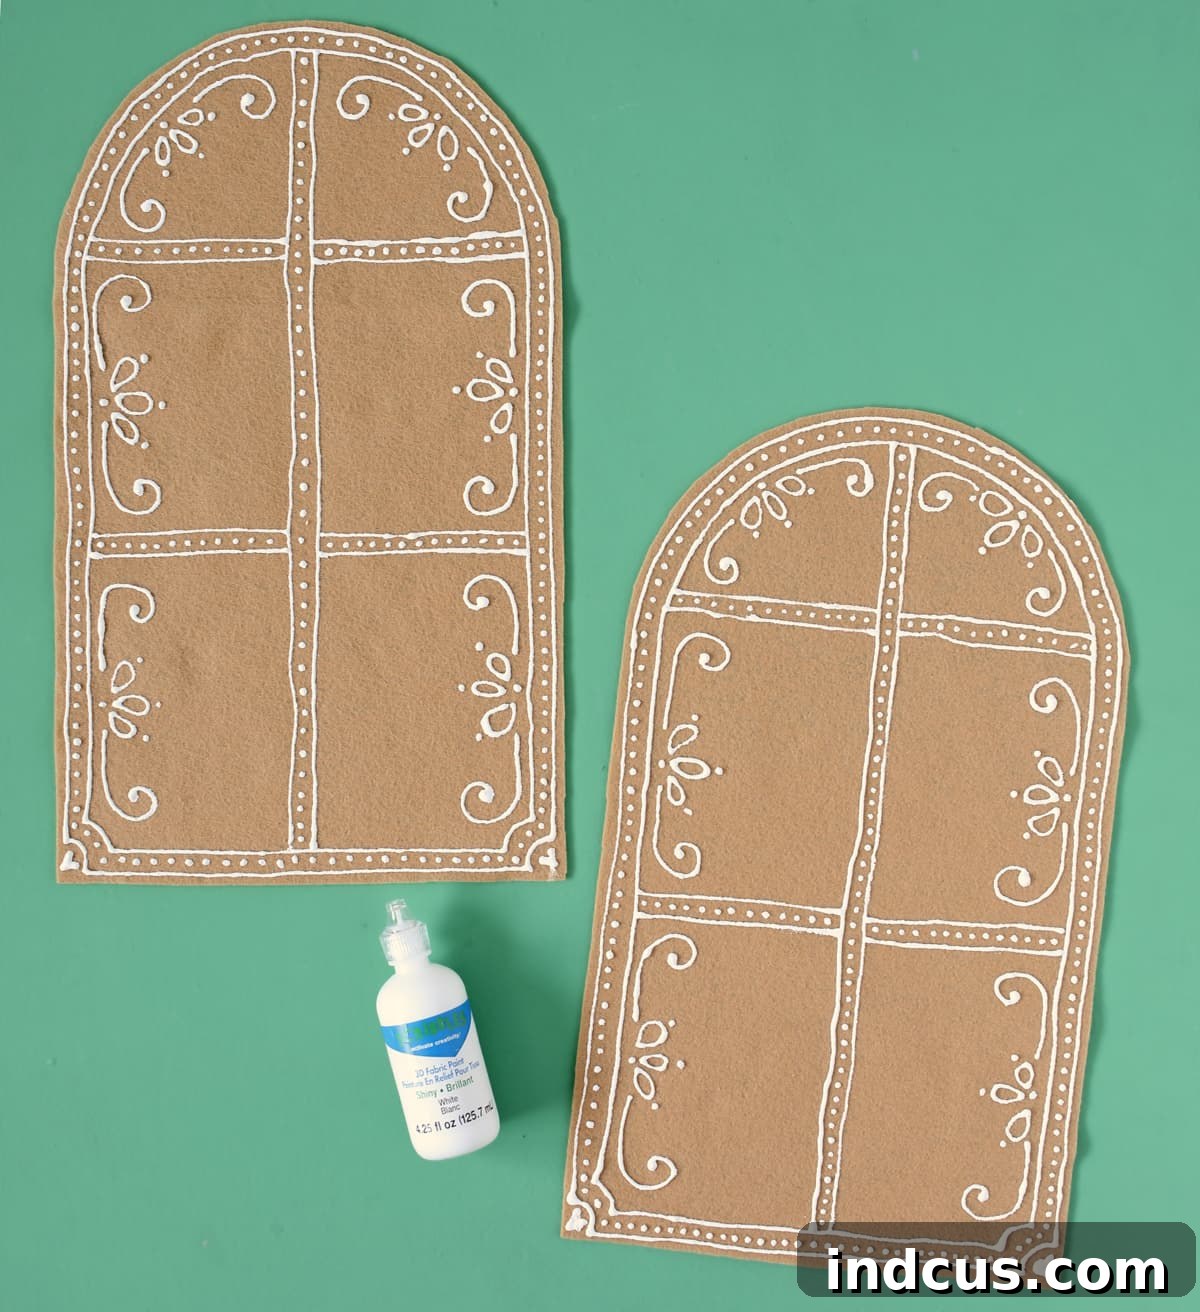
Step 4: Decorating Windows with Puffy Paint “Icing”. This is where the gingerbread magic truly comes alive! Using white puff paint, draw intricate details onto your felt windows. Think of traditional gingerbread house icing patterns: swirls, dots, zigzags, cross-hatching, or even a simple border. More is definitely more when it comes to gingerbread decoration, so unleash your creativity! Be generous but deliberate with your designs. Puffy paint typically takes several hours to dry completely (mine took about six), so plan this step accordingly. It’s often best to do this right before bed so your windows can dry undisturbed overnight. Lay them flat on a safe surface where they won’t be bumped or smeared – you wouldn’t want all your beautiful work to be ruined!
Helpful Tips for Working With 3D Fabric Paint (Puff Paint)
- Stabilize Your Hand: To achieve smooth, consistent lines, rest your wrist or forearm on the table as you draw. This provides crucial stability and reduces hand tremors.
- Prevent Smearing: Wet puff paint is your biggest enemy! Roll up your sleeves, tie back long hair, and work deliberately and carefully. Always be mindful of where your hand is moving to avoid accidentally smudging your fresh designs.
- Achieve Smooth Lines: For a truly elegant and professional finish, hold the tip of the paint bottle slightly ABOVE the fabric, allowing a steady stream of paint to fall onto the surface without pressing the tip directly into the felt. This technique results in a much cleaner, more uniform line.
- Keep the Tip Clean: Periodically wipe any paint buildup off the tip of the bottle with a damp paper towel. A clean tip prevents clogs and ensures a continuous, even flow of paint.
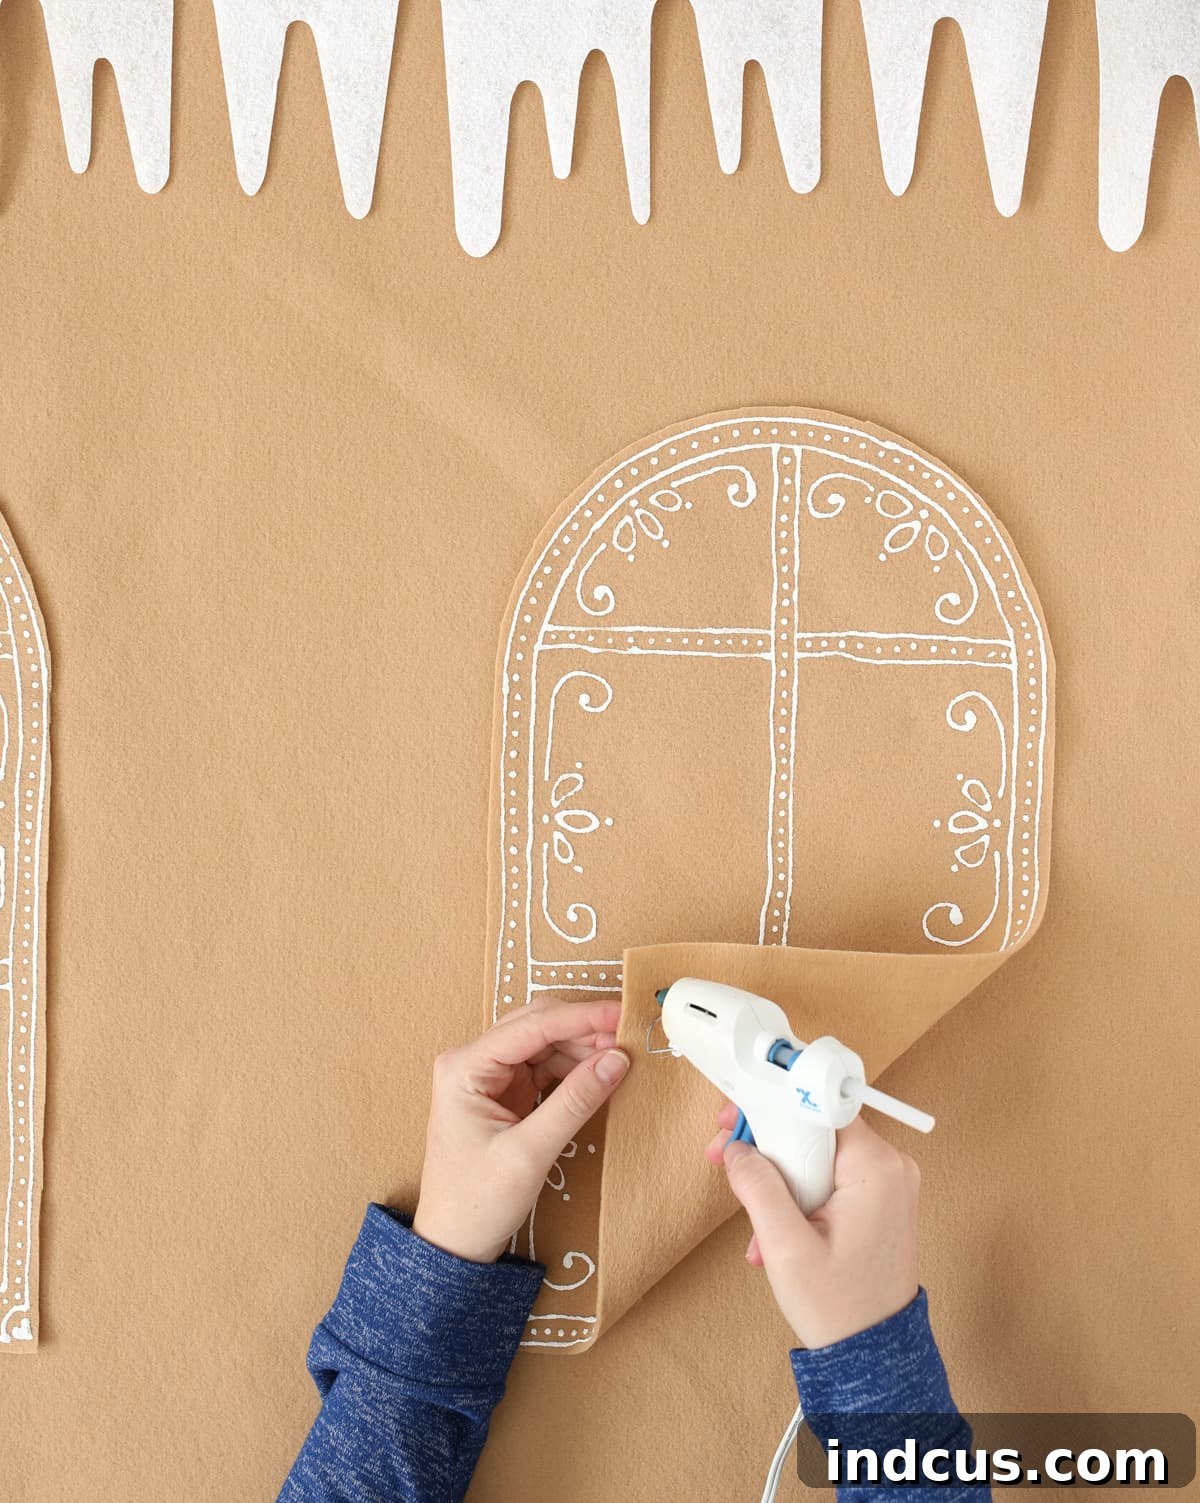
Step 5: Attaching the Windows to the Main Tent. Once your puff paint is completely dry and firm to the touch (it’s crucial to wait!), use a hot glue gun to securely attach the decorated windows to the main felt tent structure. Position them evenly on the felt, ensuring they are straight and well-adhered. The hot glue provides a strong, instant bond for this no-sew project.
Step 6: Creating Adorable Greenery Swags. To add an extra touch of charm, let’s create mini greenery swags to adorn above each window. The floral picks I purchased were bundled with four pine bunches, a pine cone bunch, and two berry bunches. I carefully disassembled these picks into their smaller individual components. For each swag, I used floral wire to securely attach two pine sprigs together. (I saved the pine cones and berries for future festive projects!). To complete each swag, I tied a cheerful red bow in the center. These small details make a big impact and turned out incredibly cute!

These miniature swags are perfectly sized to fit just above each of your gingerbread house windows. Once assembled, use more hot glue to firmly attach them to the felt, completing the cozy, inviting look of your tent’s exterior.

Step 7: Securing the Felt Covering with Velcro. The final step for the felt tent covering is to line the two bottom edges with hook and loop fastener (Velcro). For this project, you’ll only need the “scratchy” or “hook” side of the Velcro, as felt fabric naturally adheres perfectly to it. You can save the soft “loop” side for another project! I recommend applying a continuous strip of Velcro along both bottom edges of the felt to ensure the covering stays securely in place and maintains a taut, neat appearance. It’s simply adhered directly to the felt with hot glue. I initially underestimated the amount needed, so learn from my experience and plan for continuous strips for optimal hold!
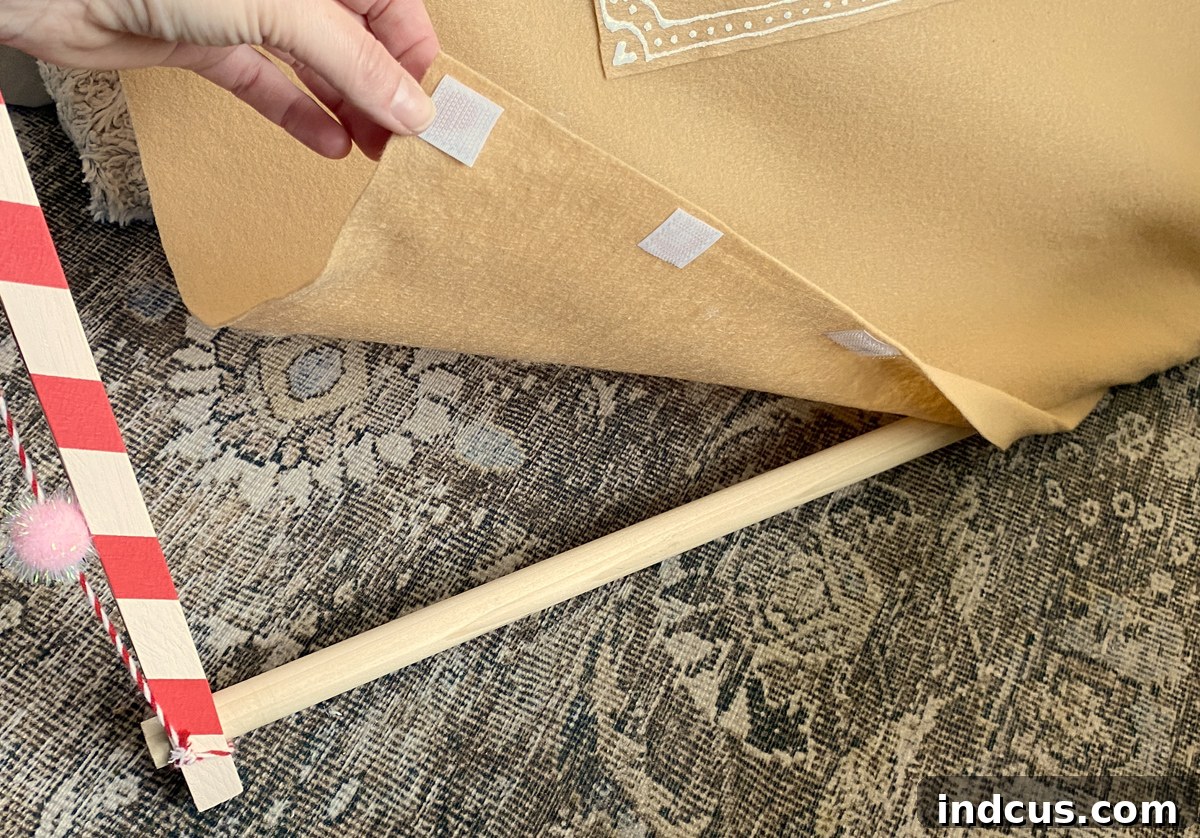
Now, carefully drape your decorated felt tent covering over the wooden A-frame. Wrap the bottom edges of the fabric around the bottom dowels of the frame. Press the Velcro-lined edges firmly against the felt on the other side of the dowel to secure them tightly. This creates a snug fit that keeps the felt covering smooth and prevents it from shifting during playtime.
Adding Magical Gingerbread Accessories
The final stage is perhaps the most exciting and certainly the most interactive: decorating your gingerbread house with an assortment of delightful “candies” and festive accessories. This is where your children can truly shine, personalizing their new play space!
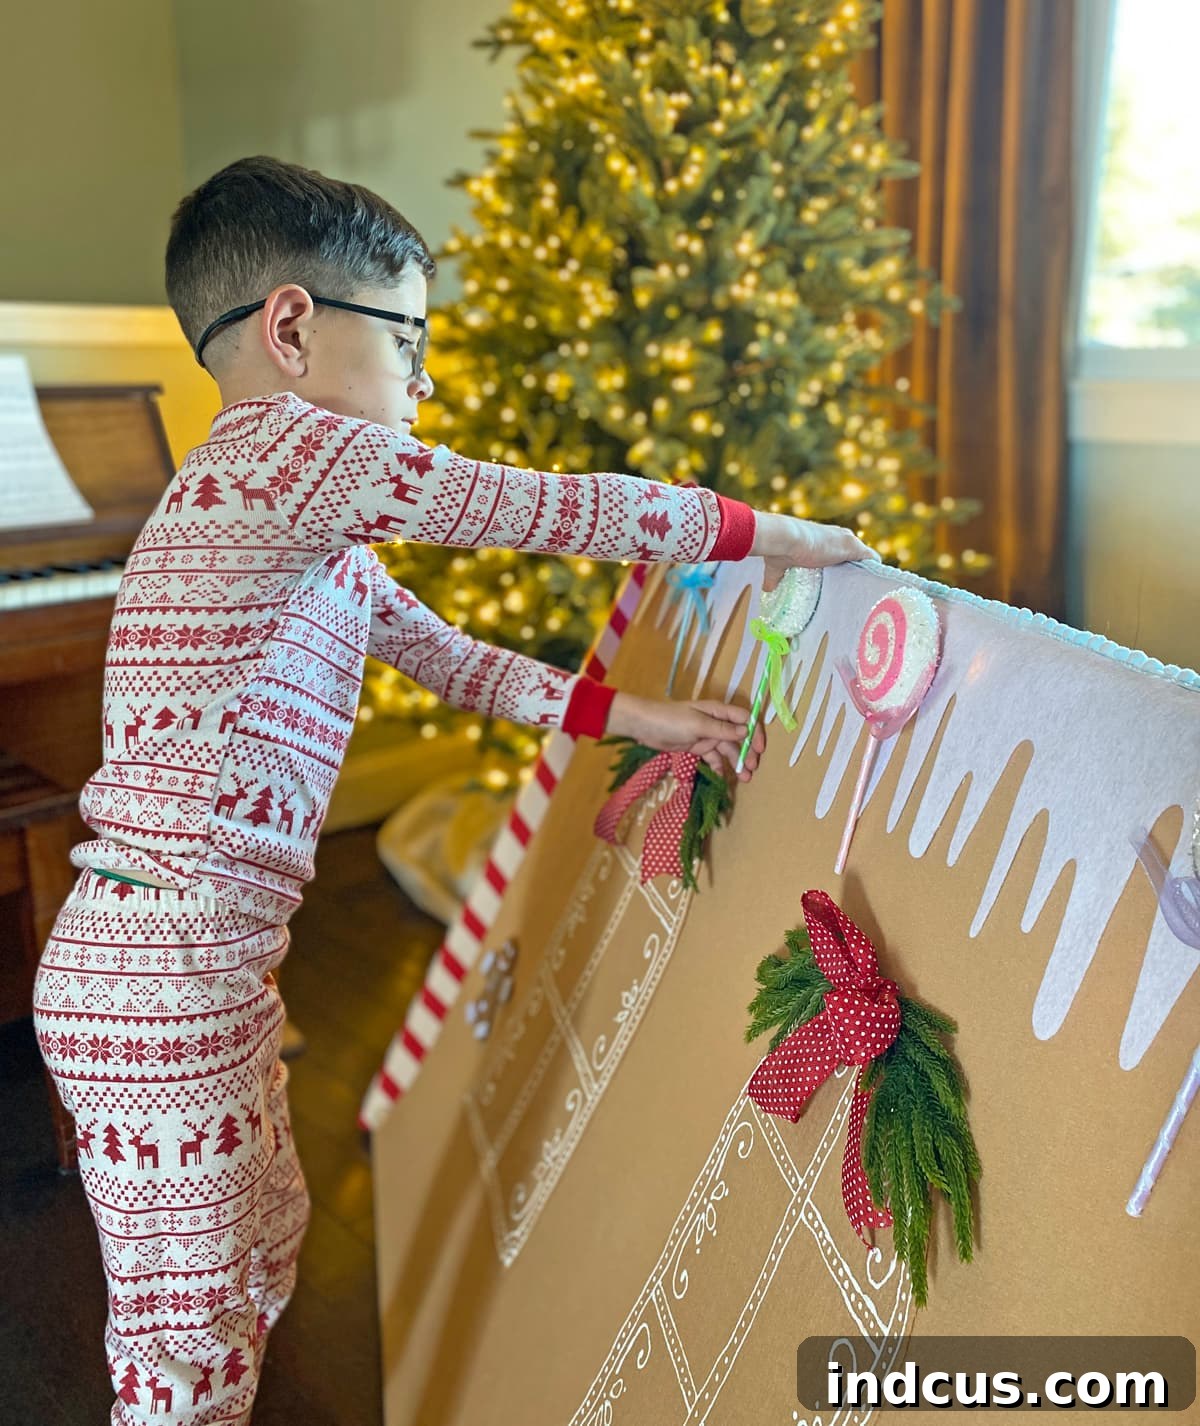
To make the decorative candies interchangeable and stickable, I simply hot glued small pieces of the “scratchy” side of Velcro to the backs of all the chosen candy-inspired embellishments. Because felt itself acts like the “loop” side of Velcro, these candies will adhere perfectly anywhere on the tent’s felt surface. This brilliant trick allows for endless redecoration and imaginative play.

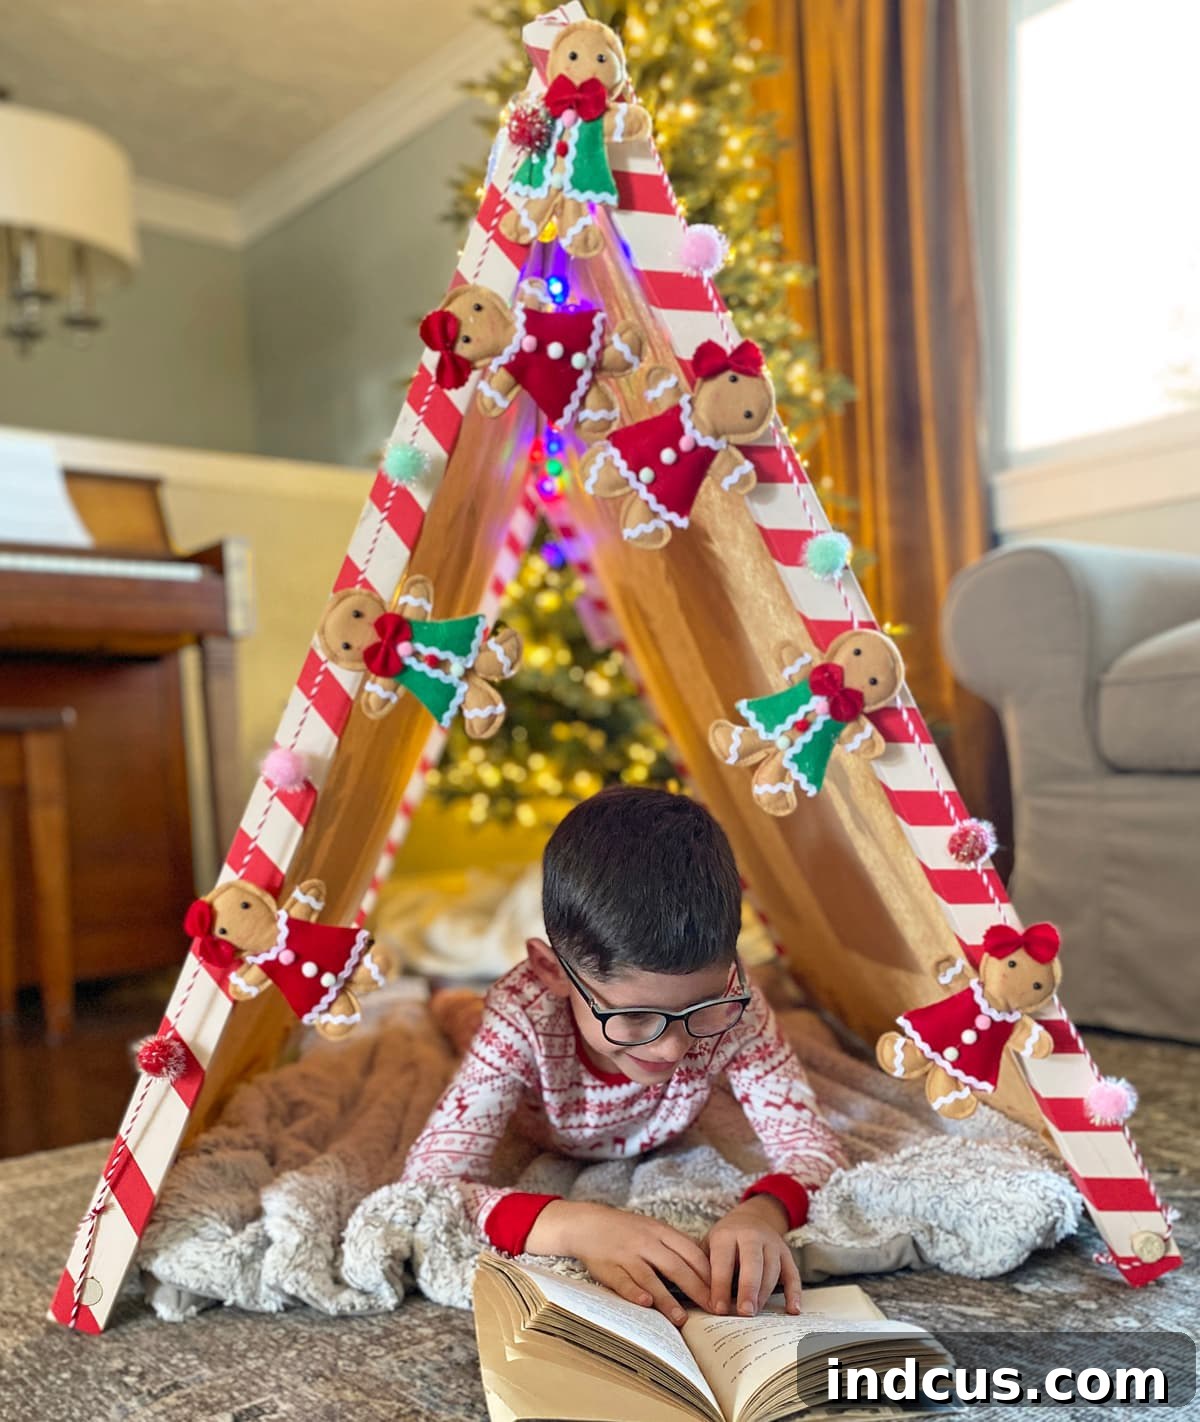
To create an even more enchanting atmosphere, I hung a small strand of colorful, battery-operated LED string lights inside the tent. This creates a warm, magical glow that enhances the cozy hideaway feel, perfect for storytelling or quiet play. Finally, I invited my six-year-old to take the lead in decorating. He enthusiastically added all the gingerbread candies and accessories exactly where he wanted them. He loves that he can redecorate his gingerbread house play tent over and over again, fostering endless creativity and ownership of his special space.
The Joy of a Handmade Christmas: Memories and Practicality
I am absolutely thrilled with how this adorable gingerbread house play tent project turned out. It’s not just a craft; it’s a testament to the magic that simple DIY projects can bring to a home, especially during the holidays. The delight on my child’s face as he explored his new festive hideout was truly priceless.
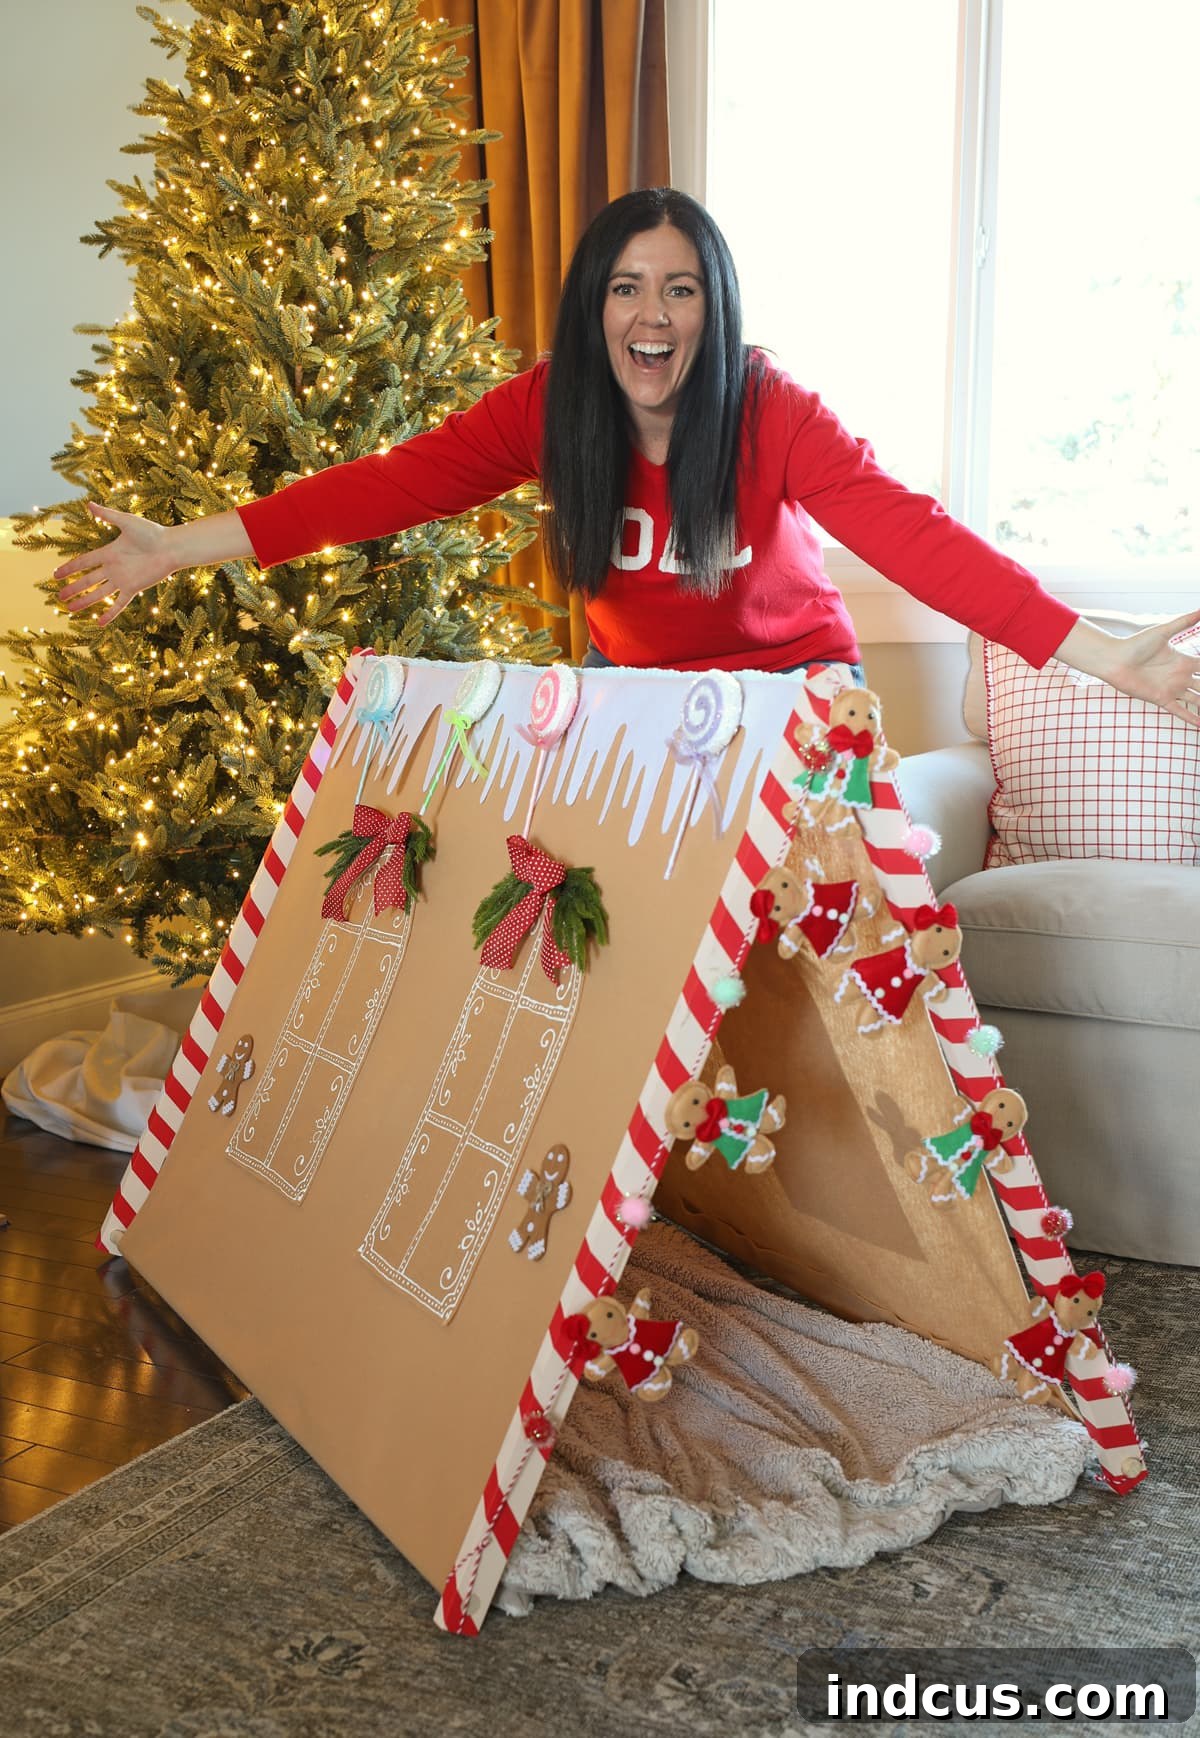
One of the aspects I particularly appreciate about this specific tent design is its practicality: it folds flat for storage. This makes it incredibly convenient to tuck away neatly once the holiday season concludes, allowing you to easily bring it out year after year without taking up excessive space. It’s a craft that combines aesthetic appeal with thoughtful design.
Watch the Gingerbread House Play Tent Video Tutorial!
For a comprehensive visual guide and to see each step come to life, watch our detailed video tutorial. It’s a great way to ensure you’re following along perfectly and to gather extra tips and inspiration.
Time, as they say, flies. My oldest child has already grown and left home, which serves as a poignant reminder to savor every moment and make the most of the precious time I have with the children still under my roof. In a blink, they too will have flown the nest. Motherhood is undoubtedly demanding, filled with constant effort and sacrifices, but it is also, without question, the most joy-filled and rewarding part of my life. I am committed to continuing to infuse my home with magic, to create unforgettable memories, and to shower my family with love because time is an irreplaceable treasure. A happy, enchanting childhood is a goal worth every bit of effort and creativity we can muster.
Do you have any questions about this enchanting no-sew gingerbread house play tent project? Please don’t hesitate to leave them in the comments section below – I’d love to help! And if you’re planning to make this festive craft later, make sure to pin it to your favorite Pinterest board so you can easily find it again when you’re ready to start building memories.







