
The Ultimate Guide to Homemade Focaccia Bread: Elevate Your BLT and Beyond
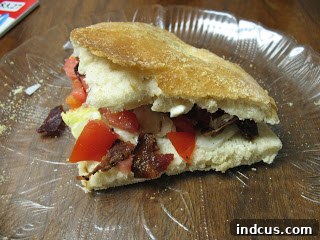
Imagine biting into a perfectly crafted BLT sandwich, where every ingredient sings in harmony. Now, picture that experience elevated to an entirely new level, not merely by a fancy sauce or gourmet bacon, but by the bread itself. This is the magic of homemade focaccia. Just a few nights ago, I faced the prospect of making simple BLTs with ordinary store-bought bread. A spontaneous decision to bake fresh focaccia instead transformed a humble meal into something truly extraordinary. The result was nothing short of astonishing; this delightful Italian flatbread elevated a classic American sandwich into a scrumptious masterpiece, showcasing the incredible difference quality bread can make.
If you’re ready to embark on a baking journey that will redefine your sandwich game and impress everyone at the table, this comprehensive guide to homemade focaccia bread is for you. Focaccia, with its signature dimpled surface, generous drizzle of olive oil, and often a sprinkle of aromatic herbs and sea salt, is a versatile and incredibly rewarding bread to bake. Originating from Italy, where it was traditionally baked in a hearth, focaccia is celebrated for its irresistible combination of a crispy, golden crust and a wonderfully soft, airy interior. It’s more than just a side dish; it’s a culinary canvas ready for your favorite toppings, a perfect vehicle for robust flavors, and, as we discovered, the ideal foundation for an unforgettable BLT. Forget dry, flimsy slices; focaccia offers a substantial yet tender bite that perfectly complements the crisp lettuce, juicy tomatoes, and savory bacon. Let’s dive into creating this delightful bread from scratch, making the process accessible for both novice bakers and seasoned pros.
Why Homemade Focaccia Bread is a Culinary Game-Changer
There’s a unique satisfaction that comes with baking bread from scratch, and focaccia is an excellent starting point for anyone looking to delve into the world of yeast doughs. Beyond the immense personal gratification, making your own focaccia offers several distinct advantages that elevate any meal:
- Unmatched Freshness and Flavor: Store-bought breads often lack the depth and vibrant flavors of a freshly baked loaf. Homemade focaccia boasts a rich, yeasty aroma and a nuanced, savory taste that simply can’t be replicated. The moment it comes out of the oven, your kitchen will be filled with an enticing scent.
- Superior Texture: The hallmark of a great focaccia is its exquisite contrast in textures – a golden, slightly chewy crust giving way to an incredibly soft, open-crumbed interior. This delightful chewiness is perfect for absorbing the delicious juices of your sandwich fillings or a flavorful olive oil dip.
- Endless Customization Opportunities: While a classic focaccia with rosemary and coarse sea salt is divine, making it at home allows you to experiment with a wide array of flavors. Consider adding other dried or fresh herbs like thyme or oregano, incorporating different cheeses such as Parmesan or feta, or topping with olives, sun-dried tomatoes, or caramelized onions for personalized perfection.
- Wholesome Ingredients, No Preservatives: Enjoy your bread knowing exactly what went into it – simple, high-quality, wholesome ingredients. You control the purity, avoiding any unwanted additives or preservatives often found in commercial breads.
- The Comforting Aroma of Home: Nothing quite compares to the comforting, warm scent of freshly baking bread filling your kitchen. It’s an experience that truly transforms your home into a cozy haven, inviting a sense of warmth and well-being.
Essential Ingredients for Your Perfect Focaccia Loaf
Creating delicious focaccia requires only a handful of common ingredients, each playing a crucial role in the final product. Paying attention to the quality of these ingredients, particularly your flour and olive oil, can make a noticeable difference in the outcome of your homemade focaccia.
Dough Ingredients:
- 3 1/4 – 3 1/2 cups All-Purpose Flour: While bread flour can be used for a slightly chewier texture due to higher protein content, good quality all-purpose flour works beautifully for a tender and fluffy crumb. It’s always best to start with 3 1/4 cups and add the remaining flour gradually as needed during the kneading process, adjusting for humidity and flour type.
- 2 tsp. Active Dry or Instant Yeast: Yeast is the essential leavening agent that makes your bread rise, creating that wonderful airy texture. If using active dry yeast, you’ll need to activate it in warm water first (often called proofing). Instant yeast, on the other hand, can typically be mixed directly with your dry ingredients, simplifying the process.
- 1 1/2 tsp. Fine Sea Salt: Salt is absolutely vital for flavor, enhancing all the other ingredients. It also plays an important role in controlling yeast activity and strengthening the gluten structure of the dough. Do not skip or significantly reduce the salt.
- 1 1/4 cups Warm Water (105-115°F / 40-46°C): The temperature of the water is critical for activating the yeast without harming it. Aim for a temperature that feels comfortably warm, like a baby’s bath – neither too hot to kill the yeast nor too cold to inhibit its activity.
- 2 tsp. Granulated Sugar: Sugar serves as immediate food for the yeast, helping it become active and energetic. Additionally, it contributes to a beautiful golden-brown crust and a subtle sweetness that balances the savory notes of the focaccia.
- 1 rounded TBSP Malted Milk Powder (or regular Dry Milk): This ingredient is optional but highly recommended. Malted milk powder adds a subtle depth of flavor, aids in achieving a more even browning, and contributes to an exceptionally soft and tender crumb. Regular dry milk can be used as a convenient substitute, offering similar benefits.
- 1 tsp. Dried Rosemary (optional): Dried rosemary is a classic and wonderfully aromatic herb that pairs exquisitely with focaccia, imparting a fragrant, piney note. Feel free to substitute with other dried herbs like oregano, thyme, or a blend of Italian herbs to suit your taste.
- 1/8 tsp. Freshly Ground Black Pepper (optional): A small amount of freshly ground black pepper adds a subtle warmth and a hint of complexity to the focaccia’s flavor profile, making it even more appealing.
Finishing Touches for Baking:
- 2 tsp. High-Quality Olive Oil (preferably Extra Virgin): Olive oil is truly fundamental to focaccia. It’s used in the dough, for generously brushing the top before baking, and for drizzling over the finished bread. Investing in a good quality extra virgin olive oil will lend a rich, fruity, and slightly peppery note that significantly enhances the bread’s overall flavor and luxurious texture.
- 1 TBSP. Yellow Cornmeal: Sprinkling yellow cornmeal on the baking sheet before placing the dough prevents sticking, ensuring easy removal, and provides a lovely, slightly crisp and golden texture to the bottom of the focaccia.
- Coarse Sea Salt (for sprinkling, optional): A final sprinkle of flaky coarse sea salt on top of the focaccia before baking adds a delightful burst of briny flavor and a wonderful textural crunch that beautifully complements the soft bread.
Step-by-Step Instructions for Making Homemade Focaccia Bread
Whether you’re using a bread machine for convenience or your own two hands for a more tactile experience, making focaccia dough is an enjoyable process. Follow these detailed steps to achieve a perfect, airy, and flavorful loaf every time.
Method 1: Using a Bread Machine (The Easiest Route)
If you own a bread machine, this method significantly simplifies the initial dough-making process, allowing the machine to do the hard work. Simply add all the dough ingredients (flour, yeast, salt, milk powder, sugar, warm water, rosemary, pepper) into your bread machine’s pan according to your specific machine’s manual. Typically, this means adding liquids first, then dry ingredients, with the yeast placed on top or in a separate dispenser. Select the “Dough” setting. The machine will handle all the mixing, kneading, and often the first rise too, usually completing the cycle in about 1.5 to 2 hours. Once the cycle is complete, the dough will be perfectly risen and ready to be shaped and baked as described in the steps below.
Method 2: Making Focaccia Dough by Hand or Stand Mixer
Don’t have a bread machine? No problem! Making focaccia dough by hand or with a stand mixer is incredibly rewarding and allows for a more personal and tactile connection with your baking. The process is straightforward and yields fantastic results.
Preparation and Mixing the Dough:
- Activate the Yeast (if using active dry): In a large bowl (or the bowl of your electric stand mixer), combine the warm water and granulated sugar. Sprinkle the active dry yeast evenly over the water. Gently stir, then let it sit undisturbed for 5-10 minutes. The mixture should become foamy and bubbly, which is a clear sign that your yeast is active and alive. If using instant yeast, you can often skip this proofing step and add it directly with your dry ingredients.
- Combine Dry Ingredients: To the activated yeast mixture (or just the warm water if using instant yeast), add 3 cups of the all-purpose flour, fine sea salt, malted milk powder (or dry milk), dried rosemary, and freshly ground black pepper (if using these optional ingredients).
- Initial Mixing: If using a stand mixer, attach the dough hook. Mix the ingredients on low speed until they are just combined and a shaggy dough begins to form. For hand mixing, use a sturdy wooden spoon or spatula to bring the ingredients together.
- Gradually Add Remaining Flour: Continue mixing, gradually adding the remaining 1/4 to 1/2 cup of flour, one tablespoon at a time, until a soft, cohesive dough forms. The dough should come together into a ball, mostly clearing the sides of the bowl, but it should still remain relatively soft and slightly sticky to the touch. It’s crucial not to add too much flour at this stage, as this can result in a dry, dense, and tough focaccia.
Kneading the Dough:
- Kneading by Stand Mixer: Increase the mixer speed to medium-low and continue to knead the dough for approximately 7-10 minutes. During this time, the dough should transform into a smooth, elastic, and satiny ball, pulling away cleanly from the sides of the bowl as the gluten develops.
- Kneading by Hand: Turn the dough out onto a lightly floured clean surface. Knead the dough vigorously for about 10-12 minutes. Use a rhythmic push, fold, and turn motion, pressing down with the heels of your hands. Add just enough flour to your hands and the surface to prevent the dough from sticking excessively, but strongly resist the urge to add too much additional flour into the dough itself. The dough should become smooth, supple, and elastic; a good test is to stretch a small piece – it should form a thin membrane without tearing easily.
First Rise (Bulk Fermentation):
- Prepare for Rising: Lightly spray a large, clean bowl with cooking spray, or drizzle a small amount of olive oil and spread it around. Place the kneaded dough into the prepared bowl, turning it once to ensure all sides are lightly coated with oil. This prevents the dough from drying out and sticking.
- Allow to Rise: Cover the bowl tightly with plastic wrap or a clean kitchen towel. Place the bowl in a warm, draft-free place. Ideal spots include a slightly warmed oven that has been turned off, or near a sunny window. Let the dough rise until it has visibly doubled in size. This crucial first rise, known as bulk fermentation, typically takes between 30-45 minutes, but the exact time can vary depending on your kitchen’s ambient temperature and the activity of your yeast. This step is essential for developing both the focaccia’s flavor and its characteristic airy, open texture.
Shaping, Topping, and Baking Your Incredible Focaccia
Once your focaccia dough has completed its first rise and achieved its full potential, it’s time to transform it into the beautiful, flavorful flatbread you envision. The following steps will guide you through shaping, topping, and baking to perfection.
- Preheat Oven and Prepare Baking Sheet: Begin by preheating your oven to a hot 450°F (230°C). This high temperature is key to achieving a crispy crust. While the oven preheats, lightly grease a 13×15 inch baking sheet (or a similar size, such as a 9×13 inch if you prefer a thicker focaccia) with olive oil. Then, generously sprinkle the greased surface with yellow cornmeal. This critical step prevents sticking and contributes a delightful, slightly crisp texture to the bottom of your focaccia.
- Shape the Dough: Gently remove the fully risen dough from its bowl and carefully place it onto the prepared baking sheet. Using your fingertips, gently press and stretch the dough outward to form a roughly 13×15 inch rectangle, or to fit the dimensions of your chosen pan. Aim for an even thickness across the entire surface. If the dough seems to resist stretching back or springs back too much, let it rest for 5-10 minutes to allow the gluten to relax before continuing to stretch it.
- Create the Iconic Dimples: This is a signature step for focaccia. Using your fingertips, gently but firmly press indentations all over the surface of the dough. Be careful not to press all the way through to the baking sheet. These dimples serve a dual purpose: they prevent large air bubbles from forming during baking, ensuring an even crumb, and they create little wells to hold the olive oil and any chosen toppings.
- Brush with Olive Oil and Add Toppings: Drizzle the top of the dimpled dough generously with approximately 1 teaspoon of high-quality olive oil, spreading it evenly across the surface with a pastry brush. Now is the time to add your desired toppings: sprinkle with coarse sea salt, additional dried rosemary, or other optional additions like thinly sliced olives, minced garlic, or cherry tomato halves.
- Second Rise (Optional, but Recommended for Lightness): For an even lighter and airier texture, you can optionally cover the dough loosely with a clean kitchen towel and let it rest for another 15-20 minutes in a warm spot while the oven finishes preheating. This brief second rise, also known as proofing, helps to achieve maximum fluffiness and an open crumb structure.
- Bake Until Golden: Carefully place the baking sheet into your preheated oven. Bake for approximately 15-20 minutes, or until the focaccia develops a beautiful, rich golden-brown color on top and is cooked through. If you have an instant-read thermometer, the internal temperature should ideally reach between 200-210°F (93-99°C).
- Apply Finishing Oil: Once the focaccia is out of the oven, immediately brush the hot bread with the remaining 1 teaspoon of olive oil. This step is essential as it enhances the flavor, adds a lovely sheen, and helps to keep the crust tender and moist.
- Cool and Serve: Let the focaccia cool on the baking sheet for a few minutes before carefully transferring it to a wire rack to cool completely. While it’s tempting to cut into it immediately, allowing it to cool fully helps the internal structure set. Once slightly cooled, cut the focaccia into squares or your desired portions and prepare to enjoy its incredible flavor and texture.
The Perfect BLT Starts Here: Assembling Your Masterpiece
Now that you have your incredible homemade focaccia, it’s time to create the BLT that started this whole endeavor. The focaccia’s sturdy yet tender crumb and its rich flavor profile are the ultimate upgrade for this timeless classic sandwich, transforming it into an unforgettable culinary experience.
- Slice the Focaccia: Carefully slice a piece of focaccia horizontally to create two distinct layers, much like you would a conventional sandwich roll. The airy texture of the focaccia makes it surprisingly easy to cut cleanly.
- Spread with Mayo: Generously spread your favorite mayonnaise on both cut sides of the focaccia. The creamy richness of the mayo will seep slightly into the porous bread, adding an incredible depth of flavor and moisture that perfectly complements the other ingredients.
- Layer the Fillings:
- Crisp Lettuce: Start by layering plenty of fresh, crisp lettuce (romaine, iceberg, or butter lettuce all work wonderfully) on the bottom half of the focaccia.
- Juicy Tomatoes: Arrange thick, ripe slices of flavorful tomatoes on top of the lettuce. A light sprinkle of salt and freshly ground black pepper on the tomatoes will enhance their natural sweetness and bring out their best flavor.
- Crispy Bacon: Pile on several strips of perfectly cooked, crispy bacon. The savory, salty bacon provides a delightful textural and flavor contrast to the focaccia and fresh vegetables.
- Assemble and Enjoy: Gently place the top half of the focaccia onto your perfectly layered fillings, press down lightly, and get ready for a truly sensational taste experience. The robust yet tender focaccia holds up beautifully to the generous fillings, preventing any sogginess and providing a deeply satisfying bite. YUM!!!
Beyond the BLT: Versatile Uses for Homemade Focaccia
While focaccia makes an extraordinary BLT, its versatility extends far beyond just this classic sandwich. Once you’ve mastered this recipe, you’ll discover countless delightful ways to incorporate your homemade creation into various meals and occasions:
- Dipping Bread: Serve warm focaccia cut into rustic pieces alongside a small bowl of high-quality extra virgin olive oil. For an extra touch of sophistication, add a splash of balsamic vinegar, a grind of black pepper, and a pinch of red pepper flakes to the oil for an elegant and flavorful appetizer.
- Accompaniment to Meals: Focaccia is a fantastic and flavorful side dish for a wide array of meals. It pairs wonderfully with robust pasta dishes, hearty soups, comforting stews, or a simple, fresh green salad, adding texture and flavor to every bite.
- Gourmet Sandwiches: Elevate any sandwich by using focaccia as the bread. It’s excellent with grilled chicken, fresh mozzarella and basil pesto, an assortment of roasted vegetables, or a selection of high-quality Italian cured meats and cheeses.
- Mini Pizza Base: Cut leftover focaccia into smaller squares or individual portions. Top with your favorite tomato sauce, a generous sprinkle of cheese, and any desired pizza toppings, then bake until bubbly and golden for quick and delicious mini focaccia pizzas.
- Gourmet Croutons: If you have focaccia that’s a day or two old, cut it into cubes, toss with a little olive oil and your favorite herbs (like oregano or garlic powder), then bake until crisp. These homemade gourmet croutons will add an incredible dimension to your salads or soups.
- Bruschetta Base: Slice thin pieces of focaccia, lightly toast them, and then top with a fresh bruschetta mix of diced tomatoes, basil, garlic, and a drizzle of olive oil for a delightful appetizer.
Expert Tips for Focaccia Success Every Time
To ensure your homemade focaccia bread turns out perfectly with that coveted crispy crust and tender interior, keep these expert tips and tricks in mind during your baking process:
- Accurate Measurements are Key: Especially for flour and water, precise measurements are paramount in successful bread baking. For the most accurate results, consider using a kitchen scale to measure your flour by weight rather than volume, as cup measurements can vary.
- Don’t Rush the Rise: Patience is a crucial virtue in bread making. The rising time, also known as proofing or fermentation, is essential for developing both the focaccia’s complex flavor and its wonderful airy texture. If your kitchen is particularly cool, find a warmer spot to encourage the dough to rise properly.
- Avoid Over-Flouring: When kneading, it’s a common mistake to add too much extra flour. A slightly sticky dough is often a sign of good hydration, which is critical for achieving a tender and moist crumb in your finished focaccia. Only add just enough flour to prevent excessive sticking.
- Invest in Quality Olive Oil: Since olive oil is such a prominent flavor and texture contributor in focaccia, investing in a good quality extra virgin olive oil will significantly enhance the taste and overall luxuriousness of your bread.
- Develop a Feel for the Dough: As you gain experience, try to get comfortable with the feel of well-kneaded dough. It should be smooth, elastic, resilient, and slightly tacky. This intuition will guide you more than any clock.
- Preheat Your Oven Thoroughly: A consistently hot oven from the very beginning helps to create that beautiful, blistered, and golden-brown crust that is characteristic of excellent focaccia. Give your oven ample time to reach and maintain the set temperature.
- Experiment with Toppings: Once you’re confident with the basic recipe, don’t be afraid to experiment with different herbs, cheeses, vegetables, or even a sprinkle of chili flakes to customize your focaccia and explore new flavor combinations.
Conclusion: Your Homemade Focaccia Journey Begins Now
There you have it – a comprehensive guide to crafting exquisite homemade focaccia bread that promises to transform your BLT sandwiches and open up a world of exciting culinary possibilities. From the simple, gratifying act of combining ingredients to the intoxicating aroma of fresh bread baking, every step of this process is a rewarding experience. The perfectly crispy exterior, the fluffy, aromatic interior, and the rich olive oil flavor will undoubtedly make this recipe a treasured staple in your kitchen.
So, ditch the bland, uninspiring store-bought bread and wholeheartedly embrace the immense joy and satisfaction of baking your own. Your taste buds, and anyone lucky enough to share your incredible creation, will undoubtedly thank you for it. Go ahead, gather your ingredients, and bake your way to bread-making bliss. We guarantee this homemade focaccia will quickly become your go-to for elevating everyday meals into truly extraordinary dining experiences. Happy baking!







