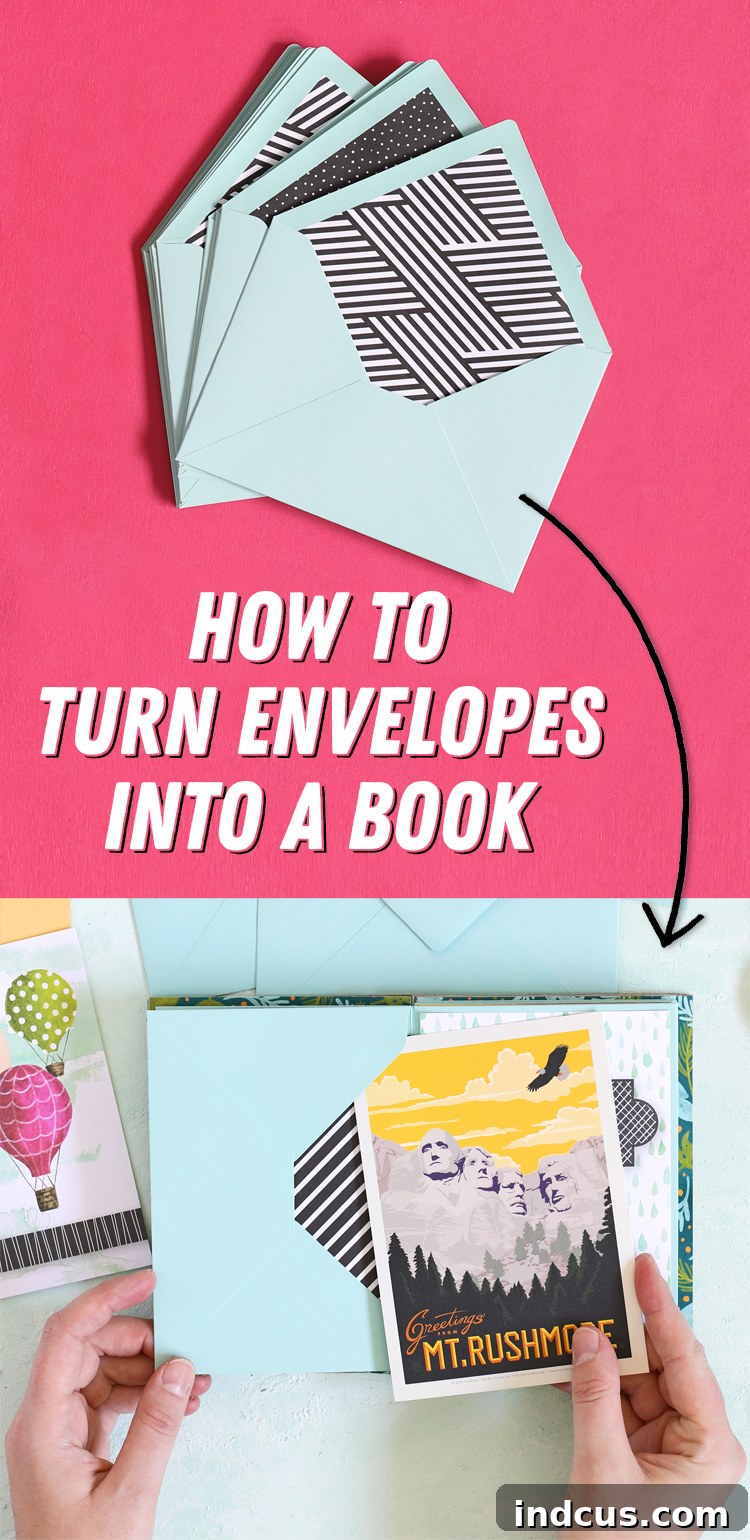
DIY Envelope Book: Craft a Unique Mini Album for Postcards & More
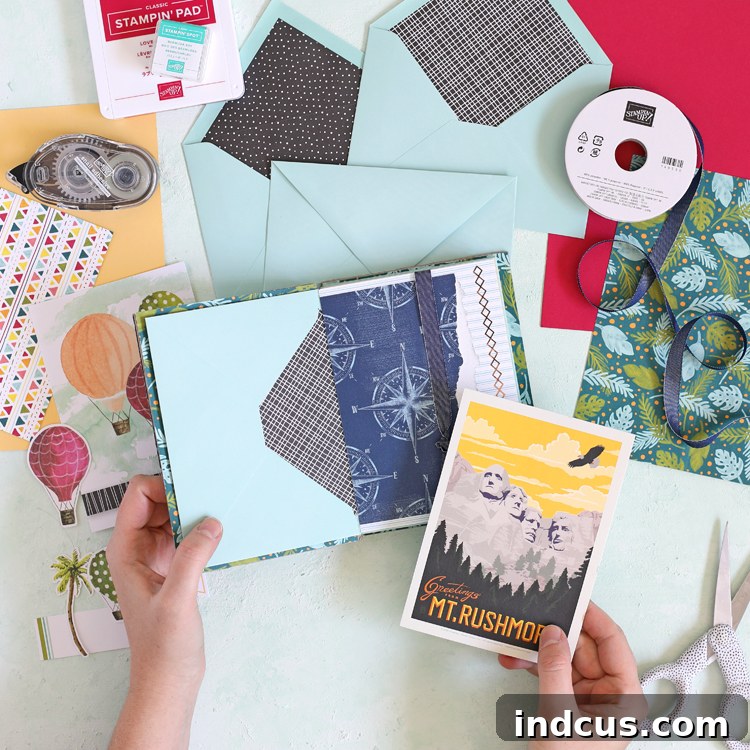
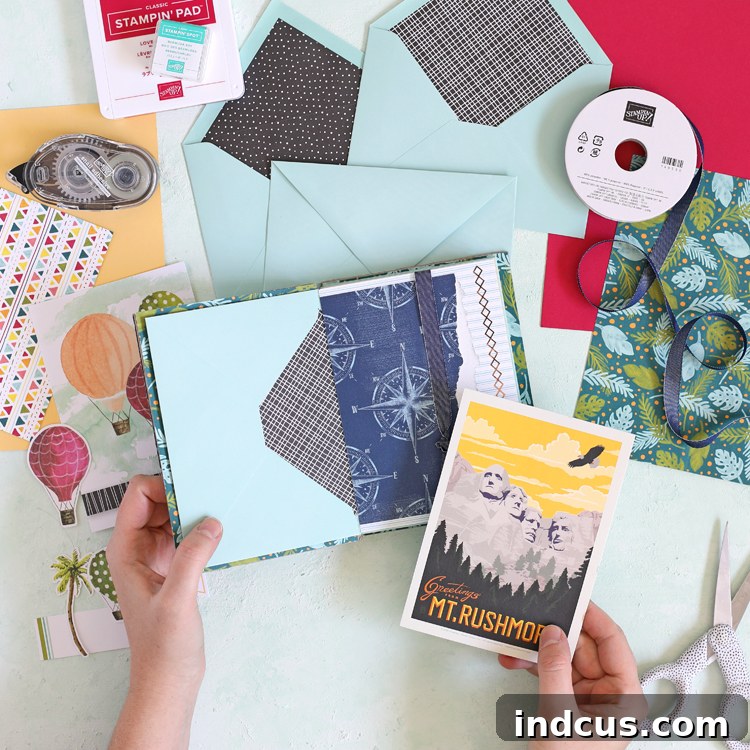
Are you looking for a creative and personalized way to preserve cherished memories? Perhaps a unique handmade gift for a loved one? This comprehensive guide will teach you how to craft a beautiful mini book from envelopes, perfect for housing a treasured postcard collection, photos, or even serving as a charming recipe book. Imagine the joy of flipping through a personalized album, each page a pocket holding a memory from a family trip or a special note from a friend. This project transforms simple envelopes into a functional and decorative keepsake, making it an ideal choice for crafters of all skill levels.
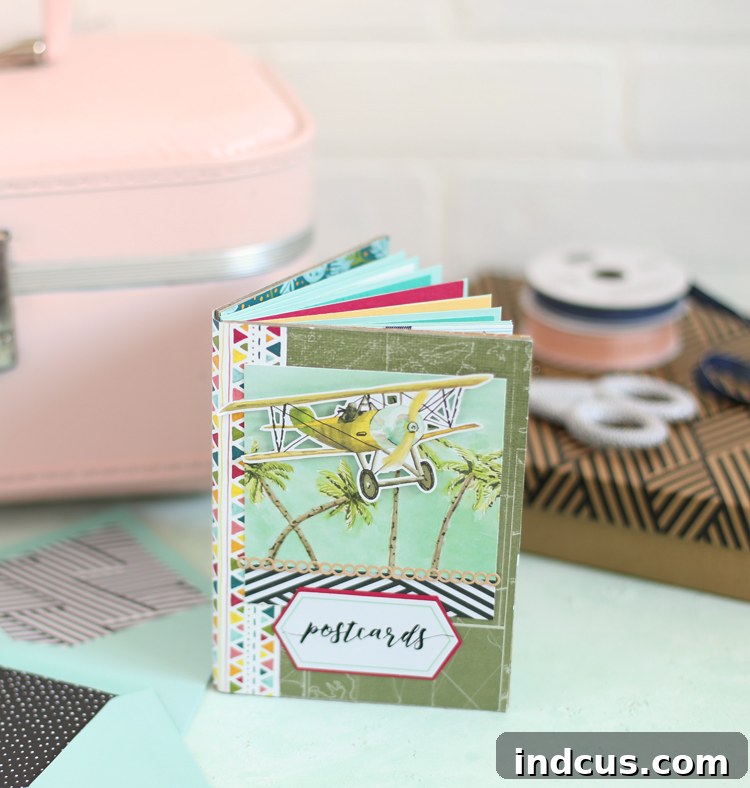
My daughter has a passion for collecting postcards from every adventure we embark on as a family. Watching her gather these small pieces of art and memory inspired me to create something truly special for her: a handmade mini album designed specifically to store her growing collection. The Looking Up Card Kit from Stampin’ Up!, with its delightful travel-themed graphics and perfectly sized envelopes, provided the ideal foundation for this project. However, the beauty of this craft lies in its adaptability; you can easily customize it with any envelopes and decorative papers that capture your imagination.
Creating an envelope book is a surprisingly straightforward process, yet the result is a durable and infinitely customizable album that can serve a multitude of purposes. Whether you’re organizing mementos, making a one-of-a-kind gift, or simply exploring a new paper crafting technique, this tutorial will guide you through every step. We’ll cover everything from selecting your materials to assembling the spine and adding those personal decorative touches. For those who prefer visual learning, I’ve included a helpful video tutorial to ensure a smooth crafting experience. Let’s dive into the rewarding world of handmade books!
This post is made possible by my generous sponsors at Stampin’ Up!, whose wonderful products often inspire my creative endeavors.
Why Create an Envelope Book? Unlocking Its Versatility
An envelope book is more than just a collection of pockets; it’s a versatile canvas for creativity and organization. Its unique design, featuring multiple pockets, makes it perfect for storing items that would otherwise get lost or damaged. Here are just a few reasons why this DIY project is a must-try:
- Preserve Memories Beautifully: From postcards and photographs to concert tickets and handwritten notes, an envelope book offers a safe and charming home for your precious keepsakes.
- Personalized Gift Idea: Imagine gifting a friend a themed envelope album filled with memories from your adventures together, or a custom recipe book for a new homeowner. A handmade gift carries immense sentimental value.
- Endless Customization: With a vast array of envelopes, cardstock, and embellishments available, you can tailor each book to a specific theme, recipient, or occasion.
- Develop Crafting Skills: This project is an excellent way to practice basic paper crafting techniques like measuring, scoring, cutting, and adhering, building confidence for more complex projects.
- Eco-Friendly Crafting: Repurpose old envelopes or use sustainably sourced papers to create something new and beautiful, reducing waste in a creative way.
Gather Your Crafting Essentials: What You’ll Need
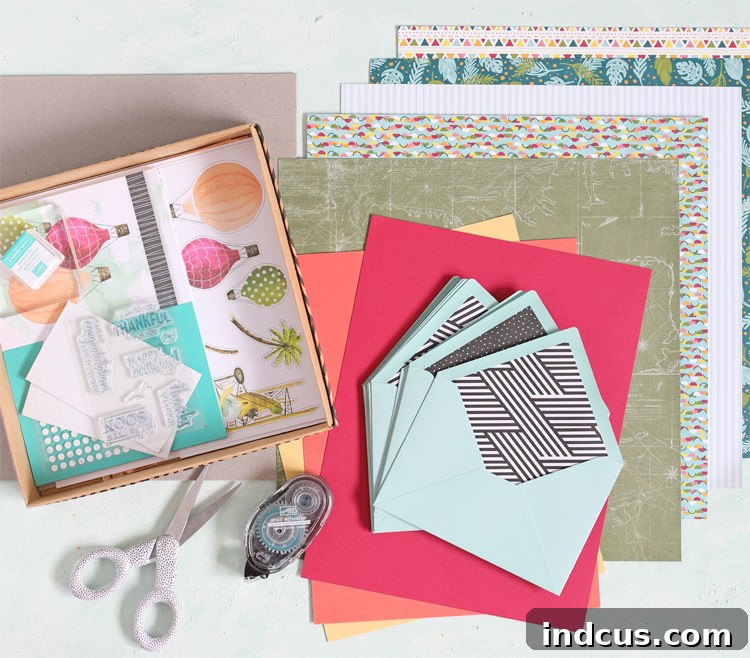
Before we embark on our creative journey, let’s ensure you have all the necessary tools and materials. Having everything ready will make the crafting process much smoother and more enjoyable. While I used specific products for my project, feel free to substitute with what you have on hand or what inspires you!
Essential Materials:
- 8-12 Decorative Envelopes: The star of our show! I used the delightful Looking Up Card Kit, which includes envelopes perfectly sized for postcards. The number of envelopes determines the thickness of your book. Choose envelopes with a sturdy paper weight and appealing designs or colors.
- Assorted Cardstock and Patterned Paper: These will form the covers and spine of your book, as well as provide decorative elements. Opt for cardstock that complements your chosen envelopes and patterned paper that aligns with your book’s theme. A good weight (e.g., 80-100 lb) for the cover is recommended for durability. Explore various options from Stampin’ Up!’s paper selection.
- Chipboard: This provides the rigid structure for your book covers, ensuring they are durable and protective. You can often find chipboard at craft stores, or repurpose it from packaging (e.g., the back of a paper pad).
- Strong Adhesive: A reliable adhesive is crucial for ensuring your book holds together over time. Snail Adhesive is a popular choice for paper crafts due to its clean application and strong hold. Liquid glue or double-sided tape can also work effectively.
- Scissors or Paper Trimmer: For precise cuts, a good pair of paper snips or a reliable paper trimmer is essential. Accuracy in cutting ensures a professional-looking finish.
- Scoring Tool or Bone Folder: While not strictly listed, a scoring tool or bone folder is highly recommended for creating crisp, clean folds on your cardstock, especially for the spine. This will make assembly much easier and give your book a polished look.
- Ruler and Pencil: For accurate measurements and marking cut lines.
Remember, a comprehensive video tutorial is located at the end of this post. If any of the following instructions seem unclear, the video offers a perfect visual walkthrough to clarify each step!
Step-by-Step Guide: Crafting Your Envelope Book
Step 1: Preparing Your Book Covers (Front and Back)
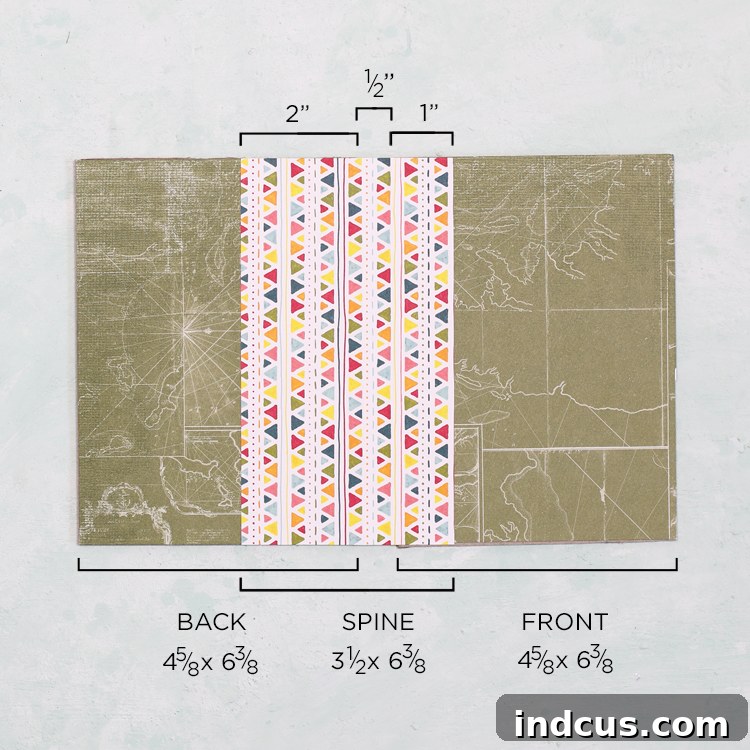
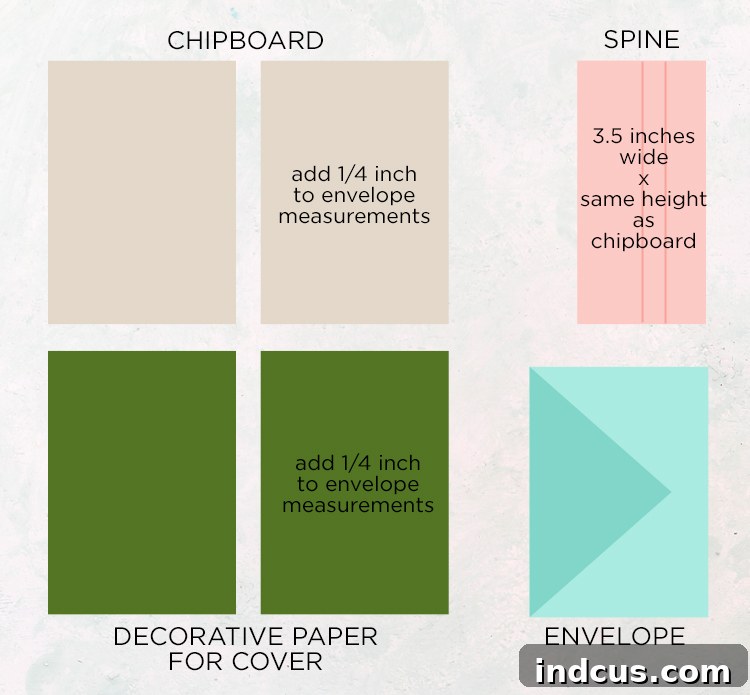
The foundation of your envelope book begins with sturdy covers. For envelopes similar in size to standard postcards, you’ll need two pieces of chipboard, each cut to 4 5/8 x 6 3/8 inches. This measurement provides a slight border around your envelopes, giving the book a finished and professional appearance. If your envelopes are a different size, simply measure them and cut your chipboard pieces to be 1/4 inch larger in both length and width. This consistent border will be applied on all four sides of the assembled envelope pages, creating a neat frame.
Step 2: Adorning Your Covers with Decorative Paper
Once your chipboard covers are cut, it’s time to add the decorative flair. Choose your favorite patterned paper or cardstock that complements your chosen envelopes and the overall theme of your book. Cut two pieces of this decorative paper to the exact same size as your chipboard covers (4 5/8 x 6 3/8 inches). Carefully adhere one piece of decorative paper to one side of each chipboard piece. Ensure the paper is centered and smoothed out to avoid any bubbles or wrinkles. This will be the outer surface of your book covers.
Step 3: Constructing the Spine Piece
The spine is a critical component that holds your book together and allows it to open and close smoothly. For a standard postcard-sized envelope book, cut a piece of sturdy cardstock to 3.5 x 6 3/8 inches. The 6 3/8 inch length should match the length of your chipboard covers, ensuring a consistent height for your book. If you’re working with different sized envelopes, maintain the 3.5-inch width for the spine (this width provides enough space for folding and adhering) and adjust the length to match your chipboard covers.
Step 4: Scoring Your Spine for Flexibility
To create a flexible and functional spine, you’ll need to make two score lines on your 3.5 x 6 3/8 inch cardstock piece. These lines will guide your folds and create the perfect allowance for your book covers.
- Make the first score line 1 inch in from the right side of the spine piece.
- Make the second score line 2 inches in from the left side of the spine piece.
These specific measurements will create a 1/2-inch gap in the center of the spine, which is essential for the book to open and close without creasing the covers. Using a scoring tool or a bone folder against a ruler will help you achieve clean, crisp lines.
To summarize the core measurements for clarity, here’s a quick reference chart:
Step 5: Assembling the Book Covers to the Spine
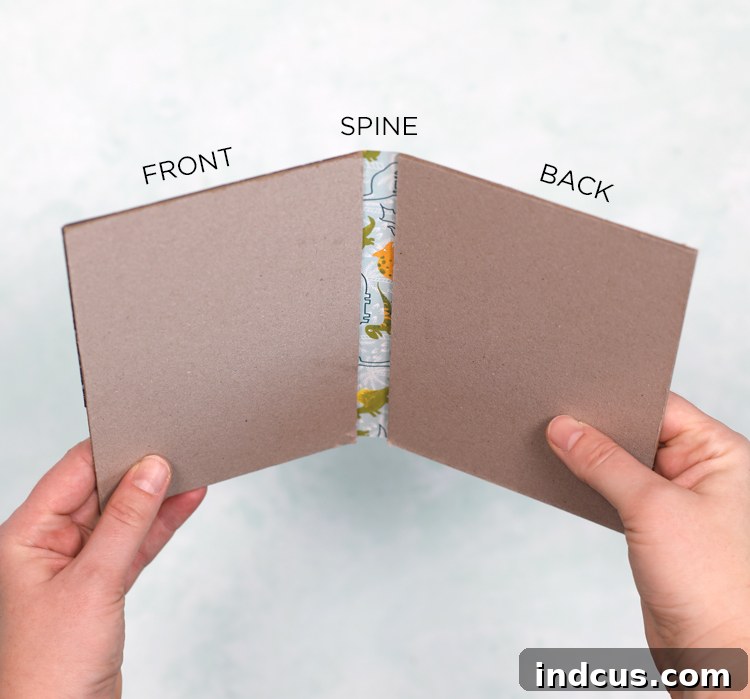
Now it’s time to bring the covers and spine together. Use your score lines as a guide to align and attach the front and back chipboard pieces to the spine. Apply strong adhesive to the overlapping sections of the spine. The spine piece should overlap the front cover by 1 inch and the back cover by 2 inches. Crucially, ensure there is a 1/2-inch gap between the two chipboard covers along the spine. This gap is vital for the book’s flexibility and allows it to open flat without stress on the paper. Press firmly to ensure a strong bond.
Step 6: Creating Your Envelope Pages
This is where the envelopes truly transform into book pages. Gather all your envelopes and stack them neatly, ensuring the flap side is consistently facing up and they are all oriented in the same direction. This consistency is key for a uniform look. Apply a thin line of adhesive along the triangle flap of the bottom envelope. Then, carefully place the next envelope directly on top, aligning all its edges perfectly with the envelope below. Repeat this process, stacking each subsequent envelope onto the flap of the one before it, until all your envelopes are securely connected in a single, continuous stack. If you find this step a bit tricky, the video tutorial provides an excellent visual demonstration.
Step 7: Integrating Envelope Pages into Your Book Cover
With your covers assembled and your envelope pages prepared, it’s time to combine them. The book cover is slightly larger than the envelopes, remember, so you’ll need to center the envelope stack carefully. Begin by aligning the inside edge of your first envelope with the inside front cover of your book. Leave a deliberate 1/8-inch border showing around the other three sides (top, bottom, and outer edge) of the envelope. Apply adhesive generously to the back of the first envelope page and firmly press it into place.
Next, turn to the back of your book. Take the very last envelope flap (which should be facing the back cover) and apply adhesive to it. Line up the straight edge of this triangle-shaped flap with the inside edge of the back cover and glue it down securely. This creates a secure attachment point and completes the internal structure of your book. A useful tip: I’ve found that applying adhesive directly to the paper (the envelope or cardstock) and then pressing it onto the chipboard yields better results, as applying adhesive directly to the chipboard can sometimes cause tearing or uneven adhesion.
Step 8: Unleash Your Creativity: Decorating Your Mini Album
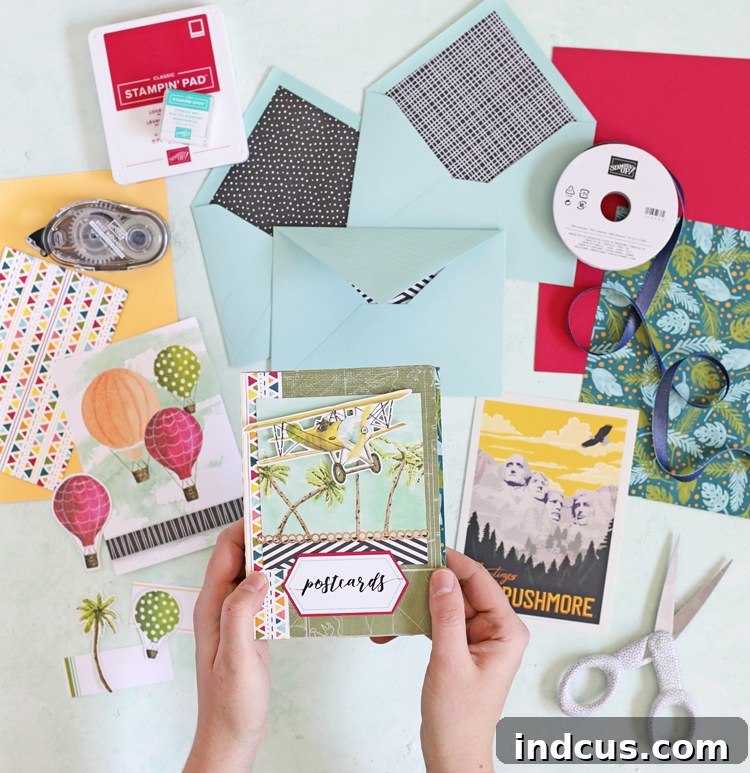
This is arguably the most exciting part – personalizing your envelope book! Now that the structure is complete, it’s time to add embellishments, photos, and all the fun details that make your book uniquely yours. The beauty of a travel-themed kit like the one I used is that it often comes with a variety of cute elements ready for decoration. For my project, I not only used the provided embellishments but also creatively cut the accompanying cards in half, transforming them into additional decorative accents and journaling spots.
Think about the theme of your book. If it’s for postcards, add travel-related stickers, small maps, or stamped phrases like “Adventure Awaits.” If it’s a recipe book, perhaps small illustrations of food or ingredient lists. Don’t be afraid to experiment with different textures and layers using die-cuts, ribbon, glitter, or even small charms. This step is where your personality truly shines through, transforming a functional item into a cherished work of art.
Beyond Postcards: Exploring More Uses for Your Envelope Book
While this project began with the perfect purpose of storing a postcard collection, the versatility of an envelope book extends far beyond. Its unique pocket design makes it incredibly adaptable for various memory-keeping and organizational needs. Here are just a few inspiring ideas to spark your creativity:
- Cherished Christmas Card Keeper: Instead of discarding beautiful holiday cards, use an envelope book to store them year after year. The pockets are ideal for keeping cards organized by sender or year, creating a heartwarming record of festive greetings.
- Personalized Recipe Book: Transform your book into a custom recipe album. Each envelope can hold a favorite recipe card, clippings, or even small notes about family cooking traditions. You can organize them by course, cuisine, or family member, making it a functional and sentimental culinary treasure.
- Scrapbook Mini Album & Keepsake Holder: The pockets are perfect for small photographs, movie tickets, pressed flowers, locks of hair, or other tiny mementos that don’t fit neatly onto traditional scrapbook pages. It’s a fantastic way to create a themed mini-album for a special event like a birthday, anniversary, or a short trip.
- Kids’ Art Portfolio: Encourage young artists by giving them a special book to store their smaller drawings, certificates, or school projects. They can decorate the cover and feel proud of their personal archive.
- Coupon and Receipt Organizer: For the super organized, an envelope book can become a portable system for coupons, receipts, or even small bills, categorized by store or type.
- Gratitude Journal: Dedicate each pocket to a week or month, filling it with small notes, photos, or tickets representing things you’re grateful for, creating a beautiful visual journal of blessings.
The possibilities truly are endless. The act of creating and then using these books brings a special kind of satisfaction, knowing you’ve crafted something functional, beautiful, and deeply personal. It’s a wonderful way to keep your memories tangible and accessible.
Visual Learning: Watch the Full Envelope Book Video Tutorial
For those who benefit from seeing each step in action, I’ve prepared a comprehensive video tutorial that walks you through the entire process of creating your envelope book. From cutting the chipboard to assembling the covers and attaching the envelopes, this video offers clear, detailed visuals that complement the written instructions. If any step felt unclear or you simply prefer a guided demonstration, this video is an invaluable resource to ensure your crafting experience is smooth and successful. Press play and let’s craft together!
Your Next Handmade Masterpiece Awaits!
You’ve now learned how to transform a simple stack of envelopes into a charming and practical mini book, a perfect home for postcards, cherished photos, or any small treasures you wish to keep organized. This DIY envelope book is not just a craft project; it’s an opportunity to create a personalized keepsake or a heartfelt gift that will be appreciated for years to come. The satisfaction of crafting something beautiful with your own hands is truly unmatched.
So, gather your materials, choose your favorite envelopes, and embark on this rewarding paper crafting adventure. Don’t be afraid to experiment with different papers, embellishments, and themes to make your envelope book truly unique. We hope this tutorial has inspired you to unleash your creativity and enjoy the process of making something special. Happy crafting!
Found this project inspiring? Pin it to your favorite crafting board so you can easily revisit it later and share the creativity with others!