Craft Your Own Cardboard Vending Machine: The Ultimate DIY Birthday Party Activity!
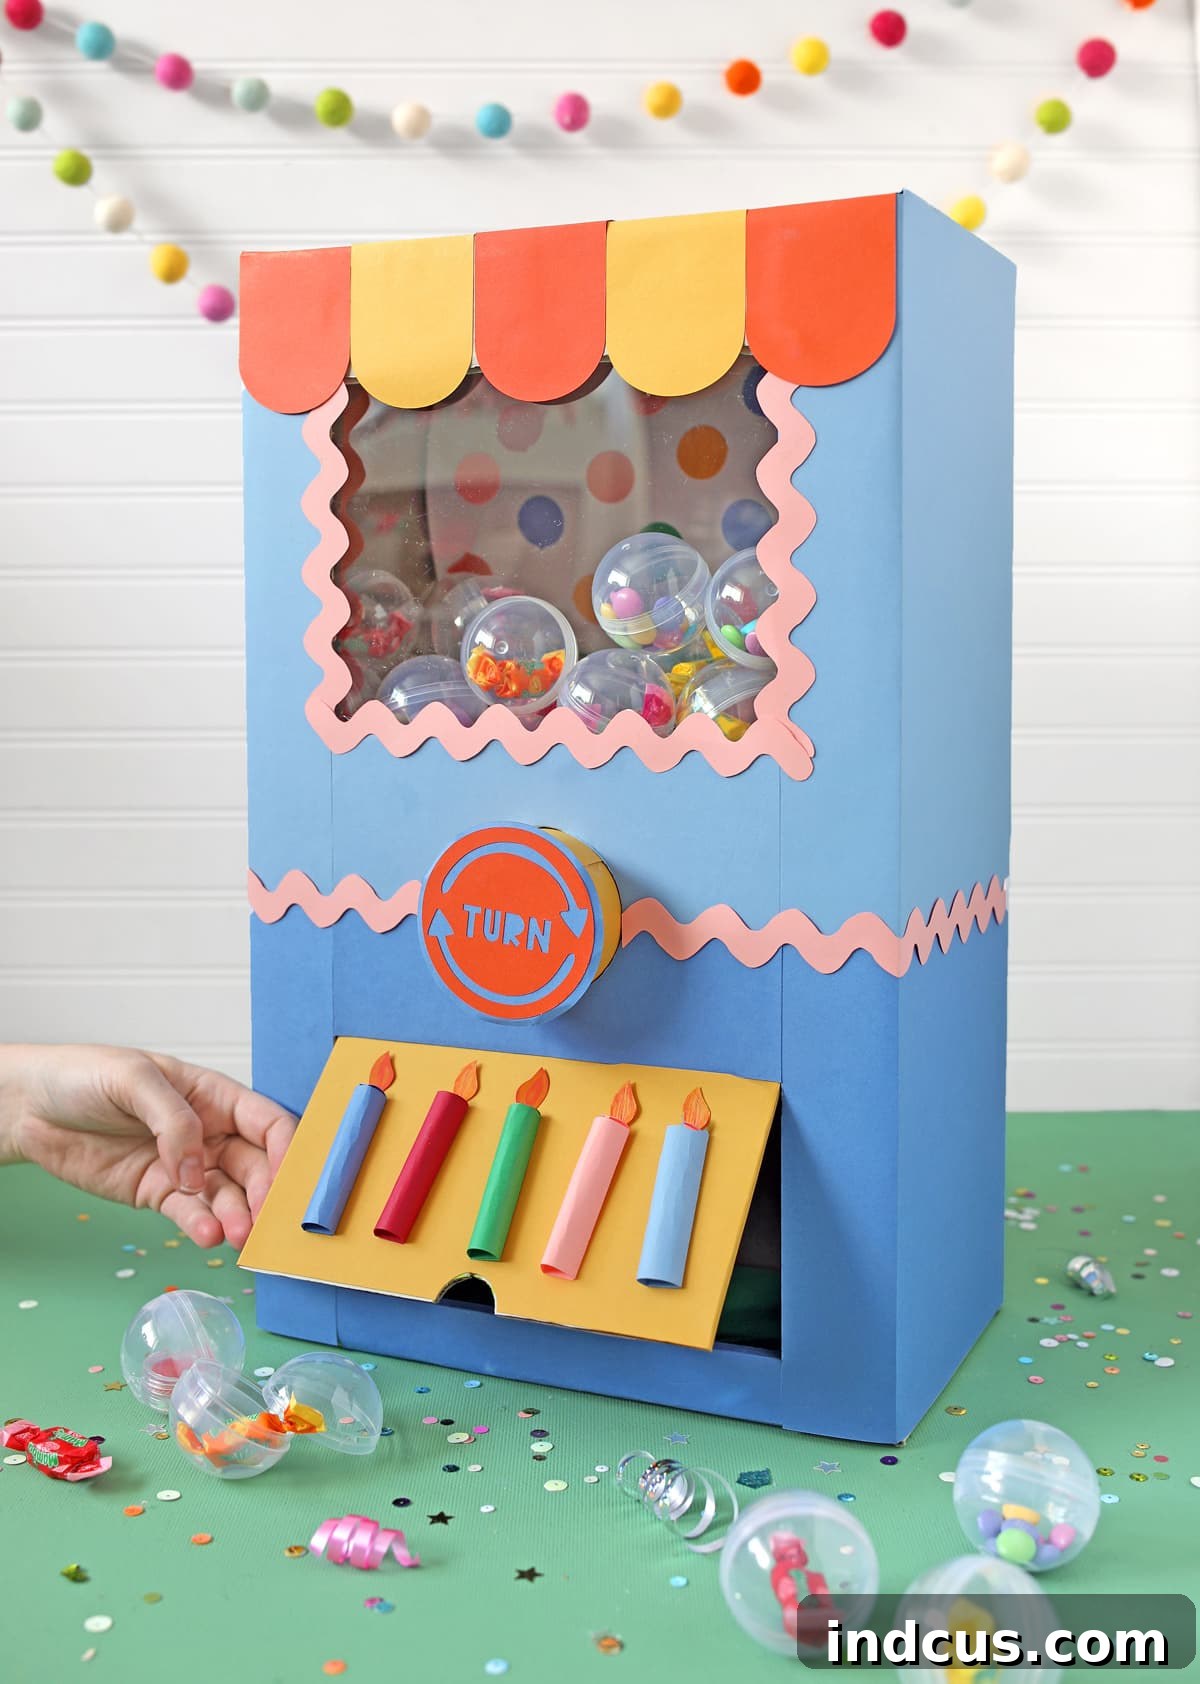
Hello, fellow craft enthusiasts and party planners! Get ready to embark on an exciting and incredibly rewarding DIY journey today. We’re diving into the creative world of cardboard crafting to build a fully functional vending machine right from a simple box! You might recall the delightful gingerbread house claw machine we fashioned during the festive season. That project was such a hit, sparking endless giggles and memorable moments, that it inspired me to create another interactive machine, perfectly suited for a variety of celebrations.
This led to the brilliant idea of designing a customizable vending machine, ideal for birthday parties. Imagine the excitement as children line up, eagerly anticipating their turn to dispense a party favor, or perhaps, for the birthday star, a whole collection of special gifts! This project offers incredible flexibility, allowing you to tailor it precisely to your needs and the theme of your event. Beyond just birthdays, this homemade vending machine can be a fantastic addition to school fairs, holiday gatherings, or simply a fun toy for imaginative play at home. It’s a project that combines creativity, engineering, and pure joy, promising hours of entertainment and a wonderful sense of accomplishment.
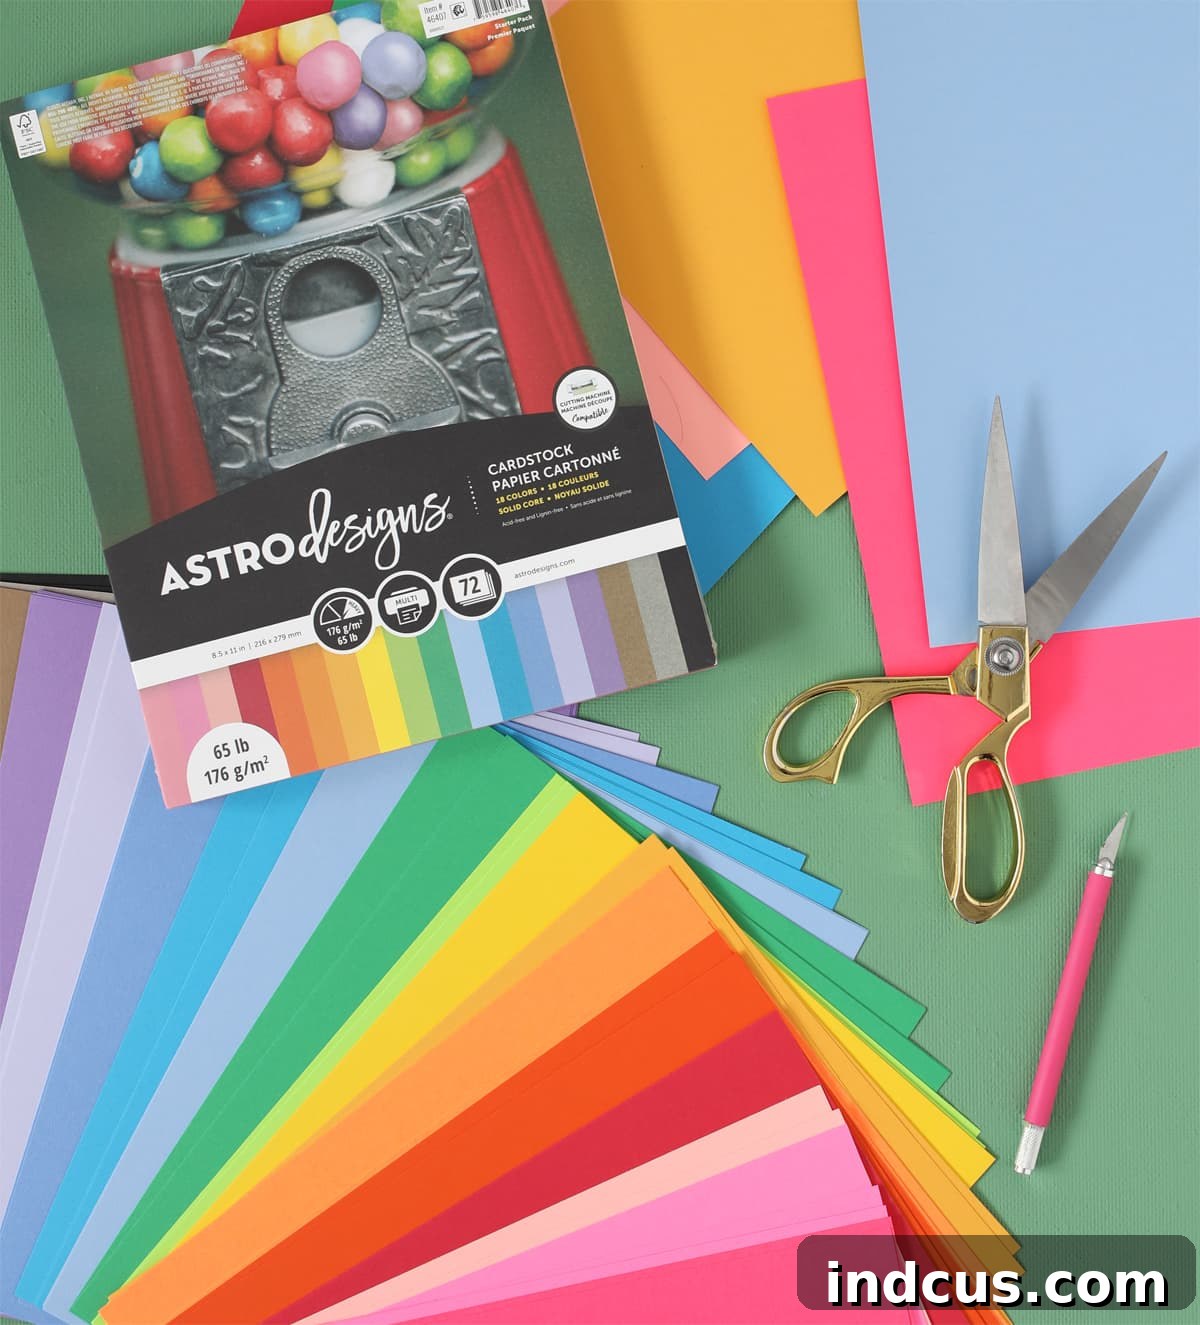
This post is proudly sponsored by ASTRODESIGNS® Papers – www.Astrobrights.com, bringing vibrant color to your crafting projects.
Are you ready to transform a humble cardboard box into an extraordinary interactive experience? Let’s gather our supplies and unleash our inner inventor!
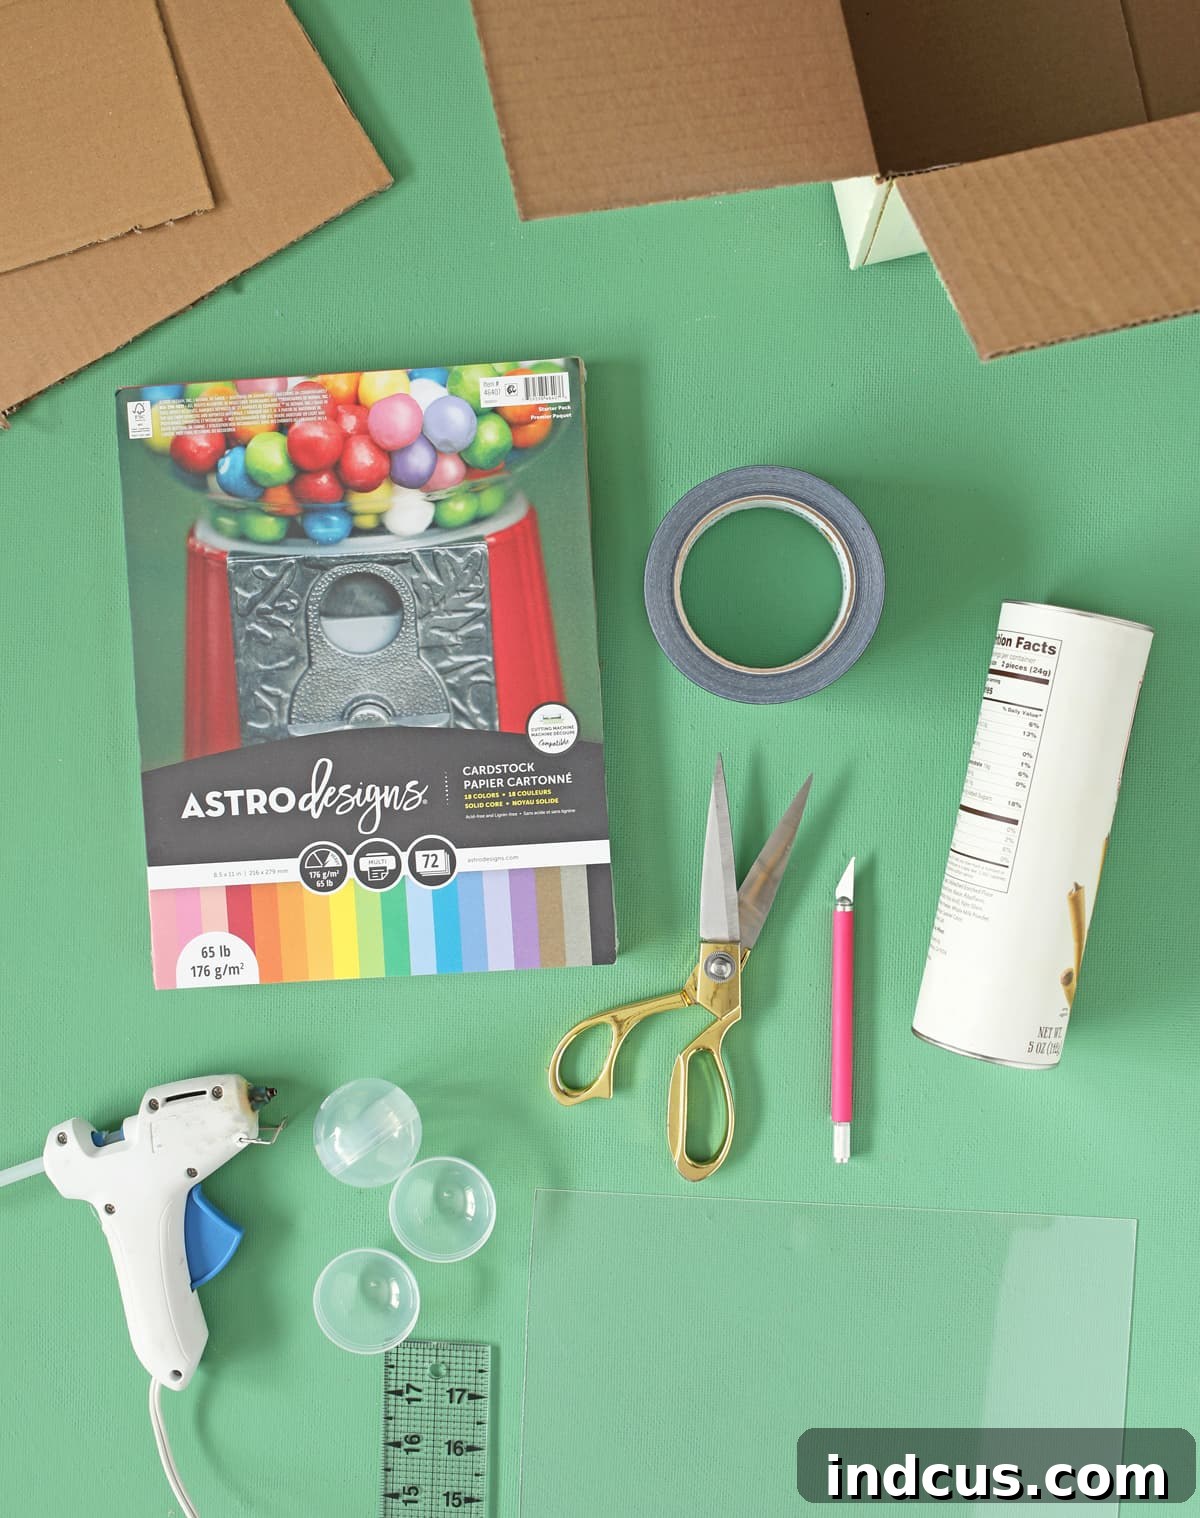
Essential Materials for Your DIY Vending Machine
For more details on any highlighted item in our comprehensive supply list, simply click on the link. Please note that affiliate links may be used, which means we may earn a small commission at no extra cost to you if you make a purchase.
- ASTRODESIGNS® Colored Cardstock: Essential for adding vibrant colors and decorative finishes to your vending machine. Its sturdy quality ensures durability and a professional look.
- Cardboard Box + Extra Cardboard Scraps: The main structure of your machine. Choose a box that is clean and sturdy. Extra scraps will be vital for internal mechanisms like shelves and supports.
- Cardboard Tube (e.g., chip can, cookie can, mailing tube): This forms the core dispensing mechanism. Ensure it’s robust enough to withstand rotation.
- Utility Blade: For precise and clean cuts through cardboard. Always use with caution and on a protected surface.
- Plexiglass Sheet: Creates the transparent display window for your prizes, offering durability and safety compared to traditional glass.
- Vending Machine Prize Balls: These clear plastic capsules are perfect for holding small toys, candies, or custom messages. Their uniform size ensures smooth operation of the dispensing mechanism.
- Hot Glue Gun + Glue Sticks: Provides a strong, fast-drying bond, crucial for assembling the structural components of the machine.
- School Glue Stick: Ideal for neatly attaching decorative papers and smaller details.
- Scissors: For cutting paper, tape, and making smaller, detailed cuts.
- Ruler: Indispensable for accurate measuring and drawing straight lines, ensuring your machine parts fit together perfectly.
- Duct Tape or Packing Tape: Excellent for reinforcing joints, securing hidden edges, and providing extra stability.
Choosing Your Cardboard Box: Size Matters
While you can certainly adapt this project to any size cardboard box you have on hand, understanding the dimensions will help you visualize the final product. For reference, the box used in this tutorial measures approximately 19 inches tall, 12 inches wide, and 7 inches deep. This size provides a good balance between a substantial presence and manageable construction for children’s prizes.
Selecting the Perfect Cardboard Tube: Key Dimensions
The cardboard tube is the heart of your vending machine’s dispensing function. Two critical measurements will determine its suitability:
- Diameter for Prize Balls: The tube must have a large enough diameter to comfortably fit your prize balls. The prize balls I utilized are 2 inches in diameter. An old cookie canister, with a diameter of about 2.5 inches, proved to be an ideal fit. A standard chip can would also work wonderfully. However, be cautious with most paper towel or wrapping paper rolls, as they tend to be too narrow for the prize balls to pass through freely.
- Length Relative to Box Depth: The tube needs to be longer than the depth of your main cardboard box. It should extend from the back of the box and protrude slightly beyond the front face. For my 7-inch deep box, I opted for an 8.5-inch long tube. This extra length at the front will allow for a “turning knob” design, making it easy for users to operate the machine.
Step-by-Step Construction: Building Your Vending Machine
Part 1: Preparing the Box Front
The front panel of your vending machine is where all the action happens, so precision here is key.
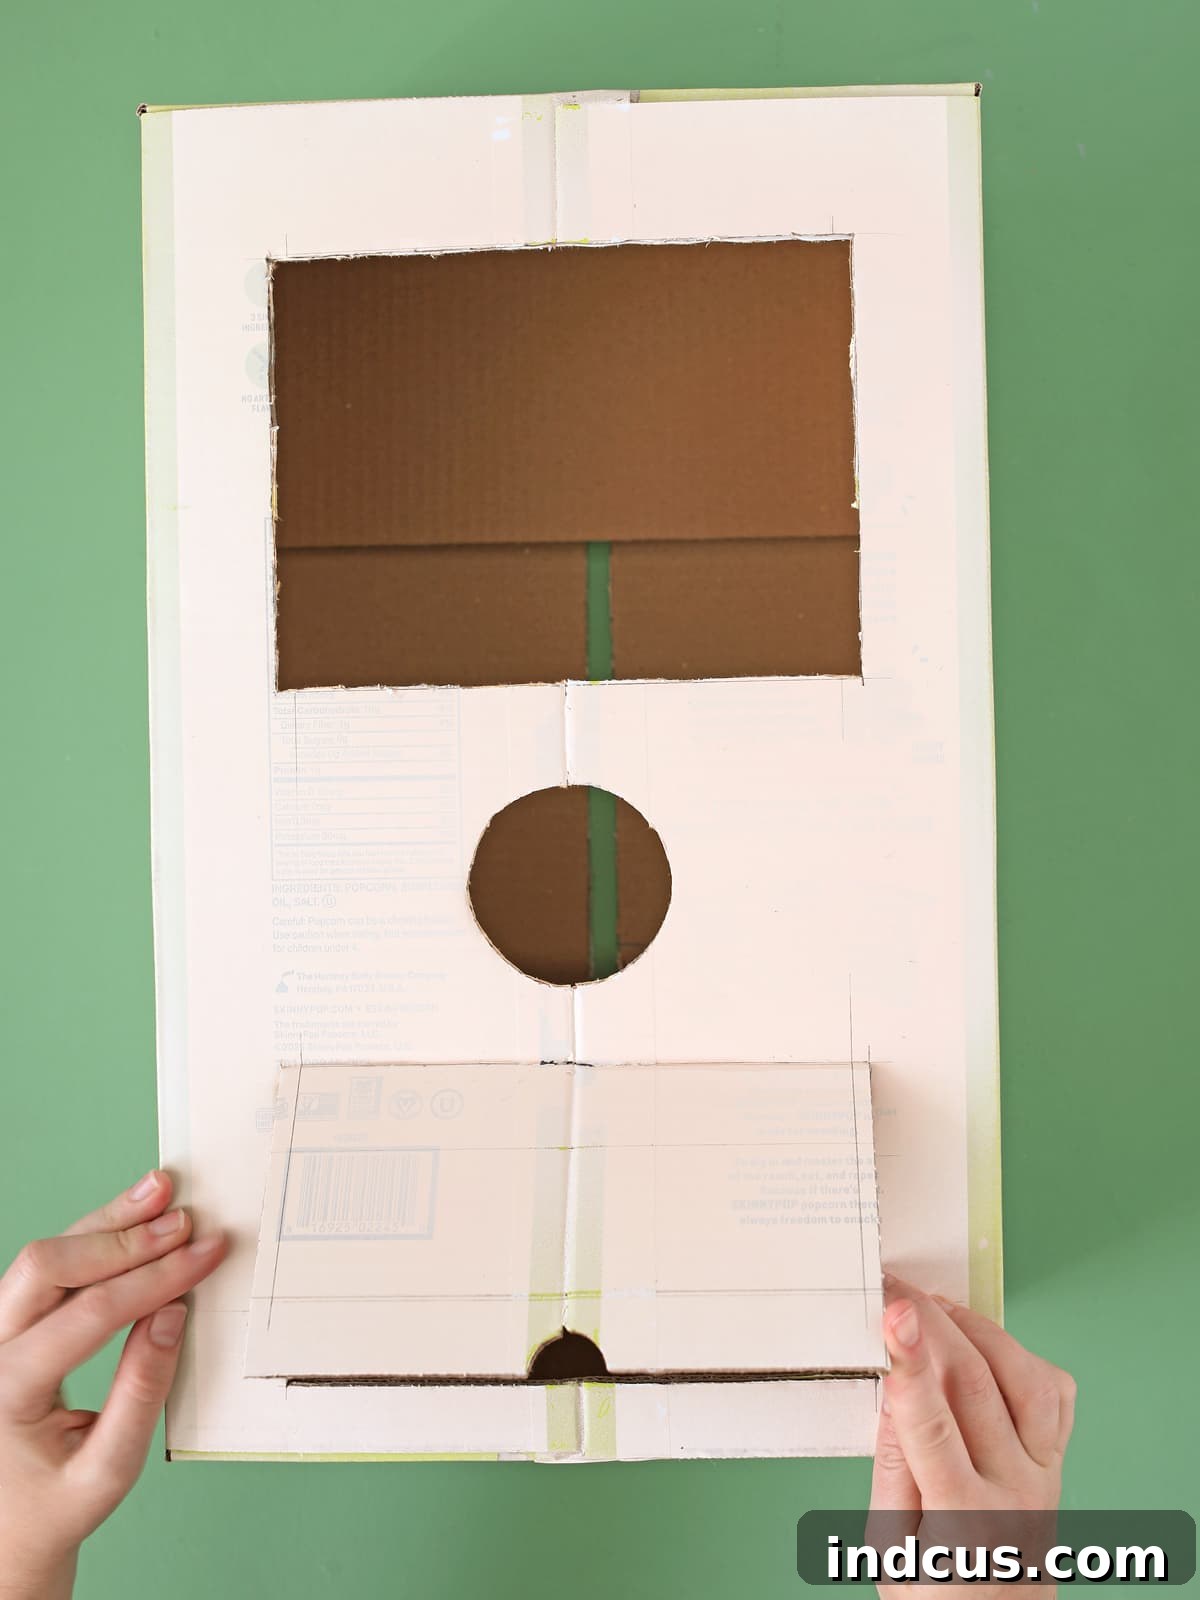
Step 1: Carefully draw three distinct areas onto the front of your main cardboard box: a viewing window, a circular opening for the prize tube, and a small flap for prize retrieval. The window and the retrieval flap can be sized according to your aesthetic preference, making them as large or as small as you deem visually appealing. However, the circular opening is critical; it must be precisely sized to allow your chosen cardboard tube to fit snugly yet be able to rotate freely within it. Use your ruler to ensure straight lines and accurate dimensions.
Step 2: Using your utility blade (always exercise extreme caution!), meticulously cut out the window and the circular opening. For the prize retrieval flap, only cut along the bottom and side lines. Gently score the top edge of this flap. This scoring technique creates a natural hinge, allowing the flap to open and close smoothly, providing easy access to the dispensed prize.
Part 2: Constructing the Interior Mechanism
The inside of your vending machine houses the clever mechanics that make it all work, ensuring prizes roll out smoothly.
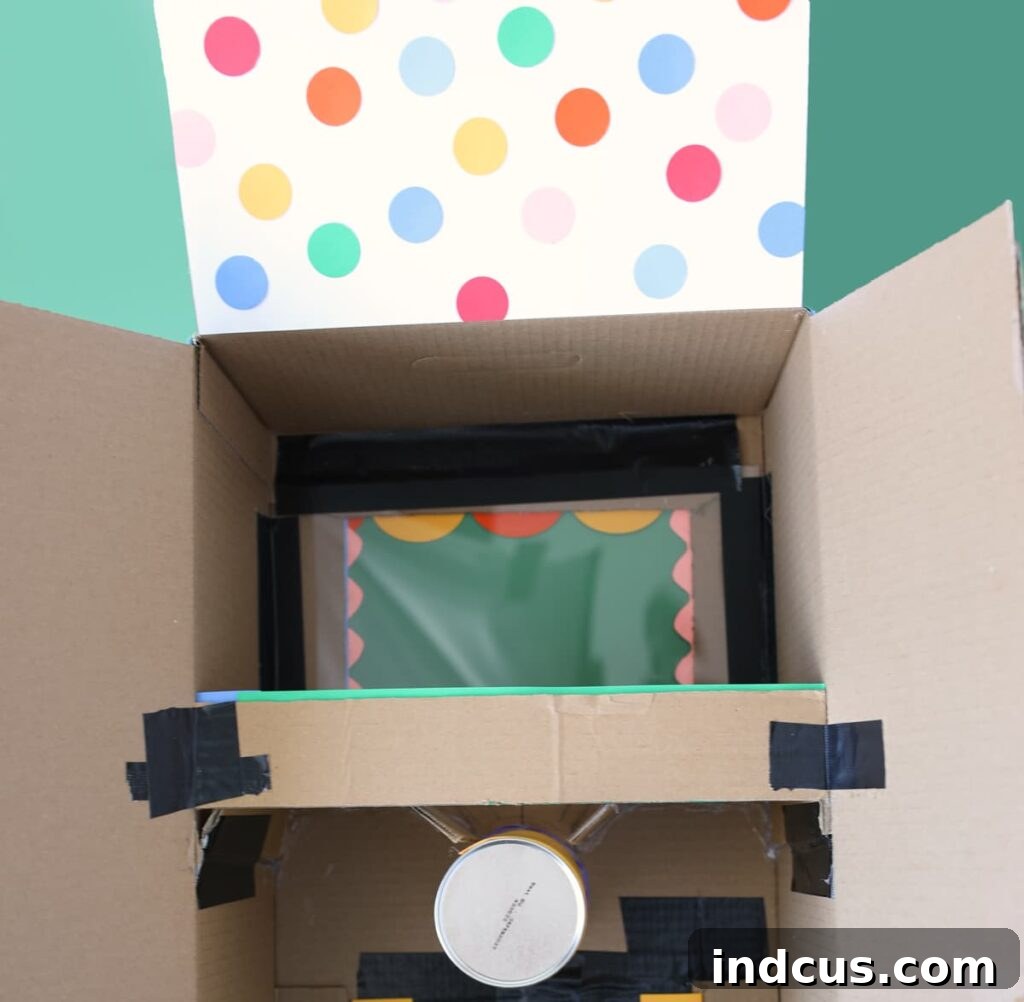
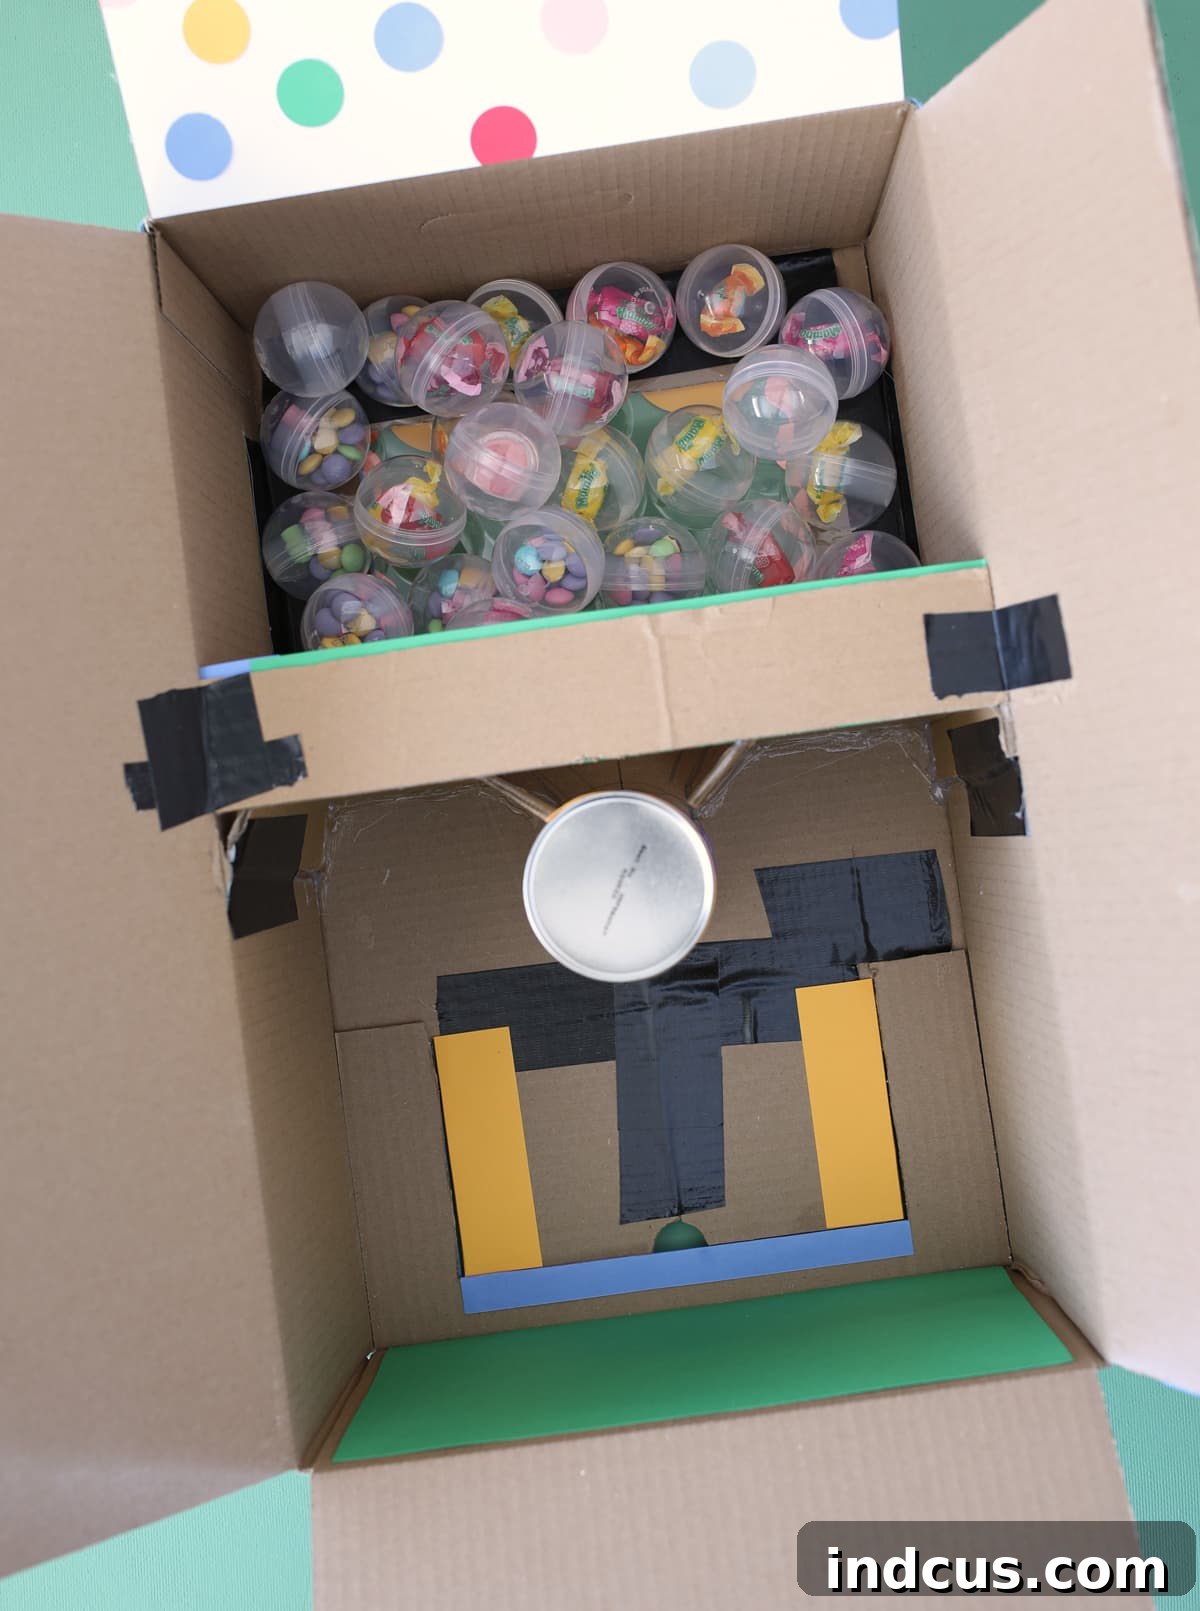
Step 1: Utilize your cardboard scraps to construct an angled shelf inside the box, positioned between the viewing window and the circular tube opening. This shelf needs to extend the full depth of the box, from front to back. Crucially, it should be angled downwards in the middle, directing prize balls towards the top of the circular opening for the tube. The angle is essential for gravity to do its job.
One important note: When designing and cutting your shelf pieces, ensure that the gap between them is sufficiently wide for a prize ball to effortlessly pass through. This clearance is vital for preventing jams and ensuring a smooth vending experience.
Step 2: Securely attach these shelf pieces to the inside of your box. I found that a combination of hot glue and duct tape provides the strongest and most reliable bond. Begin by hot gluing the skinny front edges down, then reinforce these joints with duct tape for added stability. Finish by adding more hot glue along all the seams and joints to ensure everything is firmly in place and can withstand repeated use.
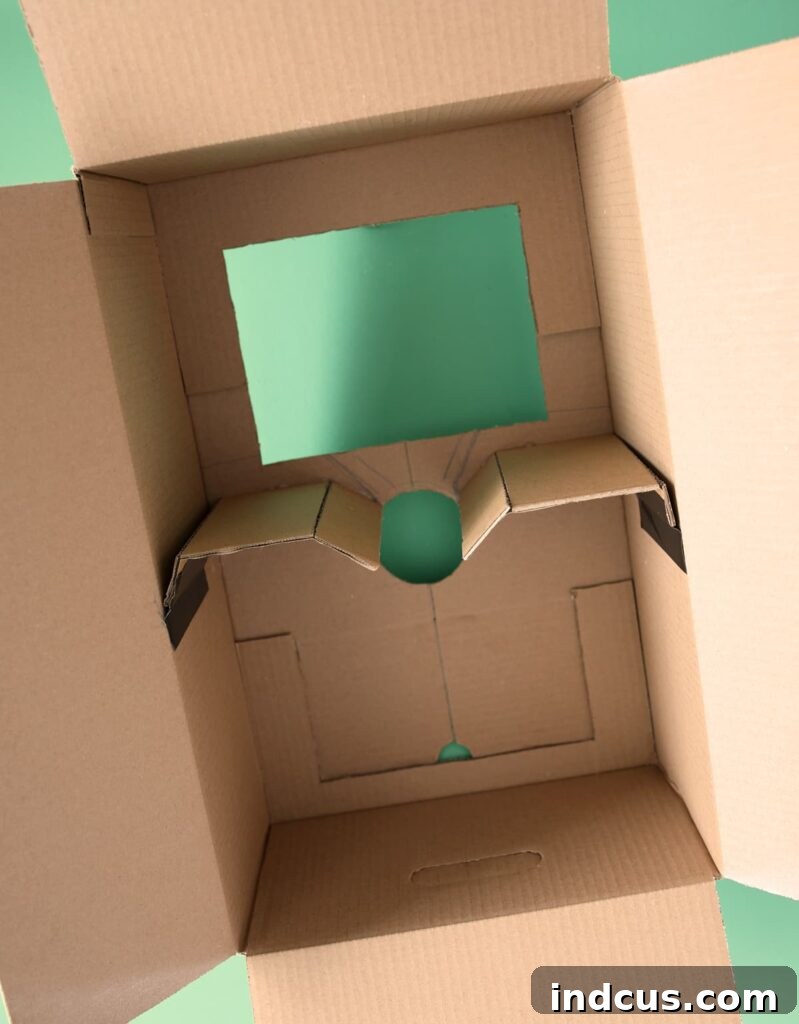
Step 3: Cut a piece of plexiglass that is slightly larger than your prize viewing window. To enhance its appearance and secure it, line the edges of the plexiglass with tape. Then, carefully place it over the window opening from the inside of the box, securing it firmly with hot glue or strong packing tape along all edges. This creates a durable and clear display for the prizes.
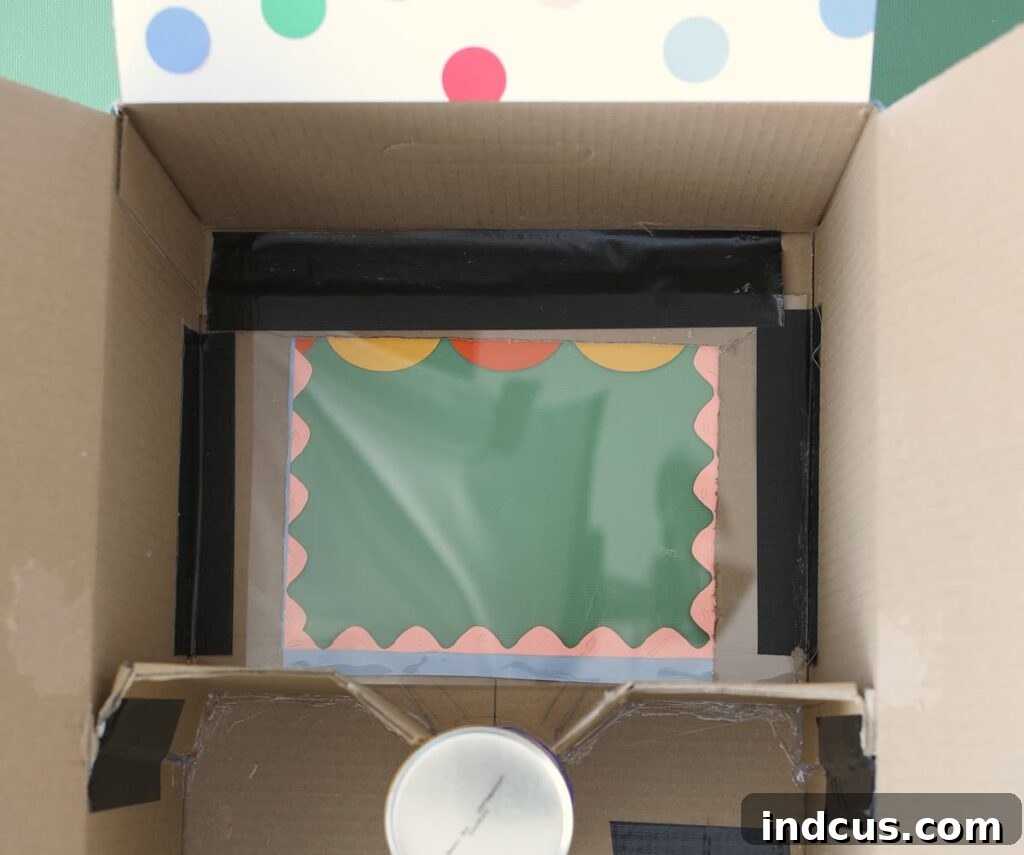
Step 4: To prevent your prize balls from accidentally rolling out when you open the back of the machine for refilling, add a thin strip of cardboard along the back edge of your newly installed shelf. This acts as a crucial barrier. Since this piece will be visible through the window, consider lining it with a piece of cute, decorative paper to integrate it seamlessly into your design.
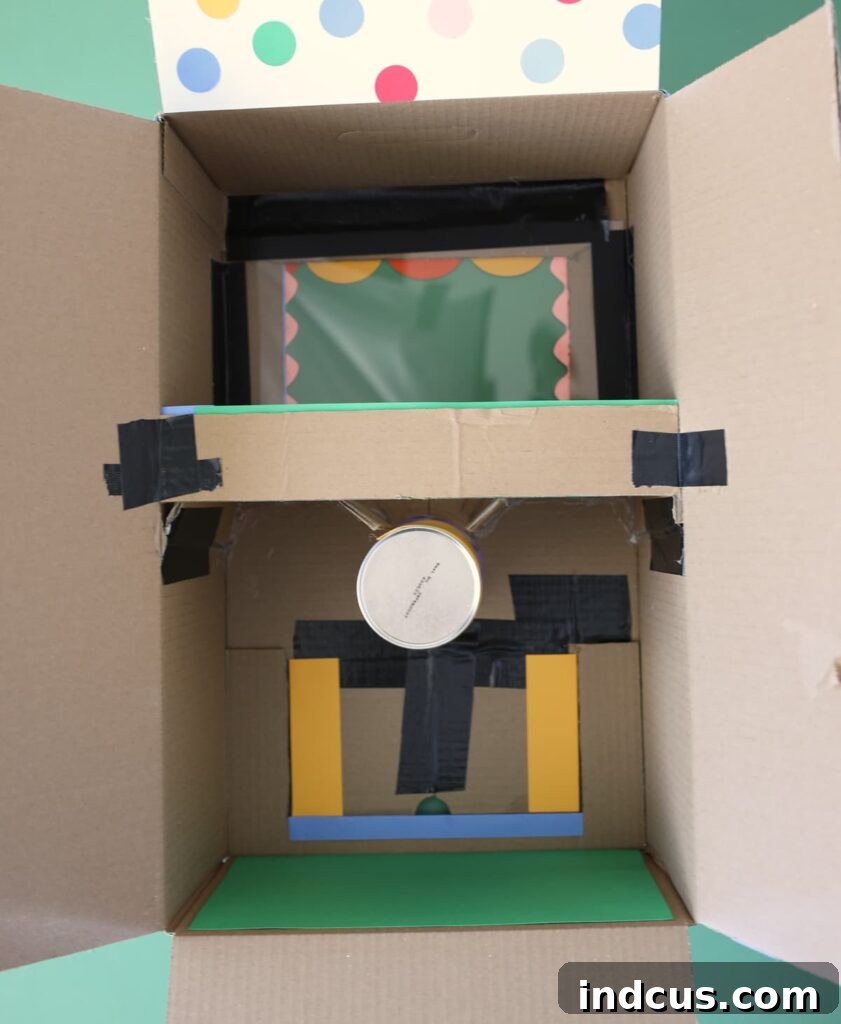
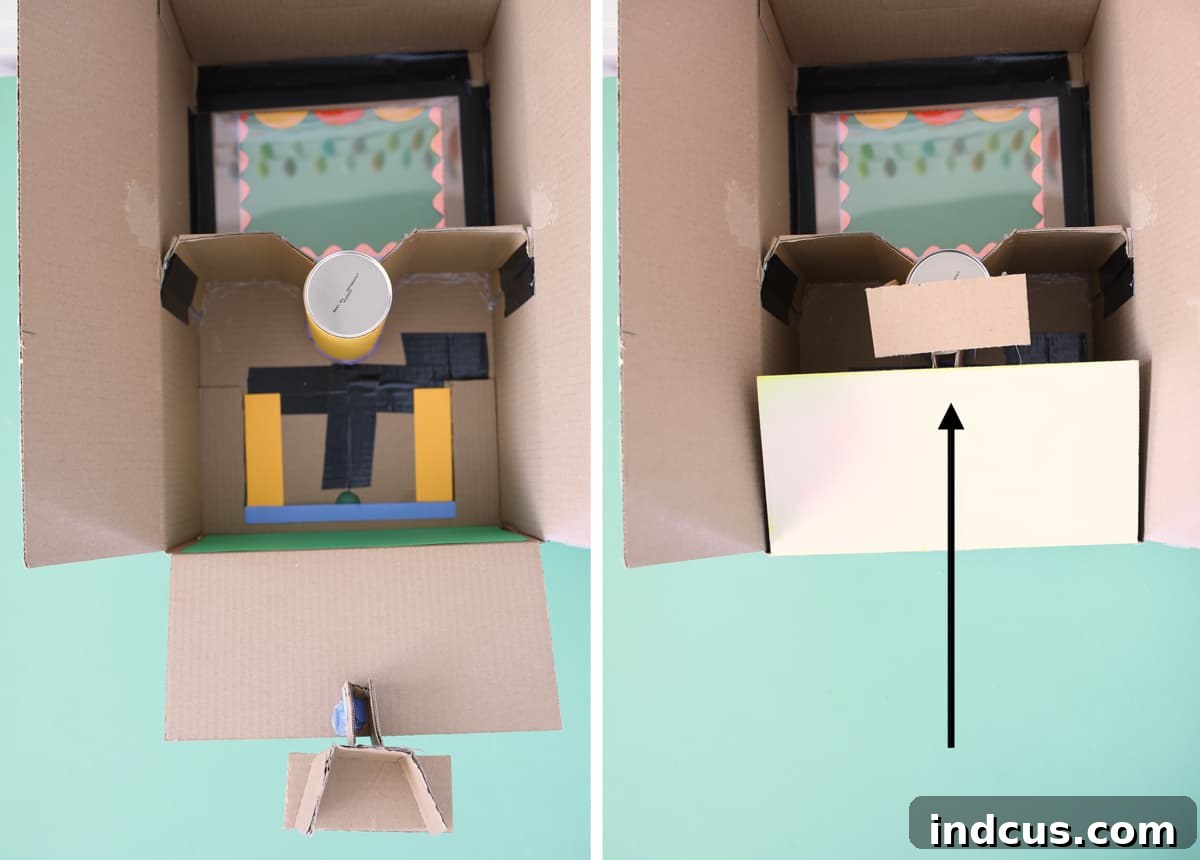
Step 5: The final internal component is a small, supportive ledge for the cardboard tube to rest on at the back of the box. Fashion a simple “cradle” from cardboard scraps. This cradle should be designed to support the tube and keep it level. Glue this cradle to the bottom back flap of the box. This ingenious placement ensures that when the box’s back is closed, the tube will be perfectly supported and held securely in its functional position.
Part 3: Crafting the Prize Dispensing Tube
This ingenious mechanism is what makes your vending machine truly “work.”
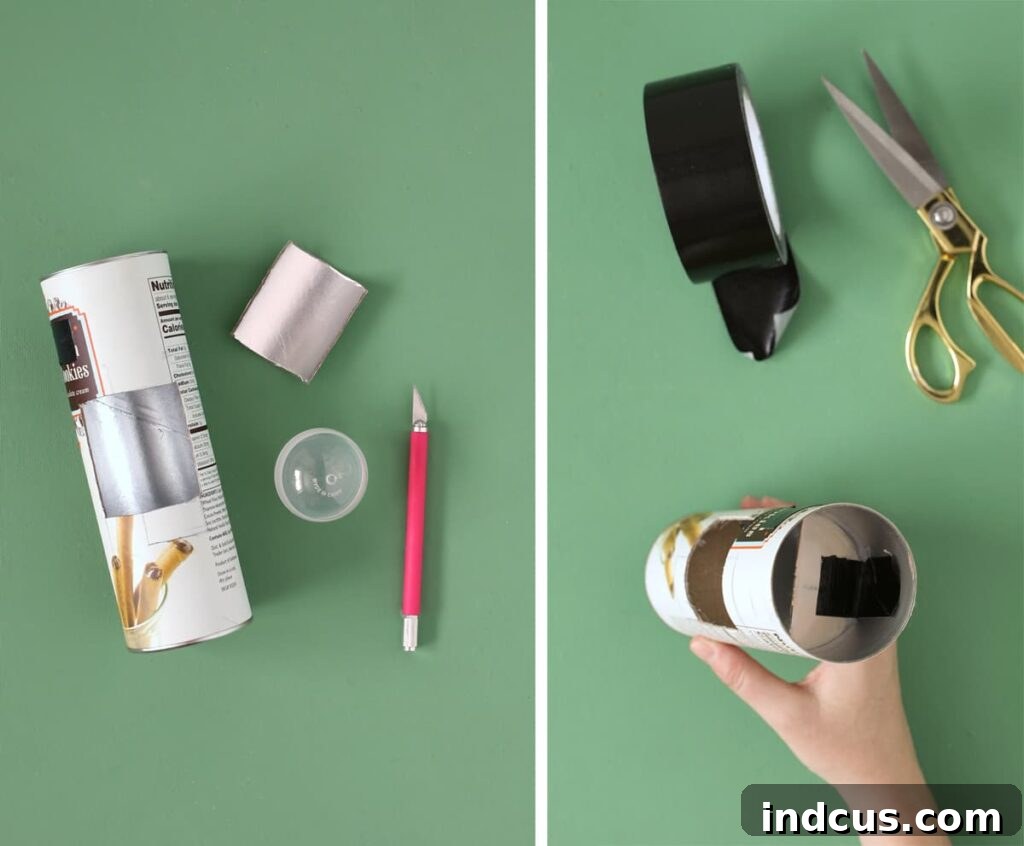
Step 1: Take your chosen cardboard tube and carefully cut a square hole into its center. This hole needs to be precisely sized, large enough for a single prize ball to comfortably fit inside. Avoid making it too large, as you want only one ball to enter at a time.
Step 2: To ensure the prize balls don’t get stuck or slide freely within the tube, add small cardboard pieces inside the tube to block off both ends, just beyond the square hole you cut. This creates a central chamber where the prize ball will reside. By blocking the ends, you prevent the balls from moving from end to end and ensure they can only enter and exit through the designated hole, guaranteeing smooth operation.
Now, carefully slide your prepared tube through the circular hole you cut into the box front. As you position it, you’ll begin to see the magic of the mechanism come to life. The tube starts with its square hole facing downwards, hidden from view. When a user turns the tube (using the extended front portion), the hole rotates upwards, allowing a prize ball from the shelf above to fall inside. As the turning continues, the prize ball is carried around with the rotation until the hole faces downwards again, releasing the prize into the bottom section of the box, right where your retrieval flap is located. Isn’t that an incredibly clever design?
This simple yet effective rotation mechanism is what makes your DIY vending machine so interactive and exciting for everyone!
Part 4: Adding the Fun: Decorations & Personalization
This is undeniably my favorite part of the entire project – where we infuse personality, charm, and vibrant aesthetics into our functional creation! This is your opportunity to unleash your creativity and make your vending machine truly unique.
I absolutely adored working with the giant pack of Astrodesigns® Cardstock for this project. The sheer variety and vibrancy of the colors are simply unparalleled. Holding a fresh stack of this paper instantly sparks a feeling of unlimited creative possibilities! It’s incredibly versatile and allows you to achieve so much in terms of design and texture.
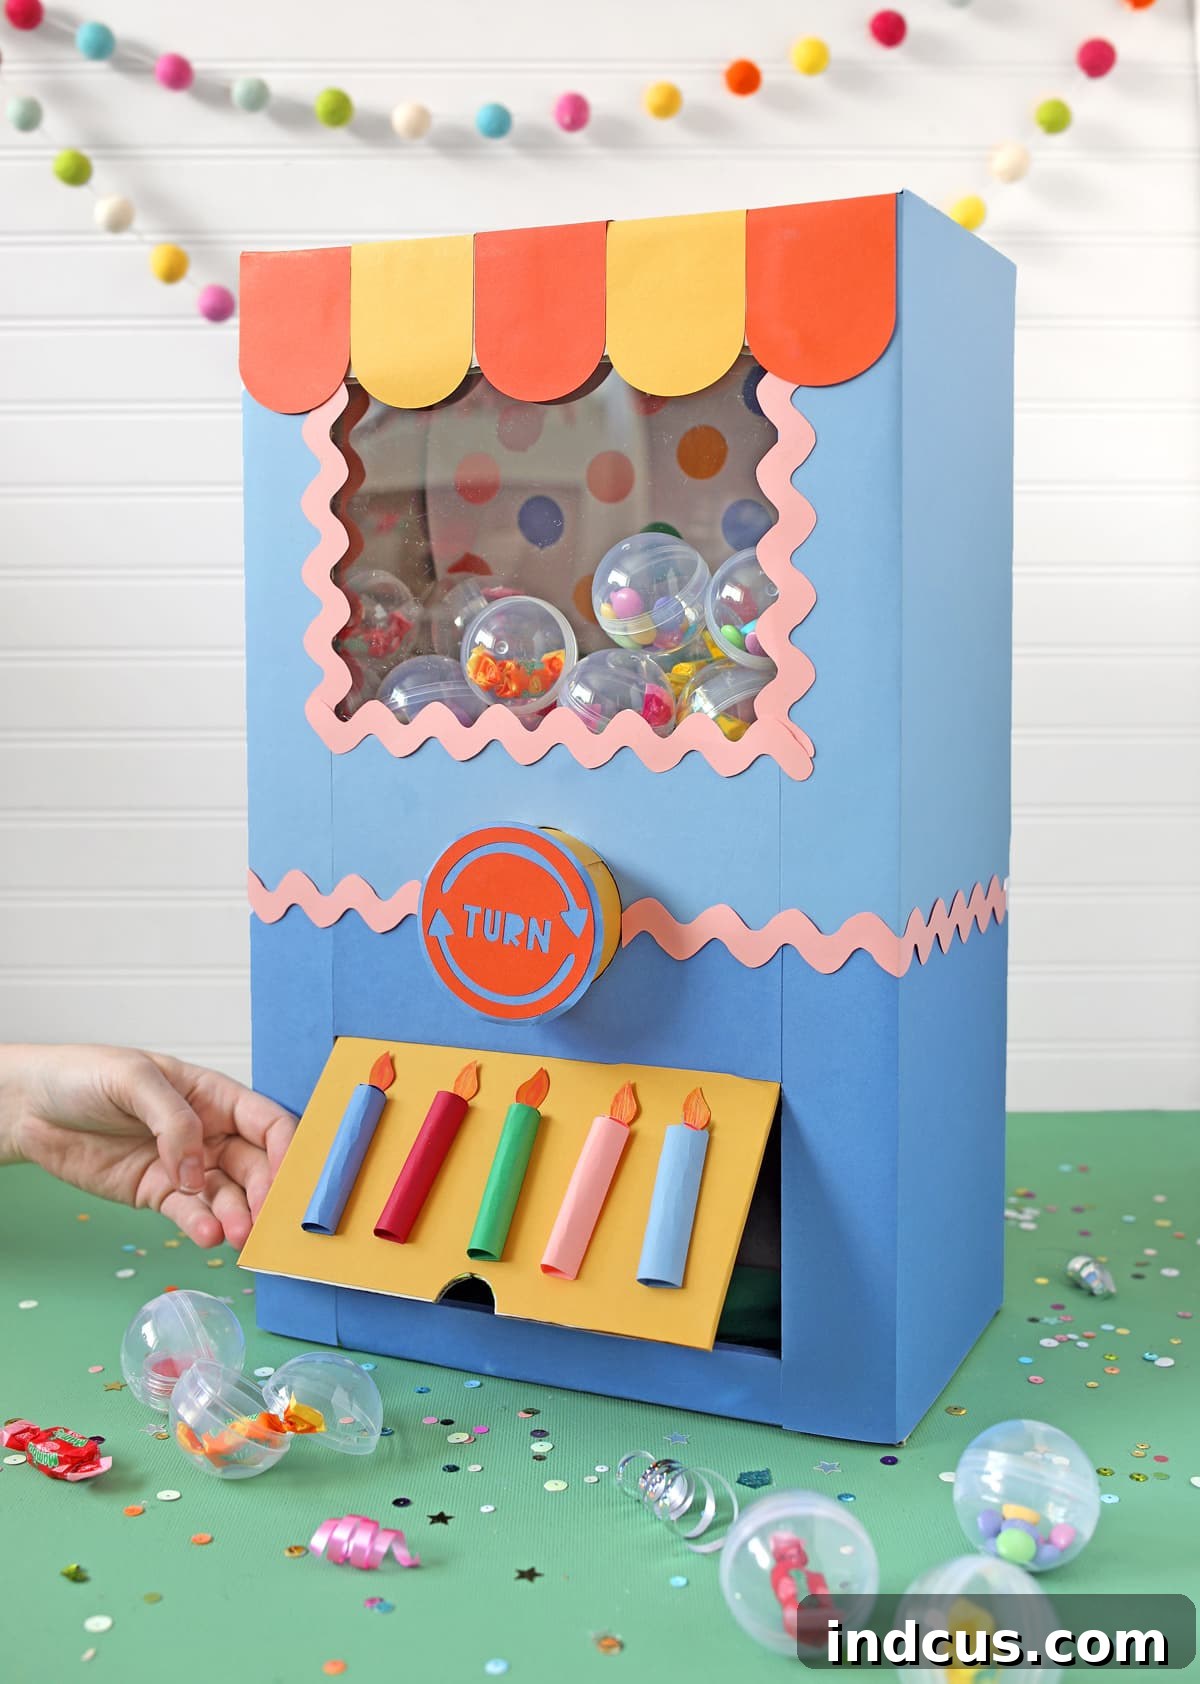
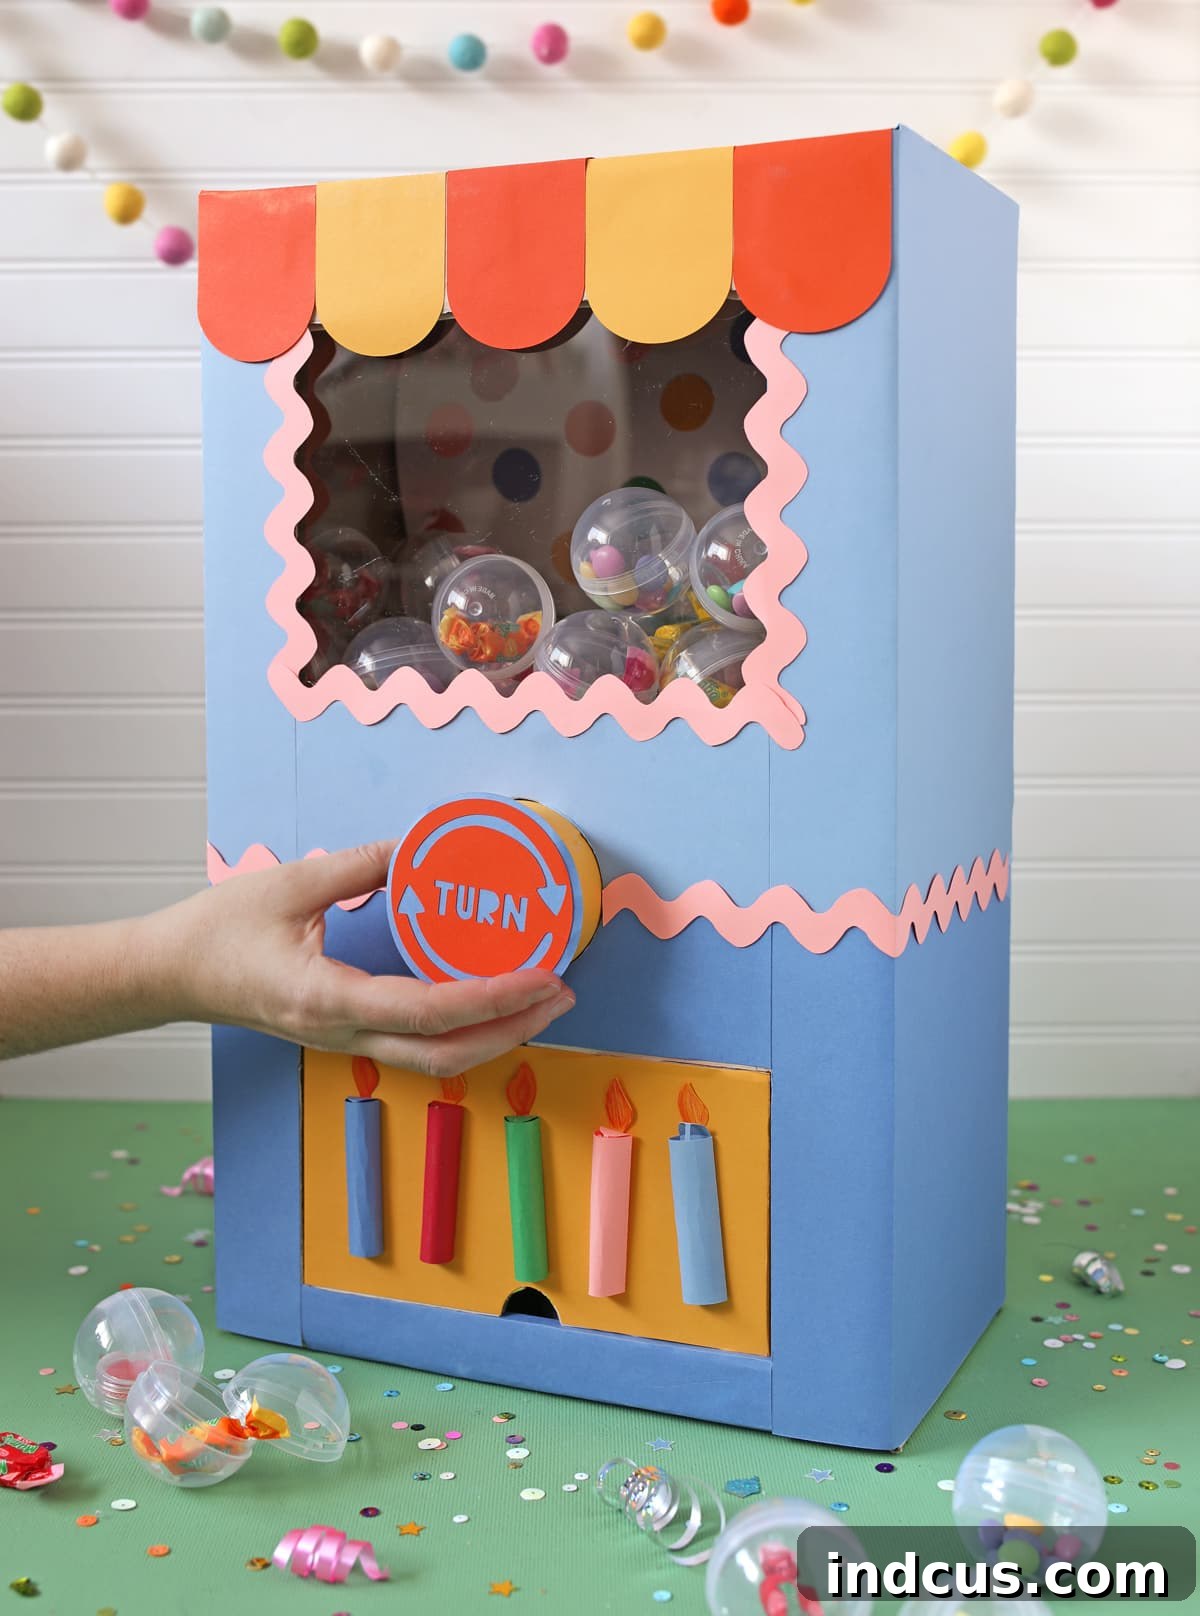
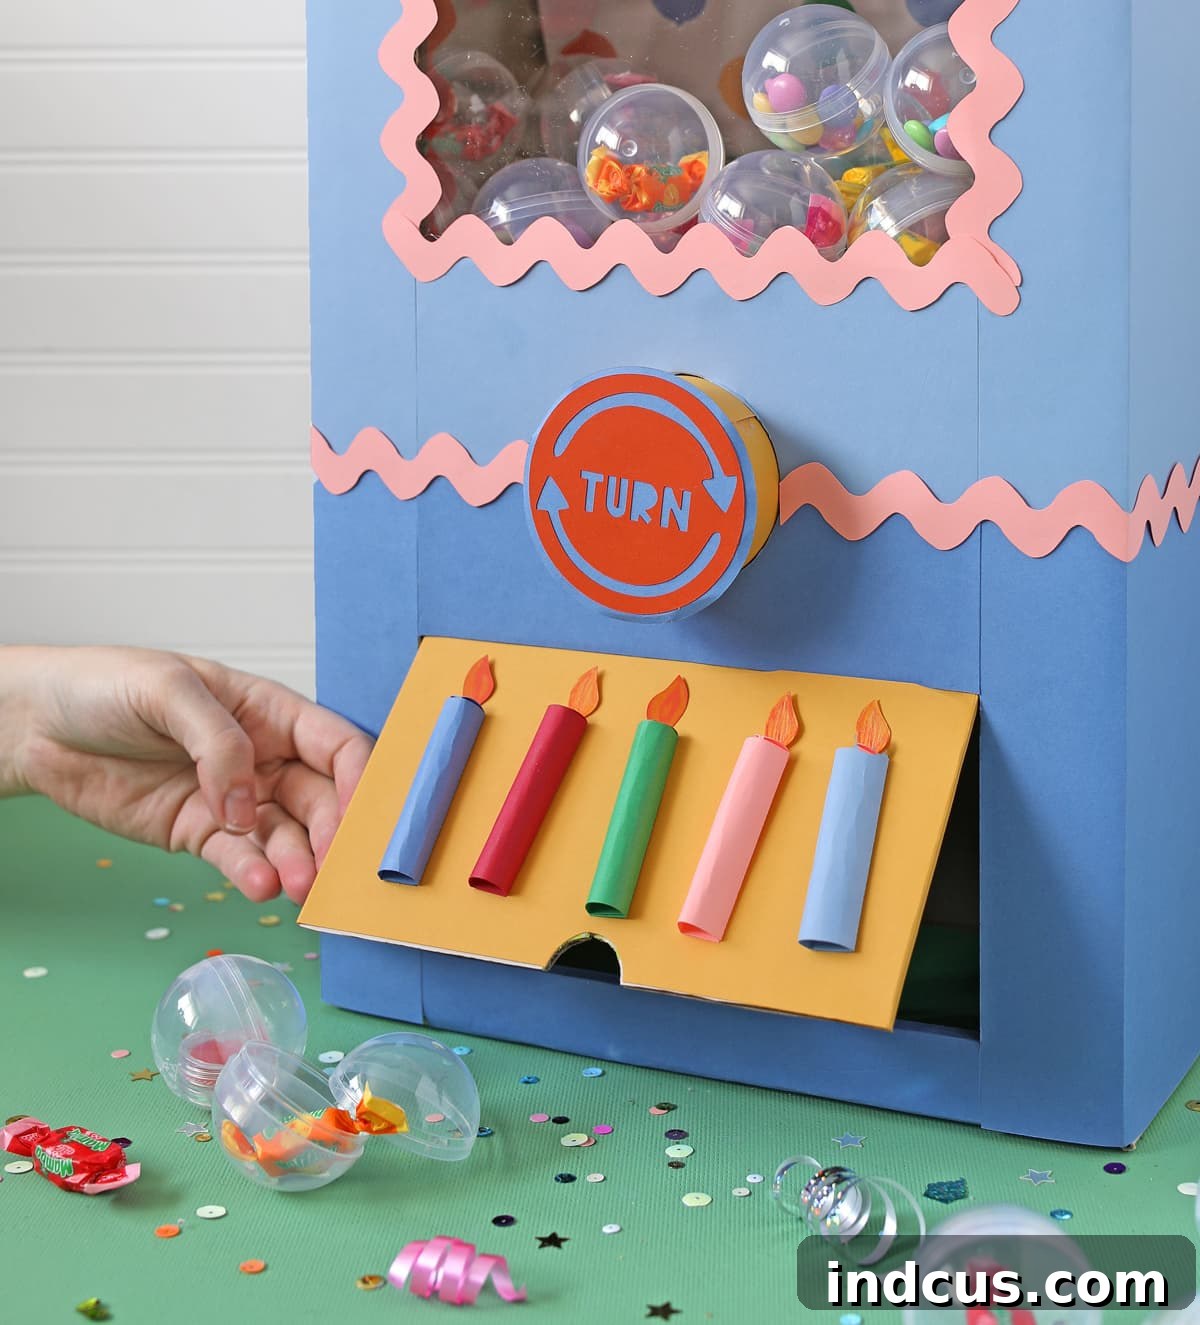
First, I meticulously covered the entire exterior of the cardboard box with an assortment of colorful papers, transforming its plain surface into a festive facade. To add a charming touch, I crafted a whimsical scalloped awning and positioned it across the top of the machine, giving it that classic vending machine look. I also cut out a fun, decorative design to attach to the visible end of the prize tube, creating an appealing “handle.” To make the machine intuitively operable, I added clear arrows and the word “TURN” near the tube, ensuring everyone knows how to claim their prize.
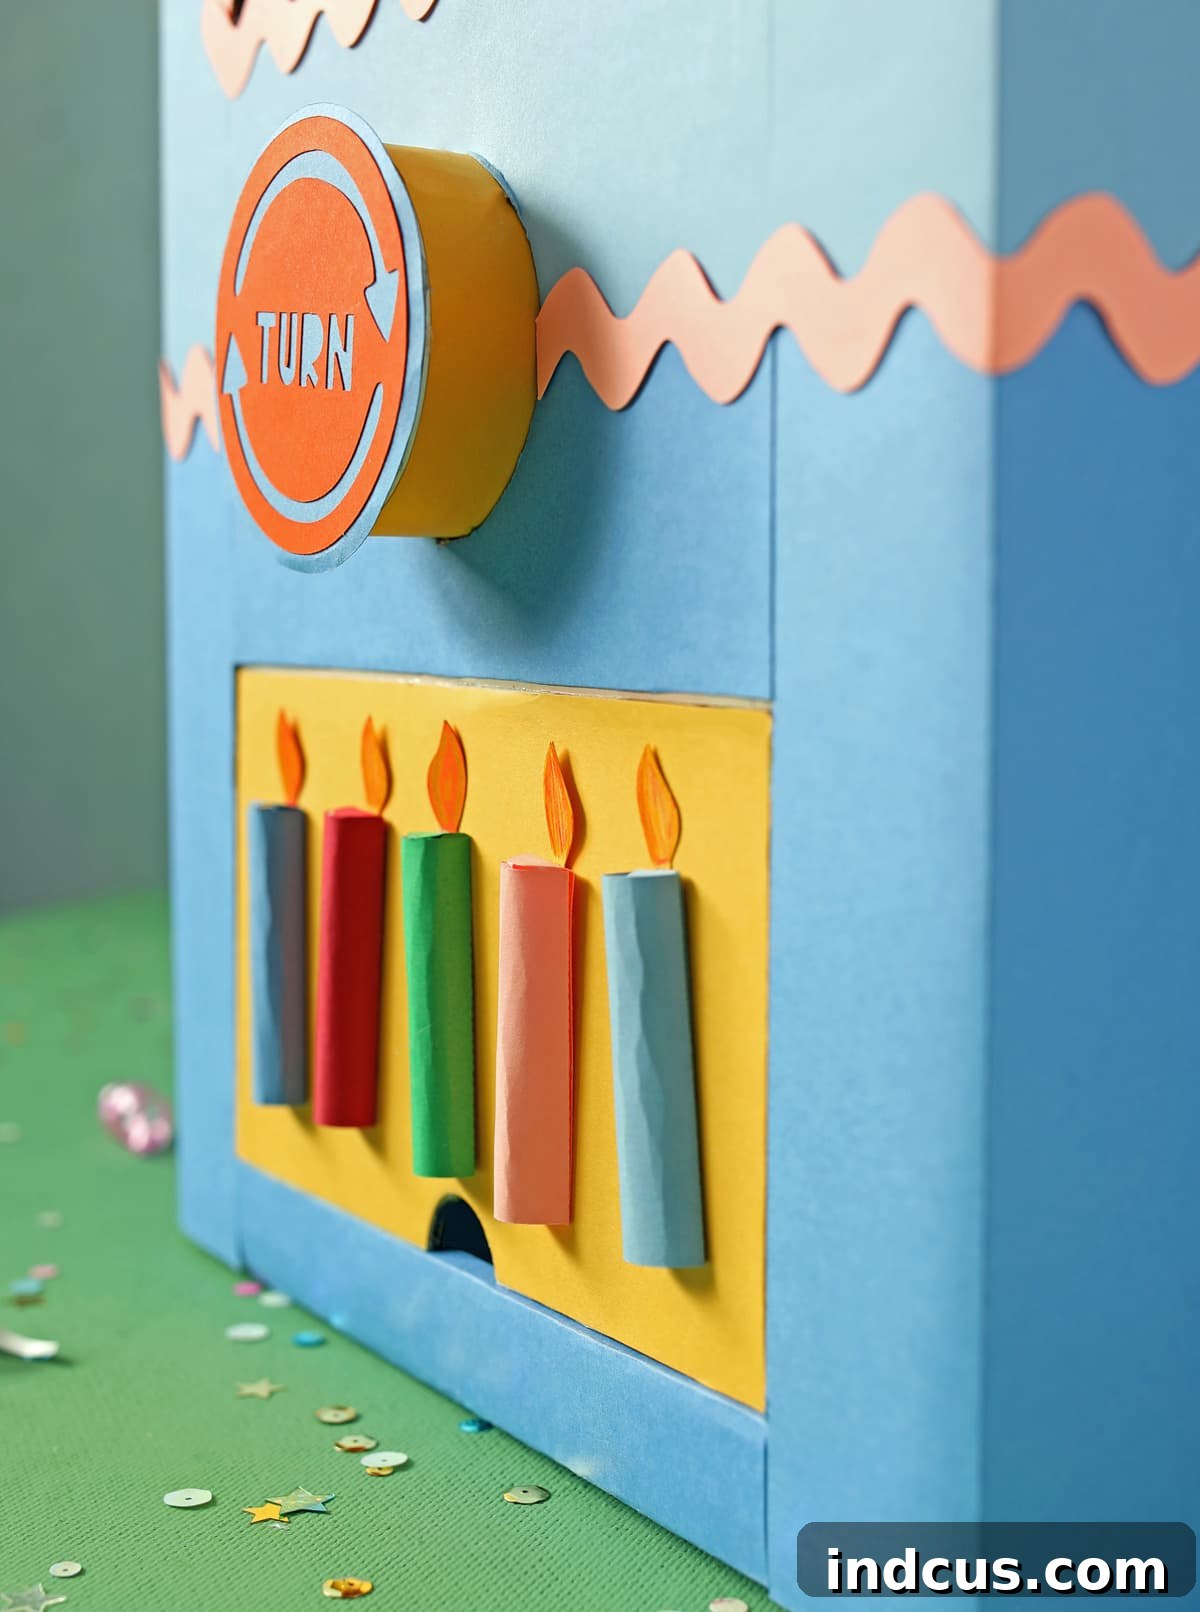
For an extra special birthday touch, I designed and created adorable 3D paper candles, which I then carefully attached to the prize retrieval flap. Oh, my goodness, these turned out absolutely darling and truly enhanced the birthday theme! If you’d be interested in a detailed tutorial on how to craft these specific 3D paper candles, please let me know in the comments – I’d be thrilled to share the process!
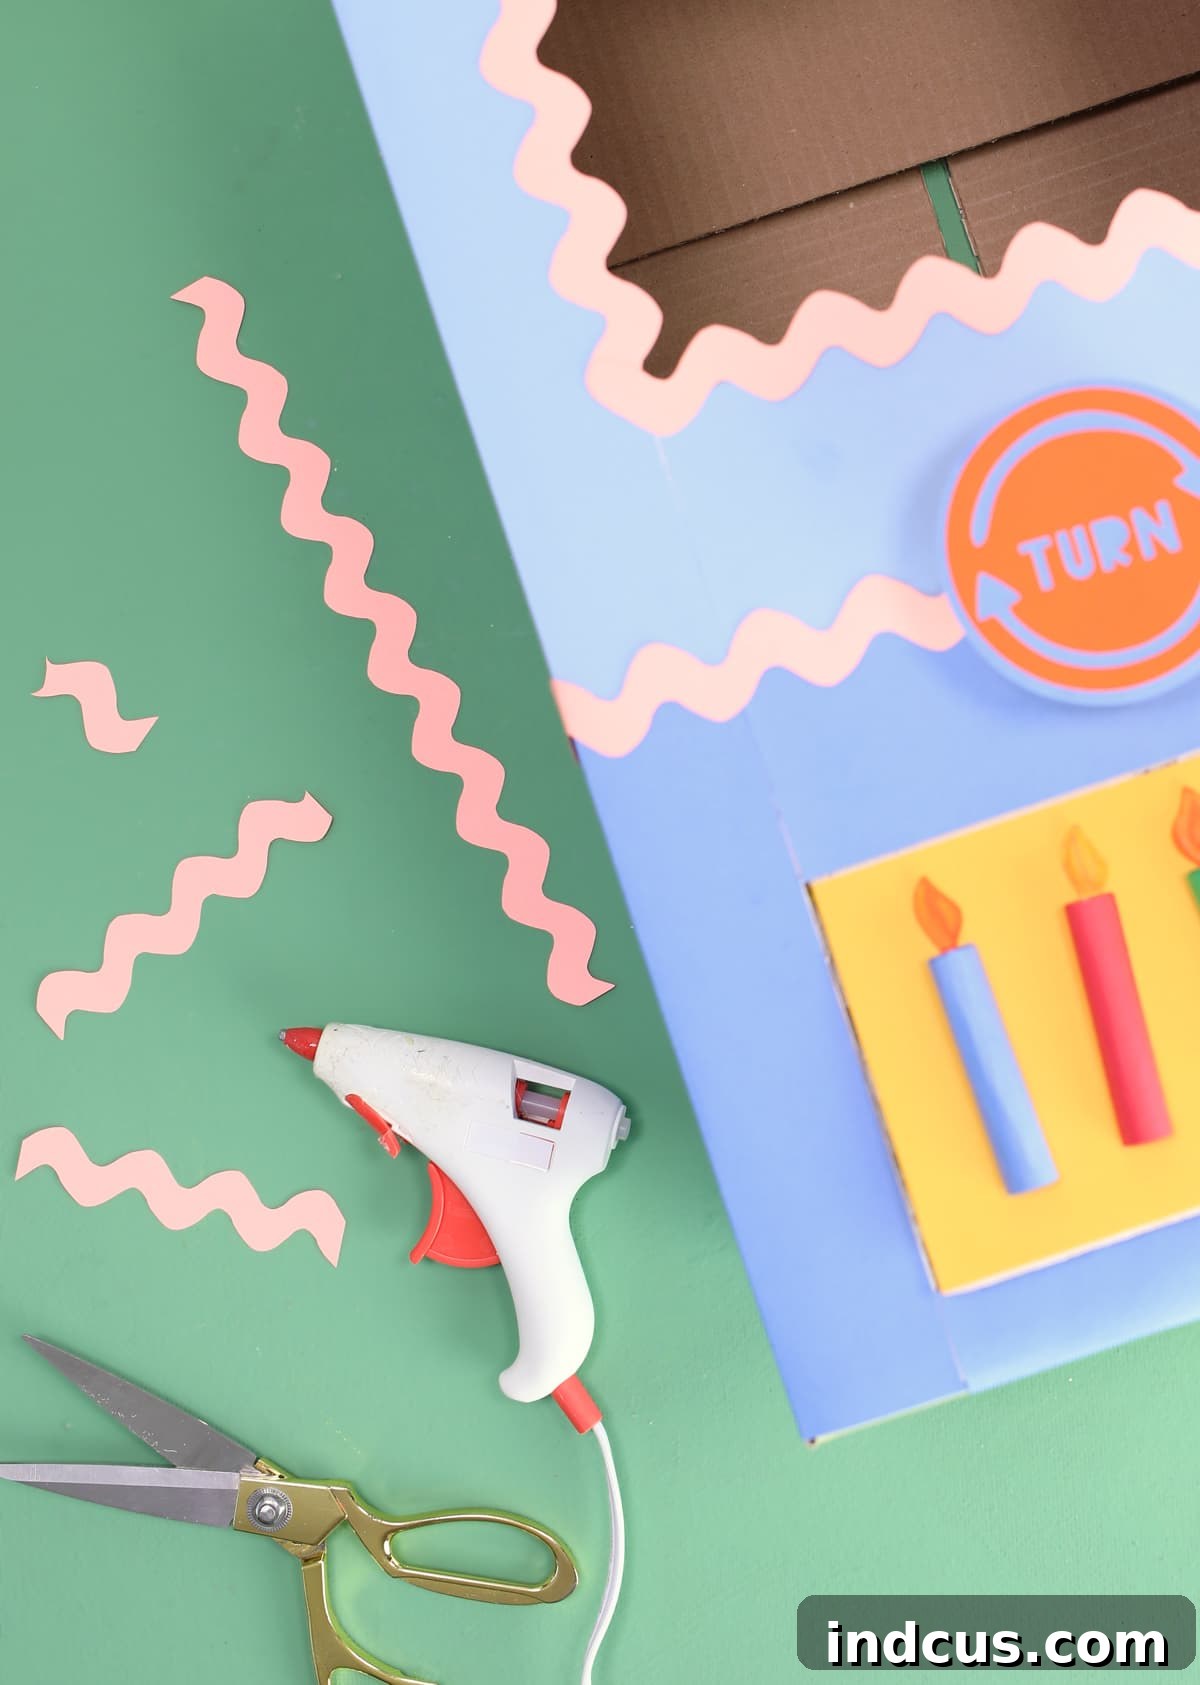
Feeling that the box needed a little extra flourish, I decided to add some decorative trim. I cut strips of paper to mimic the playful, wavy pattern of pink ric-rac. This small detail made a huge difference, adding a lovely touch of whimsy and refinement to the overall design. It’s often these subtle additions that elevate a craft project from good to truly fantastic.
My final decorative touch involved creating a cheerful polka dot background for the inside of the prize viewing window. I attached this piece of patterned paper to the inside back flap of the box, securing it along just one edge. This smart attachment method allows me to easily open the back flap when it’s time to load or retrieve prizes, while still providing a delightful backdrop for the colorful prize balls when the machine is in use.
Part 5: Filling Your Prize Balls
The anticipation builds with every prize ball! This is where you get to decide what treasures your vending machine will dispense.
Fill your prize balls with an assortment of small toys, delicious candies, stickers, temporary tattoos, customized notes, or any other delightful surprises you can imagine! For the gingerbread house claw machine I previously made, I also included tickets inside some prize balls, which could then be redeemed for larger, more substantial prizes. This is a fantastic idea as it offers greater flexibility in the types of rewards you can distribute and adds another layer of excitement. Consider age-appropriate items and any allergies for your specific audience. Small craft supplies, mini erasers, bouncy balls, or even personalized messages are all wonderful options that can fit inside these capsules.
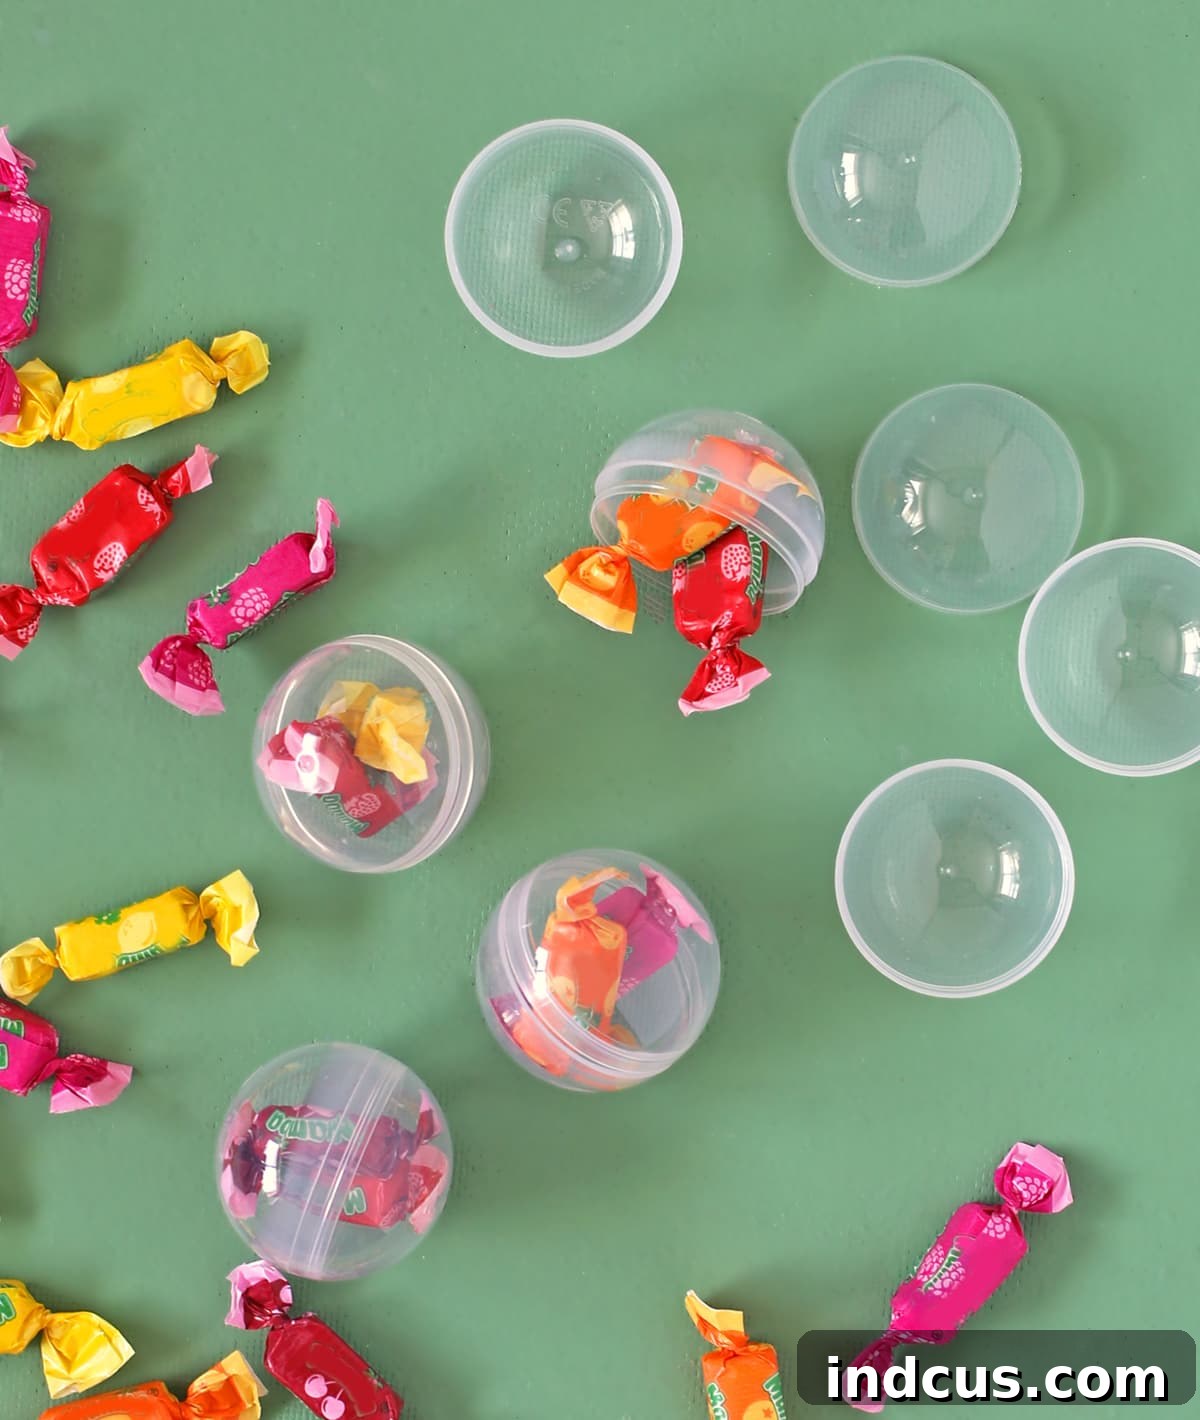
Once all your prize balls are filled with their exciting contents, gently place them into the top window section of your vending machine. Ensure they rest comfortably on the angled shelf, ready to roll into the dispensing tube. Finally, close up the back of your box, securing it firmly, and voilà – your incredible DIY cardboard vending machine is complete and ready for action!
Now, it’s time for the moment of truth! Gather your eager participants, take a turn, and claim a well-deserved prize from your very own handmade creation!
Reflections and Pro Tips for Future Builds:
Every craft project offers learning opportunities, and if I were to construct this vending machine again, I would implement a significant modification to the back panel. Instead of working with existing flaps, I would cut the entire back wall off the box. Then, I would create a brand new, large door from a separate piece of cardboard, attaching it to the main box with a robust tape hinge. I believe this would greatly simplify the process of accessing the machine’s interior, making it considerably easier to load prizes, attach the decorative backing (like the polka dot area), and securely position the support ledge for the prize tube. This thought came to me *much* too late in the initial building process, but it’s a valuable tip for anyone embarking on this project!
Regardless, I am absolutely thrilled with how this DIY craft turned out. It is genuinely so much fun to operate, and my children are already constantly begging to play with it. *Laughs out loud!* That’s always the ultimate seal of approval, isn’t it? When your creation brings that much joy, you know you’ve made something truly awesome.
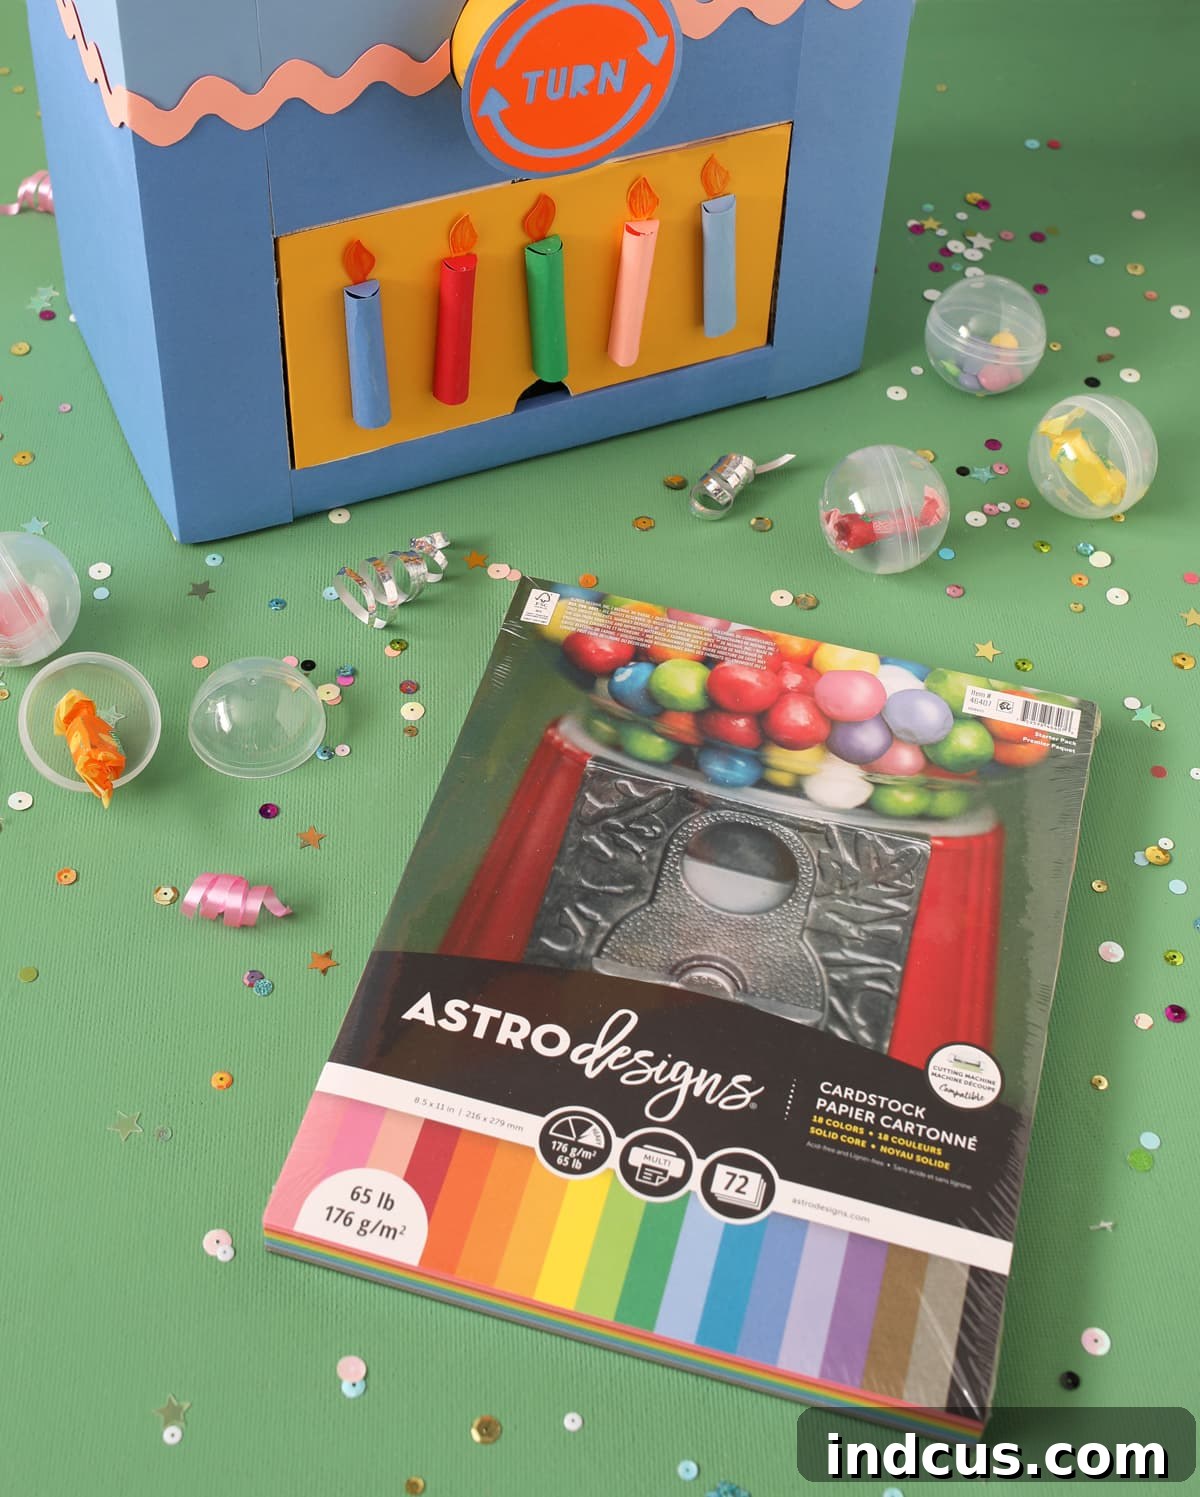
A heartfelt thank you once again to Astrodesigns Papers for partnering with me on this creative endeavor. I truly cherish the opportunity to tackle a good creative challenge, and this project was certainly a delightful one!
We hope this comprehensive guide inspires you to create your own DIY cardboard vending machine. It’s more than just a craft; it’s an opportunity to create lasting memories, spark imagination, and deliver endless smiles. Happy crafting!
DIY Birthday Party Prize Machine Video
For a visual walkthrough of each step, check out our detailed video tutorial on how to bring this fantastic birthday party prize machine to life. Watch the process, gather additional tips, and see the vending machine in action!