Mastering Wood Staining for Beginners: Transform Unfinished Furniture into Timeless Treasures
Many DIY projects can seem daunting at first glance, and wood staining often sits at the top of that list for many enthusiasts. The thought of uneven finishes, blotchy patches, or simply getting the color wrong can be enough to deter even the most eager crafter. However, I’m here to tell you a secret: wood staining is not only incredibly straightforward but also profoundly rewarding. In fact, in many respects, I find it even easier and more forgiving than painting.
If you’ve ever admired a piece of furniture with a rich, deep wood grain and wondered how to achieve that look yourself, this guide is for you. We’re going to demystify the process, turning intimidation into inspiration. My personal journey to conquering the fear of staining began with a simple project: an unfinished wood bookcase, purchased for a steal. It was the perfect canvas to experiment with, proving that stunning results are well within reach for anyone, regardless of prior experience.
Join me as we explore the simple steps to transforming a basic, raw wood item into a sophisticated piece with an antique, aged finish that will elevate any space. Prepare to be amazed at how easily you can achieve professional-looking results right in your own home!
The Perfect Project: An Unfinished Wood Bookcase Makeover
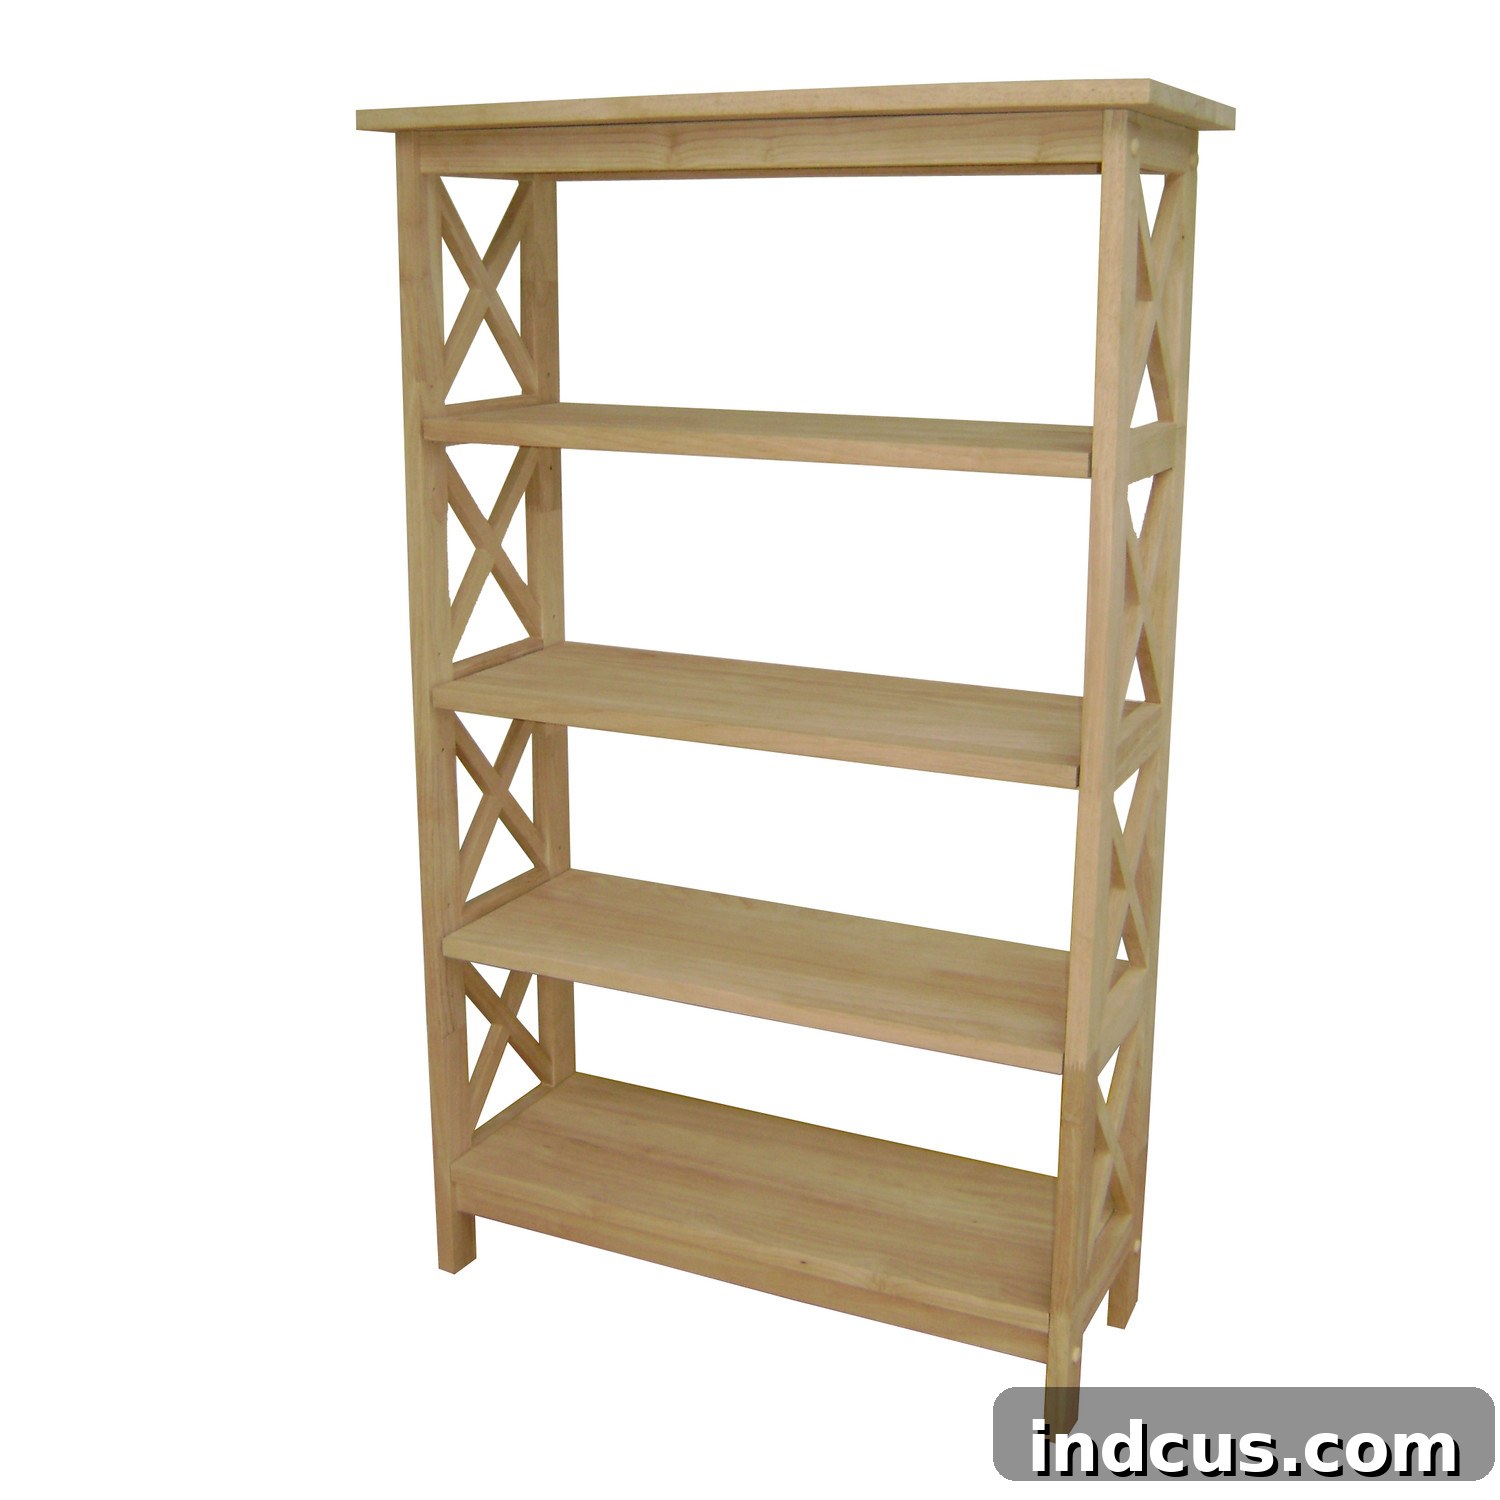
For this demonstration, I selected an unfinished wood bookcase from Wayfair. At just over $100 for a solid wood piece, it represented incredible value and an ideal starting point for a custom finish. Unfinished furniture offers the ultimate flexibility, allowing you to tailor its appearance precisely to your aesthetic preferences. The beauty of working with raw wood is its versatility – it’s a blank slate ready to absorb character and color.
Whether you’re working with a new piece of unfinished furniture or an old item you’ve stripped down to its bare wood, the principles remain the same. The key is to start with clean, raw wood, completely free from any old paint, varnish, or stain residues. This ensures uniform absorption and a truly beautiful finish. My goal for this particular bookcase was to imbue it with an antique, aged wood aesthetic, giving it a sense of history and warmth. Let’s gather the tools and materials needed to bring this vision to life.
Essential Supplies for an Antique Wood Finish
Achieving a beautiful, aged wood finish requires a few key products, each playing a crucial role in the final outcome. While the list might seem specific, these items are readily available at most hardware or home improvement stores. Here’s everything you’ll need to replicate this stunning antique look:
- Minwax Pre-Stain Wood Conditioner: This product is not optional, especially when working with softwoods like pine, which are prone to blotchiness. It ensures even stain absorption, leading to a smooth, professional finish. Think of it as your insurance policy against uneven color.
- Minwax Wood Finish in Classic Gray 211: For that coveted antique, aged aesthetic, a gray stain is perfect. Minwax offers a wide range of colors, but Classic Gray provides a subtle, sophisticated undertone that truly mimics naturally weathered wood.
- Minwax Wipe-On Poly in Clear Satin: A topcoat is essential for protecting your stained wood from wear, moisture, and everyday use. Wipe-On Poly is incredibly user-friendly and, as its name suggests, is simply wiped on. The Clear Satin finish provides a durable protective layer without adding an excessive, glossy sheen, preserving the natural look we’re aiming for.
- Lint-Free Rags: Essential for applying conditioner, stain, and poly, as well as wiping off excess. Old cotton t-shirts or cut-up socks (as I used!) work wonderfully. The key is to avoid anything that leaves fibers behind.
- Rubber Gloves: Wood stain is messy and can be difficult to remove from skin. Protect your hands!
- Fine Steel Wool (Very Fine #0000): Used for light sanding between coats of poly, this helps create an incredibly smooth, luxurious finish by removing any dust nibs or imperfections.
- Optional: Cotton Swabs: Invaluable for reaching into tight corners and crevices, ensuring an even stain application.
- Drop Cloths or Cardboard: To protect your work surface from spills and drips.
- Good Ventilation: Staining products can emit fumes, so always work in a well-ventilated area or outdoors.
The Step-by-Step Guide to a Flawless Antique Wood Finish
Now that we have all our supplies, let’s dive into the process. Each step builds upon the last, ensuring a beautiful and durable finish.
Step 1: Preparing Your Wood for Staining
Proper preparation is the foundation of any successful wood finishing project. Even if your unfinished furniture looks smooth, a light sanding can open up the wood grain, allowing for better stain absorption and a more even finish. Start by ensuring your wood is perfectly clean, dry, and free of any dust, dirt, or debris.
- Initial Sanding (if needed): If your raw wood has any rough spots or imperfections, begin with a medium-grit sandpaper (e.g., 120 or 150 grit).
- Final Sanding: Follow up with a finer grit sandpaper (e.g., 180 or 220 grit) to achieve a smooth surface. Always sand with the grain of the wood.
- Dust Removal: After sanding, thoroughly clean the wood surface. Use a vacuum cleaner with a brush attachment, followed by a tack cloth, or simply a clean, damp cloth (allow to dry completely before proceeding). Any lingering dust can interfere with stain absorption and lead to an uneven finish.
Once your wood is clean and smooth, you’re ready for the next crucial step: conditioning.
Step 2: Applying Wood Conditioner for Even Absorption
Wood conditioner is often overlooked by beginners, but it’s a critical step, especially when working with woods known for their uneven absorption, such as pine, fir, or maple. It acts as a primer, sealing the wood pores slightly to prevent blotchiness and ensuring your stain goes on smoothly and uniformly.
How to Apply:
- Wearing your rubber gloves, generously wipe the Minwax Pre-Stain Wood Conditioner onto the entire surface of your bookcase using a clean, lint-free rag.
- Ensure complete coverage, working with the grain. A little goes a long way, so don’t feel the need to drench the wood, but make sure it’s thoroughly wetted.
- Allow the conditioner to penetrate for 5-15 minutes, as per product instructions. Do not let it dry completely.
- Wipe off any excess conditioner with a clean, dry rag before it has a chance to fully dry on the surface. You’ll notice that even after conditioning an entire bookcase, you’ll still have plenty of product left for future projects!
Step 3: Staining for Depth and Character
This is where the magic truly happens, as your raw wood begins to take on its new personality. The key to successful staining is working efficiently and knowing how to control the depth of color. Remember, for the best results, apply the stain within two hours of applying the wood conditioner.
How to Apply:
- Stir the Minwax Classic Gray Wood Finish thoroughly before and during use to ensure the color pigments are evenly distributed.
- Dip a clean, lint-free rag into the stain. Apply the stain generously to the wood surface, working in small sections and always moving with the wood grain.
- For a lighter gray, like the antique look we’re aiming for, apply the stain and immediately wipe off the excess. You’re essentially “buffing” it into the wood rather than letting it soak.
- For a darker, more intense color, allow the stain to penetrate for a longer period (5-15 minutes) before wiping off the excess. You can also apply additional coats once the first coat has dried to deepen the color further. Always wipe off excess stain; never leave wet puddles or streaks, as this can lead to an uneven, sticky finish.
- Troubleshooting Corners & Crevices: If you find it challenging to get the stain into tight corners or decorative carvings, a cotton swab works wonders! Dip the swab in stain and carefully apply it to those hard-to-reach areas.
Once you’ve achieved your desired color depth across the entire piece, allow the stain to dry for at least 8 hours, or longer if humidity is high. Adequate drying time is crucial before applying the protective topcoat.
Step 4: Protecting Your Masterpiece with a Durable Topcoat
With the beautiful gray stain applied and fully dried, the final step is to protect your newly finished wood. A clear protective topcoat shields the wood from scratches, moisture, and general wear and tear, ensuring your hard work lasts for years to come. I opted for Minwax Wipe-On Poly in Clear Satin for its ease of application and elegant, subtle sheen.
How to Apply Wipe-On Poly:
- Ensure the stained wood is completely dry and free of any dust.
- Wearing gloves, dip a clean, lint-free rag into the Wipe-On Poly. Apply thin, even coats, always working with the grain of the wood. The goal is to apply a very light, uniform layer.
- Avoid over-applying; thin coats are better than thick ones, which can lead to drips or an uneven finish.
- Allow each coat to dry for 2-3 hours (or as per product instructions).
- Sanding Between Coats: After each coat has dried, gently sand the entire surface with very fine steel wool (#0000). This crucial step helps to smooth out any tiny dust nibs or imperfections and creates a microscopically rough surface for the next coat to adhere better.
- After sanding, thoroughly wipe down the surface with a tack cloth or a clean, dry rag to remove all sanding dust before applying the next coat.
- Repeat this process for a total of three coats of Wipe-On Poly. Three coats provide ample protection for a piece like a bookcase, offering durability without an overly thick or glossy appearance.
Step 5: Cleanup and Final Curing
Cleanup is surprisingly easy, especially if you used disposable rags like old socks. Simply throw them away! However, a crucial safety note: staining products, especially oil-based ones, are flammable. Always allow rags soaked with stain or poly to dry completely spread out in a well-ventilated area before disposing of them in a sealed metal container or by submerging them in water. Never crumple them up while still wet, as they can spontaneously combust.
After the final coat of poly, allow your project to cure for several days (check product instructions for specific curing times, typically 3-7 days) before placing heavy objects on it or subjecting it to heavy use. While it may feel dry to the touch, the finish is still hardening during this period.
The Reveal: A Stunning Antique Bookcase
Are you ready to witness the incredible transformation? The once plain, unfinished bookcase now boasts a rich, antique-inspired finish that exudes character and charm. The Classic Gray stain has brought out the natural beauty of the wood grain, giving it a timeless appeal.
I am absolutely enamored with the final look of this bookcase. The subtle gray stain not only adds a unique touch but also enhances the wood’s inherent patterns, making it a focal point in any room. Take a closer look at the intricate details and the gorgeous depth of color:
Why You Should Try Wood Staining
If the idea of staining wood has ever felt overwhelming, I sincerely hope this guide has convinced you otherwise. It truly is one of the most accessible and rewarding DIY techniques for transforming furniture and home decor. The process is forgiving, and the results are often breathtaking, adding value and personalized style to your pieces.
From custom bookcases to dining tables, picture frames, or even small decorative items, the possibilities with wood stain are endless. It’s an excellent way to update existing furniture, restore vintage finds, or add a unique touch to new, unfinished pieces. The satisfaction of creating something beautiful with your own hands is unparalleled, and with these simple steps, you have all the knowledge you need to get started.
Don’t let apprehension hold you back any longer. Grab your supplies, find a project, and embark on your own wood staining adventure. You might just discover your new favorite DIY skill!