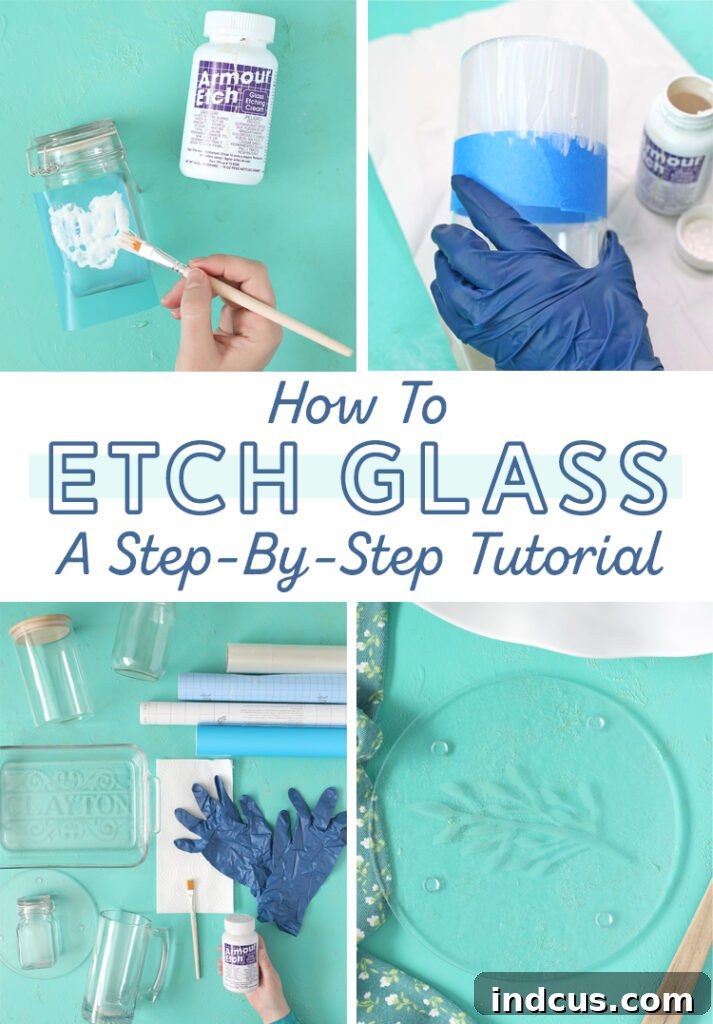
Unleash Your Creativity: The Ultimate Beginner’s Guide to DIY Glass Etching
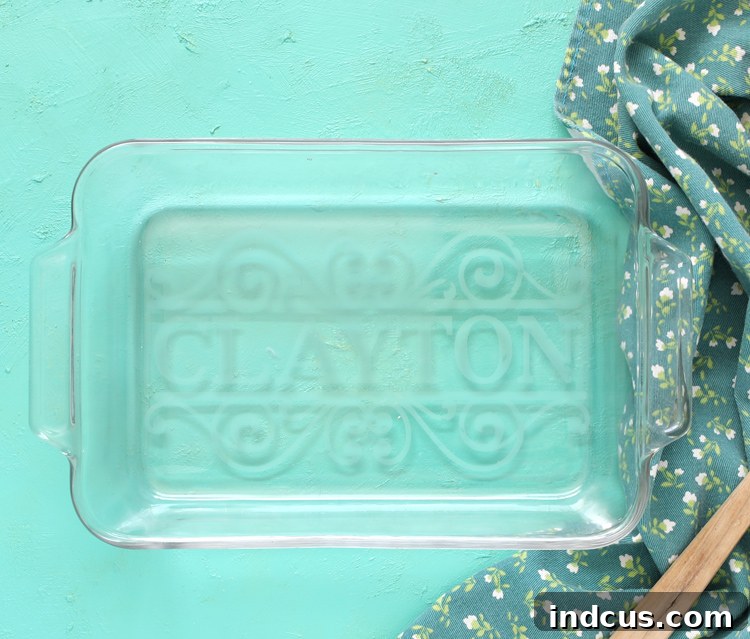
Transform ordinary glassware into exquisite, personalized treasures with the surprisingly simple art of glass etching! This sophisticated craft allows you to create elegant frosted designs that are not only beautiful but also permanent and dishwasher-safe. Imagine customizing unique gifts for weddings, birthdays, holidays, or heartfelt thank-you presents – all from the comfort of your home.
If you’ve ever felt intimidated by glass etching, this comprehensive, step-by-step tutorial is designed specifically for you. We’ll demystify the process, walking you through every detail of how to etch glass easily, even if you’re a complete beginner. Prepare to discover a fun, rewarding craft medium brimming with endless creative possibilities. You’ll be amazed at how quickly you can achieve professional-looking results!
What Exactly is Glass Etching? Understanding the Frosted Effect
At its core, glass etching is a fascinating chemical process that permanently alters the surface of glass to create a distinctive frosted effect. Unlike painting or applying decals, which sit on top of the glass, etching cream uses mild acids to create microscopic abrasions on the glass surface. These tiny, uniform scratches scatter light, resulting in that beautiful, translucent frosted look that gives your designs depth and elegance. It’s a subtle yet striking technique that elevates any glass item, providing a professional finish that truly lasts.
Why Choose Glass Etching Over Other Decorating Methods? Permanence & Practicality
When it comes to personalizing glassware, you might wonder why etching stands out. While vinyl decals can be adorable and offer a quick design solution, glass etching provides unmatched permanence and practicality. Vinyl stickers, over time, can peel, fade, or get damaged in the dishwasher, especially on frequently used items like drinking glasses, mugs, or baking dishes. Etched designs, however, are literally part of the glass. This means they are:
- Dishwasher Safe: No need to handwash delicate designs; your etched items can go straight into the dishwasher.
- Long-Lasting: The design won’t chip, fade, or rub off, ensuring your personalized pieces endure for years.
- Professional Finish: The subtle frosted texture often looks more sophisticated and high-end than a decal.
- Food Safe: Since the design is etched into the glass itself and no foreign material is applied, it’s perfectly safe for food and beverages.
For items you intend to use daily or gift as cherished keepsakes, glass etching is undoubtedly the superior, more durable choice. It’s a craft where your efforts truly pay off in lasting beauty and functionality.
This post contains affiliate links. As an Amazon Associate, I earn from qualifying purchases at no extra cost to you.
Safety First: Essential Precautions for Glass Etching
While glass etching is a remarkably straightforward craft, it involves working with a chemical etching cream that contains mild acids. Therefore, prioritizing safety is paramount. Taking a few simple precautions will ensure a smooth and safe crafting experience:
- Ventilation is Key: Always work in a well-ventilated area. Open windows, use a fan, or work outdoors if possible. This helps to dissipate any fumes from the etching cream.
- Protect Your Hands: Wear chemical-resistant gloves (plastic or nitrile gloves are sufficient) throughout the entire process, from applying the cream to rinsing the glass. Avoid direct skin contact.
- Eye Protection: While not always strictly necessary for basic projects, wearing safety glasses is a good practice, especially if you’re prone to splashes or working with larger quantities of cream.
- Cover Your Workspace: Lay down a thick layer of newspaper, a plastic garbage bag, or an old tablecloth to protect your work surface from spills and drips. Etching cream can damage certain materials.
- Read Manufacturer Instructions: Always refer to the specific safety guidelines and instructions provided by the etching cream manufacturer, as formulations can vary slightly.
- Keep Away from Children and Pets: Ensure all materials are stored safely out of reach of children and pets.
- First Aid Preparedness: In case of accidental skin contact, rinse immediately and thoroughly with plenty of water. If irritation persists, seek medical advice.
By following these simple safety measures, you can enjoy the creative process of glass etching with complete peace of mind.
Mastering the Art: Your Step-by-Step Guide to Effortless Glass Etching
Ready to create your own frosted glass masterpieces? This detailed tutorial will walk you through each phase of the glass etching process, ensuring beautiful results every time. Follow these instructions carefully, and you’ll soon be admiring your custom-designed glassware.
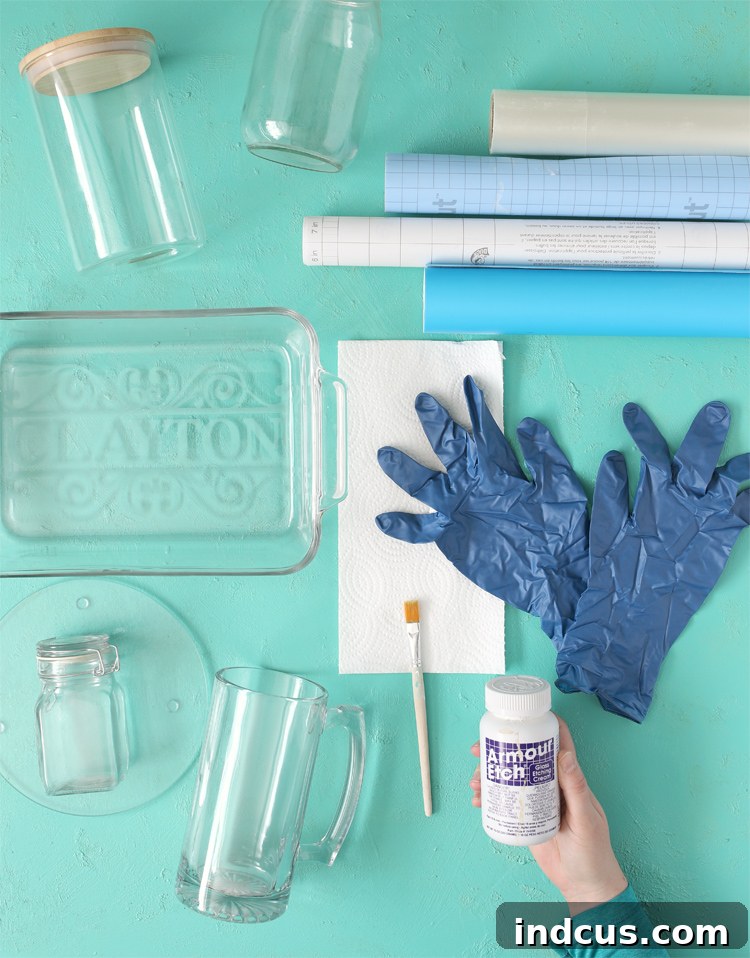
Gather Your Essential Materials
Before you begin, ensure you have all the necessary supplies readily available. Having everything organized will make the process much smoother.
- Glass Etching Cream (e.g., Armour Etch is a popular choice)
- Craft Paint Brush: A regular bristled brush is ideal. Avoid foam brushes as they can trap air bubbles. Choose one you don’t mind potentially sacrificing, as the cream can be harsh on bristles.
- Plastic or Nitrile Gloves: Absolutely essential for protecting your hands from the etching cream.
- Clean Water: For rinsing the glass and wiping up any immediate spills.
- Adhesive Stencil: (Refer to our comprehensive stencil guide below for all your options!)
- Paper Towels or Baby Wipes: For quick cleanup.
- Work Surface Protection: Newspaper, an old plastic garbage bag, or a disposable tablecloth to shield your work area.
- Rubbing Alcohol (Optional but Recommended): For a final clean of the glass surface.
Detailed Instructions: Etch Your Glass Like a Pro
Follow these steps closely for flawless results:
Step 1: Prepare Your Glassware and Workspace Meticulously
Begin by thoroughly washing your glass item with soap and warm water. This removes any grease, dust, or fingerprints that could interfere with the etching process. After washing, dry the glass completely with a lint-free cloth or paper towel. For an extra clean surface, you can wipe it down with rubbing alcohol, then let it air dry. Once clean, place your protective covering (newspaper, garbage bag) over your work surface.
Step 2: Apply Your Stencil with Precision
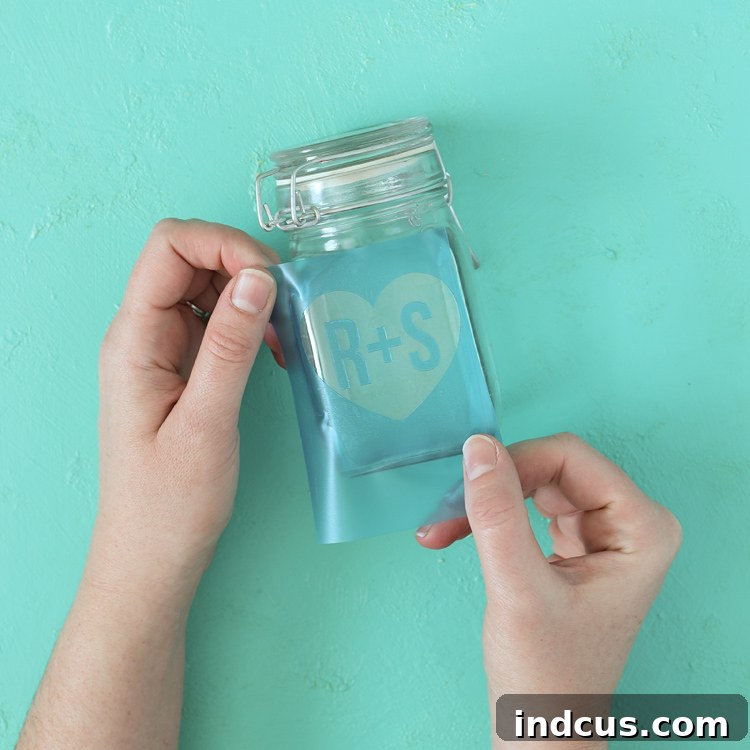
Carefully position your chosen adhesive stencil onto the clean, dry glass. This is a critical step for a crisp design. Press down firmly on all edges of the stencil to ensure it adheres completely to the glass. Run your finger or a squeegee (like a credit card) over the entire stencil surface, paying close attention to the edges of your design. The goal is to eliminate any air bubbles or gaps where the etching cream could seep underneath, which would result in blurry or uneven lines.
Step 3: Apply the Etching Cream Safely and Evenly
Before application, ensure you are wearing your protective gloves and working in a well-ventilated area (refer back to the Safety First section!). Gently stir the etching cream within its container to ensure a consistent consistency. Using your craft paintbrush, apply a thick, even layer of etching cream over all exposed areas of your stencil design. Make sure the cream completely covers the design, but avoid getting it outside the stencil borders. If any cream accidentally touches the glass outside the stencil, immediately wipe it away with a damp cloth or paper towel to prevent unwanted etching.
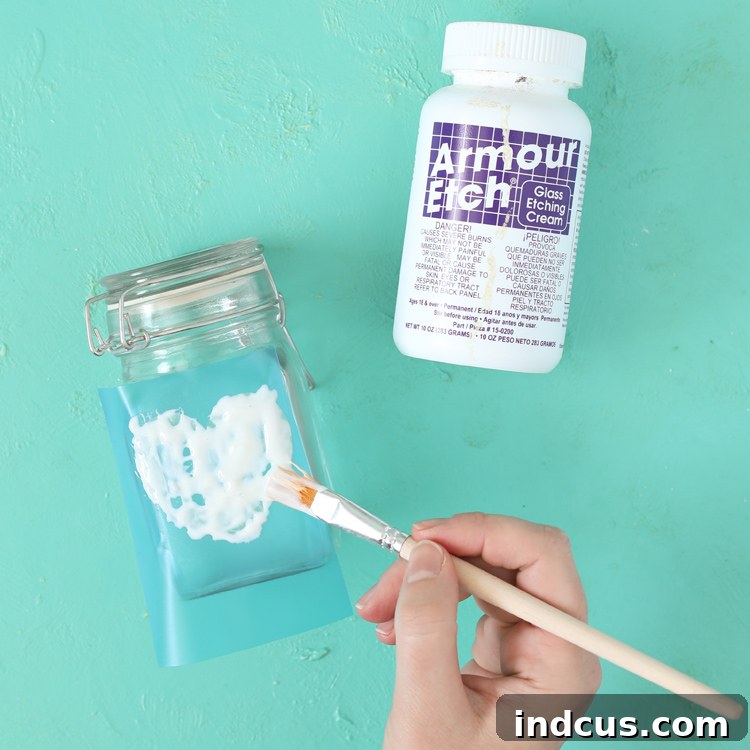
Step 4: The Waiting Game: Optimal Etching Time
While most manufacturer instructions, like those for Armour Etch, suggest leaving the cream on for only one minute, personal experience often yields better, deeper results with a longer application time. I’ve found that leaving the etching cream on for approximately 15-20 minutes provides a more pronounced and consistent frosted effect. However, the best approach is to test! After about 5-10 minutes, use a craft stick or the corner of your paintbrush to gently scrape away a small, inconspicuous corner of the cream over your design. Rinse that tiny spot with water to reveal the etch. If it’s as frosted as you desire, proceed to Step 5. If it’s too faint, reapply cream to the tested spot and let it sit longer, checking periodically until satisfied. This experimentation is especially useful if your cream is older or if you’re working with a new type of glass.
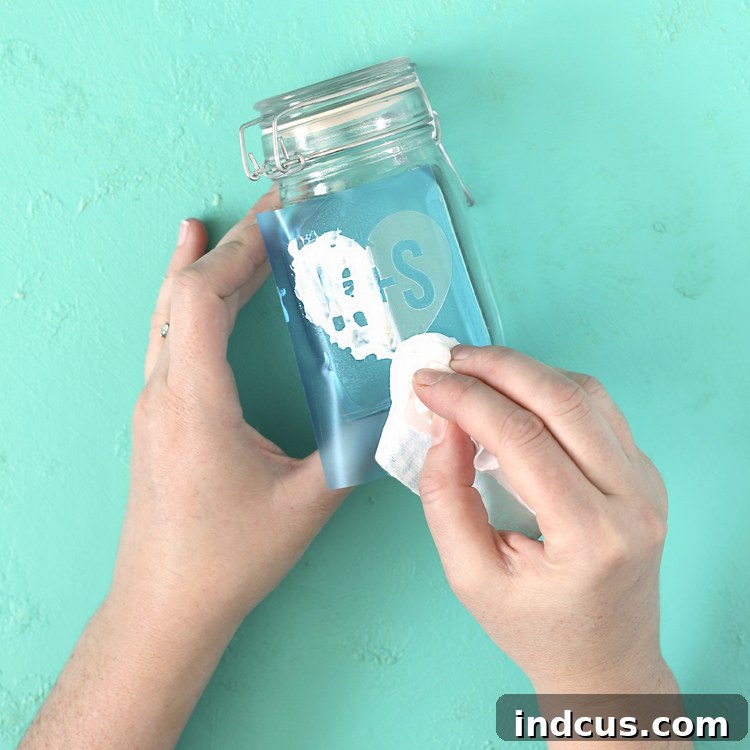
Step 5: Rinse and Reveal Your Frosted Masterpiece
Once your desired etching depth is achieved (typically after 15-20 minutes), it’s time to rinse. Still wearing your gloves, take your glass item to a sink with running water. Thoroughly rinse the entire etched area under cool water until all traces of the etching cream are completely removed. This is crucial for stopping the etching process and revealing a clean design. You can gently rub the area with your gloved hand or a soft cloth under the running water to ensure all cream is gone.
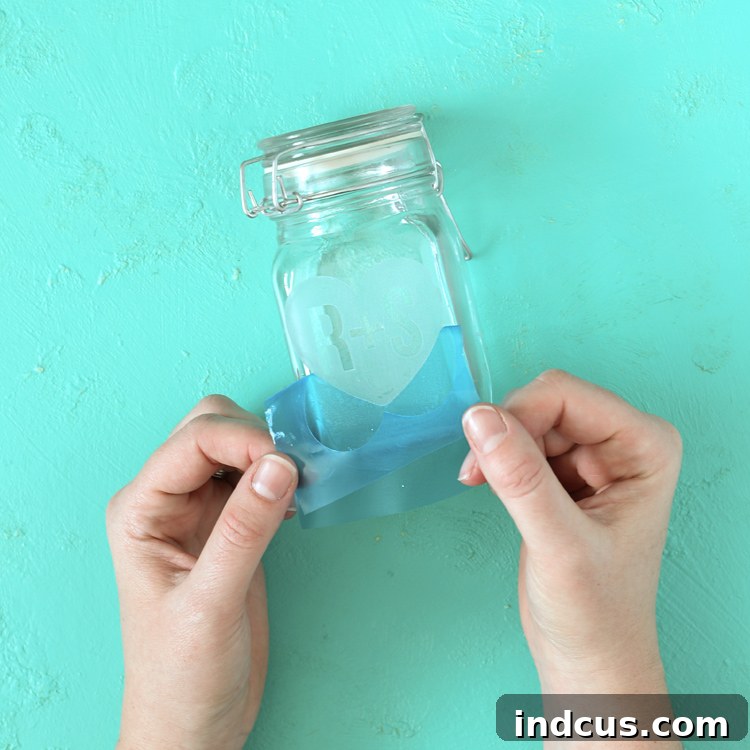
Step 6: Remove the Stencil and Admire Your Creation!
After rinsing, gently peel away the stencil from the glass. You might want to use a craft knife or tweezers for intricate details. Once the stencil is fully removed, dry your glass item completely. Step back and admire your beautifully etched glass design! Your permanent, frosted artwork is now ready to be displayed, used, or gifted.
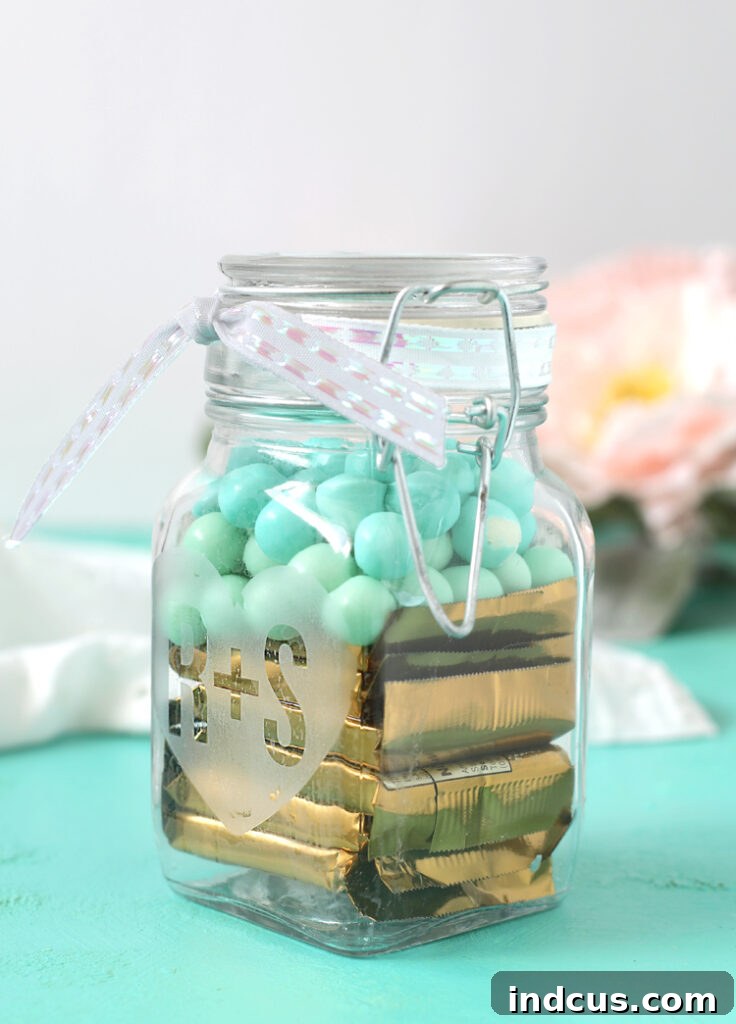
These personalized glass candy jars, etched with the couple’s initials inside a sweet heart design, were a delightful project for wedding favors. They’re not only charming but also functional and lasting mementos!
Creating Your Perfect Stencil: Options for Every Crafter
The key to a stunning etched glass design lies in a well-made, securely applied stencil. Don’t fret if you don’t own a fancy cutting machine; there are fantastic stencil-making options available for every crafter and every budget. The critical factor for successful etching is choosing an adhesive stencil material that will firmly stick to your glass and prevent any cream from seeping underneath. Here are several popular methods for creating your ideal design:
1. Store-Bought Adhesive Stencils: Convenience at Your Fingertips
For ease and speed, pre-made adhesive stencils are an excellent choice. You can find a vast array of designs at most craft stores like Michaels or online retailers like Amazon. When purchasing, make sure to look for stencils specifically labeled as “adhesive-backed” or “repositionable vinyl stencils.” Avoid rigid plastic stencils unless you plan to secure them meticulously with spray adhesive and tape, as they are prone to cream bleeding. Adhesive stencils typically come in various themes, from intricate mandalas to simple letters and shapes, offering immediate creative possibilities.
- Find Adhesive Stencils at Michaels
- Explore Adhesive Stencils on Amazon
2. Masking Tape or Painter’s Tape: Simple & Effective for Geometric Designs
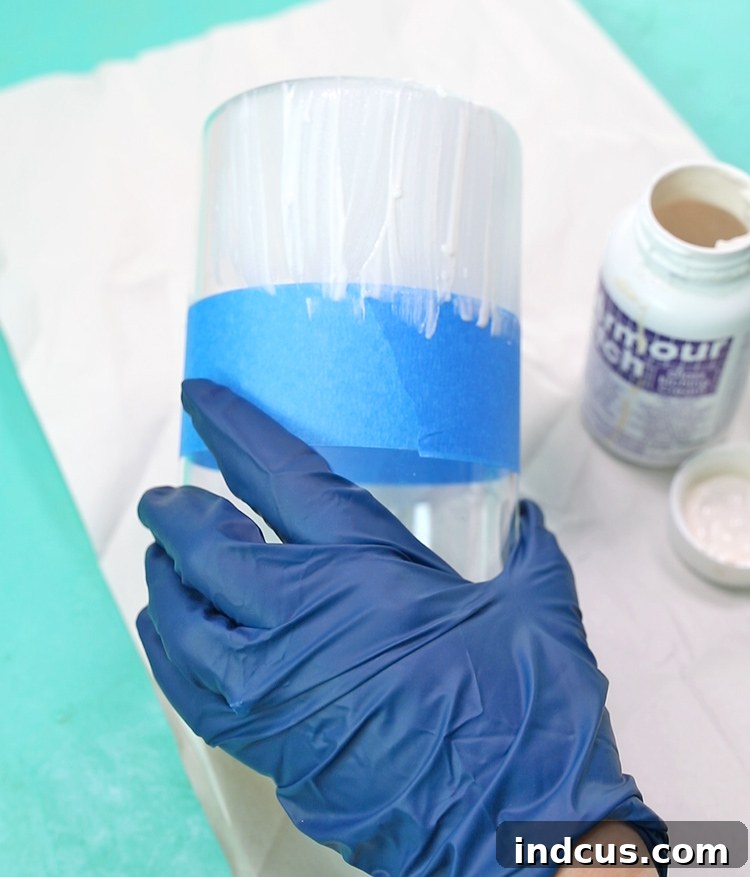
For minimalist, modern, or geometric patterns like stripes, blocks, or even chevrons, common masking tape or painter’s tape is an incredibly affordable and effective stencil material. This method works by masking off the areas you *don’t* want to be etched. Simply apply strips of tape to create your desired pattern on the glass, ensuring all edges are pressed down firmly. You can use scissors or a craft knife to cut the tape into custom shapes or straight lines. After applying the etching cream and allowing it to set, peel off the tape to reveal crisp, clean lines between the etched and unetched glass. This is perfect for borders, monograms, or color-blocking effects.
3. Hand-Cut Stencils: Unleash Your Inner Artist (No Machine Needed!)
If you enjoy freehand drawing or tracing and don’t own a cutting machine, hand-cutting your own stencils is a fantastic and versatile option. You’ll need a sheet of stencil vinyl (or even contact paper for a budget-friendly alternative) and a sharp craft blade (like an X-Acto knife) along with a cutting mat. Simply draw or trace your design onto the backing paper of the stencil vinyl, then carefully cut out the parts you want to be etched. Once cut, peel off the backing and apply your custom design to the glass. This method allows for unique, intricate designs and is incredibly rewarding.
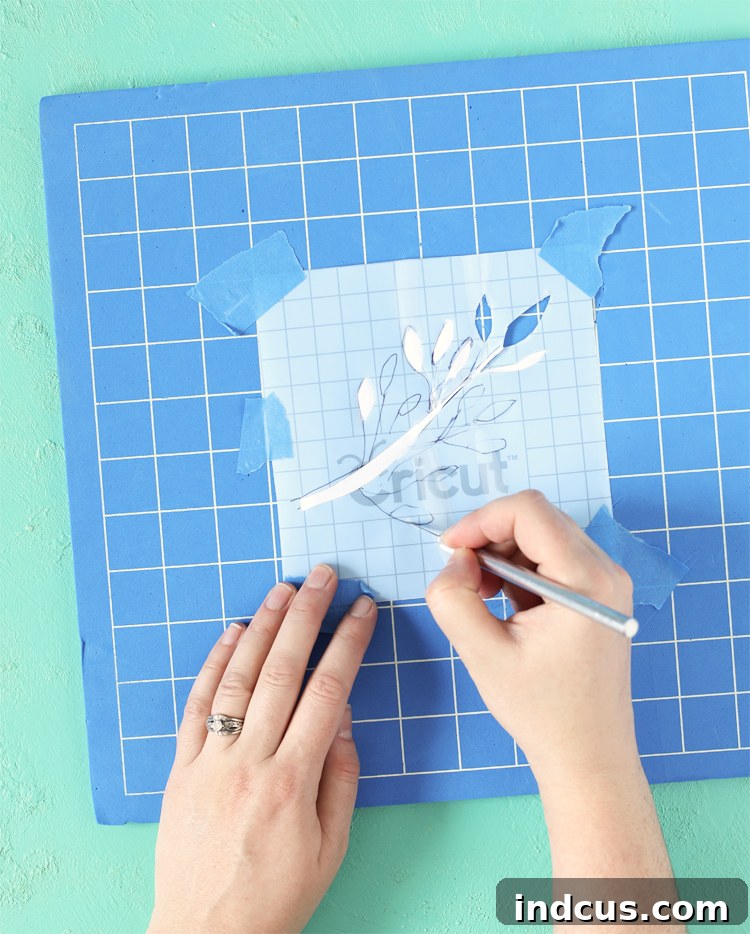
4. Cutting Machine Stencils (Cricut, Silhouette, etc.): Precision and Intricacy
For those with a Cricut, Silhouette, or similar electronic cutting machine, creating incredibly precise and intricate stencils is a breeze. These machines allow you to design virtually anything on your computer and then cut it out perfectly from specialized stencil materials. High-quality options include Cricut Stencil Vinyl or Oramask 813 Stencil Film (many crafters, myself included, find Oramask to be exceptionally easy to work with). Both perform excellently for glass etching.
Using Transfer Tape for Intricate Designs: If your design has multiple small pieces or delicate details, transfer tape becomes your best friend. After your machine cuts the stencil, “weed” away (remove) all the vinyl pieces that you *want* to be etched. Then, apply a piece of transfer tape over the top of your remaining stencil vinyl. Burnish it well with a scraper tool, then slowly peel the transfer tape (with your stencil attached) off the stencil’s backing paper. This keeps all the intricate elements perfectly aligned as you transfer them to your glass. Press the stencil firmly onto the glass, burnish again, and then slowly peel off the transfer tape, leaving your flawless stencil behind. This technique ensures a professional and clean application, especially for words or complex graphics.
Watch It In Action: Glass Etching Video Tutorial
Sometimes seeing the process makes all the difference! If you’re a visual learner, watch our comprehensive video tutorial below for a clear demonstration of each step, from preparing your glass to applying the cream and revealing your final design.
Frequently Asked Questions About Glass Etching
Navigating a new craft often comes with questions. Here are some of the most common inquiries about glass etching, along with detailed answers to help you troubleshoot and succeed.
Where Can I Purchase Glass Etching Cream?
Glass etching cream is widely accessible! You can easily find it online through retailers like Amazon, offering convenience and a variety of brands. Additionally, most major craft stores, including Hobby Lobby, Michaels, and JOANN Fabrics and Crafts, stock etching cream in their craft or glass decor aisles. A 3-ounce bottle typically goes a long way, making it a cost-effective purchase for numerous projects.
What is the Optimal Time to Leave Etching Cream on Glass?
This is a frequently debated question, and based on personal experience, the manufacturer’s suggested one-minute application time often produces a very faint etch. For a more noticeable, consistent, and beautiful frosted effect, I highly recommend leaving the etching cream on for 15 to 20 minutes. This extended time allows the chemicals to work more thoroughly, creating a deeper and more durable etch. Remember the testing tip from Step 4 of the instructions: checking a small area is the best way to determine the perfect duration for your specific cream and glass type.
Can I Etch Pyrex or Other Heat-Resistant Glassware?
The answer to etching Pyrex is a bit nuanced: sometimes yes, sometimes no. Modern Pyrex, often made of soda-lime glass, usually etches successfully. However, older Pyrex (pre-1998 in the US) made of borosilicate glass, and some other heat-resistant glass types, can be resistant to etching cream. The best way to find out is to perform a small test on an inconspicuous area of your Pyrex dish or on a similar piece of scrap glass if you have it. Don’t be discouraged if it doesn’t work on one piece; it’s often successful on others!
Can I Use Contact Paper or Regular Adhesive Vinyl for Stencils?
Absolutely! Both contact paper and regular adhesive craft vinyl (often used for decals) make excellent and inexpensive stencil materials for glass etching. As long as the material is adhesive-backed and you ensure all edges are pressed down firmly to prevent bleed, it will work wonderfully. Contact paper is a particularly budget-friendly option for larger designs or if you’re experimenting. For intricate designs, quality adhesive vinyl can offer cleaner cuts and better adhesion.
My Etching is Uneven or Too Faint – What Went Wrong?
If your etching isn’t as crisp or dark as you’d hoped, here are a few common reasons:
- Insufficient Application Time: The most common culprit. Try leaving the cream on longer (15-20 minutes).
- Uneven Cream Layer: Ensure you apply a thick, consistent layer across the entire stencil. Thin spots may not etch completely.
- Air Bubbles/Bleed: If the stencil wasn’t perfectly sealed, the cream might have seeped under, or air pockets prevented even contact. Re-check stencil application.
- Old Cream: Over time, etching cream can lose some potency. If it’s very old, consider getting a fresh bottle.
- Glass Type: As mentioned with Pyrex, some glass types are more resistant.
How Do I Clean and Care for Etched Glass?
One of the greatest advantages of glass etching is its durability! Once etched, the design is permanent. You can wash your etched glass items just as you would any other glassware – by hand or in the dishwasher. The etched design will not fade, peel, or rub off. Use standard dish soap and water for cleaning. For stubborn spots, a non-abrasive scrubber is safe to use on both the etched and unetched areas.
Inspiring Glass Etching Project Ideas: Unlock Your Creativity!
Now that you’re equipped with the knowledge of how incredibly easy and rewarding glass etching can be, it’s time to let your imagination soar! The possibilities for personalized, frosted glass creations are truly endless. Here are some fantastic project ideas to spark your inspiration for your next DIY endeavor:
1. Personalized Drinkware: Mugs, Glasses & Bottles
Transform ordinary drinking glasses, coffee mugs, or water bottles into unique items. Etch monograms, funny quotes, team logos, or special dates onto tumblers, wine glasses, or beer steins. They make exceptional gifts and add a touch of personal flair to your kitchen.
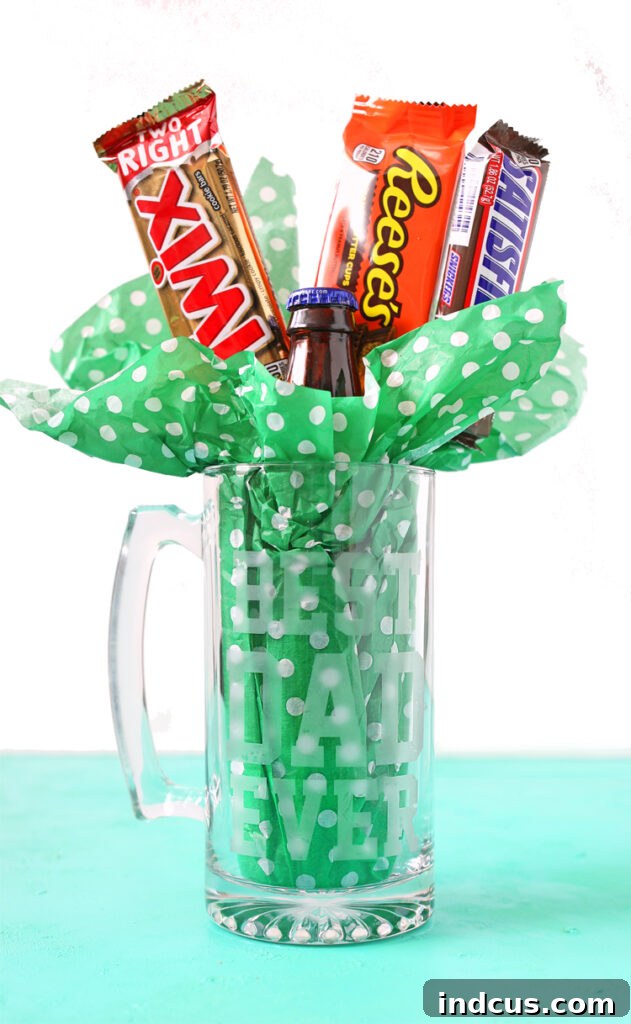
For example, this sturdy mug from Dollar Tree became the “Best Dad Ever” Father’s Day gift, filled with delicious treats after being etched with a simple yet heartfelt message. It’s a gift that keeps on giving!
2. Custom Kitchen & Bakeware
Elevate your cooking and serving with etched casserole dishes, pie plates, cutting boards, or glass containers. Imagine a baking dish with your family name or a decorative pattern – it’s perfect for potlucks and ensures your dish always finds its way home!
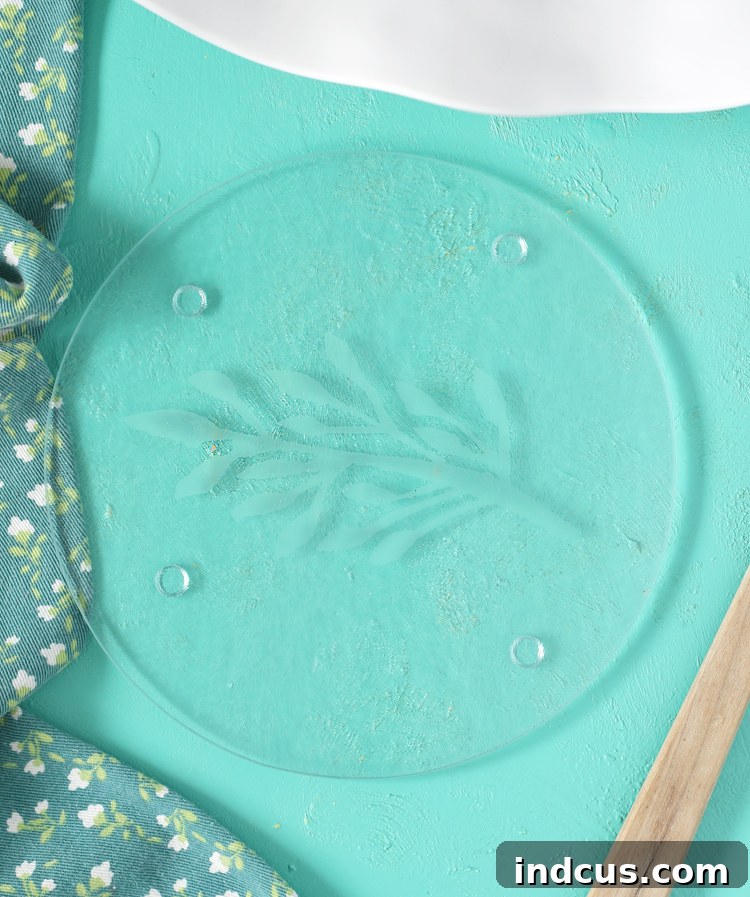
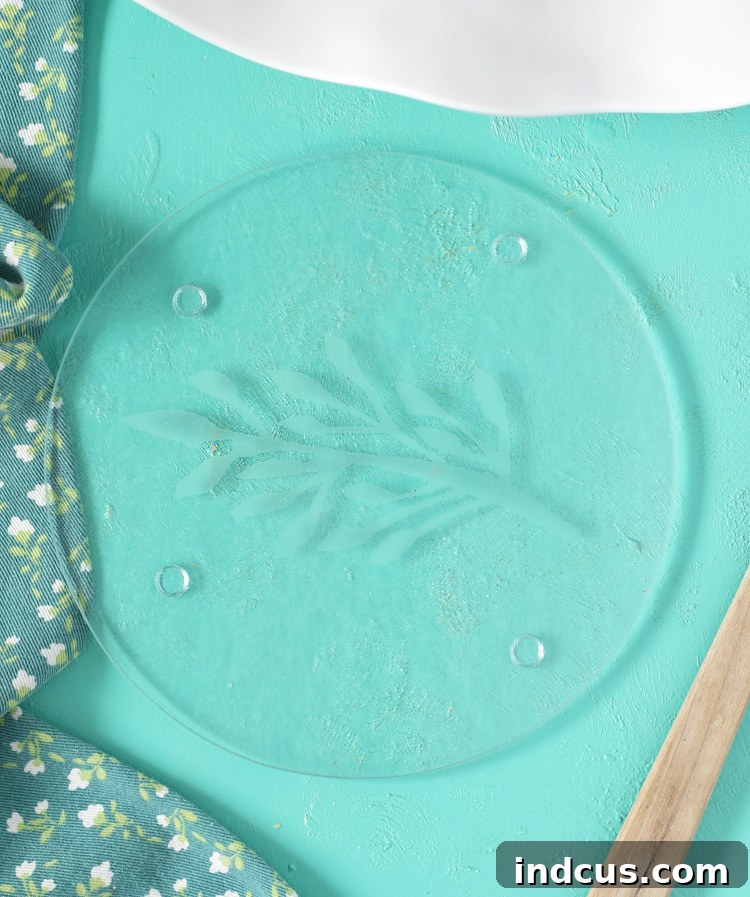
Another clever Dollar Tree find, this simple glass trivet, was given a beautiful upgrade with a delicate, hand-cut leaf design. It’s amazing what a little etching can do to create elegant home decor.
3. Elegant Home Decor & Gifts
Beyond the kitchen, glass etching can enhance vases, mirrors, candle holders, picture frames, and decorative jars. Create seasonal decor, elegant wedding favors (like the candy jars mentioned earlier), or personalized gifts for any occasion. The subtle frosted look blends seamlessly with various interior styles.
To further fuel your creative spirit, here’s a collection of inspiring glass etching project tutorials from talented crafters across the web. Click on the links to explore each individual project in detail:
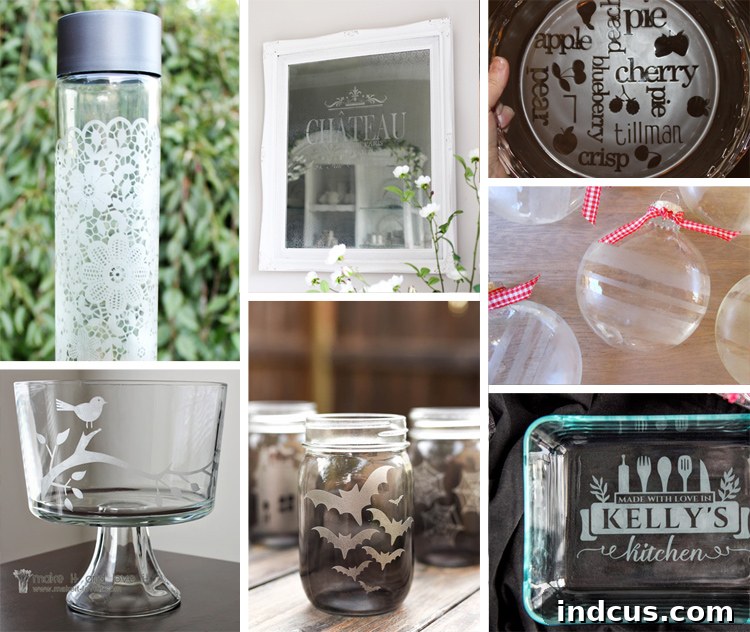
French Mirror |
Trifle Dish |
Christmas Ornament |
Pie Plate |
Halloween Luminaries
Casserole Dish |
Water Bottle |
Cookie Jar |
Wine Glasses
Ready to Etch? Your Crafting Journey Begins Now!
You’ve now uncovered the secrets to successfully etching glass at home. From understanding the simple chemistry to mastering stencil application and achieving that perfect frosted finish, you have all the knowledge needed to embark on your own glass etching adventures. Wasn’t it much easier than you initially thought?
Embrace the joy of creating permanent, personalized, and dishwasher-safe glass items that reflect your unique style. Whether you’re crafting thoughtful gifts or enhancing your own home decor, glass etching is a versatile skill that will continually inspire. We genuinely hope this ultimate guide has empowered you to pick up that etching cream and start designing!
If any questions linger or you’d like to share your first etched creations, please don’t hesitate to leave a comment below. We love connecting with fellow crafters and are always happy to help. Happy crafting, and enjoy the lasting beauty of your handmade etched glass!
Found this tutorial helpful? Don’t keep it to yourself! Pin it to your favorite craft board to save for later and inspire others!