Craft Adorable Wood Bead Easter Bunnies: Your Guide to Charming DIY Decor
Welcome to a world of simple yet captivating crafting! If you’re searching for an easy, versatile, and utterly charming DIY project to celebrate the Easter season, look no further. Today, we’re diving into creating delightful wood bead Easter bunnies that are sure to bring a smile to anyone’s face. These little wooden wonders are not only quick and fun to assemble, but they also offer a plethora of creative uses, transforming ordinary spaces into festive havens. From elegant table settings to sweet candy displays, let your imagination run wild with these handmade treasures!
This inspiring post is sponsored content, crafted with love and originality by me, featuring fantastic finds from Hobby Lobby. All opinions and creative ideas shared are 100% my own.
Why You’ll Love Crafting These Wood Bead Easter Bunnies
This project isn’t just another craft; it’s an opportunity to infuse your home with personalized charm and festive spirit. Here’s why these DIY wood bead bunnies are an absolute must-try for your spring crafting list:
- Effortlessly Easy: With just a few basic supplies and minimal steps, even beginner crafters can achieve professional-looking results.
- Incredibly Versatile: Adapt your bunnies for countless uses – think napkin rings, candy jar toppers, decorative accents for tiered trays, or even charming gift tags.
- Budget-Friendly: Wood beads and a hot glue gun are all it takes, making this an economical way to elevate your Easter decor.
- Customizable Style: Leave them natural for a rustic farmhouse look, or paint them in vibrant pastels to match your seasonal theme.
- Perfect for All Ages: A fantastic activity for families, encouraging creativity and crafting together (with adult supervision for hot glue).
- Quick & Rewarding: You can whip up a batch of these bunnies in no time, giving you instant gratification and beautiful decorations ready for display.
Gather Your Essentials: Materials for Your Wood Bead Bunnies
Preparing your materials is the first exciting step in any crafting journey. For these wood bead Easter bunnies, you’ll find most items readily available at your local craft store, especially places like Hobby Lobby, known for their extensive craft selection. The beauty of this project lies in its simplicity, requiring just a handful of supplies to bring your wooden friends to life.
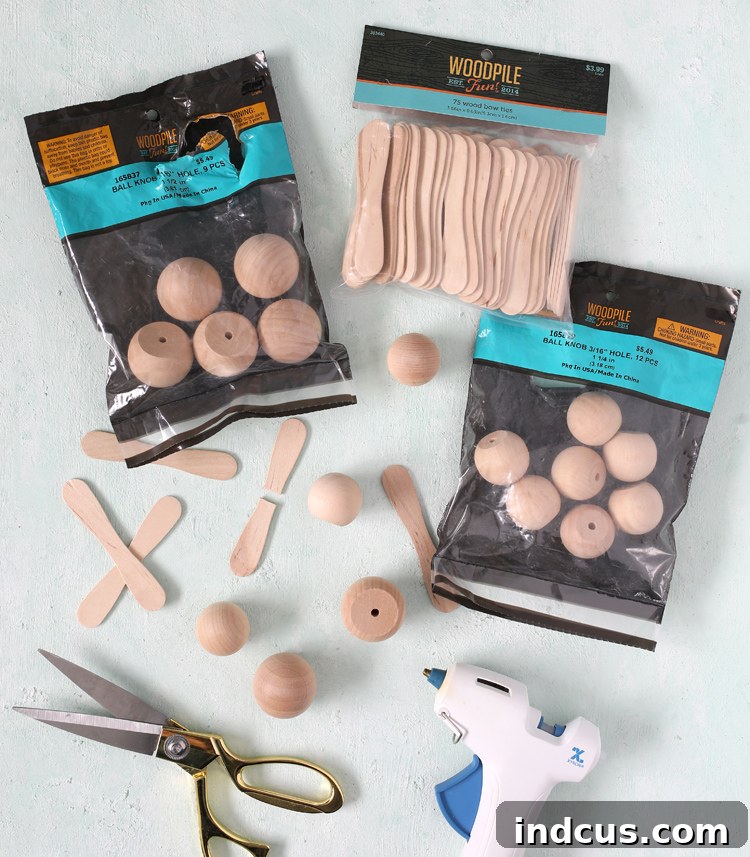
Crafting Your Bunnies: The Supplies
- Large Wood Ball Knobs – 1 1/2″ (These will form the body of your bunny.)
- Small Wood Ball Knobs – 1 1/4″ (These smaller knobs will serve as the bunny’s adorable head.)
- Wooden Bow Ties / Alternative Ear Pieces – While the original wood bow ties from Hobby Lobby may no longer be available, don’t fret! Creativity is key. Consider alternatives like cutting small wooden spoons (you can find these in craft or party supply sections, like these wooden spoons on Amazon) in half to create the ear shapes, or even using small, flat wooden oval cutouts.
- Wood Rings – 1 7/8″ (Optional: Only needed if you plan to craft charming napkin rings.)
- Glass Jars with Wood Lids (Optional: Ideal if you’re making festive Easter candy jars.)
- Sharp Scissors (Essential for precisely cutting your ear pieces.)
- Hot Glue Gun + Glue Sticks (Your primary tool for quick and secure assembly.)
- Optional: Acrylic Craft Paints, Small Paintbrushes, Embellishments (For personalizing your bunnies with color and detail.)
Remember, crafting is all about making it your own! Don’t hesitate to substitute materials if you can’t find exact matches. The essence of the project is in the creative process and the joy of making something beautiful.
Step-by-Step Guide: Assembling Your Wood Bead Bunnies
Ready to get started? Crafting these wood bead bunnies is a straightforward and enjoyable process. Follow these simple steps to bring your little Easter friends to life. For a visual demonstration, remember to check out the video tutorial further down this page!
Basic Bunny Assembly
Step 1: Form the Bunny Body and Head
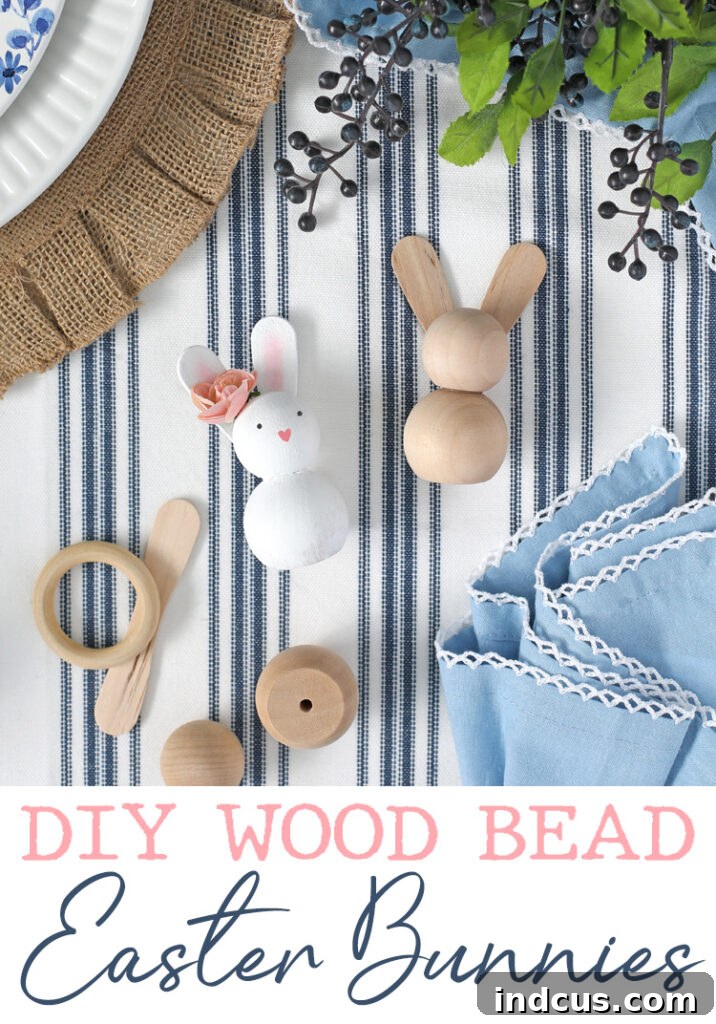
Begin by taking one of your smaller wood ball knobs (1 1/4″) and one larger wood ball knob (1 1/2″). Apply a small dab of hot glue to the flat bottom surface of the smaller bead. Carefully center and attach the smaller bead to the top of the larger wood bead. Hold them firmly together for a few seconds until the glue sets. This combination will form the distinctive head and body of your wood bead bunny.
Step 2: Adding Adorable Ears
Next, it’s time to give your bunny its iconic ears. If you’re using wood bow ties, carefully cut one piece in half lengthwise with your sharp scissors. If you’re using wooden spoons or other flat wood pieces, you’ll want to cut them into two ear-like shapes. Once cut, apply a thin line of hot glue to the bottom edge of each ear piece. Position and attach the two pieces to the back of the smaller wooden bead (the head), making sure they stand upright and are symmetrically placed. This instantly transforms your stacked beads into a recognizable bunny silhouette.
Creative Displays: Ways to Showcase Your Wood Bead Bunnies
One of the most exciting aspects of this craft is its incredible versatility. Once your bunnies are assembled, you can easily adapt them for various festive purposes. Here are two fantastic ways to incorporate them into your Easter decor, along with some additional ideas to spark your imagination.
Option 1: Charming Napkin Rings
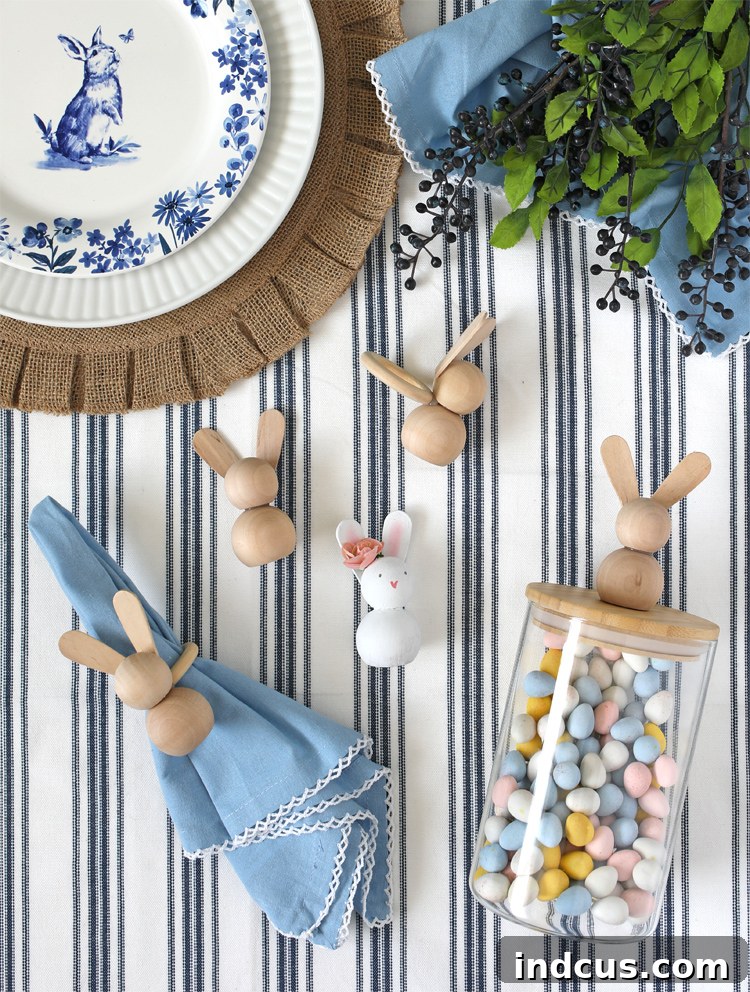
Elevate your Easter brunch table with personalized napkin rings. To transform your bunny into a napkin ring, simply take one of your wood rings (1 7/8″). Apply a generous amount of hot glue to one side of the ring. Carefully attach the wood ring to the back of your bunny, positioning it at the ‘neck joint’ where the small head bead meets the larger body bead. Ensure it’s centered and secure. Once dry, slide your linen or paper napkins through the ring for a touch of handmade elegance.
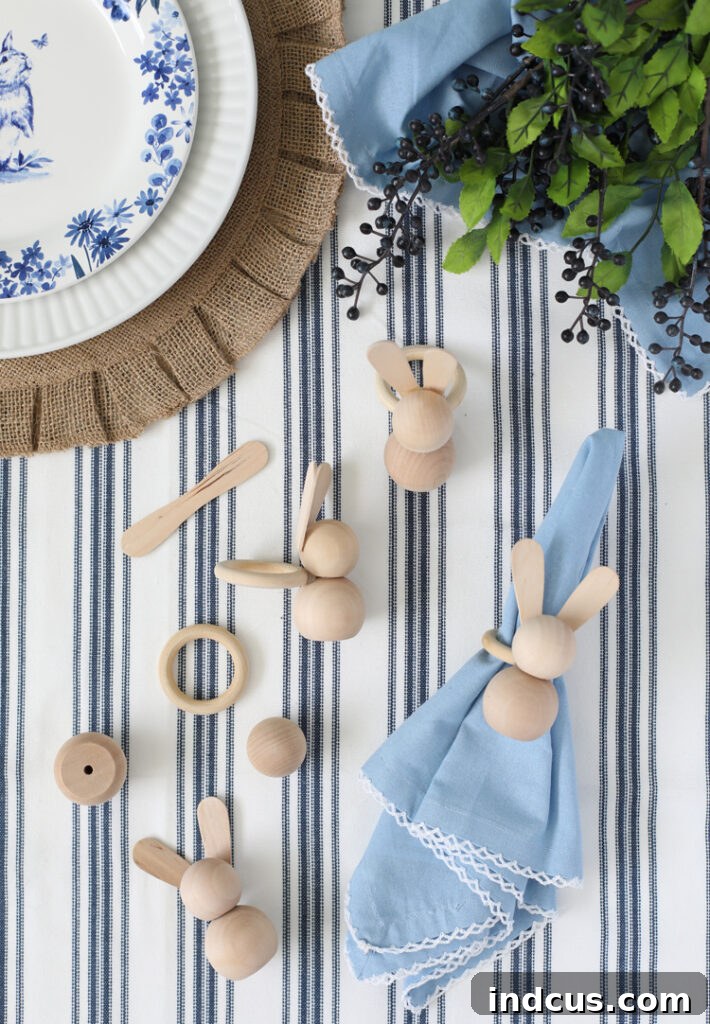
Option 2: Delightful Easter Candy Jar Toppers
Create irresistibly cute candy jars that double as festive decor and sweet treat holders. For this, you’ll need a glass jar with a flat wooden lid. Apply hot glue to the flat bottom of your wooden bunny. Center the bunny on top of the candy jar lid and press down firmly until it’s securely attached. These toppers instantly add a whimsical touch to any countertop or dessert bar, making them perfect for gifting or serving up your favorite Easter sweets!
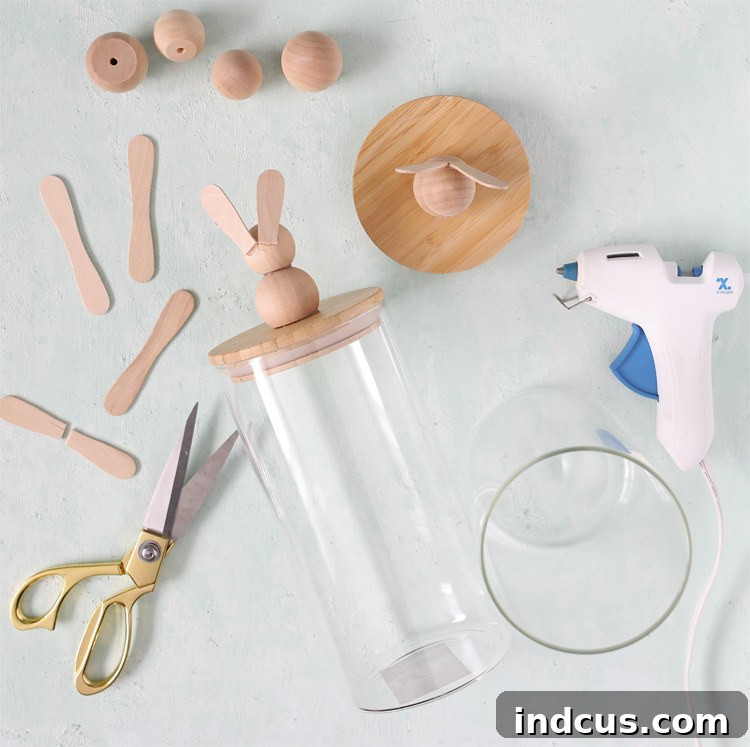
Now all that’s left is the fun part: filling your newly decorated jars with your favorite Easter treats! Think colorful jelly beans, chocolate eggs, pastel M&Ms, or even homemade cookies. The visual appeal of these jars filled with goodies is simply irresistible!
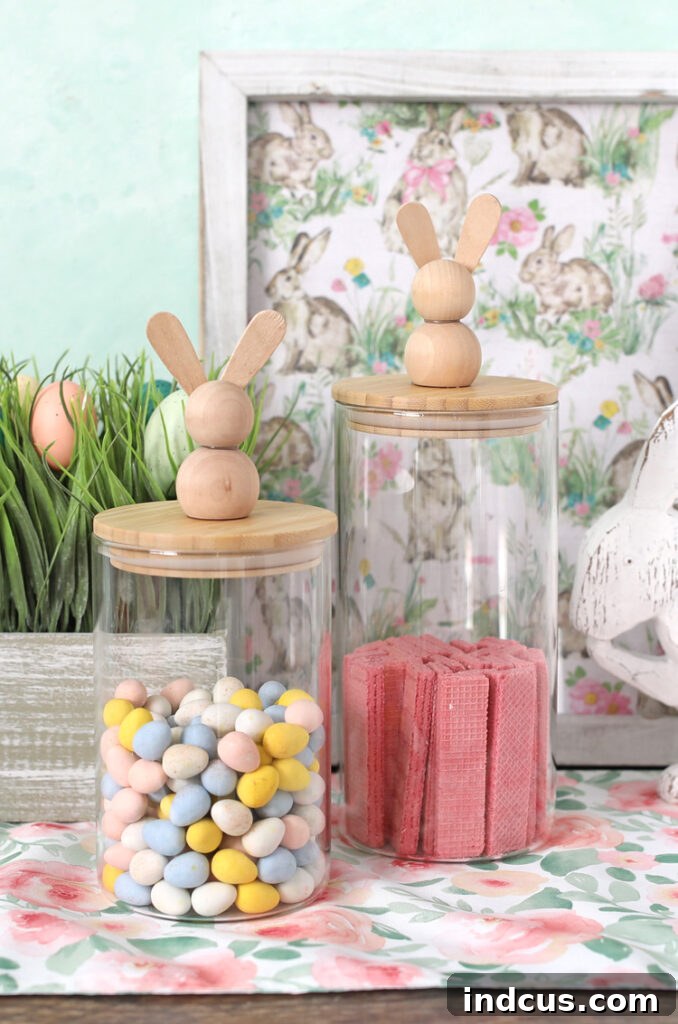
More Inspiration: Endless Possibilities!
Beyond napkin rings and candy jars, these wood bead bunnies can be adapted for countless other decorative purposes:
- Tiered Tray Decor: Nestle them amongst other spring trinkets for a charming display.
- Easter Garland: String several bunnies together with wooden beads or fabric scraps for a unique garland.
- Place Card Holders: Glue a small clip or wire loop to the back and use them to hold guest names at your Easter meal.
- Gift Tags: Attach them to Easter baskets or presents for a personalized, handmade touch.
- Spring Ornaments: Add a loop of twine to the top and hang them on a decorative branch or small Easter tree.
- Miniature Shelf Sitters: Simply display them as standalone decor on shelves, mantels, or windowsills.
Personalizing Your Bunnies: Paint Them or Keep Them Natural?
Once your wood bead bunnies are fully assembled, you face a delightful decision: will you embrace the natural beauty of the raw wood, or will you add a splash of color? Both options offer distinct aesthetic appeals, allowing you to tailor your bunnies to your specific decor style.
Leaving the bunnies in their raw wood state lends a rustic, minimalist, or modern farmhouse vibe. The light, natural wood grain offers a clean and understated elegance that complements various home decor schemes. It’s perfect if you prefer a more subtle accent or want the texture of the wood to shine through.
However, if you’re like me, the allure of painting these little creatures is hard to resist! A bit of paint can truly bring out their playful personalities and make them pop with seasonal cheer. I couldn’t help but show you just how adorable they look when adorned with a touch of color.
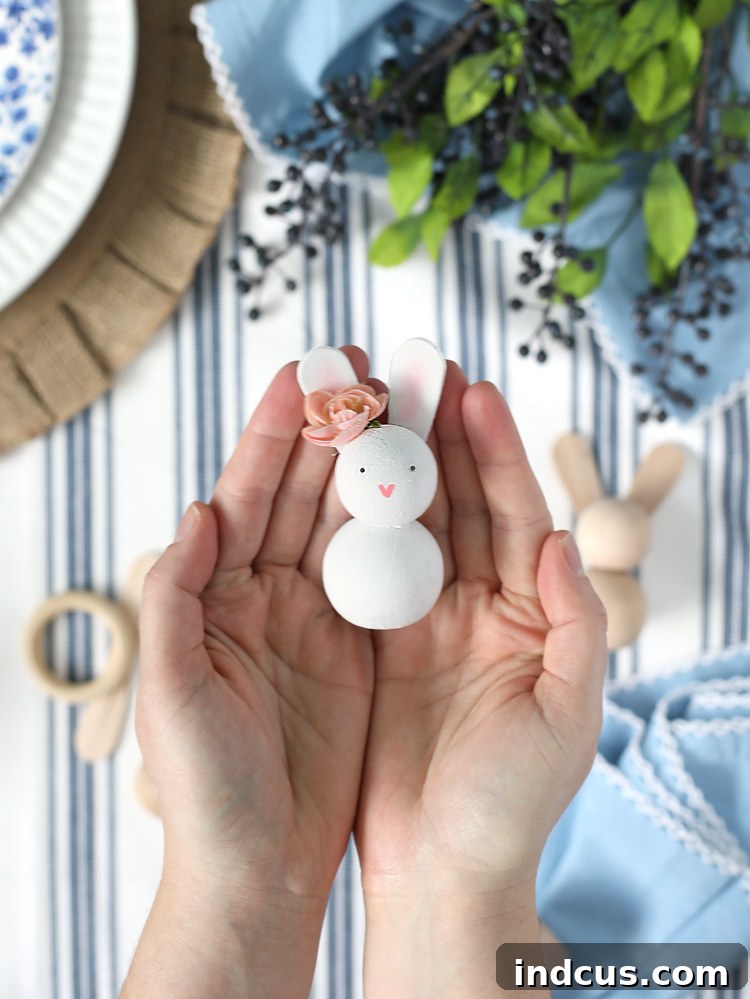
Gah! That tiny, painted heart nose is absolutely my favorite detail! To achieve this look, I simply used standard acrylic craft paint, which offers a wide array of colors and dries quickly. For the intricate details like the eyes and nose, a tiny paintbrush is essential for precision. To add an extra touch of whimsy, I glued a little pink flower, which I serendipitously found in my craft stash, next to the ear. Think about adding tiny bows, small buttons, or even a dusting of glitter for your own unique flair.
Now, I’m genuinely curious: do you prefer the charming simplicity of the raw wood bunnies, or do the painted, personalized versions capture your heart more? Let your creativity guide you!
Crafting Tips for Success
To ensure your wood bead bunny crafting experience is smooth and enjoyable, here are a few handy tips:
- Hot Glue Control: Use small dabs of hot glue. Too much can squeeze out and create messy strings. A low-temperature glue gun is great for beginners and reduces the risk of burns.
- Steady Hands: When attaching the head to the body, ensure it’s centered before the glue sets completely. Hold it firmly for a few seconds.
- Ear Placement: Play around with the angle of the ears before gluing. You can make them stand straight up, or tilt slightly for different expressions.
- Paint Layers: If painting, apply thin, even coats of acrylic paint. You might need two or three coats for full coverage, allowing each layer to dry thoroughly.
- Detail Brushes: Invest in a fine-tipped paintbrush for painting eyes, noses, and other small details.
- Vary Sizes: Experiment with different sizes of wood beads and ear pieces to create a family of bunnies!
- Protect Your Workspace: Lay down newspaper or a craft mat to protect your surfaces from glue drips or paint spills.
Before you wrap up your Easter crafting spree, make sure to check out the extensive Easter section at Hobby Lobby. They are a treasure trove for all sorts of holiday goodies and spring decorations, providing endless inspiration for your next DIY project!
Watch the Bunnies Come to Life: Wood Bead Easter Bunny Video Tutorial
Sometimes, seeing is believing! For a complete visual guide to crafting your wood bead Easter bunnies, including all the steps and a closer look at the materials, watch our helpful video tutorial below. It’s the perfect companion to these written instructions.
Ready for More Easter Crafting Inspiration?
If you’ve enjoyed making these delightful wood bead bunnies, you’re in luck! The world of Easter crafting is vast and full of exciting projects. Find even more adorable Easter craft ideas and inspiration to keep your creativity flowing all season long.
Don’t Forget to Pin It for Later!
Loved this project? Be sure to pin this idea to your favorite Easter or DIY craft board on Pinterest! It’s the perfect way to save it for next year or share with fellow craft enthusiasts.
We hope this guide inspires you to create your own charming wood bead Easter bunnies. Whether you’re crafting for decor, gifts, or just for fun, these little projects are sure to add warmth and cheer to your home. Happy crafting and Happy Easter!