Craft Adorable Giant Cherries: The Ultimate DIY Valentine’s Day Gift (Easy & Budget-Friendly!)
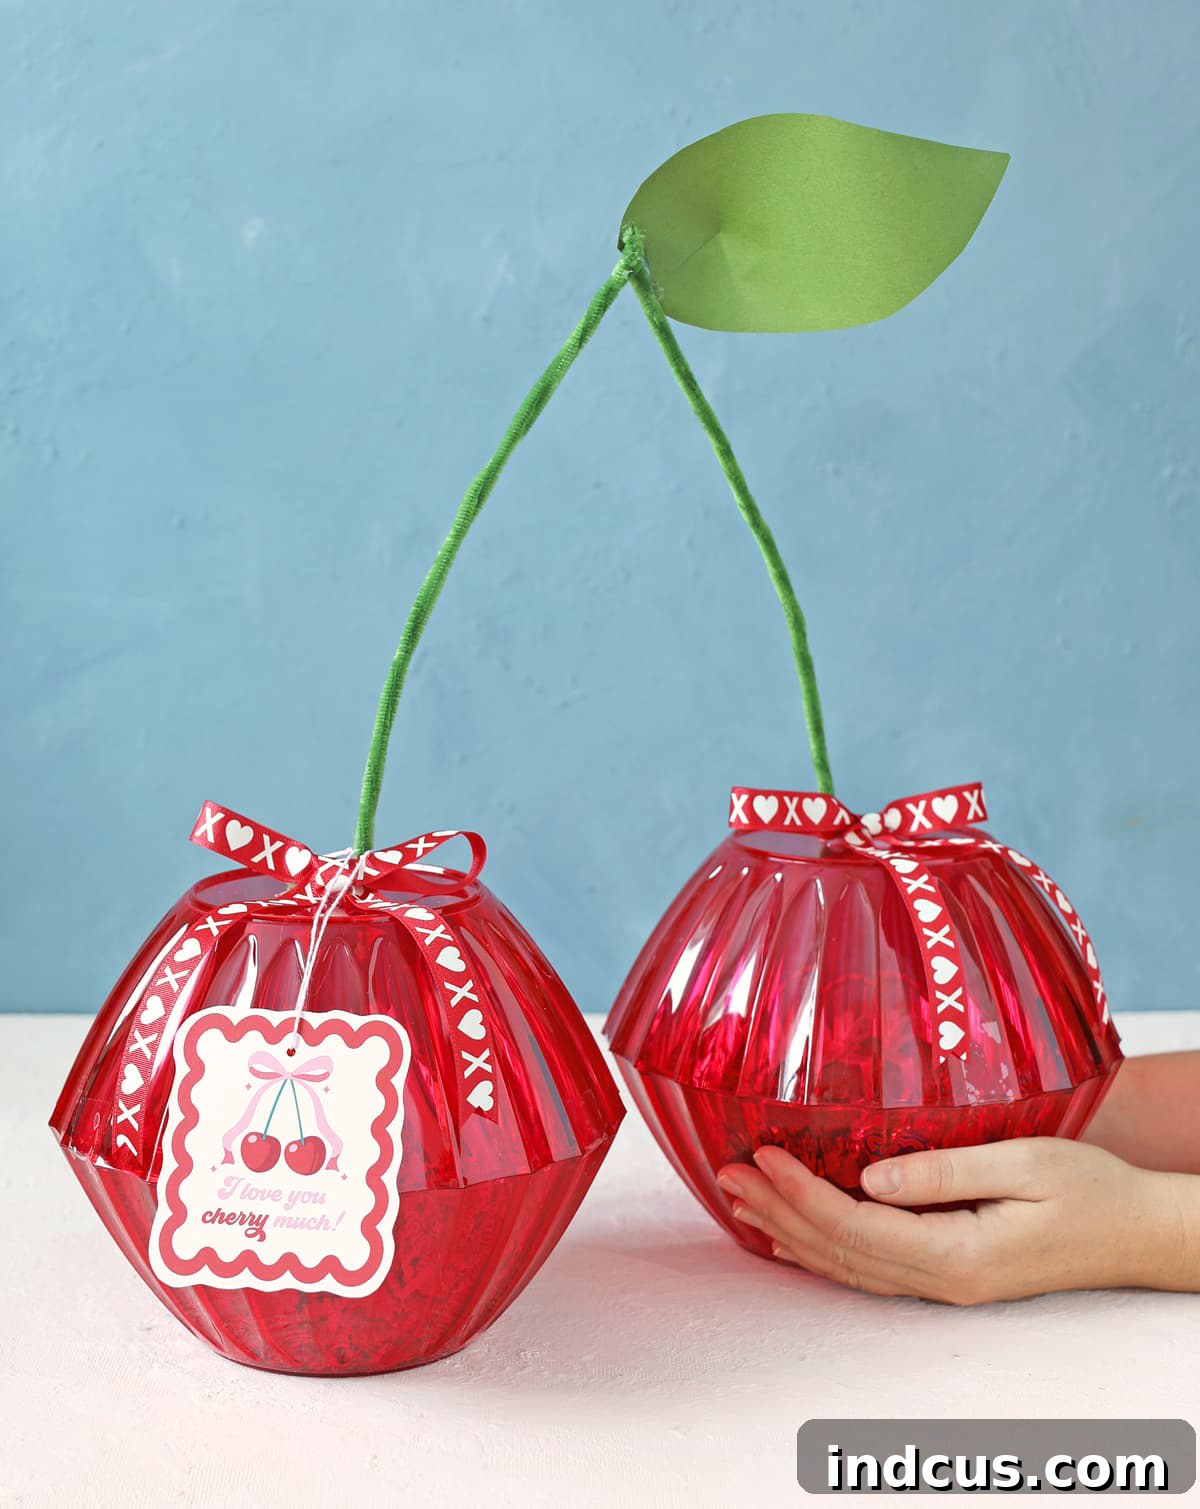
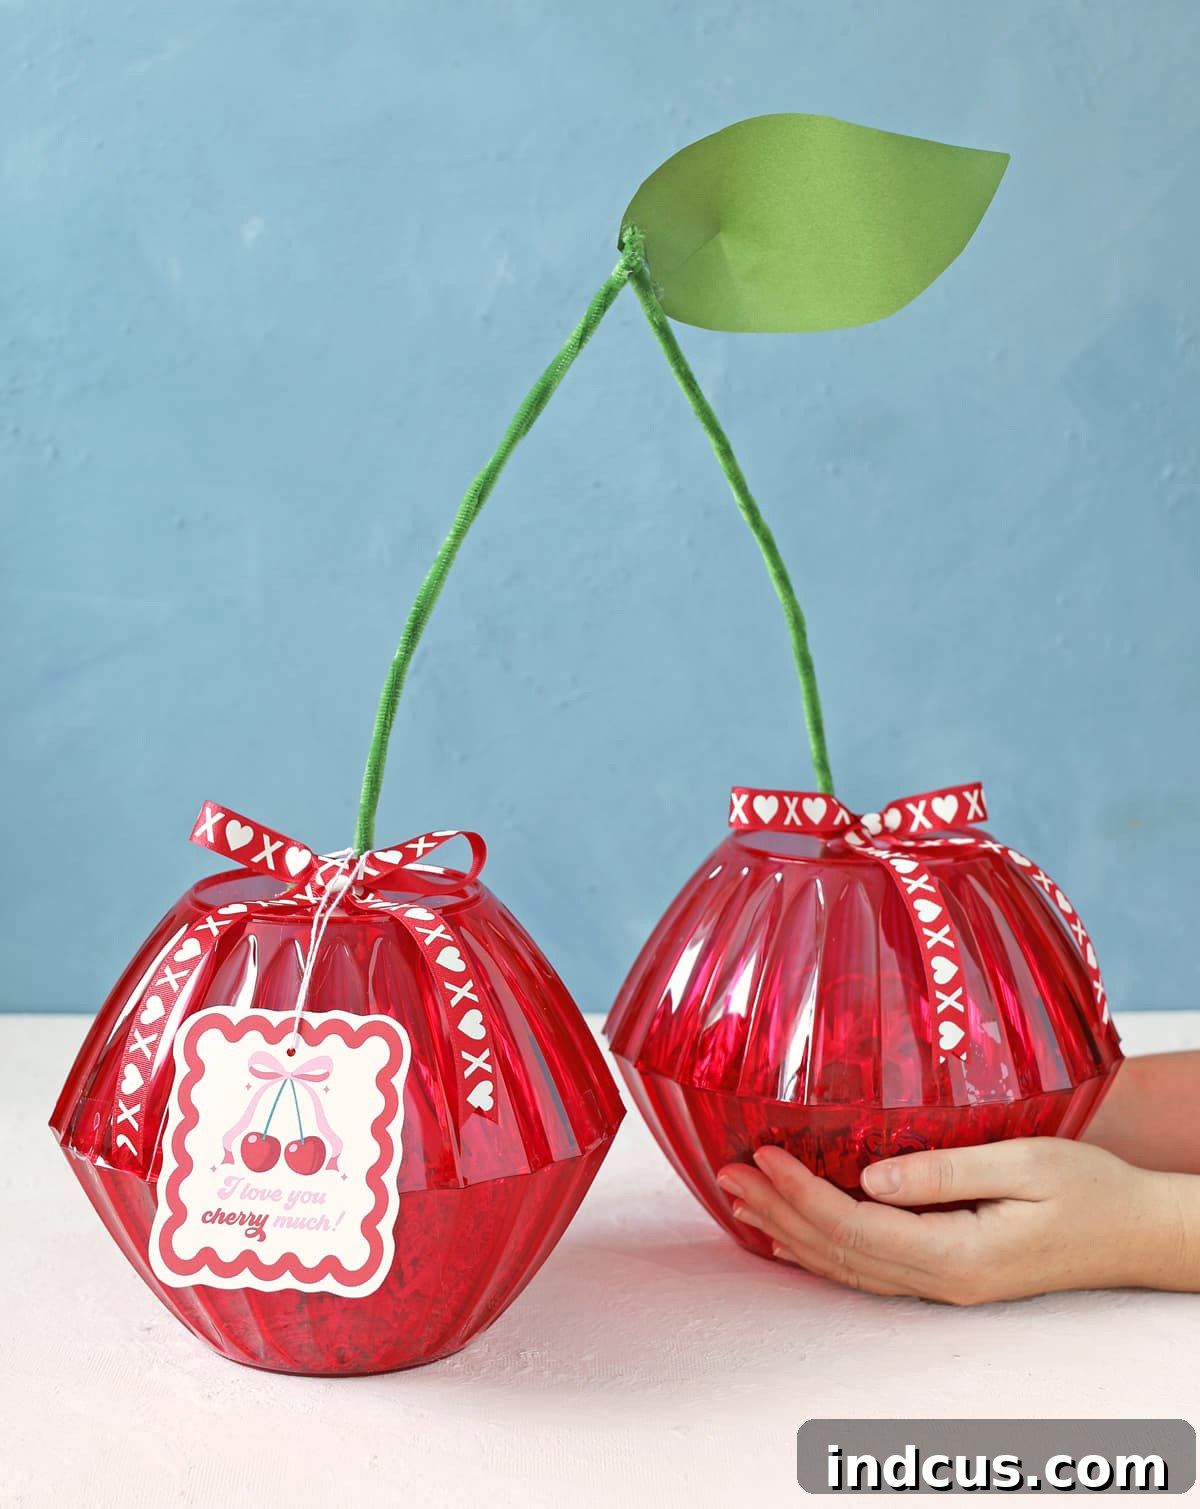
Looking for a truly unique and heartwarming way to express your affection this Valentine’s Day? Imagine presenting a gift that isn’t just thoughtful inside, but also breathtakingly creative on the outside. This year, ditch the traditional gift bags and boxes, and instead, craft these charming giant cherries made from simple red plastic bowls! They serve as both an adorable decoration and a delightful container for your carefully chosen Valentine’s treasures. Perfect for partners, children, friends, or anyone who deserves a sweet surprise, this DIY project is not only incredibly fun to make but also budget-friendly, utilizing supplies readily available at stores like Dollar Tree.
Prepare to impress with a handmade gift that truly stands out. Let’s dive into creating these irresistible oversized cherries that promise to bring smiles and warm hearts.
Why These DIY Giant Cherries Are the Perfect Valentine’s Gift
Valentine’s Day is a celebration of love, and what better way to show you care than with a gift made with your own hands? These giant cherries aren’t just a craft; they’re an experience. They combine the joy of discovery (what’s inside?) with the undeniable charm of a whimsical, oversized fruit. This project is ideal for several reasons:
- Unforgettable Presentation: Move beyond standard gift wrap. The “wow” factor of these giant cherries makes your gift instantly memorable and Instagram-worthy.
- Personal Touch: A handmade gift always feels more special. The effort and thought you put into crafting these cherries will undoubtedly be appreciated.
- Budget-Friendly: Most of the core materials can be found at dollar stores, making this an affordable option for creating a high-impact gift without breaking the bank.
- Customizable: Fill them with any small gifts, candies, or messages. The possibilities are endless, allowing you to tailor the contents perfectly to your recipient’s tastes.
- Fun to Make: The crafting process itself is enjoyable and relatively straightforward, even for beginners. It’s a rewarding project that yields impressive results.
Get ready to embark on a creative journey that culminates in the cutest, most unique Valentine’s Day gift ever imagined. It’s time to gather your supplies and turn simple items into something truly extraordinary.
Gather Your Sweet Cherry Crafting Materials
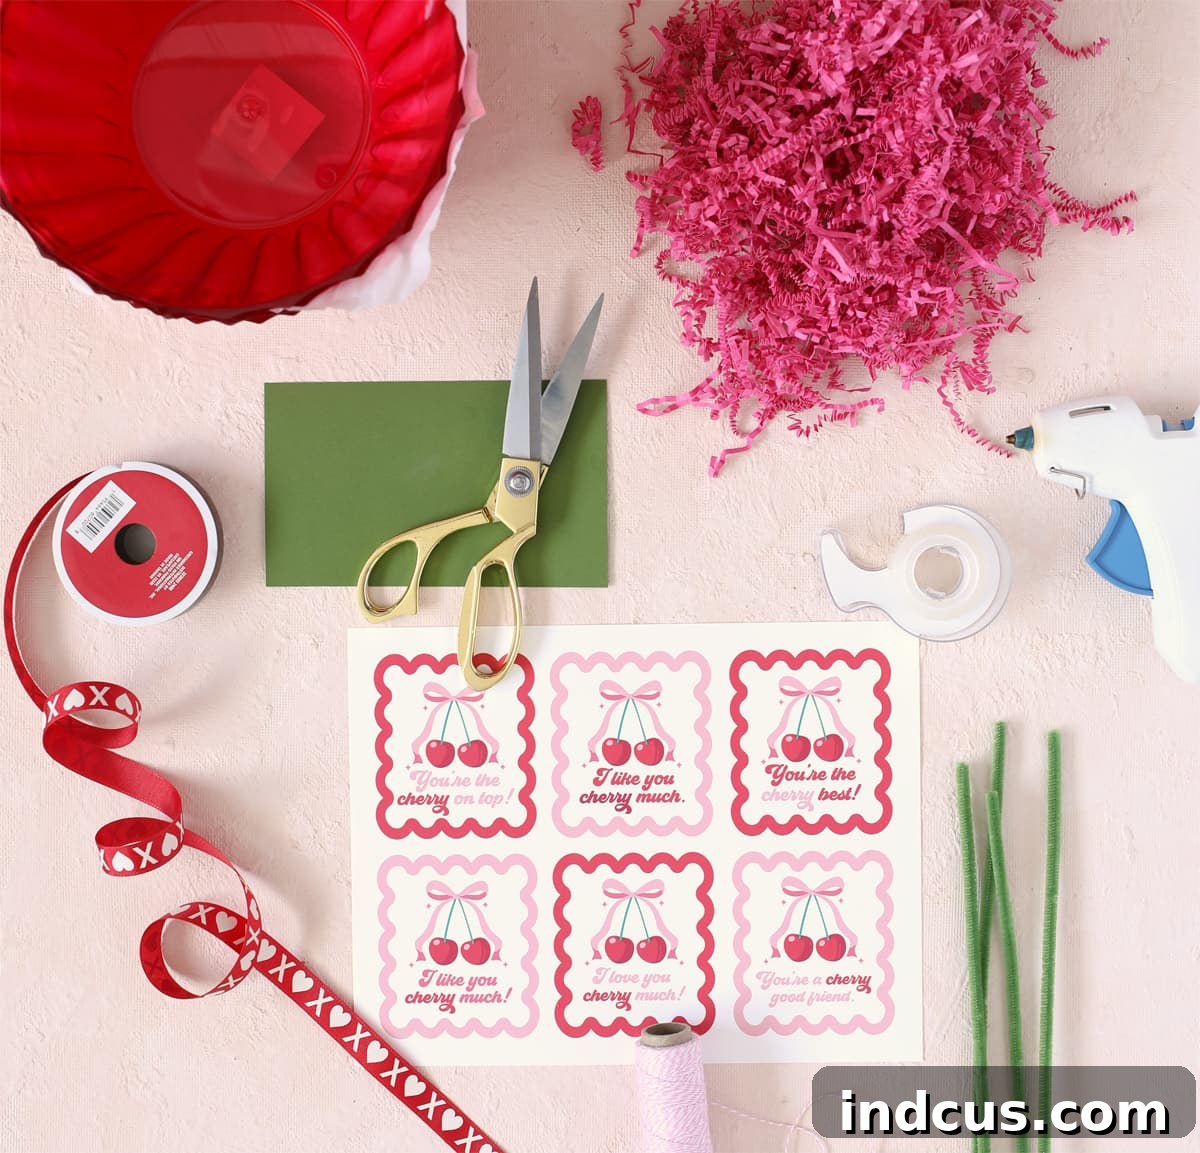
Before we begin, ensure you have all your materials ready. The beauty of this project lies in its simplicity and the accessibility of its components. Most items can be found at your local dollar store or craft supply shop, proving that you don’t need expensive supplies to create something truly magical. Remember to also consider the special gifts you’ll place inside your cherries!
- Four Red Plastic Bowls from Dollar Tree: Look for these in the party supplies aisle, often near tablecloths and plastic silverware. The wavy edge adds a nice touch, but any red plastic bowls will work. These will form the main “fruit” of your cherries.
- Four Green Pipe Cleaners: These flexible crafting wires will become the sturdy stems of your giant cherries. Their bendable nature makes them perfect for shaping.
- Green Cardstock: Essential for crafting realistic, dimensional leaves that will sit atop your cherry stems.
- Ribbon: Choose a festive ribbon, perhaps in red, pink, or a complementary color, to add decorative bows. The original ribbon used was also sourced from Dollar Tree, showcasing cost-effective options.
- Paper Shreds (Red or Pink): These are not just for aesthetics; they provide a soft nest for your gifts inside the bowls and add a pop of color upon opening.
- Clear Tape: Heavy-duty clear tape will be your best friend for securely joining the bowl halves.
- Hot Glue Gun + Glue Sticks: An absolute must for strong, instant adhesion when attaching the stems and leaves. Ensure your glue gun is heated and ready.
- Scissors: For cutting cardstock, ribbon, and any necessary adjustments.
- Valentine’s Day Ribbon: (As mentioned above) Specifically for those charming bows.
- Printable Cherry Valentine’s Day Cards: You’ll find a link to download these adorable, punny tags at the bottom of this post, adding an extra layer of personalized charm.
- Baker’s Twine: Ideal for attaching your printable gift tags with a rustic, handmade feel.
- Small Valentine’s Day Gifts: Don’t forget the treasures you’ll hide inside! Think candies, small toys, jewelry, gift cards, or heartfelt notes.
Step-by-Step Instructions: Crafting Your Deliciously Giant Cherries
Follow these detailed steps to transform your simple supplies into an unforgettable Valentine’s Day masterpiece. Patience and a little creativity are your best tools!
Step 1: Prepare and Fill Your Cherry Halves
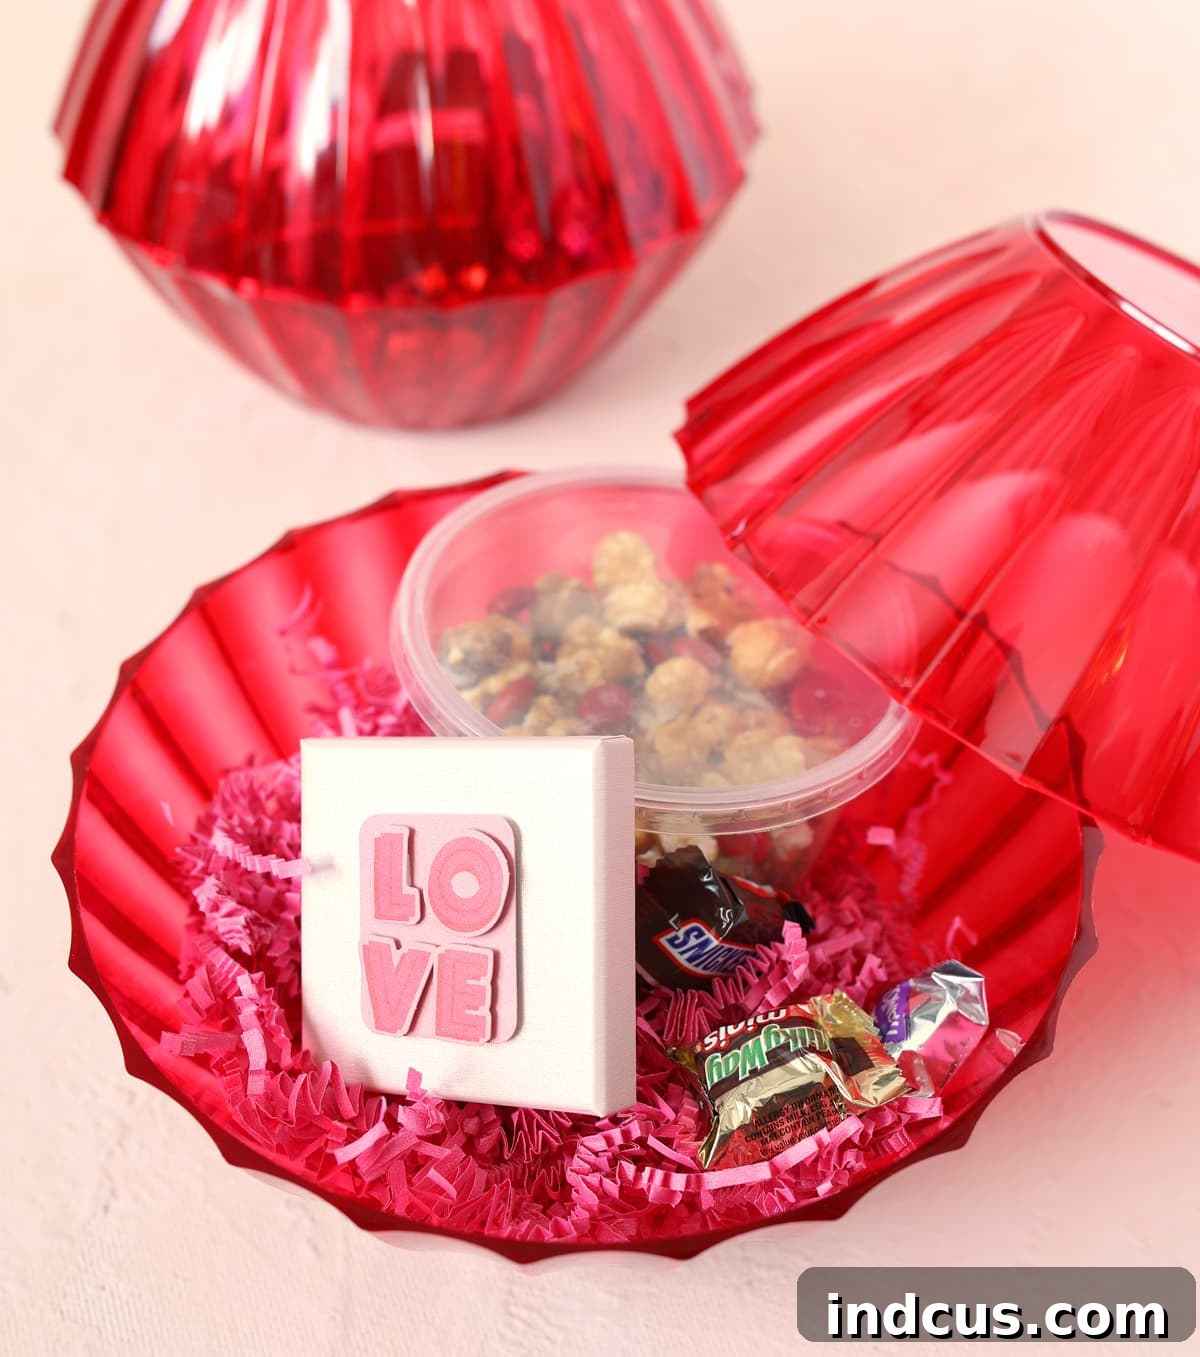
Begin by taking two of your red plastic bowls. Before doing anything else, gently peel off any manufacturer stickers from the bottom or sides of the bowls to ensure a clean finish. Now, generously add a bed of red or pink paper shreds into each of these two bowls. This vibrant filler not only adds a festive touch but also provides cushioning for your precious gifts. Carefully arrange the Valentine’s Day gifts you intend to give on top of the paper shreds, making sure they fit snugly within the bowl. Think small items like chocolates, lip balms, miniature puzzles, or heartfelt notes. Once filled, take the remaining two bowls and place them upside down directly on top of the filled bowls, creating a spherical cherry shape. Ensure the edges align as perfectly as possible.
Step 2: Secure the Cherry Halves Together
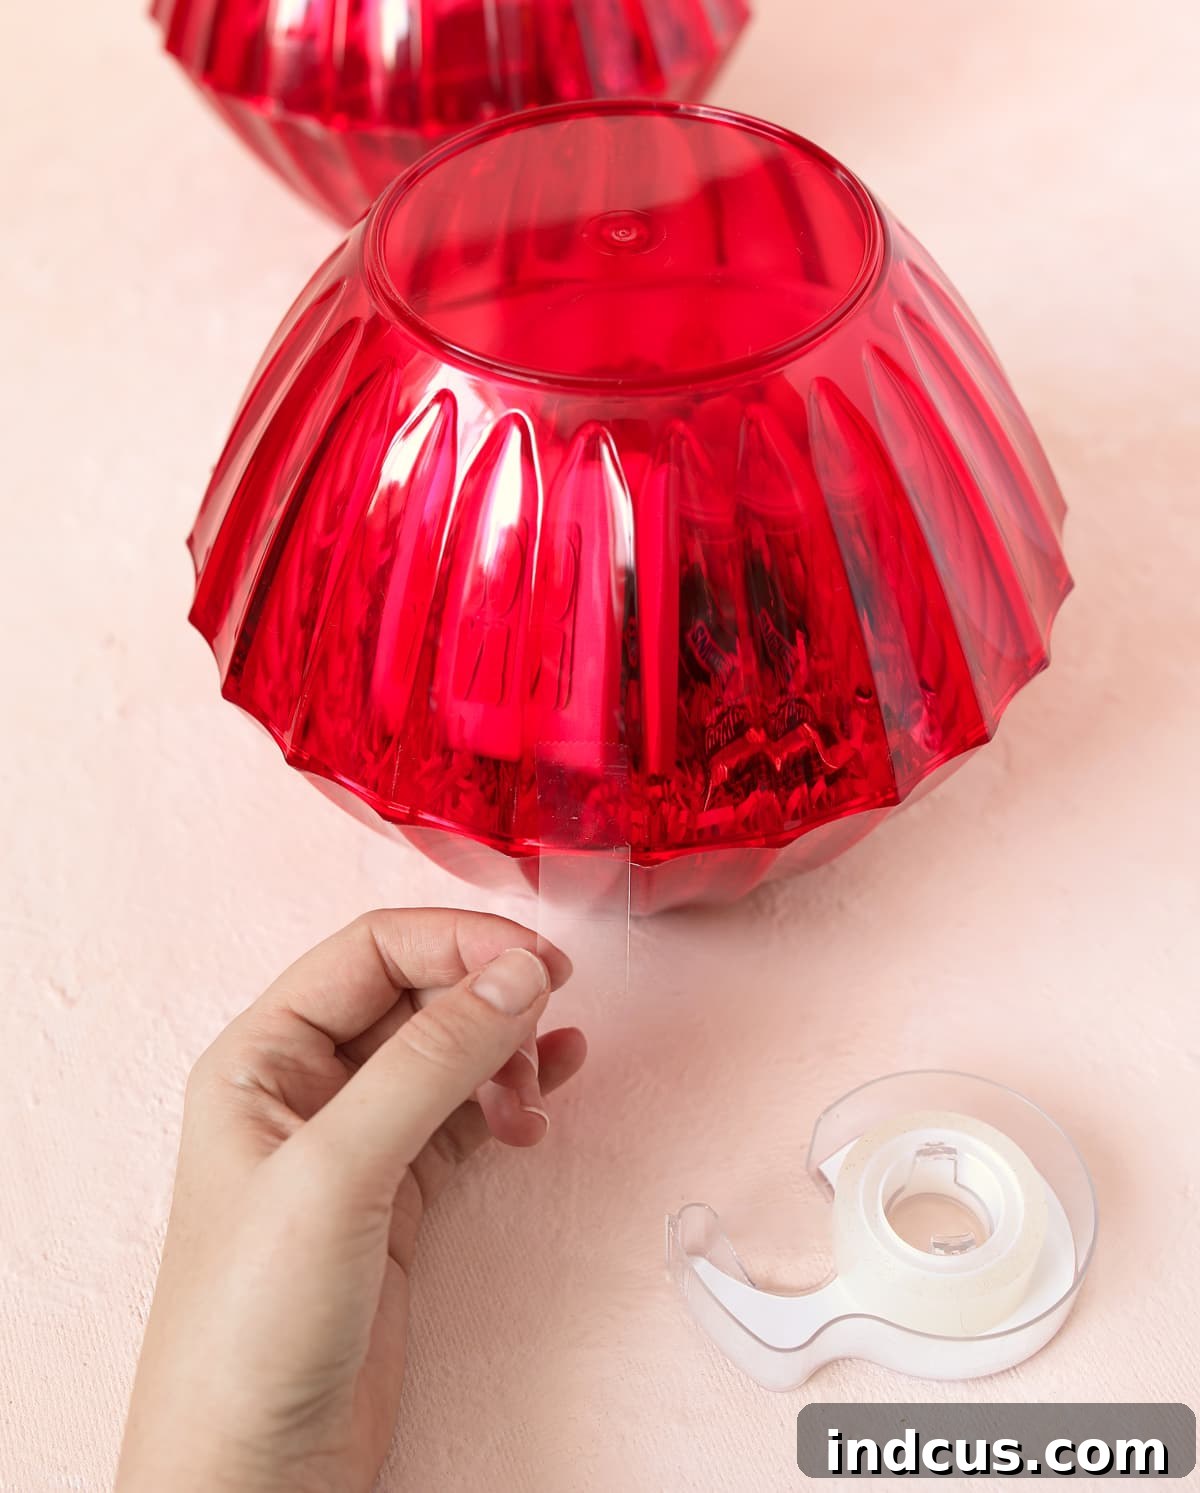
With your bowls perfectly aligned and your gifts nestled inside, it’s time to secure the top and bottom halves. Using pieces of clear, strong tape, begin to adhere the two bowls together. A good technique is to apply strips of tape vertically, spanning across the seam where the two bowls meet. For bowls with ridges, place a strip of tape every three to four ridges. This method ensures an even distribution of adhesive strength. Continue taping around the entire circumference until both cherry halves feel firmly secured and won’t easily come apart. Test the stability by gently holding the assembled cherry. The goal is a robust enclosure that protects your gifts until they are ready to be unveiled.
Step 3: Craft the Sturdy Pipe Cleaner Stems
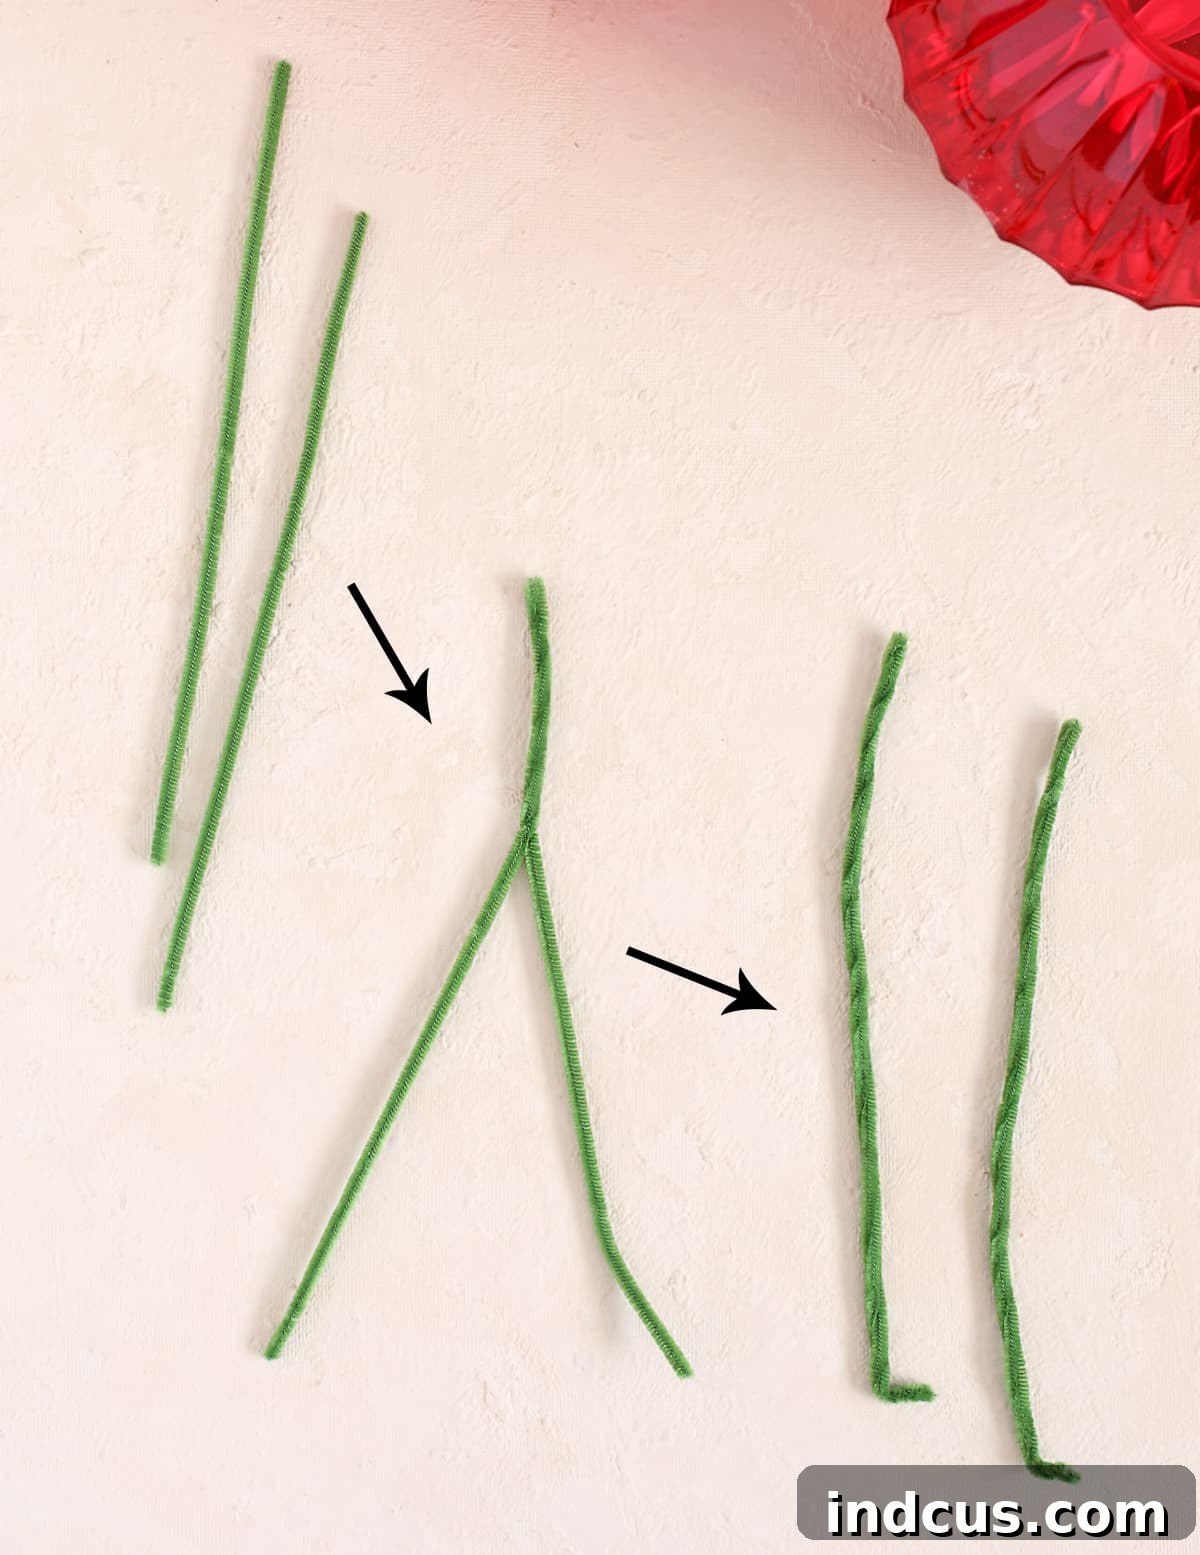
Now, let’s create the iconic cherry stems. Take two of your green pipe cleaners. Twist them tightly together along their entire length. This action isn’t just for aesthetic appeal; it significantly increases the thickness and rigidity of the stem, making it strong enough to stand upright. Once twisted, bend one end of this thicker stem at a sharp 90-degree angle, approximately one inch from the tip. This bent portion will serve as the crucial attachment point to the plastic bowl. Repeat this exact process with the remaining two pipe cleaners, so you have two robust, L-shaped stems ready for your giant cherries. Ensure the twists are tight to prevent any floppiness.
Step 4: Attach the Stems with Hot Glue
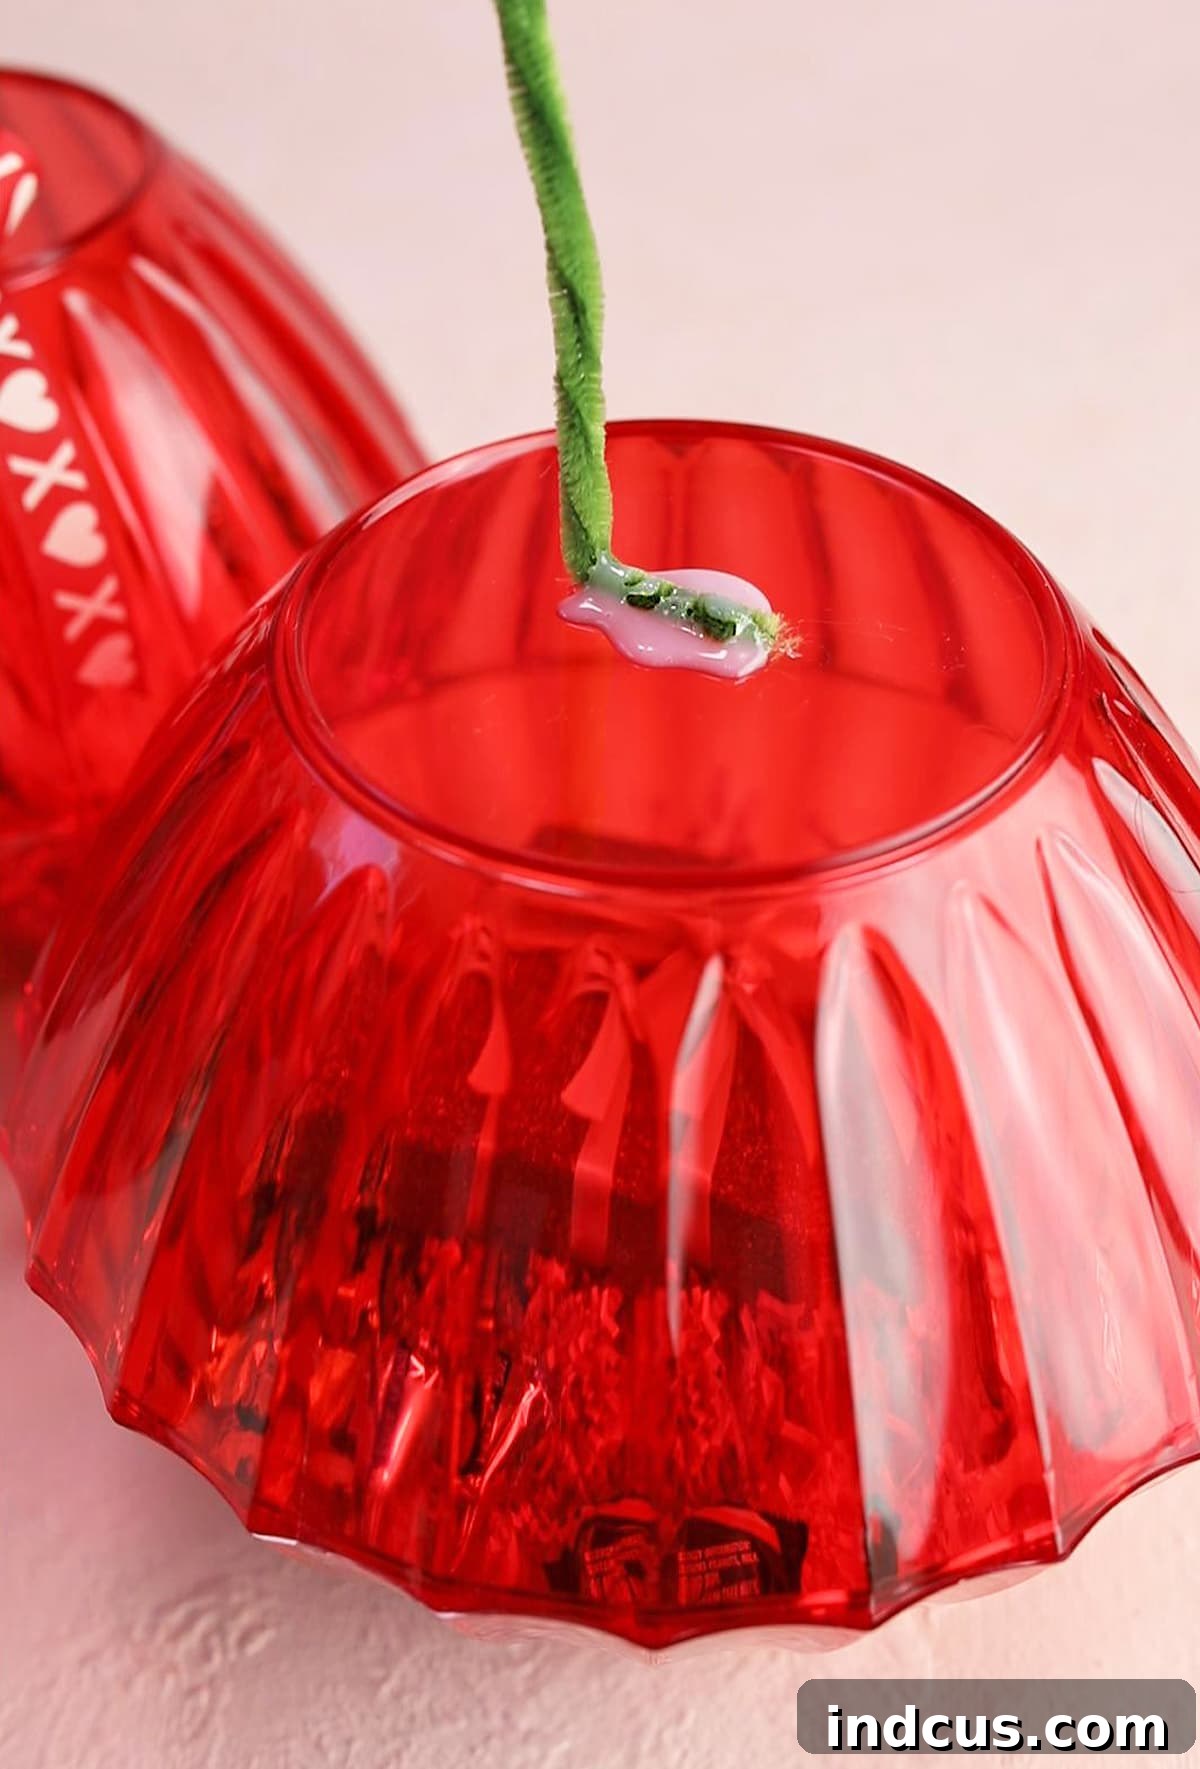
This step requires a bit of patience and a steady hand. Apply a generous amount of hot glue to the bent, 90-degree portion of one pipe cleaner stem. Carefully press this glued section onto the top center of one of your assembled cherry bowls. Hold it firmly in place. Hot glue sets quickly, but for optimal adhesion and to ensure the stem maintains the correct upright angle, you might need to lean the cherry against the edge of a table or use a heavy object to prop the stem up while the glue completely cools and hardens. This usually takes about two to three minutes per stem. Resist the urge to move or adjust the stem until the glue is fully set, as disturbing it too early can compromise the bond. Repeat for the second cherry.
Step 5: Create and Attach the Green Leaves
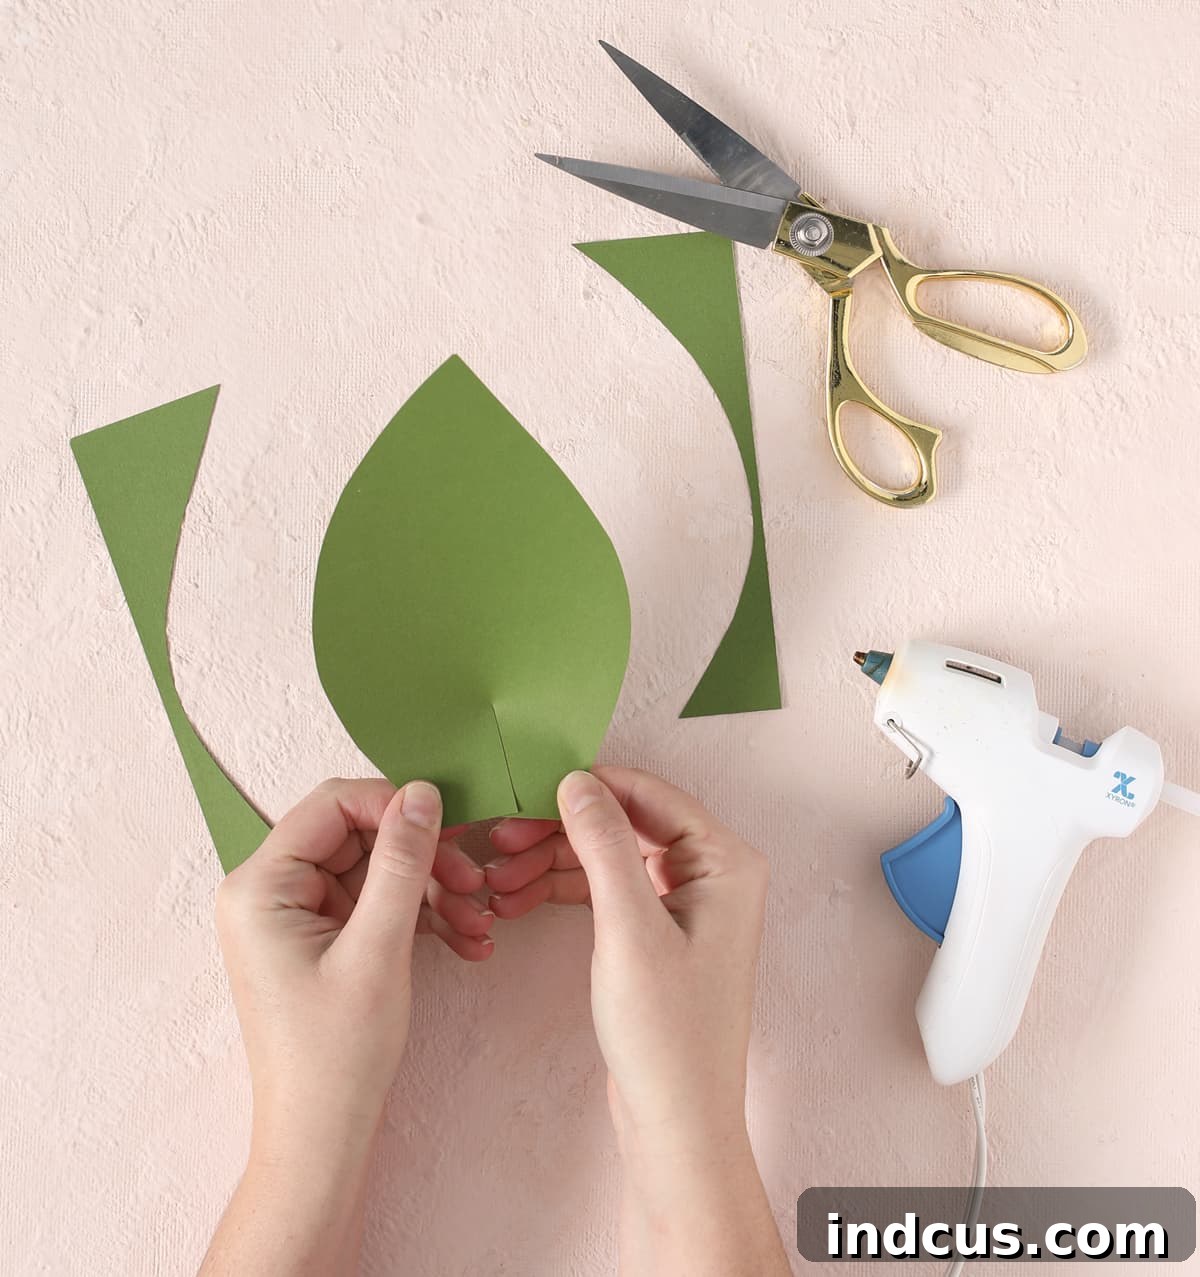
Once both stems are securely glued and the hot glue has completely hardened, bring the two stems together at the top, twisting them around each other to mimic a natural cherry branch. Now, for the leaves! Take your green cardstock and cut out a simple, elongated leaf shape. To give your leaf a more realistic and three-dimensional appearance, cut a small, one-inch slit at the very bottom edge of the leaf. Fold the cardstock inward at this slit, effectively creating a slight bend or ‘spine’ for the leaf. For an even more organic look, gently curl the tip of the leaf over your finger or a pen. Once you are satisfied with the shape and dimension of your leaf, apply a dab of hot glue to its base and firmly attach it to the twisted pipe cleaners at the very top, where the two stems meet. This adds a beautiful finishing touch.
Step 6: Add Decorative Ribbon Bows
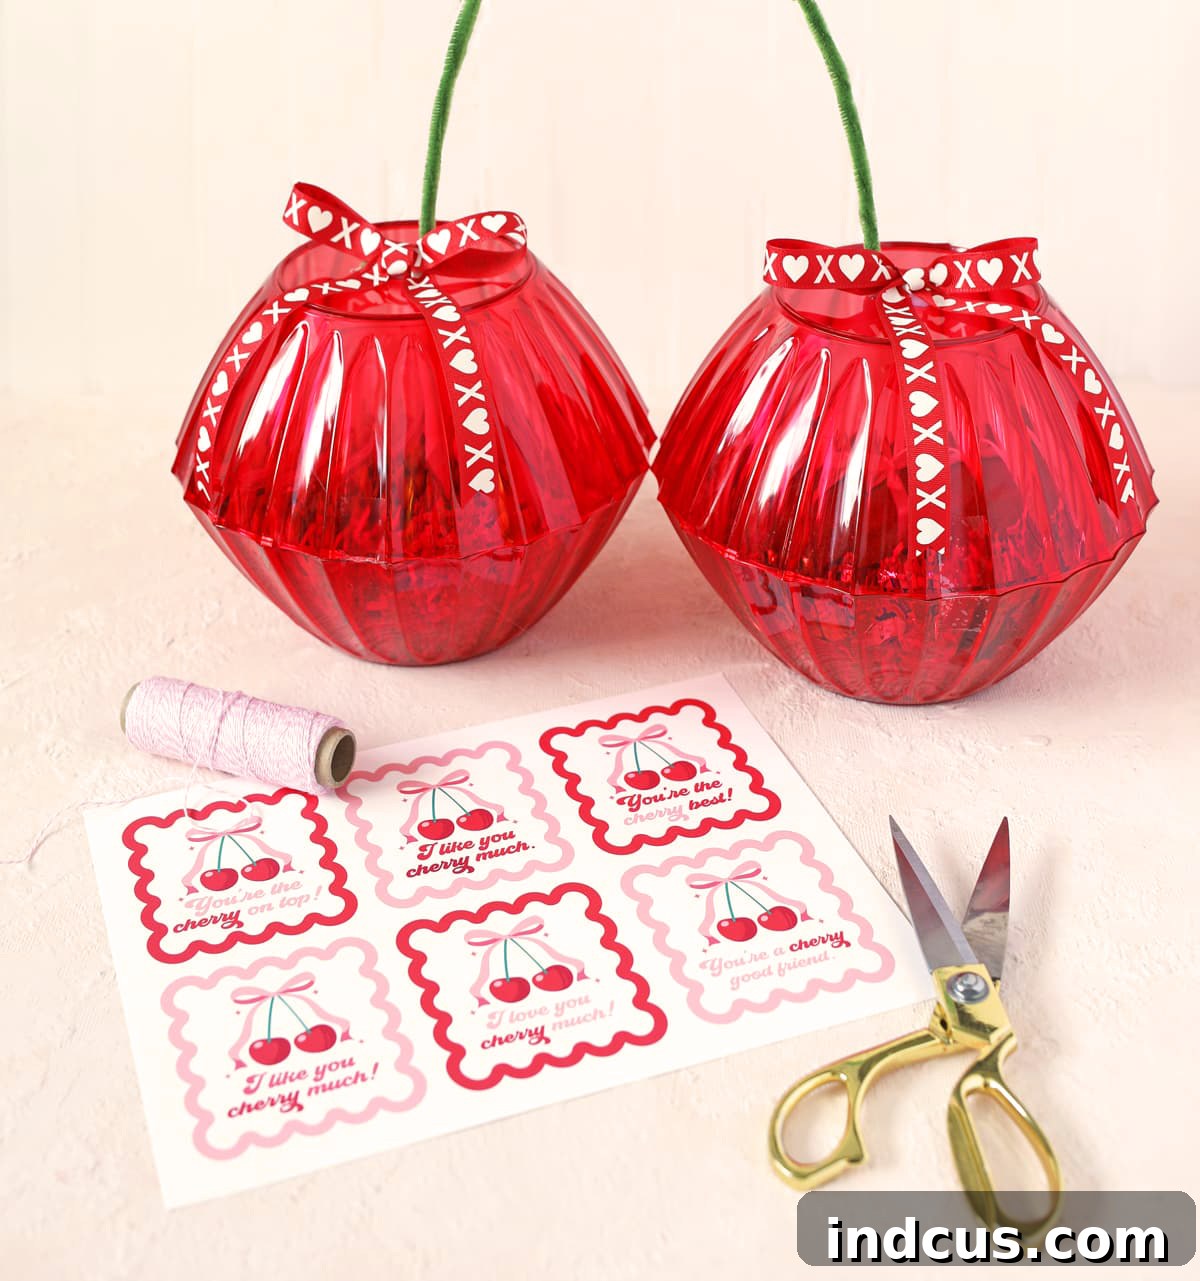
To further enhance the cuteness and hide any visible glue or tape where the stems attach to the bowls, tie two charming bows using your chosen Valentine’s Day ribbon. Make sure the bows are proportionate to your giant cherries. Once tied, apply a small dot of hot glue to the back of each bow and carefully press them onto the base of the stems, right where they meet the plastic bowls. These bows serve a dual purpose: they conceal any imperfections from the stem attachment and significantly elevate the overall aesthetic, adding a touch of festive flair and undeniable charm to your finished cherries. These small details truly make a big difference!
Step 7: Personalize with Punny Gift Tags
No Valentine’s gift is complete without a heartfelt message! To add an extra layer of sweetness and humor, consider using the printable cherry-themed gift tags provided. These tags often feature playful “punny” phrases that complement your cherry gift perfectly. Download the printable tags (link at the bottom of the post), then print them on white cardstock for durability and a crisp finish. Carefully cut out your favorite tag. Using baker’s twine, thread it through the hole in the tag and tie it onto one of the cherry stems, allowing the tag to dangle playfully. This personal touch will not only make your gift unique but also convey your affection in a memorable way.
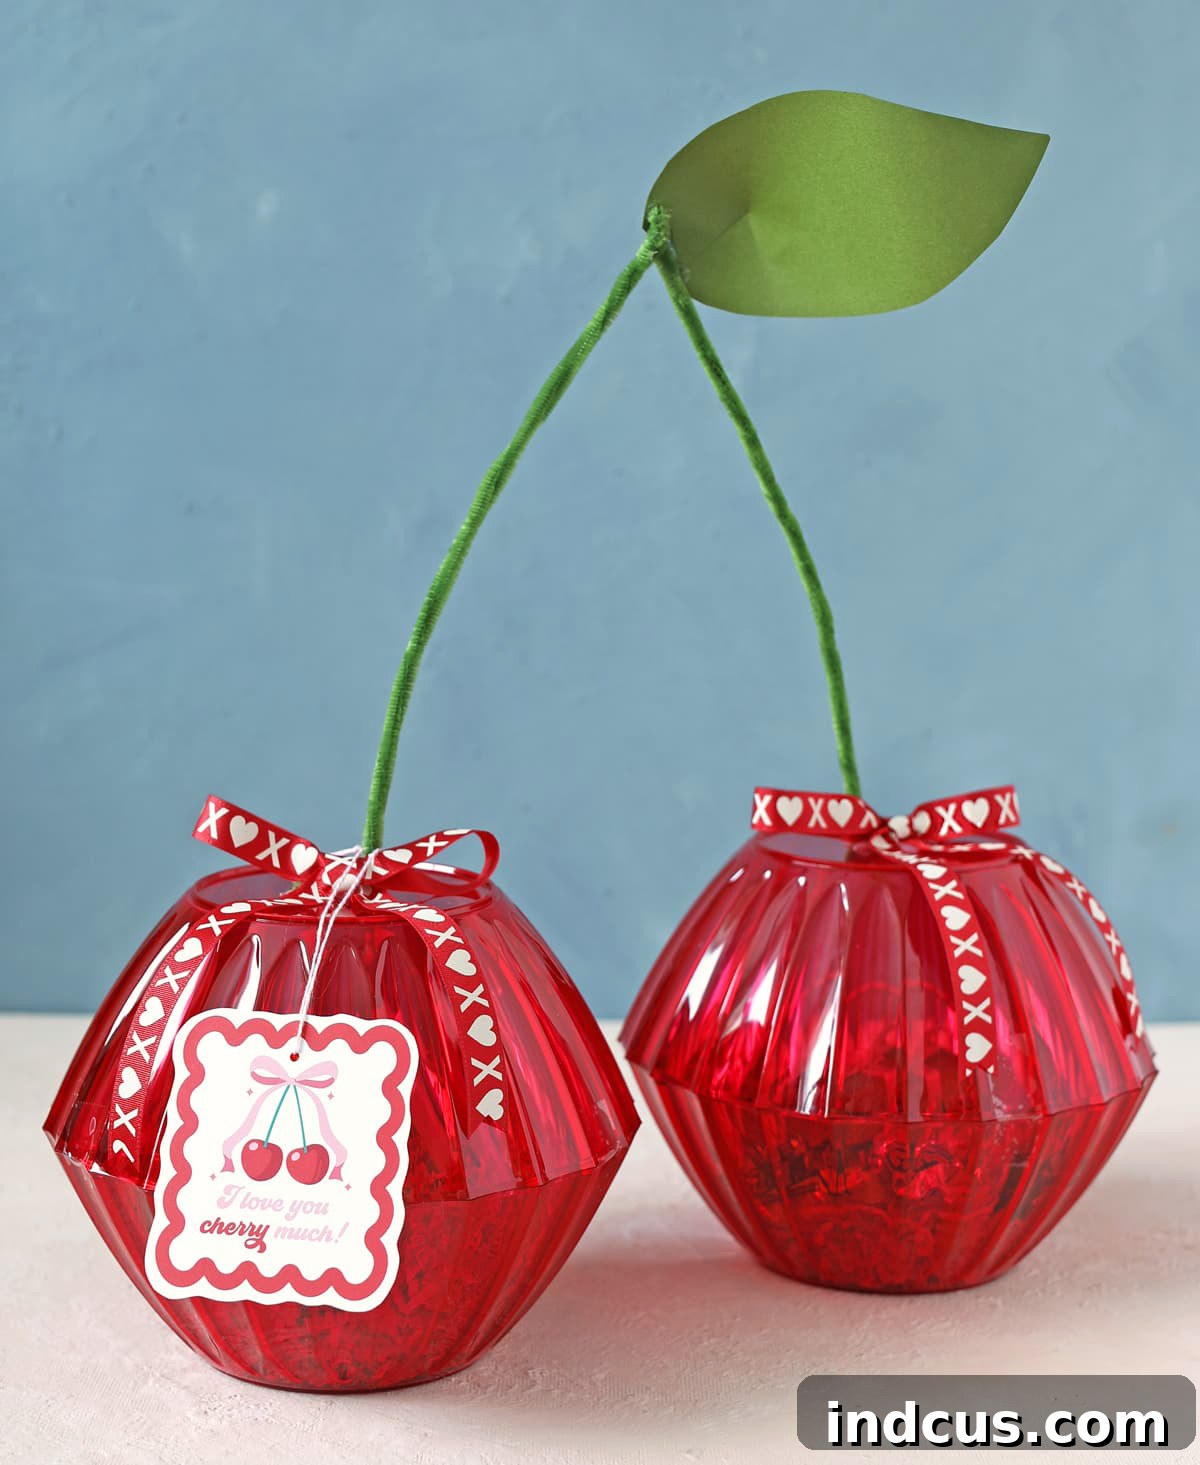
Your Beautiful Giant Cherries Are Complete!
Congratulations! You’ve successfully transformed simple plastic bowls into an enchanting pair of giant cherries, brimming with love and thoughtful gifts. Stand back and admire your handiwork. These aren’t just gifts; they’re conversation starters, delightful decorations, and proof that the most special presents often come from the heart and a little bit of DIY magic.
Creative Customization Ideas for Your Giant Cherries
While these giant cherries are perfect for Valentine’s Day, their versatility extends far beyond! Consider these ideas to adapt your craft for other occasions or simply to add your unique flair:
- Different Colors for Different Themes: Use yellow bowls for lemons or green for limes. Blue bowls could become blueberries for a summer-themed gift.
- Birthday Surprise: Fill them with small birthday treats and use a “cherry on top” pun.
- Baby Shower Decor: Pink or blue cherries filled with baby items make adorable centerpieces or gender reveal surprises.
- Teacher Appreciation: Fill with school supplies or treats and add a “Thank you cherry much!” tag.
- Seasonal Decor: Imagine golden cherries for fall harvest, or white/silver for winter festivities, filled with seasonal goodies.
- Add Glitter or Paint: For extra sparkle, apply glitter glue to the cherries or stems. You could even paint subtle highlights on the bowls for a more realistic fruit effect.
- Vary Ribbon Styles: Experiment with plaid, polka dot, or striped ribbons to match different aesthetics.
- Different Fillers: Instead of paper shreds, try crinkle cut paper, fabric scraps, or even natural elements like moss for a rustic feel.
These simple adjustments can transform your giant cherries into a customizable gift or decor item for almost any occasion, making them a truly versatile craft project.
Watch the Giant Cherries Video Tutorial
If you prefer visual guidance or encountered any unclear steps in the written instructions, this short video tutorial provides a comprehensive walkthrough. Watch as each step comes to life, making the crafting process even easier to follow.