Crafting Edible Masterpieces: A DIY Guide to Stunning Letter Charcuterie Boards
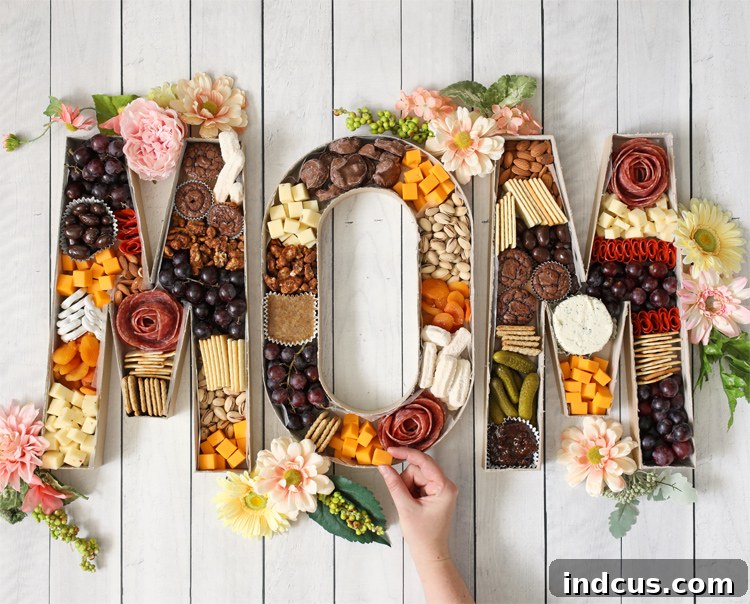
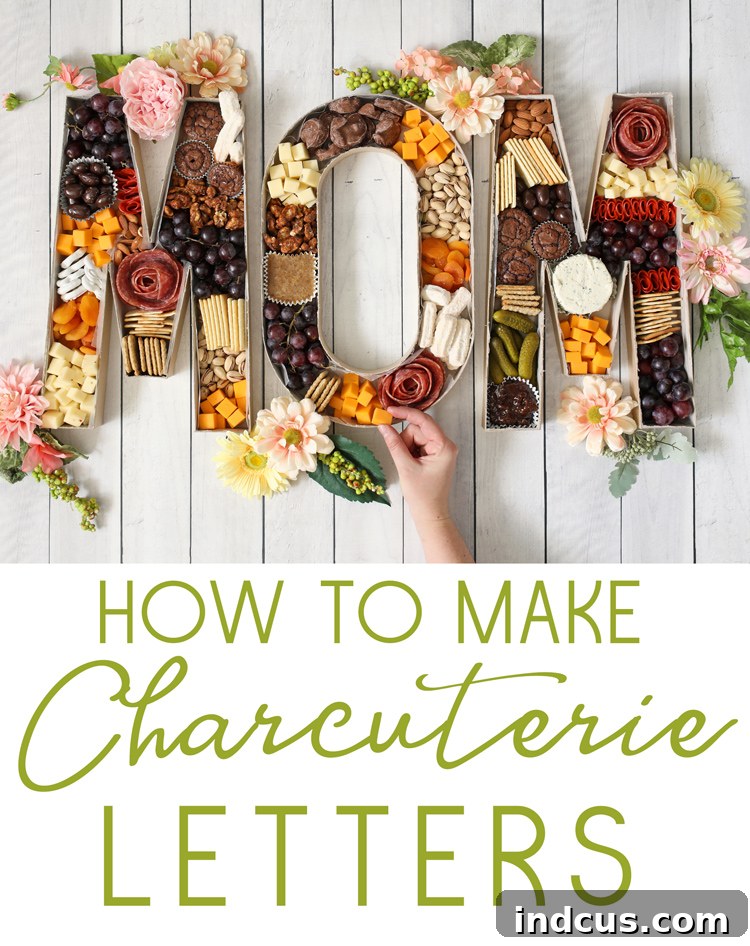
Transforming ordinary paper mache letters into extraordinary charcuterie boards is an innovative and delightful project that promises to impress at any gathering. This fun and surprisingly simple DIY craft allows you to create a personalized, edible display that serves as both a culinary treat and a captivating centerpiece. Whether you’re celebrating a special occasion, hosting a party, or simply looking for a unique way to present appetizers, these letter-shaped charcuterie boards are a guaranteed conversation starter and a memorable touch.
While the inspiration for this project originated with Mother’s Day, the versatility of letter charcuterie boards is truly limitless. Imagine spelling out “DAD” for Father’s Day, “LOVE” for an anniversary, “JOY” during the holidays, or even the initials of a happy couple for a wedding shower. The ability to personalize these boards makes them a fantastic option for virtually any event, adding a bespoke charm that traditional serving platters simply can’t match. This guide will walk you through every step of creating your own stunning and food-safe letter charcuterie board, ensuring a beautiful and delicious outcome.
Creating a personalized charcuterie board in the shape of a letter offers a unique blend of creativity and culinary artistry. It’s more than just a snack; it’s an experience, a decorative element, and a heartfelt gesture all rolled into one. The visual impact of beautifully arranged meats, cheeses, fruits, and more, all contained within a custom initial or word, elevates any celebration. This project is not only rewarding to make but also incredibly satisfying to present to your guests, who will surely be charmed by your ingenuity and attention to detail. Let’s gather our materials and embark on this exciting journey to craft an edible masterpiece.
Essential Materials for Your Letter Charcuterie Board
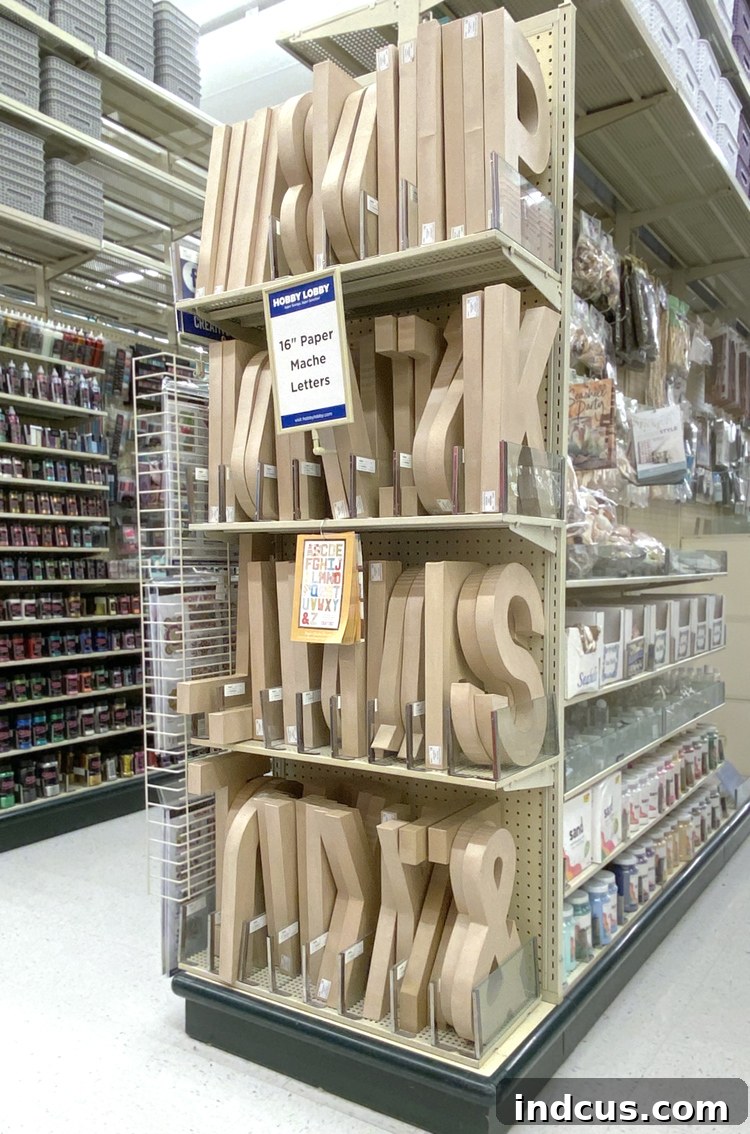
To embark on this delightful DIY project, you’ll need a few key supplies. Most of these items can be easily found at your local craft store, such as Hobby Lobby, which often carries the specific paper mache letters ideal for this craft. Carefully selecting your materials is the first step towards a successful and aesthetically pleasing charcuterie board.
- 16 Inch Paper Mache Letters: These large letters provide ample space for arranging a generous assortment of charcuterie items. Their sturdy construction is perfect for modification. When choosing your letters, consider the word or initials you wish to create to ensure you have all the necessary components.
- Utility Knife: A sharp utility knife is crucial for cleanly cutting through the paper mache. Safety is paramount when using this tool, so ensure you have a stable surface and proceed with caution. A fresh blade will make the cutting process much smoother and reduce the risk of jagged edges.
- Wax Paper or Parchment Paper: This is an absolute must for food safety and protection. Wax paper creates a barrier between the food and the paper mache, preventing any grease or moisture from seeping into the cardboard. It also makes cleanup significantly easier. You can opt for parchment paper as an alternative, which offers similar benefits.
A Convenient Update for 2023: Crafting has become even easier! Hobby Lobby now offers pre-hollowed letter trays specifically designed for charcuterie. These “White Letter Trays” are very similar in size to the 16-inch paper mache letters but come ready to fill, eliminating the need for the cutting step. This is a fantastic time-saver, particularly if you’re making multiple letter boards or are new to DIY projects. You can find them under the name White Letter Trays, simplifying the process and allowing you to jump straight to the fun part of filling your board.
Step-by-Step Instructions: Crafting Your Personalized Charcuterie Letter
Creating your letter charcuterie board is a straightforward process, but it requires attention to detail and careful execution. Follow these steps to transform simple paper mache letters into a beautiful and functional food display.
Step 1: Carefully Cut the Top Edge of Each Letter
Begin by taking your utility knife and gently, yet firmly, cutting along the top edge of each paper mache letter. The goal is to create an opening that will allow you to fill the letter with your charcuterie items. It’s essential to go slowly and maintain a steady hand to ensure a clean cut. If you’re new to using a utility knife, practice on a scrap piece of cardboard first. Always cut away from yourself, and wear protective gloves if you feel more comfortable. The key is precision to achieve a neat and professional finish, so take your time and exercise extreme caution to avoid any accidents.
Step 2: Remove the Top Piece and Internal Spacers
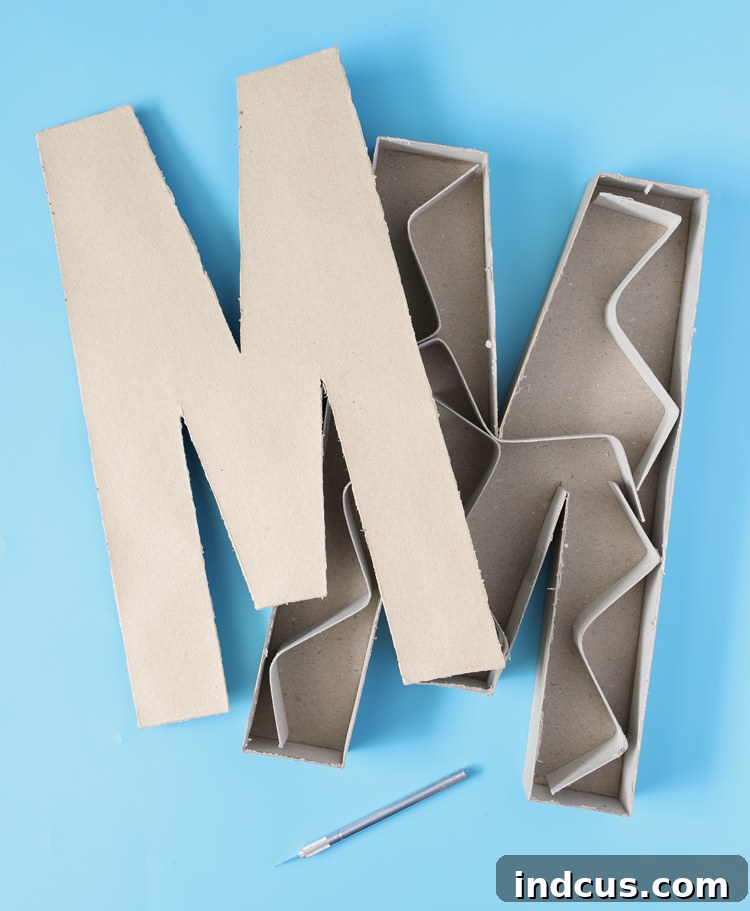
Once you’ve cut all around the perimeter of the top piece, carefully remove it from the letter. You’ll likely find several squiggly, internal spacer pieces inside the paper mache letter. These are designed to provide structural support during manufacturing but are not needed for your charcuterie board. Reach in and remove all of these internal cardboard separators, ensuring the letter is completely hollowed out. This creates a spacious cavity perfect for holding a generous assortment of food items.
Step 3: Trim Ragged Edges and Remove Stickers
After hollowing out the letters, inspect all the cut edges. You might find some ragged or uneven sections. Use your utility knife or a pair of sharp scissors to carefully trim away any imperfections, aiming for smooth, clean edges. This not only makes the board look more polished but also prevents any loose paper from potentially mixing with your food. Additionally, remember to remove any price stickers or labels that may be present on the letters. A clean surface is essential for a hygienic and appealing food presentation.
Step 4: Line the Letters with Wax Paper for Food Safety
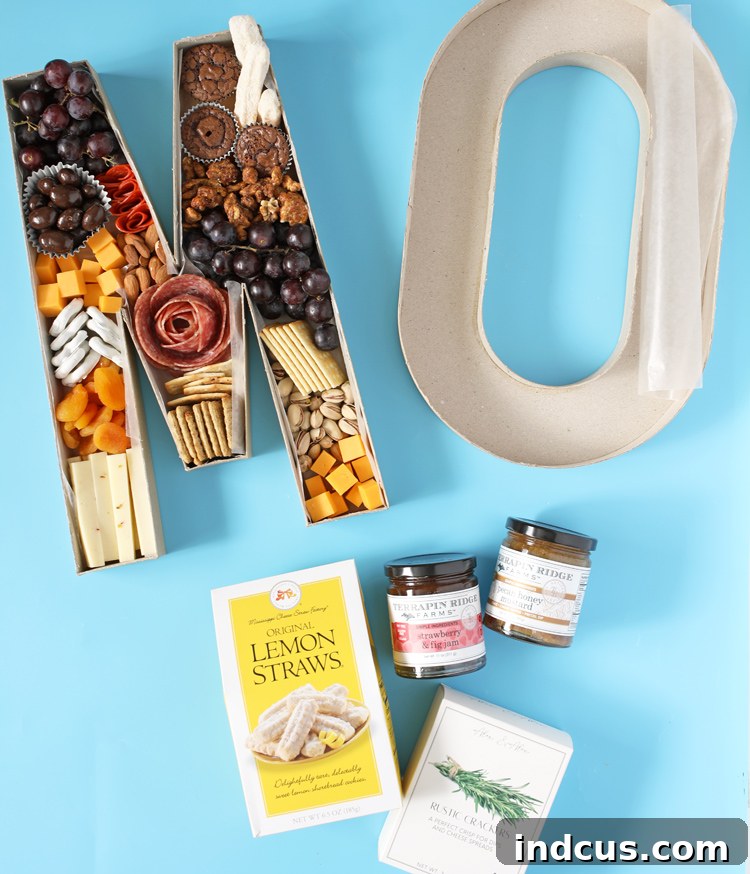
This is a critical step for ensuring your charcuterie board is food-safe and easy to clean. Line the entire interior of each letter with wax paper. Press the wax paper firmly against the sides and bottom, molding it to the contours of the letter. You can use multiple pieces if necessary, overlapping them slightly to ensure full coverage. The wax paper acts as a protective barrier, preventing any moisture, oils, or food particles from coming into direct contact with the paper mache. This not only keeps your food fresh but also protects the cardboard from getting soggy or greasy, which is particularly important if you plan to display the board for an extended period. For smaller, individual items like candies, olives, or dips, paper cupcake liners can be strategically placed within the wax paper lining to create neat compartments and add another layer of protection.
Step 5: Fill Your Letters with a Delectable Assortment of Treats
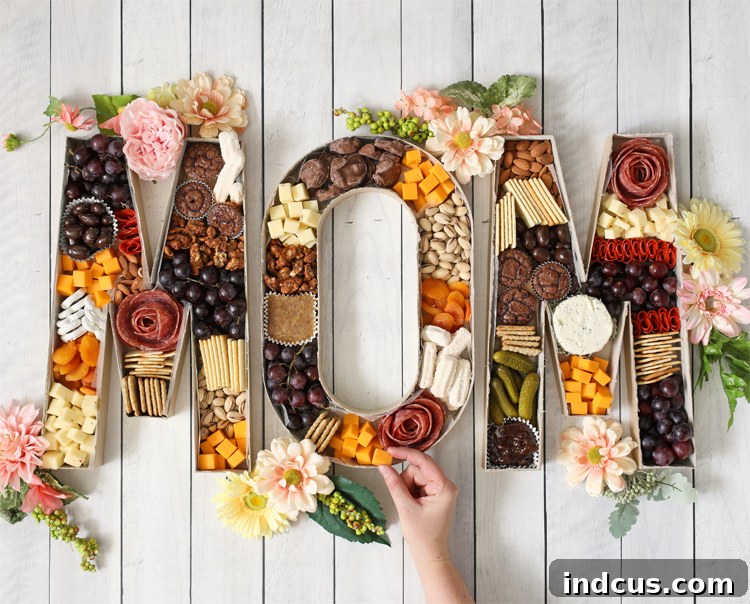
Now for the most exciting part: filling your letter charcuterie boards! This is where your creativity truly shines. The key to a stunning charcuterie board is variety in color, texture, and flavor. Arrange an assortment of your favorite meats, cheeses, crackers, fresh fruits, dried fruits, nuts, olives, spreads, and even a few sweet treats. Think about how the different items will look together and aim for an aesthetically pleasing arrangement. For example, contrasting colors like vibrant berries against pale cheeses, or dark meats next to light crackers, create visual interest.
When placing items, start with larger elements like cheese blocks or meat piles, then fill in the gaps with smaller items. Don’t be afraid to create little “rivers” of berries or nuts. For an extra touch of elegance, learn a fancy meat fold – this technique can transform simple deli meats into beautiful rosettes or intricate patterns that elevate the entire presentation. Consider adding small ramekins or mini bowls for dips, honey, or mustard, placed strategically within the letters.
During my own charcuterie board creation, I discovered an impressive selection of non-perishable food items at Hobby Lobby, specifically curated for gift baskets and charcuterie boards. This section proved to be a treasure trove of unique specialty items, from gourmet crackers to artisan spreads. The lemon straws, in particular, were an unexpected and truly delectable find, adding a delightful zesty crunch to the assortment. Exploring such specialized sections can often lead to surprising and delicious additions that make your board stand out.
Tips for Creating an Unforgettable Charcuterie Board
Beyond the basic steps, a few expert tips can elevate your letter charcuterie boards from good to truly extraordinary. Focusing on presentation, balance, and thoughtful additions will ensure your edible masterpiece is both delicious and visually stunning.
- Embrace Variety: The most appealing charcuterie boards offer a diverse range of flavors and textures. Include a mix of hard and soft cheeses, savory cured meats, crunchy crackers, sweet and tart fruits (both fresh and dried), briny olives, and various nuts. Don’t forget small bowls of honey, jams, or mustard to complement the cheeses and meats.
- Think About Color and Arrangement: Arrange items to create visual harmony. Distribute colors evenly throughout the letters, using contrasting hues to make elements pop. Group similar items together, or create artful piles and lines. Aim for a full, abundant look – a board that appears generously filled is always more inviting.
- Add Garnishes and Embellishments: Fresh herbs like rosemary or thyme sprigs, edible flowers, or small faux flowers (placed around the letters, not directly on the food) can add a touch of sophistication and vibrancy. I added faux flowers around my letters as decoration, which made the entire display feel extra special and festive. These small details can significantly enhance the overall aesthetic.
- Consider Dietary Restrictions: If you know your guests have specific dietary needs, try to include a few options that cater to them, such as gluten-free crackers, vegetarian spreads, or nut-free alternatives. Labeling these items can also be a thoughtful gesture.
- Temperature Matters: Most cheeses are best served at room temperature to allow their flavors to fully develop. Take cheeses out of the refrigerator about 30-60 minutes before serving. Meats should generally be kept chilled until just before assembly.
- Don’t Be Afraid to Experiment: While there are classic charcuterie pairings, don’t hesitate to incorporate unique items that reflect your personal taste or the theme of your event. Specialty items, like the lemon straws I discovered, can add an unexpected and delightful twist.
Presenting this elaborate and personalized charcuterie spread was an absolute hit with my entire family. My mom, in particular, adored the thoughtful and creative presentation, leading me to believe this charming tradition might just become a yearly staple for our celebrations. It’s a wonderful way to show appreciation and bring a festive touch to any occasion, truly making it a party spread to remember.
Watch the Video Tutorial for a Visual Guide
For those who prefer a visual demonstration, a comprehensive video tutorial showcasing the entire process of making these Mother’s Day charcuterie letters is available. It provides clear, step-by-step guidance on cutting, lining, and artfully arranging your edible components, bringing this creative project to life. Seeing the techniques in action can be incredibly helpful for perfecting your own personalized food display.
Found this project inspiring? Pin it to your favorite boards to save it for future celebrations and creative endeavors!