Stuffed Dinner Rolls: Our Family’s Famous “Bombs” Recipe
Welcome to our kitchen! Today, we’re thrilled to share one of our most cherished family recipes – what we affectionately call “Bombs.” These aren’t just any dinner rolls; they are pillowy soft pockets of pure joy, generously stuffed with a variety of delicious, savory fillings. Imagine a warm, golden-brown roll, baked to perfection, and when you tear it open, it reveals a molten, cheesy, and flavor-packed interior. That’s a Bomb, and it’s a recipe that has brought smiles to our dinner table for years.
Whether you’re looking for an exciting twist on dinner, a crowd-pleasing appetizer for your next gathering, or a convenient meal on the go, these stuffed dinner rolls fit the bill perfectly. They’re incredibly versatile, allowing you to unleash your culinary creativity with endless filling possibilities, ensuring there’s a “Bomb” for every taste and occasion. Get ready to impress your family and friends with this irresistible, easy-to-follow recipe!
Why You’ll Fall in Love with Stuffed Dinner Rolls
Our “Bombs” have earned their place as a family staple for countless reasons. Here’s why we think you’ll adore them too:
- Unbeatable Flavor & Texture: The combination of a tender, homemade roll and a savory, gooey filling is simply divine. Each bite is a delightful explosion of flavors and textures.
- Endless Customization: From classic pizza flavors to zesty taco fillings, the possibilities are limited only by your imagination. This makes them perfect for using up leftovers or catering to diverse dietary preferences.
- Family-Friendly Fun: Getting kids involved in shaping the rolls and choosing fillings can turn meal prep into a fun activity. Everyone gets to create their perfect “Bomb”!
- Versatile for Any Occasion: These aren’t just for dinner. They make fantastic appetizers for game nights, portable lunches for picnics and road trips, or even a comforting snack.
- Make-Ahead Convenience: You can prepare the dough in advance or assemble the rolls ahead of time, making them a fantastic option for busy weeknights or entertaining.
- Budget-Friendly: Using common pantry staples and often repurposing leftovers, this recipe is as economical as it is delicious.
Crafting Your Perfect Dough: The Foundation of Flavor
The secret to an outstanding stuffed dinner roll lies in its foundation: the dough. While you can certainly opt for store-bought frozen bread dough (though we believe making your own is a more rewarding and delicious experience), we highly recommend using a homemade recipe for the best results. Our go-to dough recipe yields rolls that are incredibly soft, airy, and flavorful – the ideal casing for any filling you choose. It’s a simple process that guarantees a superior texture and taste, transforming your “Bombs” from good to absolutely amazing.
Dough Ingredients
Our tried-and-true recipe for soft and fluffy roll dough:
- 3 tablespoons sugar
- 1 teaspoon salt
- 3 ½ cups all-purpose flour (approximately)
- 2 teaspoons active dry yeast
- 1 ⅛ cups warm milk (around 105-115°F / 40-46°C)
- ¼ cup butter, melted
- 1 large egg
Instructions for Dough Preparation
- In the bowl of a stand mixer, combine all the dough ingredients. Ensure your milk is warm but not hot enough to kill the yeast.
- Attach the dough hook and mix on low speed for approximately five minutes. Continue mixing until the dough starts to pull away cleanly from the sides of the bowl. We typically start with 3 cups of flour and then gradually add the remaining ½ cup as needed until the dough reaches the perfect consistency – it should be soft and pliable, not overly sticky or too dry and firm.
- Once mixed, cover the bowl with a clean kitchen towel or plastic wrap. Place it in a warm spot and let the dough rise for about one hour, or until it has doubled in size. This crucial step allows the yeast to activate, creating that wonderful light and airy texture.
Unleashing Your Creativity with Fillings
This is where the real fun begins! The beauty of “Bombs” is their adaptability. You can fill them with virtually anything savory, as long as the mixture isn’t excessively juicy, which could lead to leaks during baking. Think about your favorite comfort foods, your go-to leftovers, or even ingredients you have on hand. The key is to create a balanced, flavorful medley that complements the soft roll. Here are some of our family’s favorite combinations to inspire you, along with a few extra ideas:
- Pizza Bomb: A timeless classic! Combine chopped pepperoni and shredded mozzarella cheese. Serve with a side of warm marinara sauce for dipping. You can also add a pinch of Italian seasoning or a spoonful of pizza sauce directly into the filling.
- BBQ Bomb: Perfect for using up leftover shredded beef, pork, or chicken. Mix your choice of shredded meat with your favorite barbecue sauce and a generous amount of sharp cheddar cheese.
- Cheesesteak Bomb: Bring the taste of Philly to your plate! Use thinly sliced roast beef, sautéed bell peppers and onions, and classic American cheese. Provolone or a cheddar blend also works wonderfully here.
- Joe Bomb: A comforting, hearty option. Fill with your favorite sloppy joe mixture, ensuring it’s not too saucy, and plenty of cheddar cheese. This is a great way to transform a simple weeknight meal.
- Italian Bomb: A rich and savory combination. Brown some ground Italian sausage, then mix it with sautéed peppers and onions, and cheddar cheese (or mozzarella/provolone for an authentic touch).
- Ham & Cheese Bomb: Simple yet satisfying. Dice some ham, mix with finely chopped broccoli and onion (optional, for extra flavor and nutrition), and cheddar cheese. Swiss cheese is also an excellent choice here.
- Taco Bomb: Spice things up! Use seasoned ground beef (with taco seasoning), a spoonful of salsa (drain excess liquid), chopped onions, and a Mexican blend cheese. Serve with sour cream or guacamole on the side.
- Chicken Bacon Ranch Bomb: A fan favorite! Combine diced cooked chicken, crispy bacon bits, chopped green onions, a drizzle of ranch dressing, and shredded mozzarella cheese.
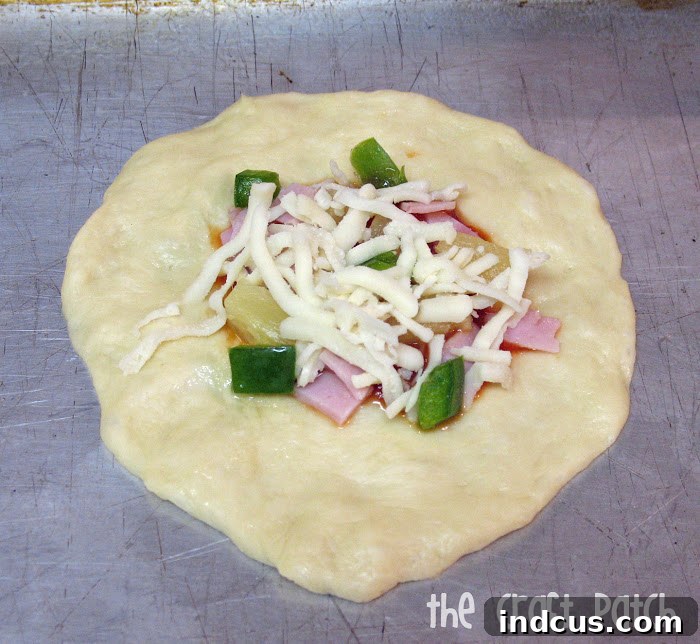
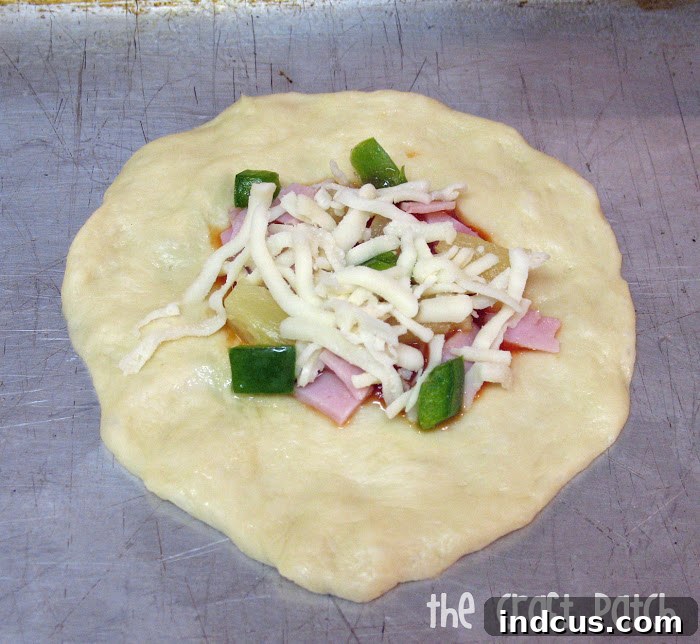
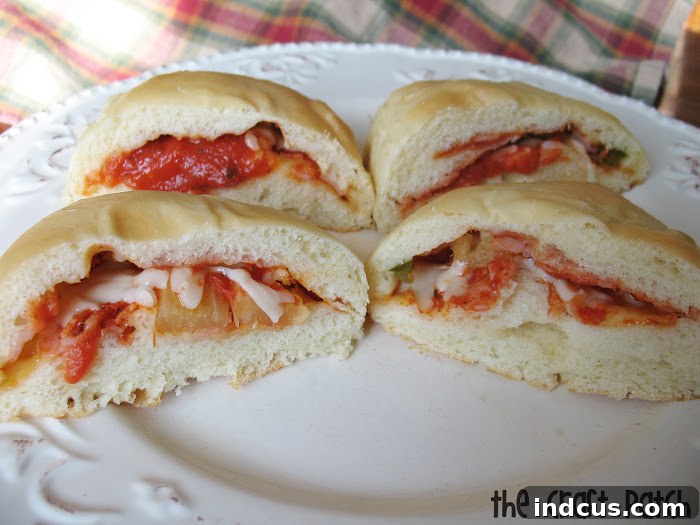
- Hawaiian Bomb: Our personal delicious creation! This features Canadian bacon, small chunks of pineapple (drained well to avoid sogginess), diced green peppers, a touch of pizza sauce, and mozzarella cheese. They are truly delightful!
- Breakfast Bomb: Perfect for brunch! Scrambled eggs, cooked sausage or bacon bits, and cheddar cheese.
- Veggie Bomb: For a lighter option, try sautéed mushrooms, spinach, bell peppers, and feta or goat cheese.
Pro Tip for Fillings: Always pre-cook meats and sauté any vegetables to remove excess moisture. Allow fillings to cool slightly before assembling the rolls to prevent the dough from becoming too warm and sticky.
Step-by-Step Guide to Assembling Your Bombs
Once your dough has risen beautifully and your fillings are prepped, it’s time to bring these delicious creations to life! Follow these simple steps for perfectly sealed and baked stuffed dinner rolls.
-
Divide and Shape the Dough
Gently punch down your risen dough to release the air. On a lightly floured surface, divide the dough into 12-15 equal pieces. Roll each piece into a smooth ball, then flatten it into an approximately 5-inch circle. Aim for an even thickness to ensure uniform baking.
-
Add the Filling
Place about 4 tablespoons (or a generous spoonful, depending on the density) of your chosen filling ingredients directly in the center of each dough circle. Be careful not to overfill, as this can make sealing difficult.

Carefully place your chosen filling in the center of the dough circle. -
Seal the Bombs
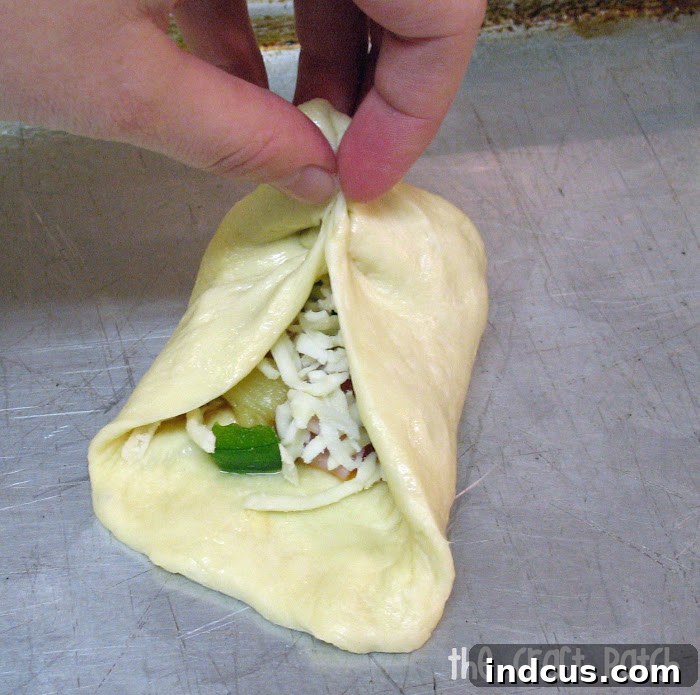
Bring the edges of the dough circle up and around the filling, gathering them at the top. Pinch the dough firmly together to create a tight seal. It’s crucial to ensure there are no holes or gaps; any breach will allow the filling to leak out during baking, making a mess on your baking sheet. Think of it like creating a small, edible parcel.
Pinch the edges firmly to create a complete seal, preventing any leaks. -
Prepare for Baking
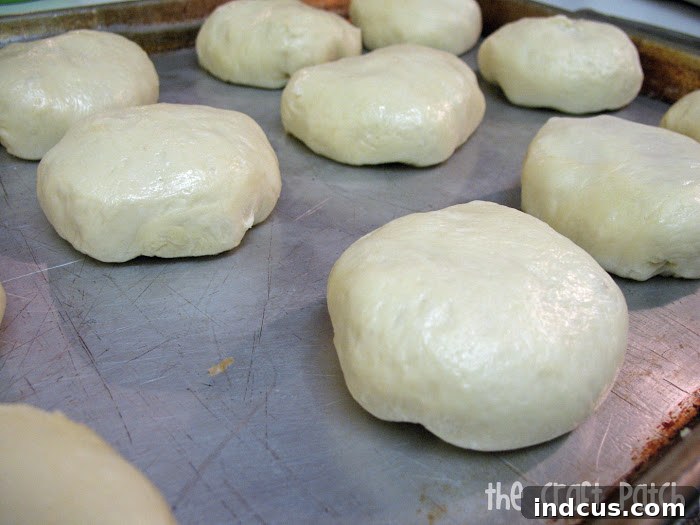
Place each sealed “Bomb” seam-side down onto a lightly greased baking sheet. Arranging them seam-side down helps maintain their round shape and prevents the seam from opening during baking.
Place each roll seam-side down on a greased baking sheet. -
Second Rise & Bake
Cover the filled and shaped rolls with a clean dish towel. Let them rise again in a warm place for an additional 15-20 minutes. This second rise contributes to a lighter, fluffier texture.
Preheat your oven to 350°F (175°C). Bake the rolls for 12-15 minutes, or until the tops are beautifully golden brown and the filling is bubbly and hot. Baking time may vary slightly depending on your oven and the size of your rolls.
Freshly baked “Bombs,” cut open to reveal their irresistible, oozing filling.
Finishing Touches and Serving Suggestions
Once your “Bombs” emerge from the oven, golden and fragrant, they are ready to be enjoyed! For an extra layer of flavor and shine, we recently started rubbing the warm, cooked buns with melted butter and sprinkling them with a touch of garlic salt. This simple step truly elevates their taste to something amazing – don’t skip it!
These stuffed dinner rolls are incredibly versatile when it comes to serving:
- Game Day & Parties: They are an absolute smash hit for events like the Super Bowl or any casual gathering. Easy to eat with your hands, they make the perfect party food.
- Complete Dinner: Pair them with a crisp, refreshing green salad for a balanced and satisfying weeknight dinner. Add a light soup for a truly comforting meal.
- On-the-Go Meals: We love taking them on car trips and picnics because they are just as delicious at room temperature as they are piping hot. Their self-contained nature makes them ideal for travel.
- Dipping Sauces: Offer a variety of dipping sauces such as marinara, ranch, BBQ sauce, or even a spicy aioli, to complement different fillings and add an extra burst of flavor.
Storage and Reheating
Leftover “Bombs” can be stored in an airtight container in the refrigerator for up to 3-4 days. To reheat, you can pop them in the microwave for a minute or two, or for best results, warm them in a preheated oven at 300°F (150°C) for 10-15 minutes until heated through and the crust is crisp again.
Elevate Your Meal with Homemade Stuffed Rolls
These Stuffed Dinner Rolls, our family’s “Bombs,” are more than just a recipe; they are an invitation to create, customize, and share delicious moments. Their combination of soft, homemade dough and endless savory fillings makes them a guaranteed favorite for any meal, snack, or celebration. We encourage you to experiment with your own favorite ingredients and make this recipe truly your own. From our kitchen to yours, we hope these “Bombs” bring as much joy and deliciousness to your table as they do to ours!
If you make these delicious “Bombs,” we’d love to see your creations! Share them on Instagram and follow us for more culinary inspiration.