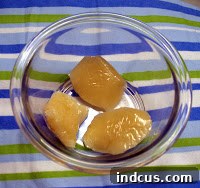
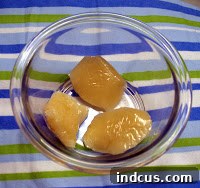
 For many, the idea of venturing into homemade candy making can feel like stepping into a highly technical laboratory. Visions of precise candy thermometers, exact temperatures, and minute stirring times often deter even the most enthusiastic home cooks. I confess, I was one of them. The sheer detail involved seemed daunting, a culinary challenge I wasn’t quite ready to embrace. However, a recent pantry purge, coupled with the unique anticipation of awaiting a new arrival (hospital bag packed, house sparkling clean!), presented an unexpected opportunity. Tucked away, almost forgotten, was a bottle of corn syrup. It was a sign, a gentle nudge to finally confront my candy-making fears. With nothing but time on my hands and a newfound sense of adventure, I decided to take the plunge. The results? Utterly delicious, and surprisingly achievable! While my first batch might not win any beauty contests, the flavor and texture were truly remarkable. If you’ve ever hesitated to make your own candy, this recipe is your invitation to a delightful, simple, and incredibly rewarding kitchen experience.
Unlocking the Sweet Secrets of Homemade Candy: A Simple Guide
There’s a unique satisfaction that comes from creating something truly special with your own hands, and homemade candy is no exception. Beyond the sheer joy of a freshly made sweet treat, making candy at home offers a multitude of benefits that packaged alternatives simply can’t match. First and foremost, you gain complete control over the ingredients. This means choosing high-quality components, avoiding artificial preservatives, and tailoring the sugar content to your preference. It’s a wonderful way to understand exactly what you’re consuming.
Furthermore, homemade candy offers an unparalleled opportunity for customization. Imagine an endless array of flavors, colors, and textures, limited only by your imagination. From classic vanilla to exotic fruit extracts, or vibrant hues that match a special occasion, the creative possibilities are boundless. This makes it a fantastic activity for families, allowing children to safely participate in the fun of choosing flavors and watching the transformation of simple ingredients into a delightful confection. It’s an edible art project that engages all the senses.
Beyond the personal satisfaction, homemade candy also makes for incredibly thoughtful and impressive gifts. A beautifully wrapped bag of hand-pulled taffy or hard candy conveys a warmth and personal touch that a store-bought item simply cannot. It’s perfect for holiday baskets, party favors, or just a spontaneous gesture of appreciation. It’s also surprisingly cost-effective. Many candy recipes rely on basic pantry staples like sugar, corn syrup, and water, making it a budget-friendly way to indulge your sweet tooth or create treats for a crowd.
Finally, there’s the sheer meditative joy of the process itself. From the gentle bubbling of sugar on the stove to the mesmerizing transformation as you pull and stretch the candy, it’s a sensory experience that can be incredibly therapeutic. It forces you to slow down, focus, and appreciate the magic of simple chemistry. So, if you’re ready to embark on a sweet kitchen adventure, prepare to be amazed at how simple and rewarding making your own delicious candy can be.
Your Essential Ingredients for Irresistible Homemade Candy
Gathering your ingredients before you begin is a crucial step in ensuring a smooth and successful candy-making process. This recipe calls for common kitchen staples, but ensure they are fresh and of good quality. The precise measurements are key to achieving the perfect texture and flavor for your candy.
- 1 cup granulated sugar: The foundation of our candy, providing sweetness and structure.
- 2 tablespoons cornstarch: A vital ingredient that helps prevent the sugar from crystallizing, ensuring a smooth, clear candy.
- 3/4 cup light corn syrup: The secret weapon for chewiness and preventing graininess. Light corn syrup is preferred for its mild flavor and clear color.
- 1/2 cup water: Helps dissolve the sugar and cornstarch, creating the initial syrup.
- 2 tablespoons unsalted butter: Adds richness, a subtle creamy flavor, and contributes to a smoother texture.
- 1/2 teaspoon salt: A pinch of salt is crucial for balancing the sweetness and enhancing all the other flavors. Don’t skip it!
- 1 teaspoon flavoring extract: This is where you can truly personalize your candy. Vanilla extract is a classic choice, but feel free to experiment with almond, peppermint, lemon, or any other extract you love.
- 3-5 drops food coloring (optional): For a visually appealing candy, add a few drops of your favorite food coloring. Gel food colorings offer more vibrant hues with less liquid.
Crafting Your Own Sweet Delights: A Step-by-Step Guide
Now that you have all your ingredients ready, let’s dive into the exciting process of making your very own batch of delectable hard candy. Follow these steps carefully, and you’ll be enjoying your homemade treats in no time!
Preparation is Key: Setting Up for Success
Before you even turn on the stove, ensure your workspace is ready. Lightly grease a large cookie sheet or baking tray with butter or a neutral oil. You’ll need this surface for pouring the hot candy mixture later. Having everything prepped avoids frantic scrambling when the candy is at its perfect temperature.
The Cooking Process: From Syrup to Sweetness
- Combine Dry Ingredients: In a sturdy, heavy-bottomed saucepan (preferably 3-quart or larger to prevent boil-overs), thoroughly mix the granulated sugar and cornstarch. Using a heavy-bottomed pan helps distribute heat evenly and reduces the risk of scorching.
- Add Wet Ingredients: Stir in the corn syrup, water, butter, and salt. Make sure all ingredients are well combined before heating.
- Initial Heating and Dissolving: Place the saucepan over medium heat. Stir the mixture constantly with a wooden spoon or heat-resistant spatula. Continue stirring until the mixture comes to a full boil and all the sugar crystals are completely dissolved. It’s important to keep stirring at this stage to prevent sugar from crystallizing on the sides of the pan and ensure an even melt.
- Reaching the Hard-Ball Stage (The Critical Step!): Once the mixture is boiling and the sugar is dissolved, stop stirring. Continue cooking without stirring until the temperature reaches 260°F (127°C). This is known as the “hard-ball stage.”
A Note on Temperature and Thermometers: The exact temperature is crucial for the candy’s final texture. A candy thermometer is highly recommended for consistent results. However, if you don’t have one (like me, on my first attempt!), you can use the cold-water test:
- Drop a small amount of the hot syrup into a cup of very cold water.
- Wait a few seconds, then retrieve the candy from the water.
- If it forms a firm but pliable ball that holds its shape and is slightly sticky, it’s at the hard-ball stage. If it’s too soft, continue cooking. If it’s brittle, you’ve gone too far (hard-crack stage). While this method *can* work, it requires practice and a keen eye. For optimal results, investing in a reliable candy thermometer is truly worthwhile. Don’t be discouraged if your first attempt without a thermometer isn’t perfect; every try is a learning experience!
Flavoring, Coloring, and Cooling
- Remove from Heat: As soon as the candy reaches 260°F (or passes the cold-water test), immediately remove the saucepan from the heat.
- Add Flavoring and Coloring: Crucially, wait until the vigorous boiling has ceased before adding your flavoring extract and food coloring. Stir them in gently but thoroughly. Adding them too early can cause the flavors to dissipate or alter due to the high heat.
- Pour onto Prepared Sheet: Carefully pour the hot candy mixture onto your lightly greased cookie sheet. Do not scrape the bottom of the pan, as any crystallized bits could make your candy grainy.
- Cooling Period: Allow the candy to stand undisturbed until it is cool enough to handle. It should be firm but still pliable and warm to the touch. This could take 15-30 minutes, depending on the thickness of your pour and room temperature.
The Fun Part: Pulling the Candy!
- Prepare for Pulling: Once the candy is cool enough to touch without burning yourself, lightly grease your hands with butter or shortening. This step is essential to prevent sticking and allows for comfortable handling.
- Begin Pulling: Now for the really fun part! Gently gather the warm candy into a manageable mass. Begin to pull and stretch the candy, folding it back onto itself repeatedly. As you pull, you’ll notice the color lightening and the texture becoming more opaque and satin-like. This process incorporates air into the candy, giving it its characteristic chewy texture and beautiful sheen.
- Continue Pulling: Continue pulling for 5-10 minutes, or until the candy has a distinct satin-like finish, a light, almost iridescent color, and is firm but still pliable. It’s a bit like playing with soft play-doh, but with a delicious outcome!
Finishing Touches and Storage
- Cut into Pieces: Once pulled to perfection, form the candy into a long rope. Using greased kitchen shears or a sharp, greased knife, cut the candy rope into 1-inch pieces.
- Wrap for Freshness: Immediately wrap each piece individually. Waxed paper is traditional, but plain old plastic wrap works wonderfully and keeps the candy from sticking together and from absorbing moisture from the air.
- Storage: Store your homemade candy in an airtight container at room temperature. It should remain fresh and delicious for several weeks. Makes approximately 1 pound of delightful candy.
Expert Tips for Candy-Making Success
While this recipe is straightforward, a few expert tips can elevate your candy-making experience and ensure perfect results every time.
- Humidity is Your Enemy: Candy making on a humid day can be challenging, as sugar attracts moisture. Try to choose a dry day for your candy making to prevent sticky or “weeping” candy.
- Use a Heavy-Bottomed Pan: As mentioned, this helps distribute heat evenly and prevents scorching, which can ruin the flavor of your candy.
- Safety First: Hot Sugar is Extremely Hot! Molten sugar can cause severe burns. Exercise extreme caution when cooking and handling the hot syrup. Keep children and pets away from the stove during this process. Have a bowl of ice water nearby in case of accidental burns.
- Don’t Scrape the Pan: When pouring the candy onto the sheet, avoid scraping the bottom or sides of the saucepan. Bits of crystallized sugar can cause the entire batch to become grainy.
- Grease Everything: Make sure your cookie sheet, hands, and cutting tools are all lightly greased. This prevents frustrating sticking and makes the process much more enjoyable.
- Resist the Urge to Stir (After Boiling): Once the sugar has dissolved and the mixture is boiling, stirring can cause sugar crystals to form on the sides of the pan, leading to a grainy candy. Let the thermometer (or your cold-water test) guide you.
- Experiment with Flavors and Colors: Don’t be afraid to try different extracts like lemon, orange, cherry, or even a mix. Food coloring can make your candy visually stunning – think vibrant rainbow pieces or elegant pastels.
Unleash Your Creativity: Flavor Variations & Customization
One of the most exciting aspects of making your own candy is the freedom to experiment with an endless array of flavors and colors. Once you’ve mastered the basic recipe, the world of customization opens up!
- Fruity Delights: Instead of vanilla, try extracts like raspberry, strawberry, cherry, or even a tropical blend of pineapple and coconut. A touch of citric acid powder (available in baking aisles) can add a pleasant tartness to fruit flavors.
- Minty Freshness: Peppermint extract is perfect for creating classic holiday candies or refreshing everyday treats. Spearmint offers a milder, sweeter mint profile.
- Nutty Notes: Almond extract brings a sophisticated, marzipan-like flavor. Hazelnut or pistachio extracts can also create unique and delicious combinations.
- Spiced Warmth: Consider adding a pinch of ground cinnamon, ginger, or even a touch of pumpkin spice for a cozy, autumnal candy. Add these spices along with the butter and salt for full flavor infusion.
- Citrus Zest: For a brighter, more natural flavor, you can add a tiny amount of finely grated lemon, lime, or orange zest along with the extracts. Be careful not to add too much liquid.
- Color Play: Use gel food colorings for vivid results. Create ombré effects by adding slightly more color to each subsequent batch, or make striped candies by carefully pouring different colored batches side-by-side on the same sheet before pulling.
- Edible Glitters & Decorations: For an extra touch of sparkle, lightly dust your finished, cut candies with edible glitter before wrapping.
Remember, when experimenting with new extracts, start with a small amount and taste (carefully, once cooled!) before adding more. A little goes a long way in candy making!
Troubleshooting Common Candy Making Hiccups
Even with the best instructions, sometimes things don’t go exactly as planned. Don’t get discouraged! Here are solutions to some common issues you might encounter:
- My candy is too sticky/doesn’t set:
- Issue: The most common culprit is not cooking the candy to a high enough temperature.
- Solution: Ensure you reach the full 260°F (hard-ball stage). If using the cold-water test, make sure the ball is firm and holds its shape. Humidity can also contribute; try making candy on a less humid day.
- My candy is grainy/sugary:
- Issue: Sugar crystals formed during cooking. This can happen if you don’t stir constantly until the sugar dissolves, if you stir too much after it boils, or if sugar crystals splash onto the sides of the pan and fall back in.
- Solution: Ensure all sugar is dissolved at the initial stage. Avoid stirring after the boil starts. You can also “wash down” the sides of the pan with a wet pastry brush to remove any clinging sugar crystals.
- My candy burned:
- Issue: Too high heat or uneven heat distribution.
- Solution: Always use medium heat. A heavy-bottomed saucepan is crucial for even heating. Keep an eye on the candy and remove it promptly when it reaches the target temperature.
- My candy is hard to pull:
- Issue: The candy cooled too much before pulling, or it was cooked slightly past the hard-ball stage.
- Solution: Start pulling when the candy is still warm and pliable, but not too hot to handle. If it’s too cool, you can try gently reheating it in a very low oven (around 150°F / 65°C) for a few minutes, but be careful not to melt it completely.
- My candy isn’t opaque/satin-like after pulling:
- Issue: Not enough pulling.
- Solution: You need to incorporate enough air into the candy. Keep pulling and stretching until it reaches the desired texture and sheen. It might take longer than you expect, so be patient!
Remember, practice makes perfect! Each batch is an opportunity to learn and refine your technique. Don’t be afraid to try again.
Embrace Your Inner Confectioner: A Sweet Conclusion
From a daunting kitchen mystery to a delightful personal triumph, making homemade candy is an incredibly rewarding experience. What began for me as an impulse, born from a quiet afternoon of waiting, transformed into a delicious discovery that has forever changed my perception of confectionery. This simple recipe proves that you don’t need to be a professional chef or possess a cabinet full of specialized gadgets to create truly impressive sweet treats.
With just a handful of everyday ingredients and a little bit of patience, you can craft beautiful, flavorful candies that are far superior to anything you’d buy at the store. The joy of customizing flavors, the fun of pulling the warm, pliable mass, and the immense satisfaction of sharing your handmade creations are all part of the sweet journey. So, if you’ve been on the fence, consider this your official invitation to dive in. Dust off that corn syrup, grab your sugar, and embark on your own homemade candy adventure. I promise, your taste buds (and anyone you share them with) will thank you!