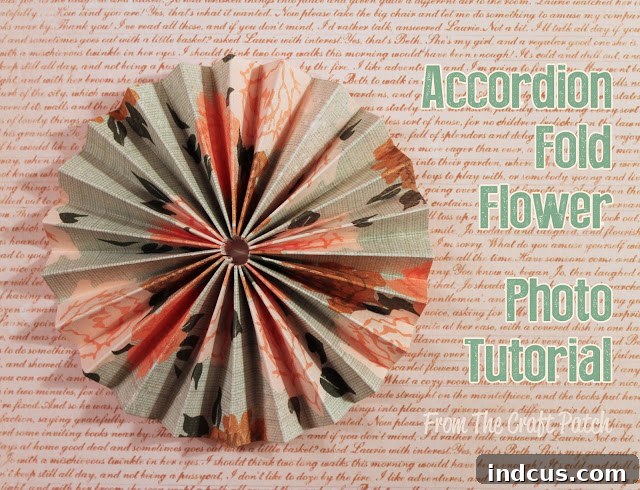
Craft Beautiful Accordion Fold Paper Medallions: A Step-by-Step DIY Guide
There’s a unique joy in crafting, especially when you stumble upon a treasure trove of supplies like those irresistible clearance scrapbook papers. We all know the feeling – a vision sparks, and suddenly, those forgotten papers on your shelf or that bargain bin find at the craft store transform into an exciting new project. It’s the thrill of turning simple materials into something beautiful and personalized. If you’re anything like me, your craft stash might already be overflowing, yet the allure of new paper is undeniable. This time, my inspiration struck in the form of elegant paper wreaths I’d seen on Pinterest, providing the perfect excuse to rescue those charming papers and transform them into stunning accordion fold paper medallions.
These versatile paper medallions, also known as paper rosettes or paper flowers, are incredibly simple to make, yet they offer endless possibilities for decoration. Whether you’re looking to add a whimsical touch to your home decor, create unique party embellishments, or personalize handmade cards, learning this basic technique will unlock a world of creative potential. Get ready to put your beloved paper collection to good use and craft something truly special. Let’s dive into making these delightful accordion fold paper medallions!
Essential Materials for Your Paper Medallions
Before we begin, gather your supplies. The beauty of this craft lies in its simplicity and the fact that you likely already have most of these items on hand. Selecting the right paper is key, so don’t be afraid to experiment with different patterns and weights.
- Paper: Two strips, typically 12″ x 2″ each. Scrapbook paper is excellent for its patterns and varied textures, but cardstock, construction paper, or even decorative wrapping paper can also work wonderfully. The weight of the paper can affect the crispness of your folds, with slightly heavier papers holding their shape better.
- Ruler: For accurate measuring and straight lines.
- Pencil: For marking cutting and scoring lines.
- Paper Cutter or Scissors: A paper cutter is highly recommended for clean, straight cuts, especially when dealing with multiple strips.
- Scoring Tool: This can be an attachment for your paper cutter, a bone folder, a scoring stylus, or even a knitting needle used with a ruler. Scoring creates a crease that ensures neat, sharp folds.
- Glue Stick or Hot Glue Gun: Both have their advantages. A glue stick offers a cleaner, less bulky bond, while a hot glue gun provides a quick, strong hold, ideal for the final steps.
- Cardstock Scraps: Small squares or circles of cardstock are needed to secure the back of your medallion, keeping it flat.
Step-by-Step Guide to Crafting Accordion Fold Paper Medallions
Step 1: Prepare Your Paper Strips
The foundation of a perfect paper medallion starts with accurately cut paper strips. Begin by selecting your desired paper. For a standard medallion, you will need two strips of paper, each measuring 12 inches long by 2 inches wide. These dimensions are a great starting point, creating a lovely medium-sized medallion.
However, feel free to experiment with different sizes to achieve various effects. If you opt for wider strips (e.g., 3 or 4 inches wide), you might find that two 12-inch strips aren’t long enough to complete a full circle. In such cases, you’ll need a third strip to extend the overall length, ensuring your medallion can close properly. Remember, the wider your strips, the more length you’ll generally require for the accordion fold to form a complete, well-proportioned circle. Precision in cutting is paramount, so use a sharp paper cutter for clean, straight edges, which will contribute to a professional-looking finish.
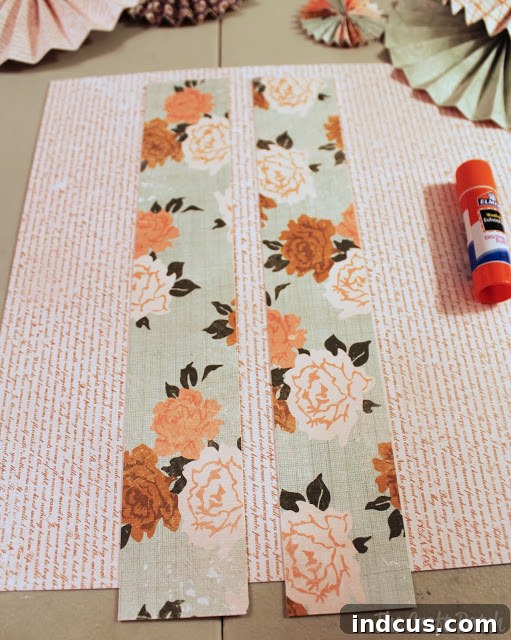
Step 2: Score the Paper for Crisp Folds
Scoring is a crucial step that elevates your paper medallions from good to great. To score means to create a crease or a shallow indentation in the paper without cutting all the way through. This pre-creasing ensures that your paper folds crisply and cleanly, resulting in sharp, uniform accordion pleats. Without scoring, your folds might appear messy or uneven, detracting from the medallion’s overall appeal.
I often use a scoring attachment on my paper cutter, which makes the process incredibly efficient and precise. If you don’t have a specialized scoring tool, don’t worry! You can easily achieve the same effect using a ruler and a knitting needle, an empty ballpoint pen, or a bone folder. Simply align your ruler and press down along the line to create a clear crease. For these medallions, I recommend spacing your score lines ½ inch apart. This spacing creates a classic accordion fold, but you can experiment with wider or narrower spacing to achieve different textures and visual densities in your finished medallion. Consistent spacing is key, so take your time with this step. If you reach the end of a strip and have a small, irregular piece remaining after the last score line, simply trim it off with a pair of scissors to maintain a clean edge.
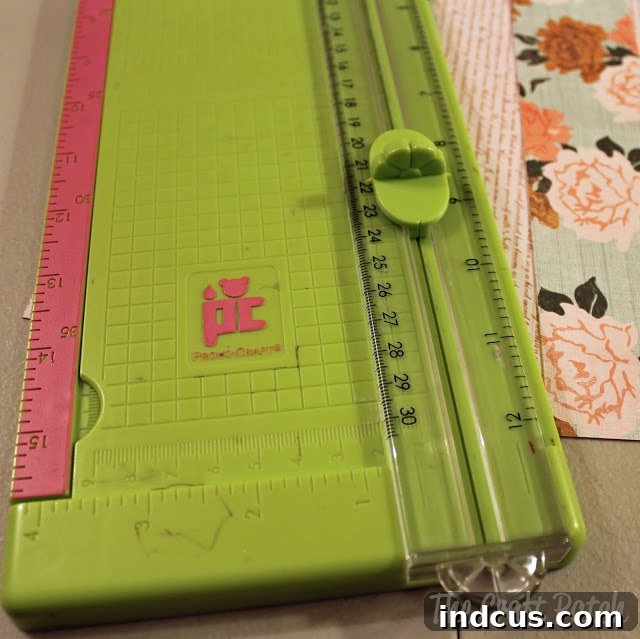
Can you clearly see the delicate score lines? Precision here ensures uniformity in your finished design.
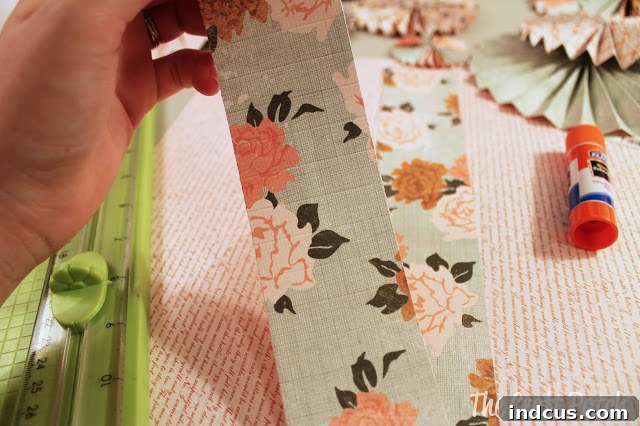
Should you find a little excess paper at the end of your strip after scoring, a quick snip with scissors will tidy it up.
Step 3: Begin Accordion Folding
Now comes the fun part – transforming your scored strips into the signature accordion fold! An accordion fold, as the name suggests, involves folding the paper in a zig-zag pattern, much like an accordion or a fan. Each fold should alternate, going up and down, creating a series of peaks and valleys along the length of your strip.
To ensure a seamless connection when joining your strips later, pay attention to the starting fold for each piece. For your first strip, begin by folding the paper upwards. For the second strip, start by folding downwards. This alternating initial fold will allow the ends of the two strips to interlock perfectly, making the subsequent gluing step much easier and resulting in a more professional finish. Press firmly along each fold to reinforce the creases, making sure they are sharp and well-defined. This attention to detail will ensure your medallion opens up beautifully and holds its shape.
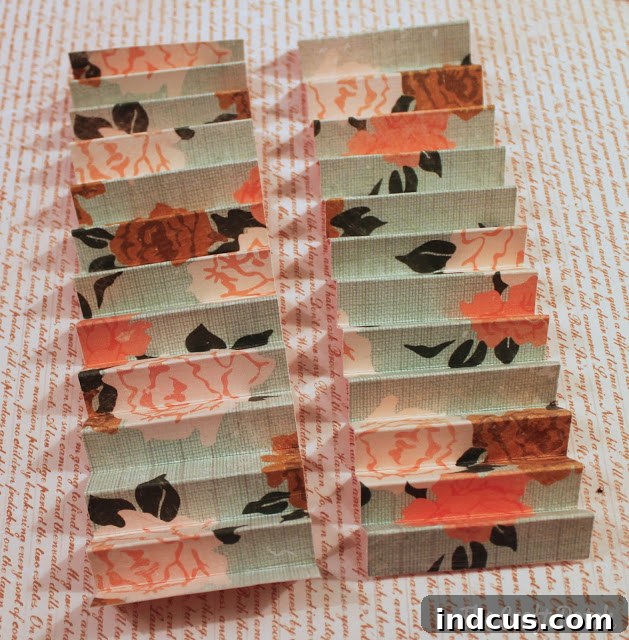
Step 4: Join the Two Accordion Folded Strips
With both paper strips neatly accordion-folded, it’s time to connect them. This step creates a continuous, longer strip that will eventually form your circular medallion. Take the end of your first strip and the beginning of your second strip. You’ll notice that because you started one fold “up” and the other “down,” they are designed to fit together like puzzle pieces, creating a natural, interlocking joint. Apply a strong adhesive to one of the ends. A glue stick works well for a clean finish, but if you prefer a quicker bond, a dab of hot glue will also do the trick. Carefully press the two ends together, ensuring that the folds align perfectly. Hold them firmly for a few moments to allow the glue to set. A seamless connection here is important for the overall aesthetic of your finished medallion.
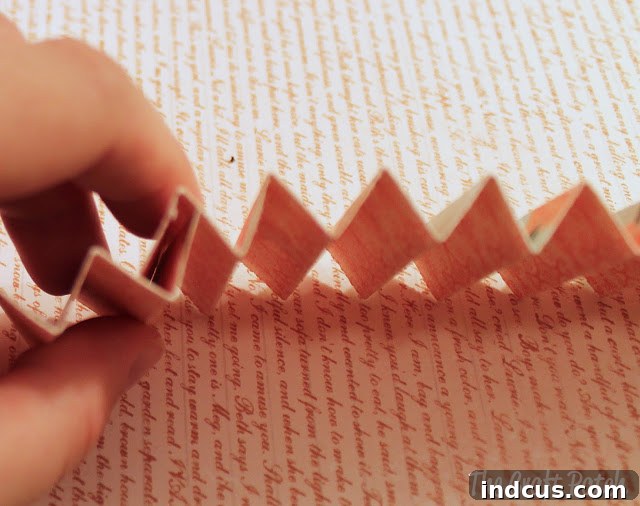
Step 5: Form the Circular Medallion
You now have one long, accordion-folded strip. The next step is to transform this strip into a continuous circle, bringing your medallion to life. Carefully bring the two remaining open ends of your long, folded strip together. Just like when you joined the first two strips, ensure that the folds align perfectly to create a consistent pattern around the entire circumference. Apply your chosen adhesive—a glue stick for a neat bond or hot glue for a faster set—to one of the ends. Press the ends firmly together, ensuring a strong and even connection. This forms the basic circular structure of your paper medallion. Hold the glued ends together until the adhesive is completely dry and secure, preventing any gaps or weak points in your circle.
Step 6: Flatten and Secure Your Medallion
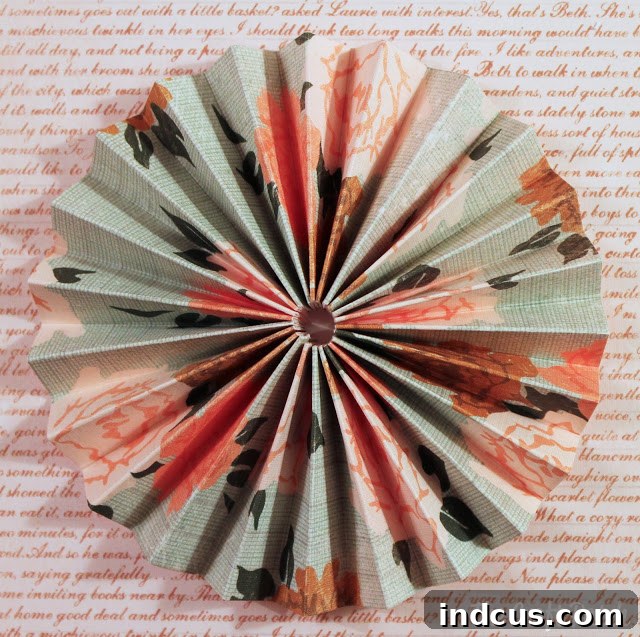
This is often considered the most satisfying and almost magical step! Once your accordion-folded paper is a continuous circle, gently push the top end of the paper towards the center. As you apply pressure, the folds will magically collapse outwards and lay flat, forming the beautiful, intricate rosette shape of your medallion. It’s truly rewarding to see your efforts come together in this spectacular fashion! However, as soon as you release the pressure, the paper will naturally want to spring back up. To keep your medallion perfectly flat and maintain its shape, you’ll need to secure the back.
Cut a small square or circle from a piece of cardstock. The size should be appropriate to cover the center back of your medallion. Apply a ring of hot glue or a strong craft adhesive to this cardstock piece. Hot glue is particularly effective here because it sets very quickly, minimizing the time you need to hold the medallion flat. Carefully press the cardstock square onto the center back of your flattened medallion, holding it firmly until the glue cools and sets completely. This backing piece acts as a stabilizer, preventing the medallion from popping back open. If you envision your medallion being viewed from both sides, consider cutting a decorative circle from a contrasting or coordinating paper to glue to the center instead of a plain scrap, ensuring your finished piece is beautiful from every angle.
Prepare a small square of cardstock, applying a ring of hot glue to its surface.
Then, carefully press the cardstock onto the back of the medallion until the glue has set. Hot glue’s quick-drying nature is a real advantage for this step, but any strong craft glue will work, just requiring a bit more patience. For a more polished look, especially if your medallion will be visible from both sides, opt for a decorative paper circle instead of a plain scrap for the center backing.
Voila! Your beautiful paper medallion is complete!
Unleash Your Creativity: Variations on Paper Medallions
Once you’ve mastered the basic accordion fold paper medallion, the possibilities for customization are truly endless. The beauty of this craft lies in how easily you can alter its appearance with simple changes. Here are some ideas to inspire your next creation:
- Varying Dimensions: Experiment with the width and length of your paper strips. Wider strips create a fuller, more substantial medallion, while narrower strips yield a more delicate, intricate design. Adjusting the length (and thus adding more strips if needed) will change the overall diameter of your finished medallion.
- Score Line Spacing: The spacing of your score marks significantly impacts the texture and appearance of your medallion. Closer score lines (e.g., ¼ inch apart) will result in tighter, denser pleats, giving the medallion a more compact and textured look. Wider spacing (e.g., ¾ inch or 1 inch apart) will create broader, softer folds, making the medallion appear more open and flowing.
- Decorative Edges: Don’t limit yourself to straight-cut edges! Before folding, use decorative scissors (like scalloped or zig-zag patterns), edge punches, or even a craft knife to create unique edges on your paper strips. Fringing the edges with small snips can also add a playful, feathery look.
- Layering and Embellishments: Elevate your medallions by adding layers to the center. Glue a smaller, contrasting medallion on top, or add a decorative circle cut from a different paper. Buttons, rhinestones, glitter, stickers, or even small fabric flowers can be glued to the center for a personalized touch.
- Mixed Papers and Colors: Combine different patterns, colors, and even textures of paper within a single medallion or create a collection of medallions with a cohesive color palette for stunning visual impact.
See how different adjustments can lead to diverse and appealing results?
For more inspiration on unique edge designs and other variations, check out some of the paper flower creations I’ve made in the past HERE.
Creative Uses for Your Accordion Fold Paper Medallions
Now that you’ve mastered the art of making these charming paper medallions, the only limit is your imagination when it comes to how you can use them! Their versatility makes them perfect for a wide range of crafts and decorations. Here are just a few ideas to spark your creativity:
- Wall Decor: Create stunning focal points by arranging a cluster of various-sized and colored medallions on a wall. I’ve used them beautifully to decorate my daughter’s nursery wall, adding a whimsical and custom touch.
- Party Decorations: These medallions are ideal for any celebration! String them together to make festive banners (like my Halloween banner), hang them from ceilings, or use them as centerpieces for birthdays, baby showers, or holiday gatherings.
- Gift Toppers: Ditch traditional bows and adorn your gifts with a handmade paper medallion for a personal and elegant touch.
- Card Making & Scrapbooking: Craft tiny medallions to embellish handmade greeting cards, add dimension to scrapbook pages, or decorate gift tags.
- Wreaths: Transform a simple wreath form into a breathtaking display by covering it with a collection of paper medallions. I used them as the focal point for a paper shamrock wreath for St. Patrick’s Day, and recently, I crafted a vibrant wreath for my front door using this very technique.
- Holiday Decor: Make festive medallions for Christmas tree ornaments, Valentine’s Day decorations, or even unique fall accents.
- Classroom & Event Decor: Brighten up classrooms, school projects, or corporate events with colorful and easy-to-make paper medallions.
- Framed Art: Arrange a beautiful collection of medallions in a shadow box frame for unique wall art.
Just look at this charming wreath I made for my front door!
For a detailed look at how to assemble a stunning wreath using these paper medallions, explore the full tutorial HERE.
Start Crafting Your Own Paper Medallions Today!
From a serendipitous find in a clearance bin to a versatile crafting staple, accordion fold paper medallions are a delightful project for crafters of all skill levels. They offer a wonderful way to utilize your paper stash, unleash your creativity, and add a personal touch to your home and special occasions. With a few simple tools and a little patience, you can create an array of beautiful, decorative elements that are sure to impress. So grab your papers, follow these steps, and start crafting your own unique collection of paper medallions. Happy crafting!